
koa2简介
1.基于Node.js平台的web开发框架
2.由Express原班人马打造 Express,koa,koa2
框架名作用异步处理Expressweb框架回调函数koaweb框架Generator+yieldkoa2web框架async/await
3.环境依赖Node.js V7.6.0以上
koa2特点
1.支持async/await
2.洋葱模型的中间件
    对于web服务器可以理解接收每一个请求再处理每一个响应返回游览器,而请求到达服务器需要程序处理称洋葱模型的中间件;

    层级中间件优先级最外围第一层中间件,先进先出原理(共三层:请求服务器->1->2->3->2->1->回响浏览器)
koa2快速上手
1.检查Node环境
node -v
2.安装koa
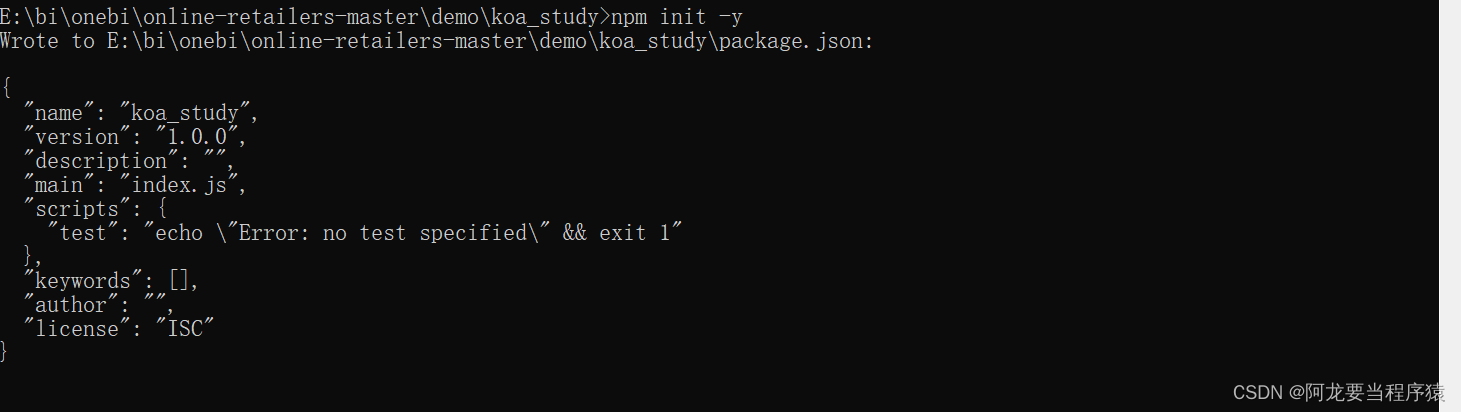
npm init -y
npm install koa
3.创建并编写app.js文件
- 创建koa对象
- 编写响应函数(中间件)
- 监听端口
4.启动服务器
koa2项目
1.创建
npm init -y
npm install koa

2.创建app.js
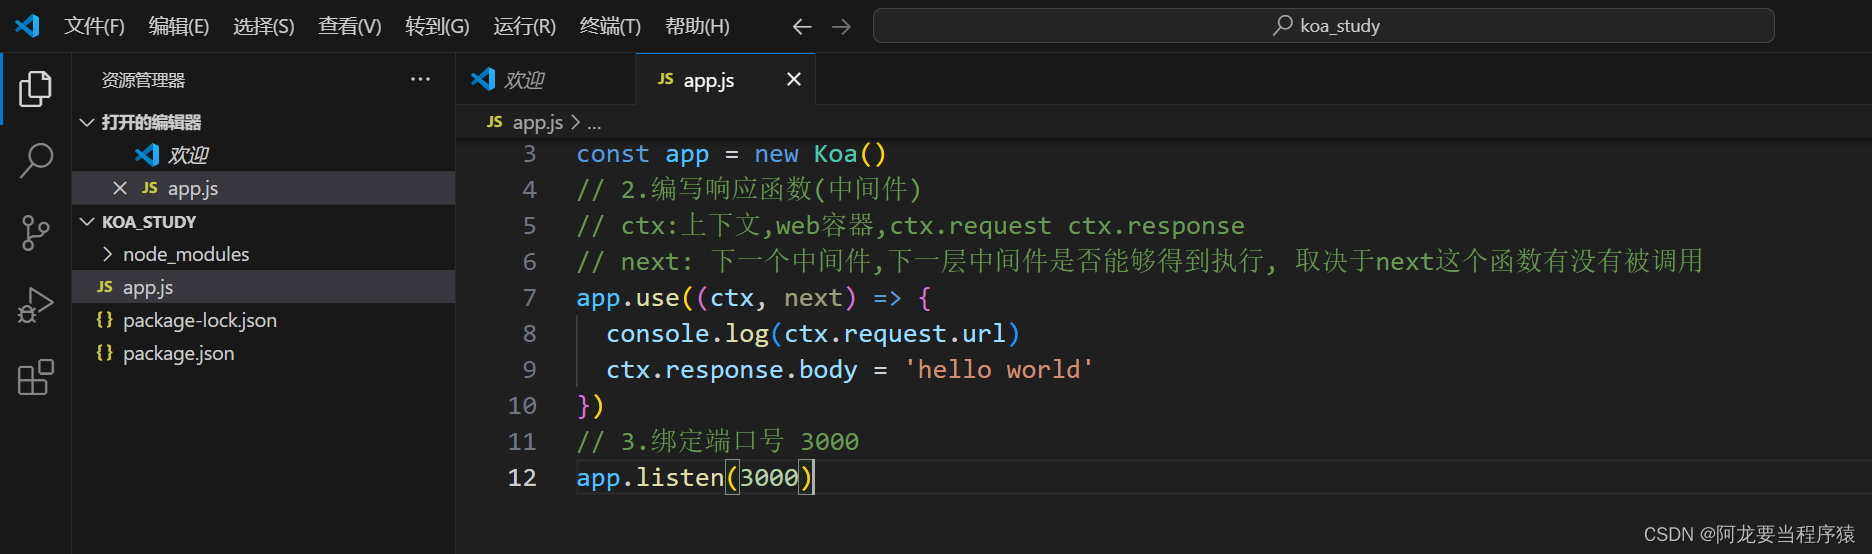
// 1.创建koa对象
const Koa = require('koa')
const app = new Koa()
// 2.编写响应函数(中间件)
// ctx:上下文,web容器,ctx.request ctx.response
// next: 下一个中间件,下一层中间件是否能够得到执行, 取决于next这个函数有没有被调用
app.use((ctx, next) => {
  console.log(ctx.request.url)
  ctx.response.body = 'hello world'
})
// 3.绑定端口号 3000
app.listen(3000)
3.启动
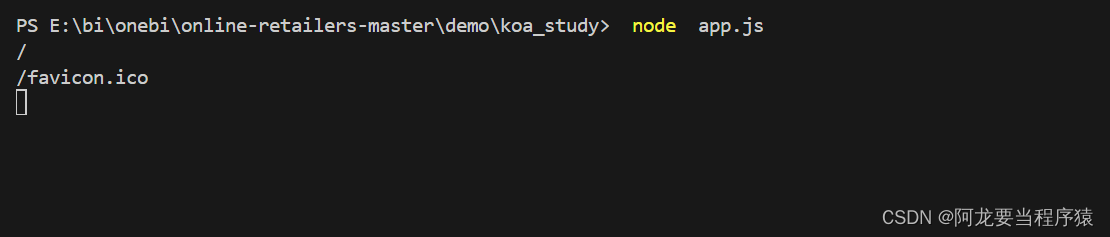
node app.js

中间件特点
- koa对象通过use方法加入中间件
- 一个中间件就是一个函数
- 中间件顺序符合洋葱模型
- 内层中间件能否执行取决于外层中间件的next函数调用
- 调用next函数得到的是Promise对象
1.1验证请求顺序
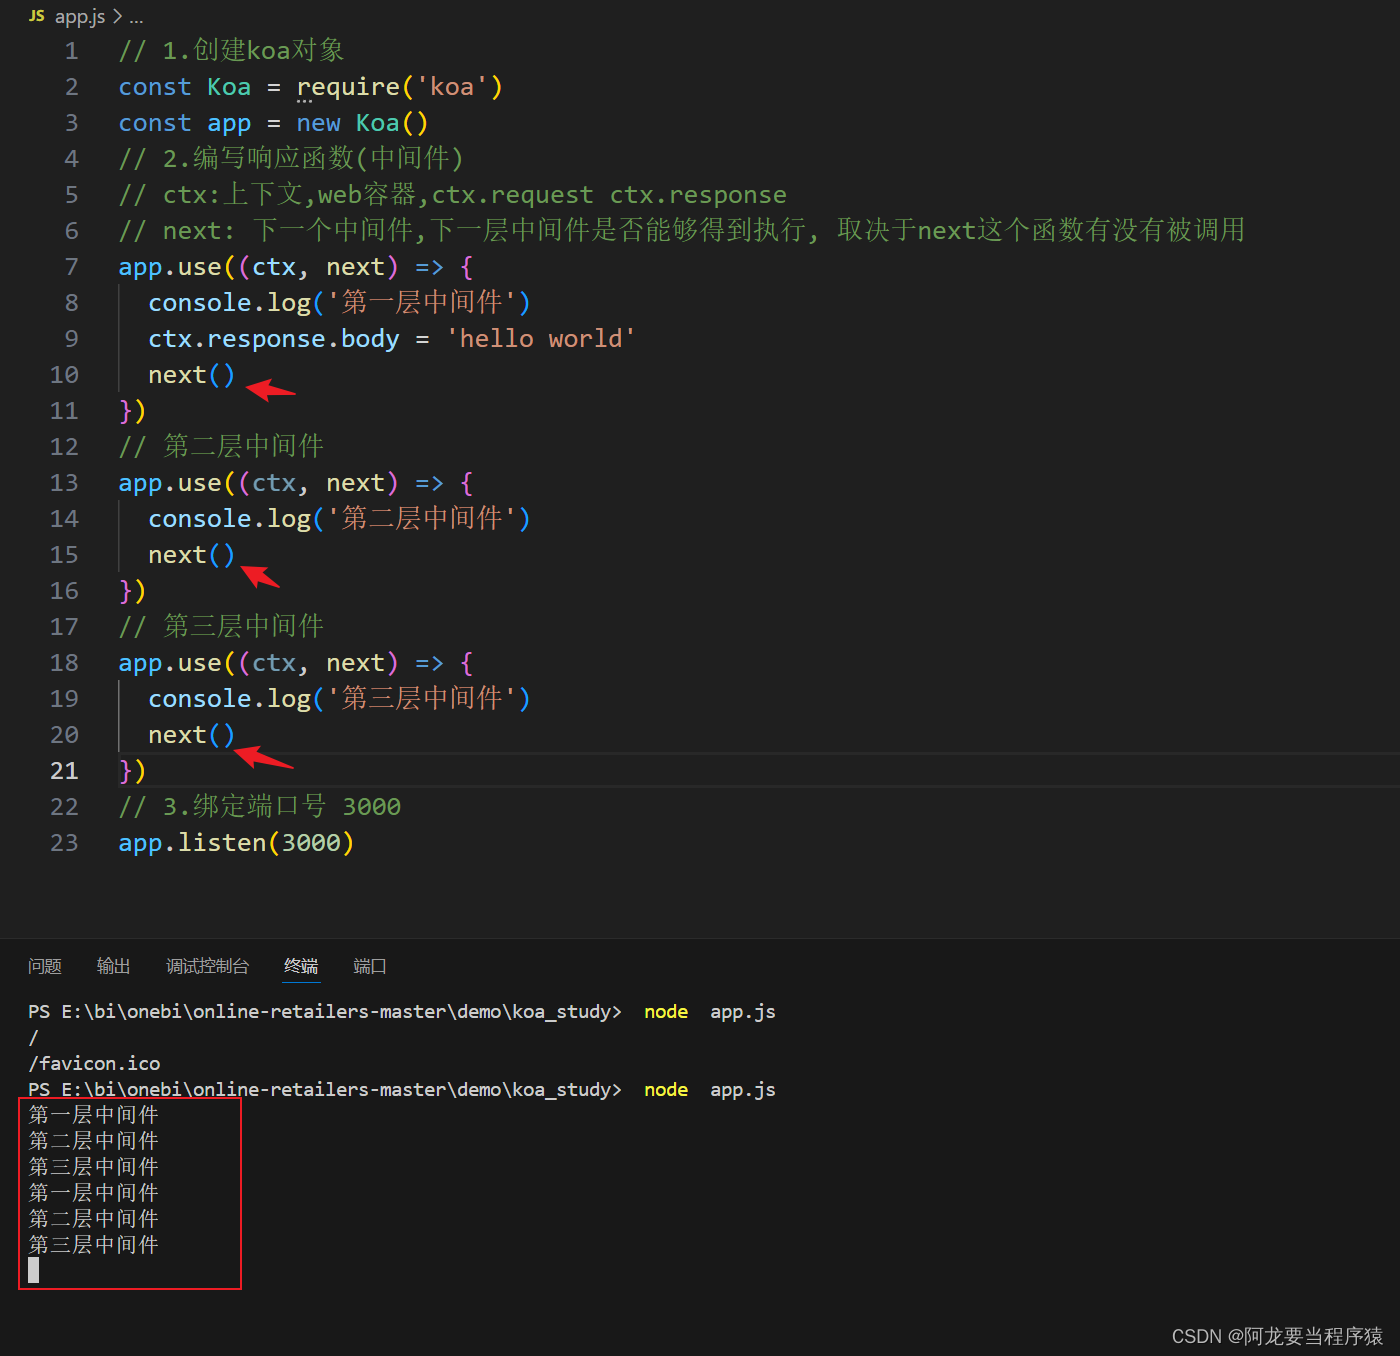
// 1.创建koa对象
const Koa = require('koa')
const app = new Koa()
// 2.编写响应函数(中间件)
// ctx:上下文,web容器,ctx.request ctx.response
// next: 下一个中间件,下一层中间件是否能够得到执行, 取决于next这个函数有没有被调用
app.use((ctx, next) => {
  console.log('第一层中间件')
  ctx.response.body = 'hello world'
  next()
})
// 第二层中间件
app.use((ctx, next) => {
  console.log('第二层中间件')
  next()
})
// 第三层中间件
app.use((ctx, next) => {
  console.log('第三层中间件')
  next()
})
// 3.绑定端口号 3000
app.listen(3000)

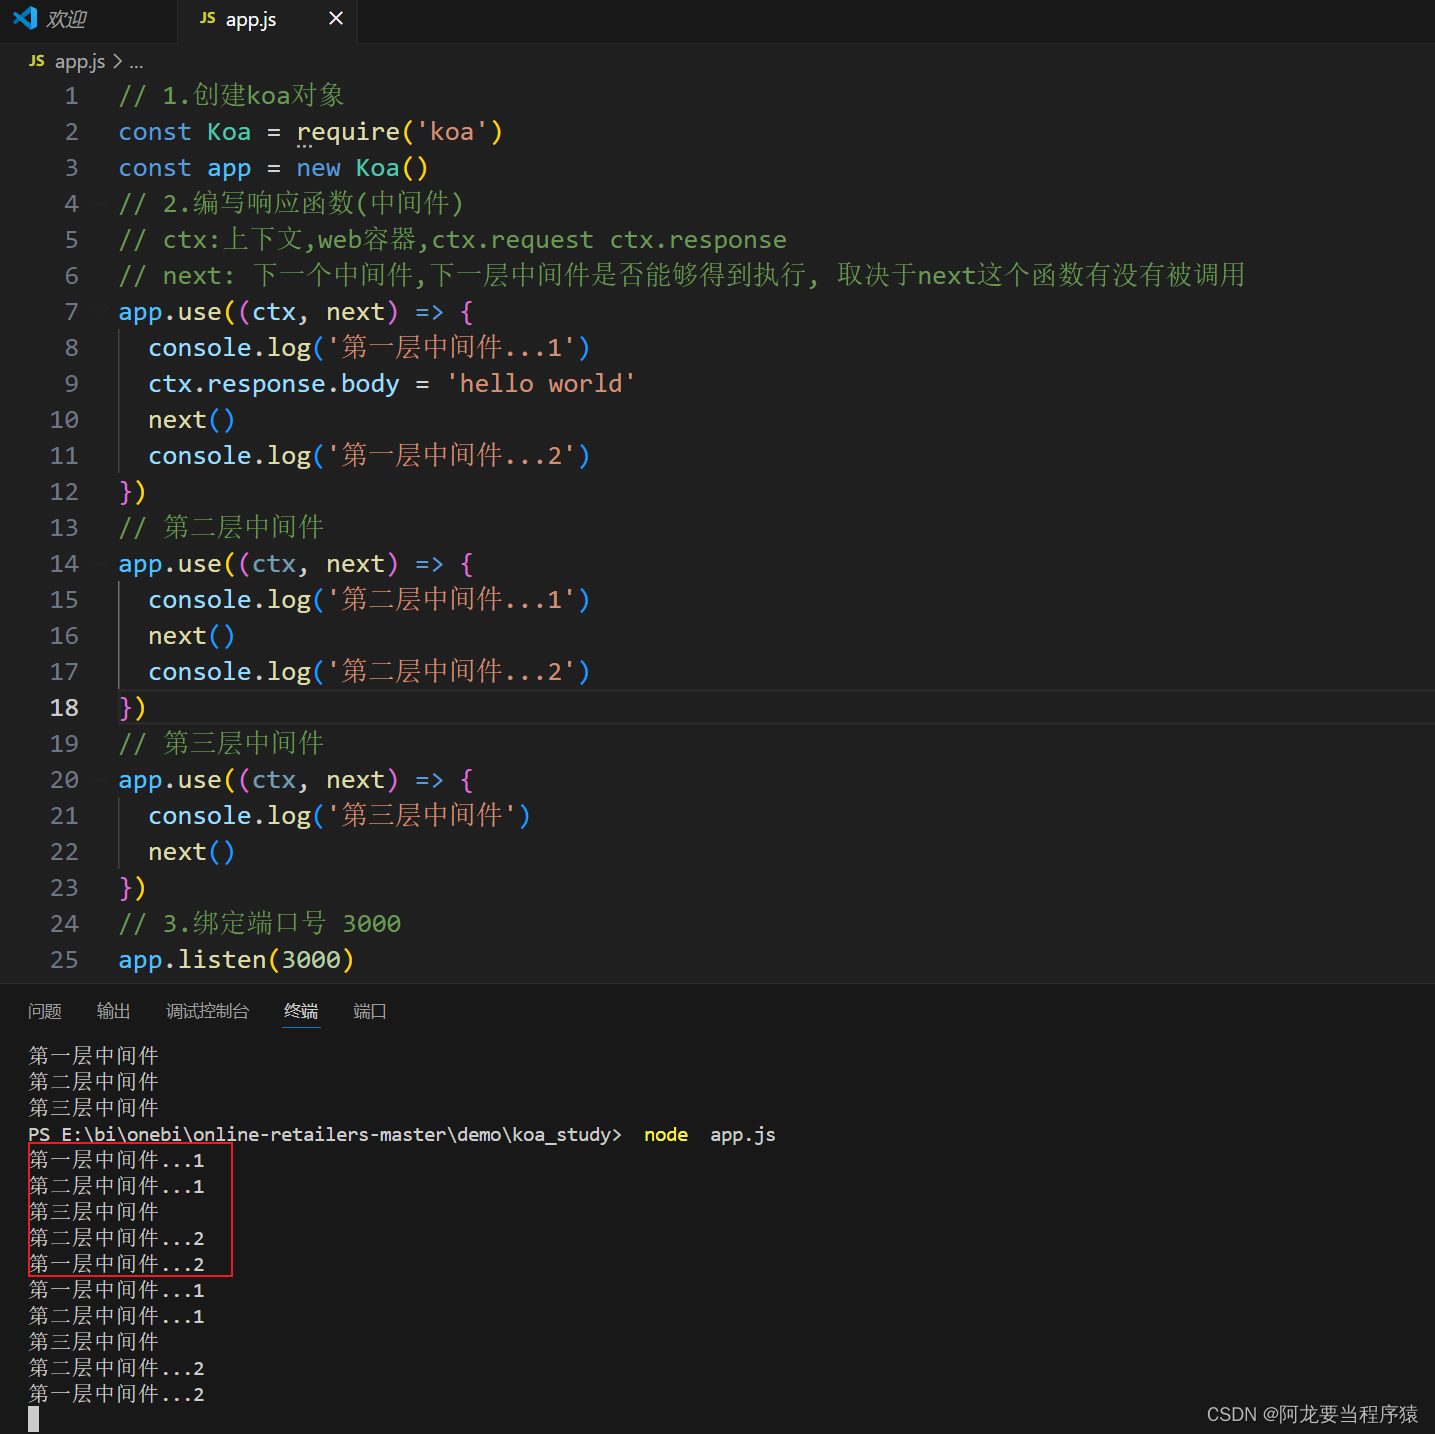
1.2验证响应顺序
// 1.创建koa对象
const Koa = require('koa')
const app = new Koa()
// 2.编写响应函数(中间件)
// ctx:上下文,web容器,ctx.request ctx.response
// next: 下一个中间件,下一层中间件是否能够得到执行, 取决于next这个函数有没有被调用
app.use((ctx, next) => {
  console.log('第一层中间件...1')
  ctx.response.body = 'hello world'
  next()
  console.log('第一层中间件...2')
})
// 第二层中间件
app.use((ctx, next) => {
  console.log('第二层中间件...1')
  next()
  console.log('第二层中间件...2')
})
// 第三层中间件
app.use((ctx, next) => {
  console.log('第三层中间件')
  next()
})
// 3.绑定端口号 3000
app.listen(3000)
1.3调用next函数得到的是Promise对象
// 1.创建koa对象
const Koa = require('koa')
const app = new Koa()
// 2.编写响应函数(中间件)
// ctx:上下文,web容器,ctx.request ctx.response
// next: 下一个中间件,下一层中间件是否能够得到执行, 取决于next这个函数有没有被调用
app.use((ctx, next) => {
  console.log('第一层中间件...1')
  ctx.response.body = 'hello world'
  next()
  console.log('第一层中间件...2')
})
// 第二层中间件
app.use(async (ctx, next) => {
    console.log('第二层中间件...1')
    const ret = await next()
    console.log(ret)
    console.log('第二层中间件...2')
  })
// 第三层中间件
app.use((ctx, next) => {
  console.log('第三层中间件')
  next()
  return 'i love the dog'
})
// 3.绑定端口号 3000
app.listen(3000)
后台项目
- 计算服务器处理请求的总耗时
- 在响应头上加上响应内容的mime类型
- 根据url读取指定目录下文件内容
项目准备总耗时中间件响应头中间件业务逻辑中间件允许跨域项目准备
1.安装包
npm init -y
npm install koa
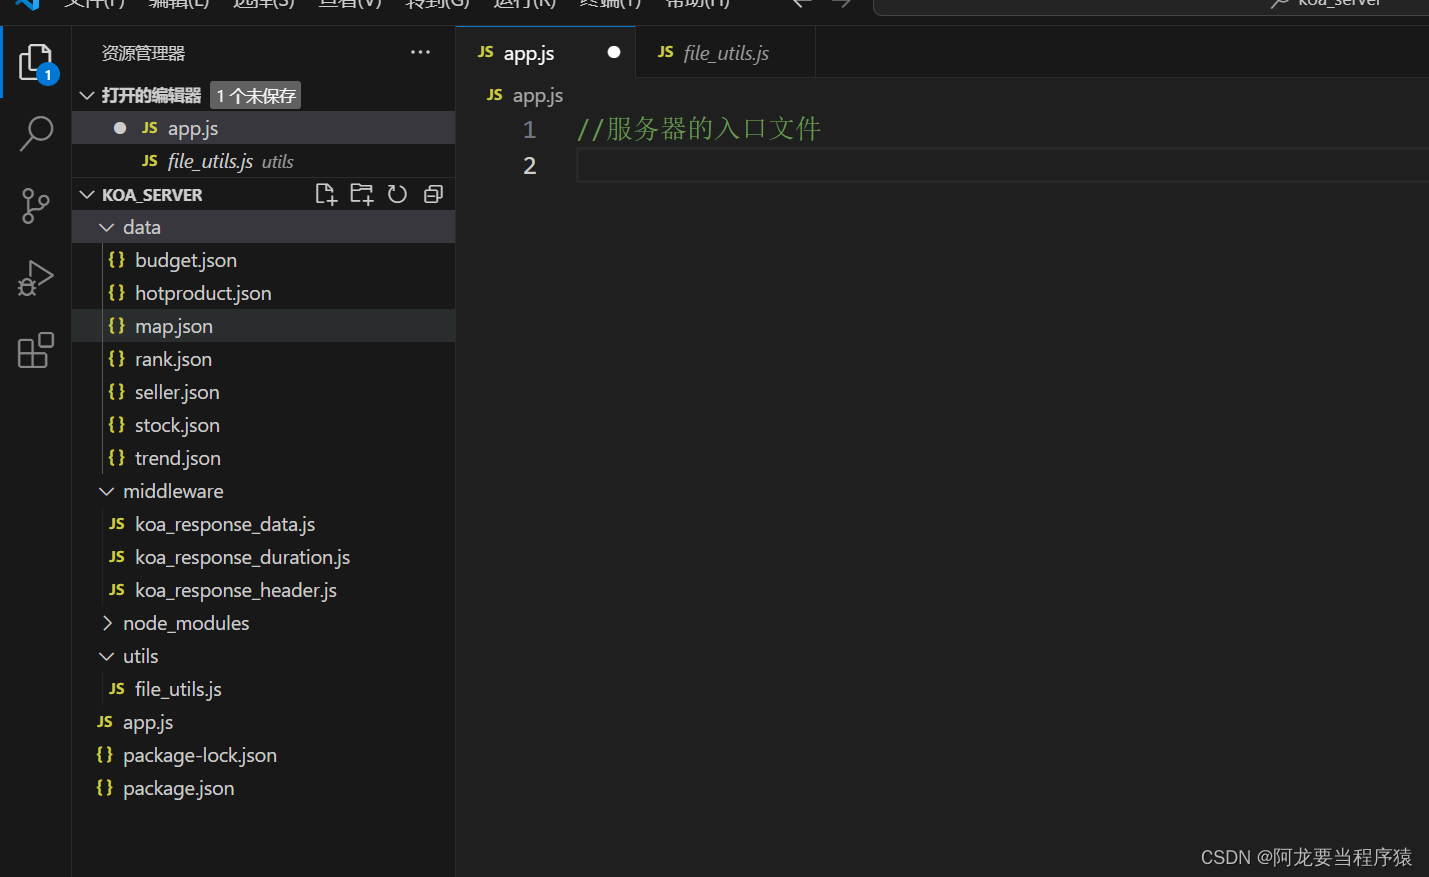
2.创建文件和目录结构
app.js
data/存放数据
middleware/中间层
    koa_response_data.js 业务逻辑

    koa_response_duration.js 请求耗时

    koa_response_header.js 响应
utils/
file_utils.js 帮助快速读取某个目录下文件
3.app.js
// 服务器的入口文件
// 1.创建KOA的实例对象
const Koa = require('koa')
const app = new Koa()
// 2.绑定中间件
// 绑定第一层中间件
const respDurationMiddleware =  require('./middleware/koa_response_duration')
app.use(respDurationMiddleware)
// 绑定第二层中间件
const respHeaderMiddleware = require('./middleware/koa_response_header')
app.use(respHeaderMiddleware)
// 绑定第三层中间件
const respDataMiddleware = require('./middleware/koa_response_data')
app.use(respDataMiddleware)
// 3.绑定端口号 8888
app.listen(8888)
4.总耗时中间件
// 计算服务器消耗时长的中间件
module.exports = async (ctx, next) => {
  // 记录开始时间
  const start = Date.now()
  // 让内层中间件得到执行
  await next()
  // 记录结束的时间
  const end = Date.now()
  // 设置响应头 X-Response-Time
  const duration = end - start
  // ctx.set 设置响应头
  ctx.set('X-Response-Time', duration + 'ms')
}
5.响应头中间件
// 设置响应头的中间件
module.exports = async (ctx, next) => {
  const contentType = 'application/json; charset=utf-8'
  ctx.set('Content-Type', contentType)
  ctx.set("Access-Control-Allow-Origin", "*")
  ctx.set("Access-Control-Allow-Methods", "OPTIONS, GET, PUT, POST, DELETE")
  await next()
}
6.业务逻辑中间件
// 处理业务逻辑的中间件,读取某个json文件的数据
const path = require('path')
const fileUtils = require('../utils/file_utils')
module.exports = async (ctx, next) => {
  // 根据url
  const url = ctx.request.url // /api/seller   ../data/seller.json
  let filePath = url.replace('/api', '') //  /seller
  filePath = '../data' + filePath + '.json'  // ../data/seller.json
  filePath = path.join(__dirname, filePath)
  try {
    const ret = await fileUtils.getFileJsonData(filePath)
    ctx.response.body = ret
  } catch (error) {
    const errorMsg = {
      message: '读取文件内容失败, 文件资源不存在',
      status: 404
    }
    ctx.response.body = JSON.stringify(errorMsg)
  }

  console.log(filePath)
  await next()
}
7.工具类获取数据
// 读取文件的工具方法
const fs = require('fs')
module.exports.getFileJsonData = (filePath) => {
  // 根据文件的路径, 读取文件的内容
  return new Promise((resolve, reject) => {
    fs.readFile(filePath, 'utf-8', (error, data) => {
      if(error) {
        // 读取文件失败
        reject(error)
      } else {
        // 读取文件成功
        resolve(data)
      }
    })
  })
}
允许跨域
实际是通过Ajax访问服务器
同源策略
  同协议/同域名/同端口

  当前页面地址和Ajax获取数据的地址
<!DOCTYPE html>
<html lang="en">
<head>
  <meta charset="UTF-8">
  <meta name="viewport" content="width=device-width, initial-scale=1.0">
  <meta http-equiv="X-UA-Compatible" content="ie=edge">
  <title>Document</title>
  <script src="lib/jquery-1.12.2.js"></script>
</head>
<body>
  <button>点我试试</button>
  <script>
  $('button').click(function(){
    //                http://127.0.0.1:5500/index.html
    // 发起ajax的请求  http://127.0.0.1:8888/api/map
    $.ajax({
      type: 'get',
      url: 'http://127.0.0.1:8888/api/map',
      success: function(data){
        console.log(data)
      }
    })
  })
  </script>
</body>
</html>
本文转载自: https://blog.csdn.net/2201_75311251/article/details/138304036
版权归原作者 阿龙要当程序猿 所有, 如有侵权,请联系我们删除。
版权归原作者 阿龙要当程序猿 所有, 如有侵权,请联系我们删除。