
1.Lombok
1.基本介绍

2.应用实例
1.pom.xml 引入Lombok,使用版本仲裁
<!--导入springboot父工程--><parent><artifactId>spring-boot-starter-parent</artifactId><groupId>org.springframework.boot</groupId><version>2.5.3</version></parent><dependencies><!--配置maven项目场景启动器,自动导入和web相关的包--><dependency><groupId>org.springframework.boot</groupId><artifactId>spring-boot-starter-web</artifactId></dependency><!--引入Lombok,使用版本仲裁--><dependency><groupId>org.projectlombok</groupId><artifactId>lombok</artifactId></dependency></dependencies>
2.@Data注解说明
- 相当于Getter, Setter, RequiredArgsConstructor, ToString, EqualsAndHashCode,Value这些注解的组合
- 主要记住Getter, Setter,ToString
package lombok;
import java.lang.annotation.ElementType;
import java.lang.annotation.Retention;
import java.lang.annotation.RetentionPolicy;
import java.lang.annotation.Target;/**
Generates getters for all fields, a useful toString method, and hashCode and equals implementations that check
all non-transient fields. Will also generate setters for all non-final fields, as well as a constructor.
Equivalent to {@code @Getter @Setter @RequiredArgsConstructor @ToString @EqualsAndHashCode}.
Complete documentation is found at the project lombok features page for @Data.
@see Getter
@see Setter
@see RequiredArgsConstructor
@see ToString
@see EqualsAndHashCode
@see lombok.Value
/
@Target(ElementType.TYPE)
@Retention(RetentionPolicy.SOURCE)
public @interface Data {
/*
- If you specify a static constructor name, then the generated constructor will be private, and
- instead a static factory method is created that other classes can use to create instances.
- We suggest the name: “of”, like so:
*     public @Data(staticConstructor = “of”) class Point { final int x, y; }

*
*
Default: No static constructor, instead the normal constructor is public.
@return Name of static ‘constructor’ method to generate (blank = generate a normal constructor).
*/
String staticConstructor() default “”;
}
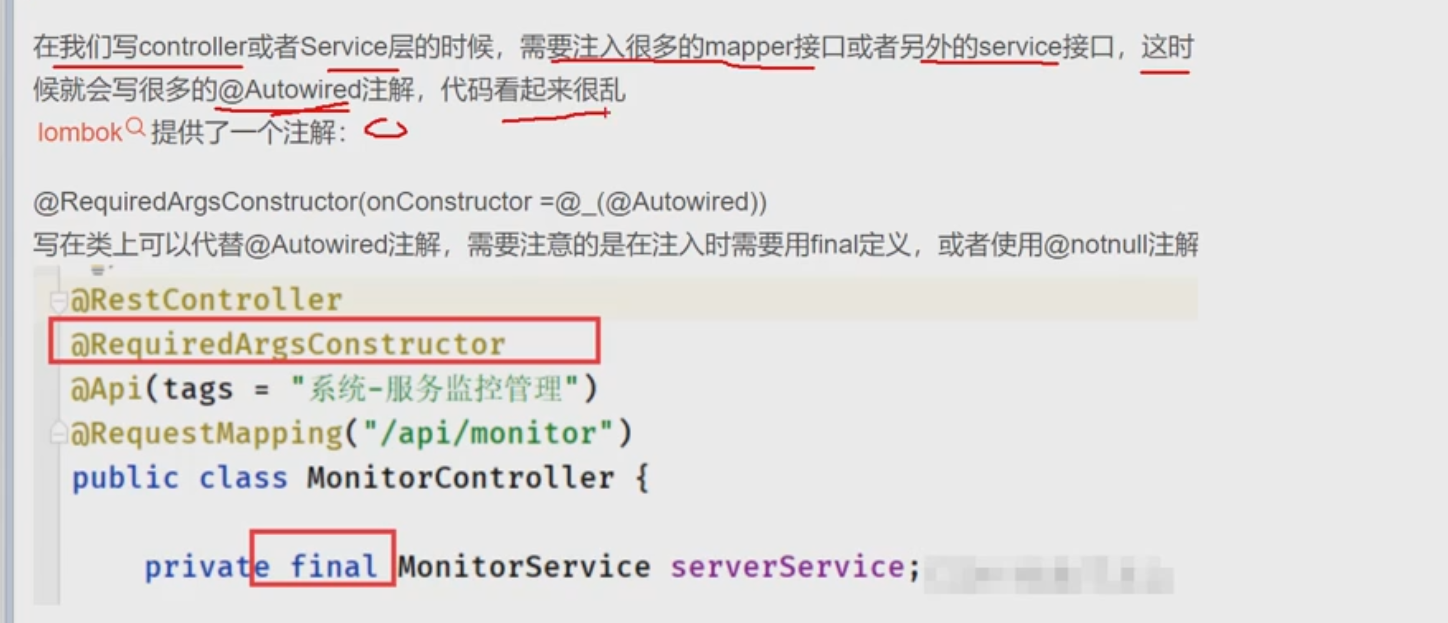
3.@RequiredArgsConstructor注解说明(不常用)
4.@NoArgsConstructor无参构造器
5.@AllArgsConstructor全参构造器
注意事项:
- 当使用全参构造器时,默认的无参构造器会消失
- 如果还想要无参构造器就需要使用无参构造器的注解
6.两种使用Lombok的方式
1.需要Getter, Setter,ToString,无参构造器
- @Data
2.需要使用Getter, Setter,ToString,无参构造器,全参构造器
- @Data
- @AllArgsConstructor
- @NoArgsConstructor
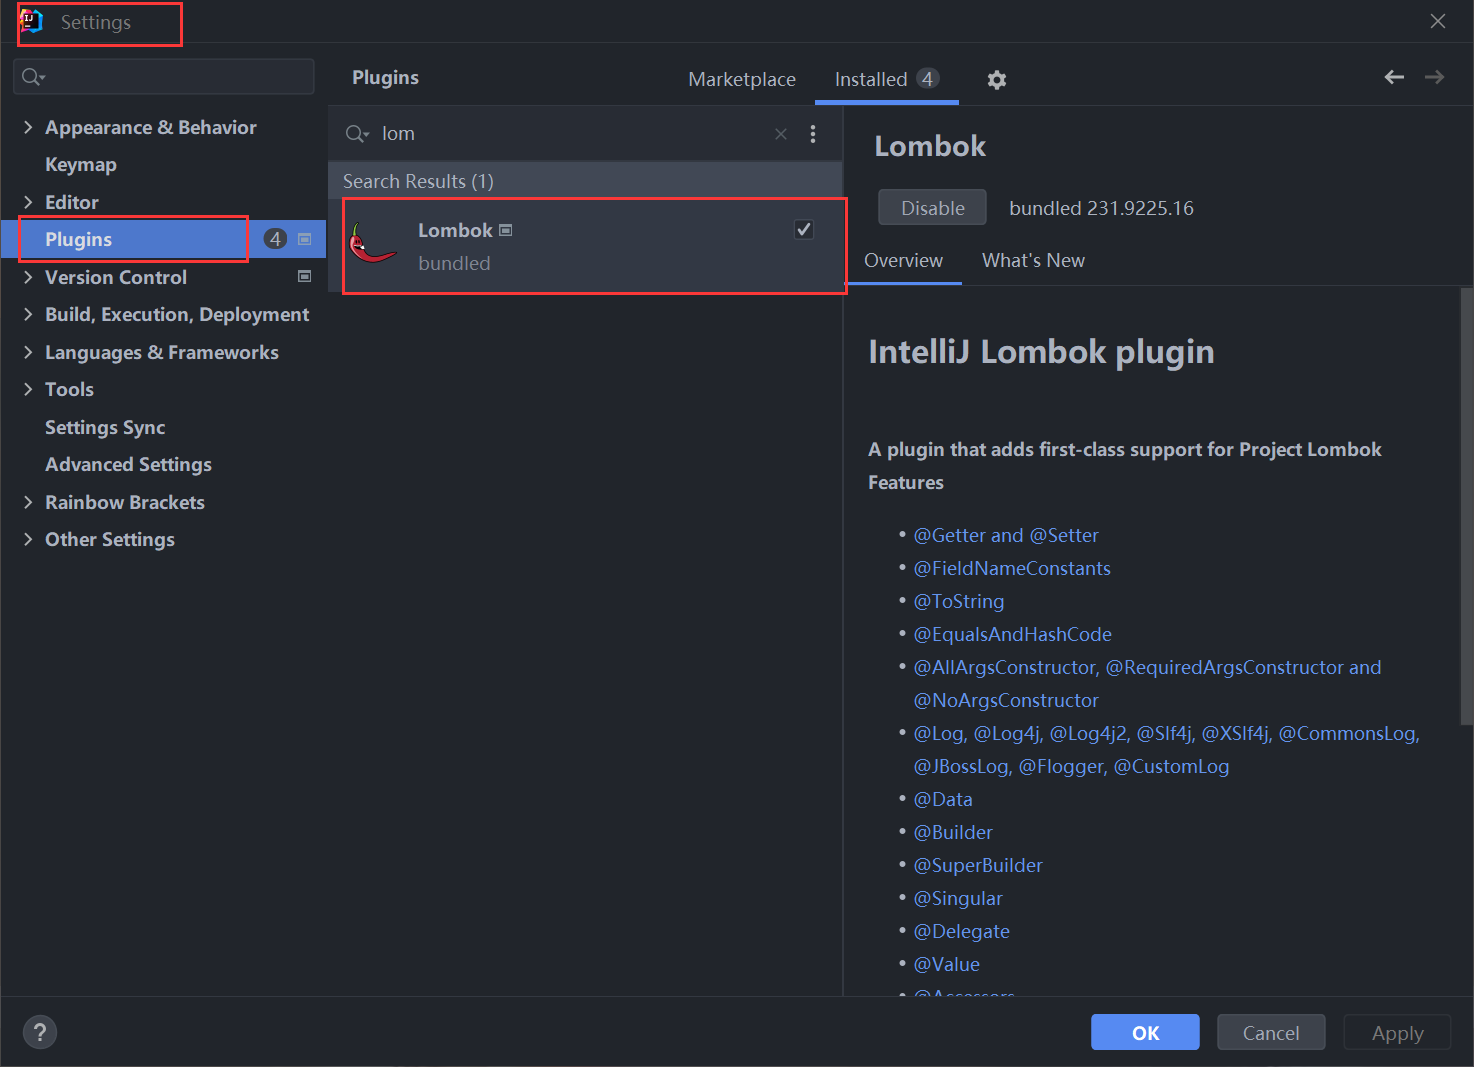
3.在IDEA中安装Lombok插件解锁扩展注解
1.安装插件
2.扩展注解:日志输出
1.代码实例
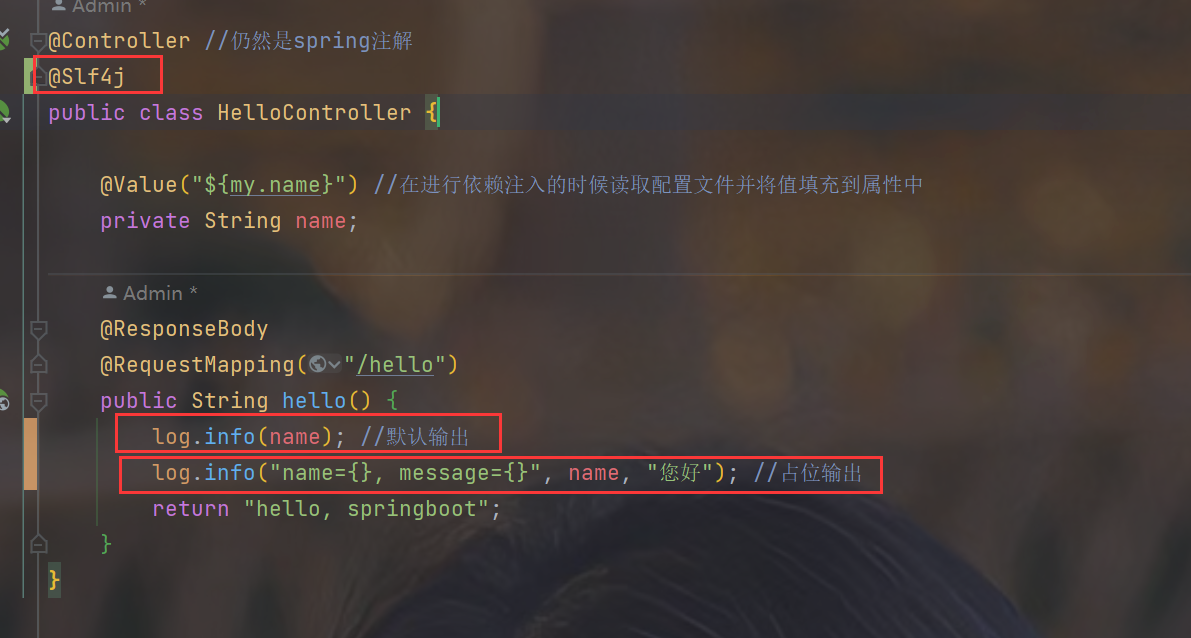
2.会在日志中输出

2.Spring Initailizr(不推荐)
1.基本介绍

2.通过IDEA方式创建
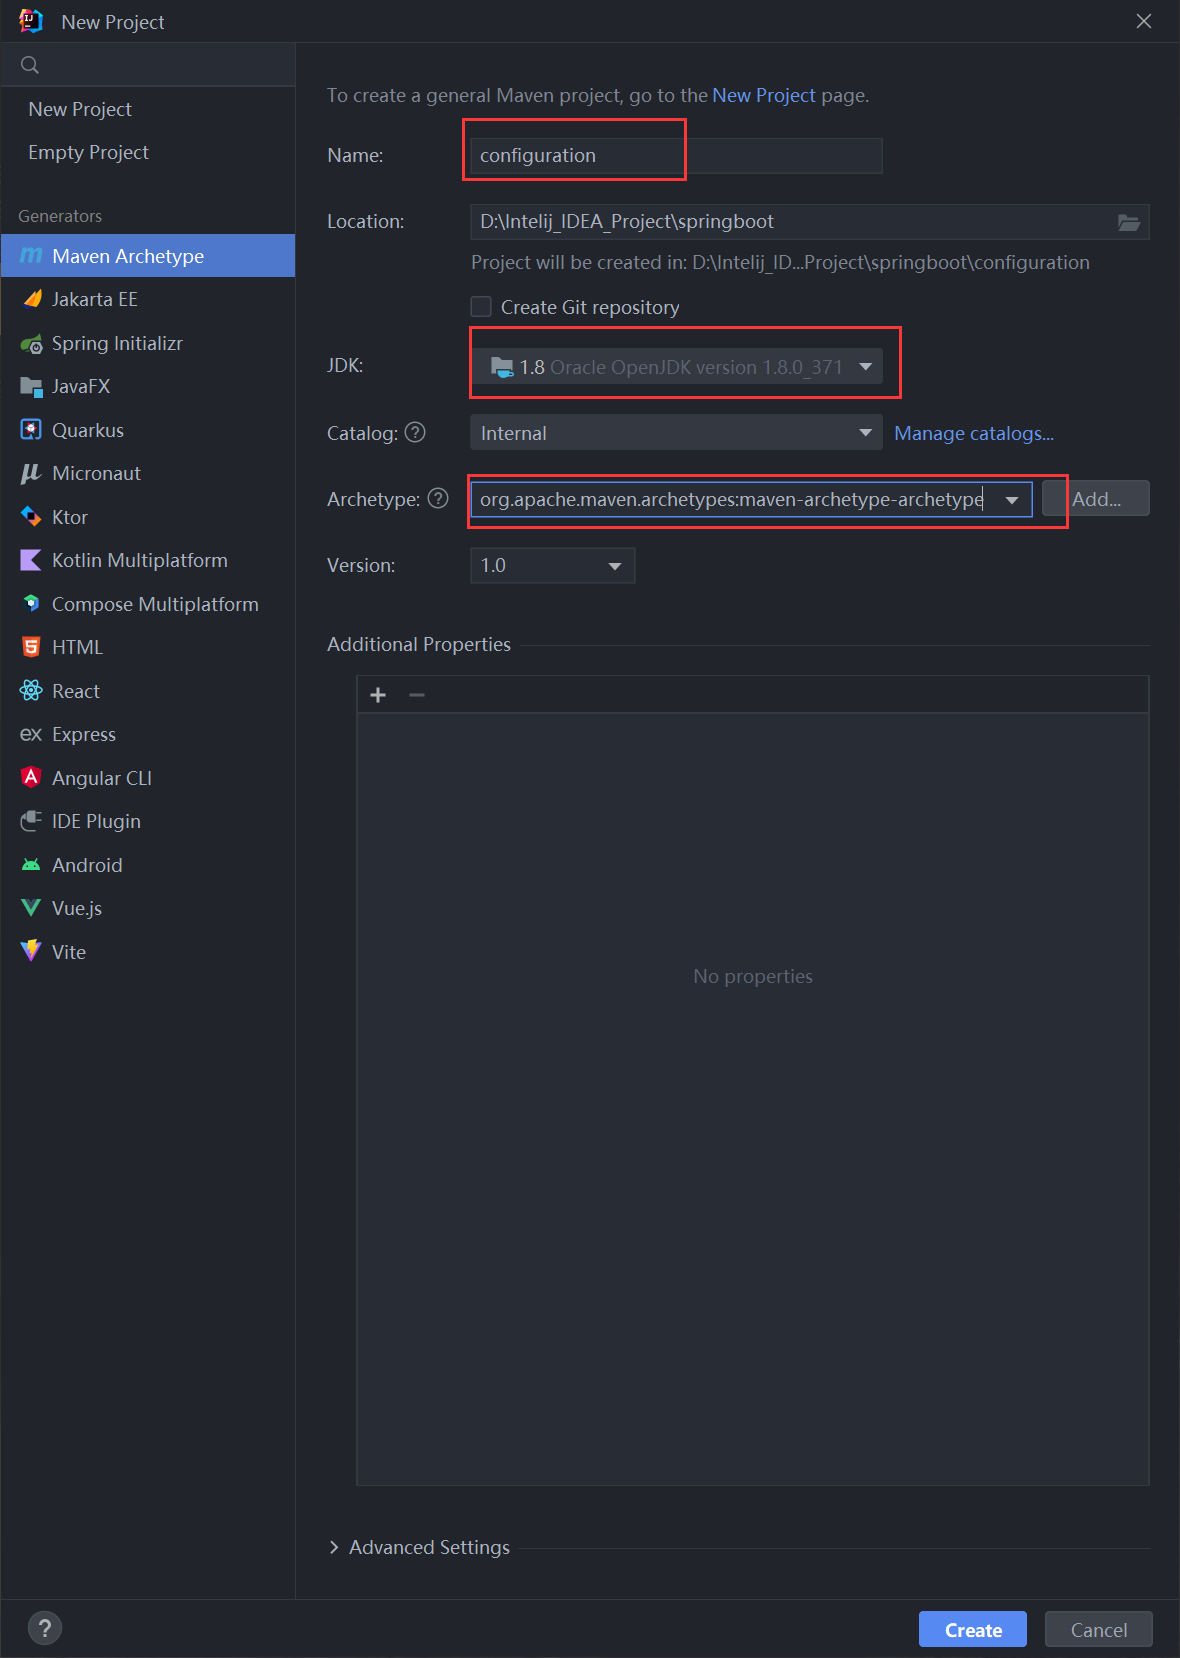
1.新创建一个项目
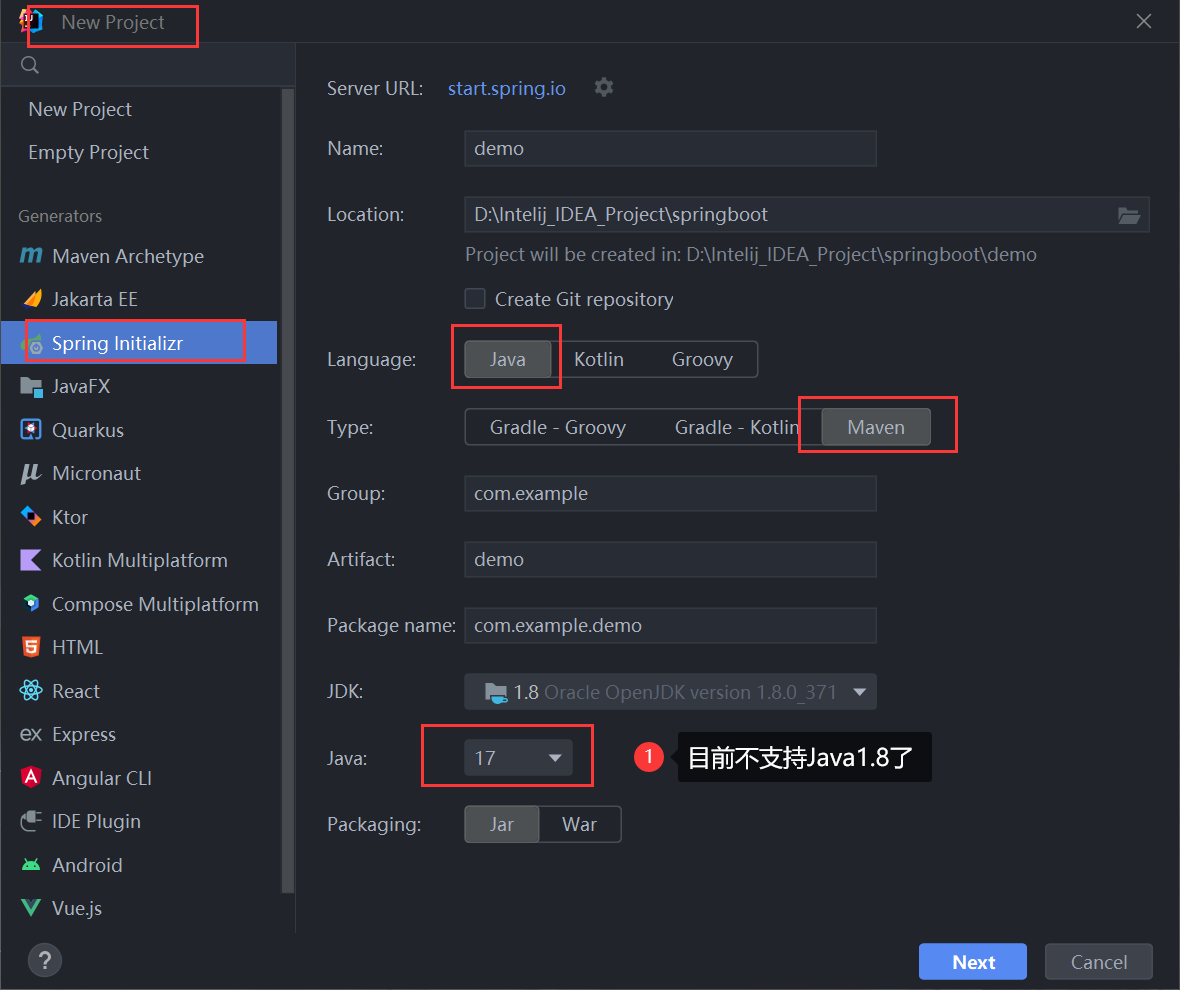
2.进行配置
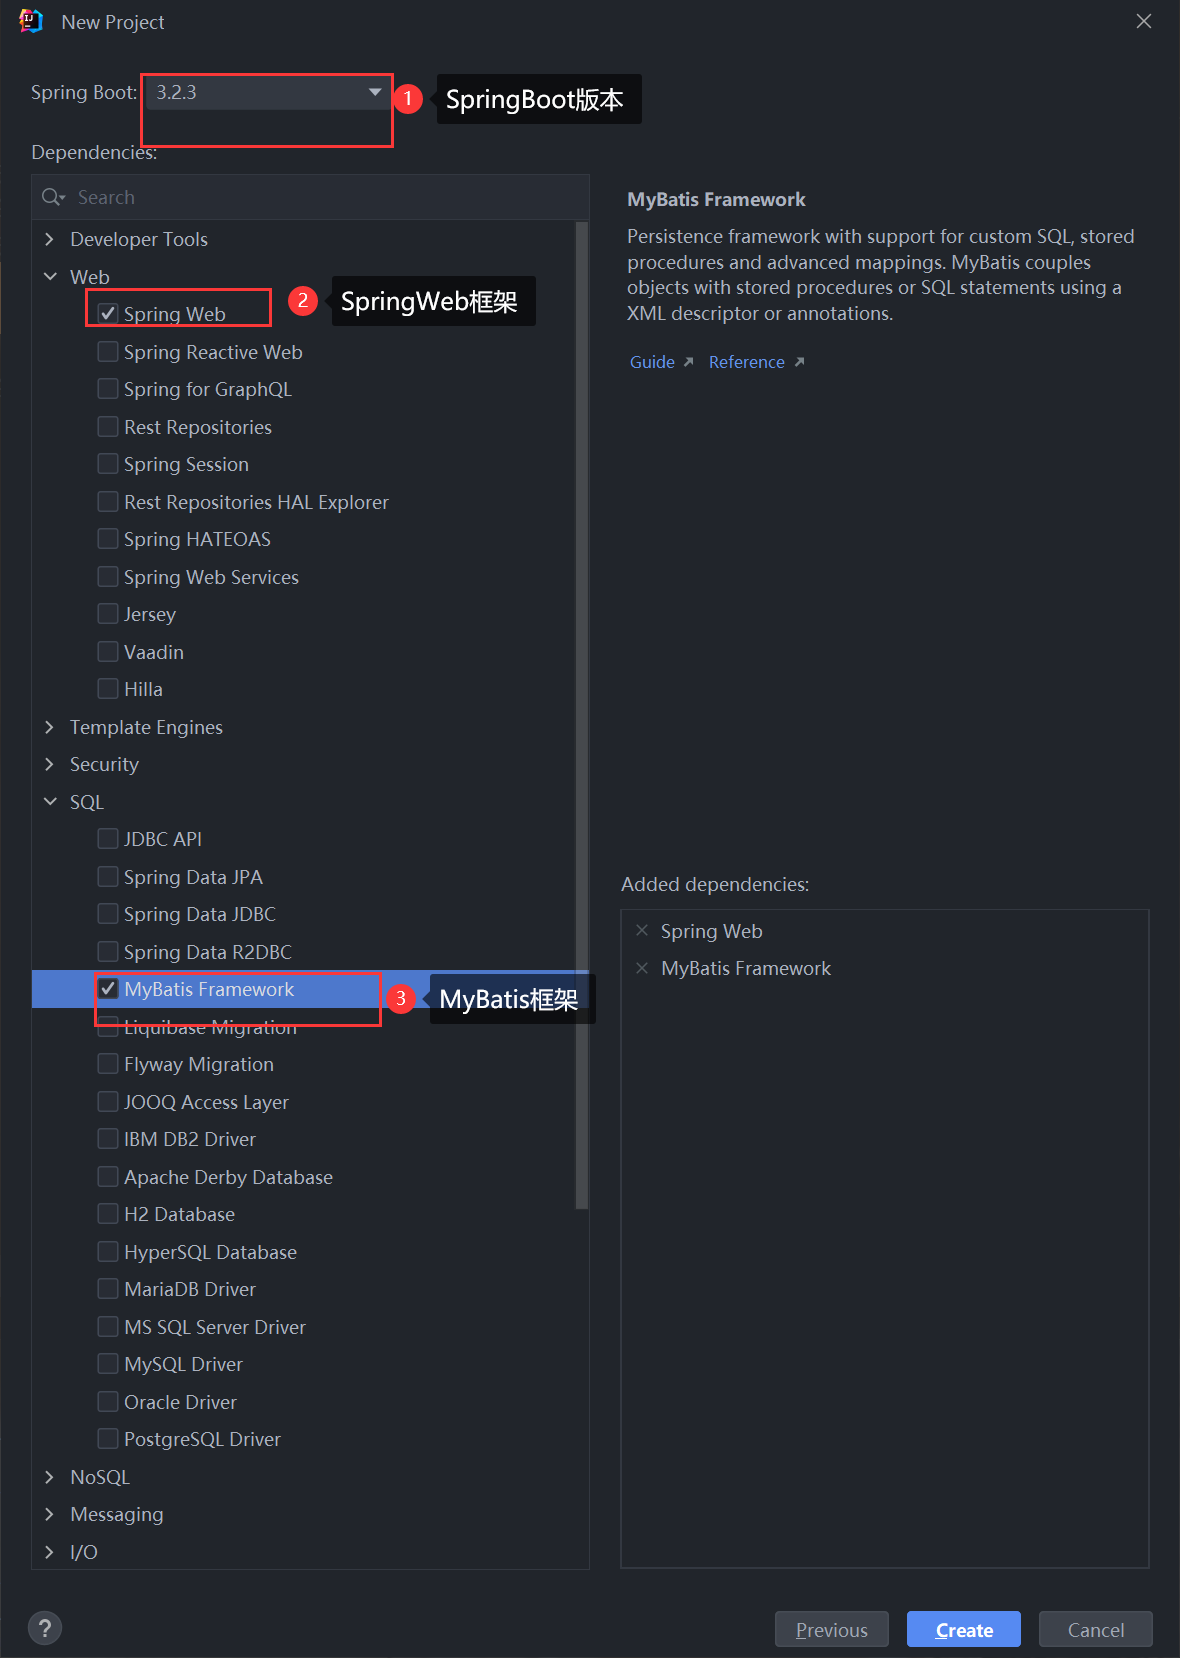
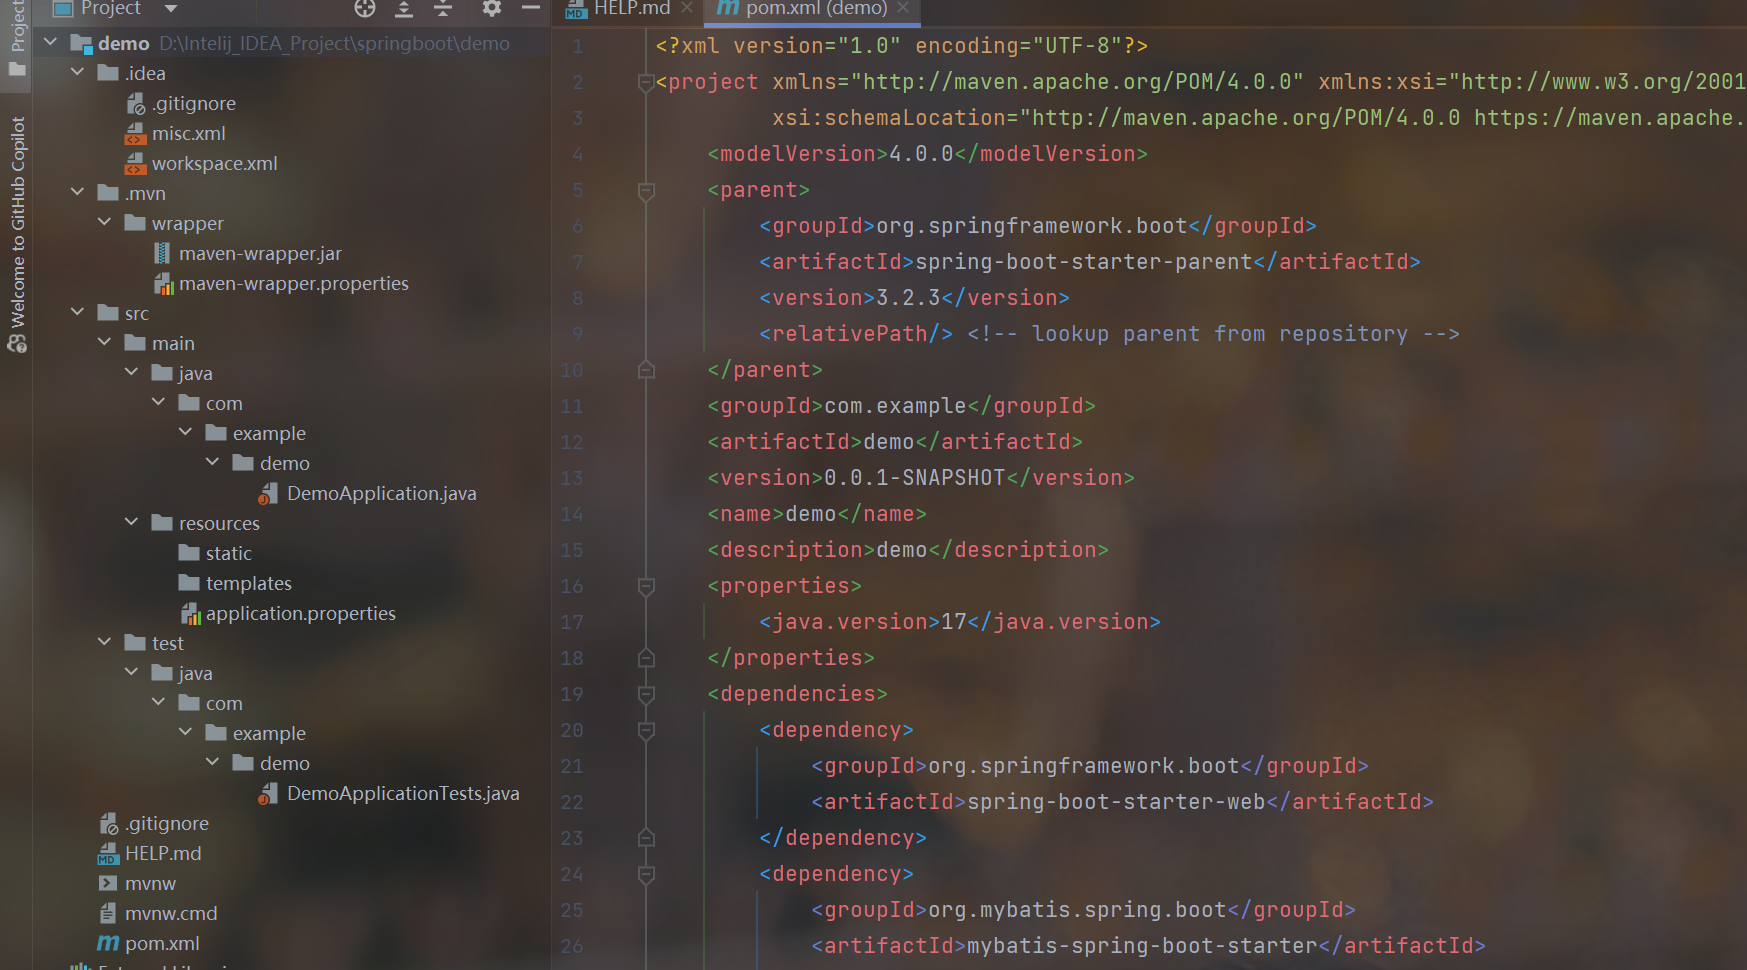
3.创建成功
3.通过官网创建
1.进入官网
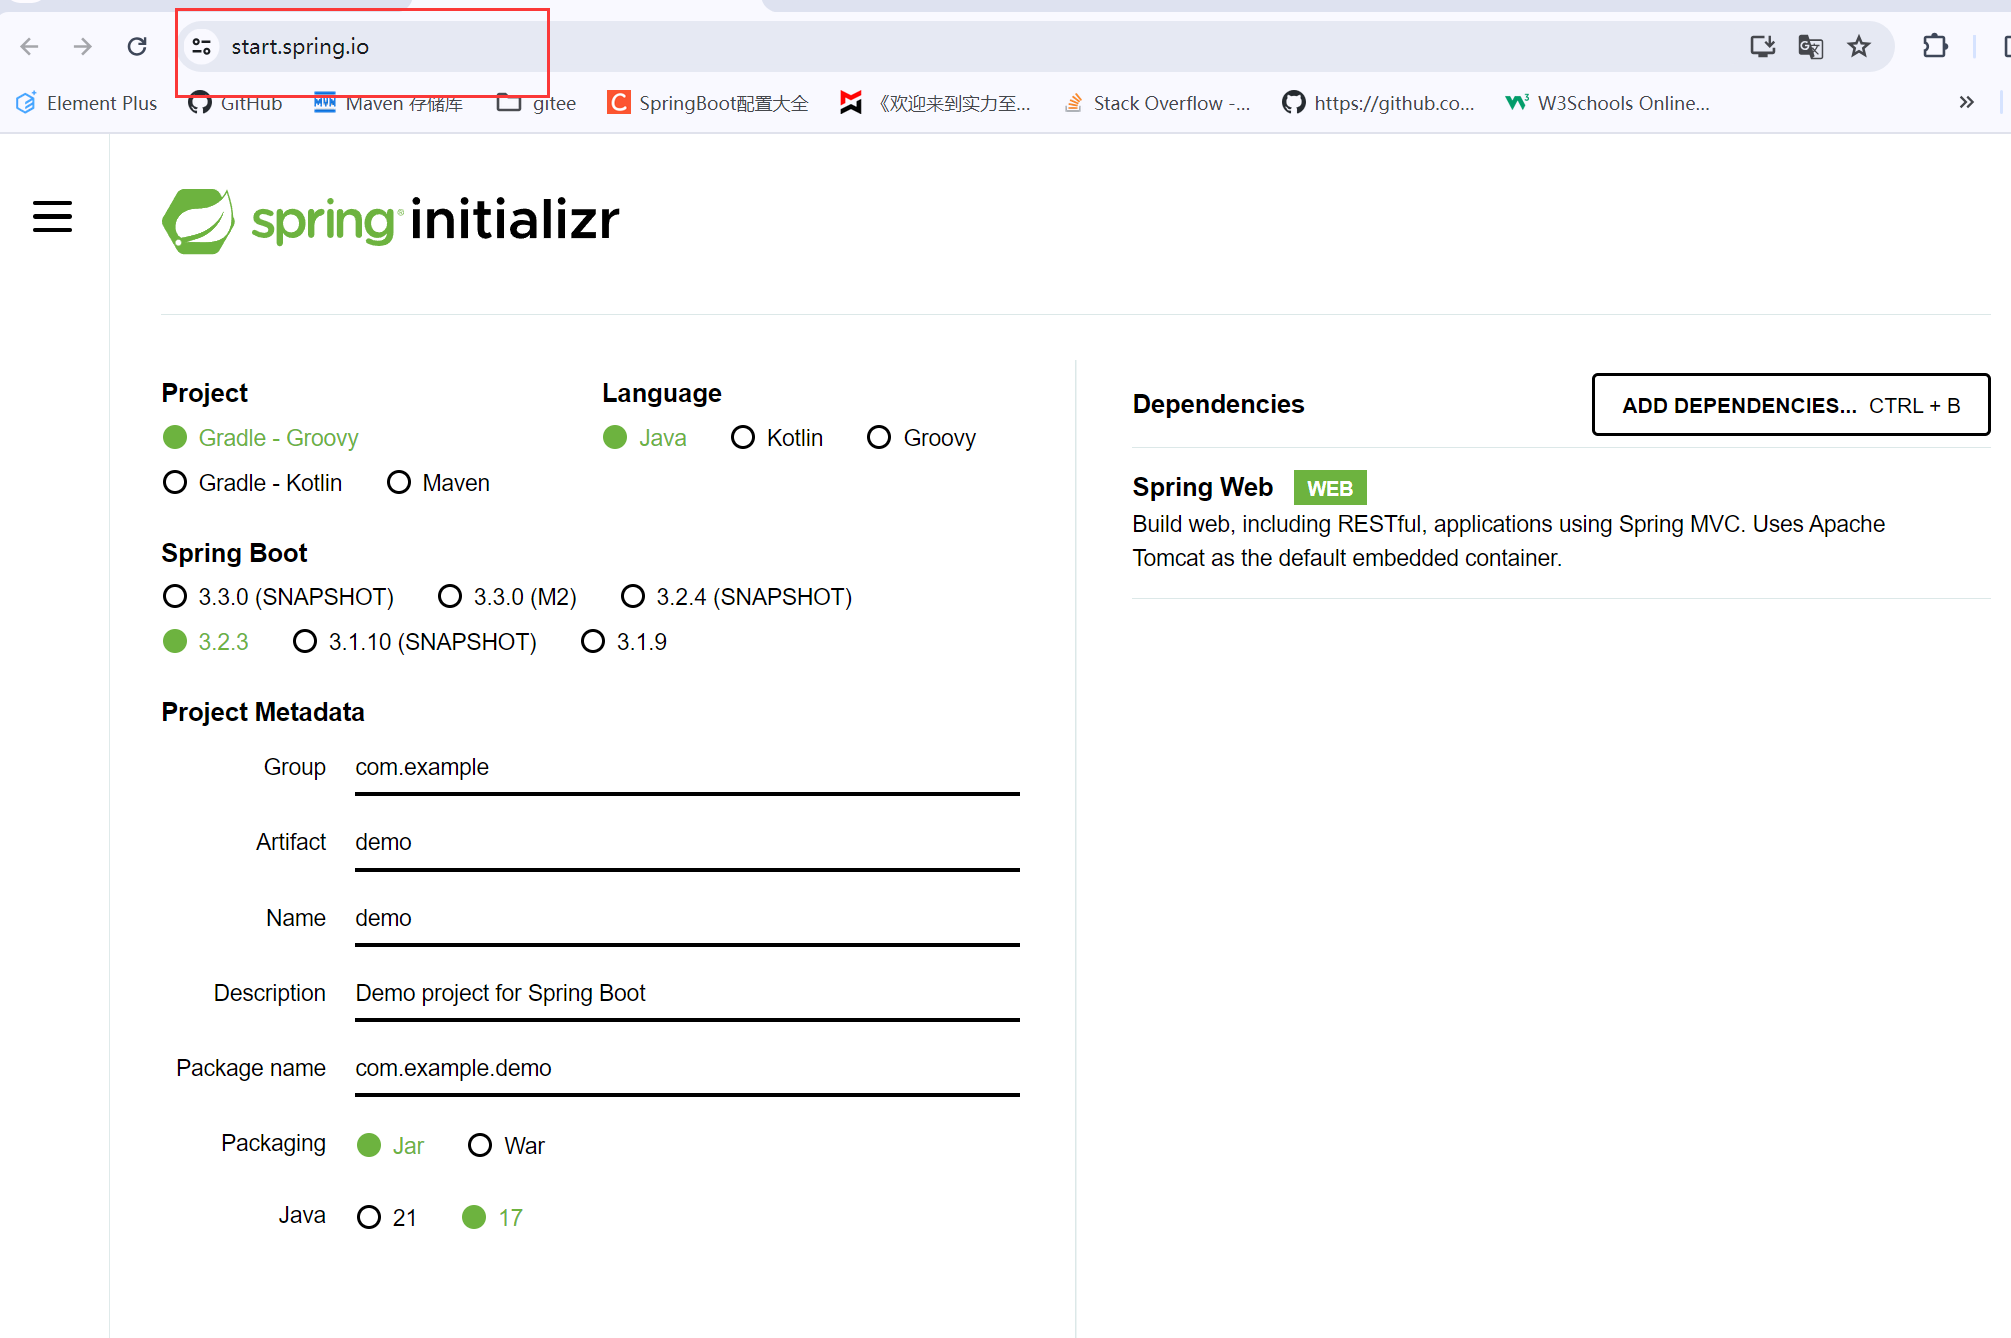
2.配置完之后选择

3.最后会生成一个.zip文件,解压之后在IDEA中打开即可
4.第一次使用自动配置爆红

3.yaml
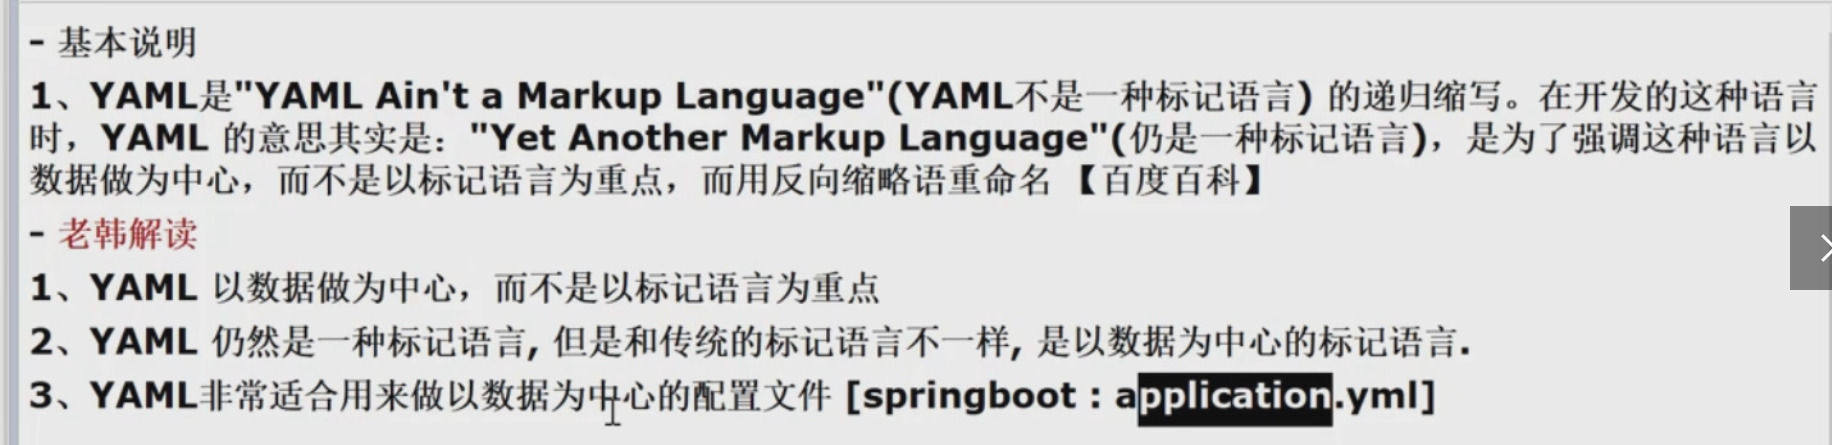
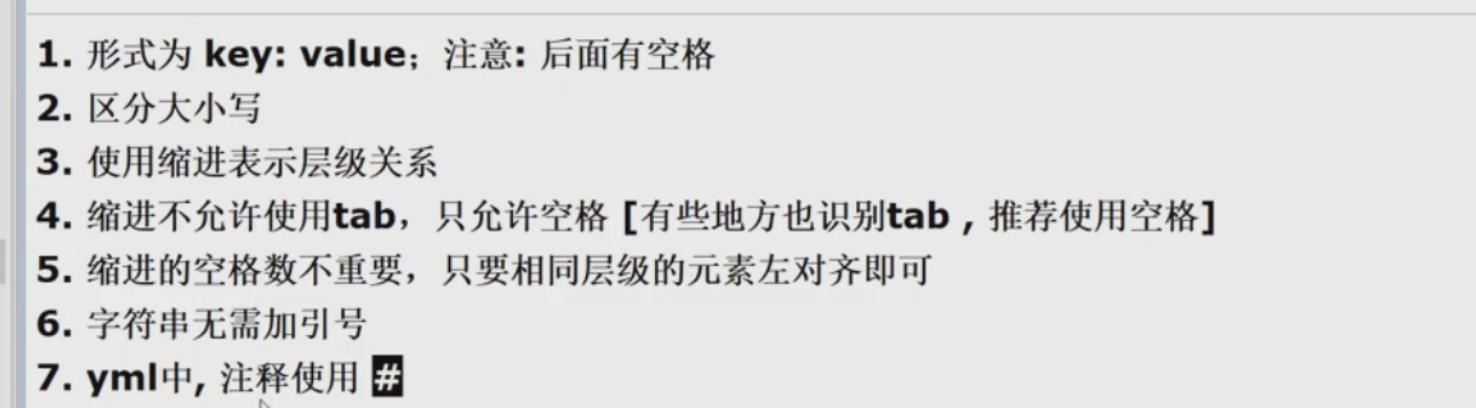
1.基本说明
2.yaml基本语法
3.yaml数据类型
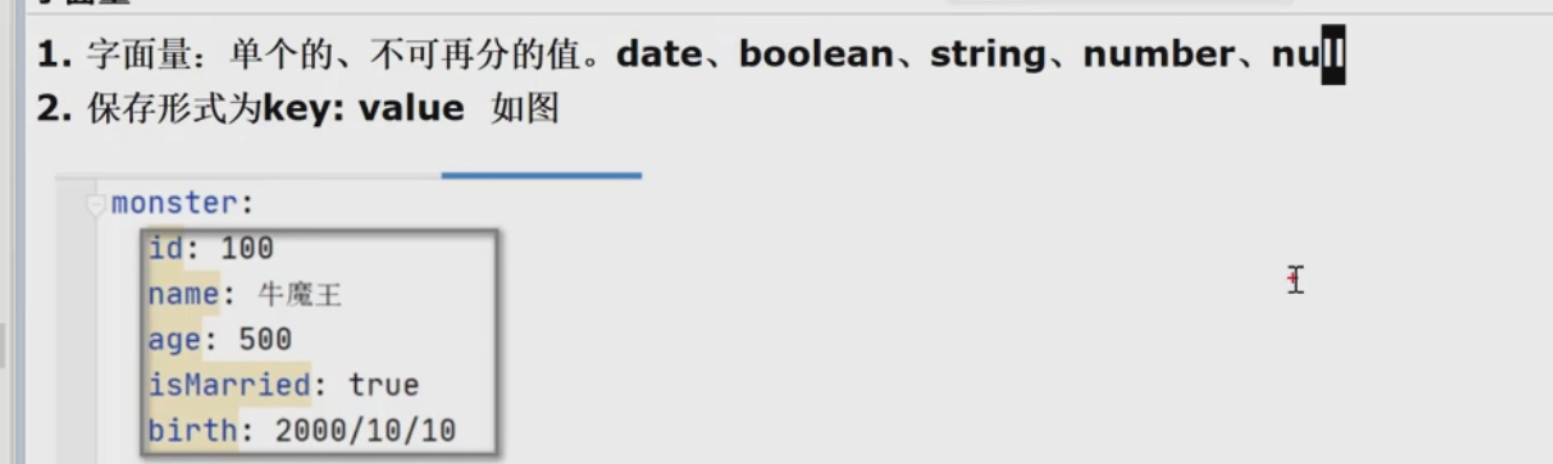
1.字面量
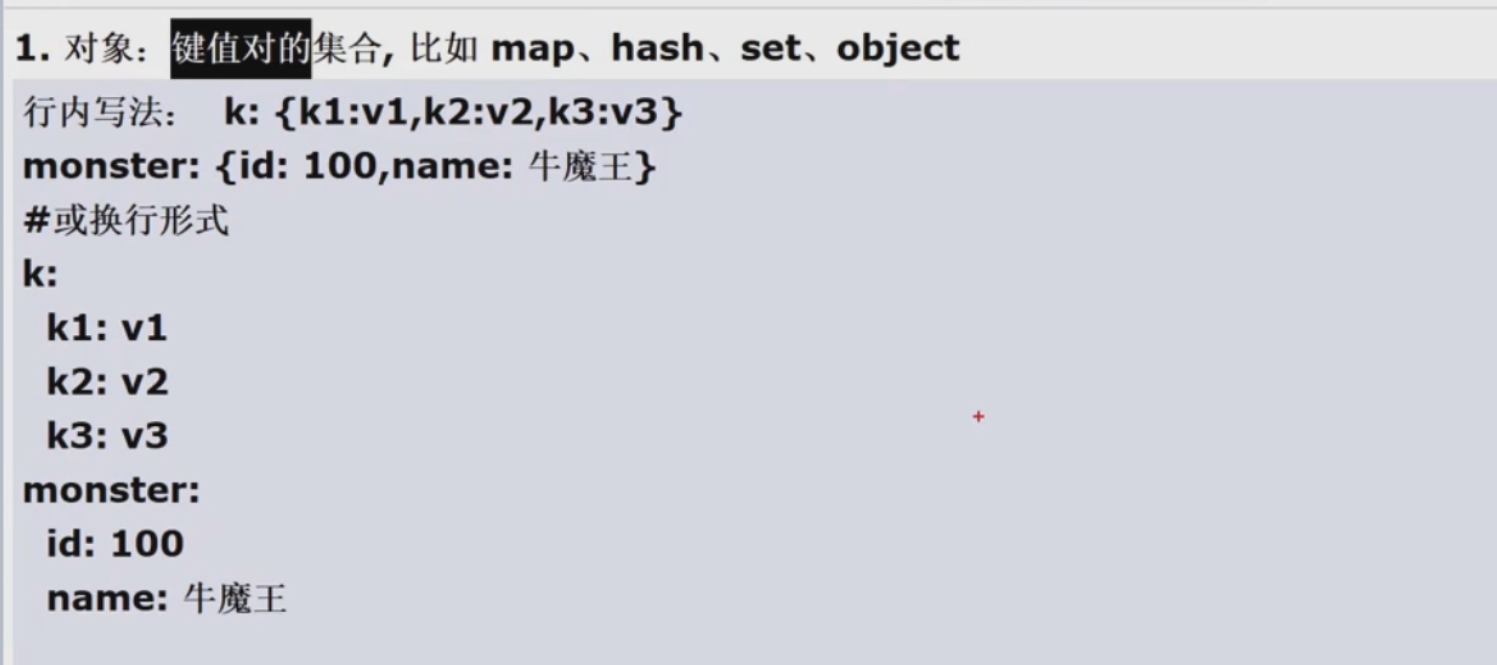
2.对象
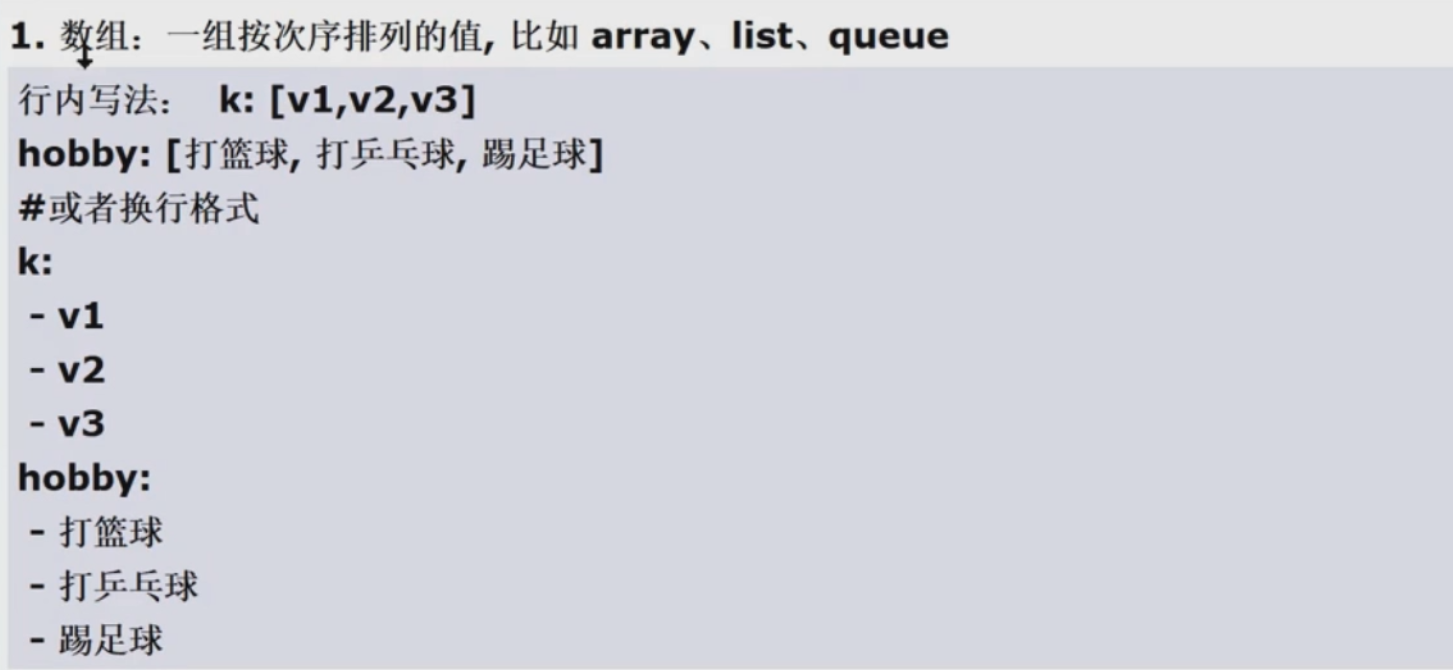
3.数组
4.yaml应用实例
1.创建一个新的maven项目
2.pom.xml引入依赖并刷新maven
<!--导入springboot父工程--><parent><artifactId>spring-boot-starter-parent</artifactId><groupId>org.springframework.boot</groupId><version>2.5.3</version></parent><dependencies><!--配置maven项目场景启动器,自动导入和web相关的包--><dependency><groupId>org.springframework.boot</groupId><artifactId>spring-boot-starter-web</artifactId></dependency><!--引入Lombok,使用版本仲裁--><dependency><groupId>org.projectlombok</groupId><artifactId>lombok</artifactId></dependency></dependencies>
3.编写两个bean
1.Car.java
packagecom.sun.springboot.bean;importlombok.Data;importorg.springframework.stereotype.Component;/**
 * @author 孙显圣
 * @version 1.0
 */@Data//getter,setter,tostring,无参构造@ComponentpublicclassCar{privateString name;privateDouble price;}
2.Monster.java
packagecom.sun.springboot.bean;importlombok.Data;importorg.springframework.stereotype.Component;importjava.util.*;/**
 * @author 孙显圣
 * @version 1.0
 */@Data@ComponentpublicclassMonster{privateInteger id;privateString name;privateInteger age;privateBoolean isMarried;privateDate birth;privateCar car;privateString[] skill;privateList<String> hobby;privateMap<String,Object> wife;privateSet<Double> salaries;privateMap<String,List<Car>> cars;}
4.HiController.java 接受请求
packagecom.sun.springboot.controller;importcom.sun.springboot.bean.Monster;importorg.springframework.web.bind.annotation.RequestMapping;importorg.springframework.web.bind.annotation.RestController;importjavax.annotation.Resource;/**
 * @author 孙显圣
 * @version 1.0
 */@RestControllerpublicclassHiController{@ResourceprivateMonster monster;@RequestMapping("/monster")publicMonstermonster(){return monster;}}
5.主程序Application.java
packagecom.sun.springboot;importorg.springframework.boot.SpringApplication;importorg.springframework.boot.autoconfigure.SpringBootApplication;/**
 * @author 孙显圣
 * @version 1.0
 */@SpringBootApplicationpublicclassApplication{publicstaticvoidmain(String[] args){SpringApplication.run(Application.class);}}
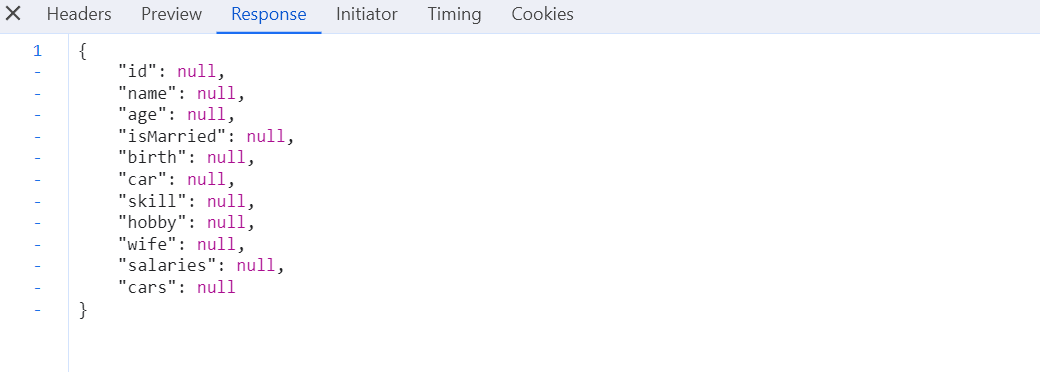
6.运行主程序(目前返回的值是空的)
7.创建yaml文件(后缀也可以是yml) resources/application.yml
monster:#前缀id:100name: 牛魔王
  age:500isMarried:falsebirth: 2000/11/11
8.绑定数据到Monster类

9.解决报错
1.因为使用@Configuration注解导致的问题

2.在pom.xml中添加依赖即可
<dependency><groupId>org.springframework.boot</groupId><artifactId>spring-boot-configuration-processor</artifactId><!--防止将该依赖传递到其他模块--><optional>true</optional></dependency>
3.运行主程序
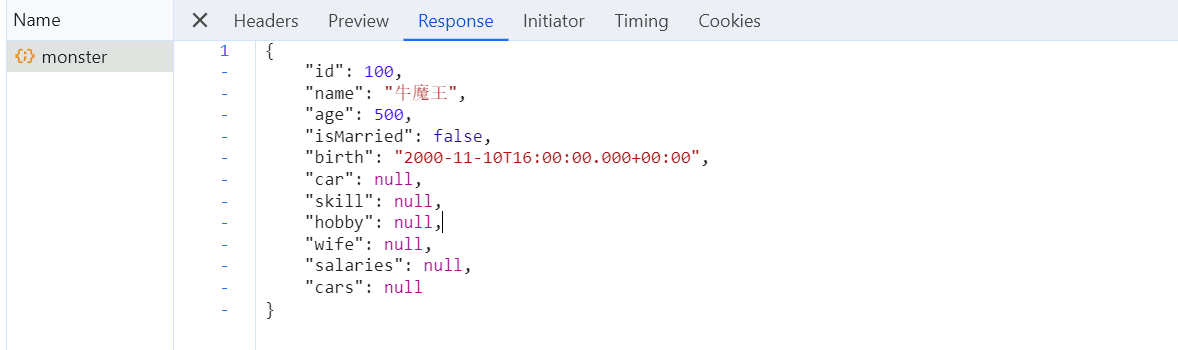
10.完整yml文件
monster:#前缀id:100name: 牛魔王
  age:500isMarried:falsebirth: 2000/11/11
  #对象类型#  car: {name: 宝马, price: 1000} #行内格式car:name: 奔驰
    price:3000#数组类型#  skill: [芭蕉扇, 牛魔拳] #行内格式skill:- 牛魔王
    - 芭蕉扇

  #list类型#  hobby: [白骨精, 美人鱼]hobby:- 白骨精
    - 牛魔王

  #map类型#  wife: {no1: 牛魔王, no2: 猪八戒}wife:no1: 白骨精
    no2: 铁扇公主

  #set类型#  salaries: [1, 2, 3]salaries:-4-5-6#map<String, List<Car>>类型cars:car1:[{name: 奔驰,price:400},{name: 奔驰,price:400}]car2:[{name: 奔驰,price:400},{name: 奔驰,price:400}]#  cars: {car1: [{name: 奔驰, price: 200}, {name: 奔驰, price: 200}],#          car2: [{name: 奔驰, price: 200}, {name: 奔驰, price: 200}]}
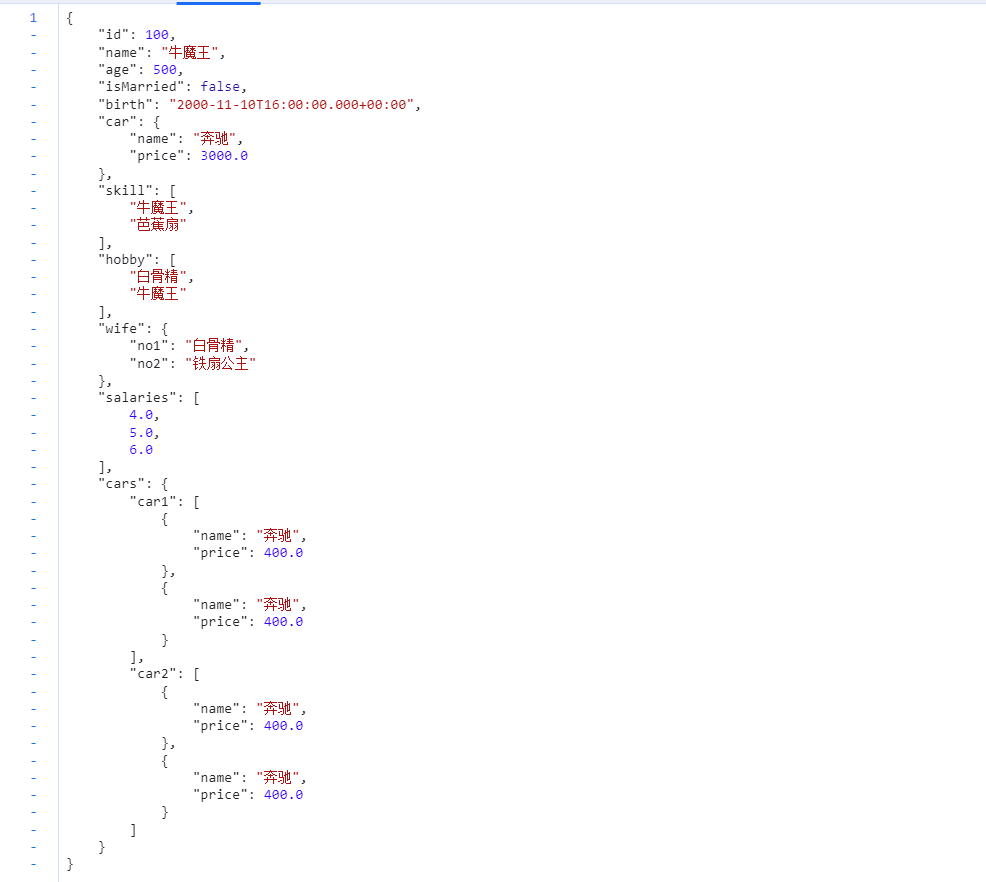
11.结果展示
12.yaml注意事项和细节说明
1.注意事项
- application.properties和application.yml如果有相同前缀值的绑定,则application.properties优先级高
- 字符串无需加引号,但是加引号也没有问题
- yaml配置文件如果不提示字段信息,则导入依赖即可
- 如果添加依赖还不显示字段信息则安装YAML插件
2.细节说明
- 其实不需要记住什么yaml的类型,只要能跟java对应上即可
- 如果是对象或者map,则表示方式是 - 换行key: value- {key1: value1, key2: value2}
- 如果是数组或list,则表示方式是 - 换行- value- [value1, value2]
版权归原作者 S-X-S 所有, 如有侵权,请联系我们删除。