文章目录
01 前言
本文源码已上传至Github:https://github.com/ylw-github/flink-agent
在当今数据驱动的时代,Apache Flink 以其卓越的有状态计算能力和对有界及无界数据流的高效处理而广受欢迎。
Flink
主要用来 “处理” 数据的,但其本身并不 “存储” 数据。但很多时候,用户更期待的是 “可以看到一个Flink任务里面的真实数据是怎么流动的,流动的内容有什么?
例如“Kafka实时同步到Mysql的flink作业” :在程序持续运行的过程中,用户期望看到实时同步有哪些数据、具体的数据内容,或可能会出现把这些数据实时写到第三方的日志系统这种需求。*很遗憾,
Flink
并不支持该功能,也没有相应的
API
或提供相关的
hook
实现,目前只能够通过
Metrics
去查看数据流动的数量以及速率*这些统计信息。
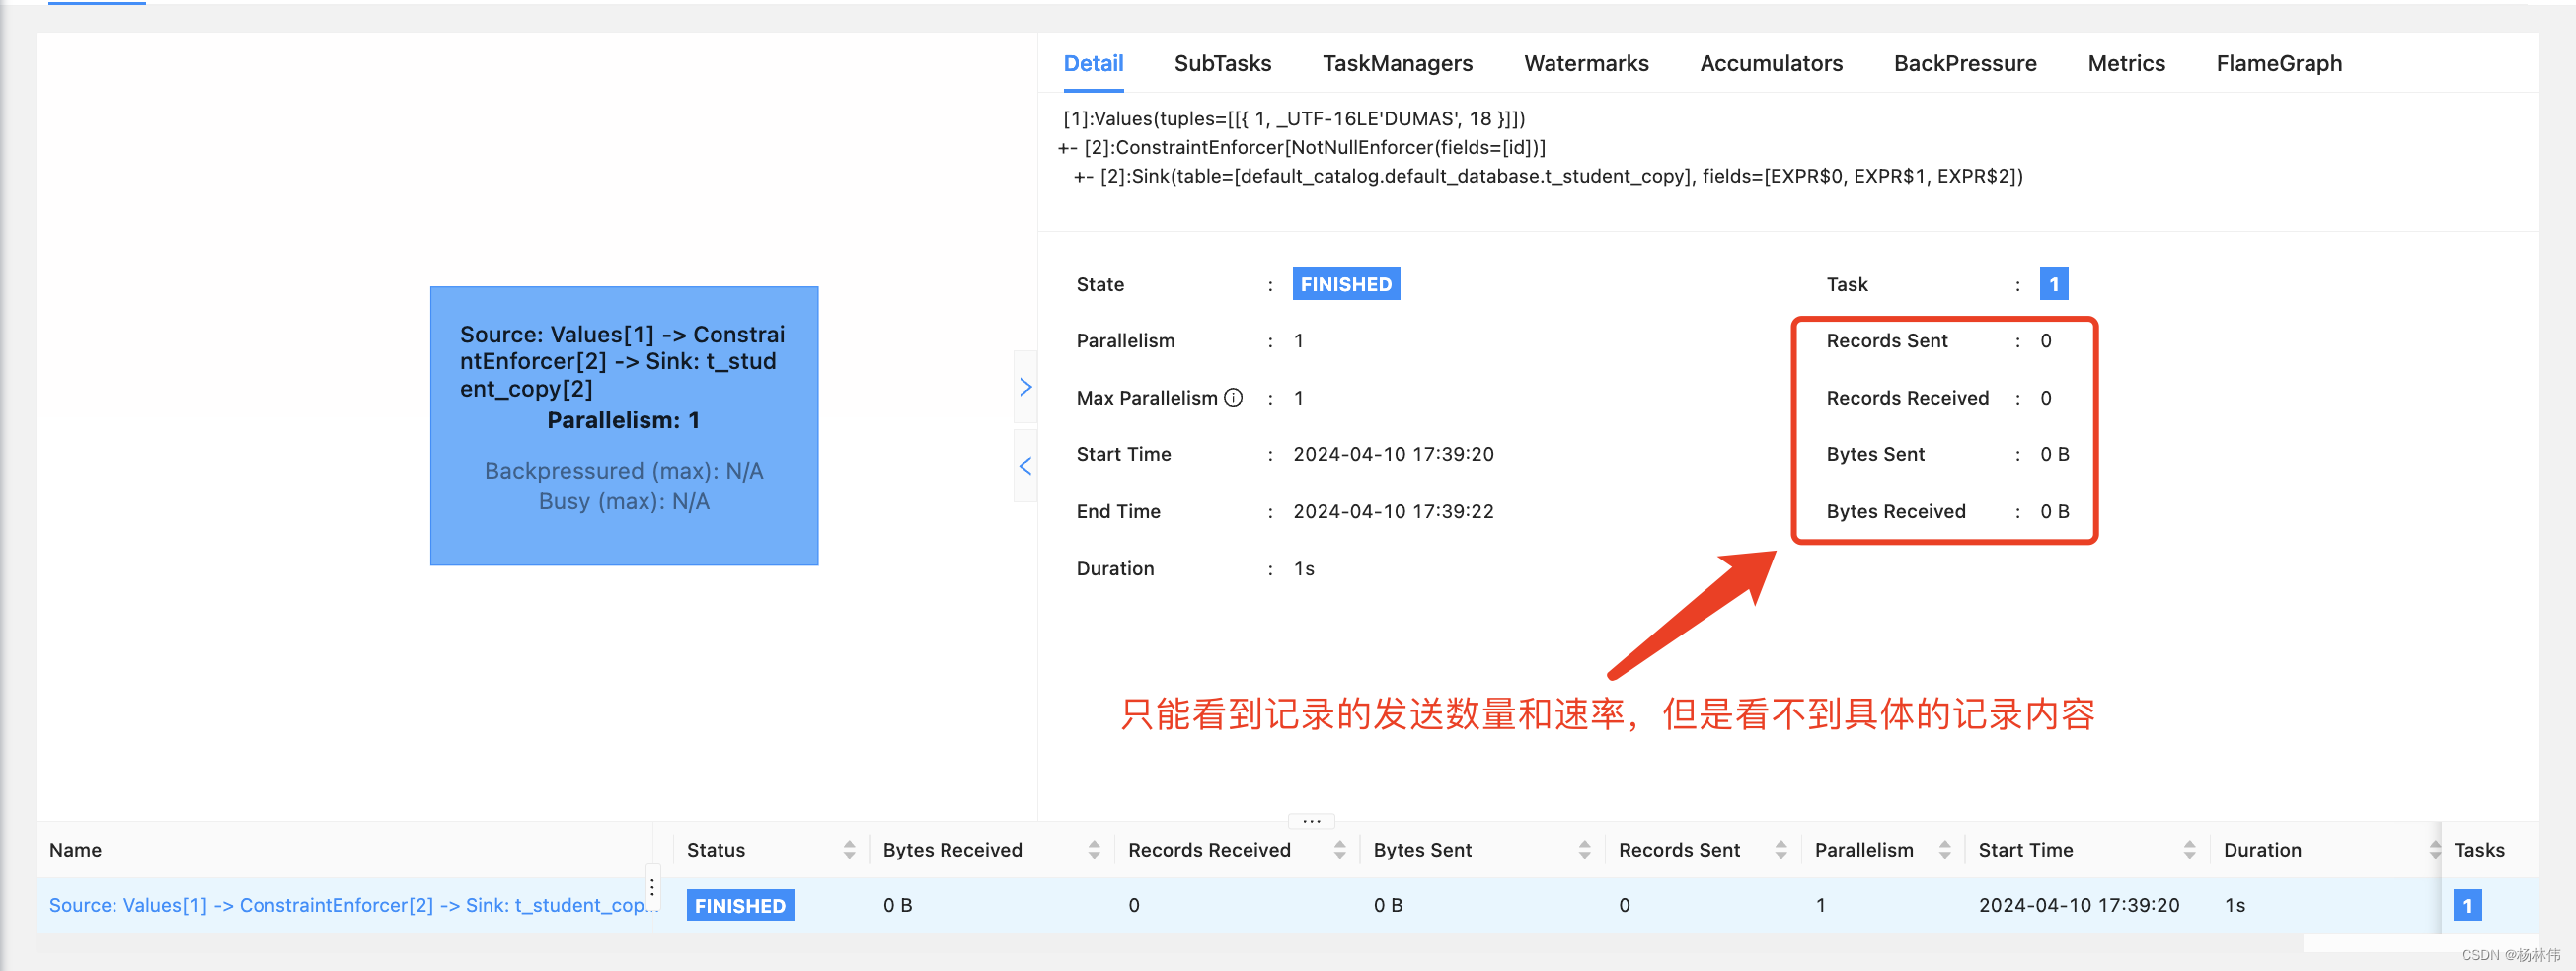
因此,博主本文主要分享的是:探索在不修改Flink源码的前提下,如何通过代理技术捕捉并记录数据流动的每一个细节?
02 背景调研
在寻找解决方案的过程中,博主发现了一些开源项目,如纯钧(原名:FlinkX),它提供了一些值得借鉴的思路。特别是关于脏数据管理的实现,具体的文档地址:《拓展功能@脏数据插件设计》
为何要提到这一块呢?博主是想参考
Chunjun是在哪里获取到脏数据?如何获取脏数据的具体内容的?以便找到监听的入口。
通过一系列的代码
review
,发现Chunjun是在每个
Connector
里面去采集脏数据的,且
Connector
都需要经过二次开发,只有使用它们的
Connector
才能取脏数据(如下图)。显然,这是不满足本文的需求的,我期望的是:在不改变Flink的源码前提下,做到通用Connector的监听,且可以通过简单的方式就能获取到这些流动数据的内容了。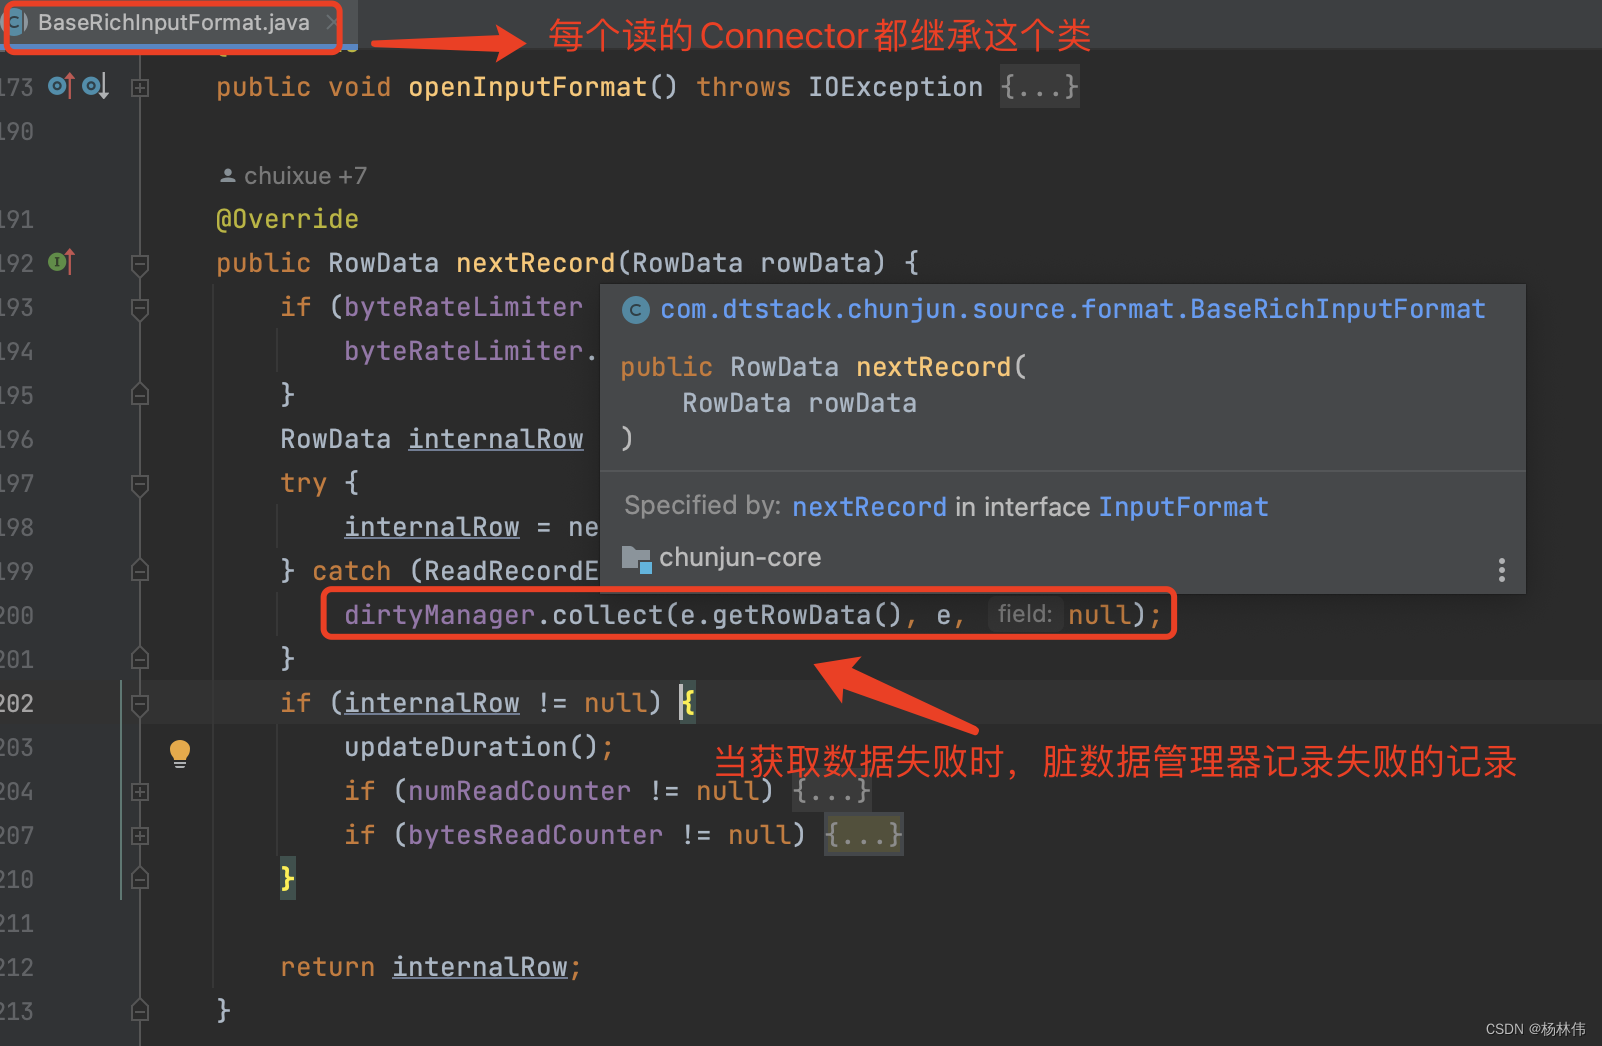
因此,博主想到了通过代理的方式去获取Flink流动的数据,类似于阿里开源的Arthas框架实现,博主也写过相关的源码分析,有兴趣的同学可以看看:《Arthas使用与源码分析》。

Ok,直接进入本文的主题,下面展示详细的实现。
03 Agent实现Flink流动数据的监听
一个Flink程序的运行,会依赖到一个或多个
Connector
(连接器),而这些连接器分为
Source
(主要用于读)和
Sink
(主要用于写),那么如果要监听到Flink作业流动的数据,我们这里可以简单尝试去查看支持
Sink
的
Connector
(例如:flink-connector-jdbc),看看 **是否有实现一个公共的接口,然后对这个接口做监听,即可“读取”写入前的数据 ? **。
再次经过一系列的代码review,博主发现基本所有的sink相关的Connector都继承了“
org.apache.flink.api.common.io.OutputFormat
”这个接口类,而这个接口类里面有个核心的方法(writeRecord),我们可以从这个方法作为监听的入口:
publicinterfaceOutputFormat<IT>extendsSerializable{...../**
     * Adds a record to the output.
     *
     * <p>When this method is called, the output format it guaranteed to be opened.
     *
     * @param record The records to add to the output.
     * @throws IOException Thrown, if the records could not be added due to an I/O problem.
     */voidwriteRecord(IT record)throwsIOException;......}
接下来可以开始编写一个Agent类了,这里直接上代码。
3.1 Agent的源码实现
Byte Buddy 是一个 Java 字节码生成和操作库,它允许在运行时创建和修改 Java 类。它可以用于在 Java 应用程序中进行动态代理、字节码增强、AOP(面向切面编程)等方面的应用。
首先maven需要依赖byte-buddy,这里贴上完整代码:
<project xmlns="http://maven.apache.org/POM/4.0.0" xmlns:xsi="http://www.w3.org/2001/XMLSchema-instance"
         xsi:schemaLocation="http://maven.apache.org/POM/4.0.0 http://maven.apache.org/xsd/maven-4.0.0.xsd">
    <modelVersion>4.0.0</modelVersion>

    <groupId>com.ylw</groupId>
    <artifactId>flink-agent</artifactId>
    <version>1.0.0</version>
    <packaging>jar</packaging>

    <name>flink-agent</name>
    <url>https://yanglinwei.blog.csdn.net</url>

    <properties>
        <project.build.sourceEncoding>UTF-8</project.build.sourceEncoding>
    </properties>

    <dependencies>
        <dependency>
            <groupId>net.bytebuddy</groupId>
            <artifactId>byte-buddy</artifactId>
            <version>1.11.14</version>
        </dependency>

        <!-- 引入这个主要是为了能使用到LOGGER,最终还是使用到 -->
        <dependency>
            <groupId>org.slf4j</groupId>
            <artifactId>slf4j-api</artifactId>
            <scope>provided</scope>
            <version>1.7.36</version>
        </dependency>

    </dependencies>

    <build>
        <plugins>
            <plugin>
                <groupId>org.apache.maven.plugins</groupId>
                <artifactId>maven-assembly-plugin</artifactId>
                <executions>
                    <execution>
                        <goals>
                            <goal>single</goal>
                        </goals>
                        <phase>package</phase>
                        <configuration>
                            <descriptorRefs>
                                <descriptorRef>jar-with-dependencies</descriptorRef>
                            </descriptorRefs>
                            <archive>
                                <manifestEntries>
                                    <Premain-Class>com.ylw.flink.agent.ProxyAgent</Premain-Class>
                                    <Agent-Class>com.ylw.flink.agent.ProxyAgent</Agent-Class>
                                    <Can-Redefine-Classes>true</Can-Redefine-Classes>
                                    <Can-Retransform-Classes>true</Can-Retransform-Classes>
                                    <Specification-Title>${project.name}</Specification-Title>
                                    <Specification-Version>${project.version}</Specification-Version>
                                    <Implementation-Title>${project.name}</Implementation-Title>
                                    <Implementation-Version>${project.version}</Implementation-Version>
                                </manifestEntries>
                            </archive>
                        </configuration>
                    </execution>
                </executions>
            </plugin>
        </plugins>
    </build>
</project>
接着编写Agent代码:
packagecom.ylw.flink.agent;importnet.bytebuddy.agent.builder.AgentBuilder;importnet.bytebuddy.implementation.MethodDelegation;importnet.bytebuddy.matcher.ElementMatchers;importorg.slf4j.Logger;importorg.slf4j.LoggerFactory;importjava.lang.instrument.Instrumentation;/**
 * Flink proxy agent
 *
 * @author : YangLinWei
 * @createTime: 2024/4/10 23:33
 * @version: 1.0.0
 */publicclassProxyAgent{privatestaticfinalLoggerLOGGER=LoggerFactory.getLogger(ProxyAgent.class);publicstaticvoidpremain(String agentArgs,Instrumentation instrumentation){LOGGER.info("Starting flink porxy agent.");newAgentBuilder.Default()// 监听OutputFormat这个接口类的下面所有子类.type(ElementMatchers.hasSuperType(ElementMatchers.named("org.apache.flink.api.common.io.OutputFormat"))).transform((
                        builder, type, classLoader,module)->// 监听OutputFormat这个接口类的下面所有子类的writeRecord方法
                        builder.method(ElementMatchers.named("writeRecord")).intercept(MethodDelegation.to(WriteRecordInterceptor.class))).installOn(instrumentation);LOGGER.info("Flink porxy agent started.");}}
其中里面的WriteRecordInterceptor内容如下,我们在这里可以拦截到的参数内容打印下来(当然也可以发送到kafka或日志服务器等):
packagecom.ylw.flink.agent;importnet.bytebuddy.implementation.bind.annotation.AllArguments;importnet.bytebuddy.implementation.bind.annotation.Origin;importnet.bytebuddy.implementation.bind.annotation.RuntimeType;importnet.bytebuddy.implementation.bind.annotation.SuperCall;importorg.slf4j.Logger;importorg.slf4j.LoggerFactory;importjava.lang.reflect.Method;importjava.util.concurrent.Callable;/**
 * 拦截器
 *
 * @author : YangLinWei
 * @createTime: 2024/4/10 23:32
 * @version: 1.0.0
 */publicclassWriteRecordInterceptor{privatestaticfinalLoggerLOGGER=LoggerFactory.getLogger(ProxyAgent.class);@RuntimeTypepublicstaticObjectintercept(@OriginMethod method,@AllArgumentsObject[] args,@SuperCallCallable<?> callable)throwsException{String clazzName = method.getDeclaringClass().getSimpleName();String methodName = method.getName();LOGGER.info("Ready to {}#{} content. ", clazzName, methodName);try{// 获取方法的参数类型Class<?>[] parameterTypes = method.getParameterTypes();// 打印方法参数的名称和内容(这里可以发送到kafka等操作)for(int i =0; i < parameterTypes.length; i++){LOGGER.info("Parameter {}: {} = {}", i, parameterTypes[i].getName(), args[i]);}return callable.call();}catch(Exception e){LOGGER.error("Record error. {}#{}", clazzName, methodName, e);throw e;}}}
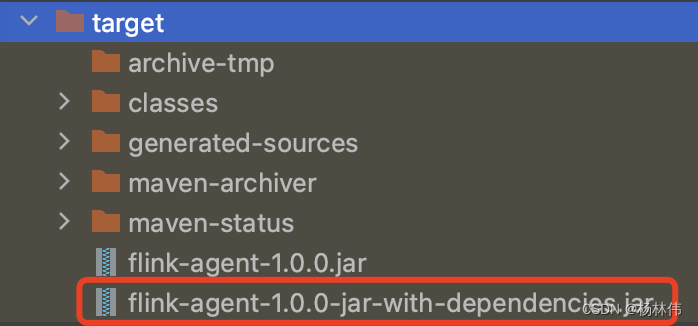
接下来,直接使用
mvn clean package
命令打包,打包后,使用
flink-agent-1.0.0-jar-with-dependencies.jar
这个包,里面包含所有的依赖:
那么这个包如何与我们的flink程序配合使用呢?接下来继续介绍。
3.2 Flink sdk集成Agent jar
我们可以从Flink官网随便下载一个flink安装包(这里使用比较新的flink-1.18版本),下载完后解压,并把打包好Agent jar放入lib目录: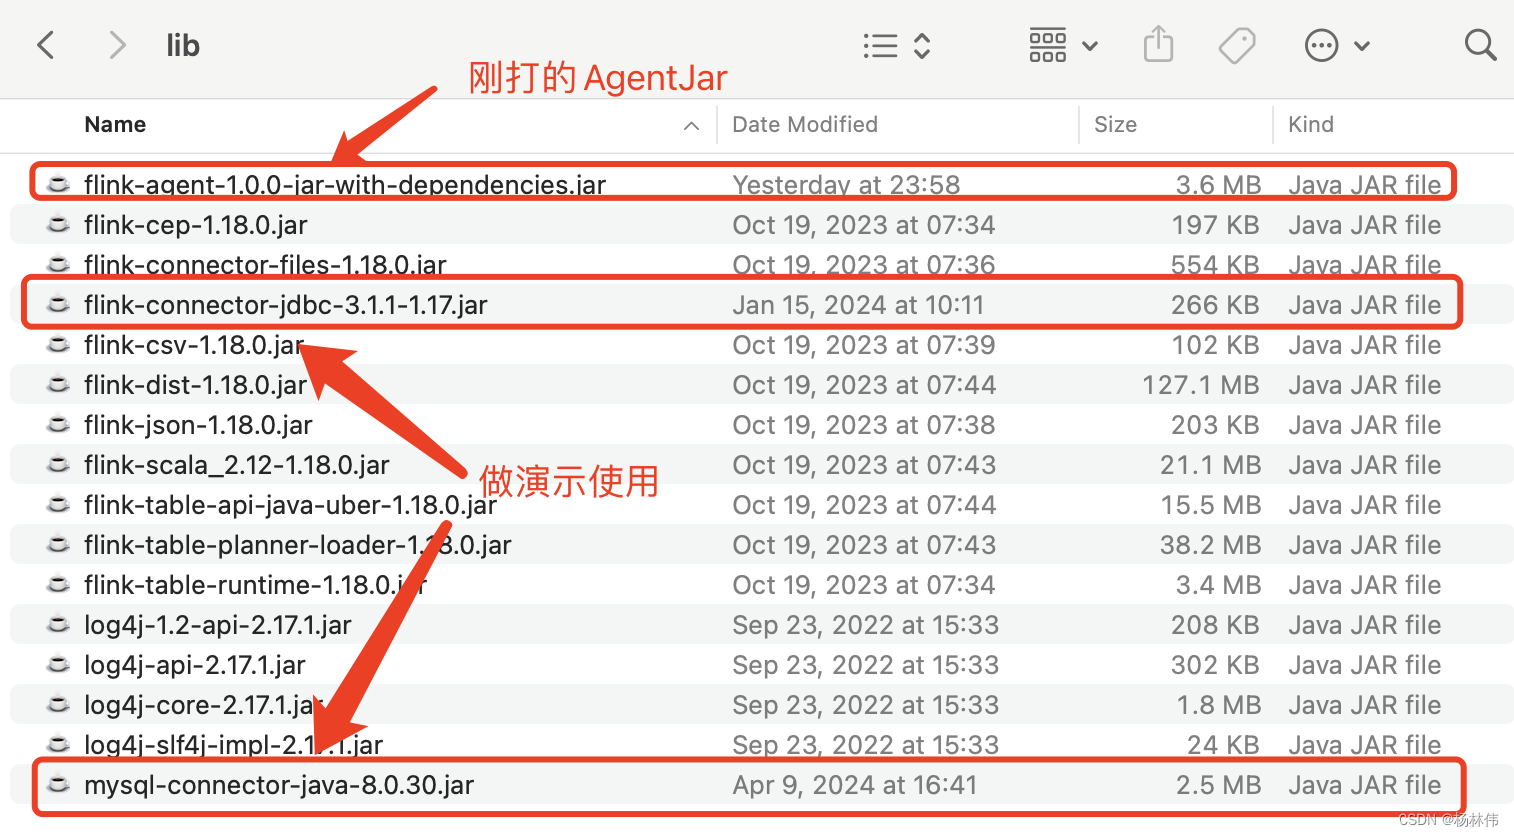
接着修改
flink-conf.yaml
文件,在 “env.java.opts.all” 参数值里加上 “**-javaagent:…/lib/flink-agent-1.0.0-jar-with-dependencies.jar** ”:

进入bin目录,启动程序:
./start-cluster.sh

04 验证
接下来我们要验证 “ 是否可以拦截Sink Connector里面的writeRecord方法,并打印“流动(写入)数据”的实际内容” 。这里我们可以起一个
sql-client
,并创建一张简单的
jdbc-connector
相关的表,并
insert
一些数据进去。进入bin目录并启动
sql-client
:
./sql-client.sh
接着,create一张jdbc相关的表:
CREATETABLE t_student_copy (
       id INT,
       name STRING,
       age INT,PRIMARYKEY(id)NOT ENFORCED
)WITH('connector'='jdbc','url'='jdbc:mysql://数据库地址:数据库端口/数据库名?serverTimezone=Asia/Shanghai&useUnicode=true&characterEncoding=utf8','username'='用户名','password'='密码','table-name'='t_student_copy');
最后插入一条数据:
INSERTINTO t_student_copy values(1,'DUMAS',20);
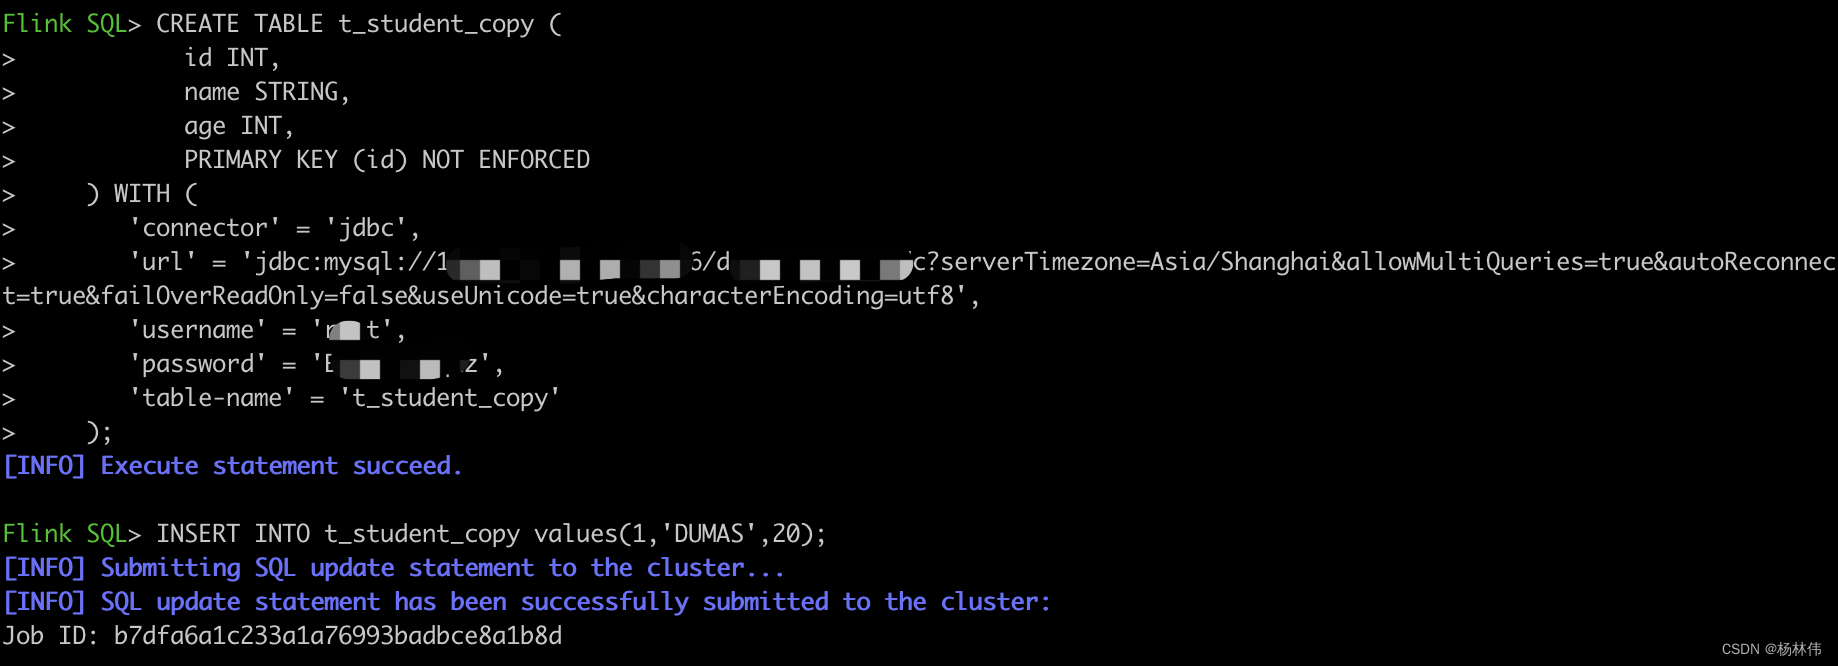
可以看到,已经成功的执行了作业。接着登录
flink web
的
task-manager
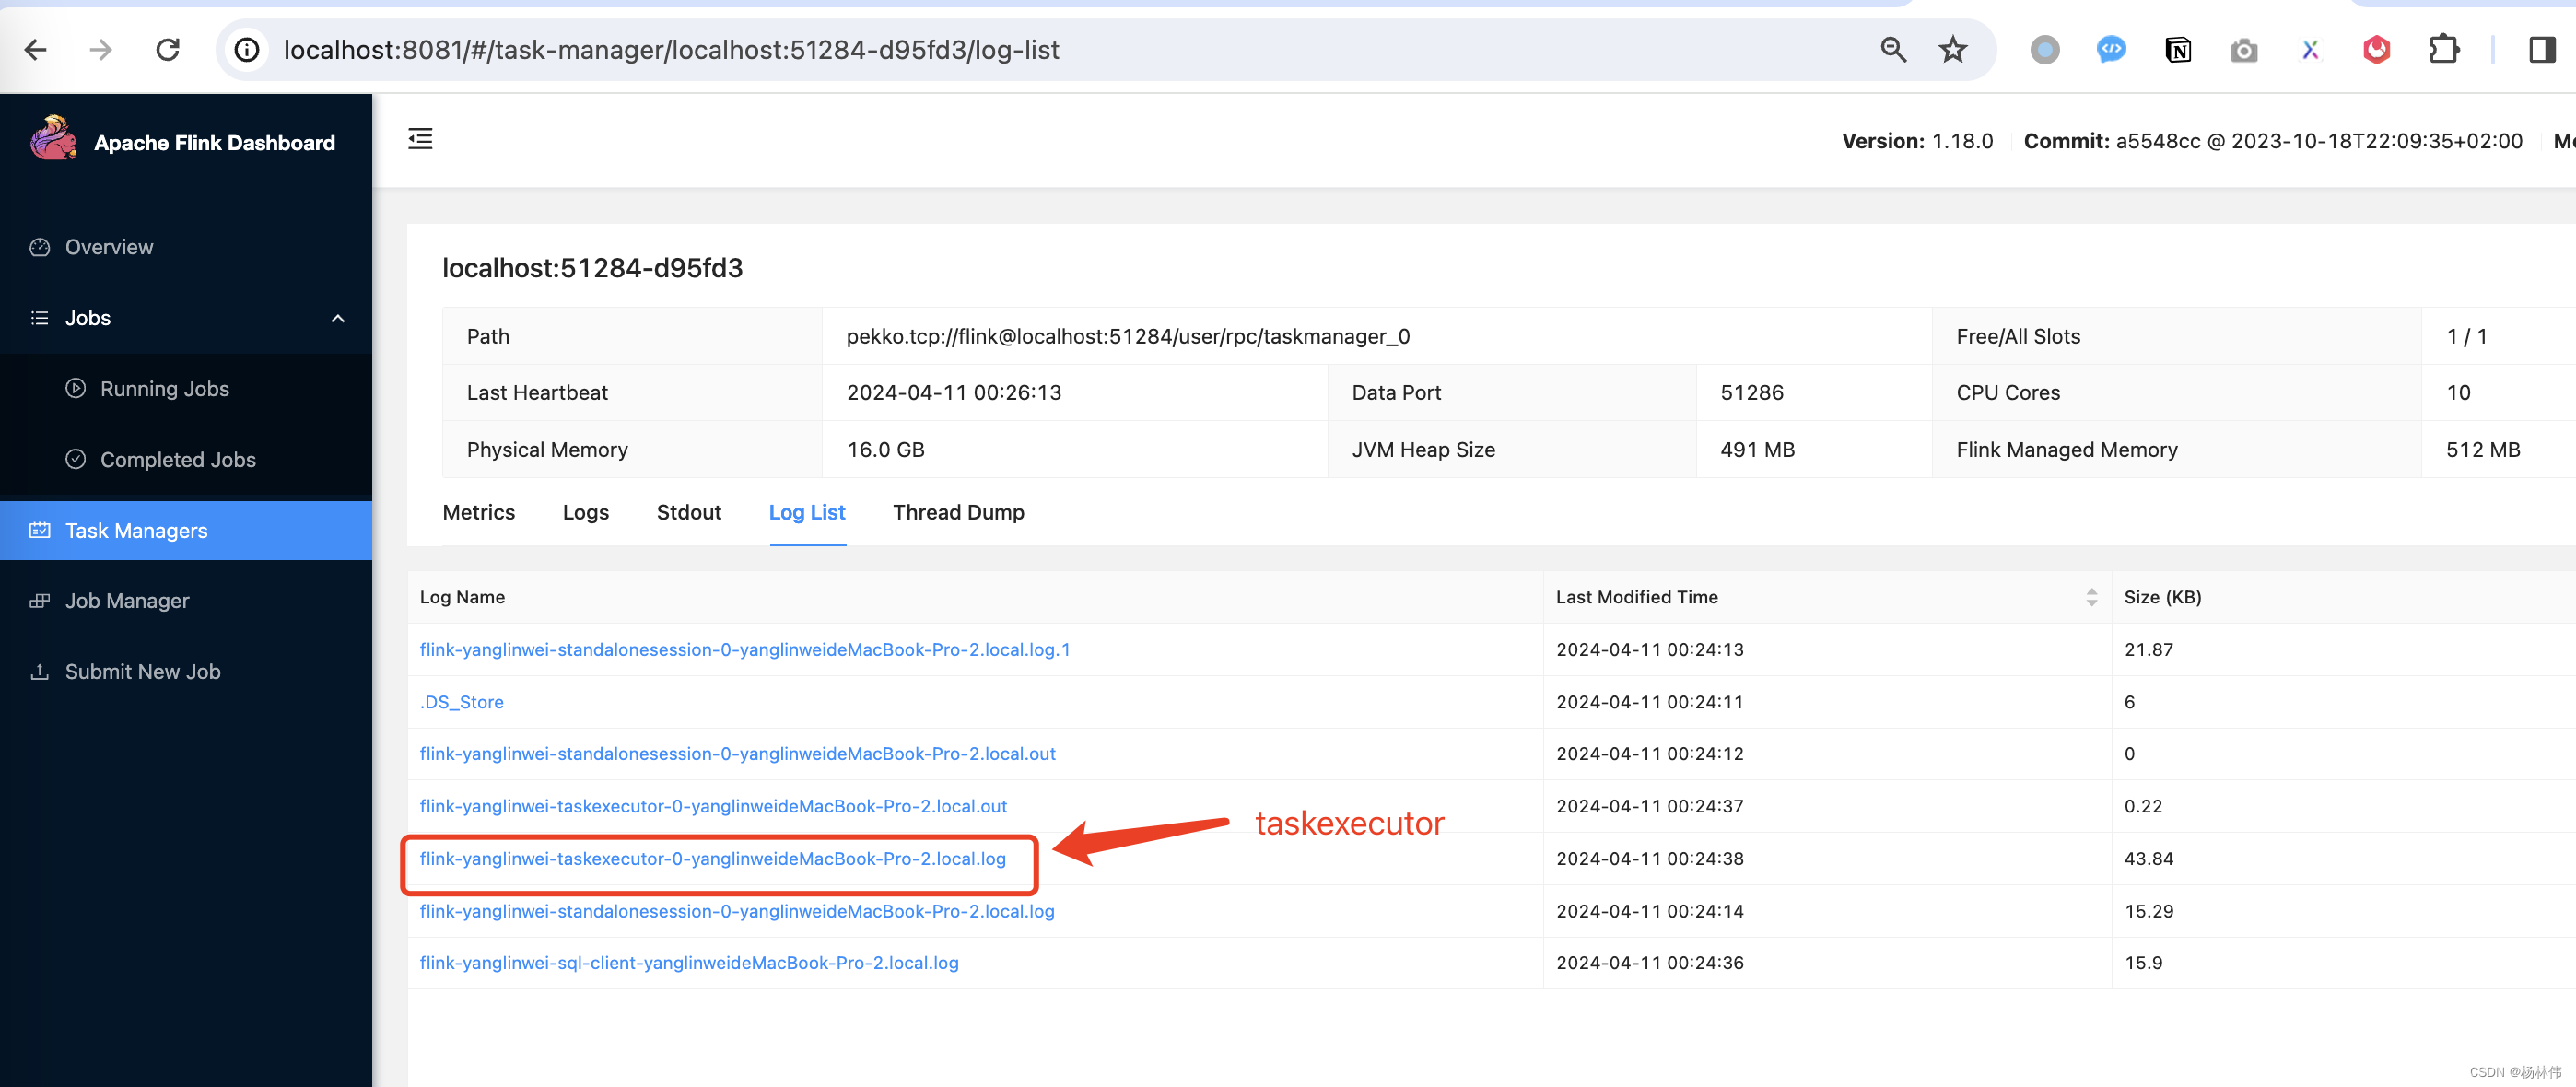
管理页:http://localhost:8081/#/task-manager,这里一般选择第一个:

选择taskexecutor的日志:
从日志可以发现打印真实的记录出来了:
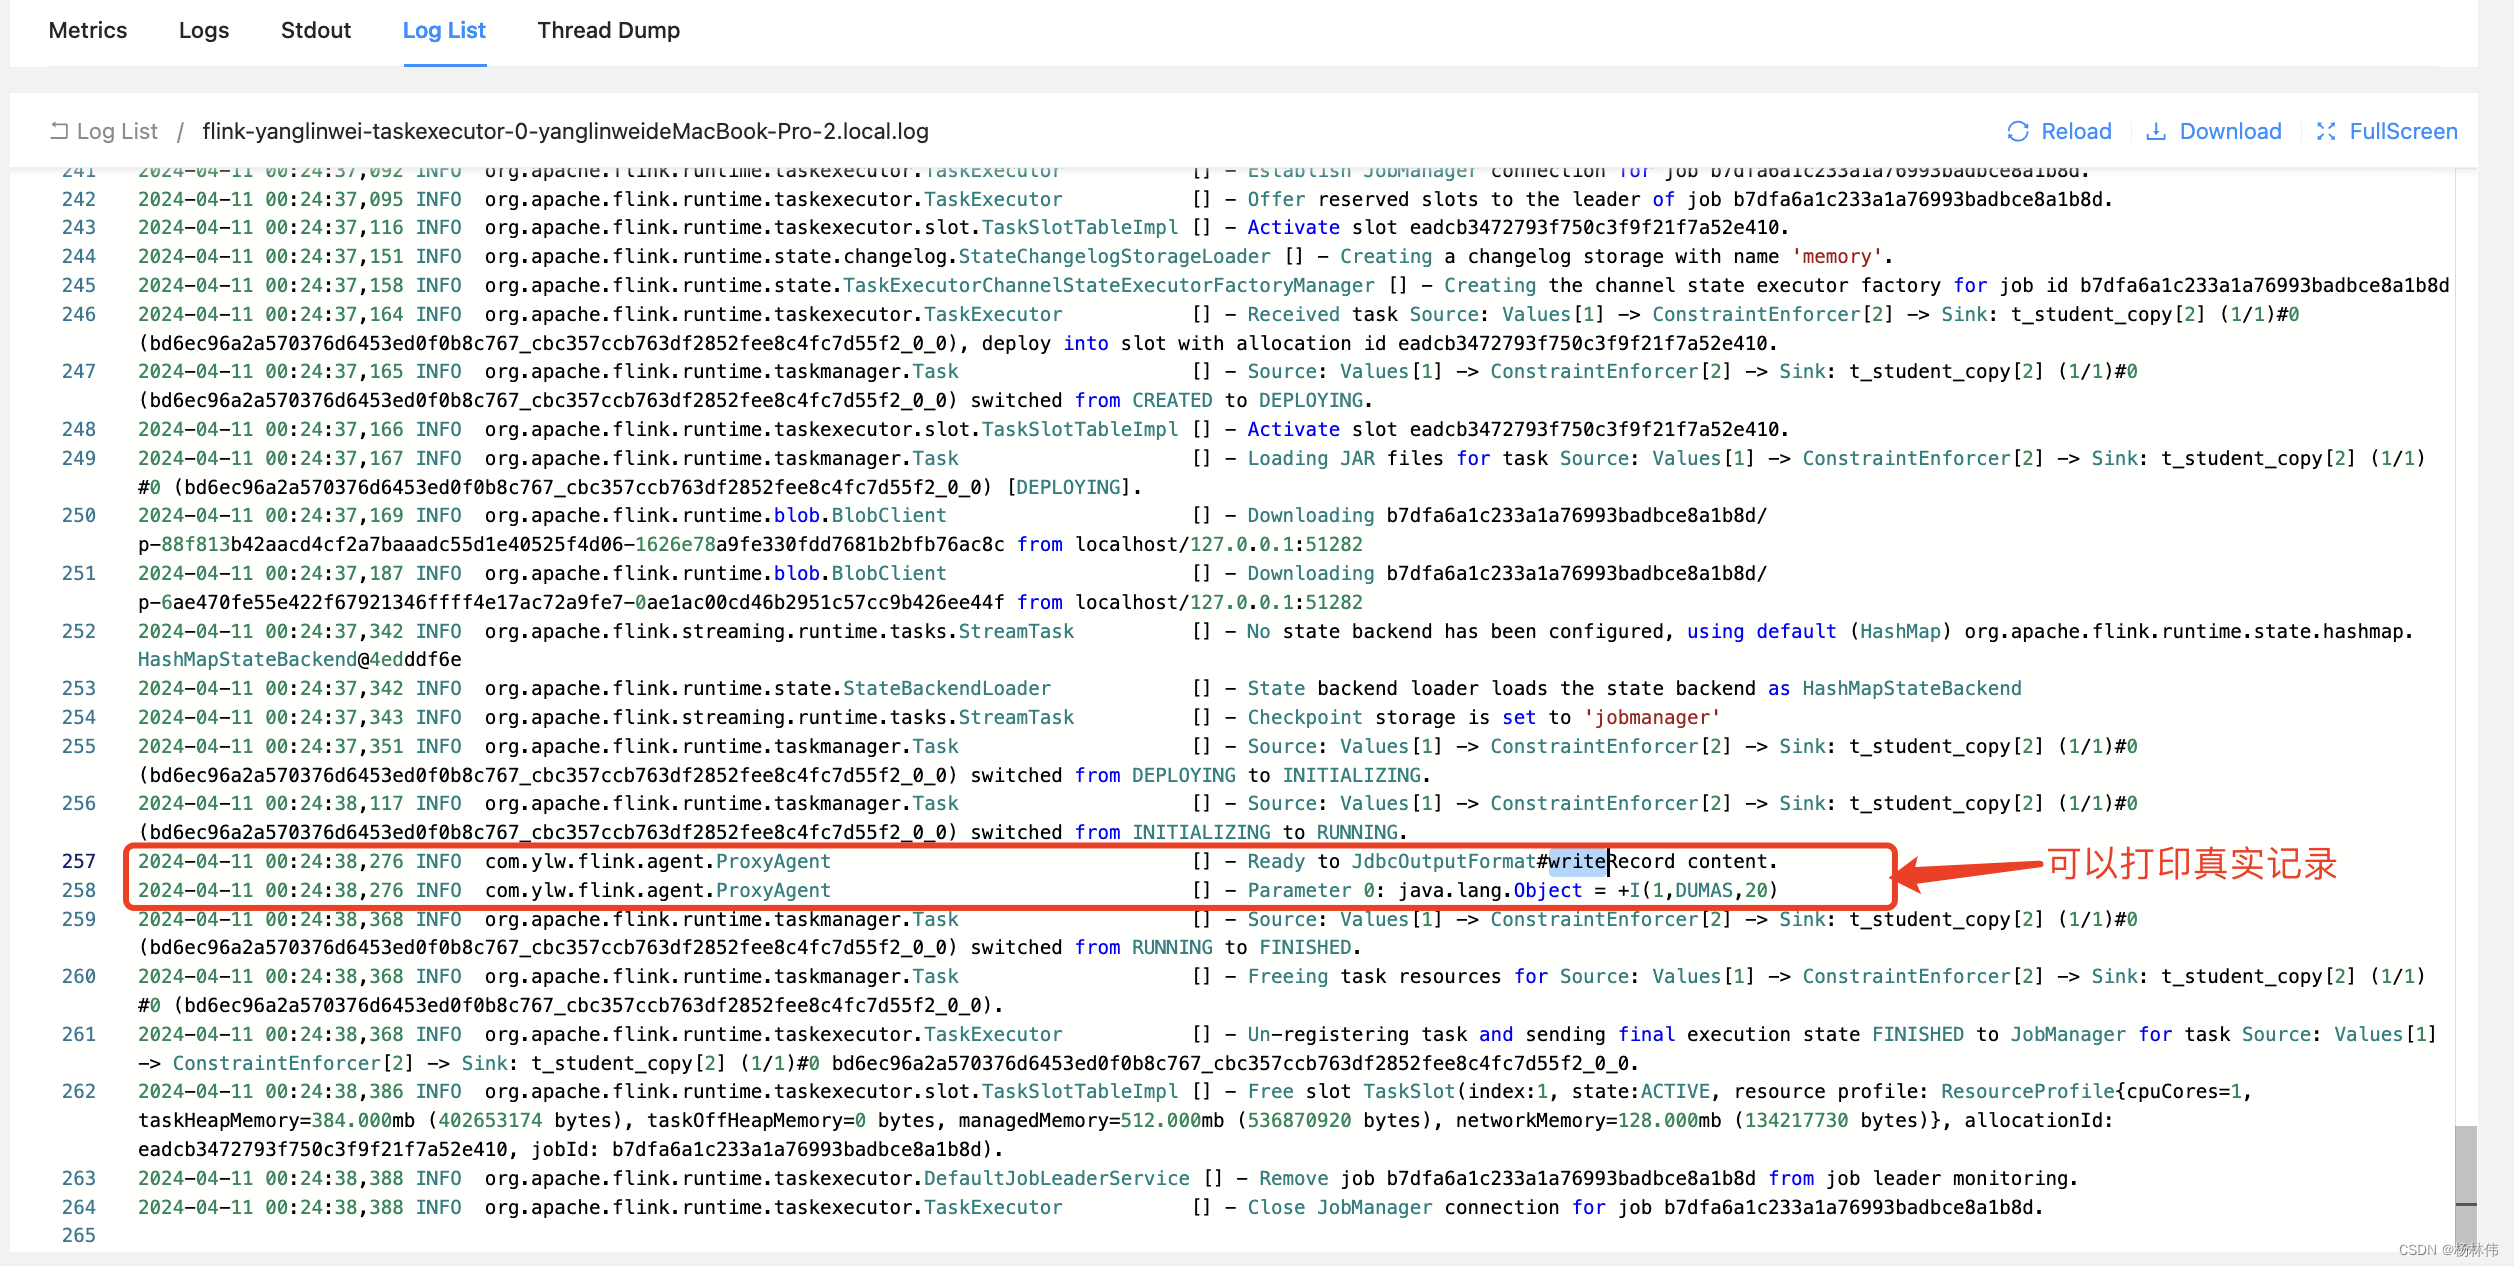
最终我们实现了flink任务流动数据的拦截了,当然可以使用
log appender
把把拦截到的数据发送给kafka或es。类似于logback就很好的集成了ES或kafka,例如:
集成ES:https://github.com/internetitem/logback-elasticsearch-appender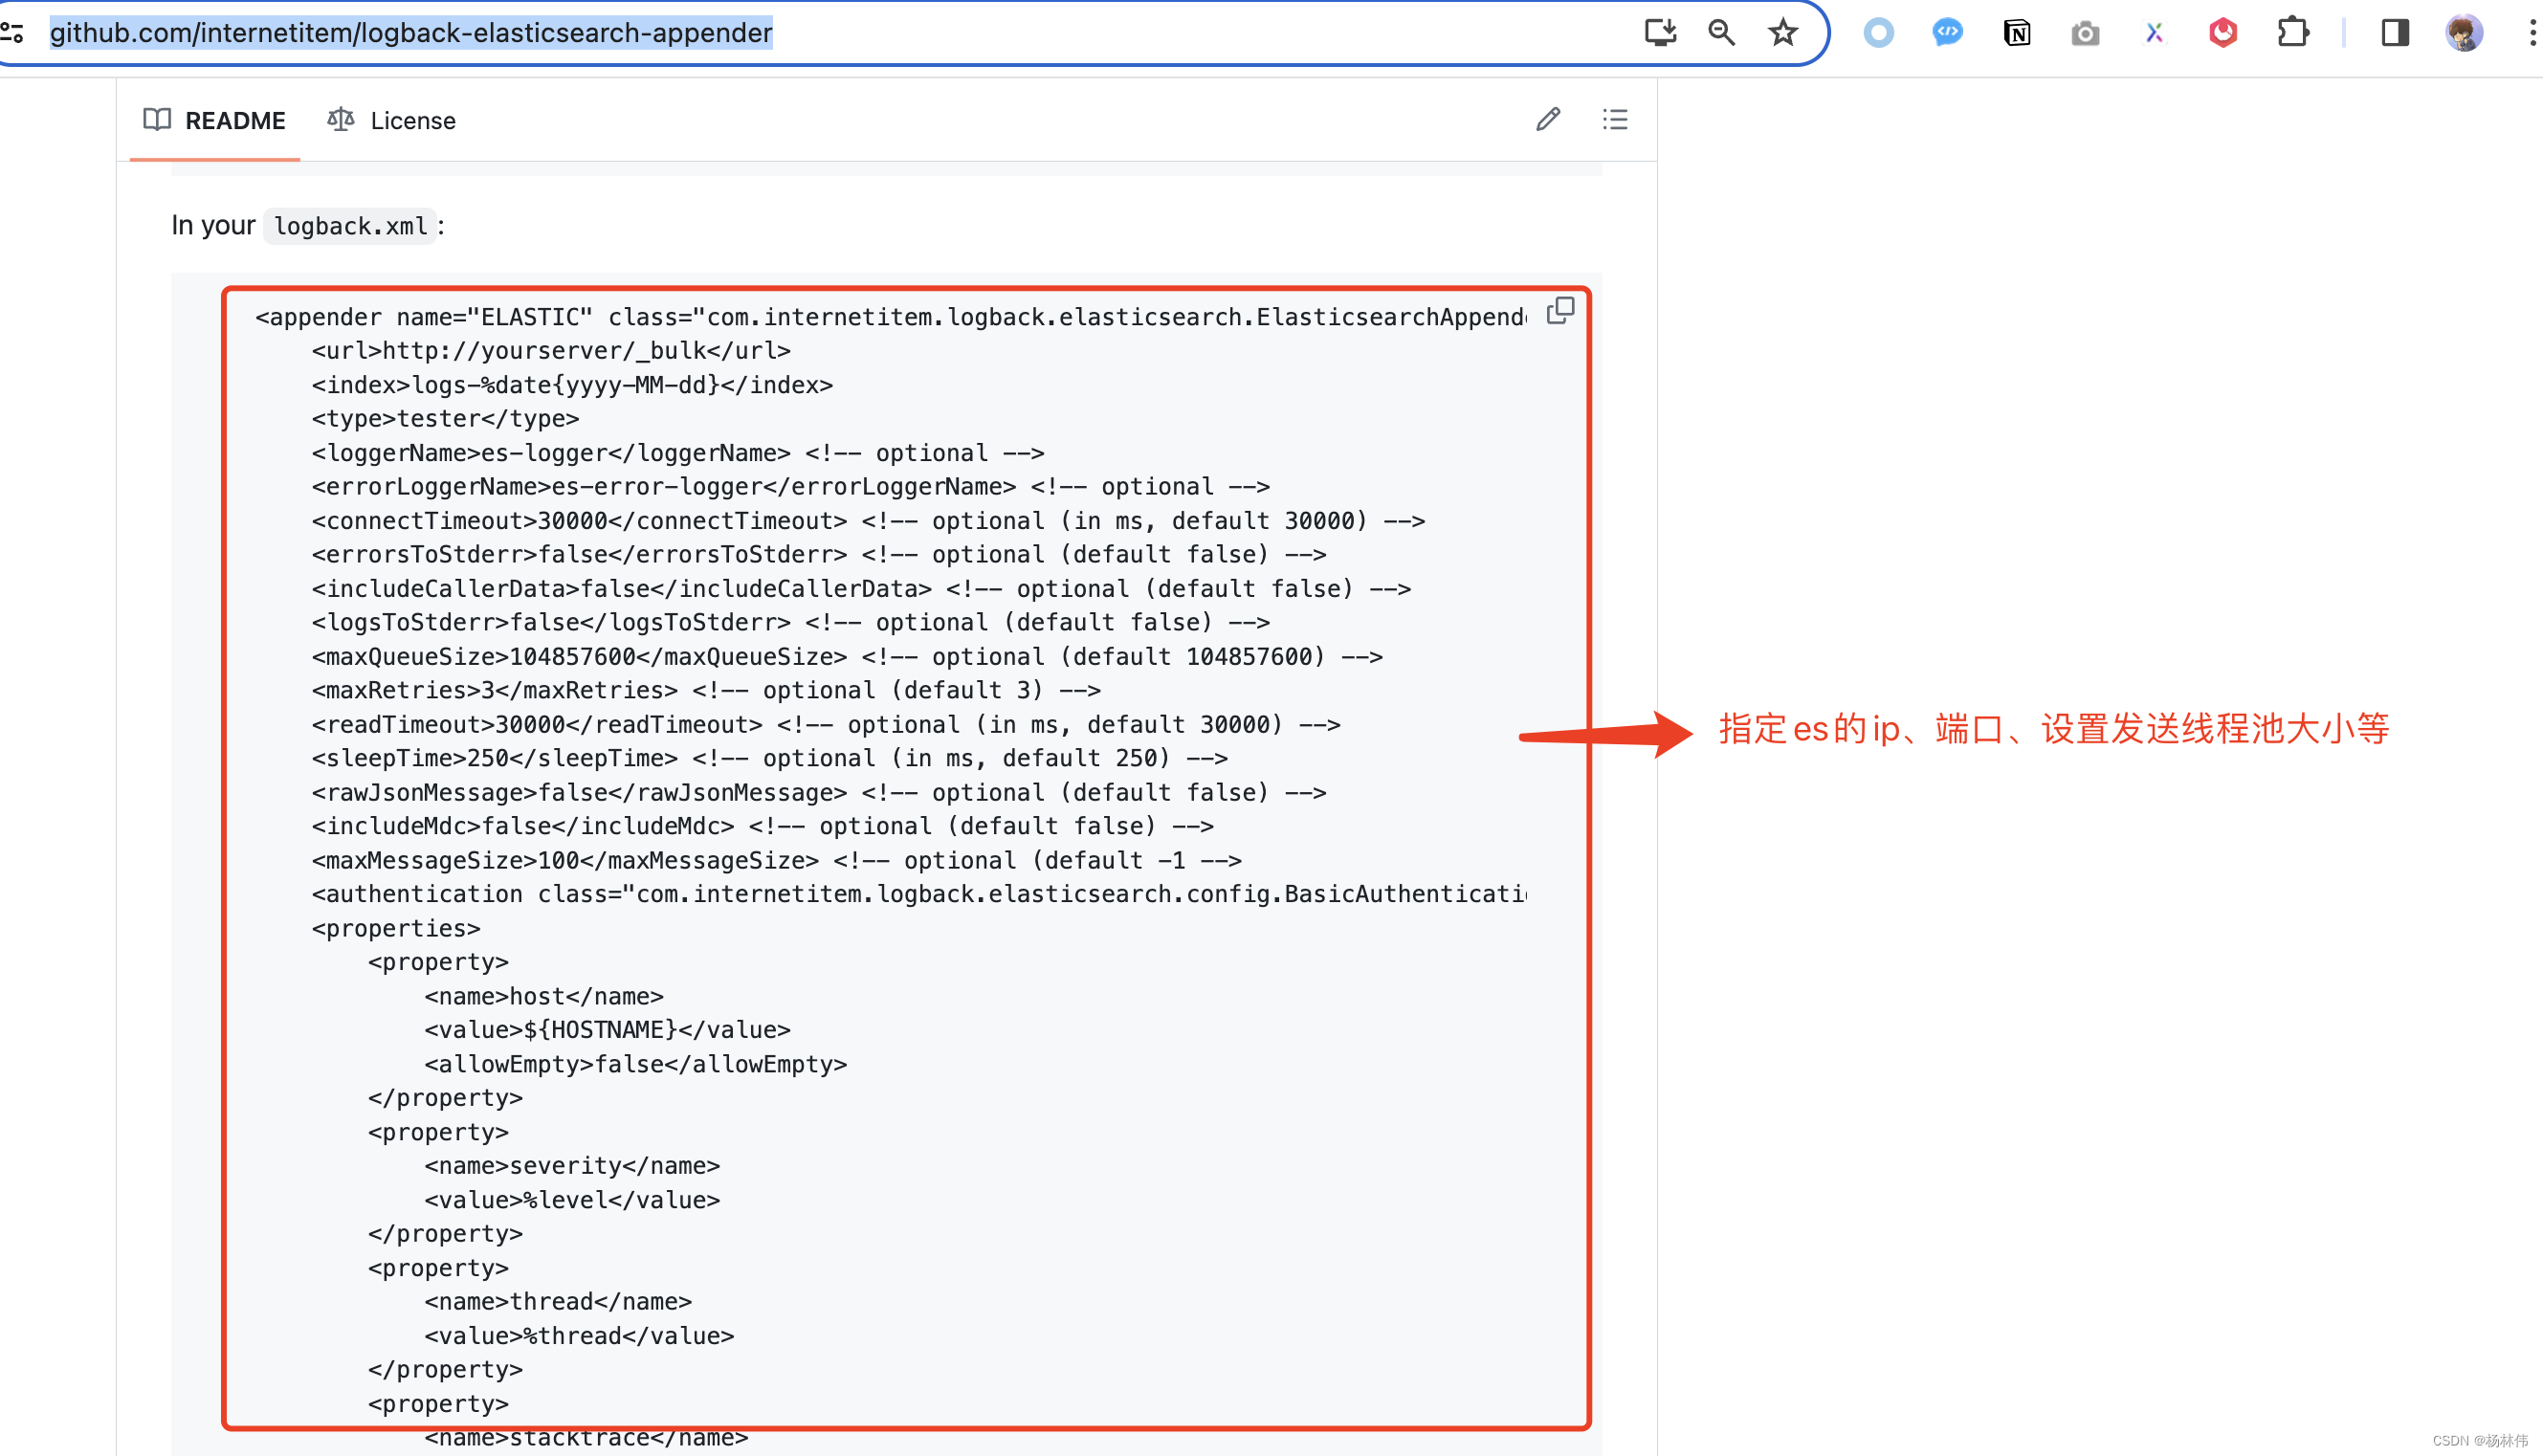
集成Kafka:https://github.com/danielwegener/logback-kafka-appender
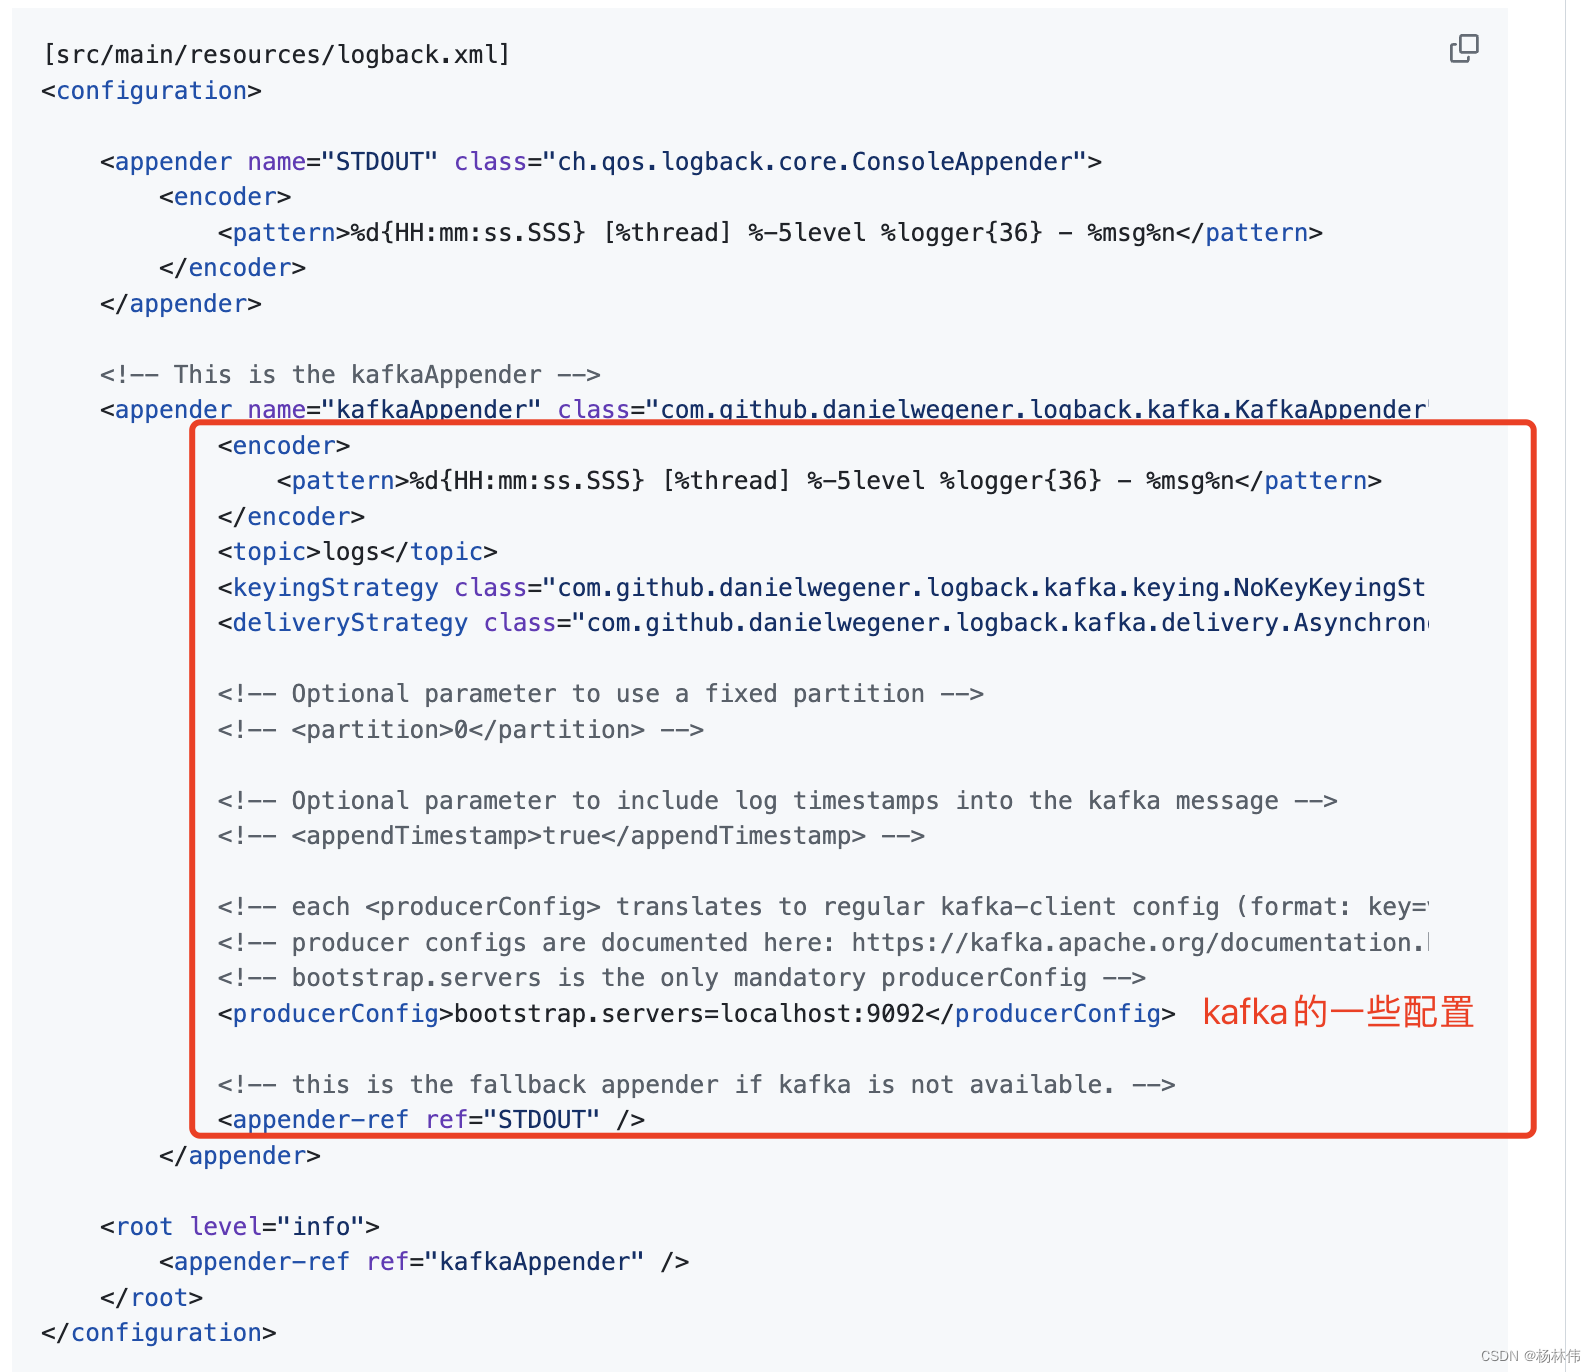
或集成至其它…
05 文末
本文源码已上传至Github:https://github.com/ylw-github/flink-agent
本文展示了如何通过代理技术实现对
Flink
任务中数据流动的监听和记录。当然这仅仅是思路的实现,很多细节都需要完善,比如:我们还需要知道这条记录所属的
jobId
、
connector
名、
timestamp
等等。博主最终目的是给用户 提供了一个深入了解数据流动细节的途径。
同时也期望
Flink社区可以提供类似于这样的功能,就如
Flink集成
Metrics一样,通过在
flink-conf.yaml简单配置
Prometheus push gateway和引入相关的
jar包,就能实现指标的推送。同理,也可以通过相同的操作,让用户自定义流动数据的
hook jar(指标:
jobId、
connector_type、
in/out record、
timestamp…),来实现“流动数据或其它有业务价值的数据” 监听与记录。
本文是博主对实现Flink任务流动数据监听的一些想法和实现思路,或许还有更好的方法,欢迎大家留言。谢谢大家的阅读,希望能帮助到大家,本文完!
版权归原作者 杨林伟 所有, 如有侵权,请联系我们删除。