
Spring Cloud Netflix Eureka是Spring Cloud Netflix子项目的核心组件之一,主要用于微服务架构中的服务治理。
什么是注册中心
在微服务架构中往往会有一个注册中心,每个微服务都会向注册中心去注册自己的地址及端口信息,注册中心维护着服务名称与服务实例的对应关系。每个微服务都会定时从注册中心获取服务列表,同时汇报自己的运行情况,这样当有的服务需要调用其他服务时,就可以从自己获取到的服务列表中获取实例地址进行调用,Eureka实现了这套服务注册与发现机制。
为什么要使用注册中心
传统RMI调用

这种调用方式如上图所示,通过在Consumer端直接配置服务端的ip+port来调用,这种方法有个缺陷就是一旦privder有修改就必须修改consumer。局限性比较大。
微服务RMI调用
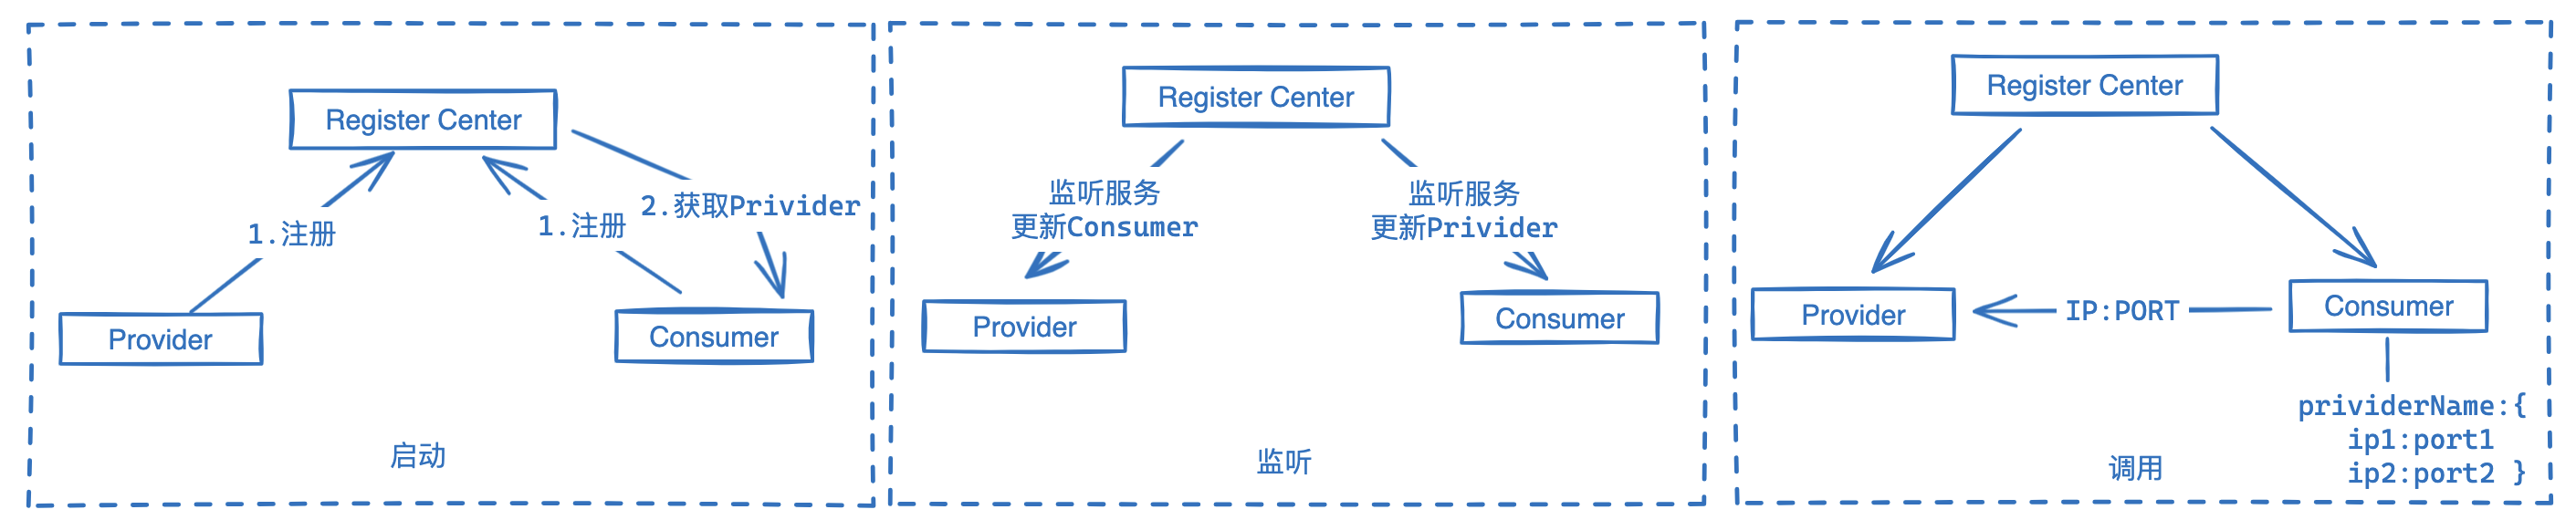
注册中心相当于一个中间层,把传统调用方式分为三个阶段:
- 启动:在提供和消费端启动时都会向注册中心注册自己,主要是用一个别名来代替ip+port。这个别名需要在注册中心范围内全局唯一,格式类似如下:
{providerID:"userProvider",services:["192.168.0.1:8080","192.168.0.2:8080","192.168.0.3:8081"]}
- 监听:服务启动时Conusmer会从注册中心拉取Provider列表到本地然后缓存起来。Provider也会拉取一些信息到本地,但一般是一些控制信息。最后在服务运行过程中 注册中心和双端会保持实时的心跳和数据同步。
- 调用:这里需要注意,微服务的调用方式和传统方式一样,是端和端直连的,注册中心并不参与调用过程。
总体来看,注册中心主要有两个作用,解耦双端和管理双端。
springcloud-eureka-server注册中心模块
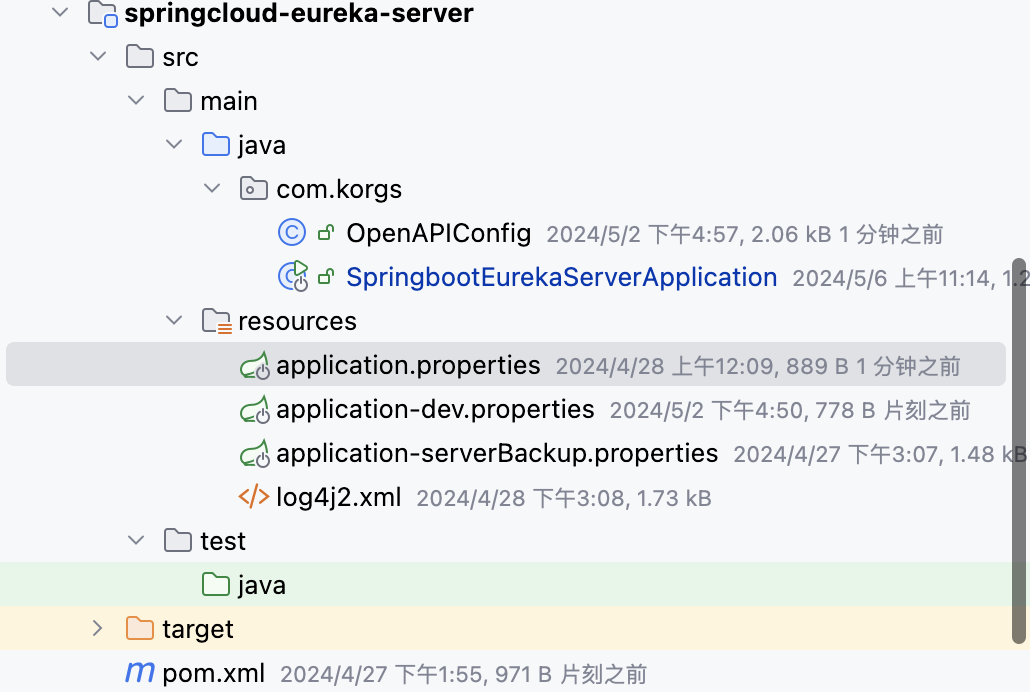
pom.xml
依赖版本可参考 springbootSeries 模块中pom.xml文件中的版本定义
<dependency><groupId>org.springframework.cloud</groupId><artifactId>spring-cloud-starter-netflix-eureka-server</artifactId></dependency>
application.properties配置
spring.profiles.active = dev
spring.application.name=springbootEurekaServer1
server.port=18082#本注册中心地址,在客户端会配置成:http://127.0.0.1:18082/eureka ,需要注意url后面的eureka不要忘记了eureka.instance.hostname=localhost
#定是否从注册中心获取服务(注册中心不需要开启)
eureka.client.fetch-registry=false
#指定是否将服务注册到注册中心(注册中心不需要开启)
eureka.client.register-with-eureka=false
SpringbootApplication启动类
添加
@EnableEurekaServer
注解
@Slf4j@SpringBootApplication(scanBasePackages ={"com.korgs","cn.hutool.extra.spring"})@Configuration@EnableConfigurationProperties@ServletComponentScan@RestController@EnableEurekaServerpublicclassSpringbootEurekaServerApplication{publicstaticvoidmain(String[] args){SpringApplication.run(SpringbootEurekaServerApplication.class, args);}@GetMapping("/helloworld")publicBaseResponsehelloWorld(){
        log.info(LogGenerator.trackLog()+"msg="+"I am busy to handle this request.");returnBaseResponse.success("hello world");}}
启动测试
启动应用,访问 :
http://127.0.0.1:18082/
,会显示如下界面。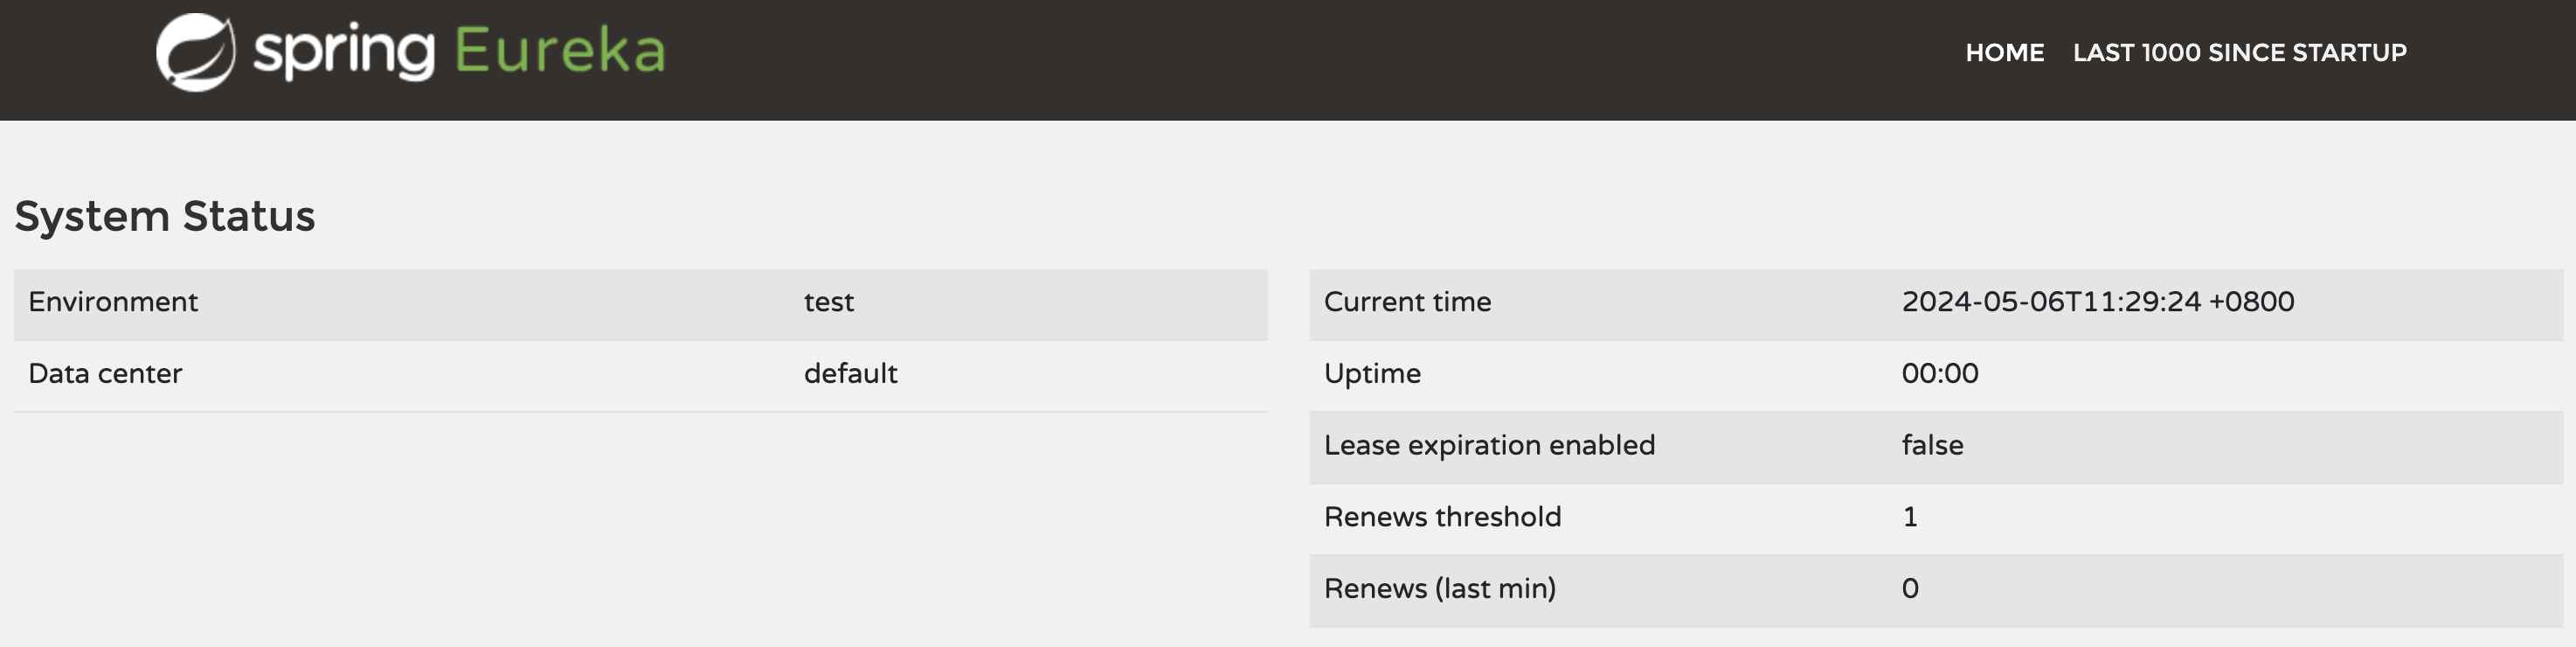
springcloud-eureka-client 测试应用
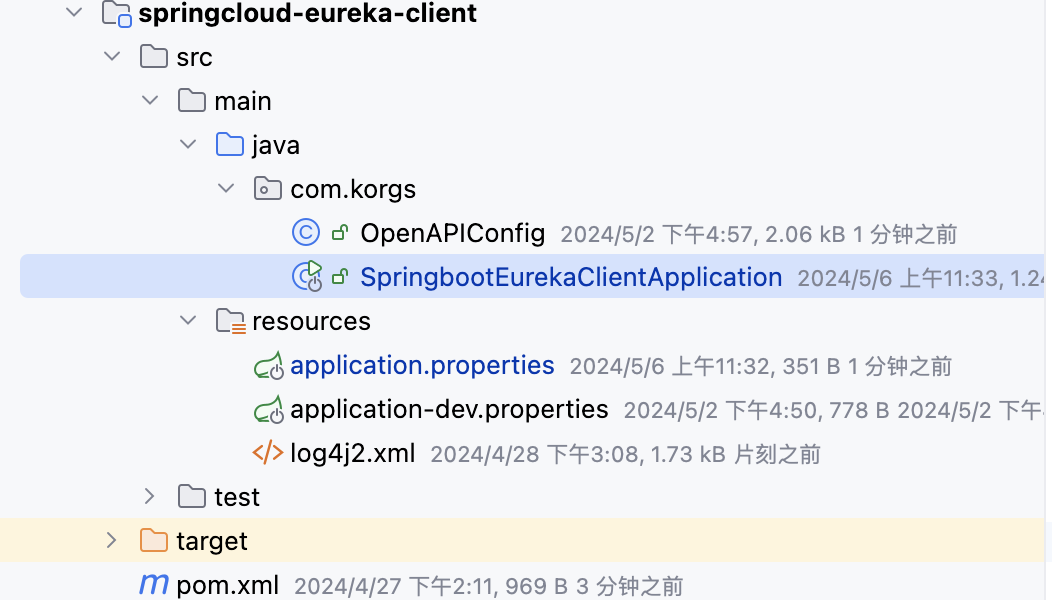
pom.xml
依赖版本可参考 springbootSeries 模块中pom.xml文件中的版本定义
<dependency><groupId>org.springframework.cloud</groupId><artifactId>spring-cloud-starter-netflix-eureka-client</artifactId></dependency>
application.properties配置
配置
eureka.client.service-url.defaultZone
等相关配置。
spring.profiles.active = dev
spring.application.name=springbootEurekaClient
server.port=18084

eureka.client.register-with-eureka=true
eureka.client.fetch-registry=true
eureka.client.service-url.defaultZone = http://127.0.0.1:18082/eureka
SpringbootApplication启动类
添加
@EnableDiscoveryClient
注解
@Slf4j@SpringBootApplication(scanBasePackages ={"com.korgs","cn.hutool.extra.spring"})@Configuration@EnableConfigurationProperties@ServletComponentScan@RestController@EnableDiscoveryClientpublicclassSpringbootEurekaClientApplication{publicstaticvoidmain(String[] args){SpringApplication.run(SpringbootEurekaClientApplication.class, args);}@GetMapping("/helloworld")publicBaseResponsehelloWorld(){
        log.info(LogGenerator.trackLog()+"msg="+"I am busy to handle this request.");returnBaseResponse.success("hello world");}}
启动测试
启动应用,然后刷新
http://127.0.0.1:18082/
,应该可以看到应用会被注册到注册中心了。
实现注册中心集群
由于所有服务都会注册到注册中心去,服务之间的调用都是通过从注册中心获取的服务列表来调用,注册中心一旦宕机,所有服务调用都会出现问题。所以我们需要多个注册中心组成集群来提供服务,下面将搭建一个双节点的注册中心集群。
修改 springcloud-eureka-server 模块
这里我们会复用
springcloud-eureka-server
,添加另外一套配置。添加一个名为
application-serverBackup.properties
的配置文件。
- 添加新文件application-serverBackup.properties,主要修改配置文件成如下内容,
eureka.client.service-url.defaultZone = http://127.0.0.1:18082/eureka
#springboot Serverspring.application.name=springbootEurekaServer2
spring.aop.auto=true
spring.aop.proxy-target-class=true

# log4jlogging.config=classpath:log4j2.xml
logging.level.root=INFO
logging.level.org.springframework.web=ERROR

#restful Serverserver.port=18083server.compression.enabled=true
server.compression.mime-types=application/json,application/octet-stream

#swagger
springdoc.api-docs.enabled=true
springdoc.api-docs.path=/api-schema

swagger-config.group = default-group
swagger-config.description= The following is a restful-api list of {} application, and you can browse or test them to determine if they are working as you expect.
swagger-config.version=V1.0
swagger-config.urlPattern=/**
swagger-config.base-package=com.korgs
swagger-config.authorization-key-name=token
swagger-config.wiki = https://korgs.blog.csdn.net/

#本注册中心地址,在客户端会配置成:http://127.0.0.1:18084/eureka ,需要注意这晨的eureka不要忘记了eureka.instance.hostname=localhost
#定是否从注册中心获取服务(注册中心不需要开启)
eureka.client.fetch-registry=false
#指定是否将服务注册到注册中心(注册中心不需要开启)
eureka.client.register-with-eureka=false
#注册到哪一个Eureka注册中心形成全注册中心互备
eureka.client.service-url.defaultZone = http://127.0.0.1:18082/eureka
- 修改 application.properties 添加
eureka.client.service-url.defaultZone = http://127.0.0.1:18083/eureka,即18083服务做为备份。
spring.profiles.active = dev
spring.application.name=springbootEurekaServer1
server.port=18082#本注册中心地址,在客户端会配置成:http://127.0.0.1:18082/eureka ,需要注意这晨的eureka不要忘记了eureka.instance.hostname=localhost
#定是否从注册中心获取服务(注册中心不需要开启)
eureka.client.fetch-registry=false
#指定是否将服务注册到注册中心(注册中心不需要开启)
eureka.client.register-with-eureka=false

#注册到哪一个Eureka注册中心形成全注册中心互备
eureka.client.service-url.defaultZone = http://127.0.0.1:18083/eureka
修改 springcloud-eureka-client 模块
修改 application.properties文件添加第二个注册中心地址
eureka.client.register-with-eureka=true
eureka.client.fetch-registry=true
eureka.client.service-url.defaultZone = http://127.0.0.1:18082/eureka, http://127.0.0.1:18083/eureka
启动测试
在idea中添加一个类型为springboot的启动类,在Idea中可以在启动配置对话框中添加Springboot,然后在配置界面勾选程序实参,最后配置–spring.profiles.active=serverBackup,以指定不同springboot的profile配置文件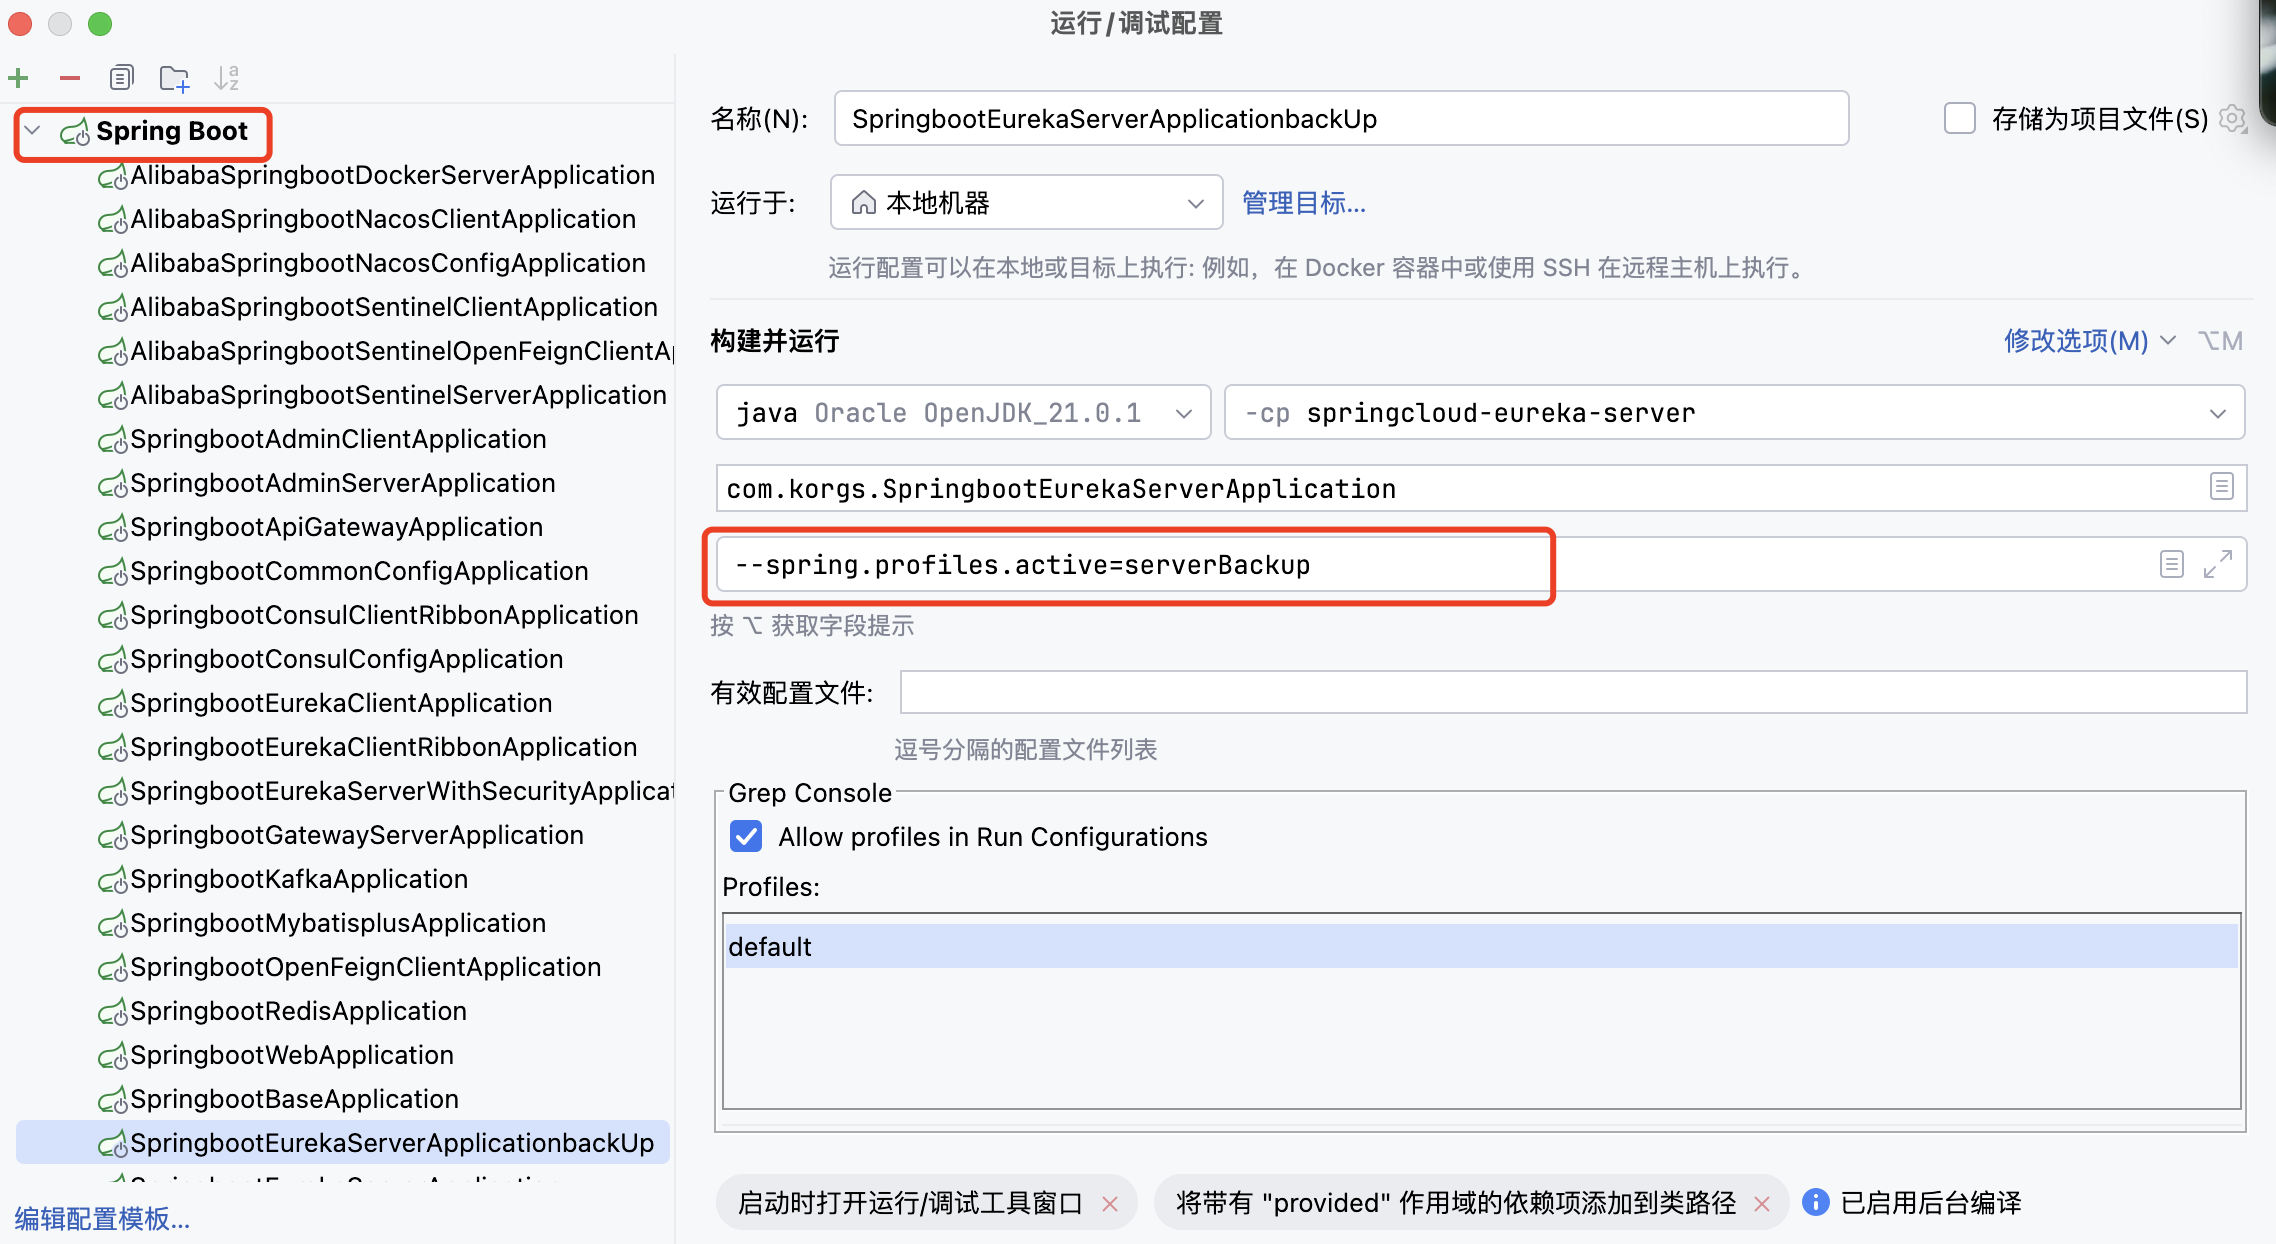
刷新
http://127.0.0.1:18082/
,会在DS Replicas下面看到一个备份的注册中心。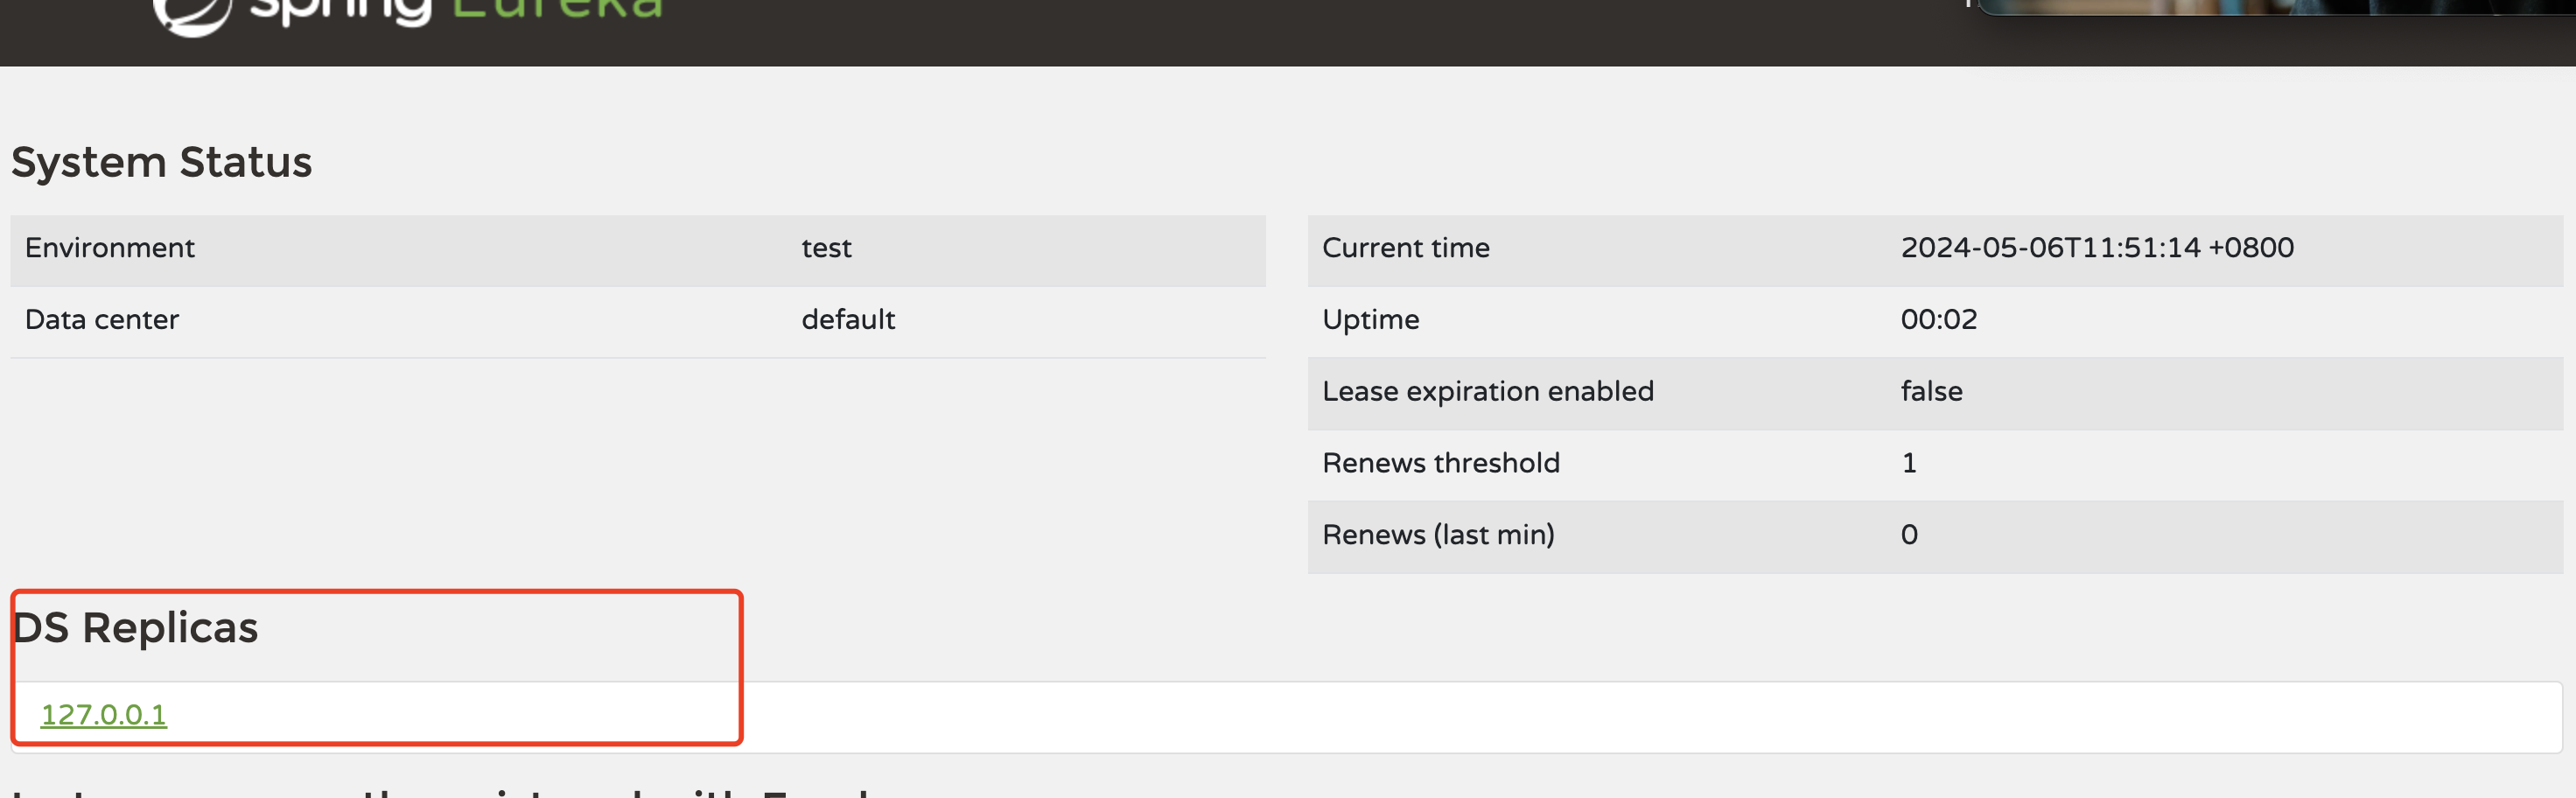
给注册中心添加登陆认证
此处会用到一个新的注册中心server模块,复制原
springcloud-eureka-server
然后做如下更新,新模块命名为:
springcloud-eureka-server-with-security, 端口号为18085
- client端可复用上一节的 springcloud-eureka-client ,注意修改注册中心地址
pom.xml
依赖版本可参考 springbootSeries 模块中pom.xml文件中的版本定义
<dependency><groupId>org.springframework.boot</groupId><artifactId>spring-boot-starter-security</artifactId></dependency>
修改 application.properties
配置用户名和密码
#配置spring security登录用户名和密码spring.security.user.name=root
spring.security.user.password=root
启动测试
填写用户名和密码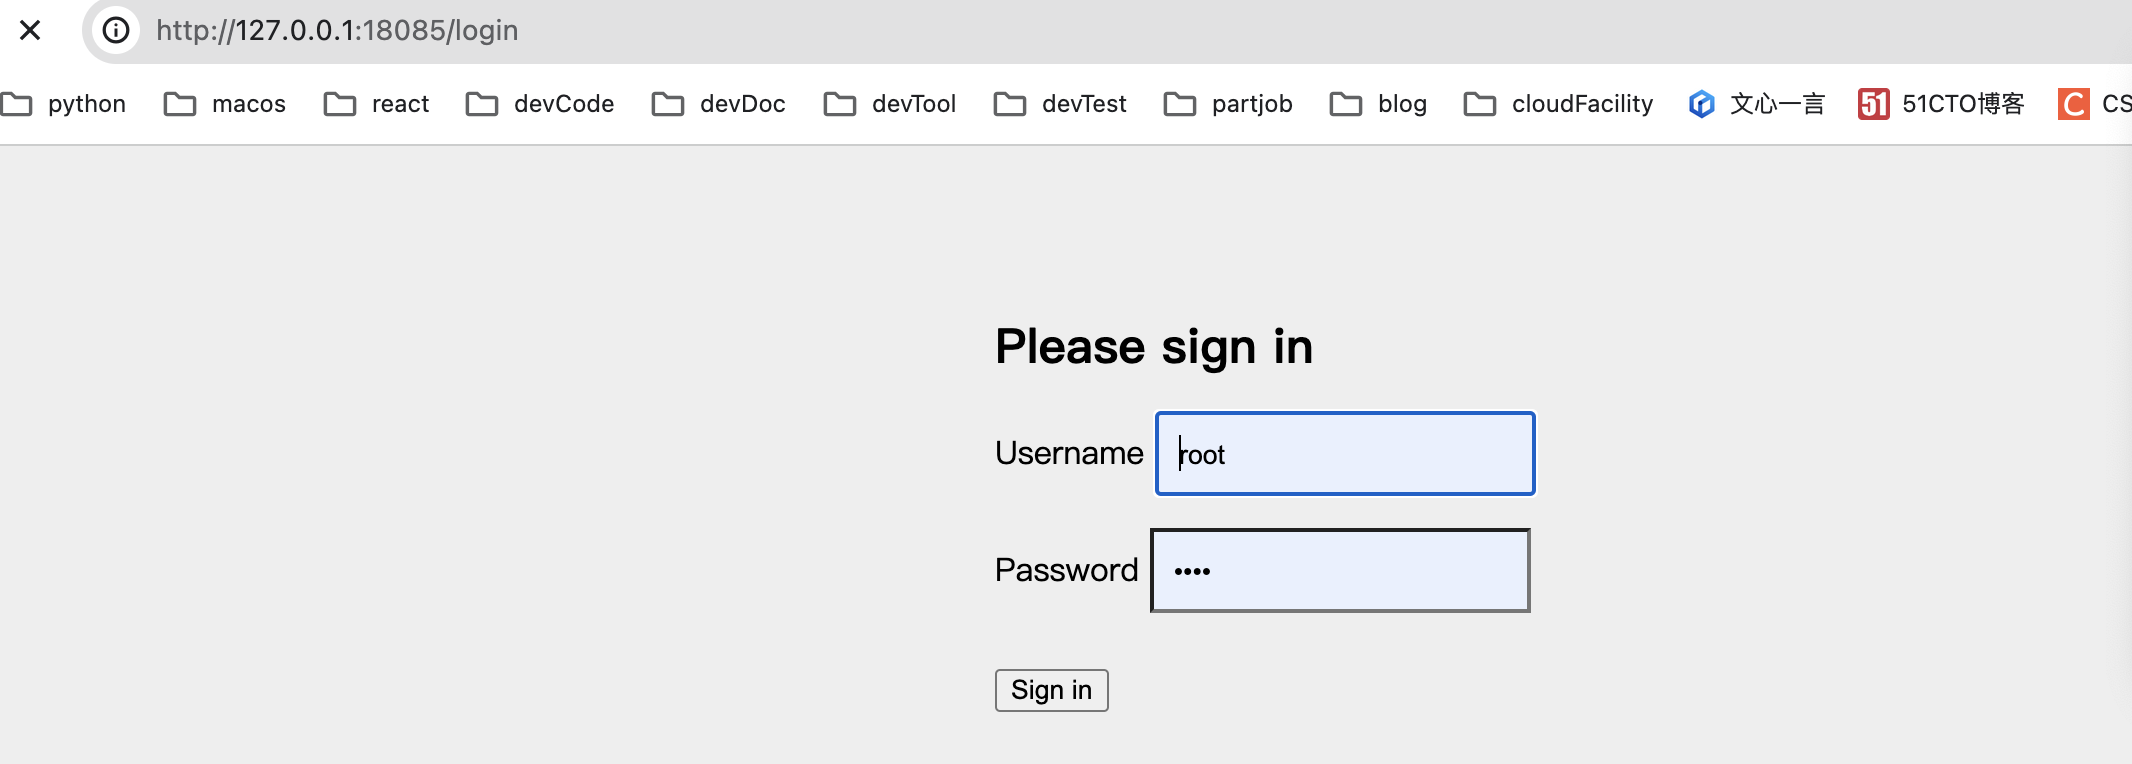
实现WebSecurityConfig
默认情况下添加SpringSecurity依赖的应用每个请求都需要添加CSRF token才能访问,Eureka客户端注册时并不会添加,所以需要配置/eureka/**路径不需要CSRF token。
@Configuration@EnableWebSecuritypublicclassWebSecurityConfig{//    @BeanpublicSecurityFilterChainfilterChain(HttpSecurity http)throwsException{//        Eureka客户端注册时并不会添加,所以需要配置/eureka/**路径不需要CSRF token
        http.csrf().ignoringRequestMatchers("/eureka/**");return http.build();}}
如果想注册到带登陆认证的注册中心,则配置要修改成如下配置
比如
springcloud-eureka-client
模块想注册到一个带验证的注册中心,则需要修改
application.properties
。
eureka.client.service-url.defaultZone = http://root:root@localhost:18085/eureka/
Eureka 常用配置
eureka:client:#eureka客户端配置register-with-eureka:true#是否将自己注册到eureka服务端上去fetch-registry:true#是否获取eureka服务端上注册的服务列表service-url:defaultZone: http://localhost:8001/eureka/ # 指定注册中心地址enabled:true# 启用eureka客户端registry-fetch-interval-seconds:30#定义去eureka服务端获取服务列表的时间间隔instance:#eureka客户端实例配置lease-renewal-interval-in-seconds:30#定义服务多久去注册中心续约lease-expiration-duration-in-seconds:90#定义服务多久不去续约认为服务失效metadata-map:zone: guangdong #所在区域hostname: localhost #服务主机名称prefer-ip-address:false#是否优先使用ip来作为主机名server:#eureka服务端配置enable-self-preservation:false#关闭eureka服务端的保护机制
源码下载
涉及模块:
- springcloud-eureka-server:注册中心,端口号: 18082, 18083
- springcloud-eureka-client:需要被注册的服务,端口号:18084
- springcloud-eureka-server-with-security, 带登陆功能的注册中心,端口号为18085
源码下载:
- 基础框架源码下载
- Springboot集成Eureka实现注册中心
源码运行方法:
- 模块详细功能说明和运行测试方法
版权归原作者 korgs 所有, 如有侵权,请联系我们删除。