
借鉴网址1
借鉴网址2
hadoop官方配置教程
搭建虚拟机,克隆(或者先配置JAVA和Hadoop环境再克隆,之后要改主机名和映射以及SSH免密)
可以利用xsync集群分发脚本一台机器配置其他机器分发
修改主机名和ip映射
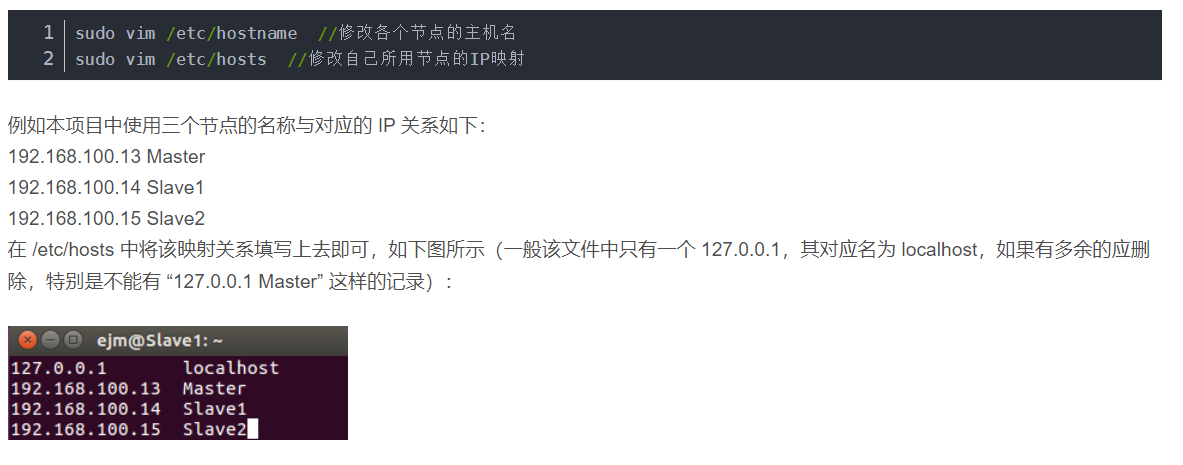
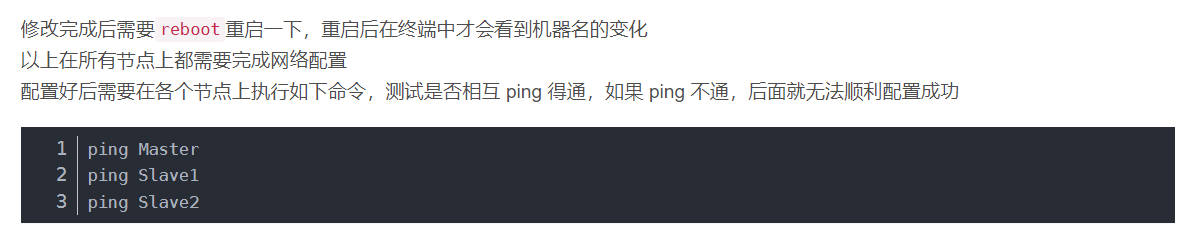
检查
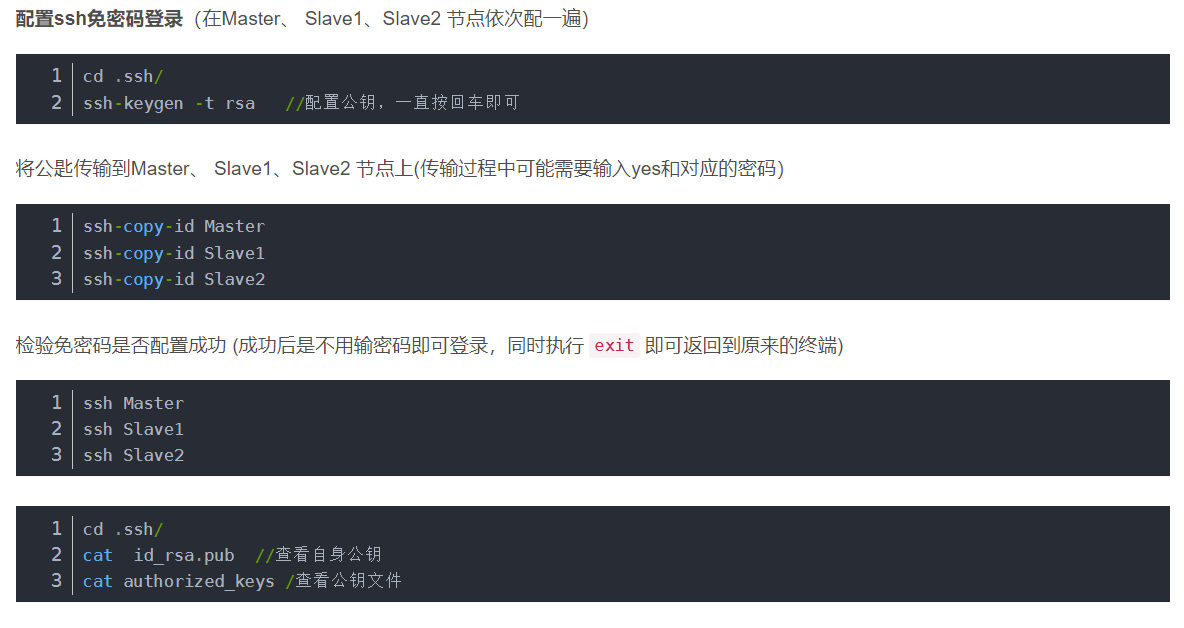
配置ssh免密登录
这里地址为 ~/.ssh
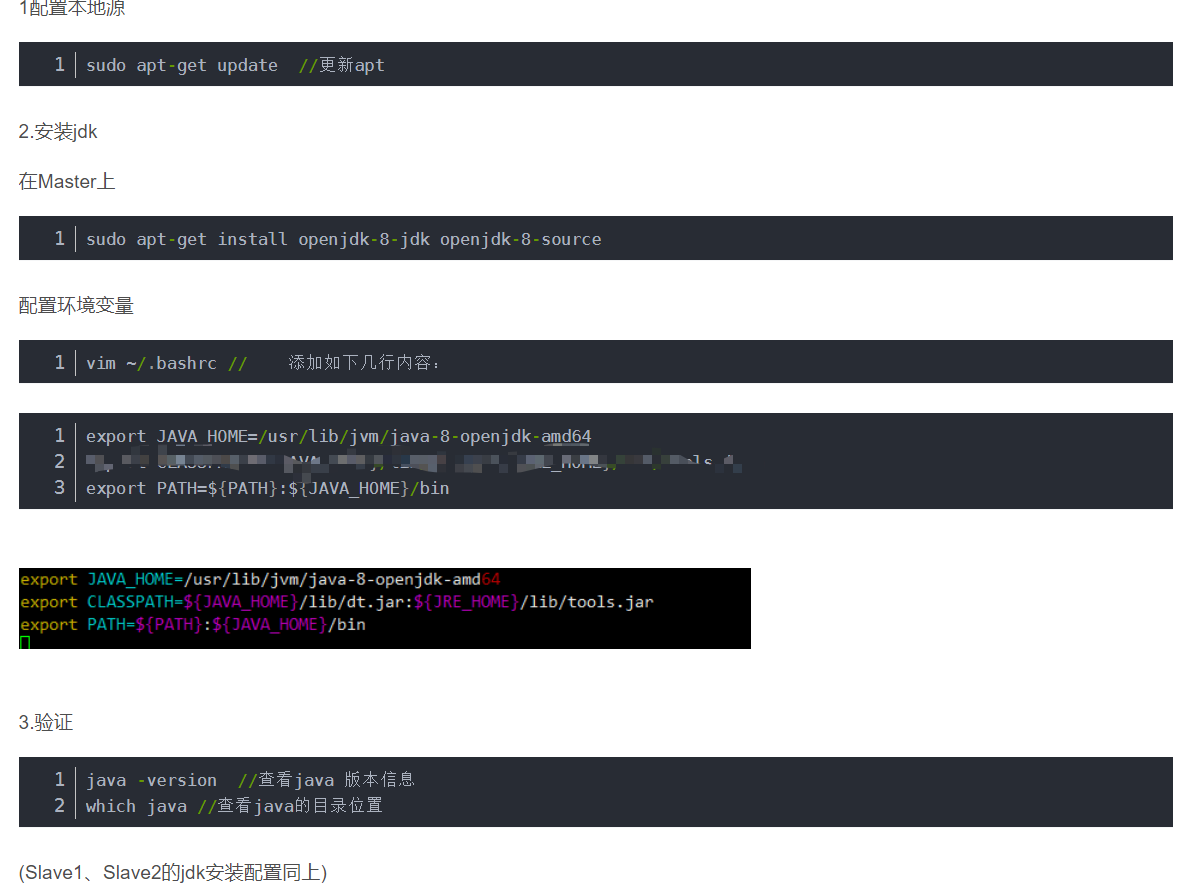
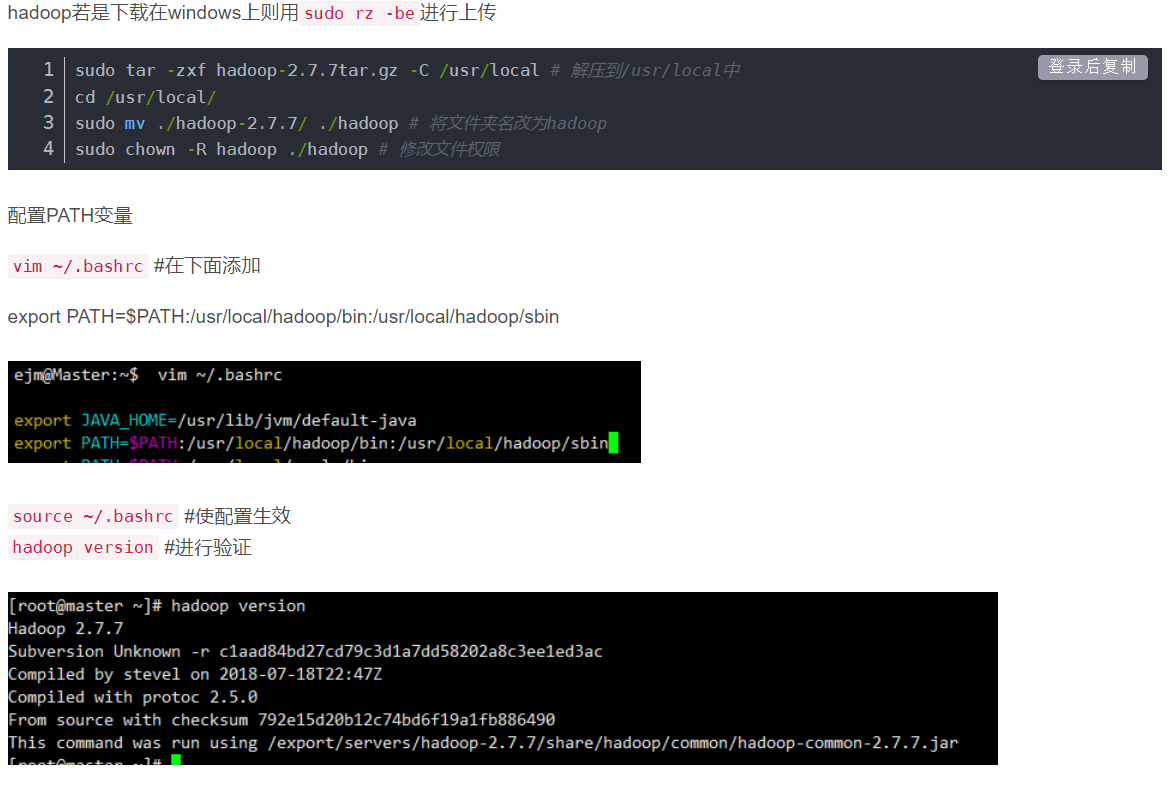
配置JAVA
Hadoop配置
Hadoop完全分布式集群搭建
    #Hadoop’s Java configuration is driven by two types of important configuration files:
    1.Read-only default configuration - core-default.xml, hdfs-default.xml, yarn-default.xml and mapred-default.xml.#默认配置文件在官网可以找到
    2.Site-specific configuration - etc/hadoop/core-site.xml, etc/hadoop/hdfs-site.xml, etc/hadoop/yarn-site.xml and etc/hadoop/mapred-site.xml. #这些都在etc/hadoop/中
集群分配示意图
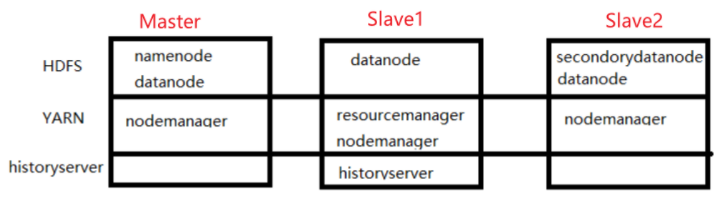
/*For large installations, these are generally running on separate hosts.*/
HDFS daemons are NameNode, SecondaryNameNode, and DataNode.
YARN daemons are ResourceManager, NodeManager, and WebAppProxy.
If MapReduce is to be used, then the MapReduce Job History Server will also be running.
开始配置
etc/hadoop/hadoop-env.sh中配置JAVA_HOME

- 配置core-site.xml
##core-site.xml 自己决定参数
<configuration>
<!-- 指定 NameNode 的地址 -->
<property>
<name>fs.defaultFS</name>
<value>hdfs://Master:8080</value>
</property>
<!-- 指定 hadoop 数据的存储目录 -->
<property>
<name>hadoop.tmp.dir</name>
<value>/usr/local/hadoop/tmp</value>
</property>
</configuration>
- 配置hdfs-site.xml
<configuration>
<!-- nn web 端访问地址-->
<property>
<name>dfs.namenode.http-address</name>
<value>Master:9870</value>
</property>
<!-- 2nn web 端访问地址-->
<property>
<name>dfs.namenode.secondary.http-address</name>
<value>Slave2:9868</value>
</property>
<property>
<name>dfs.namenode.name.dir</name>
<value>file:/usr/local/hadoop/tmp/dfs/name</value>
</property>
<property>
<name>dfs.datanode.data.dir</name>
<value>file:/usr/local/hadoop/tmp/dfs/data</value>
</property>
</configuration>
- 配置 yarn-site.xml
<configuration>
     <!-- 指定 MR 走 shuffle -->
     <property>
         <name>yarn.nodemanager.aux-services</name>
         <value>mapreduce_shuffle</value>
     </property>

     <!-- 指定 ResourceManager 的地址-->
     <property>
         <name>yarn.resourcemanager.hostname</name>
         <value>Slave1</value>
     </property>

      <property>
        <name>yarn.resourcemanager.webapp.address</name>
        <value>Slave1:8088</value>
      </property>
</configuration>
- 配置mapred-site.xm
<configuration>
    <!-- 指定 MapReduce 程序运行在 Yarn 上 -->
     <property>
         <name>mapreduce.framework.name</name>
         <value>yarn</value>
     </property>
</configuration>
配置workers
List all worker hostnames or IP addresses in your etc/hadoop/workers file, one per line. Helper scripts (described below) will use the etc/hadoop/workers file to run commands on many hosts at once. It is not used for any of the Java-based Hadoop configuration. In order to use this functionality, ssh trusts (via either passphraseless ssh or some other means, such as Kerberos) must be established for the accounts used to run Hadoop.
Master
Slave1
Slave2
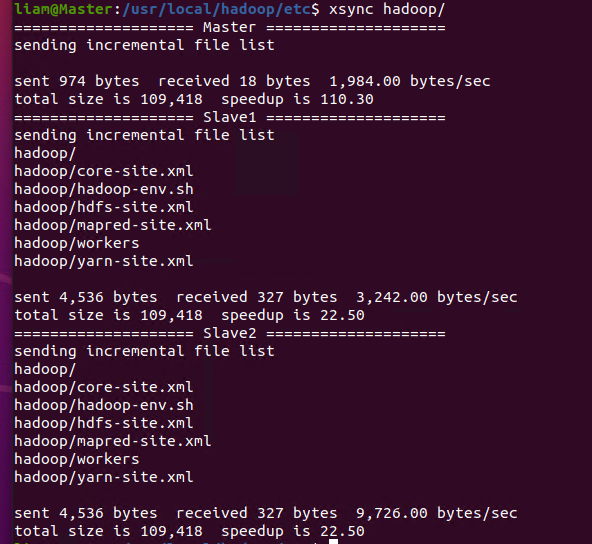
同步所有节点配置文件(这里使用xsync同步文件脚本)
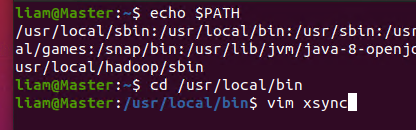
更改执行权限 chmod 777 xsync
随便建一个文件测试是否能传到其他服务器上
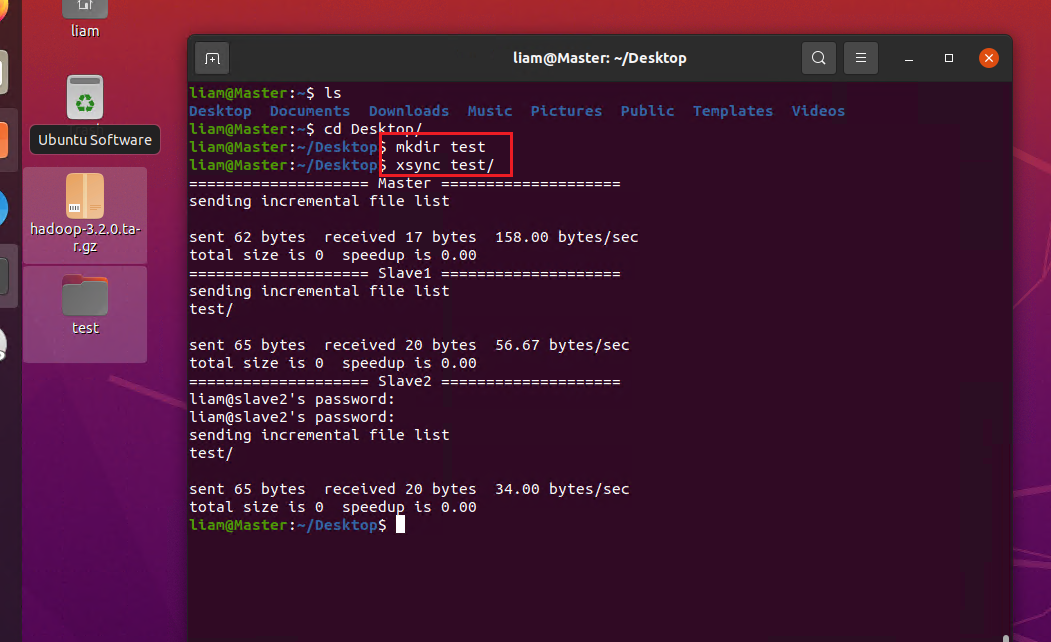
xsync同步 可以看到文件更新
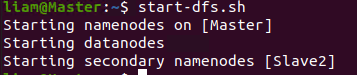
启动hadoop集群
在Master节点上
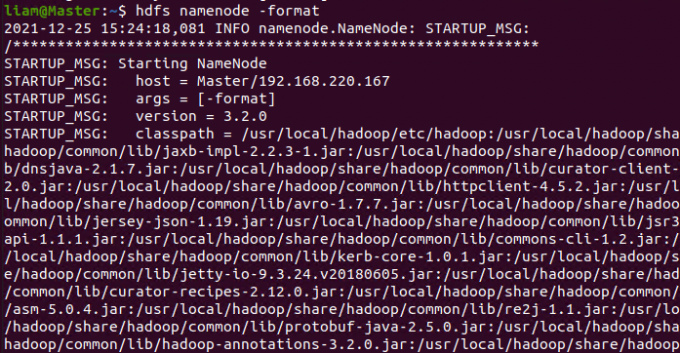
首次启动需要格式化 只有首次启动需要
启动HDFS
在配置了ResourceManager的节点启动Yarn
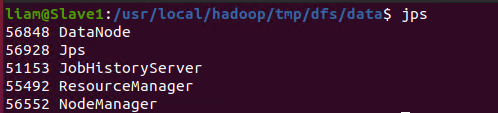
这里是Slave1

在Slave1配置historyserver
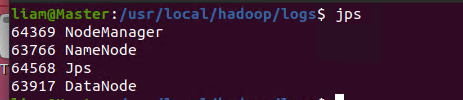
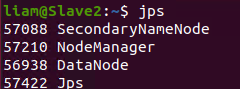
查看是否配置完成(与之前画的图一样)
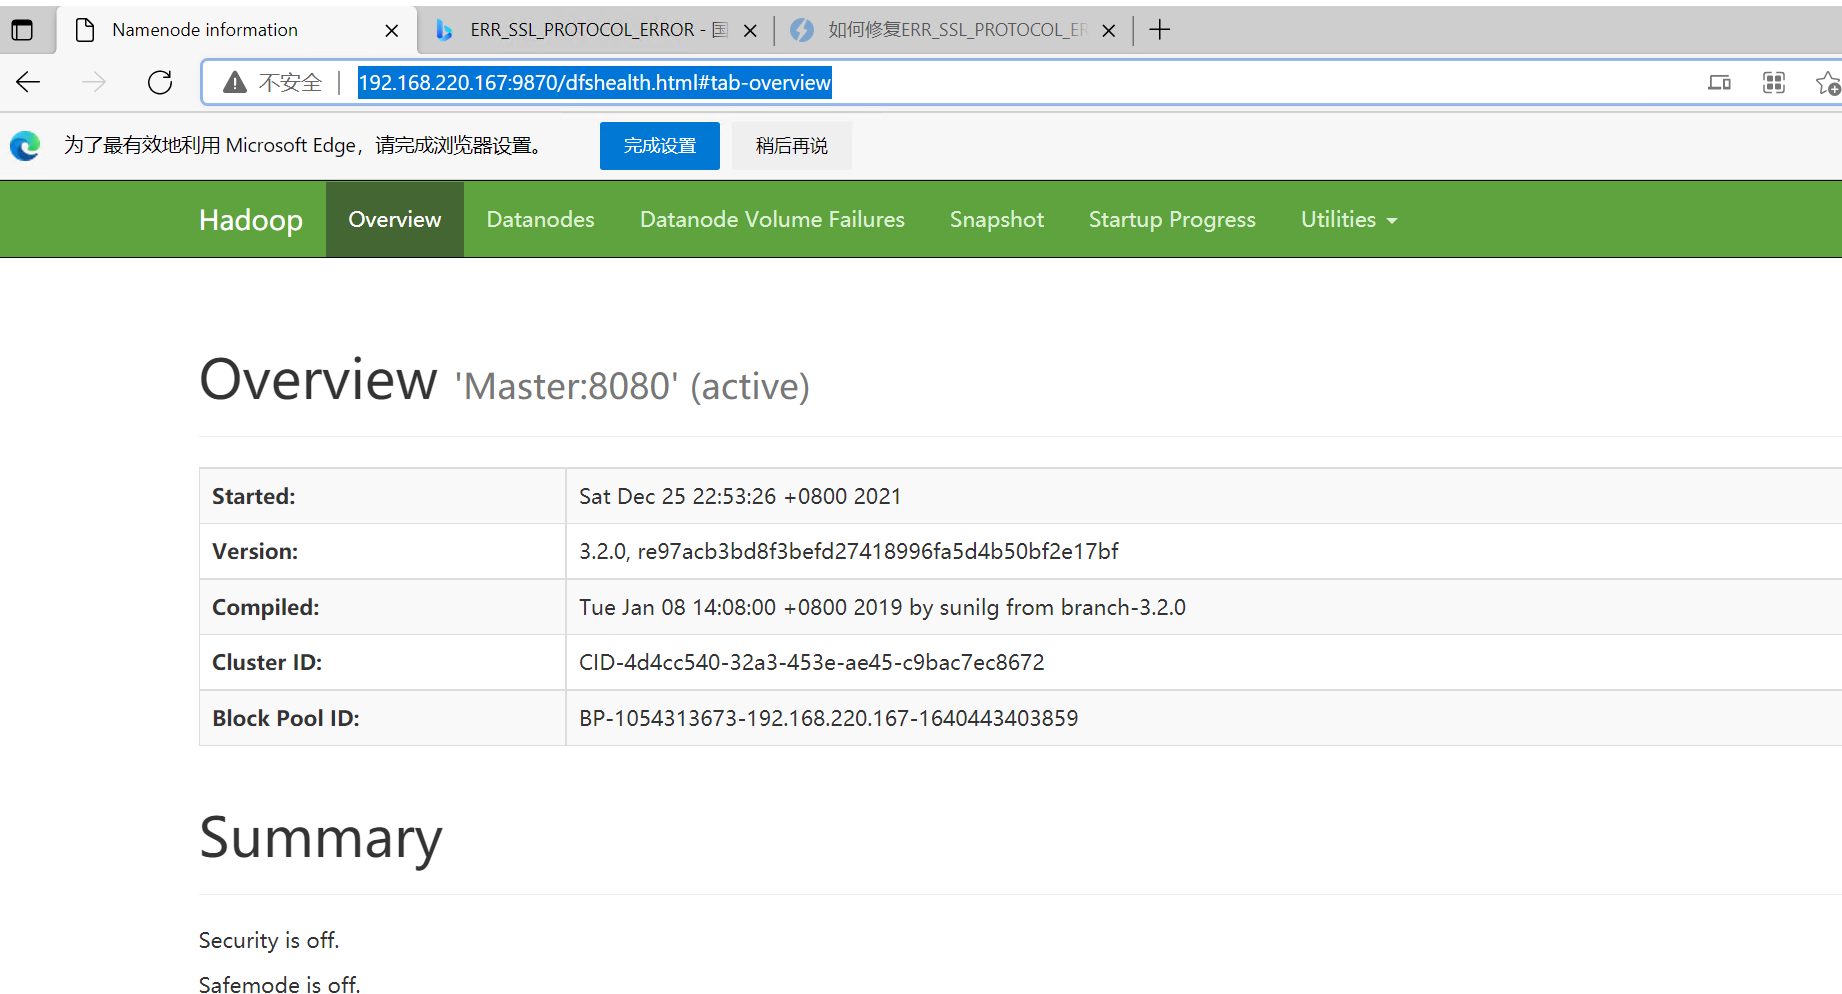
尝试web页面是否能打开
hdfs:
如果在主机里没有配置master与ip地址关联的话
同理试试yarn:
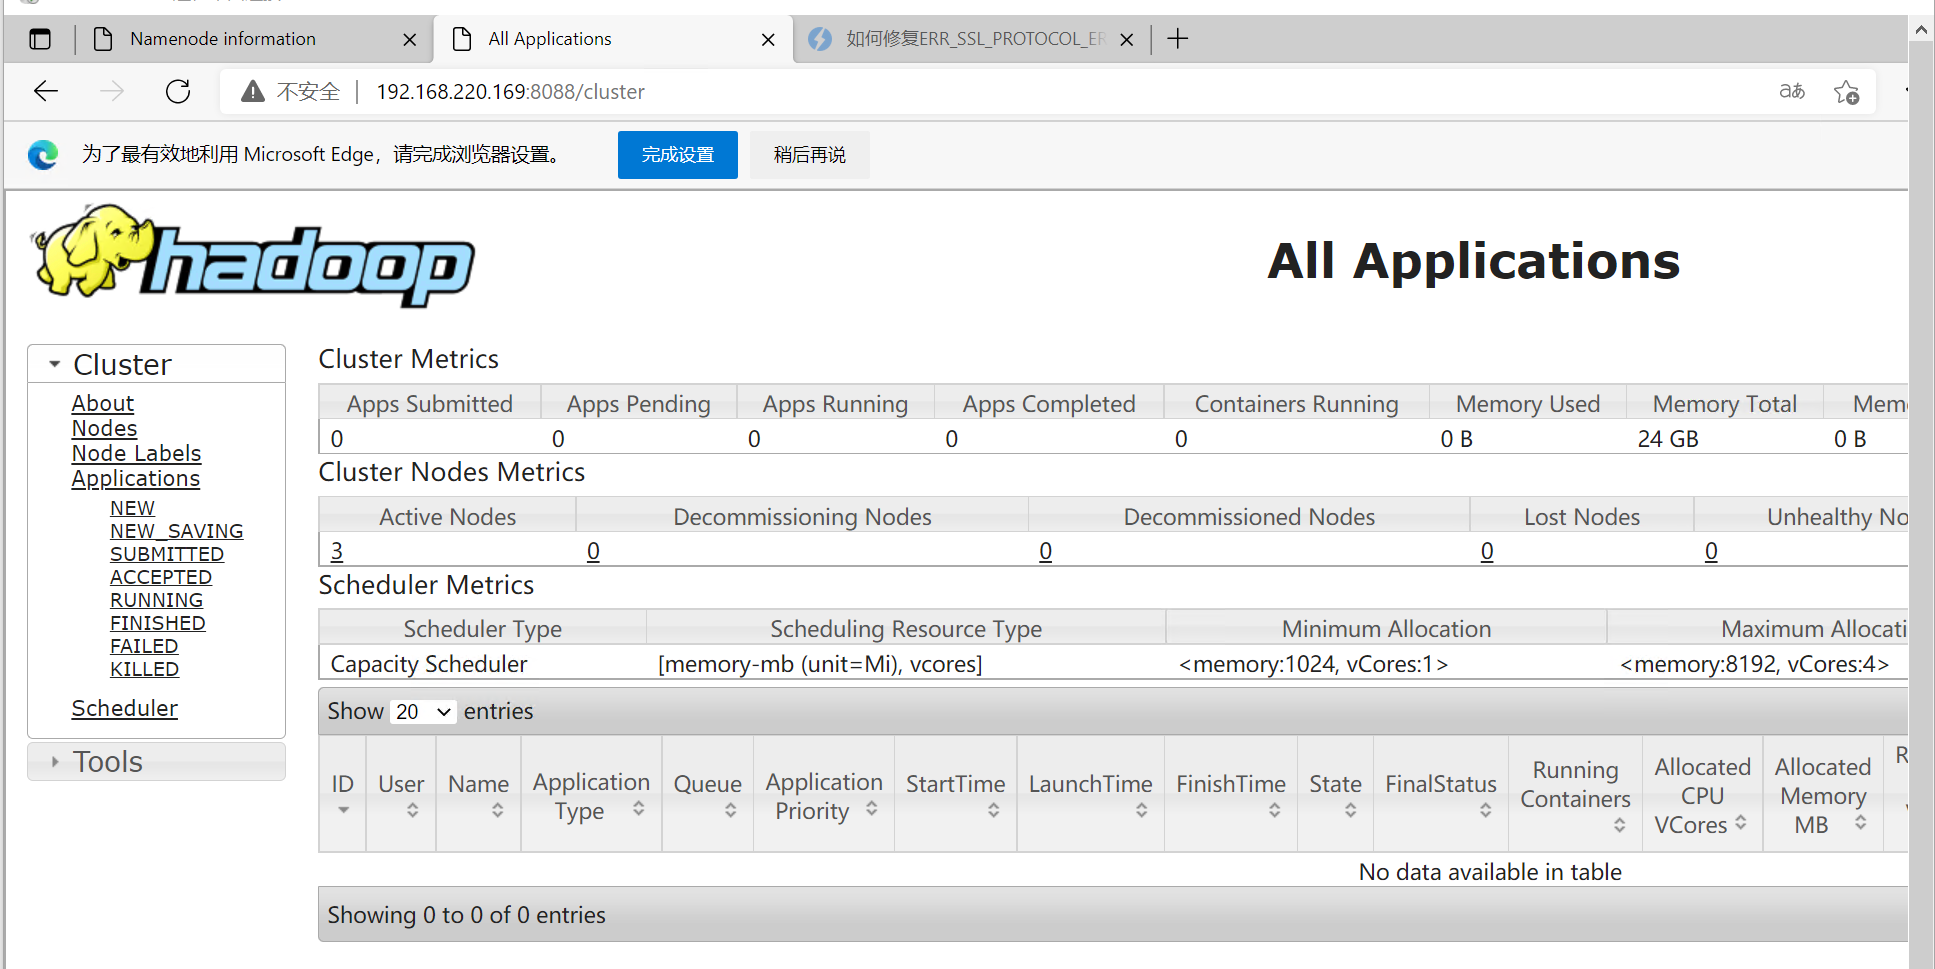
由此,Hadoop集群配置完成
xsync
#!/bin/bash
#1. 判断参数个数
if [ $# -lt 1 ]
then
echo Not Enough Arguement!
exit;
fi
#2. 遍历集群所有机器
for host in Master Slave1 Slave2 ##这里注意更改!!
do
echo ==================== $host ====================
#3. 遍历所有目录,挨个发送
for file in $@
do
#4. 判断文件是否存在
if [ -e $file ]
then
#5. 获取父目录
pdir=$(cd -P $(dirname $file); pwd)
#6. 获取当前文件的名称
fname=$(basename $file)
ssh $host "mkdir -p $pdir"
rsync -av $pdir/$fname $host:$pdir
else
echo $file does not exists!
fi
done
done
本文转载自: https://blog.csdn.net/qq_48635659/article/details/122150588
版权归原作者 李泽西liam 所有, 如有侵权,请联系我们删除。
版权归原作者 李泽西liam 所有, 如有侵权,请联系我们删除。