导语
之前很多朋友咨询过国内访问Github较慢的问题,然后我一般让他们自己去知乎上找攻略,但今天我才发现网上竟然没有一个一键配置的脚本,一般都需要我们跟着教程一步步地去做才行。这也太麻烦了,于是自己动手写了个脚本,只需要简单运行一下就可以实现访问Github加速的功能。
废话不多说,让我们愉快地开始吧~
开发工具
Python****版本:3.7.8
相关模块:
pikachupytools模块;
pythonping模块;
beautifulsoup4模块;
requests模块;
tqdm模块;
以及一些python自带的模块。
环境搭建
安装Python并添加到环境变量,pip安装需要的相关模块即可。
原理简介
核心原理就是把Github相关的域名和对应的ip地址写到本地hosts文件里,从而绕过DNS解析,达到加速访问的目的。
其中Github相关的域名整理如下:
domains = [
    'github.com', 'www.github.com', 'github.global.ssl.fastly.net', 'github.map.fastly.net', 'github.githubassets.com',
    'github.io', 'assets-cdn.github.com', 'gist.github.com', 'help.github.com', 'api.github.com', 'nodeload.github.com',
    'codeload.github.com', 'raw.github.com', 'documentcloud.github.com', 'status.github.com', 'training.github.com',
    'raw.githubusercontent.com', 'gist.githubusercontent.com', 'cloud.githubusercontent.com', 'camo.githubusercontent.com',
    'avatars0.githubusercontent.com', 'avatars1.githubusercontent.com', 'avatars2.githubusercontent.com', 'avatars3.githubusercontent.com',
    'avatars4.githubusercontent.com', 'avatars5.githubusercontent.com', 'avatars6.githubusercontent.com', 'avatars7.githubusercontent.com',
    'avatars8.githubusercontent.com', 'user-images.githubusercontent.com', 'favicons.githubusercontent.com', 'github-cloud.s3.amazonaws.com',
    'github-production-release-asset-2e65be.s3.amazonaws.com', 'github-production-user-asset-6210df.s3.amazonaws.com',
    'github-production-repository-file-5c1aeb.s3.amazonaws.com', 'alive.github.com', 'guides.github.com', 'docs.github.com'
]
然后我们利用如下网站查询每个域名对应的IP地址:
https://ipaddress.com/website/ + 域名
效果大概是这样子的:
代码实现如下:
# 生成符合ipadredd.com查询的url地址, 从而解析出域名对应的IP
pbar = tqdm(self.domains)
for domain in pbar:
    pbar.set_description(f'parse {domain}')
    url = f'https://ipaddress.com/website/{domain}'
    response = self.session.get(url, headers=self.headers)
    soup = BeautifulSoup(response.text, 'lxml')
    ips = []
    for item in soup.find('tbody', id='dnsinfo').select('tr td a'):
        ip = re.findall(r"\b(?:[0-9]{1,3}\.){3}[0-9]{1,3}\b", item.text)
        if ip: ips.append(''.join(ip))
    assert len(ips) > 0, f'parse {domain} error'
    if len(ips) == 1:
        domain2ip_dict[domain] = ''.join(ips)
    else:
        domain2ip_dict[domain] = self.lowestrttip(ips)
最后,我们根据操作系统的不同更新一下对应位置的hosts文件就行:
# 更新host文件
print(f'[INFO]: start to update the host file')
shutil.copy(self.hosts_path, self.hosts_path + '.bak')
fp_host, fp_temp = open(self.hosts_path, 'r'), open('temphost', 'w')
def distinct(domains, line):
    for domain in domains:
        if domain in line: return True
    return False
for line in fp_host.readlines():
    if not distinct(self.domains, line):
        fp_temp.write(line)
for domain, ip in domain2ip_dict.items():
    fp_temp.write(f'{domain}\t{ip}\n')
fp_host.close()
fp_temp.close()
shutil.copy('./temphost', self.hosts_path)
os.remove('./temphost')
if 'Windows' in platform.platform():
    os.system('ipconfig /flushdns')
else:
    os.system('systemd-resolve --flush-caches')
print(f'[INFO]: update the host file successfully')
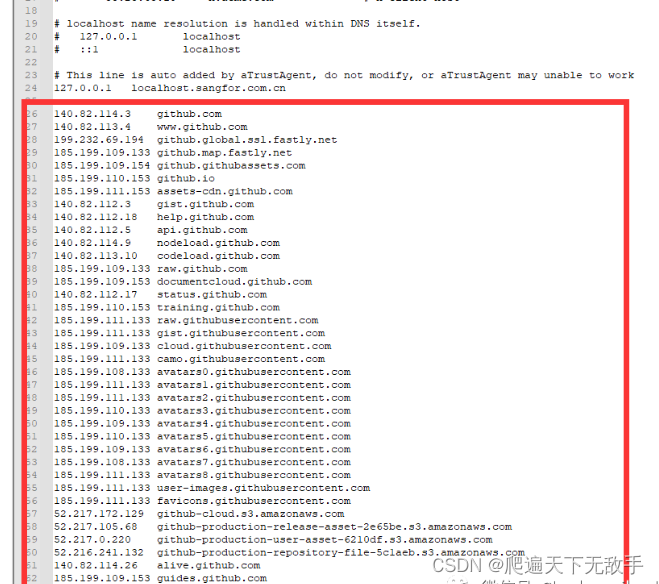
更新之后的hosts文件大概长这样:
大功告成啦,完整源代码详见相关文件~
效果展示
想要快速测试的小伙伴只需要pip安装一下pikachupytools包:
pip install pikachupytools --upgrade
然后简单写几行代码就能调用运行了:
from pytools import pytools

tool_client = pytools.pytools()
tool_client.execute('githubacceleration')
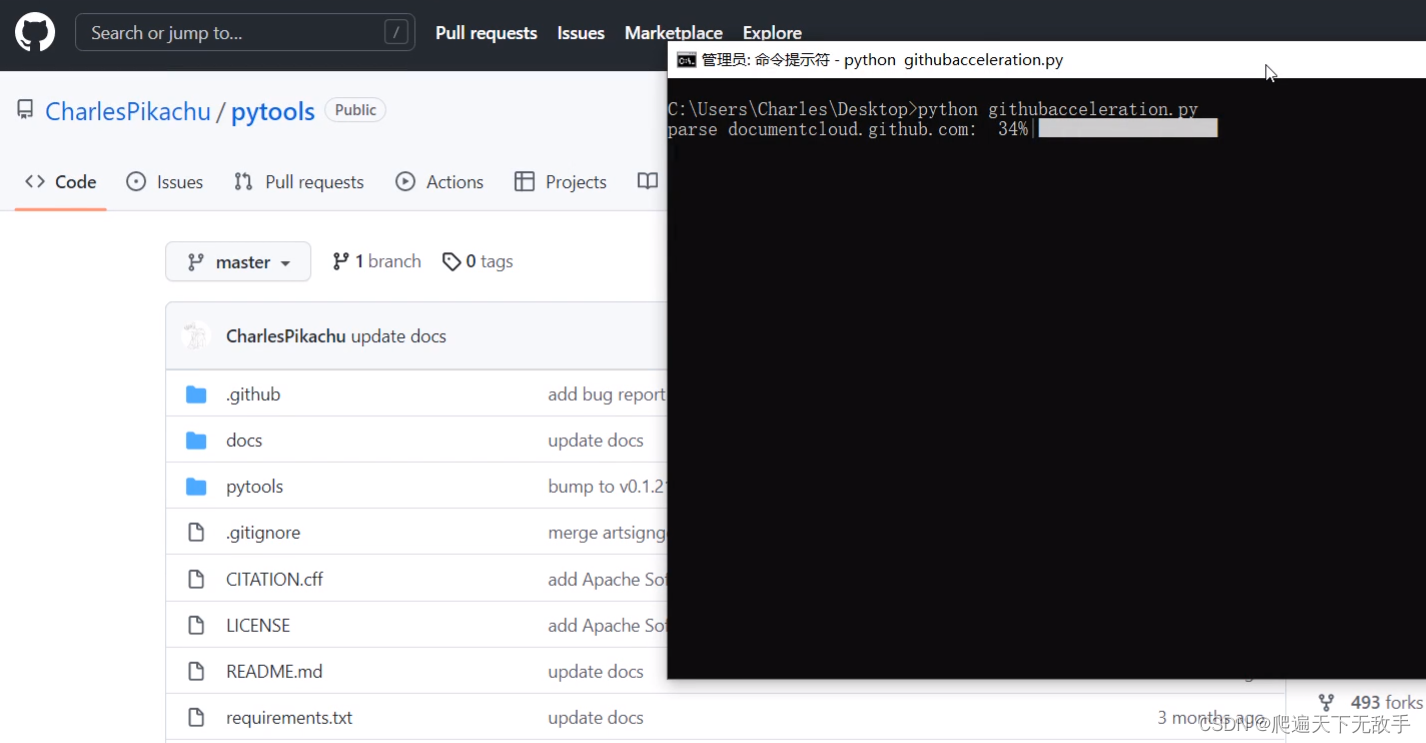
效果如下(必须管理员权限运行):

到这里就完美结束了,你学会了吗?源码见下方公众号!
版权归原作者 爬遍天下无敌手 所有, 如有侵权,请联系我们删除。