
程序示例精选
QT+Python人脸表情特征识别
前言
QT+Python是非常经典的窗体编程组合,功能完善,可视化界面美观易维护,这篇博客针对人脸表情特征识别方面编写代码,代码整洁,规则,易读,对学习与使用Python有较好的帮助。
文章目录
** 3. 识别图像特征**
** 4. 运行结果**
一、所需工具软件
** 3. Qt, Tensorflow, Pandas库**
二、使用步骤
1.引入库
代码如下(示例):
# coding:utf-8
import sys
#从转换的.py文件内调用类
import cv2
import numpy as np
import sys
import tensorflow as tf

from untitled import Ui_Dialog
from PyQt5 import QtWidgets

from PyQt5 import QtWidgets, QtCore, QtGui
from PyQt5.QtCore import *
2.打开图像文件
代码如下(示例):
   def openFileButton(self):
        imgName, imgType  = QFileDialog.getOpenFileName(self,"打开文件","./","files(*.*)")
        img = cv2.imread(imgName)
        cv2.imwrite("temp/original.jpg", img)
        height, width, pixels = img.shape
        print("width,height",width,height)
        print("self.label.width()",self.label.width())
        print("self.label.height()",self.label.height())


        frame = cv2.resize(img, (int(rwidth), int(rheight)))
        print("rwidth-elif,rheight-elfi", rwidth, rheight)
        img2 = cv2.cvtColor(frame, cv2.COLOR_BGR2RGB)  # opencv读取的bgr格式图片转换成rgb格式
        _image = QtGui.QImage(img2[:], img2.shape[1], img2.shape[0], img2.shape[1] * 3, QtGui.QImage.Format_RGB888)
        jpg_out = QtGui.QPixmap(_image).scaled(rwidth, rheight) #设置图片大小
        self.label.setPixmap(jpg_out) #设置图片显示
该处使用的url网络请求的数据。
3.识别图像特征:
代码如下(示例):
    def recogPerson(self):
        import os
        import cv2


        img = cv2.imread("temp/original.jpg")
        cv2.imwrite("save/recognPerson2.jpg", img)
        face_detect = cv2.CascadeClassifier('haarcascade_frontalface_default.xml')
        eye_detect = cv2.CascadeClassifier('haarcascade_eye.xml')
        # 灰度处理
        gray = cv2.cvtColor(img, code=cv2.COLOR_BGR2GRAY)
        # 检查人脸 按照1.1倍放到 周围最小像素为5
        face_zone = face_detect.detectMultiScale(gray,1.3,5)
        # print ('识别人脸的信息:\n',face_zone)
        l = len(face_zone)


        ints = 0
        # 绘制矩形和圆形检测人脸
        for x, y, w, h in face_zone:
            ints += 1
            # 绘制矩形人脸区域
            if w < 1000:
                cv2.rectangle(img, pt1=(x, y), pt2=(x + w, y + h), color=[0, 0, 255], thickness=2)
                # 绘制圆形人脸区域 radius表示半径
                cv2.circle(img, center=(x + w // 2, y + h // 2), radius=w // 2, color=[0, 255, 0], thickness=2)
                roi_face = gray[y:y + h, x:x + w]  # 灰度图
                roi_color = img[y:y + h, x:x + w]  # 彩色图
                eyes = eye_detect.detectMultiScale(roi_face)
                for (ex, ey, ew, eh) in eyes:
                    cv2.rectangle(roi_color, (ex, ey), (ex + ew, ey + eh), (0, 255, 0), 2)

        cv2.imwrite("save/recognPerson.jpg", img)
        #cv2.waitKey(0)
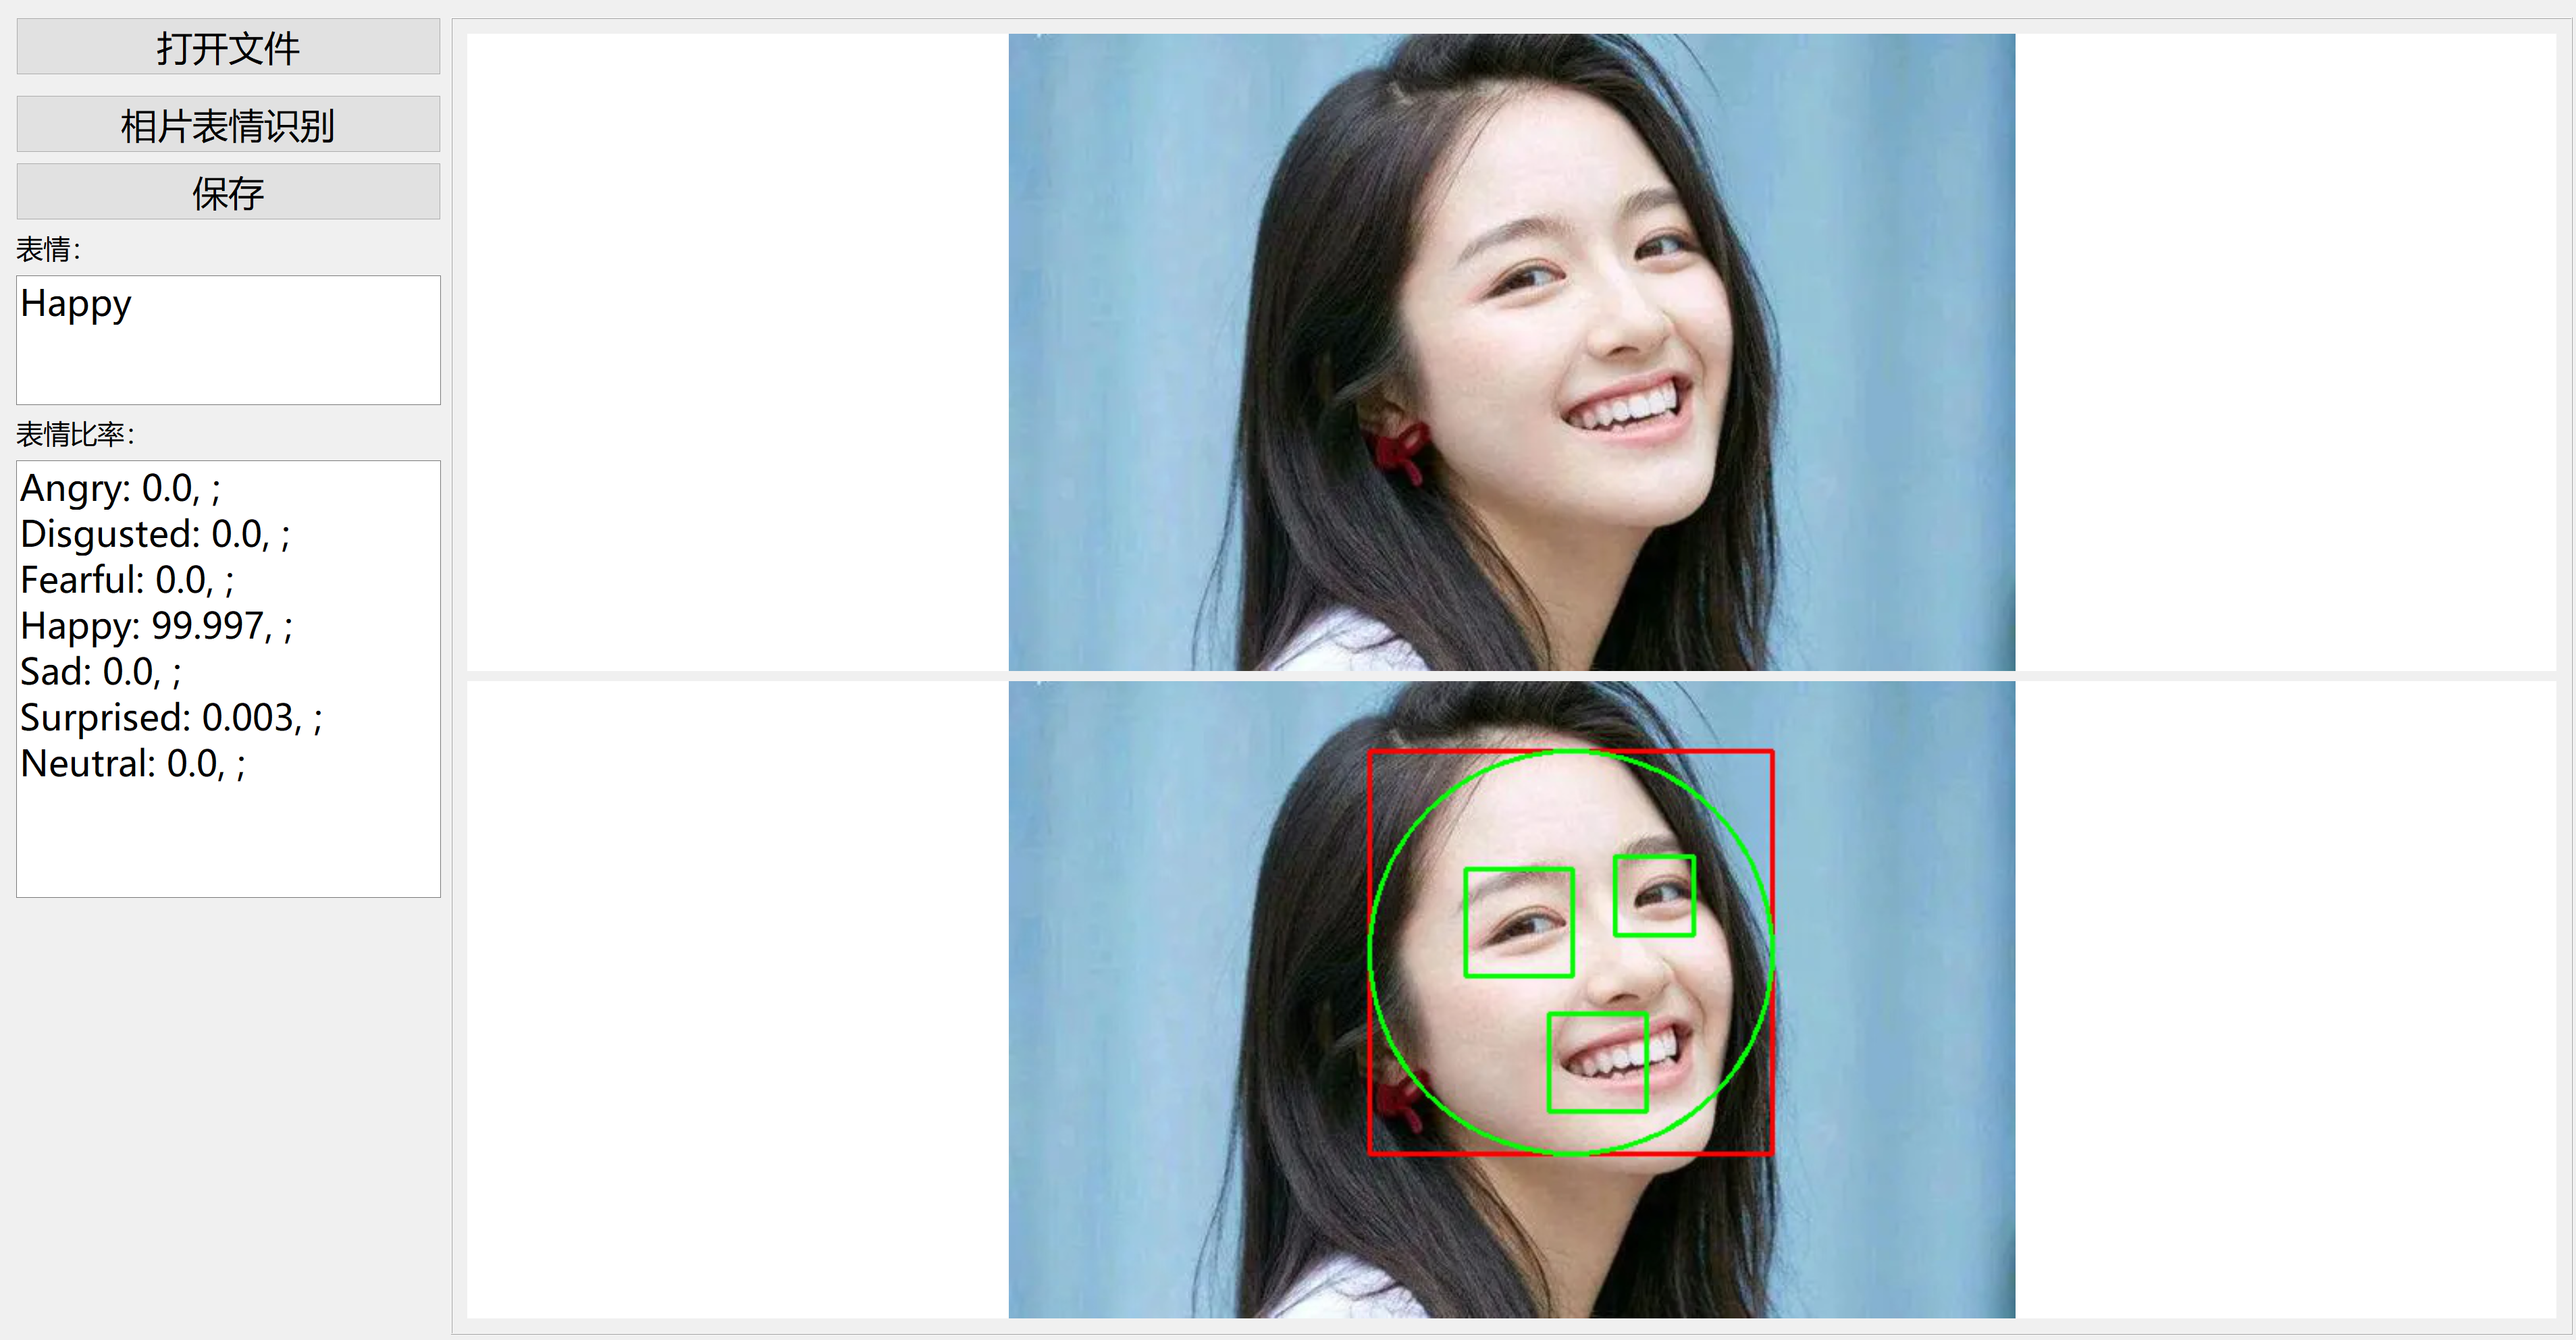
4.运行结果如下:
三、****在线协助:
如需安装运行环境或远程调试,可加扣2945218359, 或扣905733049由专业技术人员远程协助!
本文转载自: https://blog.csdn.net/alicema1111/article/details/128073797
版权归原作者 alicema1111 所有, 如有侵权,请联系我们删除。
版权归原作者 alicema1111 所有, 如有侵权,请联系我们删除。