OK,那么上篇博客我们介绍了如何搭建基于Java+selenium的环境,并且使用selenium的一些语法给大家演示了如何进行自动化测试的案例,那么本篇博客我们来继续学习selenium的一些其他的比较重要的语法,感谢关注,期待三连~
一、**定位一组元素 **
webdriver 可以很方便的使用fifindElement 方法来定位某个特定的对象,不过有时候我们却需要定位一组对象,这时候就需要使用fifindElements 方法。
定位一组对象一般用于以下场景:
1、批量操作对象,比如将页面上所有的checkbox 都勾选上;
2、先获取一组对象,再在这组对象中过滤出需要具体定位的一些对象。比如定位出页面上所有的
checkbox,然后选择最后一个;
OK,我们来做个具体的演示:
1、在我们的桌面上新建一个文本文件,然后把下面的前端代码填入保存;
<html>
<head>
<meta http-equiv="content-type" content="text/html;charset=utf-8" />
<title>Checkbox</title>
</head>
<body>
<h3>checkbox</h3>
<div class="well">
<form class="form-horizontal">
<div class="control-group">
<label class="control-label" for="c1">checkbox1</label>
<div class="controls">
<input type="checkbox" id="c1" />
</div>
</div>
<div class="control-group">
<label class="control-label" for="c2">checkbox2</label>
<div class="controls">
<input type="checkbox" id="c2" />
</div>
</div>
<div class="control-group">
<label class="control-label" for="c3">checkbox3</label>
<div class="controls">
<input type="checkbox" id="c3" />
</div>
</div>
<div class="control-group">
<label class="control-label" for="r">radio</label>
<div class="controls">
<input type="radio" id="r1" />
</div>
</div>
<div class="control-group">
<label class="control-label" for="r">radio</label>
<div class="controls">
<input type="radio" id="r2" />
</div>
</div>
</form>
</div>
</body>
</html>
2、保存之后,修改文件的名称为“xx.html”,我这里取的是demo6.html;

3、双击打开,观察界面展示;
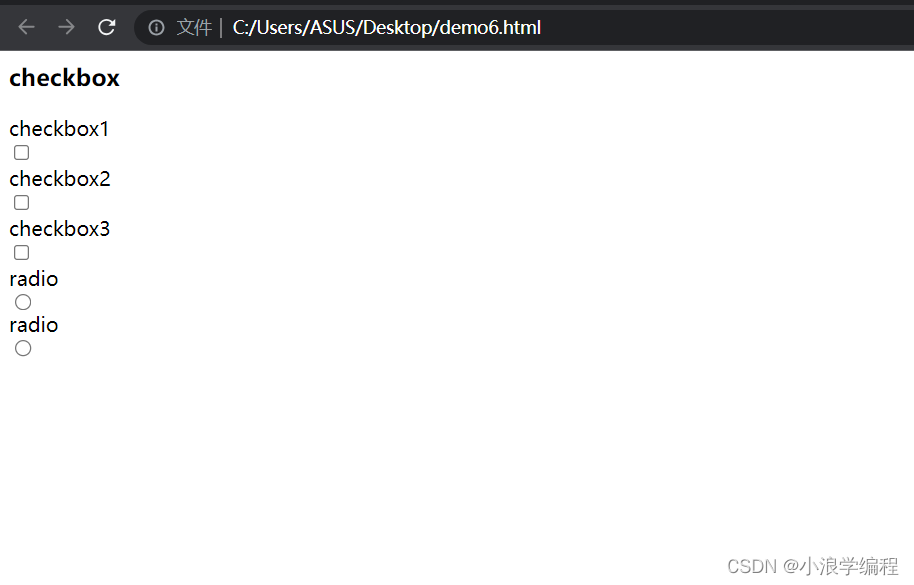
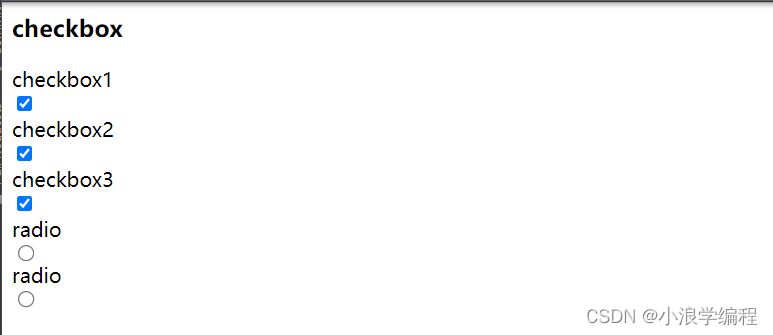
那么这里我们想实现一次性勾选checkbox1,2,3这三个选项,即实现多选,那么怎么做呢?
也就是我们开头提到的定位一组元素,看代码实现:
package AutoTest.Selenium1;

import org.openqa.selenium.By;
import org.openqa.selenium.WebElement;
import org.openqa.selenium.chrome.ChromeDriver;
import org.openqa.selenium.chrome.ChromeOptions;

import java.util.List;

//定位一组元素
public class demo6 {
    public static void main(String[] args) {
        ChromeOptions options = new ChromeOptions();
        options.addArguments("--remote-allow-origins=*");
        ChromeDriver driver = new ChromeDriver(options);
        driver.get("file:///C:/Users/ASUS/Desktop/demo6.html");

        List<WebElement> webElements = driver.findElements(By.cssSelector("input"));
        for (int i = 0; i < webElements.size(); i++) {
            if(webElements.get(i).getAttribute("type").equals("checkbox")){
                webElements.get(i).click();
            }else{
                //什么也不做
            }
        }
    }
}
我们发现是使用了List<WebElement>来存储所有带input标签的元素;
这个时候我们查看网页源代码,我们发现每个可以勾选的按钮都带有type属性;
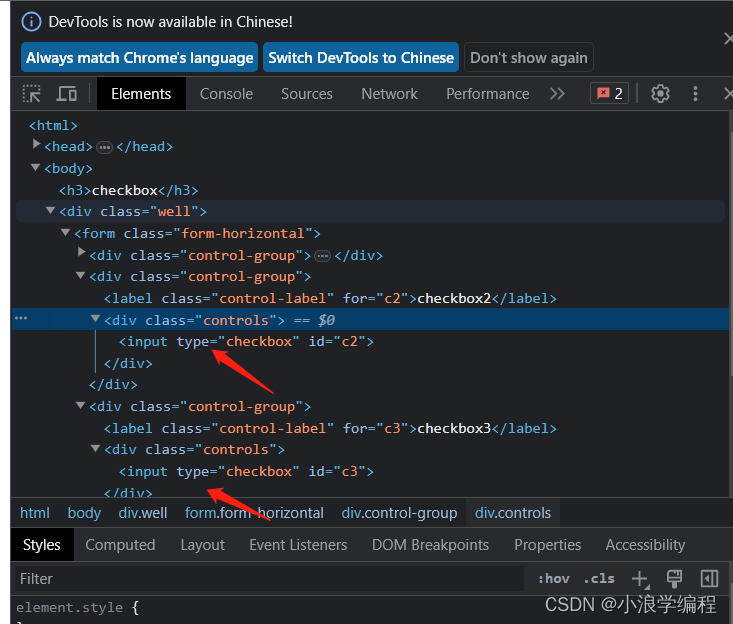
那么就可以使用方法getAttribute("type"),括号中放的是数据类型,来定位到所有类型带type的元素;定位到之后进行click()点击操作;
运行结果:
二、下拉框处理
那么我们在设计自动化用例的时候也经常会遇到input带下拉框的这种情况,比如下面:
源代码:
<html>
<body>
<select id="ShippingMethod"
onchange="updateShipping(options[selectedIndex]);" name="ShippingMethod">
<option value="12.51">UPS Next Day Air ==> $12.51</option>
<option value="11.61">UPS Next Day Air Saver ==> $11.61</option>
<option value="10.69">UPS 3 Day Select ==> $10.69</option>
<option value="9.03">UPS 2nd Day Air ==> $9.03</option>
<option value="8.34">UPS Ground ==> $8.34</option>
<option value="9.25">USPS Priority Mail Insured ==> $9.25</option>
<option value="7.45">USPS Priority Mail ==> $7.45</option>
<option value="3.20" selected="">USPS First Class ==> $3.20</option>
</select>
</body>
</html>
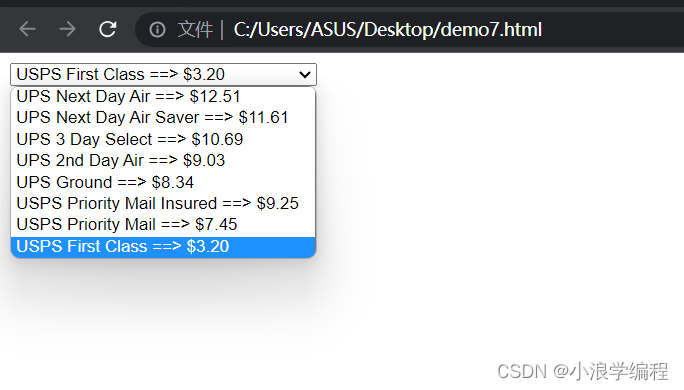
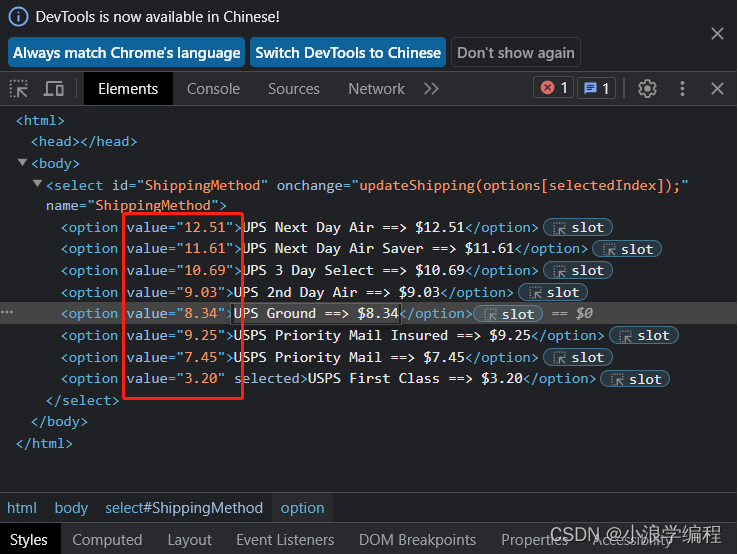
那么这种情况的话直接使用普通的cssSelector或者xpath方法是无法完成页面元素定位的,那么如何操作呢?这里主要会用到一个Select函数,创建一个Select对象,然后调用里面对应的方法;常见的使用下标定位或者通过value来进行定位;
package AutoTest.Selenium1;

import org.openqa.selenium.By;
import org.openqa.selenium.WebElement;
import org.openqa.selenium.chrome.ChromeDriver;
import org.openqa.selenium.chrome.ChromeOptions;
import org.openqa.selenium.support.ui.Select;

//下拉框处理
public class demo7 {
    public static void main(String[] args) {
        ChromeOptions options = new ChromeOptions();
        options.addArguments("--remote-allow-origins=*");
        ChromeDriver driver = new ChromeDriver(options);
        driver.manage().window().maximize();
        driver.get("file:///C:/Users/ASUS/Desktop/demo7.html");

        WebElement webElement = driver.findElement(By.cssSelector("#ShippingMethod"));
        Select select = new Select(webElement);
        select.selectByIndex(3);
        select.selectByValue("9.03");
    }
}
value值查看:
三、上传文件
先构建一个页面,代码如下:
<html>
<head>
<meta http-equiv="content-type" content="text/html;charset=utf-8" />
<title>upload_file</title>
<script type="text/javascript" src="http://code.jquery.com/jquery-1.9.1.min.js">
</script>
<link
href="http://netdna.bootstrapcdn.com/twitter-bootstrap/2.3.2/css/bootstra
p-combined.min.css" rel="stylesheet" />
<script type="text/javascript">
</script>
</head>
<body>
<div class="row-fluid">
<div class="span6 well">
<h3>upload_file</h3>
<input type="file" name="file" />
</div>
</div>
</body>
<script src="http://netdna.bootstrapcdn.com/twitterbootstrap/2.3.2/js/bootstrap.
min.js"></script>
</html>
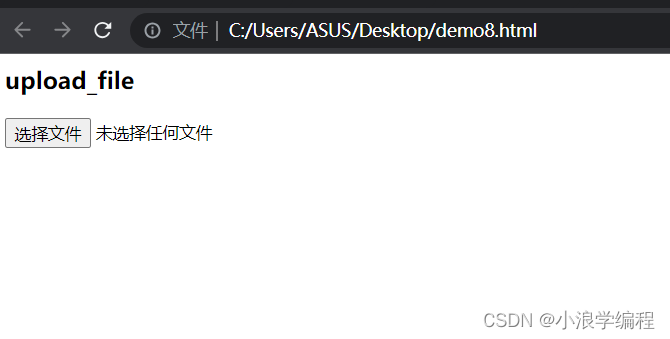
效果:
自动化代码:
package AutoTest.Selenium1;

import org.openqa.selenium.By;
import org.openqa.selenium.chrome.ChromeDriver;
import org.openqa.selenium.chrome.ChromeOptions;

//上传文件
public class demo8 {
    public static void main(String[] args) {
        ChromeOptions options = new ChromeOptions();
        options.addArguments("--remote-allow-origins=*");
        ChromeDriver driver = new ChromeDriver(options);
        driver.manage().window().maximize();
        driver.get("file:///C:/Users/ASUS/Desktop/demo8.html");

        driver.findElement(By.cssSelector("input")).sendKeys("C:\\Users\\ASUS\\Desktop\\UPUP.txt");

    }
}
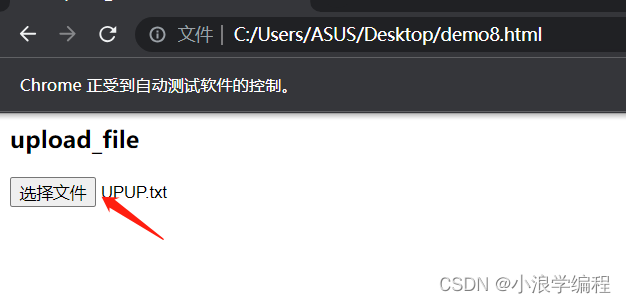
定位到上传文件的按钮,然后输入自己要上传文件的路径即可,这里使用绝对路径和相对路径均可;运行结果:
四、quit和close的区别
quit是关闭整个浏览器,close只是关闭当前窗口,即quit会清空缓存,而close不会清空缓存。
代码验证:
package AutoTest.Selenium1;

import org.openqa.selenium.By;
import org.openqa.selenium.chrome.ChromeDriver;
import org.openqa.selenium.chrome.ChromeOptions;

import static java.lang.Thread.sleep;

//quit和close的区别
public class demo9 {
    public static void main(String[] args) throws InterruptedException {
            ChromeOptions options = new ChromeOptions();
            options.addArguments("--remote-allow-origins=*");
            ChromeDriver driver = new ChromeDriver(options);
            driver.manage().window().maximize();
            driver.get("https://www.baidu.com");

//            driver.findElement(By.cssSelector("#kw")).sendKeys("杨幂");
            driver.findElement(By.cssSelector("#s-top-left > a:nth-child(1)")).click();
            sleep(3000);
            //quit是关闭整个浏览器
//            driver.quit();
            //close只是关闭当前窗口
            driver.close();
            //即quit会清空缓存,而close不会清空缓存。
    }
}
使用close()函数时,现在是打开了两个窗口句柄;

随着代码的运行,关闭了一个窗口句柄;

如果使用quit的话是运行结束之后直接退出浏览器;
五、浏览器页面跳转
那么我们在设计自动化代码的时候,可能会遇到页面从当前页面跳转到另一个新的页面,那么这个时候再去使用cssSelector或者Xpath方法去定位元素的话,肯定是定位不到的,因为跳转到了新的页面,get方法打开的是旧的页面,那么如何解决呢?
比如在百度首页,我们点击新闻这个超链接,那么浏览器会打开两个页面;
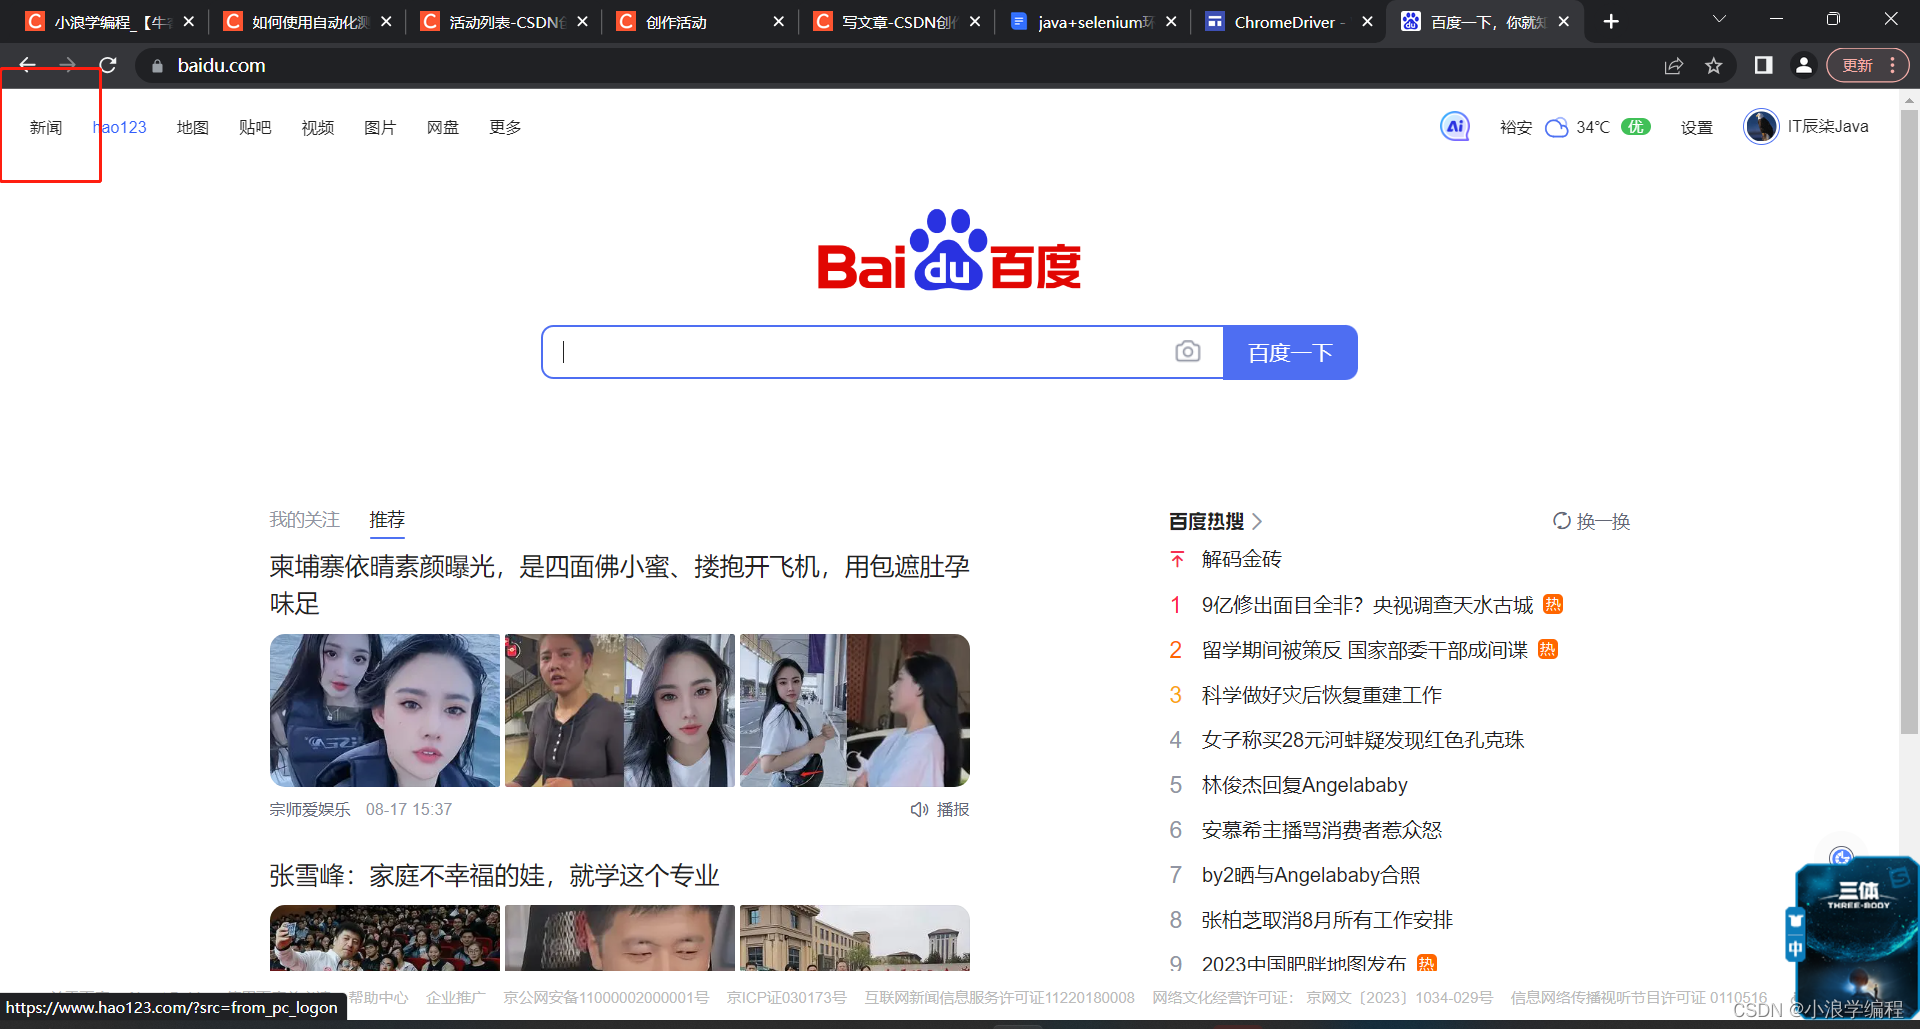
点击“新闻”按钮,来到了一个新的页面;

那么我们发现这个页面也是可以进行搜索框输入数据进行百度一下的;
看代码注释:
package AutoTest.Selenium1;

import org.openqa.selenium.By;
import org.openqa.selenium.chrome.ChromeDriver;
import org.openqa.selenium.chrome.ChromeOptions;

import java.util.Set;

import static java.lang.Thread.sleep;

public class demo10 {
    public static void main(String[] args) throws InterruptedException {
        ChromeOptions options = new ChromeOptions();
        options.addArguments("--remote-allow-origins=*");
        ChromeDriver driver = new ChromeDriver(options);
        driver.manage().window().maximize();
        driver.get("https://www.baidu.com");

        driver.findElement(By.cssSelector("#s-top-left > a:nth-child(1)")).click();
        sleep(3000);

        //通过getWindowHandles获取所有的窗口句柄
        //通过getWindowHandle获取get打开的页面窗口句柄
        Set<String> handles =  driver.getWindowHandles();
        //target用来获取当前最新的页面地址
        String target = "";
        for (String handle:handles) {
            target = handle;
        }
        driver.switchTo().window(target);
        driver.findElement(By.cssSelector("#ww")).sendKeys("新闻联播");
        driver.findElement(By.cssSelector("#s_btn_wr")).click();
    }
}
运行结果:

六、截图操作
这个操作的话就是会在指定的页面进行截图,然后保存到对应的路径,在实际工作中对比与我们的预期结果是否一致;
1、首先需要在我们的配置文件pom.xml中导入依赖;
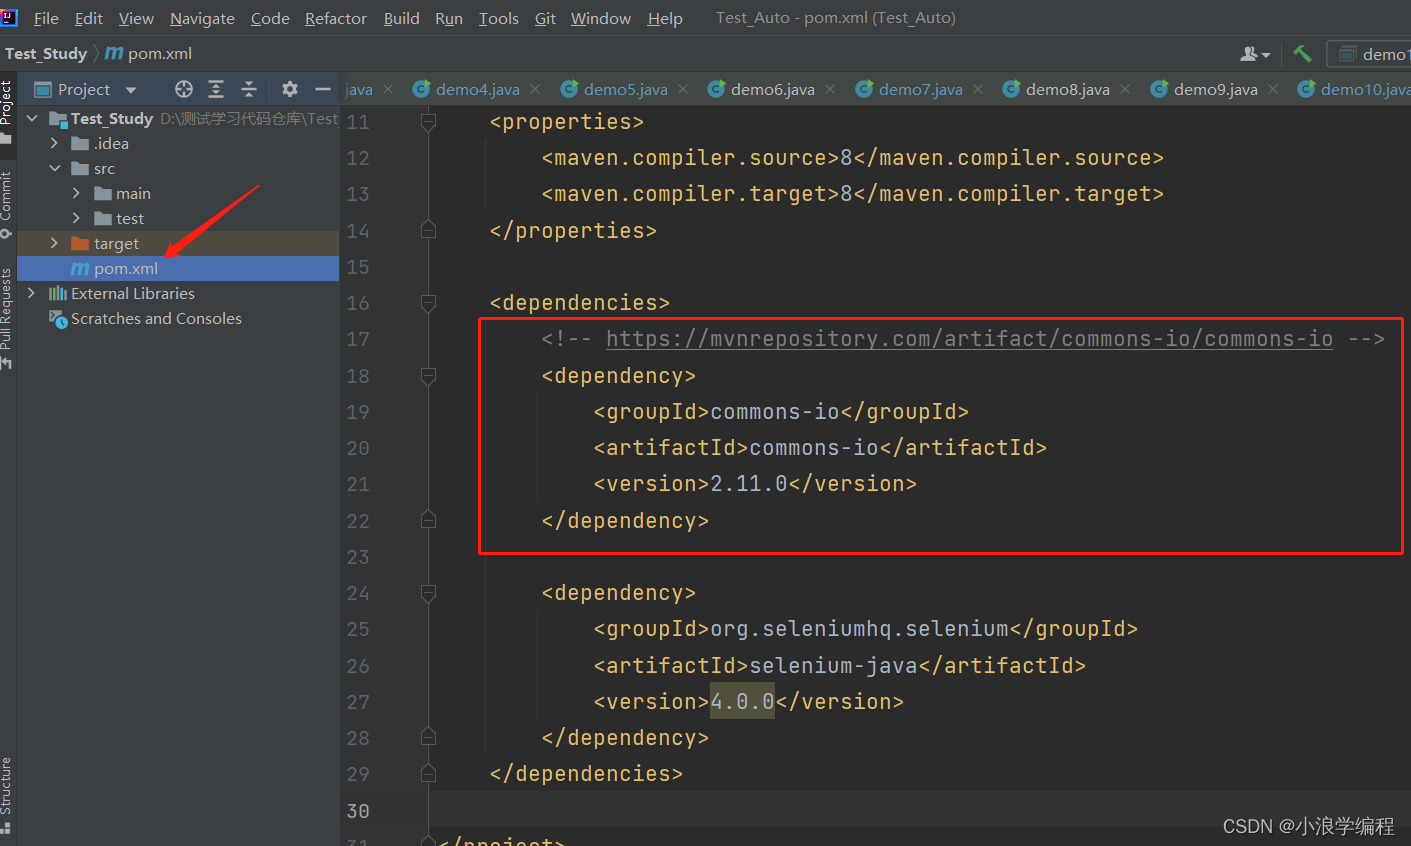
依赖代码:
        <!-- https://mvnrepository.com/artifact/commons-io/commons-io -->
        <dependency>
            <groupId>commons-io</groupId>
            <artifactId>commons-io</artifactId>
            <version>2.11.0</version>
        </dependency>
自动化代码:
package AutoTest.Selenium1;

import org.apache.commons.io.FileUtils;
import org.openqa.selenium.By;
import org.openqa.selenium.OutputType;
import org.openqa.selenium.TakesScreenshot;
import org.openqa.selenium.chrome.ChromeDriver;
import org.openqa.selenium.chrome.ChromeOptions;

import java.io.File;
import java.io.IOException;

import static java.lang.Thread.sleep;

/**
 * 截图操作:需要导入依赖,可以去pom.xml文件中查看依赖,依赖从maven中央仓库中搜索common-io,下载。
 */
public class dmeo11 {
    public static void main(String[] args) throws IOException, InterruptedException {
        ChromeOptions options = new ChromeOptions();
        options.addArguments("--remote-allow-origins=*");
        ChromeDriver driver = new ChromeDriver(options);
        driver.manage().window().maximize();
        driver.get("https://www.baidu.com");

        driver.findElement(By.cssSelector("#kw")).sendKeys("自动化测试");
        driver.findElement(By.cssSelector("#su")).click();
        sleep(3000);
        File file = ((TakesScreenshot)driver).getScreenshotAs(OutputType.FILE);
        FileUtils.copyFile(file,new File("D://demo10.png"));
    }
}
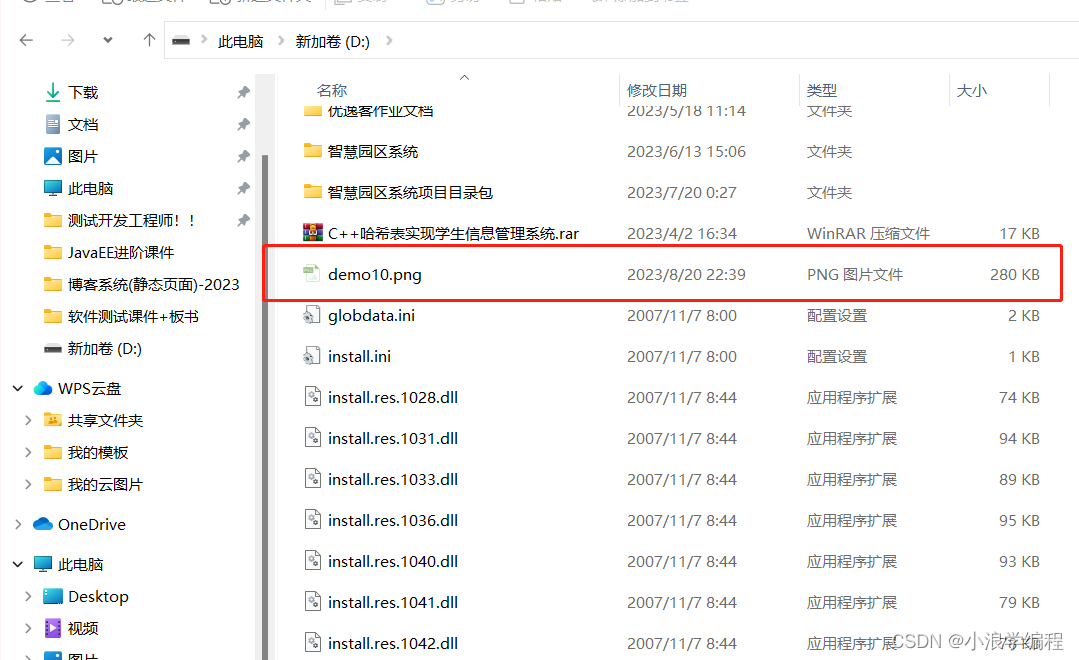
运行可以去我们自己设定的目录路径下面查看是否生成了对应的截图:
OK,以上就是selenium的所有常见操作的方法了,创作不易,可以动动小手一键三连啦,我们下篇博客更新自动化测试框架Junit的用法~
版权归原作者 小浪学编程 所有, 如有侵权,请联系我们删除。