前言
一般的用客户端实现Webservice有两种方式,一种是基于SOAP协议,另外一种是基于REST,并且REST协议目前是越来越流行。使用C#或者java来开发REST客户端目前是比较快捷方便的,毕竟可用的库或资源很多,但使用C++开发REST client的话就不容易了,毕竟原生C++在网络库这一块是没有标注库的,以前开发时候使用过libcurl库(C语言编写)和VC++ 的http client,或者使用Qt的QNetworkAccessManager库来进行后台api的调用,实现post、get请求进行数据处理,但或多或少都遇到过一些问题,再到后来别人推荐了微软开源的casablanca,或者叫CPP REST SDK库。下面整理一下CPP REST SDK库的使用及一些入门示例代码。
1、cpprestsdk介绍及编译
c++REST SDK,又叫卡萨布兰卡是一个微软发布的C++基于云的客户机-服务器通信库。该库基于现代化的C++异步API,即Promise模型或叫链式异步模型设计,c++开发人员可以方便地连接并与服务交互。
SDK内容
- 特性——HTTP客户机/服务器,JSON,URI,异步流,WebSockets客户机,oAuth
- PPL任务[2] ——一个强大的基于c++11特性编写的异步操作模型
- 支持平台——Windows桌面,Windows Store,Windows Phone,Ubuntu,OS X,iOS和Android
- Windows平台编译支持——VS 2012、2013年、2015、2017、2019
- 非Windows平台编译支持——cmake
- 包管理器支持——NuGet,仅在VS编译器支持Windows和Android平台
cpprestsdk编译
cpprestsdk的源代码可以在github下载:下载地址,但编译的过程比较复杂,因为依赖了boost、openssl等库,需要先编译这些库。常用方法有下面三种:
(1)使用vcpkg安装,但vcpkg这个工具本身需要先下载依赖库的各种源码,此外下载过程中很容易出现资源下载不下来的问题,相对较为麻烦,优点是自动化,只要解决vcpkg下载中的各种问题,编译什么的都是自动的。
(2)使用Visual studio自带的NuGet package包管理器。在visual studio 新建一个c++工程,点击 “工具——NuGet 程序包管理器——管理解决方案的NuGet 程序包”,打开NuGet包管理器。然后搜索cpprestsdk即可找到,本人用的VS2017IDE,效果如下:

点击“安装”按钮进行安装,安装完成后,visual studio自动将cpprestsdk (编译后的lib、include头文件、dll文件)下载到当前项目工程文件所在的路径中。
当然为了方便实用,也可以将编译后的lib、include头文件、dll文件拷贝到自己指定的文件夹下,作为普通的第三方库进行使用。
2、cpprestsdk官方示例
官方示例提供的是一个Get请求,获取url = "http://www.bing.com/search?q=cpprestsdk github"返回的html文件,运行结果是将请求到的html网页数据流保存生成results.html文件。
示例代码如下:
#include"stdafx.h"#include<cpprest/http_client.h>#include<cpprest/filestream.h>usingnamespace utility;// Common utilities like string conversionsusingnamespace web;// Common features like URIs.usingnamespace web::http;// Common HTTP functionalityusingnamespace web::http::client;// HTTP client featuresusingnamespace concurrency::streams;// Asynchronous streams// 官方示例//Get请求:获取url = "http://www.bing.com/search?q=cpprestsdk github"返回的html文件;//运行结果:将请求到的html网页数据流保存生成results.html文件/*    std::wstring wsServersite = L"http://www.bing.com/";
    std::wstring wsURI = L"/search";
    std::wstring wsName = L"q";
    std::wstring wsValue = L"cpprestsdk github";
*/voidOfficialExample(const std::wstring& wsServersite,const std::wstring& wsURI,const std::wstring& wsURIName,const std::wstring& wsURIValue){auto fileStream = std::make_shared<ostream>();// Open stream to output file.
    pplx::task<void> requestTask = fstream::open_ostream(U("../x64/results.html")).then([=](ostream outFile){*fileStream = outFile;// Create http_client to send the request.
        http_client client(wsServersite);//wsServersite = http://www.bing.com/// Build request URI and start the request.
        uri_builder builder(wsURI);
        builder.append_query(wsURIName, wsURIValue);//std::wstring s1 = builder.to_string().c_str();//std::wcout << s1 << std::endl;return client.request(methods::GET, builder.to_string());})// Handle response headers arriving..then([=](http_response response){printf("Received response status code:%u\n", response.status_code());// Write response body into the file.return response.body().read_to_end(fileStream->streambuf());})// Close the file stream..then([=](size_t){return fileStream->close();});// Wait for all the outstanding I/O to complete and handle any exceptionstry{
        requestTask.wait();}catch(const std::exception &e){printf("Error exception:%s\n", e.what());}}intmain(int argc,char* argv[]){// 官方示例测试
    std::wstring wsServersite = L"http://www.bing.com/";
    std::wstring wsURI = L"/search";
    std::wstring wsName = L"q";
    std::wstring wsValue = L"cpprestsdk github";OfficialExample(wsServersite, wsURI, wsName, wsValue);}
官方代码用的C++11新特性.then实现的异步请求,如果不适应的话可以改为同步请求数据:
voidOfficialExample(){auto fileStream = std::make_shared<ostream>();
    ostream outFile = fstream::open_ostream(U("results.html")).get();*fileStream = outFile;// Create http_client to send the request.
    http_client client(U("http://www.bing.com/"));// Build request URI and start the request.
    uri_builder builder(U("/search"));
    builder.append_query(U("q"),U("cpprestsdk github"));
    http_response response = client.request(methods::GET, builder.to_string()).get();// Write response body into the file.
    response.body().read_to_end(fileStream->streambuf()).get();
    fileStream->close().get();}
3、使用自己的后台api接口进行验证,包括添加header
1)POST接口使用:
// 个人测试// POST请求:通过传入Json参数获取返回状态/*    std::wstring userName = L"admin";
    std::wstring password = L"123456";
    std::wstring wsServersite = L"http://10.31.222.186:80/";
    std::wstring wsURI = L"/auth/web/login";
*/voidTestPostRequest(const std::wstring& wsServersite,const std::wstring& wsURI,const std::wstring &userName,const std::wstring &passWord);
核心代码:
    utility::stringstream_t msgStream;try{
        json::value reqMsg;
        reqMsg[U("userName")]= json::value::string(userName);
        reqMsg[U("userPassword")]= json::value::string(passWord);
        reqMsg.serialize(msgStream);}catch(const std::exception &e){
        std::cerr << e.what()<<'\n';return;}
        ……………………………………

        // request,同步方式
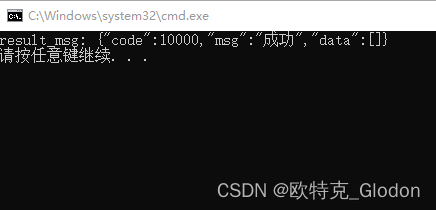
        http_response response = client.request(Request).get();if(response.status_code()== status_codes::OK){try{// 输出返回的所有json内容
                std::wstring result_msg = response.extract_string().get();
                std::wcout.imbue(std::locale("chs"));
                std::wcout <<"result_msg: "<< result_msg << std::endl;}catch(const std::exception &e){
                std::wcout << e.what()<< std::endl;}}
2)Get接口使用:
//Get请求:获取url = "http://10.31.222.186:80/messag/projects/count?projectId=a6a6aa80-140f--412a7f4d"返回的json文件;/*    std::wstring wsServersite = L"http://10.31.222.186:80/";
    std::wstring wsURI = L"/messag/projects/count";
    std::wstring wsName = L"projectId";
    std::wstring wsValue = L"a6a6aa80-140f--412a7f4d";
*/
核心代码:
// default timeout is 30s, set to 10s
        http_client_config config;
        config.set_timeout(utility::seconds(10));// Create http_client to send the request.
        http_client client(wsServersite);// Add Header
        http_request Request(methods::GET);
        Request.headers().add(L"x-userid", L"9084572");
        Request.headers().add(L"Authorization", L"Bearer cn-4146-b6d4-45c338da581d");// request,同步方式
        ……………………………………

        if(response.status_code()== status_codes::OK){// 输出返回的所有json内容
            std::wstring result_msg = response.extract_string().get();
            std::wcout.imbue(std::locale("chs"));
            std::wcout <<"result_msg: "<< result_msg << std::endl;}else{
            std::wcout <<"error:"<< response.status_code()<< std::endl;}
4、cppRestSdk编译包及示例源码下载
cppRestSdk包采用了vc141编译,可以支持VS2015 / VS2017 / VS2019的使用,包含:include、lib、dll文件夹,提供x64位debug和release编译结果。
下载地址:下载地址
版权归原作者 欧特克_Glodon 所有, 如有侵权,请联系我们删除。