文章目录
1. 概述
组件 (Component) 是 Vue.js 最强大的功能之一,它是html、css、js等的一个聚合体,封装性和隔离性非常强。
组件化:
- 将一个具备完整功能的项目的一部分分割多处使用
- 加快项目的进度
- 可以进行项目的复用
组件注册分为:
全局注册和局部注册
2. 全局注册
语法:
Vue.component('组件名称', { })
,第1个参数是标签名称,第2个参数是一个选项对象。全局组件注册后,任何vue实例都可以用。
组件注意事项:
- 构造 Vue 实例时传入的各种选项大多数都可以在组件里使用(el 不能使用),只有一个例外:data必须是函数,同时这个函数要求返回一个对象 ,保证数据唯一性,防止对象发生污染。
- 组件模板必须是单个根元素(html标签)
- 组件模板的内容可以是模板字符串
Vue.component('HelloWorld', {
  data: function(){
    return {
      msg: 'HelloWorld'
    }
  },
  template: '<div>{{msg}}</div>'
});
注意:模板字符串的写法在 Vue 工程化中已被废弃。
应用:
现在我们想要自定义一个标签,并且显示“我是一个标题”的内容,该怎么做呢?
<divid="app"><mytitle></mytitle></div><script>// 全局组件  一次定义,随时使用// 一但声明完成,就可以在所有的组件中直接使用,无需引入和注册
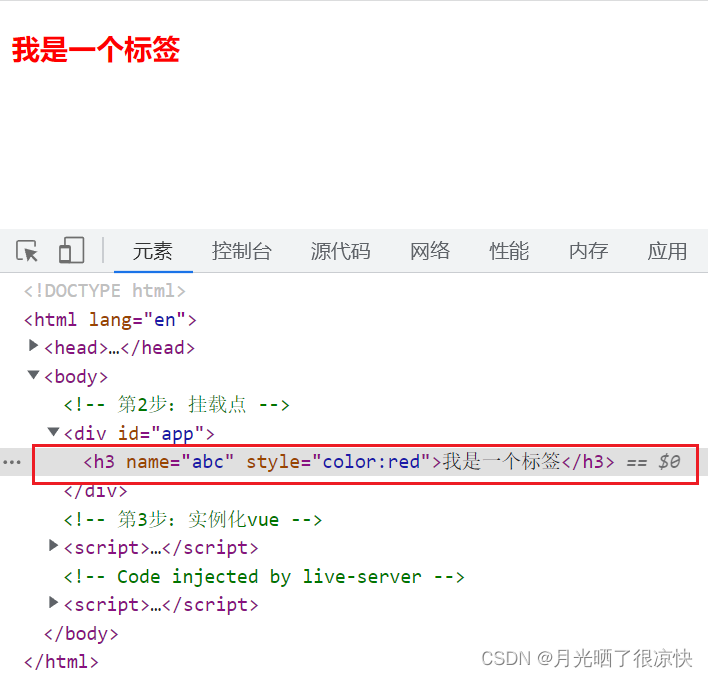
    Vue.component('mytitle',{// render 用于直接生成虚拟dom(生成标签)// 在工程化中,render中可以直接写jsx,在引入一个babel可以写jsx语法(js的增强版本)render(h){// h(生成的标签名称,标签中有哪些属性(没有属性就是null),子元素是什么)let vnode =h('h3',{attrs:{name:'abc',style:'color:red'}},'我是一个标签')return vnode
        }})const vm =newVue({el:'#app',data:{}})</script>
注意:
- 自定义的标签,在vue项目中,称为组件
- 没有使用工程化时,我们使用浏览器解析标签,所以定义组件不能使用单标签写法,否则组件无法被多次执行,因为但标签写法浏览器在解析的时候觉得有问题,不再执行后续标签。而在工程化中,我们会使用很多包来编译html标签,单标签写法是允许的
使用模板字符串生成组件,并且实现组件嵌套:
<divid="app"><mytitle></mytitle></div><script>// 定义的组件,它的元素必须要有一个顶层元素进行包裹,否则报错
    Vue.component('mytitle',{data(){return{title:'我是一个标题'}},template:`<div>
        <h3 name='abc' @click="setTitle">{{title}}</h3><div>aaaa</div>
        <hr />
        <subtitle></subtitle>
    </div>`,// 组件中可以写方法methods:{setTitle(){this.title = Date.now()}}})// 又一个全局组件,可以嵌套
    Vue.component('subtitle',{template:`<div>
          <h3>我是一个子标题</h3>
    </div>`})const vm =newVue({el:'#app',data:{}})</script>
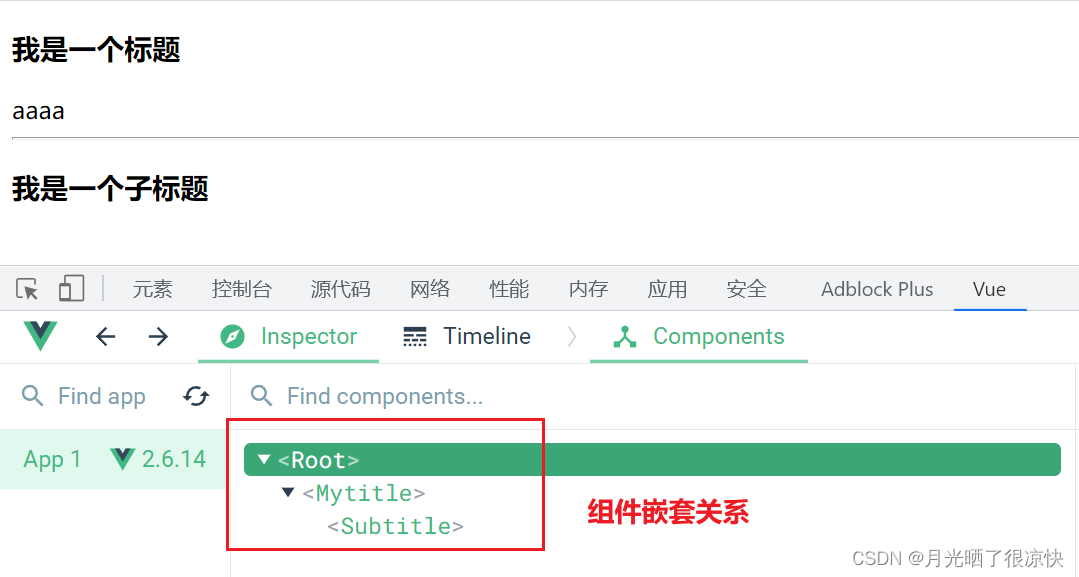
注意:定义的组件,它的元素必须要有一个顶层元素进行包裹,否则报错
3. 以插件方式定义全局组件
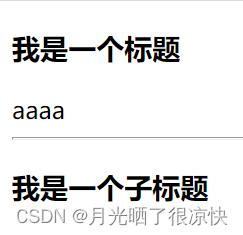
这种方式,可以使得组件的使用更加灵活,当需要使用全局组件时,就通过插件插入,不用时,就移除。
<divid="app"><!-- 自定义的标签,在vue项目中,称为组件 --><mytitle></mytitle></div><script>constmyTitleCmp=Vue=>{
        Vue.component('mytitle',{data(){return{title:'我是一个标题'}},template:`<div>
        <h3 name='abc' @click="setTitle">{{title}}</h3><div>aaaa</div>
        <hr />
        <subtitle></subtitle>
    </div>`,methods:{setTitle(){this.title = Date.now()}}})

        Vue.component('subtitle',{template:`<div>
          <h3>我是一个子标题</h3>
    </div>`})}// 通过插件的方式定义组件
    Vue.use(myTitleCmp)const vm =newVue({el:'#app',data:{}})</script>
4. 局部注册(单文件组件)
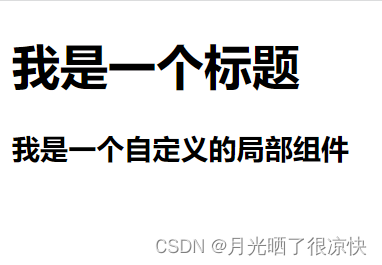
<divid="app"><child></child></div><script>// 创建局部组件,它就是一个对象// 局部组件,在创建完成后,如果你要给别人使用,一定要在配置中进行对应的配置const child ={data(){return{title:'我是一个标题'}},template:`
            <div>
        <h1>{{title}}</h1>
                <h3>我是一个自定义的局部组件</h3>
    </div>`,}const vm =newVue({el:'#app',data:{},// 局部组件配置components:{// key就是在使用时的标签名称// value就是对应的局部组件对象// child: child// 简写
            child
        }})</script>
自定义局部组件中的生命周期函数执行顺序
初始化阶段生命周期中,父组件和子组件的执行顺序:
<divid="app"><h3>{{title}}</h3><child></child></div><script>const child ={data(){return{title:'我是一个标题'}},template:`
            <div>
        <h1>{{title}}</h1>
                <h3>我是一个自定义的局部组件</h3>
    </div>`,beforeCreate(){
            console.log('child -- beforeCreate')},created(){
            console.log('child -- created')},beforeMount(){
            console.log('child -- beforeMount')},mounted(){
            console.log('child -- mounted')}}const vm =newVue({el:'#app',data:{title:'aaaa',},// 局部组件配置components:{
            child,},beforeCreate(){
            console.log('parent -- beforeCreate')},created(){
            console.log('parent -- created')},beforeMount(){
            console.log('parent -- beforeMount')},mounted(){
            console.log('parent -- mounted')setTimeout(()=>{this.$destroy()},1000)}})</script>
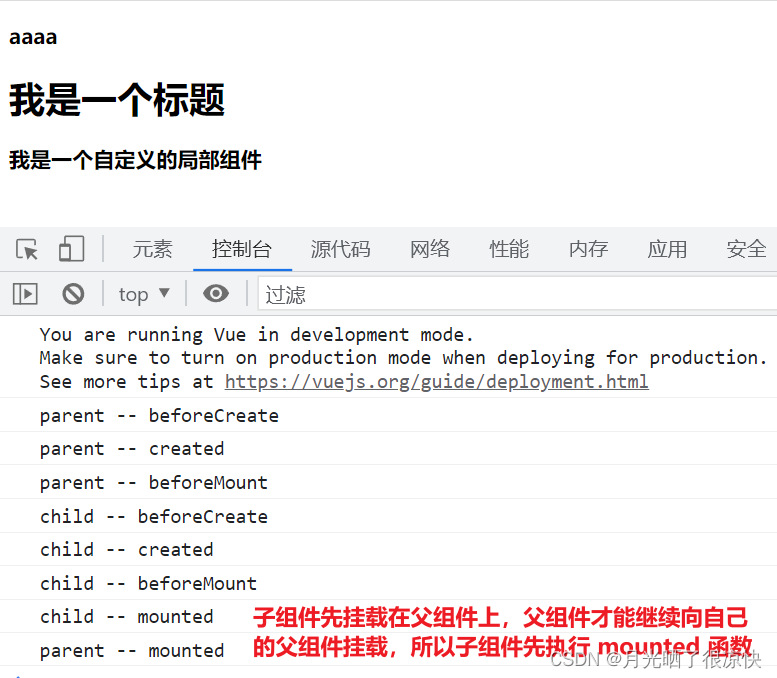
更新阶段生命周期,父组件和子组件的执行顺序:
<divid="app"><h3>{{title}}</h3><button@click="setTitle">修改</button><child></child></div><script>const child ={data(){return{title:'我是一个标题'}},template:`
            <div>
        <h1>{{title}}</h1>
                <h3>我是一个自定义的局部组件</h3>
    </div>`,beforeUpdate(){
            console.log('child -- beforeUpdate')},updated(){
            console.log('child -- updated')}}const vm =newVue({el:'#app',data:{title:'aaaa',},// 局部组件配置components:{
            child
        },beforeUpdate(){
            console.log('parent -- beforeUpdate')},updated(){
            console.log('parent -- updated')},methods:{setTitle(){this.title = Date.now()}}})</script>
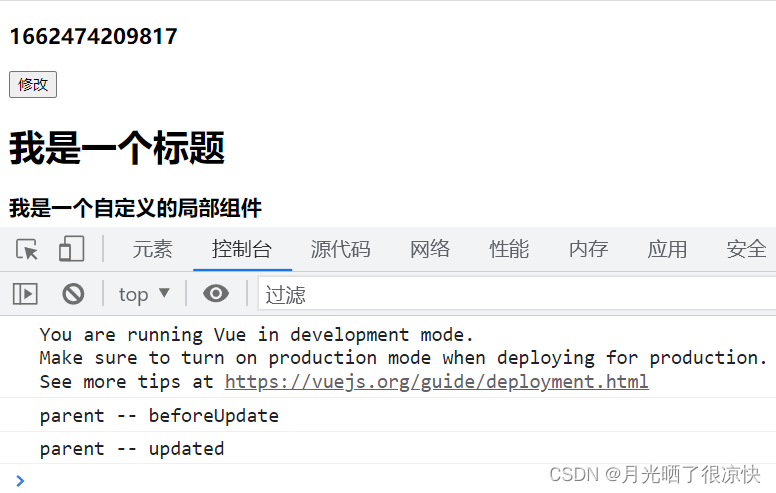
注意:上面的代码中,子组件的更新阶段函数并没有执行,说明子组件没有被更新。原因是 Vue 会进行数据劫持,劫持完后的watch监听器会监听哪些组件发生了更新,哪个组件更新就改变哪个组件,所以父组件更新并不会引起子组件的更新,而在 react 中,父组件更新,父组件下的所有子组件都会发生更新。
那么如果父组件和子组件同时更新,更新阶段的生命周期函数的执行顺序是怎样的呢?
<divid="app"><button@click="setTitle">修改</button><child:ptitle="title"></child></div><script>const child ={// 父通过自定义属性向子传数据props:['ptitle'],data(){return{title:'我是一个标题'}},template:`
            <div>
        <h1>{{title}}---{{ptitle}}</h1>
    </div>`,beforeUpdate(){
            console.log('child -- beforeUpdate')},updated(){
            console.log('child -- updated')}}const vm =newVue({el:'#app',data:{title:'aaaa',},// 局部组件配置components:{
            child
        },beforeUpdate(){
            console.log('parent -- beforeUpdate')},updated(){
            console.log('parent -- updated')},methods:{setTitle(){this.title = Date.now()}}})</script>
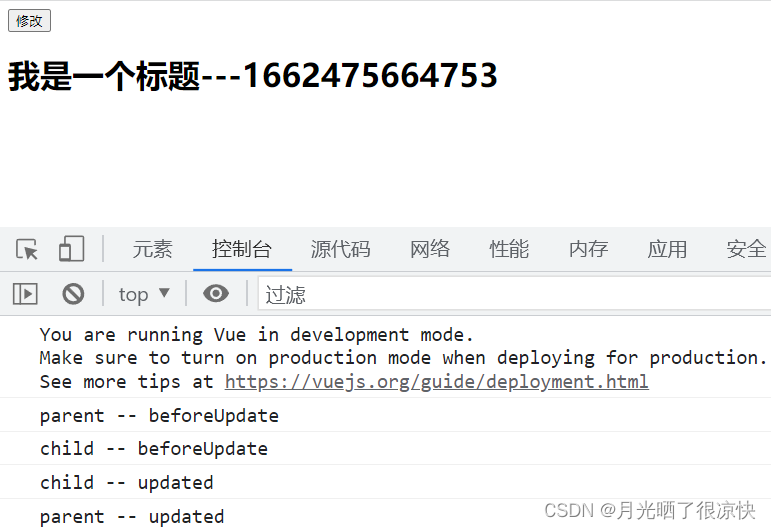
销毁阶段生命周期,父组件和子组件的执行顺序:
<divid="app"><child></child></div><script>const child ={data(){return{title:'我是一个标题'}},template:`
            <div>
        <h1>{{title}}</h1>
    </div>`,beforeDestroy(){
            console.log('child -- beforeDestroy')},destroyed(){
            console.log('child -- destroyed')}}const vm =newVue({el:'#app',data:{title:'aaaa',},// 局部组件配置components:{
            child
        },mounted(){
            console.log('parent -- mounted')setTimeout(()=>{this.$destroy()},1000)},beforeDestroy(){
            console.log('parent -- beforeDestroy')},destroyed(){
            console.log('parent -- destroyed')}})</script>
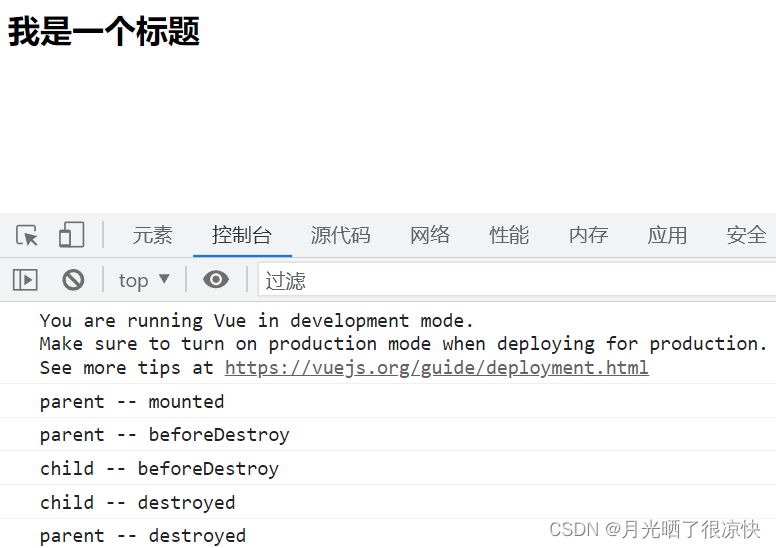
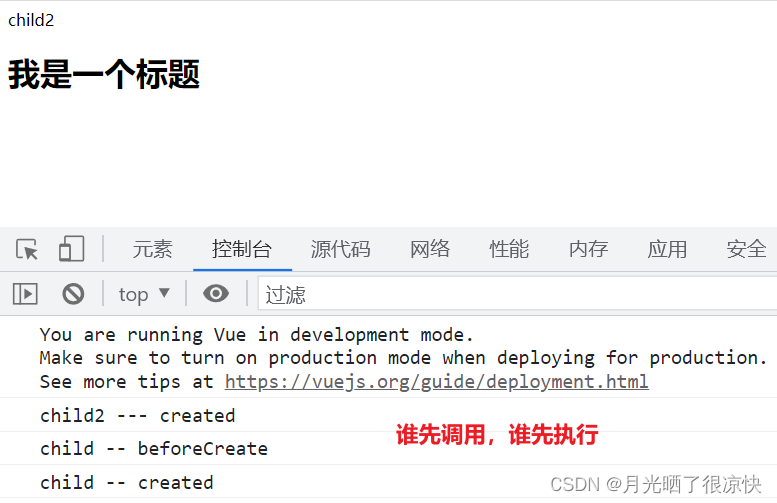
两兄弟元素,生命周期函数的执行顺序:
<divid="app"><!-- child2先调用,先执行 --><child2></child2><child></child></div><script>const child ={data(){return{title:'我是一个标题'}},template:`
            <div>
        <h1>{{title}}</h1>
    </div>`,beforeCreate(){
            console.log('child -- beforeCreate')},created(){
            console.log('child -- created')}}const child2 ={template:`<div>child2</div>`,created(){
            console.log('child2 --- created')}}const vm =newVue({el:'#app',data:{title:'aaaa',},// 局部组件配置components:{
            child,
            child2
        }})</script>
5. 捕获子组件中的错误信息
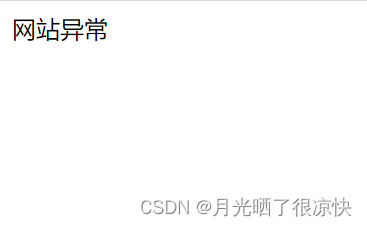
<divid="app"><templatev-if="!error"><child></child></template><!-- 如果捕获到错误就显示网站异常 --><templatev-else><div>网站异常</div></template></div><script>// 对于警告也要进行捕获
    Vue.config.warnHandler=function(err, vm, info){// console.log(err, vm, info)// 它只是一个警告,可以记录,也可以不记录,只要不在生产控制台中显示出来就可以}const child ={name:'child',template:`<div>
            <h3>我是一个子组件 --- {{title}}</h3>
    </div>`,created(){
            a
        }}// 在vue中有一个生命周期,它可以收集子孙组件中的错误信息,进行捕获const vm =newVue({el:'#app',components:{
            child
        },data:{error:false},// 子孙组件错误的捕获,它要返回一个布尔类型,如果为false,则不向上传递错误了// err具体的错误    此信息是最为关键// vm发生错误的虚拟dom对象(哪一个组件错的)// info 相关提示信息errorCaptured(err, vm, info){// console.log(err, vm, info)// 得到错误信息,进行网络请求,发给服务器端,让他记录下面,然后我们在统一来处理问题// fetch 可以通过ajax发送错误信息到后端,将错误信息统一记录下来,按照权重修复对应bug// 生产环境中,有时候报错,可能会有安全隐患(暴露服务器地址)this.error =truereturnfalse}})</script>
注意:
- 在 vue 中存在 errorCaptured 生命周期,它可以收集子孙组件中的错误信息,进行捕获。
- 得到错误信息,进行网络请求,发给服务器端,让服务器收集记录,然后我们按照权重修复对应 bug。
- 生产环境中,有时候报错,可能会有安全隐患(暴露服务器地址)。
- 警告,可以记录,也可以不记录,只要不在生产控制台中显示出来就可以。
6. 动态组件
概述:
通过使用保留的
<component>
元素,动态地绑定到它的
is
特性,我们让多个组件可以使用同一个挂载点,并动态切换。
应用:
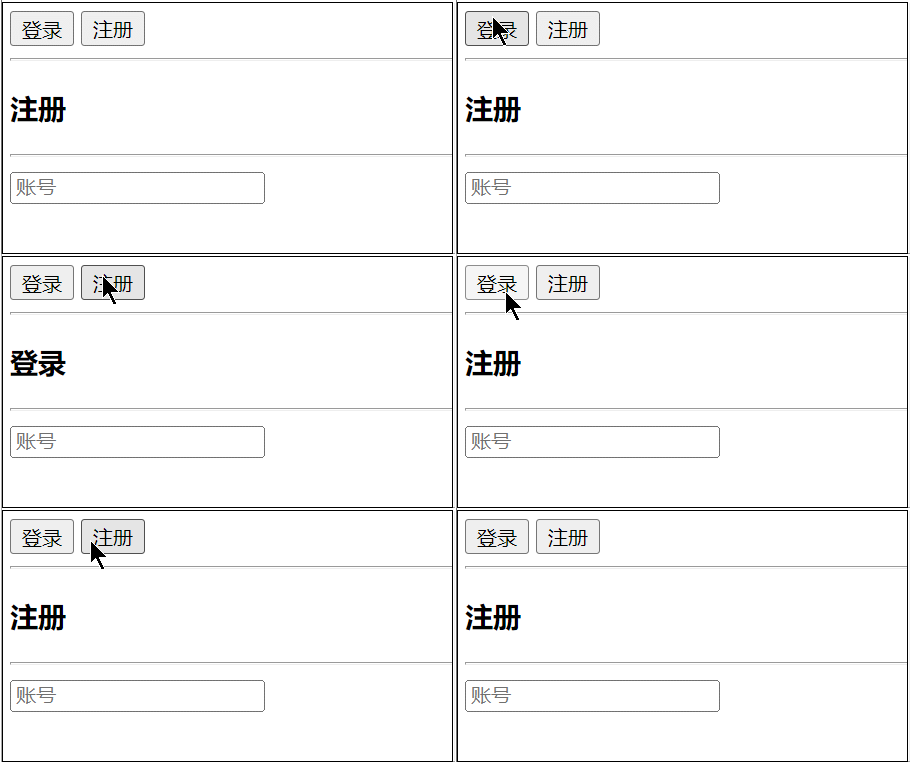
<divid="app"><!--    动态组件 component 标签完成对应的切换显示 --><div><button@click="cmp='login'">登录</button><button@click="cmp='reg'">注册</button></div><hr><!--    动态组件 动态的根据data中的数据来完成,对应名称的组件的调用显示 --><component:is="cmp"></component></div><script>const reg ={name:'reg',data(){return{username:''}},template:`
            <div>
                <h3>注册</h3>
                <hr>
                <input type="text" v-model="username" placeholder="账号">
    </div>
        `}const login ={name:'login',data(){return{username:''}},template:`
            <div>
                <h3>登录</h3>
                <hr>
                <input type="text" v-model="username" placeholder="账号">
    </div>
        `}const vm =newVue({el:'#app',components:{
            reg, login
        },data:{// cmp的值 ,作为动态组件中的is属性所用,所以它的值只能是components配置中的属性(reg或login)cmp:'reg'}})</script>
缓存组件:
在上述代码中,当我们在登录组件和注册组件中分别执行生命周期函数
created
时,我们发现,每一次切换 tab 都会销毁切换前组件,新创建切换后组件。
<divid="app"><div><button@click="cmp='login'">登录</button><button@click="cmp='reg'">注册</button></div><hr><component:is="cmp"></component></div><script>const reg ={name:'reg',data(){return{username:''}},template:`
            <div>
                <h3>注册</h3>
                <hr>
                <input type="text" v-model="username" placeholder="账号">
    </div>
        `,created(){
            console.log('reg --- created')}}const login ={name:'login',data(){return{username:''}},template:`
            <div>
                <h3>登录</h3>
                <hr>
                <input type="text" v-model="username" placeholder="账号">
    </div>
        `,created(){
            console.log('login --- created')}}const vm =newVue({el:'#app',components:{
            reg, login
        },data:{// cmp的值 ,作为动态组件中的is属性所用,所以它的值只能是components配置中的属性(reg或login)cmp:'reg'}})</script>
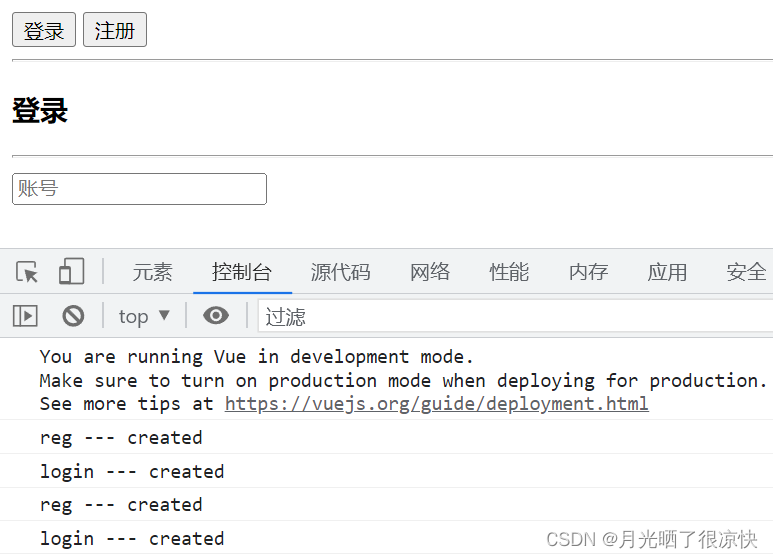
这意味着,如果我们在输入框中输入信息,则一切换组件,信息就没了。这时我们需要用到缓存组件。
<divid="app"><!--    动态组件 component 标签完成对应的切换显示 --><div><button@click="cmp='login'">登录</button><button@click="cmp='reg'">注册</button></div><hr><!--    动态组件 动态的根据data中的数据来完成,对应名称的组件的调用显示 --><!--    缓存组件 --><!--
include(白名单,选择要缓存谁)    它是一个数组,元素中对应组件的name名称,写在此数组中,要进行缓存
exclude(黑名单,选择不要缓存谁) 它是一个数组,元素中对应组件的name名称,写在此数组中,不进行缓存
--><!--    <keep-alive :include="['login']">--><!-- <keep-alive :exclude="['login']"> --><keep-alive><component:is="cmp"></component></keep-alive></div><script>const reg ={name:'reg',data(){return{username:''}},template:`
            <div>
                <h3>注册</h3>
                <hr>
                <input type="text" v-model="username" placeholder="账号">
    </div>
        `,created(){
            console.log('reg --- created')},// 下面这两种生命周期钩子,只有标签中有keep-alive才有用activated(){
            console.log('reg --- activated')},deactivated(){
            console.log('reg --- deactivated')}}const login ={name:'login',data(){return{username:''}},template:`
            <div>
                <h3>登录</h3>
                <hr>
                <input type="text" v-model="username" placeholder="账号">
    </div>
        `,created(){
            console.log('login --- created')},activated(){
            console.log('login --- activated')},deactivated(){
            console.log('login --- deactivated')}}const vm =newVue({el:'#app',components:{
            reg, login
        },data:{// cmp的值 ,作为动态组件中的is属性所用,所以它的值只能是components配置中的属性(reg或login)cmp:'reg'}})</script>
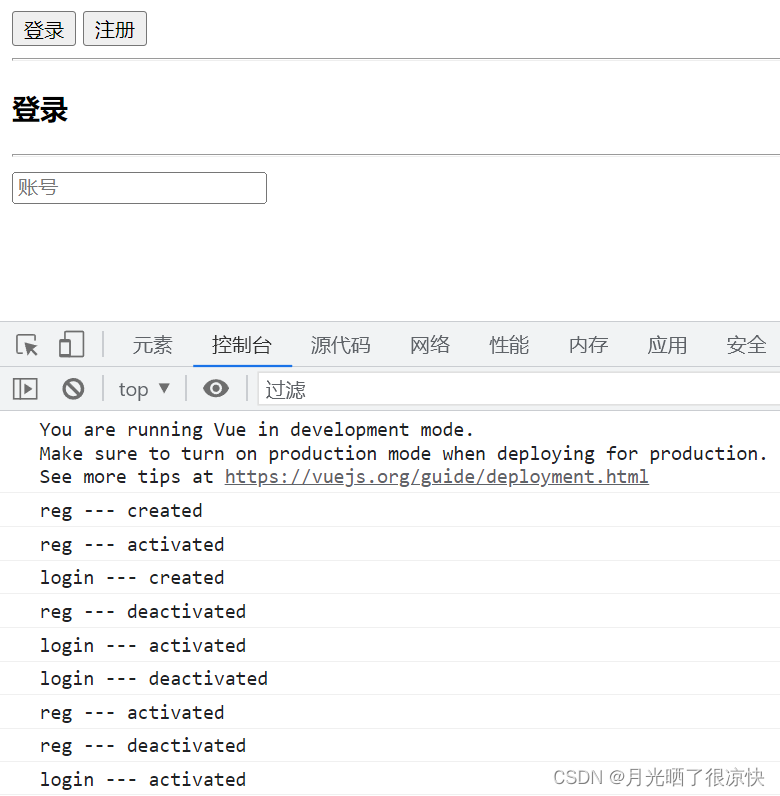
注意:
- 缓存组件中的元素并没有被销毁,而是处于未被激活状态,tab 切换时的性能得到很大的提升
- 缓存组件带来的问题是,组件的初始化阶段生命周期函数只执行一次
- Vue 提供了 activated 和 deactivated 两个生命周期钩子函数用来判断组件处于激活状态还是未激活状态。在缓存组件中,虽然初始化生命周期钩子函数只在创建组件时执行一次,但是如果有了这两个钩子函数,我们的代码就可以通过这两个函数进行捕获
- activated 和 deactivated 只有标签中有keep-alive才有用
- keep-alive 标签有两个属性,include 和 exclude。
版权归原作者 月光晒了很凉快 所有, 如有侵权,请联系我们删除。