
毕设项目-人脸识别考勤签到系统
人脸识别小程序、签到小程序,借助百度AI智能识别功能实现。
需求说明
学生信息管理,考勤管理,人脸识别处理大概这三个模块。
功能模块:
- 登录与注册(两种身份 老师或学生)
- 课程发布(老师可以发布课程信息 名称 地点 选课人数)
- 课程查看(学生查看课程信息)
- 人脸录入(学生登录后有录入人脸功能)
- 考勤发布(老师发布考勤签到,课程名称,开始时间和结束时间)
- 学生签到(人脸识别签到,签到失败,迟签,签到成功)
- 考勤记录查看(学生ID,课程名称,签到状态)
功能分析
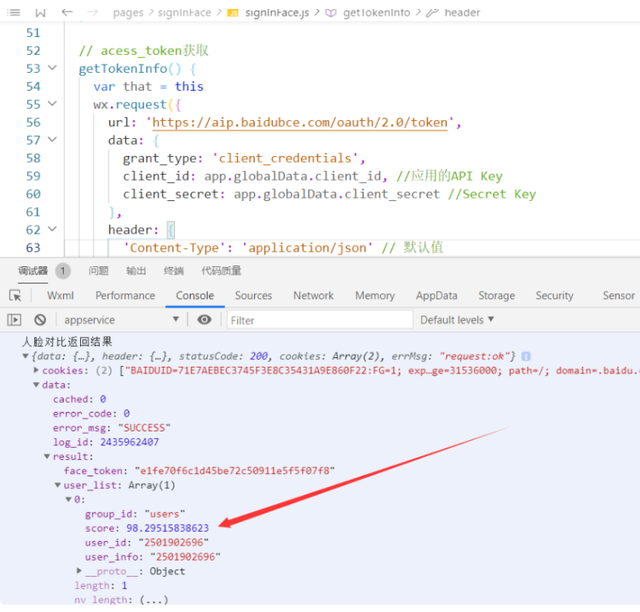
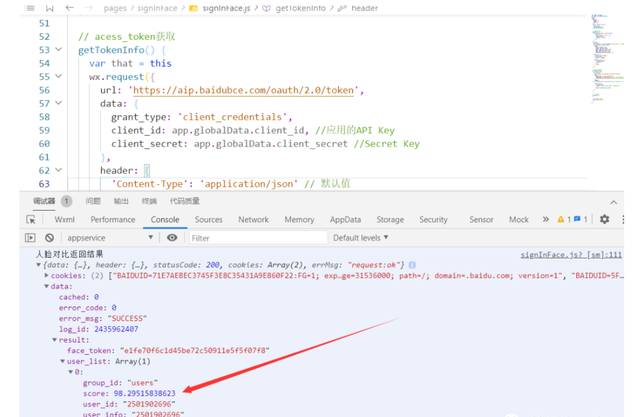
人脸识别调用百度智能云api就可以。做人脸识别签到,其实就是要拿识别的人脸和数据库里的人脸对比,相识度大于一定的值,就可以判定成功。
如我们识别的结果是98.295%,所以这里就可以认定为签到成功。
效果图
还没签到
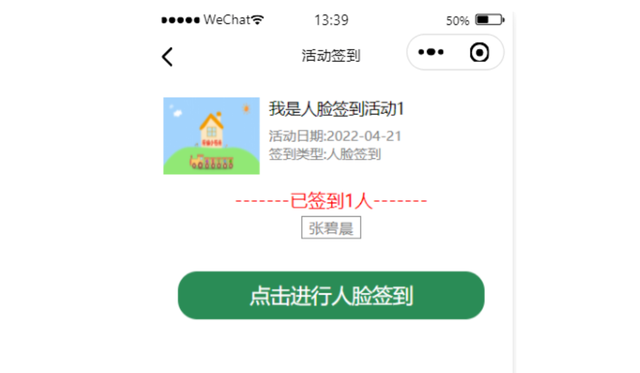
签到

签到成功

接入人脸识别
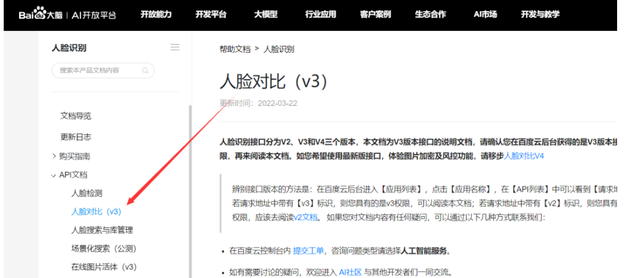
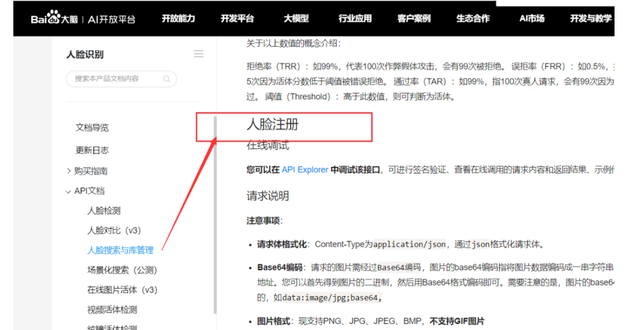
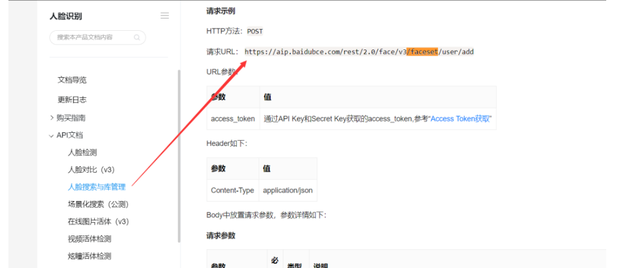
人脸注册
我们要想实现人脸识别,就需要一开始先在百度的可视化人脸库里注册人脸,要调用的接口如下。
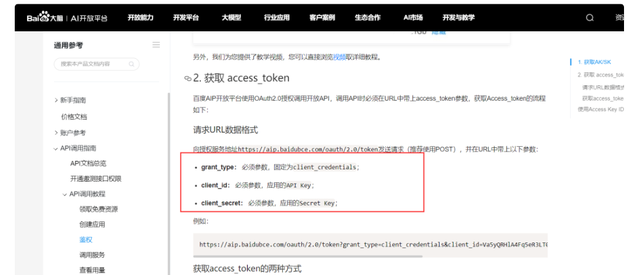
获取acess_token
在调用这个之前,我们需要先去获取对应的acess_token,所以接下来我们要做的第一步就是获取acess_token。我们后面做的所有操作,基本上都要获取这个。
wx.request({
      url: 'https://aip.baidubce.com/oauth/2.0/token',
      data: {
        grant_type: 'client_credentials',
        client_id:, //应用的API Key
        client_secret:  //应用的Secret Key
      },
      header: {
        'Content-Type': 'application/json' // 默认值
      },
      success: res => {
        this.setData({
          token: res.data.access_token //获取到token
        })
        console.log('获取到的token', this.data.token)
      }
    })
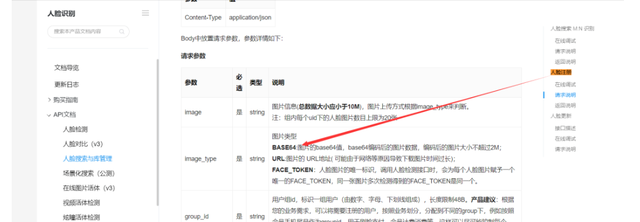
拍人脸照,注册人脸到百度人脸库
我们在拍照以后,获取到图片,并通过 wx.getFileSystemManager().readFile()方法把图片转换为base64,因为百度需要这样格式的数据。
var that = this;
    //拍照
    const ctx = wx.createCameraContext()
    ctx.takePhoto({
      quality: 'high',
      success: (res) => {
        that.setData({
          src: res.tempImagePath //获取图片
        })
        //图片base64编码
        wx.getFileSystemManager().readFile({
          filePath: that.data.src, //选择图片返回的相对路径
          encoding: 'base64', //编码格式
          success: res => { //成功的回调
            that.setData({
              base64: res.data
            })
            //第三步:上传人脸进行注册
            wx.request({
                url: 'https://aip.baidubce.com/rest/2.0/face/v3/faceset/user/add?access_token=' + that.data.token,
                method: 'POST',
                data: {
                  image: that.data.base64,
                  image_type: 'BASE64',
                  group_id: 'users', //自己建的用户组id
                  user_id: app.globalData.userInfo.phone, //学号
                  user_info: app.globalData.userInfo.name //存储学生姓名
                },
                header: {
                  'Content-Type': 'application/json' // 默认值
                },
                success(res) {
                  that.setData({
                    msg: res.data.error_msg
                  })
                  console.log("人脸注册返回结果", res)
                  //做成功判断
                  if (that.data.msg == 'SUCCESS') { //微信js字符串使用单引号
                    wx.showToast({
                      title: '注册成功',
                      icon: 'success',
                      duration: 2000
                    })
                    // that.registerFace()
                  }
                }
              }),
              //失败尝试
              wx.showToast({
                title: '请重试',
                icon: 'loading',
                duration: 500
              })
          }
        })
      } //拍照成功结束
    }) //调用相机结束
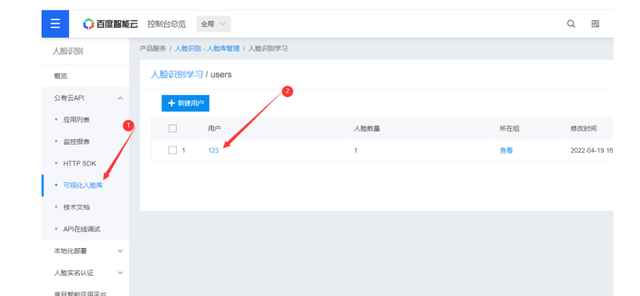
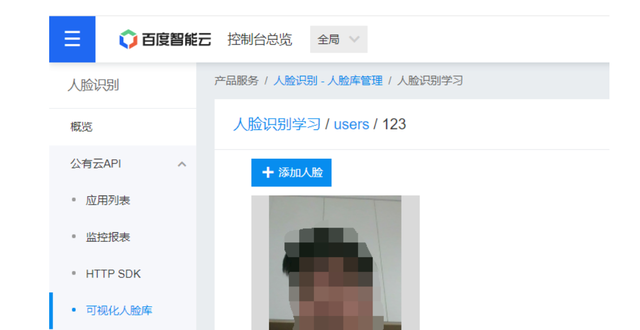
我们注册完以后,可以在百度人脸库里看到这条数据,可以看到我们创建的users表。
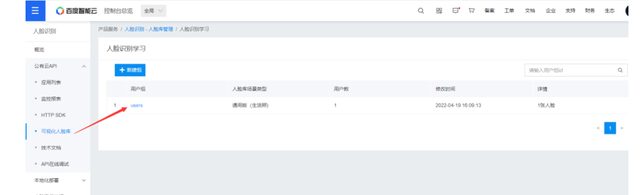
查看人脸库
人脸比对
我们上面注册好人脸以后,接下来就可以使用人脸打卡功能了。 使用之前还是第一步,获取acess_token。
获取acess_token
// acess_token获取
  getTokenInfo() {
    var that = this
    wx.request({
      url: 'https://aip.baidubce.com/oauth/2.0/token',
      data: {
        grant_type: 'client_credentials',
        client_id: app.globalData.client_id, //应用的API Key
        client_secret: app.globalData.client_secret //Secret Key
      },
      header: {
        'Content-Type': 'application/json' // 默认值
      },
      success(res) {
        that.setData({
          token: res.data.access_token //获取到token
        })
        console.log(that.data.token)
      }
    })

  },
人脸比对
//拍照并编码
  takePhoto() {
    let that=this
    const ctx = wx.createCameraContext()
    ctx.takePhoto({
      quality: 'high',
      success: (res) => {
        //图片base64编码
        wx.getFileSystemManager().readFile({
          filePath: res.tempImagePath, //选择图片返回的相对路径
          encoding: 'base64', //编码格式
          success: res => { //成功的回调
            that.signInFace(res.data)
          }
        })
      }
    })
  },

  //上传人脸进行 比对
  signInFace(base64) {
    var that = this

    if (base64 != "") {
      wx.request({
        url: 'https://aip.baidubce.com/rest/2.0/face/v3/search?access_token=' + that.data.token,
        method: 'POST',
        data: {
          image: base64,
          image_type: 'BASE64',
          group_id_list: 'users' //自己建的用户组id
        },
        header: {
          'Content-Type': 'application/json' // 默认值
        },
        success(res) {
          console.log("人脸对比返回结果", res)
          if (res.data.error_msg == "match user is not found") {
            wx.showModal({
              title: '签到失败',
              content: '请先注册人脸才可以人脸使用',
            })
          }

          if (res.data.error_msg == "SUCCESS") {
            that.setData({
              msg: res.data.result.user_list[0].score,
            })
            // console.log(res)
            if (that.data.msg > 80) { //相似度大于80
              console.log('人脸识别成功')
            } else {
              wx.showToast({
                title: '人脸识别失败',
              })
            }
          } else {
            wx.showToast({
              title: '人脸识别失败',
            })
          }
        }
      });
    }
    if (base64 == "") {
      wx.showToast({
        title: '请重试',
        icon: 'loading',
        duration: 500
      })
    }
  },
我们执行代码以后,会返回一个相识度,我这里规定相识度80%以上即为同一个人。看日志可以知道我们的相识度是98.295%,所以这里就可以认定为签到成功。
本文转载自: https://blog.csdn.net/qq_29528701/article/details/125002794
版权归原作者 mon_star° 所有, 如有侵权,请联系我们删除。
版权归原作者 mon_star° 所有, 如有侵权,请联系我们删除。