

之前 JavaWeb 学的不是太好,准备从下边列的三个发展阶段,每个阶段以项目形式去补充基础
JavaWeb 发展阶段:
- Servlet + Jsp
- SSM:SpringMVC + Spring + MyBatis其实在中间阶段还存在 SSH(Struts + Spring + Hibernate),SSM 框架其实就是用:SpringMVC 可以完全替代 Struts,配合注解的方式,编程非常快捷,而且通过 restful 风格定义 url,让地址看起来非常优雅MyBatis 替换 Hibernate,正因为MyBatis的半自动特点,程序员可以完全掌控 SQL,这会让有数据库经验的程序猿能开发出高效率的 SQL 语句,而且 XML 配置管理起来也非常方便> SpringMVC:它用于 web 层,相当于 controller(等价于传统的 servlet 和 struts 的 action),用来处理用户请求。举个例子,用户在地址栏输入 http://网站域名/login,那么 springmvc 就会拦截到这个请求,并且调用 controller 层中相应的方法,(中间可能包含验证用户名和密码的业务逻辑,以及查询数据库操作,但这些都不是 springmvc 的职责),最终把结果返回给用户,并且返回相应的页面(当然也可以只返回 json/xml 等格式数据)。springmvc 就是做前面和后面过程的活,与用户打交道!!> > Spring:太强大了,以至于我无法用一个词或一句话来概括它。但与我们平时开发接触最多的估计就是 IOC 容器,它可以装载 bean(也就是我们 java 中的类,当然也包括 service dao 里面的),有了这个机制,我们就不用在每次使用这个类的时候为它初始化,很少看到关键字 new。另外 spring 的 aop,事务管理等等都是我们经常用到的。> > MyBatis:如果你问我它跟鼎鼎大名的 Hibernate 有什么区别?我只想说,他更符合我的需求。第一,它能自由控制 sql,这会让有数据库经验的人(当然不是说我啦捂脸)编写的代码能搞提升数据库访问的效率。第二,它可以使用 xml 的方式来组织管理我们的 sql,因为一般程序出错很多情况下是sql出错,别人接手代码后能快速找到出错地方,甚至可以优化原来写的sql
- SpringBootSpring Boot 是现在比较流行的框架,可以实现快速开发,其优点是简化了 Spring 相关组件的配置,实现自动配置,降低了项目搭建的复杂度,使开发变得更加简便Spring Boot 本身并不提供 Spring 框架的核心特性以及扩展功能,只是用于快速、敏捷地开发新一代基于 Spring 框架的应用程序。Spring Boot 只是起到一个承载的作用,辅助你简化项目搭建的过程。如果承载的是 Web 项目,使用 Spring MVC 作为 MVC 框架,那么整个业务工作流程还是由 Spring MVC 来完成的,因此 Spring Boot 并不能替代 Spring MVC,它只是简化了 Spring MVC 的相关配置,Spring Boot 帮你完成了很多底层工作,相当于一个脚手架在 SpringBoot 之前的框架项目部署都是以 war 包方式需要上传到 tomcat 运行,但是在 SpringBoot 中进行了简化,SpringBoot 内嵌 tomcat 可以以微服务的方式直接运行 jar 包项目
学了 Spring Boot,还有必要学 Spring MVC 吗?
正如这篇文章中所说,SpringBoot 确实是现在用的比较多,但是作为一个安全研究人员要懂得更多的底层知识而不是简单的应用,所以还是要从基础的 Serlvet jsp 往后一步一步走
IDEA常用快捷键
ctrl+shift+alt:多行操作
psvm:生成main()方法;
fori:生成for循环;
Ctrl+Alt+v:自动补齐返回值类型
ctrl+o:覆写方法
ctrl+i:实现接口中的方法
ctrl+shift+u:大小写转换
CTRL+SHIFT+Z:取消撤销
Alt+Insert:生成构造方法、getter、setter
ctrl+y:删除当前行
Ctrl+Shift+J:将选中的行合并成一行
ctrl+g:定位到某一行
Ctrl+Shitft+向下箭头:将光标所在的代码块向下整体移动
Ctrl+Shift+向上箭头:将光标所在的代码块向上整体移动
Alt+Shift+向下箭头:将行向下移动
Alt+Shift+向上箭头:将行向上移动
Ctrl+F:在当前文件中查找
Ctrl+R:替换字符串
Ctrl+Shift+F:在全局文件中查找字符串
Ctrl+Shift+R:在全局中替换字符串
Ctrl+Shift+Enter:自动补齐{}或者分号;
Shift+Enter:在当前行的下方开始新行
Ctrl+Alt+Enter:在当前行的上方插入新行
Ctrl+Delete:删除光标所在至单词结尾处的所有字符
Servlet+Jsp
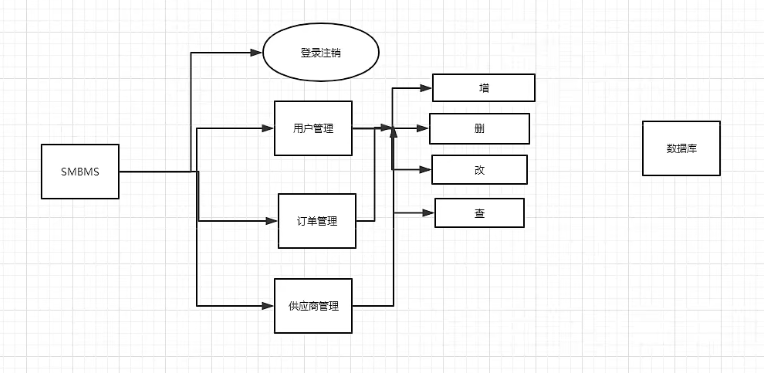
MBMS
项目结构
数据库结构
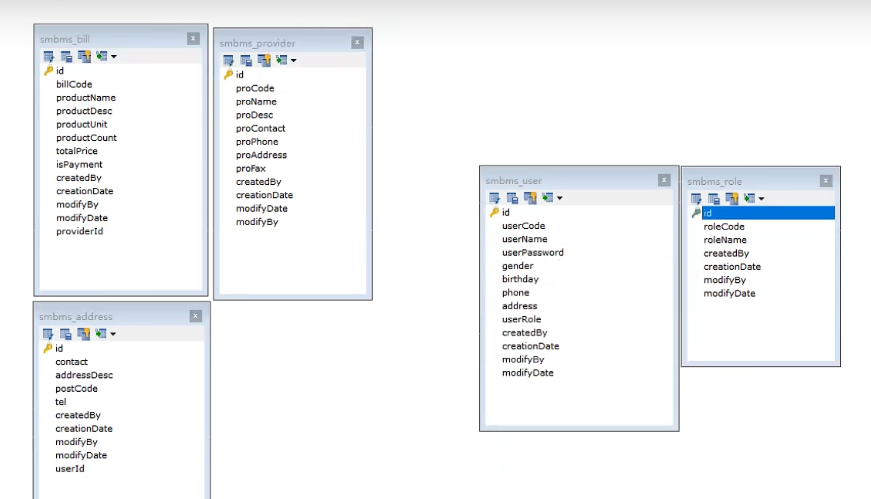
CREATETABLE`smbms_address`(`id`bigint(20)NOTNULLAUTO_INCREMENTCOMMENT'主键',`contact`varchar(15)DEFAULTNULLCOMMENT'联系人姓名',`addressDesc`varchar(50)DEFAULTNULLCOMMENT'收货地址',`postCode`varchar(15)DEFAULTNULLCOMMENT'邮编',`tel`int(20)DEFAULTNULLCOMMENT'联系人电话',`createdBy`varchar(20)DEFAULTNULLCOMMENT'创建者',`creationDate`datetimeDEFAULTNULLCOMMENT'创建时间',`modifyBy`bigint(20)DEFAULTNULLCOMMENT'修改者',`modifyDate`datetimeDEFAULTNULLCOMMENT'修改时间',`userId`bigint(20)DEFAULTNULLCOMMENT'用户ID',PRIMARYKEY(`id`))ENGINE=InnoDBDEFAULTCHARSET=utf8;CREATETABLE`smbms_user`(`id`bigint(20)NOTNULLAUTO_INCREMENTCOMMENT'id',`userCode`varchar(15)DEFAULTNULLCOMMENT'用户编码',`userName`varchar(15)DEFAULTNULLCOMMENT'用户名字',`userPassword`varchar(20)DEFAULTNULLCOMMENT'用户密码',`gender`int(10)DEFAULTNULLCOMMENT'性别',`birthday`dateDEFAULTNULLCOMMENT'出生日期',`phone`varchar(20)DEFAULTNULLCOMMENT'电话',`address`varchar(30)DEFAULTNULLCOMMENT'地址',`userRole`bigint(20)DEFAULTNULLCOMMENT'用户角色',`createBy`bigint(20)DEFAULTNULLCOMMENT'创建者',`creationDate`datetimeDEFAULTNULLCOMMENT'创建时间',`modifyBy`bigint(20)DEFAULTNULLCOMMENT'更新者',`modifyDate`datetimeDEFAULTNULLCOMMENT'更新时间',PRIMARYKEY(`id`))ENGINE=InnoDBDEFAULTCHARSET=utf8;CREATETABLE`smbms_provider`(`id`bigint(20)NOTNULLAUTO_INCREMENTCOMMENT'id',`proCode`varchar(15)DEFAULTNULLCOMMENT'供应商编码',`proName`varchar(15)DEFAULTNULLCOMMENT'供应商名称',`proDesc`varchar(50)DEFAULTNULLCOMMENT'供应商描述',`proContact`varchar(15)DEFAULTNULLCOMMENT'供应商联系人',`proPhone`varchar(20)DEFAULTNULLCOMMENT'供应商电话',`proAddress`varchar(30)DEFAULTNULLCOMMENT'供应商地址',`proFax`varchar(20)DEFAULTNULLCOMMENT'供应商传真',`createdBy`bigint(20)DEFAULTNULLCOMMENT'创建者',`creationDate`datetimeDEFAULTNULLCOMMENT'创建时间',`modifyBy`bigint(20)DEFAULTNULLCOMMENT'更新者',`modifyDate`datetimeDEFAULTNULLCOMMENT'更新时间',PRIMARYKEY(`id`))ENGINE=InnoDBDEFAULTCHARSET=utf8;CREATETABLE`smbms_role`(`id`bigint(20)NOTNULLAUTO_INCREMENTCOMMENT'id',`roleCode`varchar(30)DEFAULTNULLCOMMENT'角色编码',`roleName`varchar(15)DEFAULTNULLCOMMENT'角色名称',`createdBy`bigint(20)DEFAULTNULLCOMMENT'创建者',`creationDate`datetimeDEFAULTNULLCOMMENT'创建时间',`modifyBy`bigint(20)DEFAULTNULLCOMMENT'更新者',`modifyDate`datetimeDEFAULTNULLCOMMENT'更新时间',PRIMARYKEY(`id`))ENGINE=InnoDBDEFAULTCHARSET=utf8;CREATETABLE`smbms_bill`(`id`bigint(20)NOTNULLAUTO_INCREMENTCOMMENT'id',`billCode`varchar(30)DEFAULTNULLCOMMENT'账单编码',`productName`varchar(20)DEFAULTNULLCOMMENT'商品名称',`productDesc`varchar(50)DEFAULTNULLCOMMENT'商品描述',`productUnit`varchar(60)DEFAULTNULLCOMMENT'商品数量',`productCount`decimal(20,2)DEFAULTNULLCOMMENT'总金额',`totalPrice`decimal(20,2)DEFAULTNULLCOMMENT'是否支付',`isPayment`int(10)DEFAULTNULLCOMMENT'供应商ID',`createdBy`bigint(20)DEFAULTNULLCOMMENT'创建者',`creationDate`datetimeDEFAULTNULLCOMMENT'创建时间',`modifyBy`bigint(20)DEFAULTNULLCOMMENT'更新者',`modifyDate`datetimeDEFAULTNULLCOMMENT'更新时间',`providerId`intDEFAULTNULLCOMMENT'供应商ID',PRIMARYKEY(`id`))ENGINE=InnoDBDEFAULTCHARSET=utf8;
使用 MySQL 新建数据库 smbms 数据库,执行上述语句
项目搭建
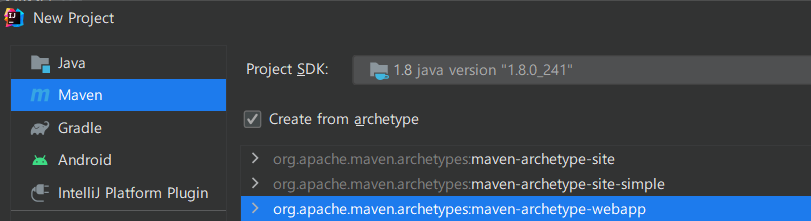
使用 maven 搭建项目
- 新建项目,使用 webapp 模板创建
 正确的项目文件目录如下,如果不对可能是因为网络原因导致 maven 项目加载失败
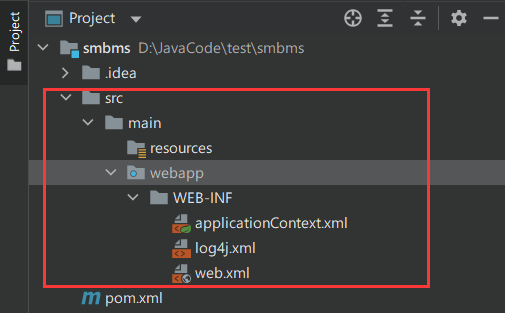 替换 WEB-INF 目录下的 web.xml 文件
<?xml version="1.0" encoding="UTF-8"?><web-app xmlns="http://xmlns.jcp.org/xml/ns/javaee" xmlns:xsi="http://www.w3.org/2001/XMLSchema-instance" xsi:schemaLocation="http://xmlns.jcp.org/xml/ns/javaee http://xmlns.jcp.org/xml/ns/javaee/web-app_4_0.xsd" version="4.0"></web-app>新建两个包 Java、resources,并且标记为文件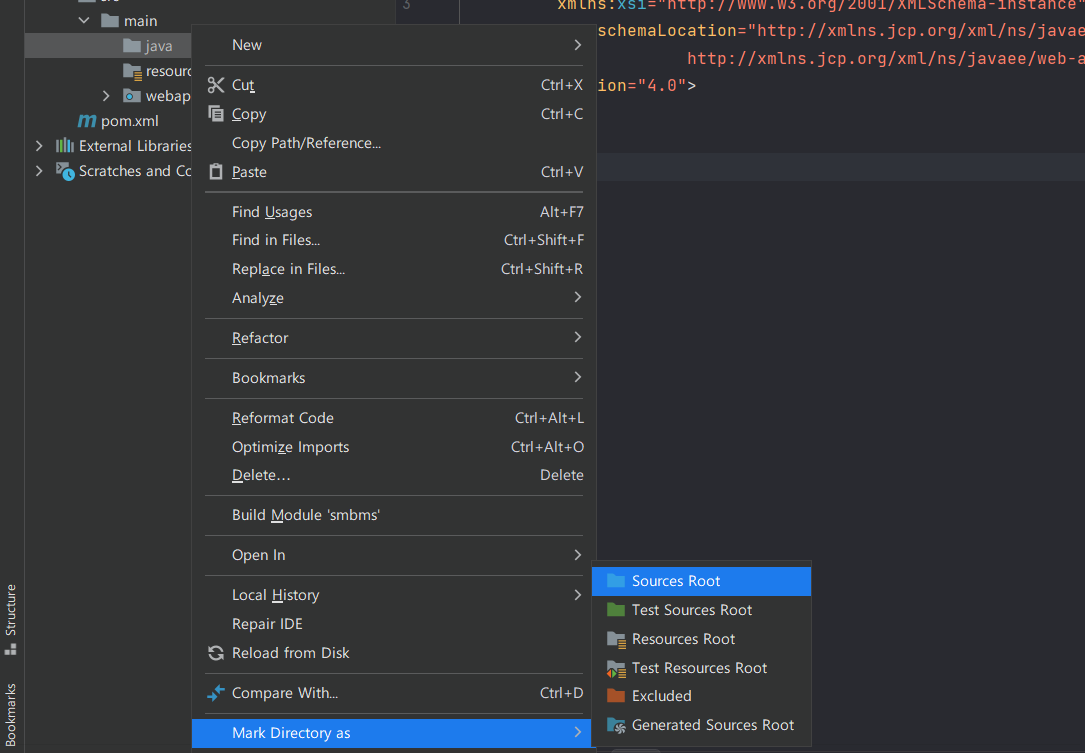
- 配置 tomcat点击 idea 右上角 add configuration
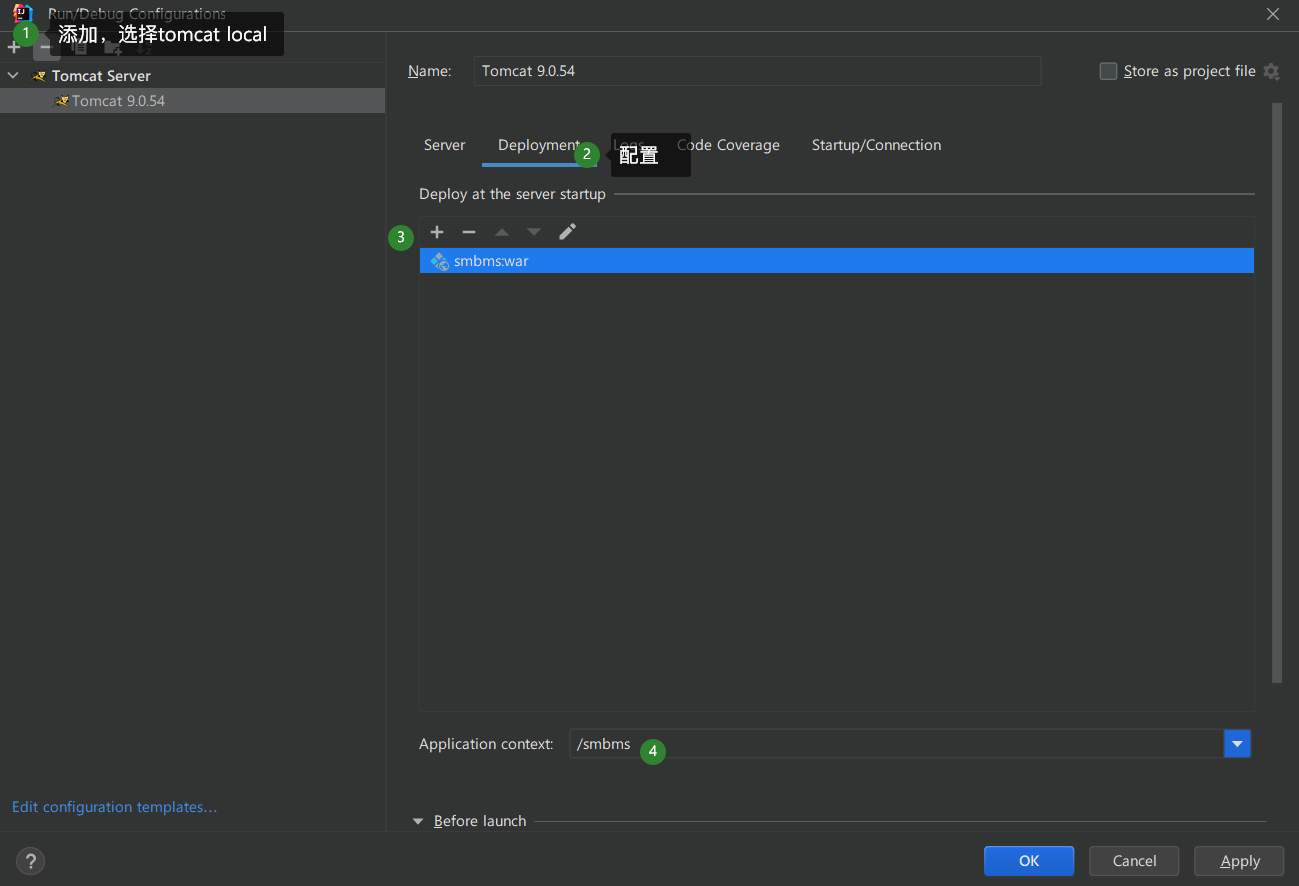 webapp 目录下没有 index.php 的话可以新建一个如果配置成 tomcat EE 会有报错
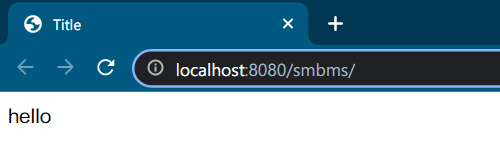
Warning:The selected directory is not a TomEE home - 启动项目测试能否正常运行
- 导包修改 pom.xml 文件,导入项目中会用到的 jar 包
<dependencies> <dependency> <groupId>javax.servlet</groupId> <artifactId>javax.servlet-api</artifactId> <version>3.1.0</version> </dependency> <dependency> <groupId>javax.servlet.jsp</groupId> <artifactId>javax.servlet.jsp-api</artifactId> <version>2.3.3</version> </dependency> <dependency> <groupId>mysql</groupId> <artifactId>mysql-connector-java</artifactId> <version>5.1.44</version> </dependency> <dependency> <groupId>javax.servlet.jsp.jstl</groupId> <artifactId>jstl-api</artifactId> <version>1.2</version> </dependency> <dependency> <groupId>taglibs</groupId> <artifactId>standard</artifactId> <version>1.1.2</version> </dependency> </dependencies>添加好后点击右上角 maven 图标,注意大概率失败原因网络问题 - 创建项目包结构
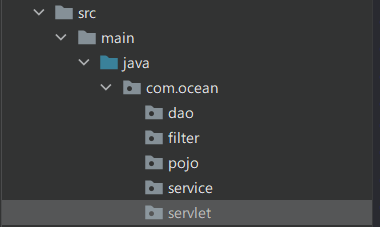 dao(data access object)数据库访问对象pojo(plain ordinary java object)普通的对象,无规则的java对象service服务层目录阿里巴巴Java开发手册中的DO、DTO、BO、AO、VO、POJO定义
 - 编写实体类:完善数据 pojo 对应数据库关系根据数据库生成对应数据
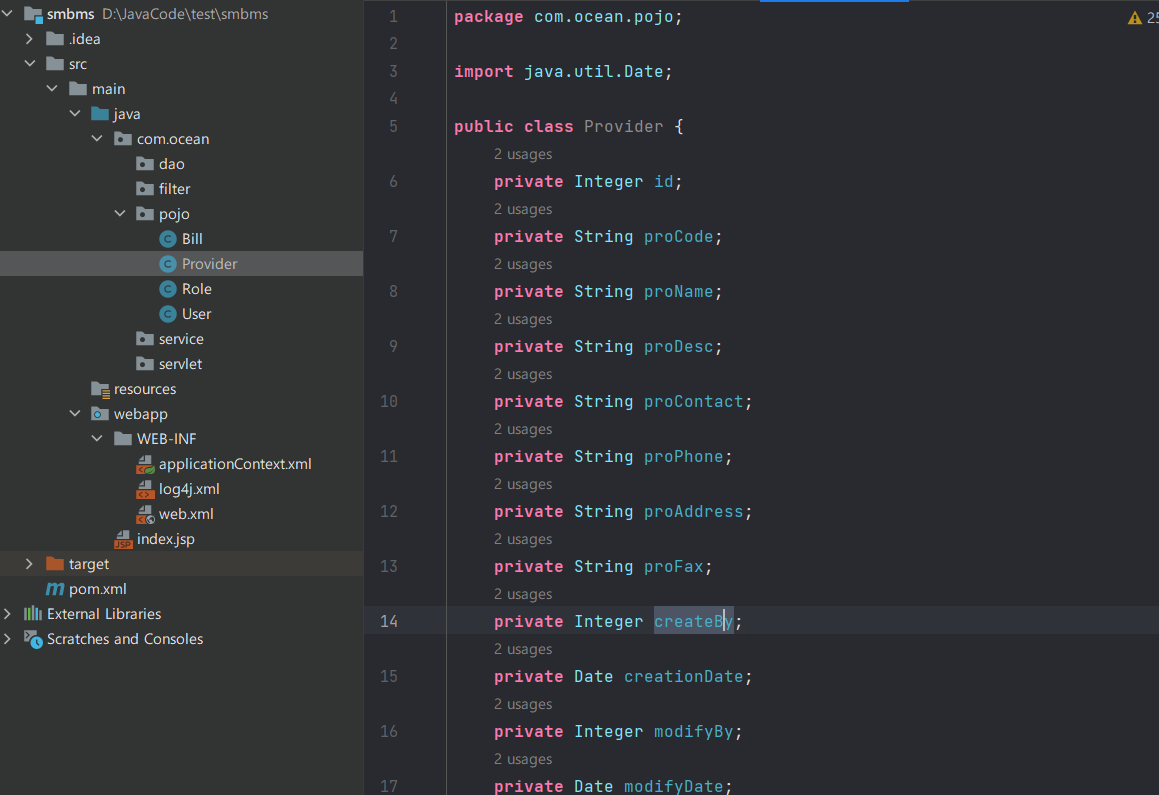
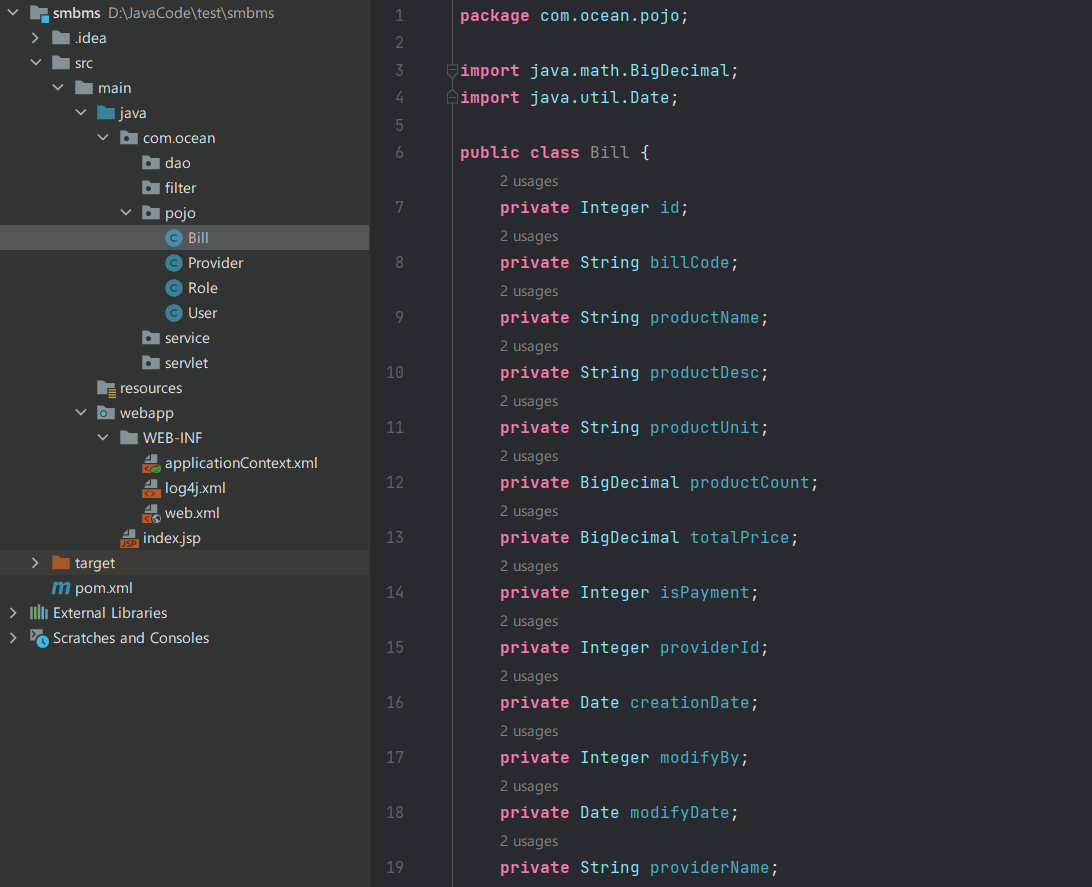
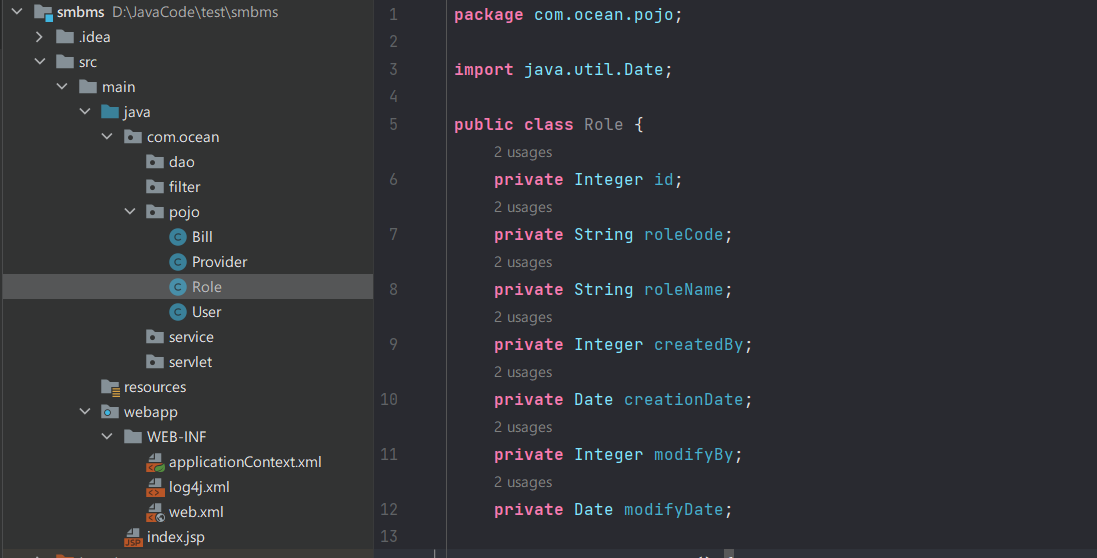
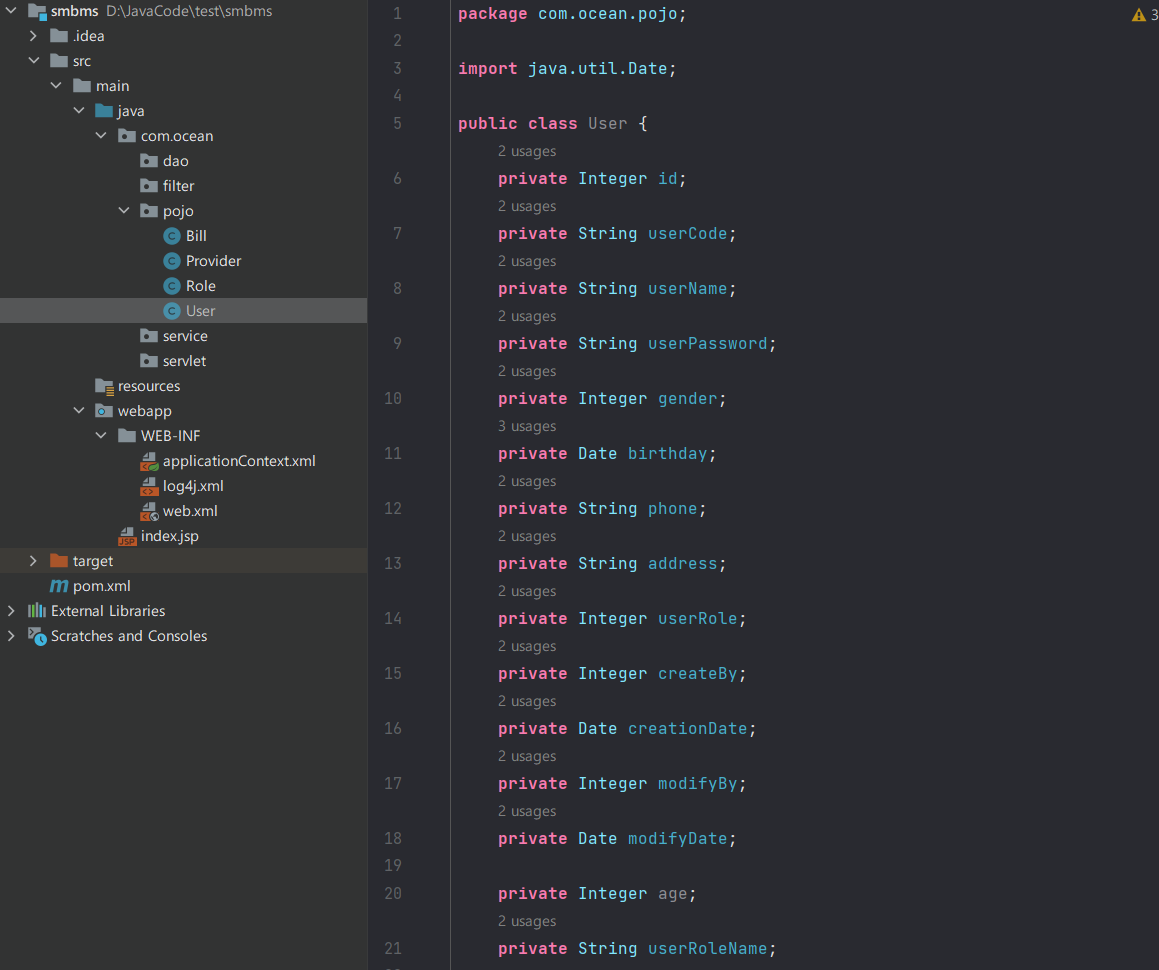 四个数据库实体类,这个过程就是 ORM 对象关系映射> 这里统一 createBy,上图中有拼写错误
 - 编写基础公共类1. 数据库配置文件resources 目录下新建文件 db.properties
driver=com.mysql.jdbc.Driverurl=jdbc:mysql://localhost:3306/smbms?useSSL=false&useUnicode=true&characterEncoding=utf8username=rootpassword=root注意:这里的配置文件后边没有分号,userSSL 还是要加上的在 dao 目录创建 BaseDao 文件// 操作数据库的公共类publicclassBaseDao{privatestaticString driver;privatestaticString url;privatestaticString username;privatestaticString password;// 静态代码块,类加载的时候初始化static{// 通过类加载器读取对应的资源Properties properties =newProperties();// 通过类加载器读取对应的资源InputStream is =BaseDao.class.getClassLoader().getResourceAsStream("db.properties");try{ properties.load(is);}catch(IOException e){ e.printStackTrace();} driver = properties.getProperty("driver"); url = properties.getProperty("url"); username = properties.getProperty("username"); password = properties.getProperty("password");}// 获取数据库的连接publicstaticConnectiongetConnection(){// 此句是用于提升作用域,用于 return 数据Connection connection =null;try{Class.forName(driver); connection =DriverManager.getConnection(url, username, password);}catch(Exception e){ e.printStackTrace();}return connection;}// 编写查询公共类publicstaticResultSetexcute(Connection connection,String sql,Object[] params,ResultSet resultSet,PreparedStatement preparedStatement)throwsSQLException{// 预编译SQL语句,后边查询时不需要传参数 preparedStatement = connection.prepareStatement(sql);// 使用循环填充参数for(int i =0; i < params.length; i++){// setObject,占位符从1开始,但是数组下标从0开始 preparedStatement.setObject(i +1, params[i]);}// 进行参数化查询,这里不需要传参了 resultSet = preparedStatement.executeQuery();return resultSet;}// 编写增删改公共方法,相比于查询不需要返回数据返回 int 类型表示查询结果即可publicstaticintexcute(Connection connection,String sql,Object[] params,PreparedStatement preparedStatement)throwsSQLException{ preparedStatement = connection.prepareStatement(sql);// 使用循环填充参数for(int i =0; i < params.length; i++){// setObject,占位符从1开始,但是数组下标从0开始 preparedStatement.setObject(i +1, params[i]);}// 进行更新操作,这里不需要传参了int updataRows = preparedStatement.executeUpdate();return updataRows;}// 释放资源publicstaticbooleancloseResource(Connection connection,PreparedStatement preparedStatement,ResultSet resultSet){// 标识符boolean flag =true;if(resultSet !=null){try{ resultSet.close();// GC回收 resultSet =null;}catch(SQLException e){ e.printStackTrace(); flag =false;}}if(connection !=null){try{ connection.close();// GC回收 connection =null;}catch(SQLException e){ e.printStackTrace(); flag =false;}}if(preparedStatement !=null){try{ preparedStatement.close();// GC回收 preparedStatement =null;}catch(SQLException e){ e.printStackTrace(); flag =false;}}// 如果都释放成功返回 true,否则返回 falsereturn flag;}}2. 创建编码过滤器
publicclassCharacterEncodingFilterimplementsFilter{publicvoidinit(FilterConfig filterConfig)throwsServletException{}publicvoiddoFilter(ServletRequest request,ServletResponse response,FilterChain chain)throwsIOException,ServletException{ request.setCharacterEncoding("utf-8"); response.setCharacterEncoding("utf-8"); chain.doFilter(request, response);}publicvoiddestroy(){}}注册编码器
- 导入静态资源[外链图片转存失败,源站可能有防盗链机制,建议将图片保存下来直接上传(img-FEgg69Pp-1650635761480)(https://s2.loli.net/2022/04/22/kcm4G9vSDXQBWeF.png)]直接 cv,拖拽可能有报错
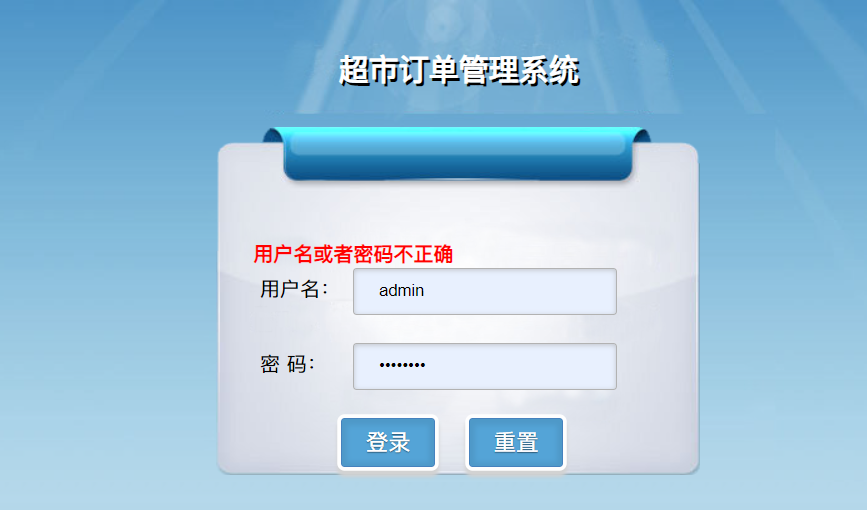
登录功能实现
流程实现
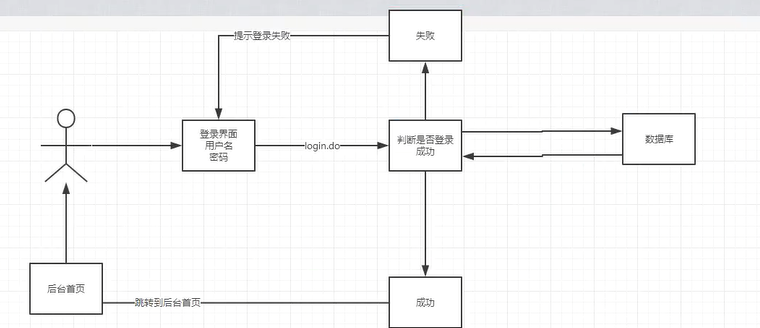
Login.jsp 前端界面
<%@ page contentType="text/html;charset=UTF-8" language="java"%><html><head><title>系统登陆</title><link type="text/css" rel="stylesheet" href="${pageContext.request.contextPath}/css/style.css"><script type="text/javascript"></script></head><body class="login_bg"><section class="loginBox"><header class="loginHeader"><h1>超市订单管理系统</h1></header><section class="loginCont"><form class="loginForm" action="${pageContext.request.contextPath}/login.do" name="actionForm" id="actionForm" method="get"><div class="info">${error}</div><div class="inputbox"><label>用户名:</label><input type="text"class="input-text" id="userCode" name="userCode" placeholder="请输入用户名" required></div><div class="inputbox"><label>密 码:</label><input type="password" id="userPassword" name="userPassword" placeholder="请输入密码" required></div><div class="subBtn"><input type="submit" value="登录"><input type="reset" value="重置"></div></form></section></section></body></html>
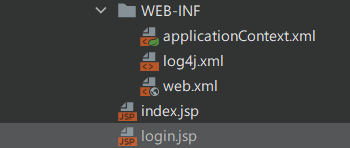
在 web.xml 中设置欢迎界面为 login.jsp
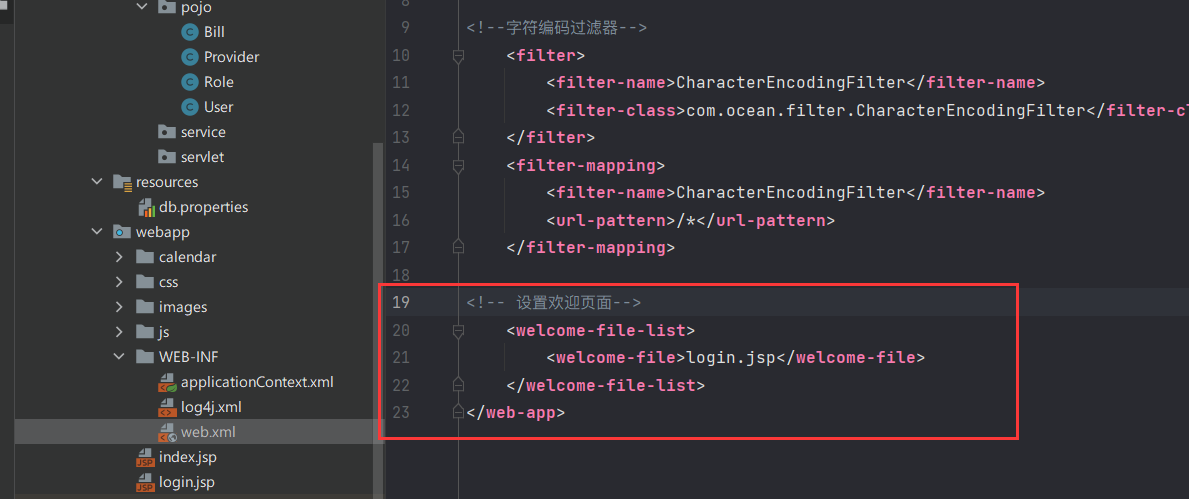
在服务器启动后会首先访问 login.jsp
后端代码
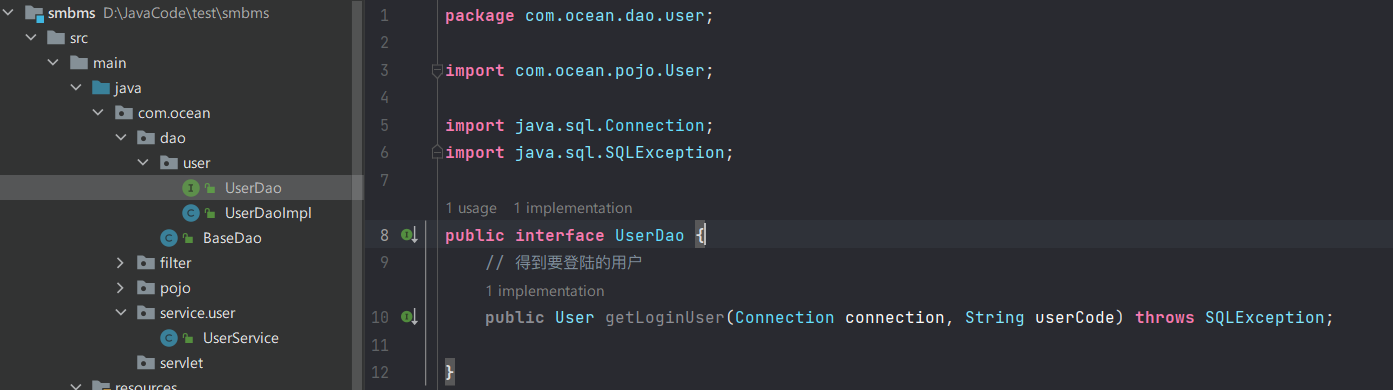
1.编写 dao 层用户登录接口及实现类
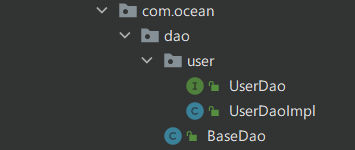
UserDao 是接口,UserDaoImpl 是实现类,接口是规范,实现类是功能实现
UserDaoImpl
publicclassUserDaoImplimplementsUserDao{/**
     * 用户登录,判断用户是否存在
     *
     * @param connection 数据库连接对象
     * @param userCode   查询到的用户数据库字段 usercode 的内容,有的话表示用户存在
     * @return
     */publicUsergetLoginUser(Connection connection,String userCode)throwsSQLException{// 1.新建三个对象PreparedStatement preparedStatement =null;ResultSet rs =null;User user =null;// 首先判断数据库是否连接,然后构造预编译查询语句,判断用户是否存在if(connection !=null){String sql ="select * from smbms_user where userCode=?";Object[] params ={userCode};

            rs =BaseDao.excute(connection, preparedStatement, rs, sql, params);// 遍历结果集if(rs.next()){
                user =newUser();// 根据数据库中查询的数据给对象赋值
                user.setId(rs.getInt("id"));
                user.setUserCode(rs.getString("userCode"));
                user.setUserName(rs.getString("userName"));
                user.setUserPassword(rs.getString("userPassword"));
                user.setGender(rs.getInt("gender"));
                user.setBirthday(rs.getDate("birthday"));
                user.setPhone(rs.getString("phone"));
                user.setAddress(rs.getString("address"));
                user.setCreateBy(rs.getInt("createBy"));
                user.setCreationDate(rs.getTimestamp("creationDate"));
                user.setUserRole(rs.getInt("userRole"));
                user.setModifyBy(rs.getInt("modifyBy"));
                user.setModifyDate(rs.getTimestamp("modifyDate"));}// 关闭资源BaseDao.closeResource(null, preparedStatement, rs);}return user;}}
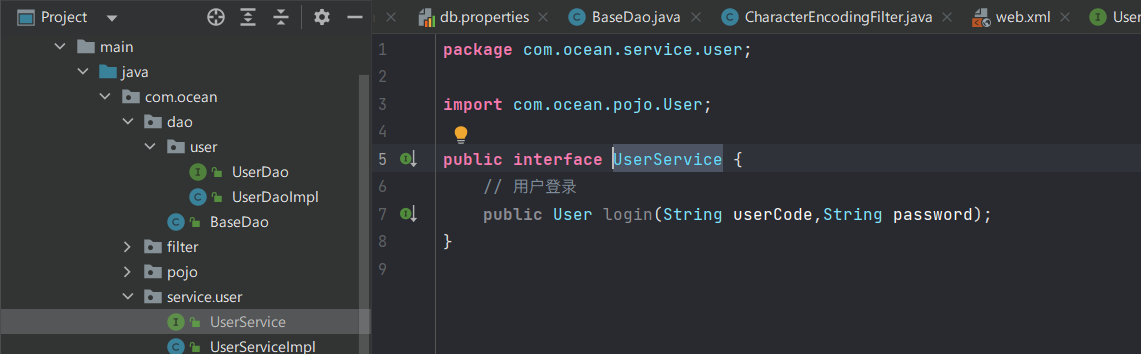
2.编写业务层接口和实现类
接口
实现类
publicclassUserServiceImplimplementsUserService{// 业务层需要调用 dao 层,这里通过无参构造方法引入 Dao 层privateUserDao userDao;publicUserServiceImpl(){
        userDao =newUserDaoImpl();}publicUserlogin(String userCode,String password){Connection connection =null;User user =null;try{
            connection =BaseDao.getConnection();// 通过业务层调用对应的具体数据库操作
            user = userDao.getLoginUser(connection, userCode);}catch(SQLException e){
            e.printStackTrace();}finally{BaseDao.closeResource(connection,null,null);}return user;}}
3.登录功能servlet
publicclassLoginServletextendsHttpServlet{// Servlet:控制层,调用业务层代码@OverrideprotectedvoiddoGet(HttpServletRequest req,HttpServletResponse resp)throwsServletException,IOException{System.out.println("LoginServletStart");// 获取用户名和密码String userCode = req.getParameter("userCode");String userPassword = req.getParameter("userPassword");// 调用业务层 service,将输入数据和数据库中的数据做对比UserService userService =newUserServiceImpl();User user = userService.login(userCode, userPassword);// 此时已经对应到了具体用户// 判断用户是否存在,存在的话存在加入session中if(user !=null){
            req.getSession().setAttribute(Constants.USER_SESSION, user);// 登录成功跳转主页
            resp.sendRedirect("jsp/frame.jsp");}else{// 没有查到用户,跳回登陆界面并提示登录错误// request.getRequestDispatcher()是请求转发,前后页面共享一个request// response.sendRedirect()是重新定向,前后页面不是一个request
            req.setAttribute("error","用户名或者密码不整却");
            req.getRequestDispatcher("login.jsp").forward(req, resp);}}@OverrideprotectedvoiddoPost(HttpServletRequest req,HttpServletResponse resp)throwsServletException,IOException{super.doPost(req, resp);}}
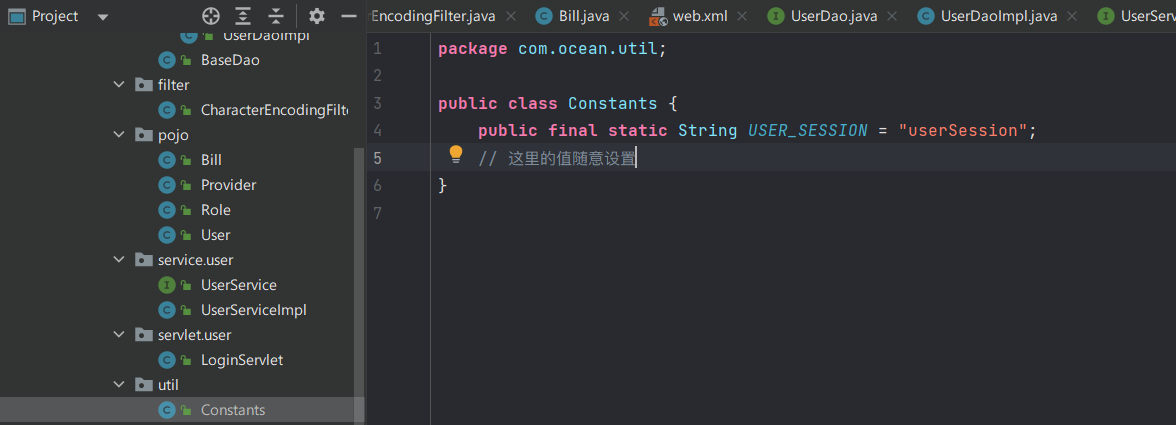
新建util目录,放入session常量
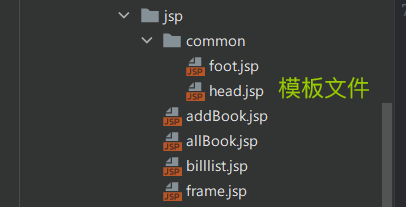
放入jsp文件
在 web.xml 中注册servlet
<!--注册servlet--><servlet><servlet-name>LoginServlet</servlet-name><servlet-class>com.ocean.servlet.user.LoginServlet</servlet-class></servlet><servlet-mapping><servlet-name>LoginServlet</servlet-name><url-pattern>/login.do</url-pattern></servlet-mapping>
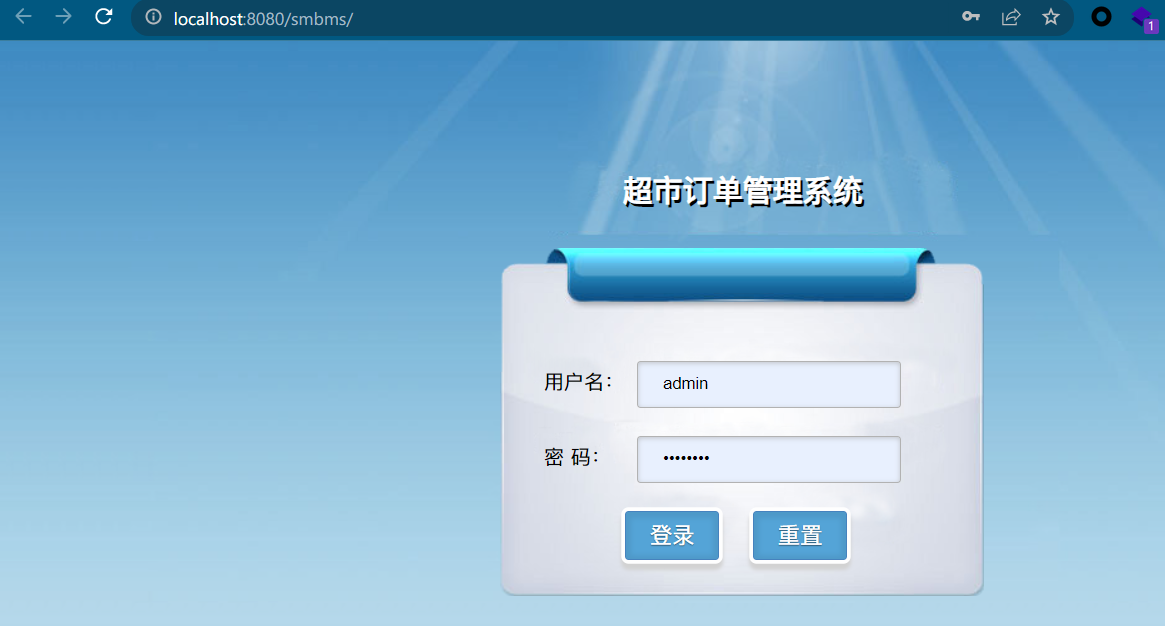
测试登录
登录成功后会显示,后台

本文转载自: https://blog.csdn.net/q20010619/article/details/124355951
版权归原作者 OceanSec 所有, 如有侵权,请联系我们删除。
版权归原作者 OceanSec 所有, 如有侵权,请联系我们删除。