
阅读目录
一、Gin 介绍
Gin 是一个Go (Golang) 编写的轻量级 http web 框架,运行速度非常快,如果你是性能和高效的追求者,我们推荐你使用Gin 框架。
Gin 最擅长的就是Api 接口的高并发,如果项目的规模不大,业务相对简单,这个时候我们也推荐您使用Gin。
当某个接口的性能遭到较大挑战的时候,这个还是可以考虑使用Gin 重写接口。
Gin 也是一个流行的 golang Web 框架,Github Strat 量已经超过了50k。
Gin 的官网:https://gin-gonic.com/zh-cn/
Gin Github 地址:https://github.com/gin-gonic/gin
二、Gin 环境搭建
要安装Gin 软件包,需要先安装Go 并设置Go 工作区。
1、下载并安装gin:
go get -u github.com/gin-gonic/gin
2、将gin 引入到代码中:
import "github.com/gin-gonic/gin"
3.、(可选)如果使用诸如 http.StatusOK 之类的常量,则需要引入net/http 包:
import "net/http"
4、新建
main.go
配置路由
package main

import"github.com/gin-gonic/gin"funcmain(){// 创建一个默认的路由引擎
    r := gin.Default()// 配置路由
    r.GET("/",func(c *gin.Context){
        c.JSON(200, gin.H{"message":"Hello worlds",})})// 启动 HTTP 服务,默认在 0.0.0.0:8080 启动服务
    r.Run()}
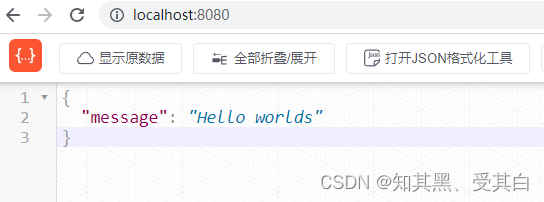
5、运行你的项目
go run main.go
6、要改变默认启动的端口
r.Run(":9000")
三、golang 程序的热加载
所谓热加载就是当我们对代码进行修改时,程序能够自动重新加载并执行,这在我们开发中是非常便利的,可以快速进行代码测试,省去了每次手动重新编译。
beego 中我们可以使用官方给我们提供的bee 工具来热加载项目,但是gin 中并没有官方提供的热加载工具,这个时候我们要实现热加载就可以借助第三方的工具。
工具1(推荐):https://github.com/gravityblast/fresh
PS E:\gormlearn\gormtest> go get github.com/pilu/fresh
go: downloading github.com/pilu/fresh v0.0.0-20190826141211-0fa698148017
go: downloading github.com/mattn/go-colorable v0.1.13
go: downloading github.com/howeyc/fsnotify v0.9.0
go: downloading github.com/pilu/config v0.0.0-20131214182432-3eb99e6c0b9a
go: added github.com/howeyc/fsnotify v0.9.0
go: added github.com/mattn/go-colorable v0.1.13
go: added github.com/pilu/config v0.0.0-20131214182432-3eb99e6c0b9a
go: added github.com/pilu/fresh v0.0.0-20190826141211-0fa698148017
PS E:\gormlearn\gormtest>
工具2:https://github.com/codegangsta/gin
PS E:\gormlearn\gormtest> go get -u github.com/codegangsta/gin
go: downloading github.com/codegangsta/gin v0.0.0-20211113050330-71f90109db02
go: downloading github.com/urfave/cli v1.22.10
go: downloading github.com/mattn/go-shellwords v1.0.12
go: downloading github.com/codegangsta/envy v0.0.0-20141216192214-4b78388c8ce4
go: downloading github.com/0xAX/notificator v0.0.0-20220220101646-ee9b8921e557
go: downloading github.com/cpuguy83/go-md2man/v2 v2.0.0-20190314233015-f79a8a8ca69d
go: downloading github.com/cpuguy83/go-md2man/v2 v2.0.2
go: downloading github.com/cpuguy83/go-md2man v1.0.10
go: downloading github.com/russross/blackfriday/v2 v2.0.1
go: downloading github.com/russross/blackfriday/v2 v2.1.0
go: downloading github.com/russross/blackfriday v1.6.0
go: downloading github.com/shurcooL/sanitized_anchor_name v1.0.0
go: added github.com/0xAX/notificator v0.0.0-20220220101646-ee9b8921e557
go: added github.com/codegangsta/envy v0.0.0-20141216192214-4b78388c8ce4
go: added github.com/codegangsta/gin v0.0.0-20211113050330-71f90109db02
go: added github.com/cpuguy83/go-md2man/v2 v2.0.2
go: added github.com/mattn/go-shellwords v1.0.12
go: added github.com/russross/blackfriday/v2 v2.1.0
go: added github.com/shurcooL/sanitized_anchor_name v1.0.0
go: added github.com/urfave/cli v1.22.10
PS E:\gormlearn\gormtest>
四、Gin 框架中的路由
4.1、路由概述
路由(Routing)是由一个URI(或者叫路径)和一个特定的HTTP 方法(GET、POST 等)组成的,涉及到应用如何响应客户端对某个网站节点的访问。
RESTful API 是目前比较成熟的一套互联网应用程序的API 设计理论,所以我们设计我们的路由的时候建议参考RESTful API 指南。
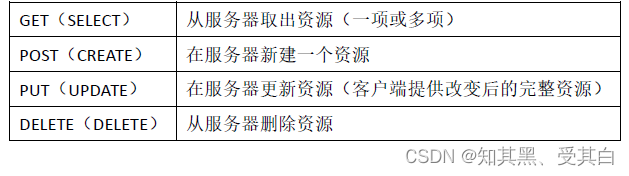
在RESTful 架构中,每个网址代表一种资源,不同的请求方式表示执行不同的操作:
4.2、简单的路由配置
简单的路由配置(可以通过postman 测试)
当用GET 请求访问一个网址的时候,做什么事情:
r.GET("网址",func(c *gin.Context){
    c.String(200,"Get")})
当用POST 访问一个网址的时候,做什么事情:
r.POST("网址",func(c *gin.Context){
    c.String(200,"POST")})
当用PUT 访问一个网址的时候,执行的操作:
r.PUT("网址",func(c *gin.Context){
    c.String(200,"PUT")})
当用DELETE 访问一个网址的时候,执行的操作:
r.DELETE("网址",func(c *gin.Context){
    c.String(200,"DELETE")})
** 路由里面获取Get 传值**
域名
/news?aid=20
r.GET("/news",func(c *gin.Context){
    aid := c.Query("aid")
    c.String(200,"aid=%s", aid)})
** 动态路由**
域名
/user/20
r.GET("/user/:uid",func(c *gin.Context){
    uid := c.Param("uid")
    c.String(200,"userID=%s", uid)})
4.3、c.String()、c.JSON()、c.JSONP()、c.XML()、c.HTML()
返回一个字符串
package main

import("github.com/gin-gonic/gin")funcmain(){
    r := gin.Default()
    r.GET("/news",func(c *gin.Context){
        aid := c.Query("aid")
        c.String(200,"aid=%s", aid)})
    r.Run(":8080")}
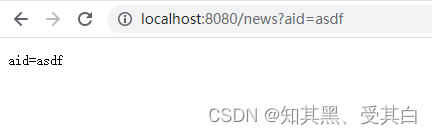
返回一个JSON 数据
package main

import("net/http""github.com/gin-gonic/gin")funcmain(){
    r := gin.Default()// gin.H 是map[string]interface{}的缩写
    r.GET("/someJSON",func(c *gin.Context){// 方式一:自己拼接JSON
        c.JSON(http.StatusOK, gin.H{"message":"Hello world!"})})
    r.GET("/moreJSON",func(c *gin.Context){// 方法二:使用结构体var msg struct{
            Name    string`json:"user"`
            Message string
            Age     int}
        msg.Name ="IT chen"
        msg.Message ="Hello world!"
        msg.Age =18
        c.JSON(http.StatusOK, msg)})
    r.Run(":8080")}
JSOPN
package main

import("net/http""github.com/gin-gonic/gin")funcmain(){
    r := gin.Default()
    r.GET("/JSONP",func(c *gin.Context){
        data :=map[string]interface{}{"foo":"bar",}// /JSONP?callback=x// 将输出:x({\"foo\":\"bar\"})
        c.JSONP(http.StatusOK, data)})// 监听并在0.0.0.0:8080 上启动服务
    r.Run(":8080")}
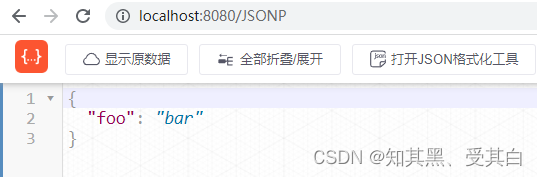
返回XML 数据
package main

import("net/http""github.com/gin-gonic/gin")funcmain(){
    r := gin.Default()// gin.H 是map[string]interface{}的缩写
    r.GET("/someXML",func(c *gin.Context){// 方式一:自己拼接JSON
        c.XML(http.StatusOK, gin.H{"message":"Hello world!"})})
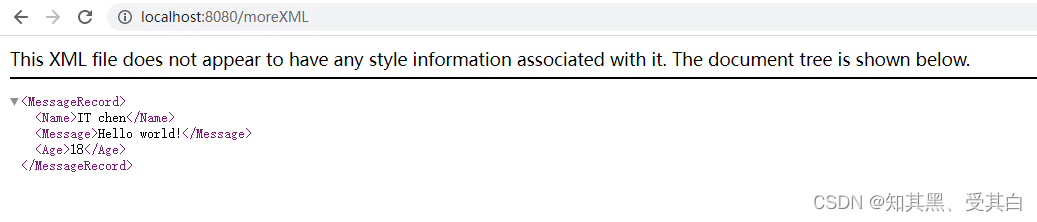
    r.GET("/moreXML",func(c *gin.Context){// 方法二:使用结构体type MessageRecord struct{
            Name    string
            Message string
            Age     int}var msg MessageRecord
        msg.Name ="IT chen"
        msg.Message ="Hello world!"
        msg.Age =18
        c.XML(http.StatusOK, msg)})
    r.Run(":8080")}
渲染模板
package main

import("net/http""github.com/gin-gonic/gin")funcmain(){
    r := gin.Default()// 配置模板文件
    r.LoadHTMLGlob("templates/*")

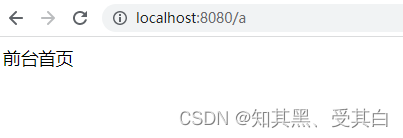
    r.GET("/a",func(c *gin.Context){
        c.HTML(http.StatusOK,"index.html",map[string]interface{}{"title":"前台首页"})})

    r.Run(":8080")}
Administrator@DESKTOP-BT1MKQ3 MINGW64 /e/gormlearn
$ tree -C
.
`-- gormtest
    |-- go.mod
    |-- go.sum
    |-- main.go
    `-- templates
        `-- index.html

2 directories, 4 files

Administrator@DESKTOP-BT1MKQ3 MINGW64 /e/gormlearn
$
五、Gin HTML 模板渲染
5.1、全部模板放在一个目录里面的配置方法
1、我们首先在项目根目录新建
templates
文件夹,然后在文件夹中新建
index.html
<!DOCTYPEhtml><htmllang="en"><head><metacharset="UTF-8"><metahttp-equiv="X-UA-Compatible"content="IE=edge"><metaname="viewport"content="width=device-width, initial-scale=1.0"><title>Document</title></head><body><h1>这是一个html 模板</h1><h3>{{.title}}</h3></body></html>
2、Gin 框架中使用
c.HTML
可以渲染模板,渲染模板前需要使用
LoadHTMLGlob()
或者
LoadHTMLFiles()
方法加载模板。
package main

import("net/http""github.com/gin-gonic/gin")funcmain(){
    r := gin.Default()// 配置模板文件
    r.LoadHTMLGlob("templates/*")

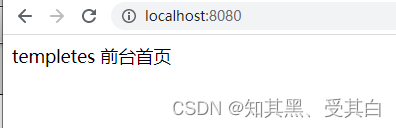
    r.GET("/",func(c *gin.Context){
        c.HTML(http.StatusOK,"index.html",map[string]interface{}{"title":"前台首页"})})// r.LoadHTMLFiles("templates/index.html", "templates/index.html")

    r.Run(":8080")}
Administrator@DESKTOP-BT1MKQ3 MINGW64 /e/gormlearn
$ tree -C
.
`-- gormtest
    |-- go.mod
    |-- go.sum
    |-- main.go
    `-- templates
        `-- index.html

2 directories, 4 files

Administrator@DESKTOP-BT1MKQ3 MINGW64 /e/gormlearn
$
5.2、模板放在不同目录里面的配置方法
Gin 框架中如果不同目录下面有同名模板的话我们需要使用下面方法加载模板。
注意:定义模板的时候需要通过
define
定义名称。
templates/admin/index.html
<!-- 相当于给模板定义一个名字define end 成对出现-->
{{ define "admin/index.html"}}<!DOCTYPE html><html lang="en"><head><meta charset="UTF-8"><meta http-equiv="X-UA-Compatible" content="IE=edge"><meta name="viewport" content="width=device-width, initial-scale=1.0"><title>Document</title></head><body><h1>后台模板</h1><h3>{{.title}}</h3></body></html>{{ end }}
templates/home/index.html
<!-- 相当于给模板定义一个名字define end 成对出现-->
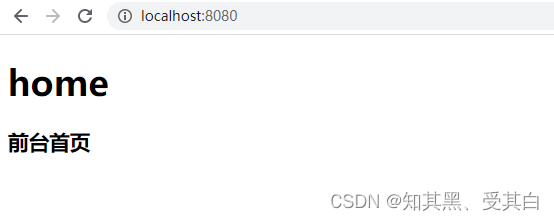
{{ define "home/index.html"}}<!DOCTYPE html><html lang="en"><head><meta charset="UTF-8"><meta http-equiv="X-UA-Compatible" content="IE=edge"><meta name="viewport" content="width=device-width, initial-scale=1.0"><title>Document</title></head><body><h1>home</h1><h3>{{.title}}</h3></body></html>{{ end }}
业务逻辑
package main

import("net/http""github.com/gin-gonic/gin")funcmain(){
    router := gin.Default()

    router.LoadHTMLGlob("templates/**/*")
    router.GET("/",func(c *gin.Context){
        c.HTML(http.StatusOK,"home/index.html", gin.H{"title":"前台首页",})})
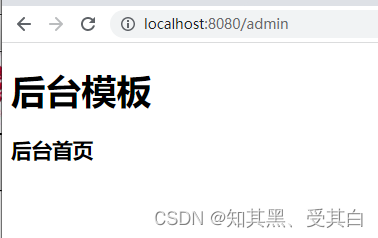
    router.GET("/admin",func(c *gin.Context){
        c.HTML(http.StatusOK,"admin/index.html", gin.H{"title":"后台首页",})})

    router.Run(":8080")}
注意:如果模板在多级目录里面的话需要这样配置
r.LoadHTMLGlob("templates/**/**/*") /**
表示目录。
Administrator@DESKTOP-BT1MKQ3 MINGW64 /e/gormlearn
$ tree -C
.
`-- gormtest
    |-- go.mod
    |-- go.sum
    |-- main.go
    `-- templates
        |-- admin
        |   `-- index.html
        |-- home
        |   `-- index.html
        `-- index.html

4 directories, 6 files

Administrator@DESKTOP-BT1MKQ3 MINGW64 /e/gormlearn
$
5.3、gin 模板基本语法
1、{{.}} 输出数据
模板语法都包含在
{{和}}
中间,其中
{{.}}
中的点表示当前对象。
当我们传入一个结构体对象时,我们可以根据
.
来访问结构体的对应字段。
例如:业务逻辑
package main

import("net/http""github.com/gin-gonic/gin")type UserInfo struct{
    Name   string
    Gender string
    Age    int}funcmain(){
    router := gin.Default()
    router.LoadHTMLGlob("templates/**/*")
    user := UserInfo{
        Name:"张三",
        Gender:"男",
        Age:18,}
    router.GET("/",func(c *gin.Context){
        c.HTML(http.StatusOK,"home/index.html",map[string]interface{}{"title":"前台首页","user":  user,})})
    router.Run(":8080")}
模板:
E:\gormlearn\gormtest\templates\home\index.html
<!-- 相当于给模板定义一个名字define end 成对出现-->
{{ define "home/index.html"}}<!DOCTYPE html><html lang="en"><head><meta charset="UTF-8"><meta http-equiv="X-UA-Compatible" content="IE=edge"><meta name="viewport" content="width=device-width, initial-scale=1.0"><title>Document</title></head><body><h1>前台模板</h1><h3>{{.title}}</h3><h4>{{.user.Name}}</h4><h4>{{.user.Age}}</h4></body></html>{{end}}
2、注释
{{/* a comment */}}
注释,执行时会忽略。可以多行。注释不能嵌套,并且必须紧贴分界符始止。
3、模板中声明变量
我们还可以在模板中声明变量,用来保存传入模板的数据或其他语句生成的结果。
具体语法如下:
<h4>{{$obj :=.title}}</h4><h4>{{$obj}}</h4>
4、移除空格
有时候我们在使用模板语法的时候会不可避免的引入一下空格或者换行符,这样模板最终渲染出来的内容可能就和我们想的不一样,这个时候可以使用{{-语法去除模板内容左侧的所有空白符号, 使用
-}}
去除模板内容右侧的所有空白符号。
例如:
{{-.Name -}}
注意:
-
要紧挨
{{和}}
,同时与模板值之间需要使用空格分隔。
5、比较函数
布尔函数会将任何类型的零值视为假,其余视为真。
下面是定义为函数的二元比较运算的集合:
eq 如果arg1 == arg2 则返回真
ne 如果arg1 != arg2 则返回真
lt 如果arg1 < arg2 则返回真
le 如果arg1 <= arg2 则返回真
gt 如果arg1 > arg2 则返回真
ge 如果arg1 >= arg2 则返回真
6、条件判断
Go 模板语法中的条件判断有以下几种:
package main

import("net/http""github.com/gin-gonic/gin")type UserInfo struct{
    Name   string
    Gender string
    Age    int
    Score  int}funcmain(){
    router := gin.Default()
    router.LoadHTMLGlob("templates/**/*")
    user := UserInfo{
        Name:"张三",
        Gender:"男",
        Age:18,
        Score:70,}
    router.GET("/",func(c *gin.Context){
        c.HTML(http.StatusOK,"home/index.html",map[string]interface{}{"title":"前台首页","user":  user,})})
    router.Run(":8080")}
E:\gormlearn\gormtest\templates\home\index.html
{{ define "home/index.html" }}
<!DOCTYPEhtml><htmllang="en"><head><metacharset="UTF-8"><metahttp-equiv="X-UA-Compatible"content="IE=edge"><metaname="viewport"content="width=device-width, initial-scale=1.0"><title>Document</title></head><body><h1>前台模板</h1><h3>{{.title}}</h3><h4>{{.user.Name}}</h4><h4>{{.user.Age}}</h4><h4>{{$pipeline := true}}</h4>

{{if $pipeline}} if T1 <br/> {{end}}
{{if $pipeline}} if else T1 <br/>  {{else}} T0 {{end}}
{{if $pipeline}} if else if T1 <br/>  {{else if $pipeline}} T0 {{end}}
{{if gt .user.Score 60}}
及格
{{else}}
不及格
{{end}}

{{if gt .user.Score 90}}
优秀
{{else if gt .user.Score 60}}
及格
{{else}}
不及格
{{end}}

</body></html>
{{end}}
7、range
Go 的模板语法中使用range 关键字进行遍历,有以下两种写法,其中pipeline 的值必须是数组、切片、字典或者通道。
{{range $key,$value :=.obj}}{{$value}}{{end}}
如果 pipeline 的值其长度为0,不会有任何输出。
{{$key,$value :=.obj}}{{$value}}{{else}}
    pipeline 的值其长度为0{{end}}
如果pipeline 的值其长度为0,则会执行T0。
router.GET("/",func(c *gin.Context){
    c.HTML(http.StatusOK,"home/index.html",map[string]interface{}{"hobby":[]string{"吃饭","睡觉","写代码"},})}){{range $key,$value :=.hobby}}<p>{{$value}}</p>{{end}}
7、With
user := UserInfo{
    Name:"张三",
    Gender:"男",
    Age:18,}

router.GET("/",func(c *gin.Context){
    c.HTML(http.StatusOK,"home/index.html",map[string]interface{}{"user": user,})})
以前要输出数据:
<h4>{{.user.Name}}</h4><h4>{{.user.Gender}}</h4><h4>{{.user.Age}}</h4>
现在要输出数据:
{{with .user}}<h4>姓名:{{.Name}}</h4><h4>性别:{{.user.Gender}}</h4><h4>年龄:{{.Age}}</h4>{{end}}
简单理解:相当于
var .=.user
。
8、预定义函数(了解)
执行模板时,函数从两个函数字典中查找:
首先是模板函数字典,然后是全局函数字典。
一般不在模板内定义函数,而是使用Funcs 方法添加函数到模板里。
预定义的全局函数如下:
and
函数返回它的第一个
empty
参数或者最后一个参数;
就是说
"and x y"
等价于
"if x then y else x";
所有参数都会执行;
or
返回第一个非 empty 参数或者最后一个参数;
亦即
"or x y"
等价于
"if x then x else y";
所有参数都会执行;
not
返回它的单个参数的布尔值的否定。
len
返回它的参数的整数类型长度。
index
执行结果为第一个参数以剩下的参数为索引/键指向的值;
如
"index x 1 2 3"
返回
x[1][2][3]
的值;
每个被索引的主体必须是数组、切片或者字典。
print:即 fmt.Sprint
printf:即 fmt.Sprintf
println:即 fmt.Sprintln
html
返回与其参数的文本表示形式等效的转义HTML。
这个函数在
html/template
中不可用。
urlquery
以适合嵌入到网址查询中的形式返回其参数的文本表示的转义值。
这个函数在
html/template
中不可用。
js
返回与其参数的文本表示形式等效的转义JavaScript。
call
执行结果是调用第一个参数的返回值,该参数必须是函数类型,其余参数作为调用该函数的参数;
- 如
"call .X.Y 1 2"等价于go 语言里的dot.X.Y(1, 2); - 其中 Y 是函数类型的字段或者字典的值,或者其他类似情况;
- call 的第一个参数的执行结果必须是函数类型的值(和预定义函数如print 明显不同);
- 该函数类型值必须有1 到2 个返回值,如果有2 个则后一个必须是error 接口类型;
如果有2 个返回值的方法返回的error 非nil,模板执行会中断并返回给调用模板执行者该错误;
{{len.title}}{{index .hobby 2}}
9、自定义模板函数
router.SetFuncMap(template.FuncMap{"formatDate": formatAsDate,})
package main

import("fmt""html/template""net/http""time""github.com/gin-gonic/gin")funcformatAsDate(t time.Time)string{
    year, month, day := t.Date()return fmt.Sprintf("%d/%02d/%02d", year, month, day)}funcmain(){
    router := gin.Default()//注册全局模板函数注意顺序,注册模板函数需要在加载模板上面
    router.SetFuncMap(template.FuncMap{"formatDate": formatAsDate,})//加载模板
    router.LoadHTMLGlob("templates/**/*")
    router.GET("/",func(c *gin.Context){
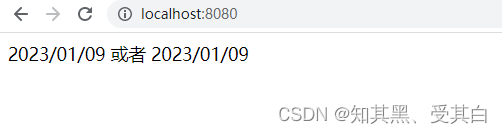
        c.HTML(http.StatusOK,"home/index.html",map[string]interface{}{"title":"前台首页","now":   time.Now(),})})
    router.Run(":8080")}
模板里面的用法。
E:\gormlearn\gormtest\templates\home\index.html
{{ define "home/index.html"}}<!DOCTYPE html><html lang="en"><head><meta charset="UTF-8"><meta http-equiv="X-UA-Compatible" content="IE=edge"><meta name="viewport" content="width=device-width, initial-scale=1.0"><title>Document</title></head><body>{{.now | formatDate}}
或者
{{formatDate .now }}</body></html>{{end}}
5.4、嵌套 template
1、新建
E:\gormlearn\gormtest\templates\deafult\page_header.html
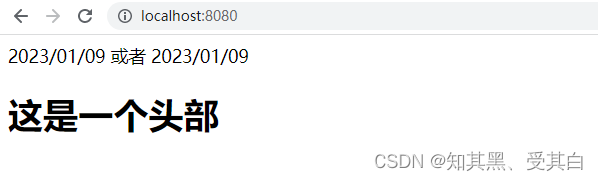
{{ define "default/page_header.html"}}<h1>这是一个头部</h1>{{end}}
2、外部引入
注意:
1、引入的名字为
page_header.html
中定义的名字。
2、引入的时候注意最后的点
(.)
。
{{template "default/page_header.html".}}
E:\gormlearn\gormtest\templates\home\index.html
{{ define "home/index.html"}}<!DOCTYPE html><html lang="en"><head><meta charset="UTF-8"><meta http-equiv="X-UA-Compatible" content="IE=edge"><meta name="viewport" content="width=device-width, initial-scale=1.0"><title>Document</title></head><body>{{.now | formatDate}}
或者
{{formatDate .now }}{{template "default/page_header.html".}}</body></html>{{end}}
六、静态文件服务
当我们渲染的HTML 文件中引用了静态文件时,我们需要配置静态 web 服务。
r.Static("/static", "./static")
前面的
/static
表示路由后面的
./static
表示路径。
funcmain(){
    r := gin.Default()
    r.Static("/static","./static")
    r.LoadHTMLGlob("templates/**/*")// ...
    r.Run(":8080")}<link rel="stylesheet" href="/static/css/base.css"/>
七、路由详解
路由(Routing)是由一个URI(或者叫路径)和一个特定的HTTP 方法(GET、POST 等)组成的,涉及到应用如何响应客户端对某个网站节点的访问。
前面章节我们给大家介绍了路由基础以及路由配置,这里我们详细给大家讲讲路由传值、路由返回值。
7.1、GET POST 以及获取Get Post 传值
7.1.1、Get 请求传值:
GET /user?uid=20&page=1
router.GET("/user",func(c *gin.Context){
    uid := c.Query("uid")
    page := c.DefaultQuery("page","0")
    c.String(200,"uid=%v page=%v", uid, page)})
7.1.2、动态路由传值:
域名/user/20
r.GET("/user/:uid",func(c *gin.Context){
    uid := c.Param("uid")
    c.String(200,"userID=%s", uid)})
7.1.3、Post 请求传值获取 form 表单数据,定义一个add_user.html 的页面。
{{ define "admin/add_user.html"}}<!DOCTYPE html><html lang="en"><head><meta charset="UTF-8"><meta http-equiv="X-UA-Compatible" content="IE=edge"><meta name="viewport" content="width=device-width, initial-scale=1.0"><title>Document</title></head><body><form action="/doAddUser" method="post">
用户名:<input type="text" name="username"/>
密码:<input type="password" name="password"/><input type="submit" value="提交"></form></body></html>{{end}}
通过
c.PostForm
接收表单传过来的数据。
E:\gormlearn\gormtest\main.go
package main

import("github.com/gin-gonic/gin")funcmain(){
    router := gin.Default()
    router.LoadHTMLGlob("templates/**/*")

    router.GET("/addUser",func(c *gin.Context){
        c.HTML(200,"admin/add_user.html", gin.H{})})

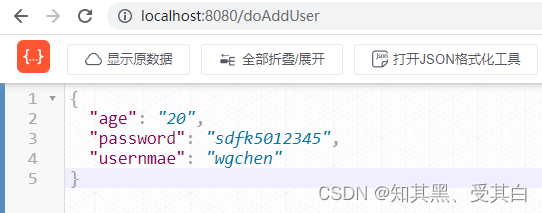
    router.POST("/doAddUser",func(c *gin.Context){
        username := c.PostForm("username")
        password := c.PostForm("password")
        age := c.DefaultPostForm("age","20")
        c.JSON(200, gin.H{"usernmae": username,"password": password,"age":      age,})})

    router.Run(":8080")}
E:\gormlearn\gormtest\templates\admin\add_user.html
{{ define "admin/add_user.html"}}<!DOCTYPE html><html lang="en"><head><meta charset="UTF-8"><meta http-equiv="X-UA-Compatible" content="IE=edge"><meta name="viewport" content="width=device-width, initial-scale=1.0"><title>Document</title></head><body><form action="/doAddUser" method="post">
用户名:<input type="text" name="username"/>
密码:<input type="password" name="password"/><input type="submit" value="提交"></form></body></html>{{end}}
7.2、获取GET、POST 传递的数据绑定到结构体
为了能够更方便的获取请求相关参数,提高开发效率,我们可以基于请求的 Content-Type 识别请求数据类型并利用反射机制自动提取请求中 QueryString、form 表单、JSON、XML 等参数到结构体中。
下面的示例代码演示了
. ShouldBind()
强大的功能,它能够基于请求自动提取JSON、form 表单和 QueryString 类型的数据,并把值绑定到指定的结构体对象。
//注意首字母大写type Userinfo struct{
    Username string`form:"username" json:"user"`
    Password string`form:"password" json:"password"`}
Get 传值绑定到结构体:
/?username=zhangsan&password=123456
。
router.GET("/",func(c *gin.Context){var userinfo Userinfo
    if err := c.ShouldBind(&userinfo); err ==nil{
        c.JSON(http.StatusOK, userinfo)}else{
        c.JSON(http.StatusBadRequest, gin.H{"error": err.Error()})}})
返回数据:
{"user":"zhangsan","password":"123456"}
完整代码
E:\gormlearn\gormtest\main.go
package main

import("net/http""github.com/gin-gonic/gin")// 注意首字母大写type Userinfo struct{
    Username string`form:"username" json:"user"`
    Password string`form:"password" json:"password"`}funcmain(){
    router := gin.Default()
    router.LoadHTMLGlob("templates/**/*")

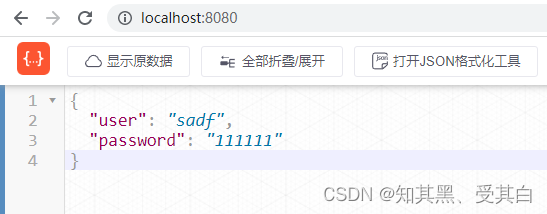
    router.GET("/",func(c *gin.Context){var userinfo = Userinfo{
            Username:"sadf",
            Password:"111111",}if err := c.ShouldBind(&userinfo); err ==nil{
            c.JSON(http.StatusOK, userinfo)}else{
            c.JSON(http.StatusBadRequest, gin.H{"error": err.Error()})}})

    router.Run(":8080")}
** Post 传值绑定到结构体**
router.POST("/doLogin",func(c *gin.Context){var userinfo Userinfo
    if err := c.ShouldBind(&userinfo); err ==nil{
        c.JSON(http.StatusOK, userinfo)}else{
        c.JSON(http.StatusBadRequest, gin.H{"error": err.Error()})}})
返回数据
{"user":"zhangsan","password":"123456"}
7.3、获取 Post Xml 数据
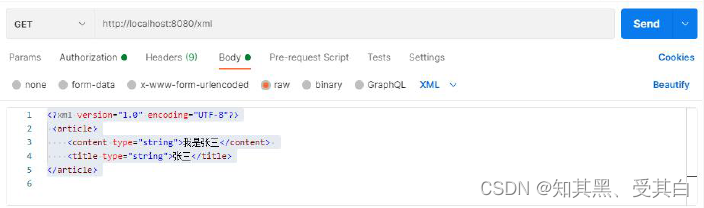
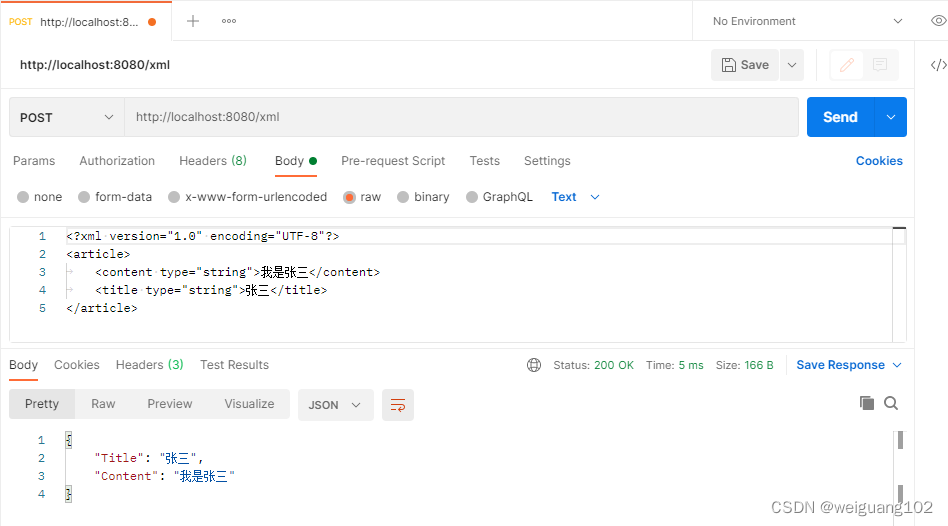
在API 的开发中,我们经常会用到JSON 或XML 来作为数据交互的格式,这个时候我们可以在 gin 中使用
c.GetRawData()
获取数据。
<?xml version="1.0" encoding="UTF-8"?><article><content type="string">我是张三</content><title type="string">张三</title></article>
完整代码
package main

import("encoding/xml""net/http""github.com/gin-gonic/gin")type Article struct{
    Title   string`xml:"title"`
    Content string`xml:"content"`}funcmain(){
    router := gin.Default()
    router.LoadHTMLGlob("templates/**/*")

    router.POST("/xml",func(c *gin.Context){// 从c.Request.Body 读取请求数据
        b,_:= c.GetRawData()
        article :=&Article{}if err := xml.Unmarshal(b,&article); err ==nil{
            c.JSON(http.StatusOK, article)}else{
            c.JSON(http.StatusBadRequest, err.Error())}})

    router.Run(":8080")}
7.4、简单的路由组
https://gin-gonic.com/zh-cn/docs/examples/grouping-routes/
funcmain(){
    router := gin.Default()// 简单的路由组: v1
    v1 := router.Group("/v1"){
        v1.POST("/login", loginEndpoint)
        v1.POST("/submit", submitEndpoint)
        v1.POST("/read", readEndpoint)}// 简单的路由组: v2
    v2 := router.Group("/v2"){
        v2.POST("/login", loginEndpoint)
        v2.POST("/submit", submitEndpoint)
        v2.POST("/read", readEndpoint)}

    router.Run(":8080")}
7.5、Gin 路由文件分组
新建
routes
文件夹,routes 文件下面新建
adminRoutes.go
、
apiRoutes.go
、
defaultRoutes.go
。
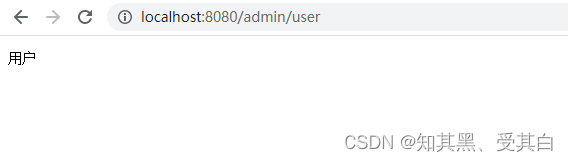
1、E:\gormlearn\gormtest\routes\adminRoutes.go
package routes

import("net/http""github.com/gin-gonic/gin")funcAdminRoutesInit(router *gin.Engine){
    adminRouter := router.Group("/admin"){
        adminRouter.GET("/user",func(c *gin.Context){
            c.String(http.StatusOK,"用户")})
        adminRouter.GET("/news",func(c *gin.Context){
            c.String(http.StatusOK,"news")})}}
2、E:\gormlearn\gormtest\routes\apiRoutes.go
package routes

import("net/http""github.com/gin-gonic/gin")funcApiRoutesInit(router *gin.Engine){
    apiRoute := router.Group("/api"){
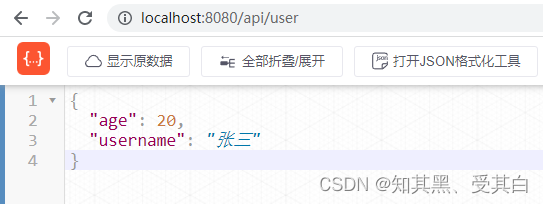
        apiRoute.GET("/user",func(c *gin.Context){
            c.JSON(http.StatusOK, gin.H{"username":"张三","age":20,})})
        apiRoute.GET("/news",func(c *gin.Context){
            c.JSON(http.StatusOK, gin.H{"title":"这是新闻",})})}}
3、E:\gormlearn\gormtest\routes\defaultRoutes.go
package routes

import("github.com/gin-gonic/gin")funcDefaultRoutesInit(router *gin.Engine){
    defaultRoute := router.Group("/"){
        defaultRoute.GET("/",func(c *gin.Context){
            c.String(200,"首页")})}}
4 、配置 main.go
package routes

import("net/http""github.com/gin-gonic/gin")funcApiRoutesInit(router *gin.Engine){
    apiRoute := router.Group("/api"){
        apiRoute.GET("/user",func(c *gin.Context){
            c.JSON(http.StatusOK, gin.H{"username":"张三","age":20,})})
        apiRoute.GET("/news",func(c *gin.Context){
            c.JSON(http.StatusOK, gin.H{"title":"这是新闻",})})}}
八、Gin 中自定义控制器
8.1、控制器分组
当我们的项目比较大的时候有必要对我们的控制器进行分组。
新建:
E:\gormlearn\gormtest\controller\admin\NewsController.go
package admin

import("net/http""github.com/gin-gonic/gin")type NewsController struct{}func(c NewsController)Index(ctx *gin.Context){
    ctx.String(http.StatusOK,"新闻首页")}
新建:
E:\gormlearn\gormtest\controller\admin\UserController.go
package admin

import("net/http""github.com/gin-gonic/gin")type UserController struct{}func(c UserController)Index(ctx *gin.Context){
    ctx.String(http.StatusOK,"这是用户首页")}func(c UserController)Add(ctx *gin.Context){
    ctx.String(http.StatusOK,"增加用户")}
配置对应的路由 E:\gormlearn\gormtest\routes\adminRoutes.go
其他路由的配置方法类似
package routes

import("wgchen/controller/admin""github.com/gin-gonic/gin")funcAdminRoutesInit(router *gin.Engine){
    adminRouter := router.Group("/admin"){
        adminRouter.GET("/user", admin.UserController{}.Index)
        adminRouter.GET("/user/add", admin.UserController{}.Add)// adminRouter.GET("/news", admin.NewsController{}.Add)}}
8.2、控制器的继承
1、新建 E:\gormlearn\gormtest\controller\admin\BaseController.go
package admin

import("net/http""github.com/gin-gonic/gin")type BaseController struct{}func(c BaseController)Success(ctx *gin.Context){
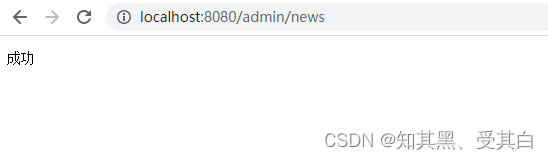
    ctx.String(http.StatusOK,"成功")}func(c BaseController)Error(ctx *gin.Context){
    ctx.String(http.StatusOK,"失败")}
2、NewsController 继承 BaseController
继承后就可以调用控制器里面的公共方法了。
package admin

import("github.com/gin-gonic/gin")type NewsController struct{
    BaseController
}func(c NewsController)Index(ctx *gin.Context){
    c.Success(ctx)}
3、分组文件
E:\gormlearn\gormtest\routes\adminRoutes.go
package routes

import("wgchen/controller/admin""github.com/gin-gonic/gin")funcAdminRoutesInit(router *gin.Engine){
    adminRouter := router.Group("/admin"){
        adminRouter.GET("/user", admin.UserController{}.Index)
        adminRouter.GET("/user/add", admin.UserController{}.Add)
        adminRouter.GET("/news", admin.NewsController{}.Index)}}
4、E:\gormlearn\gormtest\main.go
package main

import("wgchen/routes""github.com/gin-gonic/gin")// 注意首字母大写type Userinfo struct{
    Username string`form:"username" json:"user"`
    Password string`form:"password" json:"password"`}funcmain(){
    r := gin.Default()
    routes.AdminRoutesInit(r)
    routes.ApiRoutesInit(r)
    routes.DefaultRoutesInit(r)
    r.Run(":8080")}
5、运行
九、Gin 中间件
Gin 框架允许开发者在处理请求的过程中,加入用户自己的钩子(Hook)函数。
这个钩子函数就叫中间件,中间件适合处理一些公共的业务逻辑,比如登录认证、权限校验、数据分页、记录日志、耗时统计等。
通俗的讲:中间件就是匹配路由前和匹配路由完成后执行的一系列操作。
9.1、路由中间件
9.1.1、初识中间件
Gin 中的中间件必须是一个
gin.HandlerFunc
类型,配置路由的时候可以传递多个
func
回调函数,最后一个
func
回调函数前面触发的方法都可以称为中间件。
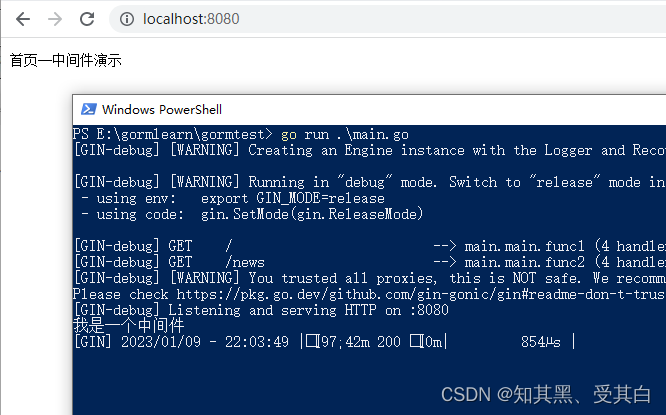
package main

import("fmt""github.com/gin-gonic/gin")funcinitMiddleware(ctx *gin.Context){
    fmt.Println("我是一个中间件")}funcmain(){
    r := gin.Default()
    r.GET("/", initMiddleware,func(ctx *gin.Context){
        ctx.String(200,"首页--中间件演示")})
    r.GET("/news", initMiddleware,func(ctx *gin.Context){
        ctx.String(200,"新闻页面--中间件演示")})
    r.Run(":8080")}
9.1.2、ctx.Next() 调用该请求的剩余处理程序
中间件里面加上
ctx.Next()
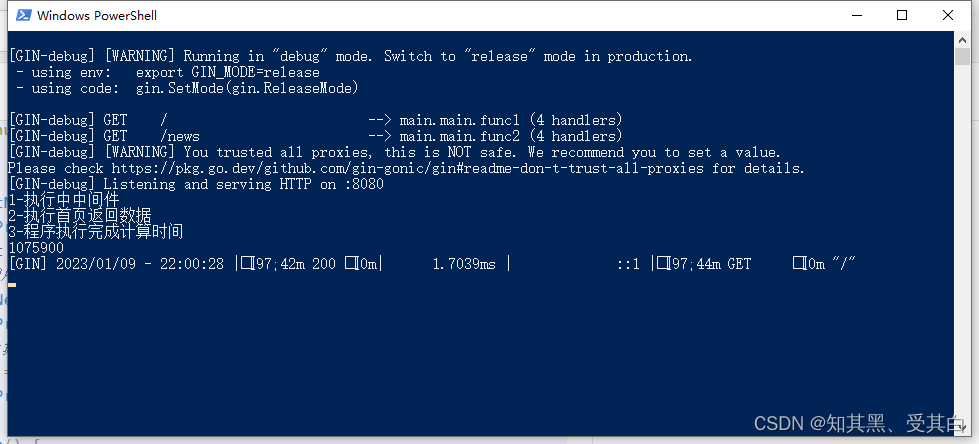
可以让我们在路由匹配完成后执行一些操作。
比如我们统计一个请求的执行时间。
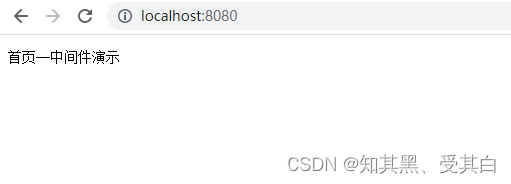
package main

import("fmt""time""github.com/gin-gonic/gin")funcinitMiddleware(ctx *gin.Context){
    fmt.Println("1-执行中中间件")
    start := time.Now().UnixNano()// 调用该请求的剩余处理程序
    ctx.Next()
    fmt.Println("3-程序执行完成计算时间")// 计算耗时Go 语言中的Since()函数保留时间值,并用于评估与实际时间的差异
    end := time.Now().UnixNano()
    fmt.Println(end - start)}funcmain(){
    r := gin.Default()
    r.GET("/", initMiddleware,func(ctx *gin.Context){
        fmt.Println("2-执行首页返回数据")
        ctx.String(200,"首页--中间件演示")})
    r.GET("/news", initMiddleware,func(ctx *gin.Context){
        ctx.String(200,"新闻页面--中间件演示")})
    r.Run(":8080")}
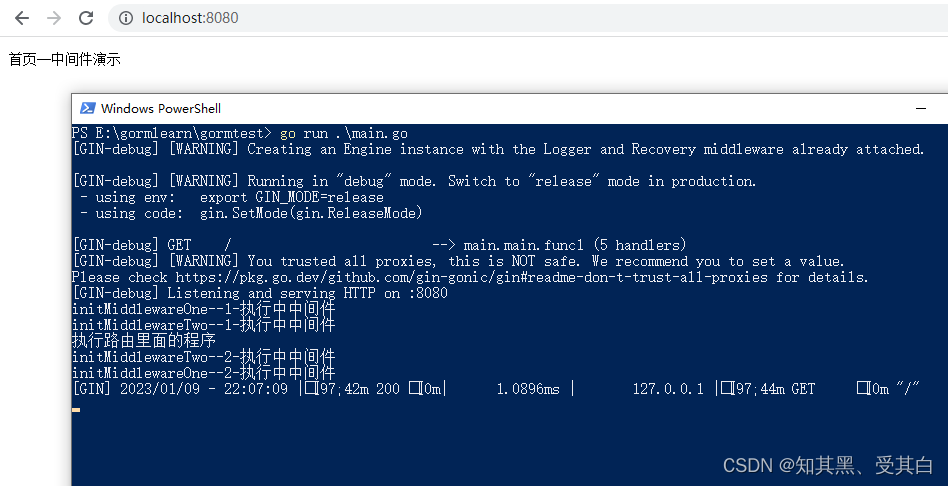
9.1.3、一个路由配置多个中间件的执行顺序
E:\gormlearn\gormtest\main.go
package main

import("fmt""github.com/gin-gonic/gin")funcinitMiddlewareOne(ctx *gin.Context){
    fmt.Println("initMiddlewareOne--1-执行中中间件")// 调用该请求的剩余处理程序
    ctx.Next()
    fmt.Println("initMiddlewareOne--2-执行中中间件")}funcinitMiddlewareTwo(ctx *gin.Context){
    fmt.Println("initMiddlewareTwo--1-执行中中间件")// 调用该请求的剩余处理程序
    ctx.Next()
    fmt.Println("initMiddlewareTwo--2-执行中中间件")}funcmain(){
    r := gin.Default()
    r.GET("/", initMiddlewareOne, initMiddlewareTwo,func(ctx *gin.Context){
        fmt.Println("执行路由里面的程序")

        ctx.String(200,"首页--中间件演示")})
    r.Run(":8080")}
控制台内容:
9.1.4、c.Abort()–(了解)
Abort 是终止的意思,
c.Abort()
表示终止调用该请求的剩余处理程序。
package main

import("fmt""github.com/gin-gonic/gin")funcinitMiddlewareOne(ctx *gin.Context){
    fmt.Println("initMiddlewareOne--1-执行中中间件")// 调用该请求的剩余处理程序
    ctx.Next()
    fmt.Println("initMiddlewareOne--2-执行中中间件")}funcinitMiddlewareTwo(ctx *gin.Context){
    fmt.Println("initMiddlewareTwo--1-执行中中间件")// 终止调用该请求的剩余处理程序
    ctx.Abort()
    fmt.Println("initMiddlewareTwo--2-执行中中间件")}funcmain(){
    r := gin.Default()
    r.GET("/", initMiddlewareOne, initMiddlewareTwo,func(ctx *gin.Context){
        fmt.Println("执行路由里面的程序")
        ctx.String(200,"首页--中间件演示")})
    r.Run(":8080")}
首页–中间件演示,不显示了。

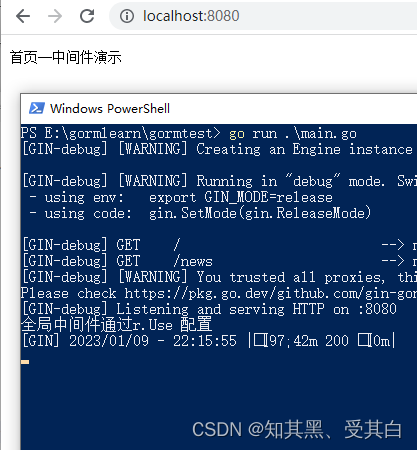
9.2、全局中间件
package main

import("fmt""github.com/gin-gonic/gin")funcinitMiddleware(ctx *gin.Context){
    fmt.Println("全局中间件通过r.Use 配置")// 调用该请求的剩余处理程序
    ctx.Next()}funcmain(){
    r := gin.Default()
    r.Use(initMiddleware)
    r.GET("/",func(ctx *gin.Context){
        ctx.String(200,"首页--中间件演示")})
    r.GET("/news",func(ctx *gin.Context){
        ctx.String(200,"新闻页面--中间件演示")})
    r.Run(":8080")}
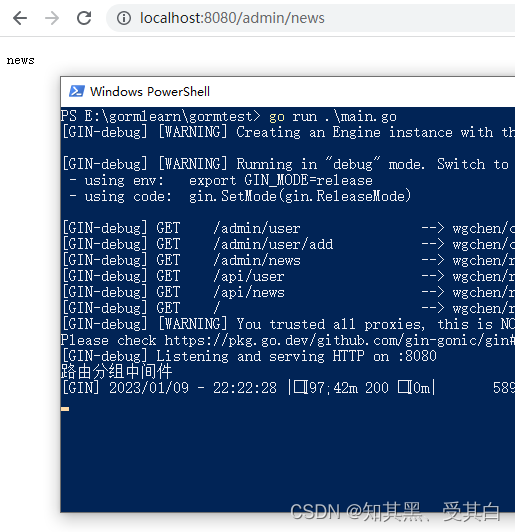
9.3、在路由分组中配置中间件
1、为路由组注册中间件有以下两种写法。
写法1:
shopGroup := r.Group("/shop",StatCost()){
    shopGroup.GET("/index",func(c *gin.Context){...})...}
写法2:
shopGroup := r.Group("/shop")
shopGroup.Use(StatCost()){
    shopGroup.GET("/index",func(c *gin.Context){...})...}
2、分组路由
AdminRoutes.go
中配置中间件。
E:\gormlearn\gormtest\routes\adminRoutes.go
package routes

import("fmt""net/http""wgchen/controller/admin""github.com/gin-gonic/gin")funcinitMiddleware(ctx *gin.Context){
    fmt.Println("路由分组中间件")// 调用该请求的剩余处理程序
    ctx.Next()}funcAdminRoutesInit(router *gin.Engine){
    adminRouter := router.Group("/admin", initMiddleware){
        adminRouter.GET("/user", admin.UserController{}.Index)
        adminRouter.GET("/user/add", admin.UserController{}.Add)
        adminRouter.GET("/news",func(c *gin.Context){
            c.String(http.StatusOK,"news")})}}
3、
E:\gormlearn\gormtest\main.go
package main

import("wgchen/routes""github.com/gin-gonic/gin")funcmain(){
    r := gin.Default()
    routes.AdminRoutesInit(r)
    routes.ApiRoutesInit(r)
    routes.DefaultRoutesInit(r)
    r.Run(":8080")}
9.4、中间件和对应控制器之间共享数据
设置值
ctx.Set("username","张三")
获取值
username,_:= ctx.Get("username")
中间件设置值
E:\gormlearn\gormtest\routes\adminRoutes.go
package routes

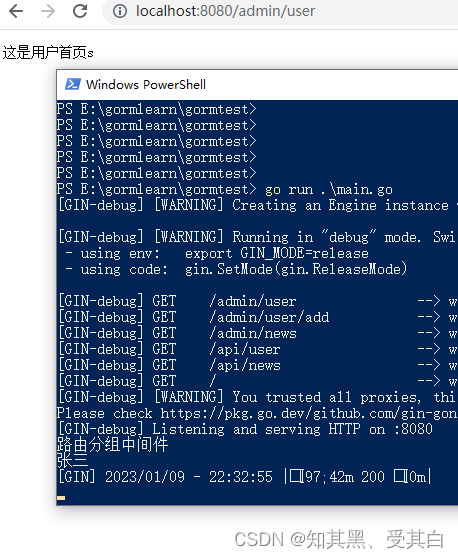
import("fmt""net/http""wgchen/controller/admin""github.com/gin-gonic/gin")funcInitAdminMiddleware(ctx *gin.Context){
    fmt.Println("路由分组中间件")// 可以通过ctx.Set 在请求上下文中设置值,后续的处理函数能够取到该值
    ctx.Set("username","张三")// 调用该请求的剩余处理程序
    ctx.Next()}funcAdminRoutesInit(router *gin.Engine){
    adminRouter := router.Group("/admin", InitAdminMiddleware){
        adminRouter.GET("/user", admin.UserController{}.Index)
        adminRouter.GET("/user/add", admin.UserController{}.Add)
        adminRouter.GET("/news",func(c *gin.Context){
            c.String(http.StatusOK,"news")})}}
E:\gormlearn\gormtest\controller\admin\UserController.go
package admin

import("fmt""net/http""github.com/gin-gonic/gin")type UserController struct{}func(c UserController)Index(ctx *gin.Context){
    username,_:= ctx.Get("username")
    fmt.Println(username)
    ctx.String(http.StatusOK,"这是用户首页s")}func(c UserController)Add(ctx *gin.Context){
    ctx.String(http.StatusOK,"增加用户")}
9.5、中间件注意事项
gin 默认中间件
gin.Default()
默认使用了
Logger
和
Recovery
中间件,其中:
- Logger 中间件将日志写入
gin.DefaultWriter,即使配置了GIN_MODE=release。 - Recovery 中间件会 recover 任何 panic。如果有panic 的话,会写入500 响应码。
如果不想使用上面两个默认的中间件,可以使用
gin.New()
新建一个没有任何默认中间件的路由。
gin 中间件中使用 goroutine
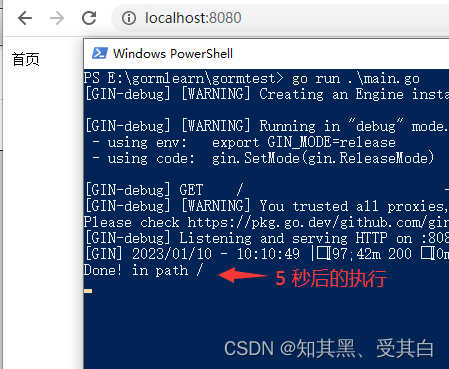
当在中间件或 handler 中启动新的 goroutine 时,不能使用原始的上下文(
c *gin.Context
),必须使用其只读副本(
c.Copy()
)。
E:\gormlearn\gormtest\main.go
package main

import("fmt""time""github.com/gin-gonic/gin")funcmain(){
    r := gin.Default()

    r.GET("/",func(c *gin.Context){
        cCp := c.Copy()gofunc(){// simulate a long task with time.Sleep(). 5 seconds
            time.Sleep(5* time.Second)// 这里使用你创建的副本
            fmt.Println("Done! in path "+ cCp.Request.URL.Path)}()
        c.String(200,"首页")})

    r.Run(":8080")}
十、Gin 中自定义 Model
10.1、关于 Model
如果我们的应用非常简单的话,我们可以在Controller 里面处理常见的业务逻辑。
但是如果我们有一个功能想在多个控制器、或者多个模板里面复用的话,那么我们就可以把公共的功能单独抽取出来作为一个模块(Model)。
Model 是逐步抽象的过程,一般我们会在Model里面封装一些公共的方法让不同Controller 使用,也可以在Model 中实现和数据库打交道。
10.2、Model 里面封装公共的方法
1、新建 models\tools.go
E:\gormlearn\gormtest\models\tools.go
package models

import("crypto/md5""fmt""time")// 时间戳间戳转换成日期funcUnixToDate(timestamp int)string{
    t := time.Unix(int64(timestamp),0)return t.Format("2006-01-02 15:04:05")}// 日期转换成时间戳2020-05-02 15:04:05funcDateToUnix(str string)int64{
    template :="2006-01-02 15:04:05"
    t, err := time.ParseInLocation(template, str, time.Local)if err !=nil{return0}return t.Unix()}funcGetUnix()int64{return time.Now().Unix()}funcGetDate()string{
    template :="2006-01-02 15:04:05"return time.Now().Format(template)}funcGetDay()string{
    template :="20060102"return time.Now().Format(template)}funcMd5(str string)string{
    data :=[]byte(str)return fmt.Sprintf("%x\n", md5.Sum(data))}
10.3、控制器中调用 Model
package controllers
import("gin_demo/models")
day := models.GetDay()
10.4、调用 Model 注册全局模板函数
models/tools.go
// 时间戳间戳转换成日期funcUnixToDate(timestamp int64)string{
    t := time.Unix(timestamp,0)return t.Format("2006-01-02 15:04:05")}
main.go
// 注册全局模板函数注意顺序,注册模板函数需要在加载模板上面
r.SetFuncMap(template.FuncMap{"unixToDate": models.UnixToDate,})
控制器
func(c UserController)Add(ctx *gin.Context){
    ctx.HTML(http.StatusOK,"admin/user/add.html", gin.H{"now": models.GetUnix(),})}
模板
{{.now | formatDate}}
10.5、Golang Md5 加密
打开golang 包对应的网站:https://pkg.go.dev/,搜索 md5。
方法一:
data :=[]byte("123456")
has := md5.Sum(data)
md5str := fmt.Sprintf("%x", has)
fmt.Println(md5str)
方法二:
h := md5.New()
io.WriteString(h,"123456")
fmt.Printf("%x\n", h.Sum(nil))
十一、Gin 文件上传
注意:需要在上传文件的
form表单上面需要加入
enctype="multipart/form-data"。
11.1、单文件上传
https://gin-gonic.com/zh-cn/docs/examples/upload-file/single-file/
官方示例:
funcmain(){
    router := gin.Default()// 为multipart forms 设置较低的内存限制(默认是32 MiB)
    router.MaxMultipartMemory =8<<20// 8 MiB
    router.POST("/upload",func(c *gin.Context){// 单文件
        file,_:= c.FormFile("file")
        log.Println(file.Filename)// 上传文件至指定目录
        c.SaveUploadedFile(file, dst)
        c.String(http.StatusOK, fmt.Sprintf("'%s' uploaded!", file.Filename))})
    router.Run(":8080")}
项目中实现文件上传:
1、定义模板需要在上传文件的 form 表单上面需要加入
enctype="multipart/form-data"
。
E:\gormlearn\gormtest\templates\admin\user\add.html
<!-- 相当于给模板定义一个名字define end 成对出现-->{{ define "admin/user/add.html"}}<!DOCTYPE html><html lang="en"><head><meta charset="UTF-8"><meta http-equiv="X-UA-Compatible" content="IE=edge"><meta name="viewport" content="width=device-width, initial-scale=1.0"><title>Document</title></head><body><form action="/admin/user/doAdd" method="post" enctype="multipart/form-data">
用户名: <input type="text" name="username" placeholder="用户名"><br><br>
头像:<input type="file" name="face"><br><br><input type="submit" value="提交"></form></body></html>{{ end }}
2、定义业务逻辑
func(c UserController)DoAdd(ctx *gin.Context){
    username := ctx.PostForm("username")
    file, err := ctx.FormFile("face")if err !=nil{
        ctx.JSON(http.StatusInternalServerError, gin.H{"message": err.Error(),})return}// 上传文件到指定的目录
    dst := path.Join("./static/upload", file.Filename)
    fmt.Println(dst)
    ctx.SaveUploadedFile(file, dst)
    ctx.JSON(http.StatusOK, gin.H{"message":  fmt.Sprintf("'%s' uploaded!", file.Filename),"username": username,})}
11.2、多文件上传–不同名字的多个文件
1、定义模板需要在上传文件的
form
表单上面需要加入
enctype="multipart/form-data"
。
<!-- 相当于给模板定义一个名字define end 成对出现-->{{ define "admin/user/add.html"}}<!DOCTYPE html><html lang="en"><head><meta charset="UTF-8"><meta http-equiv="X-UA-Compatible" content="IE=edge"><meta name="viewport" content="width=device-width, initial-scale=1.0"><title>Document</title></head><body><form action="/admin/user/doAdd" method="post" enctype="multipart/form-data">
用户名: <input type="text" name="username" placeholder="用户名"><br><br>
头像1:<input type="file" name="face1"><br><br>
头像2:<input type="file" name="face2"><br><br><input type="submit" value="提交"></form></body></html>{{ end }}
2、定义业务逻辑
func(c UserController)DoAdd(ctx *gin.Context){
    username := ctx.PostForm("username")
    face1, err1 := ctx.FormFile("face1")
    face2, err2 := ctx.FormFile("face2")// 上传文件到指定的目录if err1 ==nil{
        dst1 := path.Join("./static/upload", face1.Filename)
        ctx.SaveUploadedFile(face1, dst1)}if err2 ==nil{
        dst2 := path.Join("./static/upload", face2.Filename)
        ctx.SaveUploadedFile(face2, dst2)}
    ctx.JSON(http.StatusOK, gin.H{"message":"文件上传成功","username": username,})// ctx.String(200, username)}
11.3、多文件上传–相同名字的多个文件
参考:https://gin-gonic.com/zh-cn/docs/examples/upload-file/multiple-file/
1、定义模板需要在上传文件的
form
表单上面需要加入
enctype="multipart/form-data"
。
<!-- 相当于给模板定义一个名字define end 成对出现-->{{ define "admin/user/add.html"}}<!DOCTYPE html><html lang="en"><head><meta charset="UTF-8"><meta http-equiv="X-UA-Compatible" content="IE=edge"><meta name="viewport" content="width=device-width, initial-scale=1.0"><title>Document</title></head><body><form action="/admin/user/doAdd" method="post" enctype="multipart/form-data">
用户名: <input type="text" name="username" placeholder="用户名"><br><br>
头像1:<input type="file" name="face[]"><br><br>
头像2:<input type="file" name="face[]"><br><br><input type="submit" value="提交"></form></body></html>{{ end }}
2、定义业务逻辑
func(c UserController)DoAdd(ctx *gin.Context){
    username := ctx.PostForm("username")// Multipart form
    form,_:= ctx.MultipartForm()
    files := form.File["face[]"]// var dst;for_, file :=range files {// 上传文件至指定目录
        dst := path.Join("./static/upload", file.Filename)
        ctx.SaveUploadedFile(file, dst)}
    ctx.JSON(http.StatusOK, gin.H{"message":"文件上传成功","username": username,})}
11.4、文件上传按照日期存储
1、定义模板需要在上传文件的
form
表单上面需要加入
enctype="multipart/form-data"
。
<!-- 相当于给模板定义一个名字define end 成对出现-->{{ define "admin/user/add.html"}}<!DOCTYPE html><html lang="en"><head><meta charset="UTF-8"><meta http-equiv="X-UA-Compatible" content="IE=edge"><meta name="viewport" content="width=device-width, initial-scale=1.0"><title>Document</title></head><body><form action="/admin/user/doAdd" method="post" enctype="multipart/form-data">
用户名: <input type="text" name="username" placeholder="用户名"><br><br>
头像: <input type="file" name="face"><br><br><input type="submit" value="提交"></form></body></html>{{ end }}
2、定义业务逻辑
func(c UserController)DoAdd(ctx *gin.Context){
    username := ctx.PostForm("username")//1、获取上传的文件
    file, err1 := ctx.FormFile("face")if err1 ==nil{//2、获取后缀名判断类型是否正确.jpg .png .gif .jpeg
        extName := path.Ext(file.Filename)
        allowExtMap :=map[string]bool{".jpg":true,".png":true,".gif":true,".jpeg":true,}if_, ok := allowExtMap[extName];!ok {
            ctx.String(200,"文件类型不合法")return}//3、创建图片保存目录static/upload/20200623
        day := models.GetDay()
        dir :="./static/upload/"+ day
        if err := os.MkdirAll(dir,0666); err !=nil{
            log.Error(err)}//4、生成文件名称144325235235.png
        fileUnixName := strconv.FormatInt(models.GetUnix(),10)//static/upload/20200623/144325235235.png
        saveDir := path.Join(dir, fileUnixName+extName)
        ctx.SaveUploadedFile(file, saveDir)}
    ctx.JSON(http.StatusOK, gin.H{"message":"文件上传成功","username": username,})// ctx.String(200, username)}
3、models/tools.go
package models

import("crypto/md5""fmt""time")// 时间戳间戳转换成日期funcUnixToDate(timestamp int)string{
    t := time.Unix(int64(timestamp),0)return t.Format("2006-01-02 15:04:05")}// 日期转换成时间戳2020-05-02 15:04:05funcDateToUnix(str string)int64{
    template :="2006-01-02 15:04:05"
    t, err := time.ParseInLocation(template, str, time.Local)if err !=nil{
        beego.Info(err)return0}return t.Unix()}funcGetUnix()int64{return time.Now().Unix()}funcGetDate()string{
    template :="2006-01-02 15:04:05"return time.Now().Format(template)}funcGetDay()string{
    template :="20060102"return time.Now().Format(template)}funcMd5(str string)string{
    data :=[]byte(str)return fmt.Sprintf("%x\n", md5.Sum(data))}funcHello(in string)(out string){
    out = in +"world"return}
十二、Gin 中的 Cookie
12.1、Cookie 介绍
HTTP 是无状态协议。
简单地说,当你浏览了一个页面,然后转到同一个网站的另一个页面,服务器无法认识到这是同一个浏览器在访问同一个网站。
每一次的访问,都是没有任何关系的。如果我们要实现多个页面之间共享数据的话我们就可以使用 Cookie 或者 Session 实现。
cookie 是存储于访问者计算机的浏览器中。
可以让我们用同一个浏览器访问同一个域名的时候共享数据。
12.2、Cookie 能实现的功能
1、保持用户登录状态。
2、保存用户浏览的历史记录。
3、猜你喜欢,智能推荐。
4、电商网站的加入购物车。
12.3、设置和获取 Cookie
https://gin-gonic.com/zh-cn/docs/examples/cookie/
设置 Cookie
c.SetCookie(name,
            value string,
            maxAge int,
            path,
            domain string,
            secure,
            httpOnly bool)
- 第一个参数 key。
- 第二个参数 value。
- 第三个参数过期时间,如果只想设置 Cookie 的保存路径而不想设置存活时间,可以在第三个参数中传递
nil。 - 第四个参数 cookie 的路径。
- 第五个参数 cookie 的路径 Domain 作用域本地调试配置成 localhost , 正式上线配置成域名。
- 第六个参数是 secure ,当 secure 值为 true 时,cookie 在HTTP 中是无效,在HTTPS 中才有效。
- 第七个参数 httpOnly,是微软对 COOKIE 做的扩展。如果在 COOKIE 中设置了“httpOnly” 属性,则通过程序(JS 脚本、applet 等)将无法读取到COOKIE 信息,防止XSS 攻击产生。
获取 Cookie
cookie, err := c.Cookie("name")
完整 demo
package main

import("github.com/gin-gonic/gin")funcmain(){
    r := gin.Default()

    r.GET("/",func(c *gin.Context){
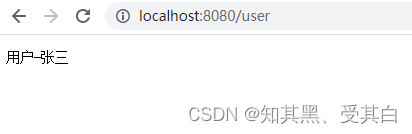
        c.SetCookie("usrename","张三",3600,"/","localhost",false,true)
        c.String(200,"首页")})
    r.GET("/user",func(c *gin.Context){
        username,_:= c.Cookie("usrename")
        c.String(200,"用户-"+username)})
    r.Run(":8080")}
12.4 、多个二级域名共享 cookie
1、分别把
a.icu.com
和
b.icu.com
解析到我们的服务器。
2、我们想的是用户在
a.icu.com
中设置Cookie 信息后在
b.icu.com
中获取刚才设置的 cookie,也就是实现多个二级域名共享 cookie。
这时候的话我们就可以这样设置 cookie。
c.SetCookie("usrename","张三",3600,"/",".icu.com",false,true)
十三、Gin 中的 Session
13.1、Session 简单介绍
session 是另一种记录客户状态的机制,不同的是Cookie 保存在客户端浏览器中,而session 保存在服务器上。
13.2、Session 的工作流程
当客户端浏览器第一次访问服务器并发送请求时,服务器端会创建一个session 对象,生成一个类似于
key,value
的键值对,然后将
value
保存到服务器将
key(cookie)
返回到浏览器(客户)端。
浏览器下次访问时会携带
key(cookie)
,找到对应的
session(value)
。
13.3、Gin 中使用 Session
Gin 官方没有给我们提供Session 相关的文档,这个时候我们可以使用第三方的Session 中间件来实现。
https://github.com/gin-contrib/sessions
gin-contrib/sessions 中间件支持的存储引擎:
- cookie
- memstore
- redis
- memcached
- mongodb
13.4、基于Cookie 存储Session
1、安装session 包
go get github.com/gin-contrib/sessions
PS E:\gormlearn\gormtest> go get github.com/gin-contrib/sessions
go: downloading github.com/gin-contrib/sessions v0.0.5
go: downloading github.com/gorilla/context v1.1.1
go: downloading github.com/gorilla/sessions v1.2.1
go: downloading github.com/gorilla/securecookie v1.1.1
go: added github.com/gin-contrib/sessions v0.0.5
go: added github.com/gorilla/context v1.1.1
go: added github.com/gorilla/securecookie v1.1.1
go: added github.com/gorilla/sessions v1.2.1
PS E:\gormlearn\gormtest>
2、基本的 session 用法
package main

import("github.com/gin-contrib/sessions""github.com/gin-contrib/sessions/cookie""github.com/gin-gonic/gin")funcmain(){
    r := gin.Default()// 创建基于cookie 的存储引擎,secret11111 参数是用于加密的密钥
    store := cookie.NewStore([]byte("secret11111"))// 设置session 中间件,参数mysession,指的是session 的名字,也是cookie 的名字// store 是前面创建的存储引擎,我们可以替换成其他存储引擎
    r.Use(sessions.Sessions("mysession", store))

    r.GET("/",func(c *gin.Context){// fmt.Println(123)// os.Exit(123)//初始化session 对象
        session := sessions.Default(c)//设置过期时间
        session.Options(sessions.Options{
            MaxAge:3600*6,// 6hrs})//设置Session
        session.Set("username","张三session")
        session.Save()
        c.JSON(200, gin.H{"msg": session.Get("username")})})
    r.GET("/user",func(c *gin.Context){// 初始化session 对象
        session := sessions.Default(c)// 通过session.Get 读取session 值
        username := session.Get("username")
        c.JSON(200, gin.H{"username": username})})
    r.Run(":8000")}
13.5、基于Redis 存储Session
如果我们想将 session 数据保存到 redis 中,只要将 session 的存储引擎改成 redis 即可。
使用 redis 作为存储引擎的例子:首先安装 redis 存储引擎的包。
go get github.com/gin-contrib/sessions/redis
PS E:\gormlearn\gormtest> go get github.com/gin-contrib/sessions/redis
go: downloading github.com/gomodule/redigo v2.0.0+incompatible
go: downloading github.com/boj/redistore v0.0.0-20180917114910-cd5dcc76aeff
go: warning: github.com/gomodule/[email protected]+incompatible: retracted by module author: Old development version not maintained or published.
go: to switch to the latest unretracted version, run:
        go get github.com/gomodule/redigo@latest
PS E:\gormlearn\gormtest>
例子:
package main

import("github.com/gin-contrib/sessions""github.com/gin-contrib/sessions/redis""github.com/gin-gonic/gin")funcmain(){
    r := gin.Default()// 初始化基于redis 的存储引擎// 参数说明:// 第1 个参数- redis 最大的空闲连接数// 第2 个参数- 数通信协议tcp 或者udp// 第3 个参数- redis 地址, 格式,host:port// 第4 个参数- redis 密码// 第5 个参数- session 加密密钥
    store,_:= redis.NewStore(10,"tcp","localhost:6379","",[]byte("secret"))
    r.Use(sessions.Sessions("mysession", store))

    r.GET("/",func(c *gin.Context){
        session := sessions.Default(c)
        session.Set("username","李四")
        session.Save()
        c.JSON(200, gin.H{"username": session.Get("username")})})
    r.GET("/user",func(c *gin.Context){// 初始化session 对象
        session := sessions.Default(c)// 通过session.Get 读取session 值
        username := session.Get("username")
        c.JSON(200, gin.H{"username": username})})

    r.Run(":8888")}
十四、Gin 中使用GORM 操作mysql 数据库
14.1、GORM 简单介绍
GORM 是Golang 的一个orm 框架。
简单说,ORM 就是通过实例对象的语法,完成关系型数据库的操作的技术,是"对象-关系映射"(Object/Relational Mapping) 的缩写。
使用ORM框架可以让我们更方便的操作数据库。
GORM 官方支持的数据库类型有: MySQL, PostgreSQL, SQlite, SQL Server。
全功能 ORM
- 关联(Has One,Has Many,Belongs To,Many To Many,多态,单表继承)
- Create,Save,Update,Delete,Find 中钩子方法。
- 支持 Preload、Joins 的预加载。
- 事务,嵌套事务,Save Point,Rollback To Saved Point。
- Context、预编译模式、DryRun 模式。
- 批量插入,FindInBatches,Find/Create with Map,使用SQL 表达式、Context Valuer 进行CRUD。
- SQL 构建器,Upsert,数据库锁,Optimizer/Index/Comment Hint,命名参数,子查询。
- 复合主键,索引,约束。
- Auto Migration。
- 自定义 Logger
- 灵活的可扩展插件API:Database Resolver(多数据库,读写分离)、Prometheus …
- 每个特性都经过了测试的重重考验。
- 开发者友好
官方文档:https://gorm.io/zh_CN/docs/index.html
14.2、Gin 中使用 GORM
1、安装
如果使用 go mod 管理项目的话可以忽略此步骤。
go get -u gorm.io/gorm
go get -u gorm.io/driver/mysql
2、Gin 中使用 Gorm 连接数据库
在 models 下面新建
core.go
,建立数据库链接。
package models

import("fmt""gorm.io/driver/mysql""gorm.io/gorm")var DB *gorm.DB
var err errorfuncinit(){
    dsn :="root:123456@tcp(127.0.0.1:3306)/gin?charset=utf8mb4&parseTime=True&loc=Local"
    DB, err = gorm.Open(mysql.Open(dsn),&gorm.Config{})if err !=nil{
        fmt.Println(err)}}
3、定义操作数据库的模型
Gorm 官方给我们提供了详细的:
https://gorm.io/zh_CN/docs/models.html
。
虽然在 gorm 中可以指定字段的类型以及自动生成数据表,但是在实际的项目开发中,我们是先设计数据库表,然后去实现编码。
在实际项目中定义数据库模型注意以下几点:
1、结构体的名称必须首字母大写,并和数据库表名称对应。
例如:
表名称为 user 结构体名称定义成 User,表名称为 article_cate 结构体名称定义成 ArticleCate。
2、结构体中的字段名称首字母必须大写,并和数据库表中的字段一一对应。
例如:
下面结构体中的 Id 和数据库中的 id 对应,Username 和数据库中的 username 对应,Age 和数据库中的 age 对应,Email 和数据库中的 email 对应,AddTime 和数据库中的 add_time 字段对应。
3、默认情况表名是结构体名称的复数形式。
如果我们的结构体名称定义成 User,表示这个模型默认操作的是 users 表。
4、我们可以使用结构体中的自定义方法 TableName 改变结构体的默认表名称。
如下:
func(User)TableName()string{return"user"}
表示把 User 结构体默认操作的表改为 user 表。
定义 user 模型:
package models

type User struct{// 默认表名是`users`
    Id       int
    Username string
    Age      int
    Email    string
    AddTime  int}func(User)TableName()string{return"user"}
** 关于更多模型定义的方法参考:https://gorm.io/zh_CN/docs/conventions.html**
gorm.Model
GORM 定义一个gorm.Model 结构体,其包括字段
ID、CreatedAt、UpdatedAt、DeletedAt
。
// gorm.Model 的定义type Model struct{
    ID uint`gorm:"primaryKey"`
    CreatedAt time.Time
    UpdatedAt time.Time
    DeletedAt gorm.DeletedAt `gorm:"index"`}
14.3、Gin GORM CURD
找到要操作数据库表的控制器,然后引入models 模块。
1、增加
增加成功后会返回刚才增加的记录。
func(con UserController)Add(c *gin.Context){
    user := models.User{
        Username:"icu.com",
        Age:18,
        Email:"[email protected]",
        AddTime:int(time.Now().Unix()),}
    result := models.DB.Create(&user)// 通过数据的指针来创建if result.RowsAffected >1{
        fmt.Print(user.Id)}
    fmt.Println(result.RowsAffected)
    fmt.Println(user.Id)
    c.String(http.StatusOK,"add 成功")}
更多增加语句:https://gorm.io/zh_CN/docs/create.html
2、查找
查找全部
func(con UserController)Index(c *gin.Context){
    user :=[]models.User{}
    models.DB.Find(&user)
    c.JSON(http.StatusOK, gin.H{"success":true,"result":  user,})}
指定条件查找
func(con UserController)Index(c *gin.Context){
    user :=[]models.User{}
    models.DB.Where("username=?","王五").Find(&user)
    c.JSON(http.StatusOK, gin.H{"success":true,"result":  user,})}
更多查询语句:https://gorm.io/zh_CN/docs/query.html
3、修改
func(con UserController)Edit(c *gin.Context){
    user := models.User{Id:7}
    models.DB.Find(&user)
    user.Username ="gin gorm"
    user.Age =1
    models.DB.Save(&user)
    c.String(http.StatusOK,"Edit")}
更多修改的方法参考:https://gorm.io/zh_CN/docs/update.html
4、删除
func(con UserController)Delete(c *gin.Context){
    user := models.User{Id:8}
    models.DB.Delete(&user)
    c.String(http.StatusOK,"Delete")}
更多删除的方法参考:https://gorm.io/zh_CN/docs/delete.html
5、批量删除
DB.Where("email LIKE ?","%jinzhu%").Delete(Email{})// DELETE from emails where email LIKE "%jinzhu%";

DB.Delete(Email{},"email LIKE ?","%jinzhu%")// DELETE from emails where email LIKE "%jinzhu%";
func(con UserController)DeleteAll(c *gin.Context){
    user := models.User{}
    models.DB.Where("id>9").Delete(&user)
    c.String(http.StatusOK,"DeleteAll")}
更多删除的方法参考:https://gorm.io/zh_CN/docs/delete.html
14.4、Gin GORM 查询语句详解
https://gorm.io/zh_CN/docs/query.html
1、Where
=<
\><=
\>=!=
IS NOT NULL
IS NULL
BETWEEN AND
NOT BETWEEN AND
IN
OR
AND
NOT
LIKE
nav :=[]models.Nav{}
models.DB.Where("id<3").Find(&nav)
c.JSON(http.StatusOK, gin.H{"success":true,"result": nav,})
var n =5
nav :=[]models.Nav{}
models.DB.Where("id>?", n).Find(&nav)
c.JSON(http.StatusOK, gin.H{"success":true,"result": nav,})
var n2 =9
nav :=[]models.Nav{}
models.DB.Where("id > ? AND id < ?", n1, n2).Find(&nav)
c.JSON(http.StatusOK, gin.H{"success":true,"result": nav,})
nav :=[]models.Nav{}
models.DB.Where("id in (?)",[]int{3,5,6}).Find(&nav)
c.JSON(http.StatusOK, gin.H{"success":true,"result": nav,})
nav :=[]models.Nav{}
models.DB.Where("title like ?","%会%").Find(&nav)
c.JSON(http.StatusOK, gin.H{"success":true,"result": nav,})
nav :=[]models.Nav{}
models.DB.Where("id between ? and ?",3,6).Find(&nav)
c.JSON(http.StatusOK, gin.H{"success":true,"result": nav,})
2、Or 条件
nav :=[]models.Nav{}
models.DB.Where("id=? OR id=?",2,3).Find(&nav)
nav :=[]models.Nav{}
models.DB.Where("id=?",2).Or("id=?",3).Or("id=4").Find(&nav)
3、选择字段查询
nav :=[]models.Nav{}
models.DB.Select("id, title,url").Find(&nav)
4、排序Limit 、Offset
nav :=[]models.Nav{}
models.DB.Where("id>2").Order("id Asc").Find(&nav)

nav :=[]models.Nav{}
models.DB.Where("id>2").Order("sort Desc").Order("id Asc").Find(&nav)

nav :=[]models.Nav{}
odels.DB.Where("id>1").Limit(2).Find(&nav)
跳过 2 条查询 2 条。
nav :=[]models.Nav{}
models.DB.Where("id>1").Offset(2).Limit(2).Find(&nav)
5、获取总数
nav :=[]models.Nav{}var num int
models.DB.Where("id > ?",2).Find(&nav).Count(&num)
6、Distinct
从模型中选择不相同的值。
nav :=[]models.Nav{}
models.DB.Distinct("title").Order("id desc").Find(&nav)
c.JSON(200, gin.H{"nav": nav,})
SELECT DISTINCT `title` FROM `nav` ORDER BY id desc
7、Scan
type Result struct{
    Name string
    Age int}var result Result

DB.Table("users").Select("name","age").Where("name = ?","Antonio").Scan(&result)// 原生SQL
DB.Raw("SELECT name, age FROM users WHERE name = ?","Antonio").Scan(&result)var result []models.User
models.DB.Raw("SELECT * FROM user").Scan(&result)

fmt.Println(result)
8、Join
type result struct{
    Name string
    Email string}

DB.Model(&User{}).Select("users.name, emails.email").Joins("left join emails on emails.user_id = users.id").Scan(&result{})

SELECT users.name, emails.email FROM `users` left join emails on emails.user_id = users.id
14.4、Gin GORM 查看执行的sql
funcinit(){
    dsn :="root:123456@tcp(192.168.0.6:3306)/gin?charset=utf8mb4&parseTime=True&loc=Local"
    DB, err = gorm.Open(mysql.Open(dsn),&gorm.Config{
        QueryFields:true,})// DB.Debug()if err !=nil{
        fmt.Println(err)}}
十五、原生SQL 和SQL 生成器
更多使用方法参考:https://gorm.io/zh_CN/docs/sql_builder.html
1、使用原生sql 删除user 表中的一条数据
result := models.DB.Exec("delete from user where id=?",3)
fmt.Println(result.RowsAffected)
2、使用原生 sql 修改 user 表中的一条数据
result := models.DB.Exec("update user set username=? where id=2","哈哈")
fmt.Println(result.RowsAffected)
3、查询 uid=2 的数据
var result models.User
models.DB.Raw("SELECT * FROM user WHERE id = ?",2).Scan(&result)
fmt.Println(result)
4、查询 User 表中所有的数据
var result []models.User
models.DB.Raw("SELECT * FROM user").Scan(&result)
fmt.Println(result)
5、统计user 表的数量
var count int
row := models.DB.Raw("SELECT count(1) FROM user").Row(&count )
row.Scan(&count)
十六、Gin 中使用GORM 实现表关联查询
https://gorm.io/zh_CN/docs/has_many.html
16.1、一对一
如上图所示,一个文章只有一个分类,article 和 article_cate 之间是1 对1 的关系。
文章表中的 cate_id 保存着文章分类的 id。
如果我们想查询文章的时候同时获取文章分类,就涉及到 1 对1 的关联查询。
foreignkey 指定当前表的外键、references 指定关联表中和外键关联的字段。
Article
package models
type Article struct{
    Id int`json:"id"`
    Title string`json:"title"`
    Description int`json:"description"`
    CateId string`json:"cate_id"`
    State int`json:"state"`
    ArticleCate ArticleCate `gorm:"foreignKey:CateId;references:Id"`}func(Article)TableName()string{return"article"}
ArticleCate
package models
//ArticleCate 的结构体type ArticleCate struct{
    Id int`json:"id"`
    Title string`json:"title"`
    State int`json:"state"`}func(ArticleCate)TableName()string{return"article_cate"}
1、查询所有文章以及文章对应的分类信息:
func(con ArticleController)Index(c *gin.Context){var articleList []models.Article
    models.DB.Preload("ArticleCate").Limit(2).Find(&articleList)
    c.JSON(200, gin.H{"result": articleList,})}
注意:Preload(“ArticleCate”) 里面的 ArticleCate 为 Article struct 中定义的属性ArticleCate。
返回JSON 数据:
[{"id":1,"title":"8 月份CPI 同比上涨2.8% 猪肉价格上涨46.7%","description":0,"cate_id":"1","state":1,"ArticleCate":{"id":1,"title":"国内","state":1}},{"id":2,"title":"中国联通与中国电信共建共享5G 网络用户归属不变","description":0,"cate_id":"1","state":1,"ArticleCate":{"id":1,"title":"国内","state":1}}]
2、查询所有文章以及文章对应的分类信息指定条件:
func(con ArticleController)Index(c *gin.Context){var articleList []models.Article
    models.DB.Preload("ArticleCate").Where("id>=?",4).Find(&articleList)
    c.JSON(200, gin.H{"result": articleList,})}
返回数据:
[{"id":4,"title":"这些老师的口头禅,想起那些年“被支配的恐惧”了吗","description":0,"cate_id":"2","state":1,"ArticleCate":{"id":2,"title":"国际","state":1}},{"id":5,"title":"美国空军一号差点遭雷劈,特朗普惊呼:令人惊奇","description":0,"cate_id":"3","state":1,"ArticleCate":{"id":3,"title":"娱乐","state":1}}]
16.2、一对多
1 对多在实际项目中用的非常多
比如一个点餐系统:有菜品分类、有菜品。
菜品分类和菜品之间就是一对多的关系订单表和订单商品表:
订单表和订单商品表之间也是一对多的关系。
如上图所示,一个分类下面有很多个文章,article_cate 和 article 之间是 1 对多的关系。
文章表中的 cate_id 保存着文章分类的 id。
如果我们想查询文章分类的时候获取分类下面的文章,这个时候就涉及到一对多的关联查询。
ArticleCate
// ArticleCate 的结构体package models
type ArticleCate struct{
    Id int`json:"id"`
    Title string`json:"title"`
    State int`json:"state"`
    Article []Article `gorm:"foreignKey:CateId"`}func(ArticleCate)TableName()string{return"article_cate"}
Article
package models
type Article struct{
    Id int`json:"id"`
    Title string`json:"title"`
    Description int`json:"description"`
    CateId string`json:"cate_id"`
    State int`json:"state"`}func(Article)TableName()string{return"article"}
1、查找所有分类以及分类下面的文章信息。
func(con ArticleController)Index(c *gin.Context){var articleCateList []models.ArticleCate
    models.DB.Preload("Article").Find(&articleCateList)
    c.JSON(200, gin.H{"result": articleCateList,})}
2、查找所有分类以及分类下面的文章信息指定条件。
func(con ArticleController)Index(c *gin.Context){var articleCateList []models.ArticleCate
    models.DB.Preload("Article").Where("id>0").Offset(1).Limit(1).Find(&articleCateList)
    c.JSON(200, gin.H{"result": articleCateList,})}
3、更多1 对多的查询方法
地址: https://github.com/jouyouyun/examples/tree/master/gorm/related
4、如果我们的程序中有如下需求
1、查询文章获取文章分类信息
2、查询文章分类获取文章信息
这个时候可以这样定义 models。
package models
type Article struct{
    Id int`json:"id"`
    Title string`json:"title"`
    Description int`json:"description"`
    CateId string`json:"cate_id"`
    State int`json:"state"`
    ArticleCate ArticleCate `gorm:"foreignKey:CateId;references:Id"`}func(Article)TableName()string{return"article"}
package models
//ArticleCate 的结构体type ArticleCate struct{
    Id int`json:"id"`
    Title string`json:"title"`
    State int`json:"state"`
    Article []Article `gorm:"foreignKey:CateId"`}func(ArticleCate)TableName()string{return"article_cate"}
16.3、多对多
1、定义学生课程学生课程表 model
如果想根据课程获取选学本门课程的学生,这个时候就在 Lesson 里面关联 Student。
Lesson
package models
type Lesson struct{
    Id int`json:"id"`
    Name string`json:"name"`
    Student []*Student `gorm:"many2many:lesson_student"`}func(Lesson)TableName()string{return"lesson"}
Student
package models
type Student struct{
    Id int
    Number string
    Password string
    ClassId int
    Name string
    Lesson []*Lesson `gorm:"many2many:lesson_student"`}func(Student)TableName()string{return"student"}
LessonStudent
package models
type LessonStudent struct{
    LessonId int
    StudentId int}func(LessonStudent)TableName()string{return"lesson_student"}
2、获取学生信息以及课程信息
studentList :=[]models.Student{}
models.DB.Find(&studentList)
c.JSON(http.StatusOK, studentList)

lessonList :=[]models.Lesson{}
models.DB.Find(&lessonList)
c.JSON(http.StatusOK, lessonList)
3、查询学生信息的时候获取学生的选课信息
studentList :=[]models.Student{}
models.DB.Preload("Lesson").Find(&studentList)
c.JSON(http.StatusOK, studentList)
4、查询张三选修了哪些课程
studentList :=[]models.Student{}
models.DB.Preload("Lesson").Where("id=1").Find(&studentList)
c.JSON(http.StatusOK, studentList)
5、课程被哪些学生选修了
lessonList :=[]models.Lesson{}
models.DB.Preload("Student").Find(&lessonList)
c.JSON(http.StatusOK, lessonList)
6、计算机网络被那些学生选修了
lessonList :=[]models.Lesson{}
models.DB.Preload("Student").Where("id=1").Find(&lessonList)
c.JSON(http.StatusOK, lessonList)
7、查询数据指定条件
lessonList :=[]models.Lesson{}
models.DB.Preload("Student").Offset(1).Limit(2).Find(&lessonList)
c.JSON(http.StatusOK, lessonList)
8、关联查询指定子集的筛选条件
https://gorm.io/zh_CN/docs/preload.html
张三被开除了查询课程被哪些学生选修的时候要去掉张三
用法:
access :=[]models.Access{}
models.DB.Preload("AccessItem","status=1").Order("sort desc").Where("module_id=?",0).Find(&access)

lessonList :=[]models.Lesson{}
models.DB.Preload("Student","id!=1").Find(&lessonList)
c.JSON(http.StatusOK, lessonList)

lessonList :=[]models.Lesson{}
models.DB.Preload("Student","id not in (1,2)").Find(&lessonList)
c.JSON(http.StatusOK, lessonList)
9、自定义预加载SQL
查看课程被哪些学生选修要求:学生 id 倒叙输出。
https://gorm.io/zh_CN/docs/preload.html
注意:需要引入
gorm.io/gorm
这个包。
lessonList :=[]models.Lesson{}
models.DB.Preload("Student",func(db *gorm.DB)*gorm.DB {return models.DB.Order("id DESC")}).Find(&lessonList)
c.JSON(http.StatusOK, lessonList)

lessonList :=[]models.Lesson{}
models.DB.Preload("Student",func(db *gorm.DB)*gorm.DB {return models.DB.Where("id>3").Order("id DESC")}).Find(&lessonList)
c.JSON(http.StatusOK, lessonList)
十七、GORM 中使用事务
事务处理可以用来维护数据库的完整性,保证成批的SQL 语句要么全执行,要么全不执行。
17.1、禁用默认事务
为了确保数据一致性,GORM 会在事务里执行写入操作(创建、更新、删除)。
如果没有这方面的要求,您可以在初始化时禁用它,这将获得大约30%+ 性能提升。
package models

import("fmt""gorm.io/driver/mysql""gorm.io/gorm")var DB *gorm.DB
var err errorfuncinit(){
    dsn :="root:123456@tcp(192.168.0.6:3306)/gin?charset=utf8mb4&parseTime=True&loc=Local"
    DB, err = gorm.Open(mysql.Open(dsn),&gorm.Config{
        SkipDefaultTransaction:true,})
    DB.Debug()if err !=nil{
        fmt.Println(err)}}
GORM 默认会将单个的 create, update, delete 操作封装在事务内进行处理,以确保数据的完整性。
如果你想把多个 create, update, delete 操作作为一个原子操作,Transaction 就是用来完成这个的。
17.2、事务
https://gorm.io/zh_CN/docs/transactions.html
1、事务执行流程
要在事务中执行一系列操作,通常您可以参照下面的流程来执行。
db.Transaction(func(tx *gorm.DB)error{// 在事务中执行一些db 操作(从这里开始,您应该使用'tx' 而不是'db')if err := tx.Create(&Animal{Name:"Giraffe"}).Error; err !=nil{// 返回任何错误都会回滚事务return err
    }if err := tx.Create(&Animal{Name:"Lion"}).Error; err !=nil{return err
    }// 返回nil 提交事务returnnil})
2、事务(手动控制)
// 开启事务
tx := db.Begin()// 在事务中做一些数据库操作(这里应该使用'tx' ,而不是'db')
tx.Create(...)// ...// 有错误时,手动调用事务的Rollback()
tx.Rollback()// 无错误时,手动调用事务的Commit()
tx.Commit()
3、张三给李四转账
package admin

import("fmt""github.com/gin-gonic/gin")type TransitionController struct{
    BaseController
}func(con TransitionController)Index(c *gin.Context){
    tx := models.DB.Begin()deferfunc(){if r :=recover(); r !=nil{
            tx.Rollback()
            con.error(c)}}()if err := tx.Error; err !=nil{
        fmt.Println(err)
        con.error(c)}// 张三账户减去100
    u1 := models.Bank{Id:1}
    tx.Find(&u1)
    u1.Balance = u1.Balance -100if err := tx.Save(&u1).Error; err !=nil{
        tx.Rollback()
        con.error(c)}// panic("遇到了错误")// 李四账户增加100
    u2 := models.Bank{Id:2}
    tx.Find(&u2)
    u2.Balance = u2.Balance +100// panic("失败")if err := tx.Save(&u2).Error; err !=nil{
        tx.Rollback()
        con.error(c)}
    tx.Commit()
    con.success(c)}
十八、Gin 中使用go-ini 加载.ini 配置文件
18.1、go-ini 介绍
go-ini 官方介绍,go-ini 是地表最强大、最方便和最流行的Go 语言
INI
文件操作库。
Github 地址:https://github.com/go-ini/ini
官方文档:https://ini.unknwon.io/
PS E:\gormlearn\gormtest> go get gopkg.in/ini.v1
go: downloading gopkg.in/ini.v1 v1.67.0
go: added gopkg.in/ini.v1 v1.67.0
PS E:\gormlearn\gormtest>
18.2、go-ini 使用
1、新建 conf/app.ini
现在,我们编辑 app.ini 文件并输入以下内容。
E:\gormlearn\gormtest\conf\app.ini
app_name = icu gin
# possible values: DEBUG, INFO, WARNING, ERROR, FATAL
log_level = DEBUG
[mysql]
ip = 192.168.0.6
port = 3306
user = root
password =
database = test
[redis]
ip = 127.0.0.1
port = 6379
很好,接下来我们需要编写 main.go 文件来操作刚才创建的配置文件。
E:\gormlearn\gormtest\main.go
package main

import("fmt""os""gopkg.in/ini.v1")funcmain(){
    cfg, err := ini.Load("./conf/app.ini")if err !=nil{
        fmt.Printf("Fail to read file: %v", err)
        os.Exit(1)}// 典型读取操作,默认分区可以使用空字符串表示
    fmt.Println("App Mode:", cfg.Section("").Key("app_name").String())
    fmt.Println("Data Path:", cfg.Section("mysql").Key("ip").String())// 差不多了,修改某个值然后进行保存
    cfg.Section("").Key("app_name").SetValue("itying gin")
    cfg.SaveTo("./conf/app.ini")}
PS E:\gormlearn\gormtest> go run .\main.go
App Mode: icu gin
Data Path: 192.168.0.6
PS E:\gormlearn\gormtest>
18.3、从 .ini 中读取 mysql 配置
https://gorm.io/zh_CN/docs/connecting_to_the_database.html
package main

import("fmt""os""gopkg.in/ini.v1""gorm.io/driver/mysql""gorm.io/gorm")var DB *gorm.DB

// var err errorfuncinit(){
    cfg, err := ini.Load("./conf/app.ini")if err !=nil{
        fmt.Printf("Fail to read file: %v", err)
        os.Exit(1)}
    ip := cfg.Section("mysql").Key("ip").String()
    port := cfg.Section("mysql").Key("port").String()
    user := cfg.Section("mysql").Key("user").String()
    password := cfg.Section("mysql").Key("password").String()
    database := cfg.Section("mysql").Key("database").String()

    dsn := fmt.Sprintf("%v:%v@tcp(%v:%v)/%v?charset=utf8mb4&parseTime=True&loc=Local", user, password, ip, port, database)
    fmt.Println(dsn)
    DB, err = gorm.Open(mysql.Open(dsn),&gorm.Config{//打印sql
        QueryFields:true,//SkipDefaultTransaction: true, //禁用事务})if err !=nil{
        fmt.Println(err)}}funcmain(){}
版权归原作者 知其黑、受其白 所有, 如有侵权,请联系我们删除。