
更多SpringBoot3内容请关注我的专栏:《SpringBoot3》
期待您的点赞👍收藏⭐评论✍
重学SpringBoot3-集成Spring Security(一)
Spring Security 是一个强大、灵活的安全框架,广泛用于保护 Java 应用程序。随着 Spring Boot 3 和 Java 17 的引入,Spring Security 继续增强其功能,为开发者提供了更简化的配置和现代化的安全实践。
本文将详细介绍如何在 Spring Boot 3 中集成 Spring Security,涵盖基本认证、密码加密等核心功能。
1. 简介与概念
Spring Security 提供了基于身份验证(Authentication)和授权(Authorization)的安全模型。身份验证是验证用户身份的过程,而授权则是决定用户是否有权访问资源。
核心组件:
- SecurityFilterChain:负责定义 HTTP 请求的安全过滤链。
- UserDetailsService:用于加载用户信息,提供身份验证。
- PasswordEncoder:处理用户密码的加密与解密。
2. 基础配置
Spring Boot 3 使用自动配置来简化 Spring Security 的集成。但在许多实际场景中,我们需要自定义安全配置,下面介绍基本的 Spring Security 配置步骤。
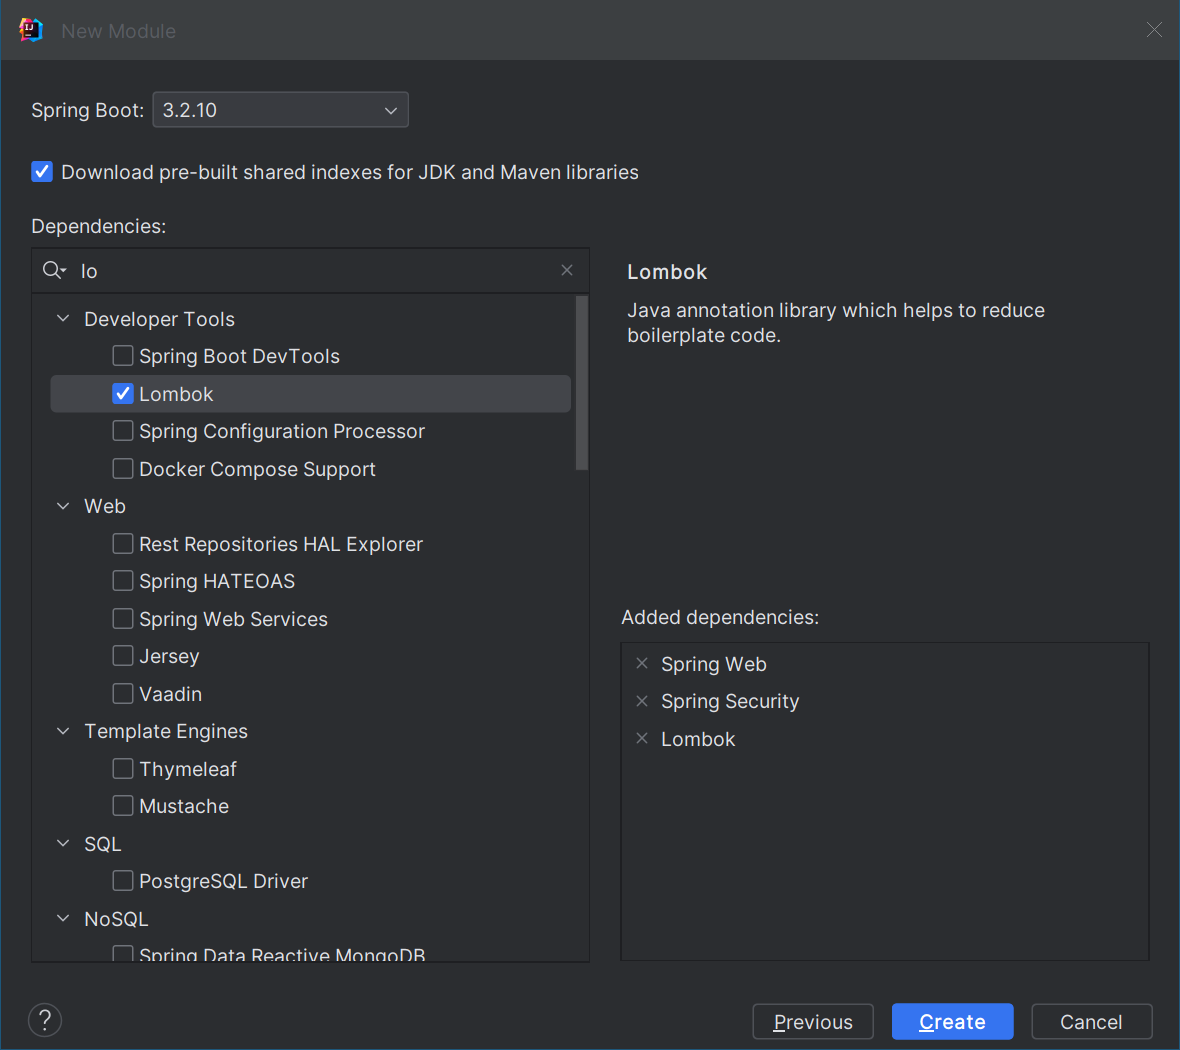
2.1. 添加依赖
首先,在
pom.xml
中添加 Spring Security 依赖:
<dependency><groupId>org.springframework.boot</groupId><artifactId>spring-boot-starter-security</artifactId></dependency><dependency><groupId>org.springframework.boot</groupId><artifactId>spring-boot-starter-web</artifactId></dependency>
接着,在
application.yml
中配置安全设置。
2.1 基本认证与授权配置
首先,我们通过创建
SecurityConfig
类来自定义 Spring Security 的配置。该配置类通常需要实现
SecurityFilterChain
,Spring Security 通过过滤器链的方式来处理 HTTP 请求。过滤器链由一系列的过滤器 (
Filter
) 组成,这些过滤器按照配置的顺序依次处理请求。每个过滤器完成特定的安全检查或操作(如身份验证、授权、会话管理等),然后将请求传递给下一个过滤器。

示例代码:
packagecom.coderjia.boot313security.config;importorg.springframework.context.annotation.Bean;importorg.springframework.security.config.Customizer;importorg.springframework.security.config.annotation.web.builders.HttpSecurity;importorg.springframework.security.config.annotation.web.configuration.EnableWebSecurity;importorg.springframework.security.core.userdetails.User;importorg.springframework.security.core.userdetails.UserDetails;importorg.springframework.security.core.userdetails.UserDetailsService;importorg.springframework.security.crypto.bcrypt.BCryptPasswordEncoder;importorg.springframework.security.crypto.password.PasswordEncoder;importorg.springframework.security.provisioning.InMemoryUserDetailsManager;importorg.springframework.security.web.SecurityFilterChain;/**
 * @author CoderJia
 * @create 2024/10/13 下午 01:57
 * @Description
 **/@EnableWebSecuritypublicclassSecurityConfig{@BeanpublicSecurityFilterChainsecurityFilterChain(HttpSecurity http)throwsException{
        http
                .authorizeHttpRequests(auth -> auth
                        .requestMatchers("/").permitAll()// 公开访问.anyRequest().authenticated()// 其他接口需认证).formLogin(Customizer.withDefaults()).httpBasic(Customizer.withDefaults());// 使用 HTTP Basic 认证return http.build();}@BeanpublicUserDetailsServiceuserDetailsService(PasswordEncoder passwordEncoder){// 创建用户UserDetails user =User.builder().username("coderjia").password(passwordEncoder.encode("cj123456")).roles("USER").build();returnnewInMemoryUserDetailsManager(user);}@BeanpublicPasswordEncoderpasswordEncoder(){returnnewBCryptPasswordEncoder();// 使用 BCrypt 进行密码加密}}
解释:
SecurityFilterChain定义了所有 HTTP 请求的安全策略。在这里,/路径对所有人公开,而其他路径需要用户身份认证。UserDetailsService提供了用户的详细信息,包括用户名、密码及角色。在这个例子中,我们创建了一个用户名为 “user” 的用户,密码为 “password”(经过加密处理),并分配了 “USER” 角色,如果不配置,系统则会在日志中输出名为 user 的用户对应的密码:Using generated security password: b9fe7857-97a3-4db7-9602-9e10db56496d。PasswordEncoder通过BCryptPasswordEncoder实现密码加密,以确保用户密码存储时是安全的。@EnableWebSecurity注解启动 Spring Security 的自动配置,使得应用能够自动集成 Spring Security 提供的安全功能。
3. 密码加密
Spring Security 强烈建议使用加密算法对密码进行加密,防止敏感信息泄露。在 Spring Boot 3 中,
BCryptPasswordEncoder
是一种常用的加密方式。它基于
bcrypt
算法,提供了足够的强度和安全性。
3.1. 如何加密用户密码
- 在
UserDetailsService中,我们通过passwordEncoder.encode("password")对用户密码进行加密。 - 在身份验证时,Spring Security 会自动使用同样的加密算法进行密码比对。
3.2. 自定义密码加密器
如果需要自定义密码加密算法,可以实现
PasswordEncoder
接口。以下是自定义加密器的简单示例:
@BeanpublicPasswordEncoderpasswordEncoder(){returnnewBCryptPasswordEncoder(10);// 设置加密强度}
在这个示例中,我们为
BCryptPasswordEncoder
提供了加密强度参数,值越大,安全性越高,但加密速度会相对减慢。
BCryptPasswordEncoder
的默认实现使用
BCryptPasswordEncoder
的 Javadoc 中提到的强度10。
// Create an encoder with strength 16BCryptPasswordEncoder encoder =newBCryptPasswordEncoder(16);String result = encoder.encode("myPassword");System.out.println(encoder.matches("password", result));
或者使用 SpringBoot CLI 对密码进行加密:
$ spring encodepassword password

4. 表单登录与自定义登录页面
除了 Basic 认证,Spring Security 还支持表单登录。通过
formLogin()
方法,可以启用表单认证,也提供自定义的登录页面。
        http
                .formLogin(Customizer.withDefaults() // 使用默认登录

4.1. 自定义表单登录配置
@BeanpublicSecurityFilterChainsecurityFilterChain(HttpSecurity http)throwsException{
    http
        .authorizeHttpRequests(auth -> auth
              .requestMatchers("/").permitAll()// 公开访问.anyRequest().authenticated()).formLogin(form -> form
            .loginPage("/login")// 自定义登录页面.permitAll()// 登录页面无需认证).logout(logout -> logout.permitAll());// 允许注销return http.build();}
在这里,我们自定义了登录页面
/login
,并允许用户访问登录功能而无需认证,提供接口
/index
返回 index.html 页面:
@GetMapping("/login")publicStringlogin(){return"login";// 返回名为 "login" 的模板或 HTML 页面}
4.2. 定义控制器
packagecom.coderjia.boot313security.controller;importlombok.extern.slf4j.Slf4j;importorg.springframework.stereotype.Controller;importorg.springframework.web.bind.annotation.GetMapping;importorg.springframework.web.bind.annotation.ResponseBody;/**
 * @author CoderJia
 * @create 2024/10/13 下午 02:10
 * @Description
 **/@Slf4j@ControllerpublicclassLoginController{@GetMapping("/login")publicStringlogin(){return"login";// 返回名为 "login" 的模板或 HTML 页面}@GetMapping("/index")publicStringhome(){
        log.info("index");return"index";// 返回名为 "index" 的模板或 HTML 页面}@ResponseBody@GetMapping("/admin")publicStringadmin(){
        log.info("admin");return"欢迎进入管理页面";}}
4.3. 自定义登录界面
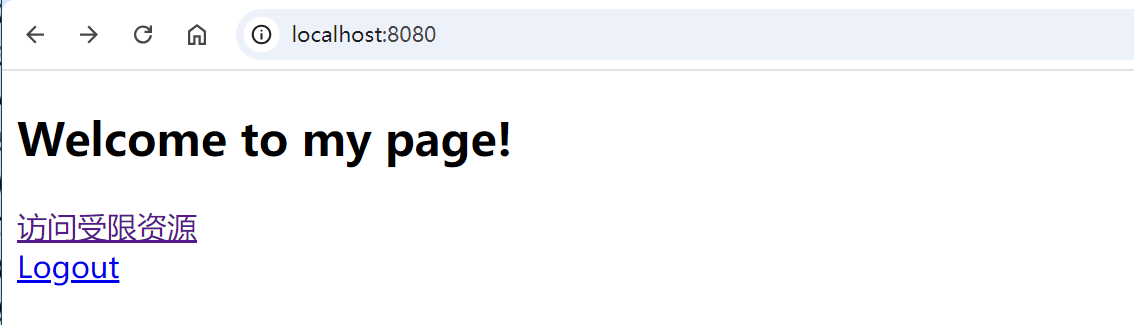
提供一个简单的首页页面和登录页,这里使用了 thymeleaf 摸板,详细请参考重学SpringBoot3-集成Thymeleaf:
<!DOCTYPEhtml><htmlxmlns:th="http://www.thymeleaf.org"><head><title>Main Page</title></head><body><h2>Welcome to my page</span>!</h2><ath:href="@{/admin}">访问受限资源</a><br/><ath:href="@{/logout}">Logout</a></body></html>
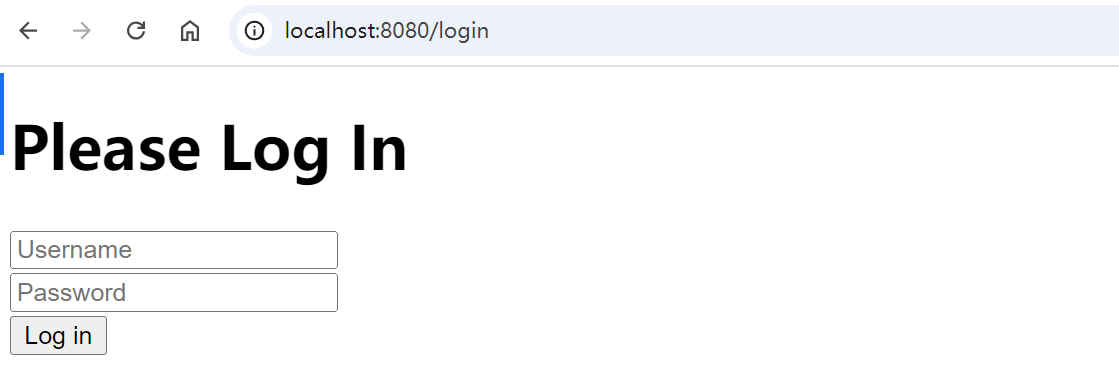
<!DOCTYPEhtml><htmlxmlns="http://www.w3.org/1999/xhtml"xmlns:th="https://www.thymeleaf.org"><head><title>Please Log In</title></head><body><h1>Please Log In</h1><divth:if="${param.error}">
            Invalid username and password.</div><divth:if="${param.logout}">
            You have been logged out.</div><formth:action="@{/login}"method="post"><div><inputtype="text"name="username"placeholder="Username"/></div><div><inputtype="password"name="password"placeholder="Password"/></div><inputtype="submit"value="Log in"/></form></body></html>
4.4. 测试登录
进入首页,此时不需要登录!
点击
访问受限资源 /admin
要求认证,进入我们自定义的登录页。
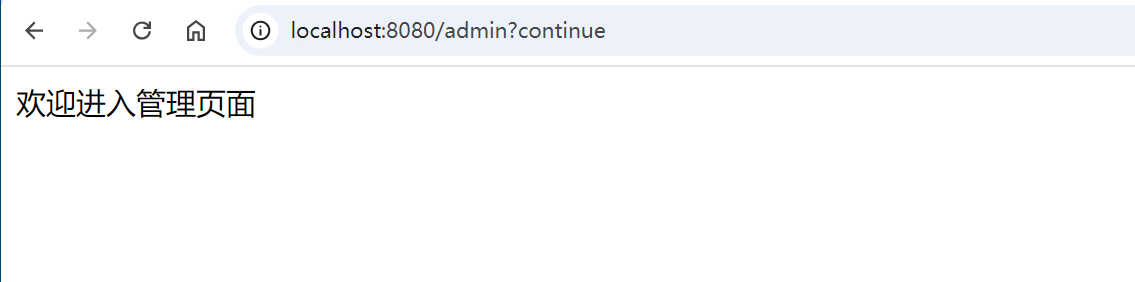
输入设置的用户名和密码之后,认证通过,进入
/admin
页面:
5. 注销
有登录,同样也提供了登出,默认情况下,Spring Security 会建立一个
/logout
端点,所以不需要额外的代码。当你包含
spring-boot-starter-security
依赖或使用
@EnableWebSecurity
注解时,Spring Security 将添加其注销支持,并默认响应
GET /logout
和
POST /logout
。
注意,Spring Security 默认开启了防
CSRF
攻击,注销时需要提供
csrf_token
,直接调用
GET /logout
会提示 404,只能能通过
POST
请求,
<formth:action="@{/logout}"method="post"><buttontype="submit">Logout</button></form>
如果强制要使用
GET
请求,则需要修改成以下配置形式:
@BeanpublicSecurityFilterChainsecurityFilterChain(HttpSecurity http)throwsException{
        http
                .csrf(Customizer.withDefaults()).authorizeHttpRequests(auth -> auth
                        .requestMatchers("/").permitAll()// 公开访问.anyRequest().authenticated()// 其他接口需认证).formLogin(form -> form
                        .loginPage("/login").permitAll()).logout((logout)-> logout
                        .logoutRequestMatcher(newAntPathRequestMatcher("/logout"))).httpBasic(Customizer.withDefaults());// 使用 HTTP Basic 认证return http.build();}
6. 总结
Spring Security 包含的概念很多,本节先简单介绍了其认证功能、用户定义和密码管理,后面会继续介绍其他功能。
版权归原作者 CoderJia_ 所有, 如有侵权,请联系我们删除。