
利用vite创建vue3项目
一.搭建一个Vite 项目
兼容性注意
Vite 需要 Node.js 版本 14.18+,16+。然而,有些模板需要依赖更高的 Node 版本才能正常运行,当你的包管理器发出警告时,请注意升级你的 Node 版本。
首先安装vite 以下是安装方式
使用 NPM:
$ npm create vite@latest
使用 Yarn:
$ yarn create vite
使用 PNPM:
$ pnpm create vite
然后按照提示操作即可!
第二步 通过命令行安装想要的模板
1.个性化模板
通过附加的命令行选项直接指定项目名称和你想要使用的模板。例如,要构建一个 Vite + Vue 项目,运行:
# npm 6.x
npm create vite@latest my-vue-app --template vue

# npm 7+, extra double-dash is needed:
npm create vite@latest my-vue-app -- --template vue

# yarn
yarn create vite my-vue-app --template vue

# pnpm
pnpm create vite my-vue-app --template vue
查看 create-vite 以获取每个模板的更多细节:
vanilla
,
vanilla-ts
,
vue
,
vue-ts
,
react
,
react-ts
,
preact
,
preact-ts
,
lit
,
lit-ts
,
svelte
,
svelte-ts
。
2.推荐模板
create-vite 是一个快速生成主流框架基础模板的工具。
//创建vite+vue3项目
//使用npm 安装方式
npm init vite@latest

//按照如下教程进行安装

Need to install the following packages:
  create-vite@latest
Ok to proceed? (y) y
√ Project name: ... todos-list
√ Select a framework: » vue
√ Select a variant: » vue-ts

Scaffolding project in D:\Learning\todos-list...

Done. Now run:

  cd todos-list //进入项目文件夹
  npm install   //项目初始化
  npm run dev   //启动项目
如果上述没有任何问题的话,我们就可以开始项目相关内容的构建了
完善项目结构
在src目录下面创建这些文件夹
文件名用途api存放请求相关文件layout布局plugins插件composables组合式 API 抽离方法router路由store仓储styles公共样式utils工具函数views路由页面
第三方库集成
安装 vue-router
npm i vue-router
初始化路由实例
在router文件夹下创建index.ts文件
import { createRouter, createWebHashHistory, RouteRecordRaw } from 'vue-router'

const routes: RouteRecordRaw[] = [{
  path: '/',
  name: 'Home',
  component: () => import('../views/home/IndexHome.vue')
}]

const router = createRouter({
  history: createWebHashHistory(), // 路由模式
  routes
})

export default router
挂载router实例,及配置路由出口
// main.ts
import { createApp } from 'vue'
import App from './App.vue'
import router from './router'
createApp(App)
  .use(router)
  .mount('#app')

// App.vue
<template>
  <router-view />
</template>
安装vuex
npm install vuex@next --save
配置store
- 创建vuex实例
- Vue组件中的$sotre属性的类型声明
- useStore组合式函数的类型声明
目录 ./src/store 。
├─ store
│  ├─ index.ts
│  └─ interface.ts
// index.ts 文件
import { createStore, Store, useStore as baseUseStore } from 'vuex'
// 定义类型InjectionKey。
// InjectionKey在将商店安装到Vue应用程序时提供类型。
// 将类型传递InjectionKey给useStore方法。
import { InjectionKey } from 'vue'
// 定义 injection key
export const key: InjectionKey<Store<State>> = Symbol('key')

// 创建store实例
export const store = createStore<State>({
  state() {
    //存放数据和data类似
    return {
      count: 0,
      foo: 'Hi'
    }
  },
  getters: {
     //相当于计算属性
  },
  mutations: {
    increment(state) {
      state.count++
    }
  },
  actions: {
//vuex中用于发起异步请求
  },
  modules: {
    //拆分模块
  }
})

// 定义自己的useStore组合式函数
export function useStore() {
  return baseUseStore(key)
}
// interface.ts
// 定义并且导出所有状态的接口 类型文件

export default interface State {
  count: number
  foo: string
}
./src/main.ts 中引入
store
import { createApp } from 'vue'
//  引入store
import { store, key } from './store'
...
const app = createApp(App)
app.use(store,key)
  ...
- 注意引入方式,这里引入了之前的唯一值
key,并在createApp的use方法中和store一起传入 - injectionKey注入类型
vite+vue3+ts路径别名配置
配置
//vite.config.ts
import path from 'path'

 resolve: {
    alias: {
      // '@':'绝对路径', 若有需要,自行配置其他
      '@': path.join(__dirname, 'src')
    }
  }

//tsconfig.json
{
  "compilerOptions": {
     // 路径配置
    "paths": {
      "@/*": [
        "./src/*"
      ]
    }
  }
}
path引入时的报错解决
- npm i @types/node 下载node相关的类型声明
- 模块 ““path”” 只能在使用 “allowSyntheticDefaultImports” 标志时进行默认导入
- tsconfig.node.josn配置
{
  "compilerOptions": {
    "composite": true,
    "module": "esnext",
    "moduleResolution": "node",
    "allowSyntheticDefaultImports": true
  },
  "include": ["vite.config.ts"]
}
css样式处理
- vite对css的支持
- 支持预处理器,这里以sass为例
下载相关预处理器
npm i -D sass
配置
在 styles 文件下搭建样式目录结构
- index.scss 组织统一导出
- variables.scss 全局 Sass变量
- minxin.scss 全局mixin
- common.scss 全局公共样式
- transition.scss 全局过渡动画样式
index.scss 文件
@import './common.scss';
@import './mixin.scss';
@import './transitiono.scss';
@import './variables.scss';
main.ts 文件
import { createApp } from 'vue'
import App from './App.vue'
import router from './router'
import { store, key } from './store'
// 加载全局样式
import './styles/index.scss'
const app = createApp(App)
app.use(store,key)
app.use(router)

  app.mount('#app')
问题及相关优化
如下样式配置,当直接在vue文件中使用,会发现定义的变量无法生效且报错,只有body这类的样式正常使用
// common.scss
body {
  background-color: #000;
}

// variables.scss
$color: red;1
我们需要引入定义的样式变量才能正常使用,但是每个单文件组件都引入是麻烦的。
<template>
  <h1> demo </h1>
</template>

<script lang="ts" setup>
</script>

<style lang="scss" scoped>
@import '@/styles/variables.scss';
h1 {
  color: $color;
}
</style>
采取 变量注入全局的方式
// vite.config.ts
css: {
    preprocessorOptions: {
      scss: {
        // 注入样式变量(根据自己需求注入其他)
        additionalData: '@import "@/styles/variables.scss;"'
      }
    }
  }
这样的话就可以直接使用变量
<style lang="scss" scoped>
  h1 {
    color: $color;
  }
</style>
集成elepemt-plus组件
elepemt-plus一个针对vue3.0的桌面端组件库
安装elepemt-plus
npm install element-plus
全局引入
import { createApp } from 'vue'
import './style.css'
import router from './router'
import App from './App.vue'
//  引入store
import { store, key } from './store'
//  加载全局样式
import './styles/index.scss'

//  引入组件库 element-plus 全部导入
import ElementPlus from 'element-plus'
import 'element-plus/theme-chalk/index.css'

const app = createApp(App)

app.use(router)
app.use(store, key)
app.use(ElementPlus)

//挂载
app.mount('#app)
全局引入
优点:继承比较简单
缺点:组件全部会打包
按需引入:
优点:包会小一点
缺点:引用起来比较麻烦
按需导入
1.安装babel的插件
npm install babel-plugin-import -D
2.配置babel.config.js 根目录下创建
module.exports = {
  plugins: [
    [
      'import',
      {
        libraryName: 'element-plus',
        customStyleName: (name) => {
          return `element-plus/lib/theme-chalk/${name}.css`
        }
      }
    ]
  ],
  presets: ['@vue/cli-plugin-babel/preset'],
}
但是这里依然有个弊端:
- 这些组件我们在多个页面或者组件中使用的时候,都需要导入并且在 components 中进行注册;
- 所以我们可以将它们在全局注册一次
3.src下创建global文件夹
- index.ts
- interface.ts
//index
import { App } from 'vue'
import registerElement from './register-element'

export function globalRegister(app: App): void {
  app.use(registerElement)
}
//register-element-plus

import { App } from 'vue'
import 'element-plus/theme-chalk/base.css'
import {
  ElButton,
  ElCheckbox,
  ElForm,
  ElFormItem,
  ElInput,
  ElLink,
  ElRadio,
  ElTabPane,
  ElTabs
} from 'element-plus'

const components = [
  ElButton,
  ElForm,
  ElFormItem,
  ElInput,
  ElRadio,
  ElTabs,
  ElTabPane,
  ElCheckbox,
  ElLink
]

export default function (app: App): void {
  for (const component of components) {
    app.component(component.name, component)
  }
}
在main.ts中使用
import { createApp } from 'vue'
import './style.css'
import router from './router'
import App from './App.vue'
//  引入store
import { store, key } from './store'
//  加载全局样式
import './styles/index.scss'
//  引入组件库 element-plus 全部导入
//import ElementPlus from 'element-plus'
//import 'element-plus/theme-chalk/index.css'
//按需导入组件库
import { globalRegister } from './global'

const app = createApp(App)

app.use(router)
app.use(store, key)
app.use(ElementPlus)
app.use(globalRegister)

//  挂载
app.mount('#app')
axios集成以及封装
安装axios
npm install axios
封装axios
新建service文件夹
文件目录如下
service/request/config.ts文件
let BASE_URL = ''

const TIME_OUT = 10000

if (process.env.NODE_ENV === 'development') {

  BASE_URL = '开发环境ip'

} else if (process.env.NODE_ENV === 'production') {

  BASE_URL = '生产环境ip'

} else {

  BASE_URL = '测试环境ip'

}

export { BASE_URL, TIME_OUT }
service/request/index.ts
import axios from 'axios'
import type { AxiosInstance } from 'axios'
import type { HYRequestInterceptors, HYRequestConfig } from './type'

class HYRequest {
  instance: AxiosInstance
  interceptors?: HYRequestInterceptors
  constructor(config: HYRequestConfig) {

 //创建axios实例
    this.instance = axios.create(config)
    //保存基本信息
    this.interceptors = config.interceptors

    //使用拦截器
    //从config钟取出的拦截器是对应的实例的拦截器
    this.instance.interceptors.request.use(

      this.interceptors?.requestInterceptor,

      this.interceptors?.requestInterceptorCatch

    )

    this.instance.interceptors.response.use(
      this.interceptors?.responseInterceptor,
      this.interceptors?.requestInterceptorCatch
    )

    //所有的实例都有的拦截器
    this.instance.interceptors.request.use(

      (config) => {

        console.log('所有的实例都有的拦截器: 请求拦截成功')
        return config
      },
      (err) => {
        console.log('所有的实例都有的拦截器: 请求拦截失败')
        return err
      }
    )

    this.instance.interceptors.response.use(
      (res) => {
        console.log('所有的实例都有的拦截器: 响应拦截成功')
        return res.data
      },
      (err) => {
        console.log('所有的实例都有的拦截器: 响应拦截失败')
        //例子:判断不同httpErrorCode显示不同错误信息
        if (err.response.status === 404) {
          console.log('404错误~')
        }
        return err
      }
    )
  }

  request<T>(config: HYRequestConfig<T>): Promise<T> {

    return new Promise((resolve, reject) => {
      //单个请求对请求config的处理
      if (config.interceptors?.requestInterceptor) {
        config = config.interceptors.requestInterceptor(config)
      }

      this.instance
        .request<any, T>(config)
        .then((res) => {
          //单个请求对数据的处理
          if (config.interceptors?.responseInterceptor) {
            res = config.interceptors.responseInterceptor(res)
          }
          console.log(res)
          //将结果返回出去
          resolve(res)

        })
        .catch((err) => {
          reject(err)
          return err
        })
    })
  }

  get<T>(config: HYRequestConfig<T>): Promise<T> {
    return this.request<T>({ ...config, method: 'GET' })
  }

  post<T>(config: HYRequestConfig<T>): Promise<T> {
    return this.request<T>({ ...config, method: 'POST' })
  }

  delete<T>(config: HYRequestConfig<T>): Promise<T> {
    return this.request<T>({ ...config, method: 'DELETE' })
  }

  patch<T>(config: HYRequestConfig<T>): Promise<T> {
    return this.request<T>({ ...config, method: 'PATCH' })
  }

}
service/request/type.ts
import type { AxiosRequestConfig, AxiosResponse } from 'axios'

export interface HYRequestInterceptors<T = AxiosResponse> {
  requestInterceptor?: (config: AxiosRequestConfig) => AxiosRequestConfig
  requestInterceptorCatch?: (error: any) => any
  responseInterceptor?: (res: T) => T
  responseInterceptorCatch?: (error: any) => any
}
export interface HYRequestConfig<T = AxiosResponse> extends AxiosRequestConfig {
  interceptors?: HYRequestInterceptors<T>
}
idnex.ts文件
import HYRequest from './request'
import { BASE_URL, TIME_OUT } from './request/config'

const hyRequest = new HYRequest({
  baseURL: BASE_URL,
  timeout: TIME_OUT,
  interceptors: {
    requestInterceptor: (config) => {
      const token = ''
      if (token) {
        config.headers!.Authorization = token
      }
      console.log('请求成功拦截')
      return config
    },

    requestInterceptorCatch: (err) => {
      console.log('请求失败拦截')
      return err
    },
    responseInterceptor: (config) => {
      console.log('响应成功拦截')
      return config
    },
    responseInterceptorCatch: (err) => {
      console.log('响应失败拦截')
      return err
    }
  }
})
使用
interface DataType {
  data: any
  returnCode: string
  success: boolean
}

hyRequest
  .get<DataType>({
    url: '/home/multidata',
    showLoading: true
  })
  .then((res) => {
    console.log(res.data)
    console.log(res.returnCode)
    console.log(res.success)
  })
代码规范
1. 集成 editorconfig 配置
EditorConfig 有助于为不同 IDE 编辑器上处理同一项目的多个开发人员维护一致的编码风格。
# http://editorconfig.org
root = true

[*] # 表示所有文件适用

charset = utf-8 # 设置文件字符集为 utf-8

indent_style = space # 缩进风格(tab | space)

indent_size = 2 # 缩进大小

end_of_line = lf # 控制换行类型(lf | cr | crlf)

trim_trailing_whitespace = true # 去除行首的任意空白字符

insert_final_newline = true # 始终在文件末尾插入一个新行

[*.md] # 表示仅 md 文件适用以下规则

max_line_length = off

trim_trailing_whitespace = false

复制代码
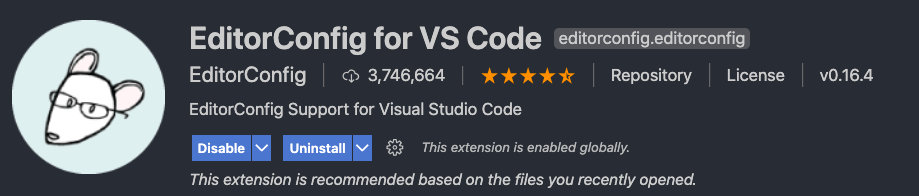
VSCode 需要安装一个插件:EditorConfig for VS Code
1.2. 使用 prettier 工具
Prettier 是一款强大的代码格式化工具,支持 JavaScript、TypeScript、CSS、SCSS、Less、JSX、Angular、Vue、GraphQL、JSON、Markdown 等语言,基本上前端能用到的文件格式它都可以搞定,是当下最流行的代码格式化工具。
1.安装 prettier
npm install prettier -D
2.配置.prettierrc 文件:
- useTabs:使用 tab 缩进还是空格缩进,选择 false;
- tabWidth:tab 是空格的情况下,是几个空格,选择 2 个;
- printWidth:当行字符的长度,推荐 80,也有人喜欢 100 或者 120;
- singleQuote:使用单引号还是双引号,选择 true,使用单引号;
- trailingComma:在多行输入的尾逗号是否添加,设置为
none; - semi:语句末尾是否要加分号,默认值 true,选择 false 表示不加;
{

  "useTabs": false,

  "tabWidth": 2,

  "printWidth": 80,

  "singleQuote": true,

  "trailingComma": "none",

  "semi": false

}
3.创建.prettierignore 忽略文件
/dist/*

.local

.output.js

/node_modules/**

**/*.svg

**/*.sh

/public/*

复制代码
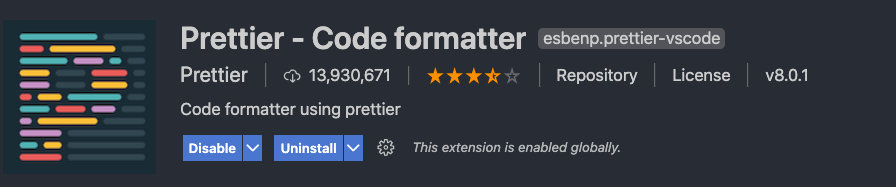
4.VSCode 需要安装 prettier 的插件
5.测试 prettier 是否生效
- 测试一:在代码中保存代码;
- 测试二:配置一次性修改的命令;
在 package.json 中配置一个 scripts:
"prettier": "prettier --write ."
1.3. 使用 ESLint 检测
1.在前面创建项目的时候,我们就选择了 ESLint,所以 Vue 会默认帮助我们配置需要的 ESLint 环境。
2.VSCode 需要安装 ESLint 插件:

3.解决 eslint 和 prettier 冲突的问题:
安装插件:(vue 在创建项目时,如果选择 prettier,那么这两个插件会自动安装)
npm i eslint-plugin-prettier eslint-config-prettier -D
添加 prettier 插件:
  extends: [

    "plugin:vue/vue3-essential",

    "eslint:recommended",

    "@vue/typescript/recommended",

    "@vue/prettier",

    "@vue/prettier/@typescript-eslint",

    'plugin:prettier/recommended'

  ],
1.4. git Husky 和 eslint
虽然我们已经要求项目使用 eslint 了,但是不能保证组员提交代码之前都将 eslint 中的问题解决掉了:
- 也就是我们希望保证代码仓库中的代码都是符合 eslint 规范的;
- 那么我们需要在组员执行
git commit命令的时候对其进行校验,如果不符合 eslint 规范,那么自动通过规范进行修复;
那么如何做到这一点呢?可以通过 Husky 工具:
- husky 是一个 git hook 工具,可以帮助我们触发 git 提交的各个阶段:pre-commit、commit-msg、pre-push
如何使用 husky 呢?
这里我们可以使用自动配置命令:
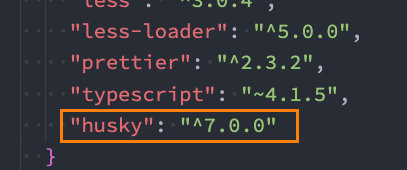
npx husky-init && npm install
这里会做三件事:
1.安装 husky 相关的依赖:
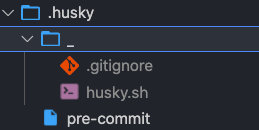
2.在项目目录下创建
.husky
文件夹:
npx huksy install
3.在 package.json 中添加一个脚本:

接下来,我们需要去完成一个操作:在进行 commit 时,执行 lint 脚本:
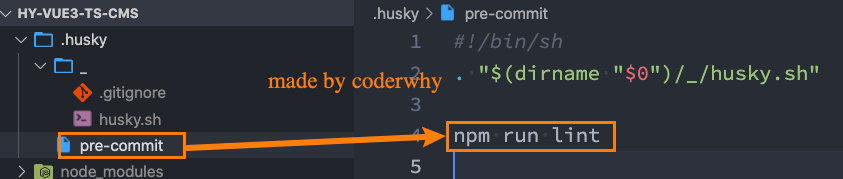
这个时候我们执行 git commit 的时候会自动对代码进行 lint 校验。
1.5. git commit 规范
1.5.1. 代码提交风格
通常我们的 git commit 会按照统一的风格来提交,这样可以快速定位每次提交的内容,方便之后对版本进行控制。

但是如果每次手动来编写这些是比较麻烦的事情,我们可以使用一个工具:Commitizen
Commitizen 是一个帮助我们编写规范 commit message 的工具;
1.安装 Commitizen
npm install commitizen -D
2.安装 cz-conventional-changelog,并且初始化 cz-conventional-changelog:
npx commitizen init cz-conventional-changelog --save-dev --save-exact
这个命令会帮助我们安装 cz-conventional-changelog:

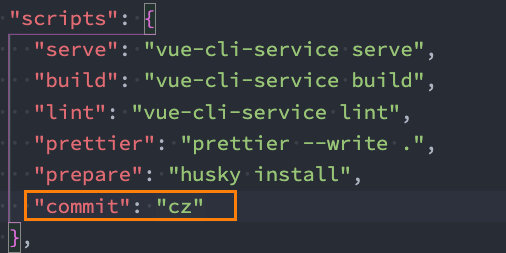
并且在 package.json 中进行配置:

这个时候我们提交代码需要使用
npx cz
:
第一步是选择 type,本次更新的类型
Type 作用feat新增特性 (feature) fix 修复 Bug(bug fix)docs 修改文档 (documentation) style 代码格式修改(white-space, formatting, missing semi colons, etc) refactor 代码重构(refactor) perf 改善性能(A code change that improves performance) test 测试(when adding missing tests)build 变更项目构建或外部依赖(例如 scopes: webpack、gulp、npm 等)ci 更改持续集成软件的配置文件和 package 中的 scripts 命令,例如 scopes: Travis, Circle 等chore 变更构建流程或辅助工具(比如更改测试环境) revert 代码回退第二步选择本次修改的范围(作用域)

- 第三步选择提交的信息

- 第四步提交详细的描述信息

- 第五步是否是一次重大的更改

- 第六步是否影响某个 open issue

我们也可以在 scripts 中构建一个命令来执行 cz:
1.5.2. 代码提交验证
如果我们按照 cz 来规范了提交风格,但是依然有同事通过
git commit
按照不规范的格式提交应该怎么办呢?
我们可以通过 commitlint 来限制提交;
1.安装 @commitlint/config-conventional 和 @commitlint/cli
npm i @commitlint/config-conventional @commitlint/cli -D

复制代码
2.在根目录创建 commitlint.config.js 文件,配置 commitlint
module.exports = {

  extends: ['@commitlint/config-conventional']

}

复制代码
3.使用 husky 生成 commit-msg 文件,验证提交信息:
npx husky add .husky/commit-msg "npx --no-install commitlint --edit $1"
以上就是代码构建的全部过程。如有其他需要的插件请自行安装,我想这些已经涵盖了大部分的应用场景了,当然在构建的过程中一定要记得测试,不仅仅依托于教程,更多的是去查看相关插件的官网,看官网上面的应用场景以及常见的使用手法,防止出错。
部分转载于coderwhy vue3+ts+element-plus(1.2以下版本)项目搭建规范
版权归原作者 K可。乐L 所有, 如有侵权,请联系我们删除。