canfestival下载地址:https://hg.beremiz.org/canfestival
一般ubuntu环境编译:
1、./configure --prefix=$PWD/myinstall --can=socket --debug=WAR,MSG
2、make all
遇到python报错解决方法如下:
sudo apt-get install python安装python2
sudo ln -s /usr/bin/python2 /usr/bin/python建立链接
3、sudo make install
板子上交叉编译:
1、./configure --cc=aarch64-linux-gnu-gcc --arch=aarch64 --prefix=$PWD/myinstall --can=socket --debug=WAR,MSG
2、make all
遇到python报错解决方法同上
3、sudo make install
存在can口测试:
1、ifconfig -a查看网口列表,该命令即便can口没打开也会被找到
2、can口关闭、设置、打开:
sudo ifconfig can0 down
sudo ip link set can0 type can bitrate 250000
sudo ifconfig can0 up
3、can0测试:进入编译后得到的可执行文件目录$PWD/myinstall/bin,多个终端执行以下命令,观察现象:
./CANOpenShell load#../lib/libcanfestival_can_socket.so,can0,500k,1,1
没有can口则创建虚拟can口测试:
1、确认安装了环境,不管有没有安装can-utils走一遍总没错:sudo apt install can-utils
2、加载vcan内核模块、创建虚拟CAN接口、将虚拟CAN接口处于在线状态
sudo modprobe vcan
sudo ip link add dev vcan0 type vcan
sudo ip link set up vcan0
3、类似上面步骤多终端执行以下命令:
./CANOpenShell load#../lib/libcanfestival_can_socket.so,vcan0,500k,1,1
一般ubuntu环境移植:
1、win10_64下Canfestival对象字典工具objdictedit运行环境配置:
从https://www.python.org/ftp/python/2.7.10/python-2.7.10.amd64.msi下载python-2.7.10.amd64.msi,安装时记得选择Add python.exeto Path,也可以在安装完成之后手动将安装路径添加到系统环境变量中(当然,这个较为麻烦,尽量前一种方式,没找着就反复卸了再装,找到那个选项加上为止)
解压源码objdictgen目录下的Gnosis_Utils-current.tar.gz,使得该目录下存在gnosis目录
2、使用源码目录下objdictgen目录下的objdictedit.py生成需要的.h和.c文件:
打开objdictedit.py
文件
新建
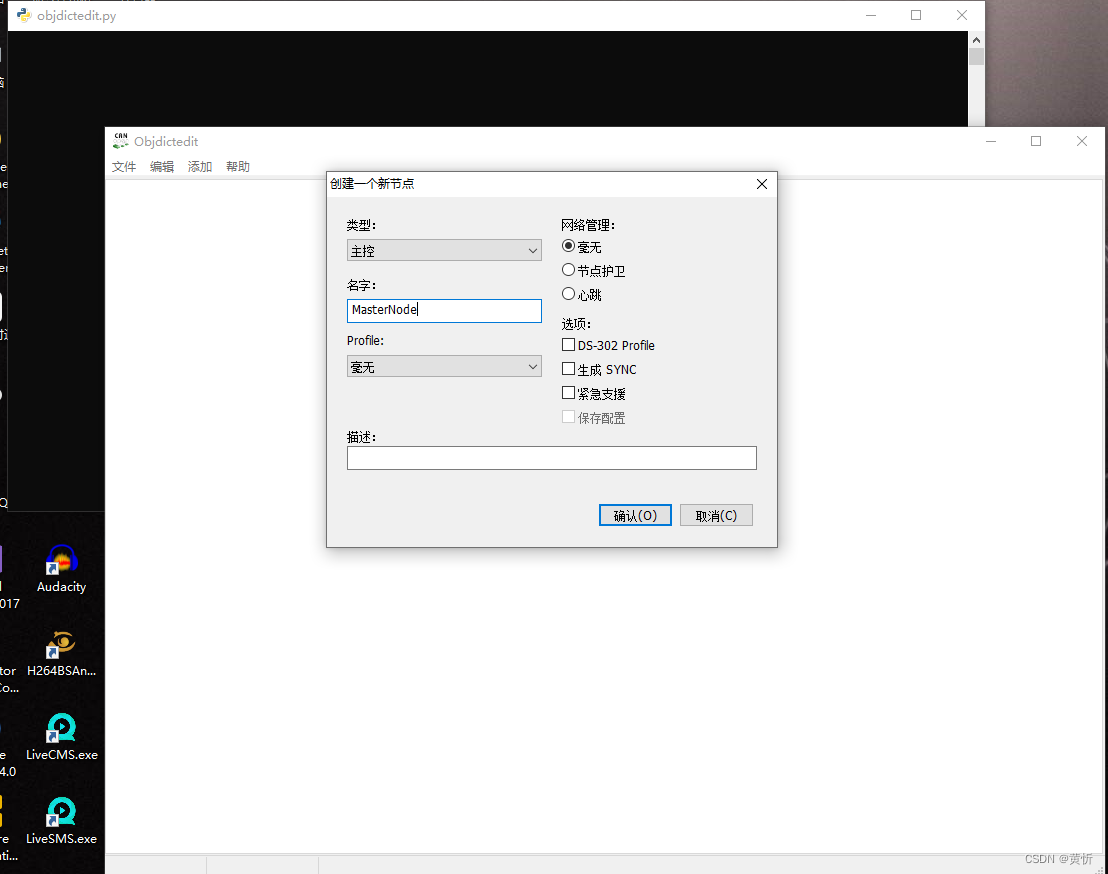
选定为上图情形,确认
文件
建立词典
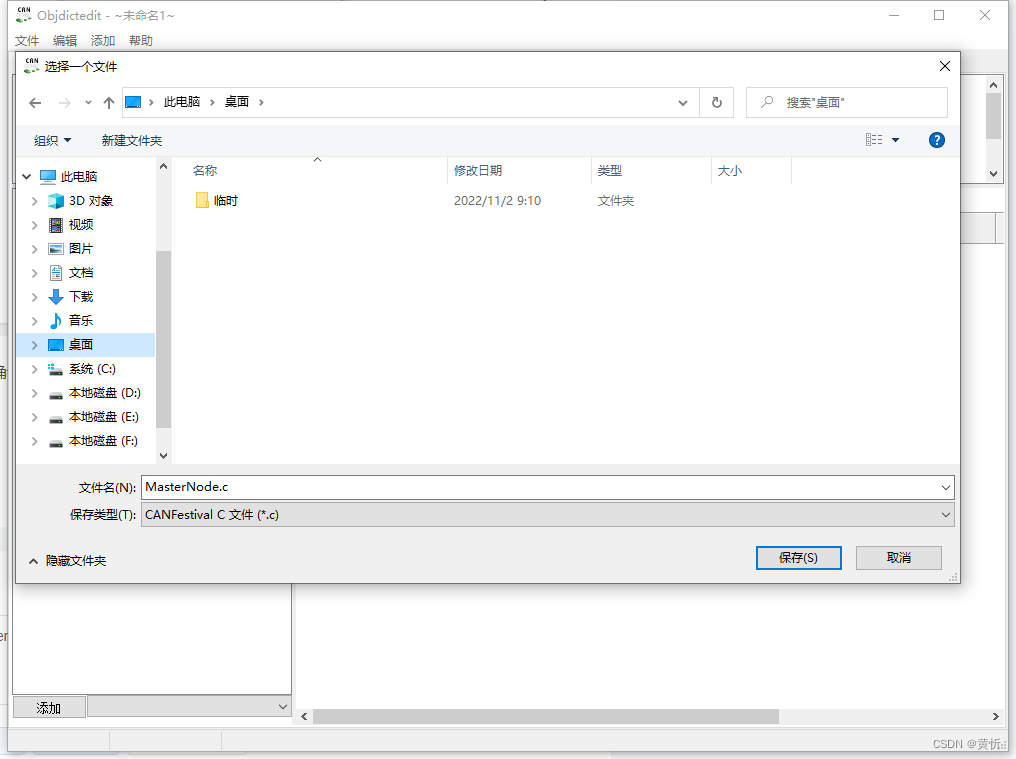
路径自己选,保存
3、弄三个.h和.c的文件,然后弄下Makefile文件,文件名及源码如下:
master.h
#include "canfestival.h"
#include "data.h"
#include <unistd.h>
#include <stdio.h>

INTEGER8 InitCANdevice( char* bus, UNS32 baudrate, UNS8 node );

void MasterNode_heartbeatError(CO_Data* d, UNS8);

UNS8 MasterNode_canSend(Message *);

void MasterNode_initialisation(CO_Data* d);
void MasterNode_preOperational(CO_Data* d);
void MasterNode_operational(CO_Data* d);
void MasterNode_stopped(CO_Data* d);

void MasterNode_post_sync(CO_Data* d);
void MasterNode_post_TPDO(CO_Data* d);
void MasterNode_storeODSubIndex(CO_Data* d, UNS16 wIndex, UNS8 bSubindex);
void MasterNode_post_emcy(CO_Data* d, UNS8 nodeID, UNS16 errCode, UNS8 errReg);
master.c
#include "MasterNode.h"
#include "master.h"

static UNS8 masterNodeID = 0;

void InitNode(CO_Data* d, UNS32 id)
{
    /* Defining the node Id */
    setNodeId(&MasterNode_Data, masterNodeID);
    /* CAN init */
    setState(&MasterNode_Data, Initialisation);
}

void Exit(CO_Data* d, UNS32 id)
{
    setState(&MasterNode_Data, Stopped);
}

INTEGER8 InitCANdevice(char * bus, UNS32 baudrate, UNS8 node )
{
    char busName[2];
    char baudRate[7];
    s_BOARD board;

    sprintf(baudRate, "%uK", baudrate);
    board.busname = bus;
    board.baudrate = baudRate;

    masterNodeID = node;

    MasterNode_Data.heartbeatError = MasterNode_heartbeatError;
    MasterNode_Data.initialisation = MasterNode_initialisation;
    MasterNode_Data.preOperational = MasterNode_preOperational;
    MasterNode_Data.operational = MasterNode_operational;
    MasterNode_Data.stopped = MasterNode_stopped;
    MasterNode_Data.post_sync = MasterNode_post_sync;
    MasterNode_Data.post_TPDO = MasterNode_post_TPDO;
    MasterNode_Data.storeODSubIndex = MasterNode_storeODSubIndex;
    MasterNode_Data.post_emcy = MasterNode_post_emcy;

    TimerInit();

    if(!canOpen(&board, &MasterNode_Data))
    {
        printf("aInitCANdevice() CAN bus %s opening error, baudrate=%s",board.busname, board.baudrate);
        return -1;
    }

    printf("InitCANdevice(), canOpen() OK, starting timer loop...");

    /* Start timer thread */
    StartTimerLoop(&InitNode);

    /* wait Ctrl-C */
    pause();
    printf("Finishing.");

    /* Stop timer thread */
    StopTimerLoop(&Exit);
    return 0;
}

void MasterNode_heartbeatError(CO_Data* d, UNS8 heartbeatID)
{
    printf("MasterNode_heartbeatError %d", heartbeatID);
}

void MasterNode_initialisation(CO_Data* d )
{
    printf("MasterNode_initialisation");
}

void MasterNode_preOperational(CO_Data* d)
{
    printf("MasterNode_preOperational");

    setState(d, Operational);
}

void MasterNode_operational(CO_Data* d)
{
    printf("MasterNode_operational");
}

void MasterNode_stopped(CO_Data* d)
{
    printf("MasterNode_stopped");
}

void MasterNode_post_sync(CO_Data* d)
{
    printf("MasterNode_post_sync");
}

void MasterNode_post_TPDO(CO_Data* d)
{
    printf("MasterNode_post_TPDO");
}

void MasterNode_storeODSubIndex(CO_Data* d, UNS16 wIndex, UNS8 bSubindex)
{
    /*TODO :
     * - call getODEntry for index and subindex,
     * - save content to file, database, flash, nvram, ...
     *
     * To ease flash organisation, index of variable to store
     * can be established by scanning d->objdict[d->ObjdictSize]
     * for variables to store.
     *
     * */
    printf("MasterNode_storeODSubIndex : %4.4x %2.2xh", wIndex,  bSubindex);
}

void MasterNode_post_emcy(CO_Data* d, UNS8 nodeID, UNS16 errCode, UNS8 errReg)
{
    printf("Slave received EMCY message. Node: %2.2xh  ErrorCode: %4.4x  ErrorRegister: %2.2xh", nodeID, errCode, errReg);
}
main.c
#include "master.h"

 int main(int argc,char **argv)
 {
     char* LibraryPath = (char*)"/home/hx/compile/canfestival-de1fc3261f21/myinstall/lib/libcanfestival_can_socket.so";

     LoadCanDriver(LibraryPath);

     if(InitCANdevice((char*)"vcan0" , 500000,  0x0A) < 0)
     {
         printf("InitCANdevice() failed, exiting.");
         return -1;
     }

     return 0;
 }
Makefile
#编译环境
GXX_C = gcc

#头文件和库
INCLUDES += -I./canfestival/include
INCLUDES += -I./canfestival/include/timers_unix
INCLUDES += -I./canfestival/include/unix
INCLUDES += -I./canfestival/include/AVR
LIBS += -lpthread -lrt -ldl

#.c文件
FILES_C = $(wildcard *.c)
FILES_C += $(wildcard ./canfestival/src/*.c)
FILES_C += $(wildcard ./canfestival/drivers/timers_unix/*.c)
FILES_C += $(wildcard ./canfestival/drivers/unix/*.c)

#.c文件生成的.o文件
FILES_O_C = $(FILES_C:.c=.o)

#目标文件
TARGET = my_canfestival_test

#编译:1、将.c文件编译成.o文件;2、将.o文件编译成目标文件
all:$(TARGET)
$(FILES_O_C):%.o:%.c
    $(GXX_C) -c $< -o $@ $(INCLUDES)
$(TARGET):$(FILES_O_C) $(FILES_O_CPP)
    $(GXX_C) -o $(TARGET) $(FILES_O_C) $(FILES_O_CPP) $(LIBS)

#清理:目标文件、.c文件生成的.o文件
clean:
    rm -rf $(TARGET) $(FILES_O_C)
4、拷贝及修改需要的文件、编译
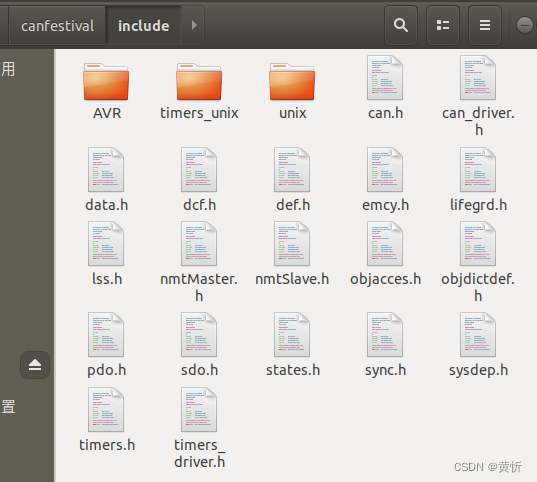
建一个目录canfestival,将源码目录下的drivers、include、src三个目录拷贝进去
make编译
报错:fatal error: avr/io.h: 没有那个文件或目录
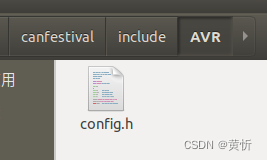
修改include/AVR/config.h将选中地方注释或去掉
报错:在函数‘check_and_start_node’中:
dcf.c:(.text+0x61):对‘start_node’未定义的引用
修改src/dcf.c将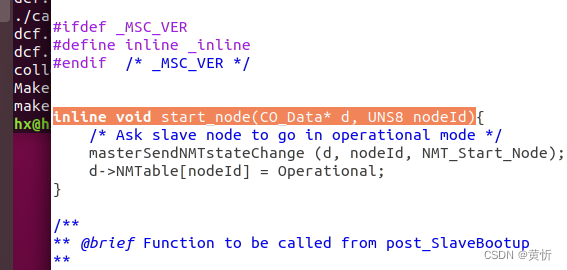
选中地方最前面加上static
类似上面的报错还有一个start_and_seek_node,解决方法同上
5、测试编译出来的my_canfestival_test
main.c文件中的main函数里面用到了编译出来的库,所以记得要填对位置
准备好虚拟vcan0环境
多终端执行./my_canfestival_test看效果
6、清理多余的文件
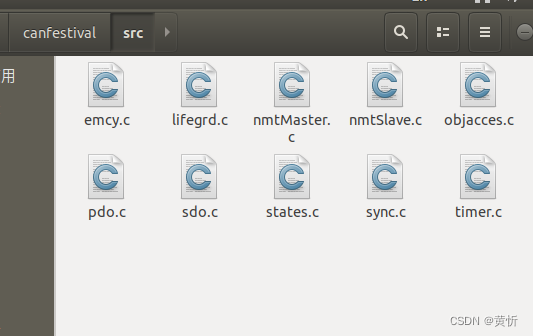
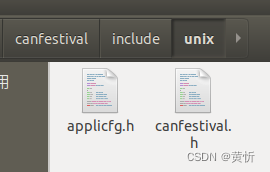
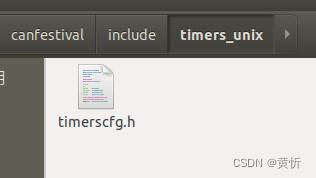
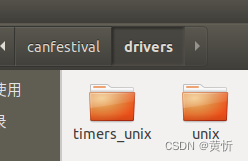
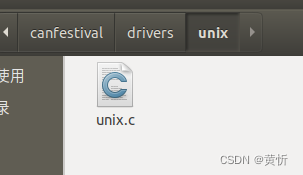
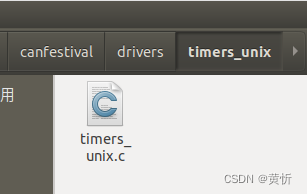
针对canfestival目录清理多余的文件,最后效果如以下图:
版权归原作者 黄忻 所有, 如有侵权,请联系我们删除。