
在虚拟机(VM)安装好+Hadoop集群搭建正确的前提下,才可以进行我们的Zookeeper组件安装啦
所需压缩包如下:

2.2 正式开始搭建
2.2.1 如何把Windows中压缩包上传到指定的虚拟机中某个文件夹下,请友友们翻看我发过的Hadoop集群完全分布式的搭建~(超详细版)的步骤流程,里面开头就演示过这个操作呢

2.2.2 先关闭外防火墙和安全模式
systemctl disable firewalld.service
hdfs dfsadmin -safemode leave
(1)解压文件
tar -zxvf 压缩包名字
(2)配置环境变量(并上传其他两个节点中)
vim ~/.bashrc
export ZOOKEEPER_HOME=~/zookeeper
export PATH=$ZOOKEEPER_HOME/bin:$PATH
source ~/.bashrc #使环境变量生效
(3)修改配置文件:(conf/zoo.cfg )
cd /home/hadoop/zookeeper/conf #通过绝对路径进入配置文件里
cp zoo_sample.cfg zoo.cfg #备份文件一下
vim zoo.cfg (把文件里内容全部替换以下内容)
The number of milliseconds of each tick
tickTime=2000
The number of ticks that the initial
synchronization phase can take
initLimit=10
The number of ticks that can pass between
sending a request and getting an acknowledgement
syncLimit=5
the directory where the snapshot is stored.
do not use /tmp for storage, /tmp here is just
example sakes.
dataDir=/home/test_1/zookeeper/zookeeper_tmp #必须写绝对路径,不然服务器找不到,运行不起来
the port at which the clients will connect
clientPort=2181
server.1=analysis01:2888:3888
server.2=analysis02:2888:3888
server.3=analysis03:2888:3888
the maximum number of client connections.
increase this if you need to handle more clients
#maxClientCnxns=60
#
Be sure to read the maintenance section of the
administrator guide before turning on autopurge.
http://zookeeper.apache.org/doc/current/zookeeperAdmin.html#sc_maintenance
The number of snapshots to retain in dataDir
#autopurge.snapRetainCount=3
Purge task interval in hours
Set to "0" to disable auto purge feature
#autopurge.purgeInterval=1
(4)创建文件夹然后编号
cd /home/test_1/zookeeper/zookeeper_tmp
mkdir zookeeper_tmp
cd zookeeper_tmp
vim myid #在analysis宿主机名下在这个文件里添加1
其他analysis02,analysis03如法炮制(和analysis01一样操作),分别添加2,3
(5)向其他两个节点分发文件夹
scp -r zookeeper analysis02://
scp -r zookeeper analysis03:
scp /.bashrc analysis02:/
scp /.bashrc analysis03:/
source ~/.bashrc #分别在analysis02,analysis03,进行一下source(使环境变量生效)
特别注意!!!特别注意!!!所有的节点都要时区相同,不然启动不起来 ~
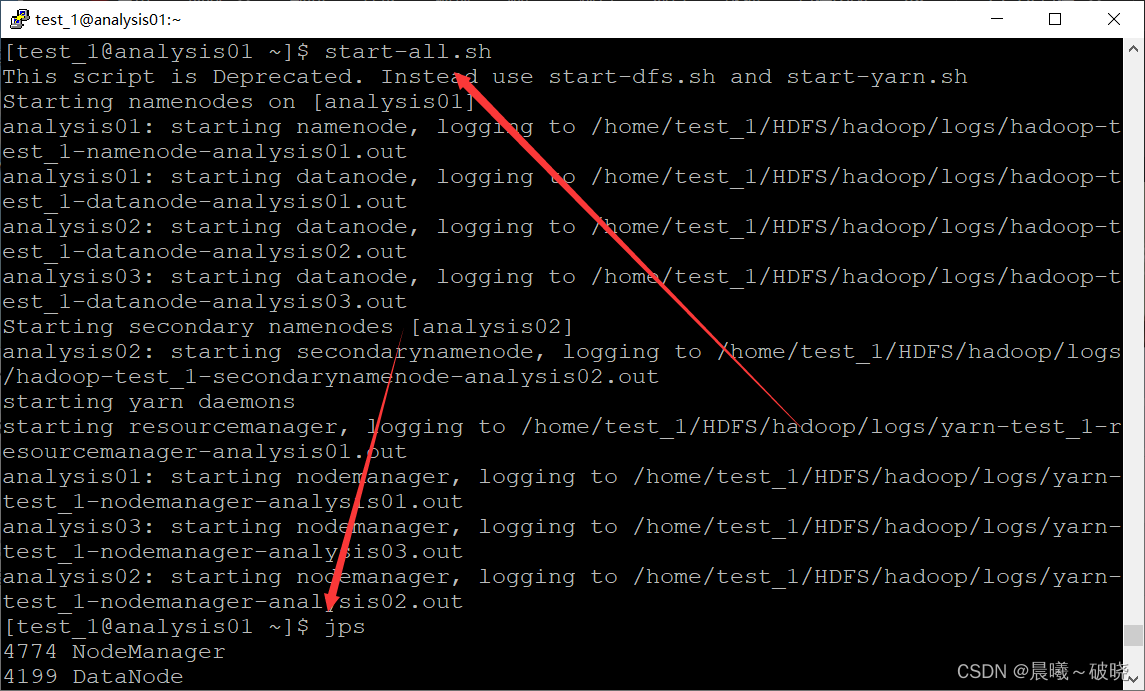
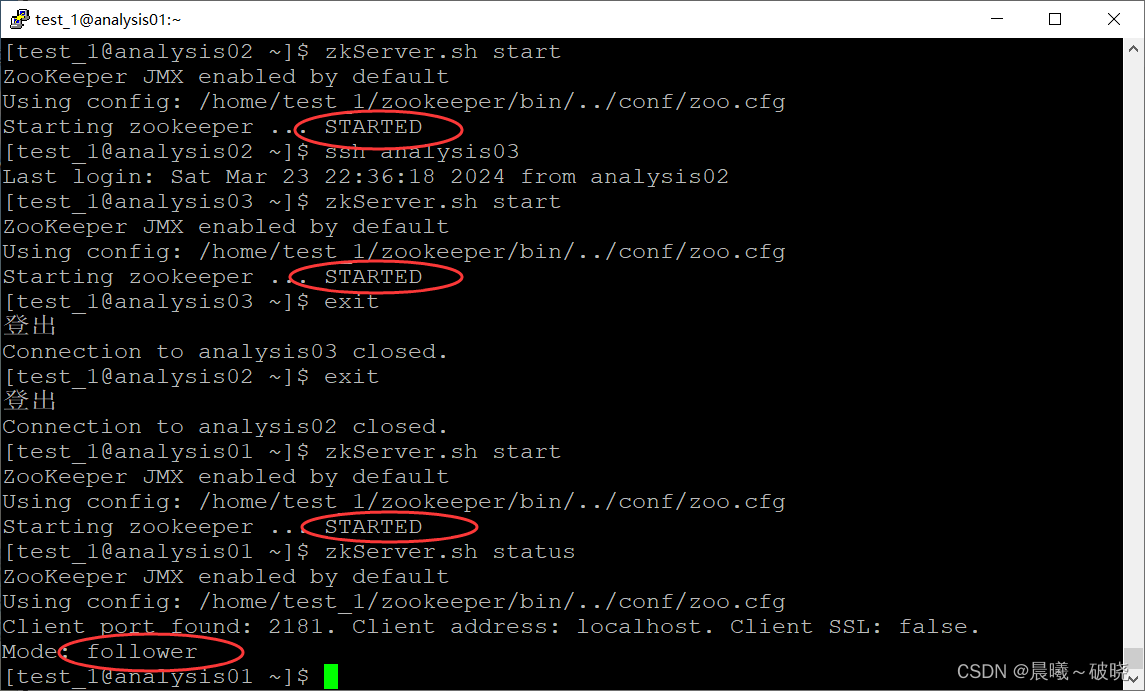
(6)启动并验证
在三个节点都运行面启动指令
zkServer.sh start #三个节点都要输入后,在输入以下的指令
zkServer.sh stop
zkServer.sh status
[hadoop@hadoop01 ~]$ jps
3682 ResourceManager
5650 QuorumPeerMain
5938 Jps
3207 NameNode
3450 SecondaryNameNode
[hadoop@hadoop01 ~]$ zkServer.sh status
ZooKeeper JMX enabled by default
Using config: /home/hadoop/zookeeper/bin/../conf/zoo.cfg
Client port found: 2181. Client address: localhost. Client SSL: false.
Mode: follower
#这是运行后查看状态
3.3 我们要实现的效果图如下

4.4 结束语
感谢友友们的支持和理解!若此篇文章有疑问之处,欢迎在评论区留言,收到后,我会一一答复的呐,后期我会不断地提高发表文章的质量,可能发表文章速度慢了点哈,但会一直持续更新的呢
版权归原作者 晨曦~破晓 所有, 如有侵权,请联系我们删除。