1 安装
npm install vue-quill-editor --save
2 引入
有两种引入方式
(1)全局引入(main)
import  VueQuillEditor from 'vue-quill-editor'//调用编辑器
// 样式
import 'quill/dist/quill.core.css'
import 'quill/dist/quill.snow.css'
import 'quill/dist/quill.bubble.css'
Vue.use(VueQuillEditor)
(2)局部引入
import { quillEditor } from 'vue-quill-editor'

export default {
  components: {
    quillEditor
  }
}
3 在组件内使用
<template>
  <div>
    <div style="width: 80%; margin: 0 auto">
      <quill-editor
        v-model="content"
        ref="myQuillEditor"
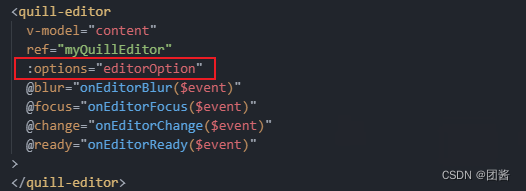
        :options="editorOption"
        @blur="onEditorBlur($event)"
        @focus="onEditorFocus($event)"
        @change="onEditorChange($event)"
        @ready="onEditorReady($event)"
      >
      </quill-editor>
    </div>
  </div>
</template>

<script>
import { quillEditor } from "vue-quill-editor";
export default {
  name: "HomeView",
  components: { quillEditor },
  data() {
    return {
      content: "",
      TiLength:0,
      // 富文本编辑器配置
      editorOption: {},
    };
  },

  methods: {
    onSubmit() {
      console.log("submit!");
    },
    // 失去焦点事件
    onEditorBlur(quill) {
      console.log("editor blur!", quill);
    },
    // 获得焦点事件
    onEditorFocus(quill) {
      console.log("editor focus!", quill);
    },
    // 准备富文本编辑器
    onEditorReady(quill) {
      console.log("editor ready!", quill);
    },
    // 内容改变事件
    onEditorChange({ quill, html, text }) {
      console.log("editor change!", quill, html, text);
      this.content = html;
    },
  },
};
</script>
<style>

</style>
 4 自定义编辑器配置项(可以根据自己所需要的显示工具表)

data中返回
 // 富文本编辑器配置
      editorOption: {
        theme: "snow", // or 'bubble'
        modules: {
          toolbar: [
            ["bold", "italic", "underline", "strike"], // 加粗 斜体 下划线 删除线
            ["blockquote", "code-block"], // 引用  代码块
            [{ header: 1 }, { header: 2 }], // 1、2 级标题
            [{ list: "ordered" }, { list: "bullet" }], // 有序、无序列表
            [{ script: "sub" }, { script: "super" }], // 上标/下标
            [{ indent: "-1" }, { indent: "+1" }], // 缩进
            [{ direction: "rtl" }], // 文本方向
            [
              {
                size: [
                  "12",
                  "14",
                  "16",
                  "18",
                  "20",
                  "22",
                  "24",
                  "28",
                  "32",
                  "36",
                ],
              },
            ], // 字体大小
            [{ header: [1, 2, 3, 4, 5, 6] }], // 标题
            [{ color: [] }, { background: [] }], // 字体颜色、字体背景颜色
            // [{ font: ['songti'] }], // 字体种类
            [{ align: [] }], // 对齐方式
            ["clean"], // 清除文本格式
            ["image", "video"], // 链接、图片、视频
          ],
        },
        placeholder: "请输入正文",
      },

(1)对于字体详细的配置
<template>
  <div class="vue-quill-editor">
    <quill-editor ref="mwQuillEditor" v-model="html" :options="editorOption" />
  </div>
</template>
<script>
import { quillEditor, Quill } from "vue-quill-editor";
import "quill/dist/quill.core.css";
import "quill/dist/quill.snow.css";
import "quill/dist/quill.bubble.css";
// 设置字体大小
const fontSizeStyle = Quill.import("attributors/style/size"); // 引入这个后会把样式写在style上
fontSizeStyle.whitelist = [
  "12px",
  "14px",
  "16px",
  "18px",
  "20px",
  "24px",
  "28px",
  "32px",
  "36px"
];
Quill.register(fontSizeStyle, true);
// 设置字体样式
const Font = Quill.import("attributors/style/font"); // 引入这个后会把样式写在style上
const fonts = ["SimSun", "SimHei", "Microsoft-YaHei", "KaiTi", "FangSong"];
Font.whitelist = fonts; // 将字体加入到白名单
Quill.register(Font, true);
export default {
  name: "VueQuillEditor",
  components: {
    quillEditor,
  },
  data() {
    return {
      html: this.value,
      editorOption: {
        modules: {
          toolbar: [
            [
              {
                size: [
                  "12px",
                  "14px",
                  "16px",
                  "18px",
                  "20px",
                  "24px",
                  "28px",
                  "32px",
                  "36px",
                ],
              },
            ],
            [
              {
                font: [
                  "SimSun",
                  "SimHei",
                  "Microsoft-YaHei",
                  "KaiTi",
                  "FangSong",
                ],

              },
            ],
            [{ header: [1, 2, 3, 4, 5, 6, false] }] // 标题
          ],
        },
      },
      isShow: false,
    };
  },
};
</script>
<style lang="less">
.vue-quill-editor {
  .quill-editor {
    line-height: normal;

    .ql-container.ql-snow {
      line-height: normal !important;
      height: 450px !important;
      font-size: 14px;
    }

    .ql-picker.ql-size .ql-picker-label[data-value="12px"]::before,
    .ql-picker.ql-size .ql-picker-item[data-value="12px"]::before {
      content: "12px";
    }

    .ql-picker.ql-size .ql-picker-label[data-value="14px"]::before,
    .ql-picker.ql-size .ql-picker-item[data-value="14px"]::before {
      content: "14px";
    }

    .ql-picker.ql-size .ql-picker-label[data-value="16px"]::before,
    .ql-picker.ql-size .ql-picker-item[data-value="16px"]::before {
      content: "16px";
    }

    .ql-picker.ql-size .ql-picker-label[data-value="18px"]::before,
    .ql-picker.ql-size .ql-picker-item[data-value="18px"]::before {
      content: "18px";
    }

    .ql-picker.ql-size .ql-picker-label[data-value="20px"]::before,
    .ql-picker.ql-size .ql-picker-item[data-value="20px"]::before {
      content: "20px";
    }

    .ql-picker.ql-size .ql-picker-label[data-value="24px"]::before,
    .ql-picker.ql-size .ql-picker-item[data-value="24px"]::before {
      content: "24px";
    }

    .ql-picker.ql-size .ql-picker-label[data-value="28px"]::before,
    .ql-picker.ql-size .ql-picker-item[data-value="28px"]::before {
      content: "28px";
    }

    .ql-picker.ql-size .ql-picker-label[data-value="32px"]::before,
    .ql-picker.ql-size .ql-picker-item[data-value="32px"]::before {
      content: "32px";
    }

    .ql-picker.ql-size .ql-picker-label[data-value="36px"]::before,
    .ql-picker.ql-size .ql-picker-item[data-value="36px"]::before {
      content: "36px";
    }

    .ql-snow .ql-picker.ql-font .ql-picker-label[data-value="Microsoft-YaHei"]::before,
    .ql-snow .ql-picker.ql-font .ql-picker-item[data-value="Microsoft-YaHei"]::before {
      content: "微软雅黑";
    }

    .ql-snow .ql-picker.ql-font .ql-picker-label[data-value="SimSun"]::before,
    .ql-snow .ql-picker.ql-font .ql-picker-item[data-value="SimSun"]::before {
      content: "宋体";
    }

    .ql-snow .ql-picker.ql-font .ql-picker-label[data-value="SimHei"]::before,
    .ql-snow .ql-picker.ql-font .ql-picker-item[data-value="SimHei"]::before {
      content: "黑体";
    }

    .ql-snow .ql-picker.ql-font .ql-picker-label[data-value="KaiTi"]::before,
    .ql-snow .ql-picker.ql-font .ql-picker-item[data-value="KaiTi"]::before {
      content: "楷体";
    }

    .ql-snow .ql-picker.ql-font .ql-picker-label[data-value="FangSong"]::before,
    .ql-snow .ql-picker.ql-font .ql-picker-item[data-value="FangSong"]::before {
      content: "仿宋";
    }

    .ql-picker.ql-header {

      .ql-picker-label::before,
      .ql-picker-item::before {
        content: "文本";
      }

      .ql-picker-label[data-value="1"]::before,
      .ql-picker-item[data-value="1"]::before {
        content: "标题1";
        font-size: 14px;
      }

      .ql-picker-label[data-value="2"]::before,
      .ql-picker-item[data-value="2"]::before {
        content: "标题2";
        font-size: 14px;
      }

      .ql-picker-label[data-value="3"]::before,
      .ql-picker-item[data-value="3"]::before {
        content: "标题3";
        font-size: 14px;
      }

      .ql-picker-label[data-value="4"]::before,
      .ql-picker-item[data-value="4"]::before {
        content: "标题4";
        font-size: 14px;
      }

      .ql-picker-label[data-value="5"]::before,
      .ql-picker-item[data-value="5"]::before {
        content: "标题5";
        font-size: 14px;
      }

      .ql-picker-label[data-value="6"]::before,
      .ql-picker-item[data-value="6"]::before {
        content: "标题6";
        font-size: 14px;
      }
    }

    .ql-align-center {
      text-align: center;
    }

    .ql-align-right {
      text-align: right;
    }

    .ql-align-left {
      text-align: left;
    }
  }
}
</style>
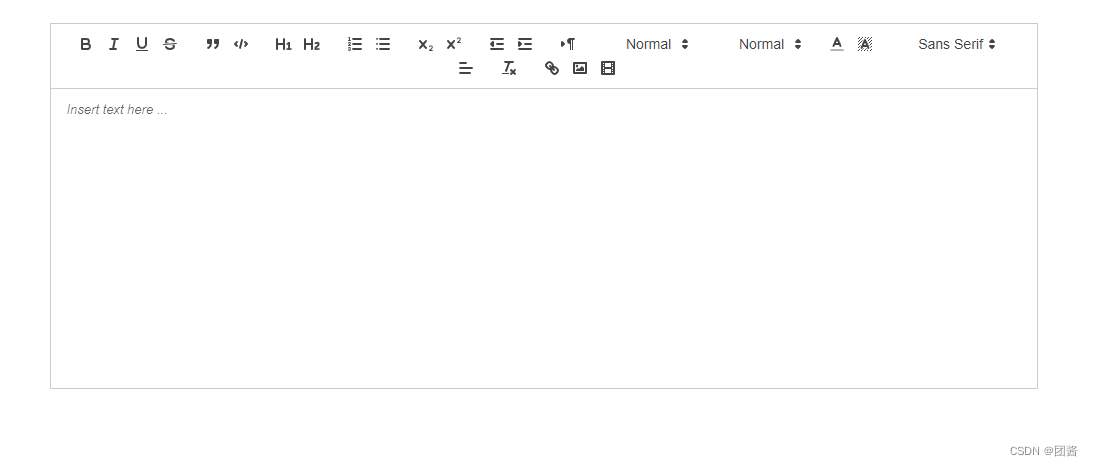
效果展示:

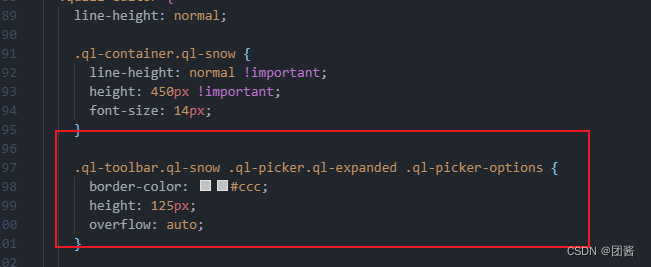
如果想设置展现的那部分为滚动条形式的


(2)限制输入字符

js:
methods:{
    // 内容改变事件
    onEditorChange({ quill, html, text }){
      // console.log( quill, html, text );
      this.content=html;
      if(this.$refs.ruleForm){
        this.$refs.ruleForm.validateField('content')
      }
      let event=this.$refs.mwQuillEditor;
      event.quill.deleteText(10,1)
      if(this.content===''){
        this.TiLength=0
      }else{
        this.TiLength=event.quill.getLength()-1
      }
    }
  }
效果展示 :

(3)自定义控制上传的图片大小
- 安装插件
npm i quill-image-resize-module
- 在vue.config.js 文件中添加配置,记得重启哦~
//其他配置
  configureWebpack: {
    plugins: [
      new webpack.ProvidePlugin({
        "window.Quill": "quill/dist/quill.js",
        Quill: "quill/dist/quill.js",
      }),
    ],
  }
引入
// 调整上传图片大小
import ImageResize from 'quill-image-resize-module'
Quill.register('modules/imageResize', ImageResize)
放在toolbar下面就可以
// 调整图片大小
          imageResize: {
            displayStyles: {
              backgroundColor: "black",
              border: "none",
              color: "white"
            },
            modules: ["Resize", "DisplaySize", "Toolbar"]
          }
版权归原作者 团酱 所有, 如有侵权,请联系我们删除。