🍁博主简介
🏅云计算领域优质创作者
🏅华为云开发者社区专家博主
🏅阿里云开发者社区专家博主
💊交流社区:运维交流社区 欢迎大家的加入!
文章目录
文章声明
文章声明:此文基于实操撰写 生产环境:
ssh -V查看版本是:OpenSSH_7.4p1, OpenSSL 1.0.2k-fips 26 Jan 2017
问题关键字:OpenSSH 升级, OpenSSH 更新, OpenSSH 漏洞修复

前述
OpenSSH(OpenBSD Secure Shell)是OpenBSD计划组的一套用于安全访问远程计算机的连接工具。该工具是SSH协议的开源实现,支持对所有的传输进行加密,可有效阻止窃听、连接劫持以及其他网络级的攻击。 OpenSSH 8.9版本至9.3之前版本存在安全漏洞,该漏洞源于将智能卡密钥添加到ssh-agent,会导致忽略每次转发的目标约束。
注:此操作步骤同样适用于Red Hat系所有 9.x 服务器系统。
注意事项:
在升级之前,建议打开多个SSH终端连接,并安装telnet服务器,确保在SSH服务器升级异常时,可以通过telnet服务器远程连接,进行紧急问题修复处理。
因为最开始需要直接卸载openssh,卸载完之后就连不上了,如有问题不好解决,所以建议多开几个SSH终端连接。
在升级前一定要备份原有的配置文件,以防出现意外情况。
安装一些必要的命令(需要用到的)
安装一些必要的命令(需要用到的)
yum installwget gcc openssl-devel pam-devel rpm-build zlib -y
如果没有外网,可以选择在有网络的服务器上下载rpm安装包,yum离线下载安装包可参考:Centos7 yum如何下载离线安装包?(详解)
命令解析:
- 1.1 OpenSSL:OpenSSH 使用了 OpenSSL 的加密库。因此,在更新 OpenSSH 之前,需要先更新 OpenSSL 的版本。
- 1.2 PAM:OpenSSH 使用了Pluggable Authentication Modules (PAM),因此需要安装 PAM 相关的库文件。
- 1.3 Zlib:OpenSSH 使用了 Zlib 库进行数据压缩。因此,需要安装 Zlib 的库文件。
- 1.4 GCC 和 G++:OpenSSH 的编译需要 GCC 和 G++ 编译器。
Centos 服务器升级OpenSSH到9.3
1、安装依赖
2、编译安装openssl
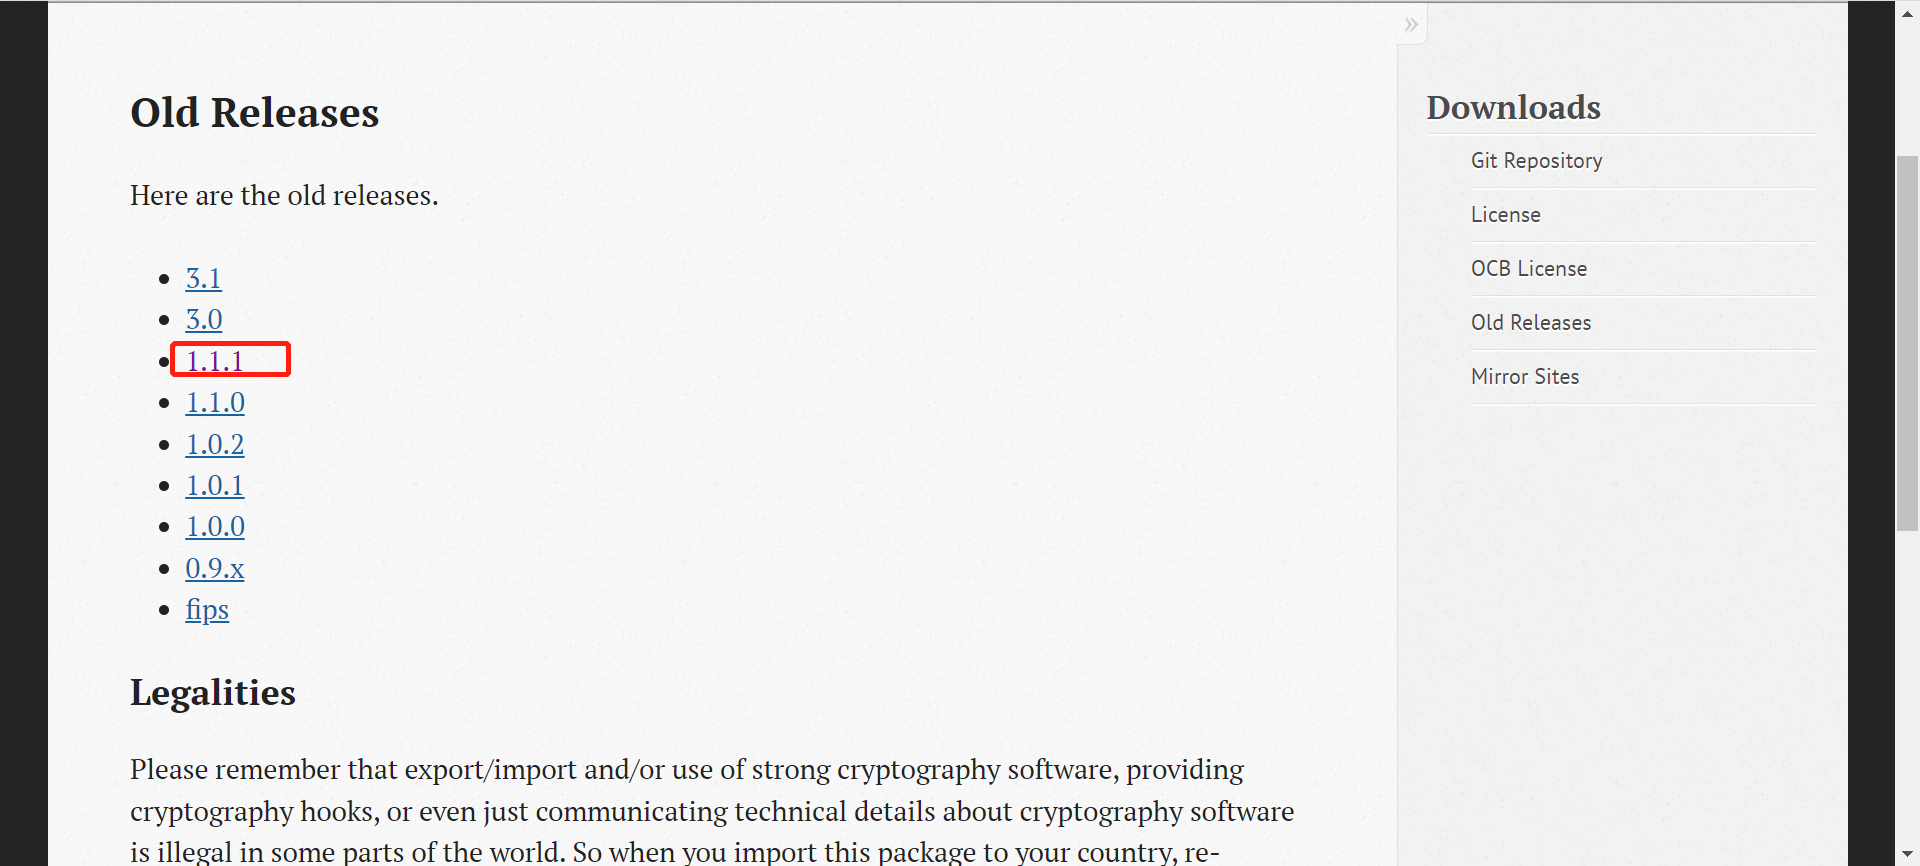
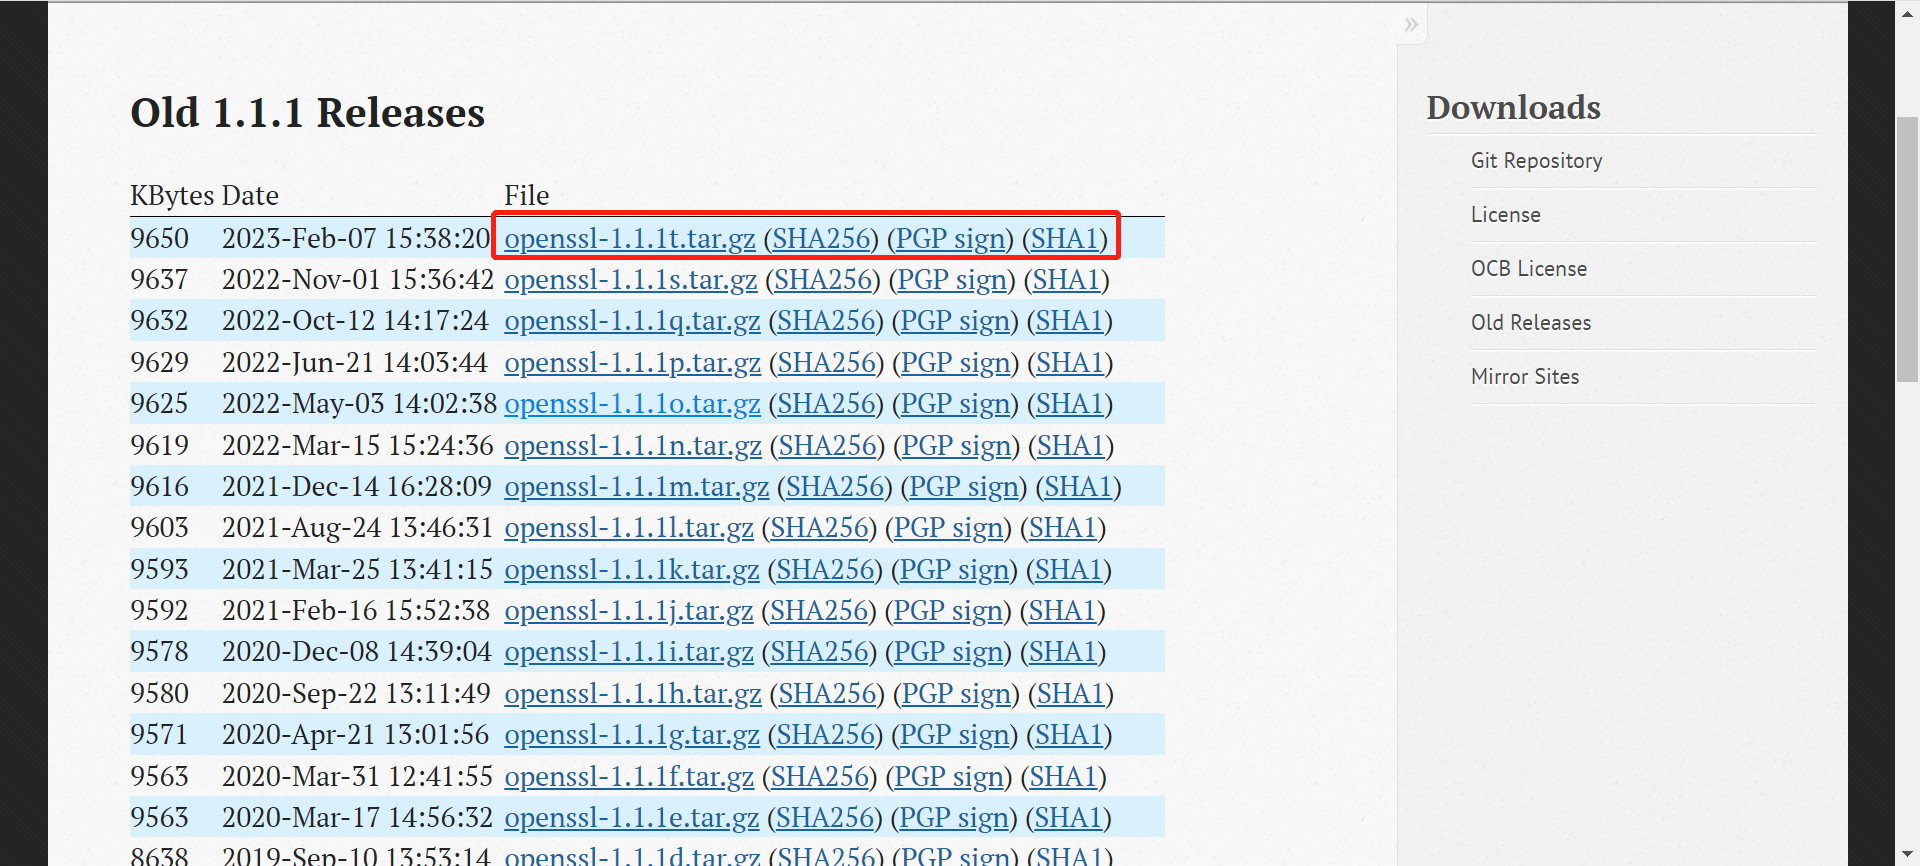
2.1 官网下载安装包:openssl官网


wget https://www.openssl.org/source/old/1.1.1/openssl-1.1.1t.tar.gz
或者是使用我提供的离线包:openssh升级9.3所需的离线包
网盘下载:
链接:https://pan.baidu.com/s/1DbdMNM3fbvLgB0mcVSo3pw
提取码:4qm0
2.2 解压并放到/usr/local/目录
tar xf openssl-1.1.1t.tar.gz -C /usr/local
2.3 编译安装openssl
# 进入openssl目录cd /usr/local/openssl-1.1.1t

# 编译安装openssl
./config shared --prefix=/usr/local/openssl
make -j 4makeinstall
2.4 为openssl做软连接
echo"/usr/local/openssl/lib/">> /etc/ld.so.conf
# 加载配置文件
ldconfig
# 备份以前的opensslmv /usr/bin/openssl /usr/bin/openssl.old
# 软连接ln -sv /usr/local/openssl/bin/openssl /usr/bin/openssl
ln -s /usr/local/openssl/lib/libssl.so.1.1 /usr/lib64/libssl.so.1.1
ln -s /usr/local/openssl/lib/libcrypto.so.1.1 /usr/lib64/libcrypto.so.1.1
2.5 查看openssl版本
openssl version -a

3、查看、备份并卸载原有OpenSSH
确保终端一直连接 断开远程连接就不能用了
# 查看当前安装包[root@localhost ~]# rpm -qa | grep openssh
openssh-clients-7.4p1-21.el7.x86_64
openssh-7.4p1-21.el7.x86_64
openssh-server-7.4p1-21.el7.x86_64

# 查看当前OpenSSH版本(Centos7 默认使用OpenSSH_7.4p1)[root@localhost ~]# ssh -V
OpenSSH_7.4p1, OpenSSL 1.0.2k-fips  26 Jan 2017# 备份现有的SSH[root@localhost ~]# mv /etc/ssh/ /etc/ssh.bak[root@localhost ~]# mv /usr/bin/ssh /usr/bin/ssh.bak[root@localhost ~]# mv /usr/sbin/sshd /usr/sbin/sshd.bak# 如果您是第一次升级,备份/etc/init.d/sshd时会不存在,不影响后续操作[root@localhost ~]# mv /etc/init.d/sshd /etc/init.d/sshd.bak
mv: 无法获取'/etc/init.d/sshd' 的文件状态(stat): No such file or directory

# 卸载现有OpenSSHrpm -e --nodeps $(rpm -qa |grep openssh)

确保已经卸载成功(没有返回则卸载成功)
rpm -qa |grep openssh

4、下载OpenSSH二进制包
openssh官网:下载官网
wget https://cdn.openbsd.org/pub/OpenBSD/OpenSSH/portable/openssh-9.3p1.tar.gz

或者是使用我提供的离线包:openssh升级9.3所需的离线包
网盘下载:
链接:https://pan.baidu.com/s/1DbdMNM3fbvLgB0mcVSo3pw
提取码:4qm0
5、解压并编译安装OpenSSH
# 将下载的openssh安装包移动到/usr/local下[root@localhost ~]# mv openssh-9.3p1.tar.gz /usr/local/# 进入/usr/local/目录解压openssh9.3[root@localhost ~]# cd /usr/local/[root@localhost local]# tar xf openssh-9.3p1.tar.gz# 进入openssh目录[root@localhost local]# cd openssh-9.3p1# 编译安装[root@localhost openssh-9.3p1]# CCFLAGS="-I/usr/local/include" \LDFLAGS="-L/usr/local/lib64"\
./configure \
--sysconfdir=/etc/ssh \
--with-zlib \
--with-ssl-dir=/usr/local/openssl

[root@localhost openssh-9.3p1]# make -j 4[root@localhost openssh-9.3p1]# make install
6、授权
[root@localhost openssh-9.3p1]# chmod 600 /etc/ssh/*
7、复制配置文件
[root@localhost openssh-9.3p1]# cp -rf /usr/local/sbin/sshd /usr/sbin/sshd[root@localhost openssh-9.3p1]# cp -rf /usr/local/bin/ssh /usr/bin/ssh[root@localhost openssh-9.3p1]# cp -rf /usr/local/bin/ssh-keygen /usr/bin/ssh-keygen[root@localhost openssh-9.3p1]# cp -ar /usr/local/openssh-9.3p1/contrib/redhat/sshd.init /etc/init.d/sshd[root@localhost openssh-9.3p1]# cp -ar /usr/local/openssh-9.3p1/contrib/redhat/sshd.pam /etc/pam.d/sshd.pam
8、修改配置允许root用户远程登录
# 修改配置允许root用户远程登录(允许使用密码登录,允许root远程登录,开启端口,赋予/etc/init.d/sshd权限)cat>>/etc/ssh/sshd_config<<EOF
PermitRootLogin yes
X11Forwarding yes
PasswordAuthentication yes
KexAlgorithms diffie-hellman-group1-sha1,diffie-hellman-group14-sha1,diffie-hellman-group-exchange-sha1,diffie-hellman-group-exchange-sha256,ecdh-sha2-nistp256,ecdh-sha2-nistp384,ecdh-sha2-nistp521,diffie-hellman-group1-sha1,[email protected]
EOF[root@localhost openssh-9.3p1]# sed -i "s/^#Port/Port/g" /etc/ssh/sshd_config[root@localhost openssh-9.3p1]# chmod 755 /etc/init.d/sshd
9、启用sshd,生成服务配置文件,并重启服务
# 启用sshd,生成服务配置文件[root@localhost openssh-9.3p1]# systemctl enable sshd
sshd.service is not a native service, redirecting to /sbin/chkconfig.
Executing /sbin/chkconfig sshd on

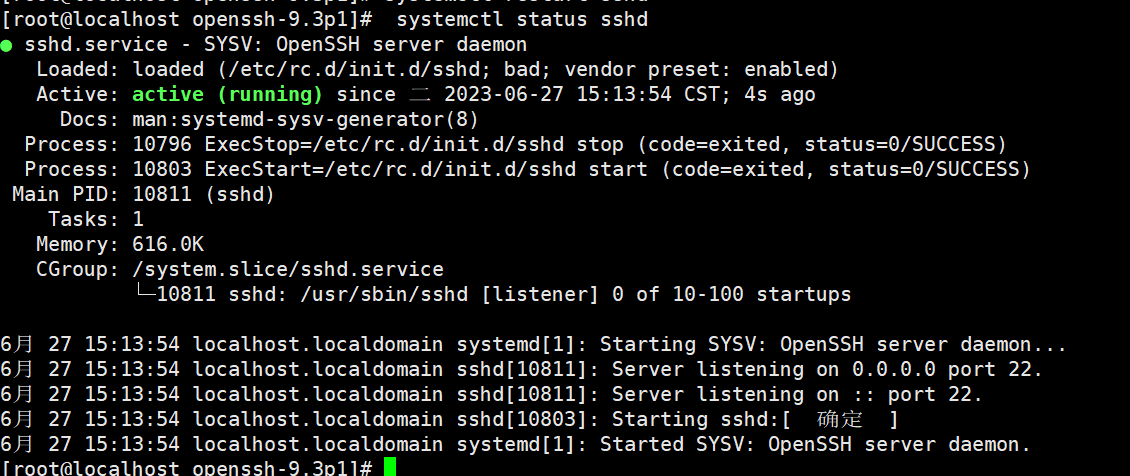
# 重启服务[root@localhost openssh-9.3p1]# systemctl restart sshd# 查看服务状态[root@localhost openssh-9.3p1]# systemctl status sshd

10、验证升级是否成功
[root@localhost ~]# ssh -V
OpenSSH_9.3p1, OpenSSL 1.0.2k-fips  26 Jan 2017

可能遇到的问题及解决方式
问题一:

问题二:
编译时报错信息:
checking for cc... cc
checking whether the C compiler works... no
configure: error: in`/usr/local/openssh-9.3p1':
configure: error: C compiler cannot create executables
See `config.log' formore details
gcc问题,如果gcc是5.4将gcc降级为4.8.5,我遇到的问题就是因为gcc的版本为5.4,将gcc版本降为4.8.5即可。
问题三:
编译时报错信息:
checking for openssl/opensslv.h... yes
checking OpenSSL header version... 009070e0 (OpenSSL 0.9.7n-dev xx XXX xxxx)
checking for OpenSSL_version... no
checking for OpenSSL_version_num... no
checking OpenSSL library version... configure: error: OpenSSL >=1.0.1 required (have "009070e0 (OpenSSL 0.9.7n-dev xx XXX xxxx)")
问题四:
升级OpenSSH后SFTP无法连接问题
- 1.修改配置
vim  /etc/ssh/sshd_config

#override default of no subsystems#Subsystem      sftp    /usr/local/openssh/libexec/sftp-server改成下面这句
Subsystem      sftp    internal-sftp
- 2.重启sshd服务
systemctl restart sshd
再试一下就可以了。
参考文献
- [1] 国家信息安全漏洞库:http://www.cnnvd.org.cn/
- [2] 腾讯安全:https://s.tencent.com/research/bsafe/
- [3] Centos7 yum如何下载离线安装包?(详解):https://liucy.blog.csdn.net/article/details/125780172?spm=1001.2014.3001.5502
相关文章
文章标题文章链接【Linux】 OpenSSH_7.4p1 升级到 OpenSSH_9.3p1(亲测无问题,建议收藏)https://liucy.blog.csdn.net/article/details/131398113【Linux】 OpenSSH_7.4p1 升级到 OpenSSH_8.7p1(亲测无问题,建议收藏)https://liucy.blog.csdn.net/article/details/130484944?spm=1001.2014.3001.5502
版权归原作者 A-刘晨阳 所有, 如有侵权,请联系我们删除。