
文章目录
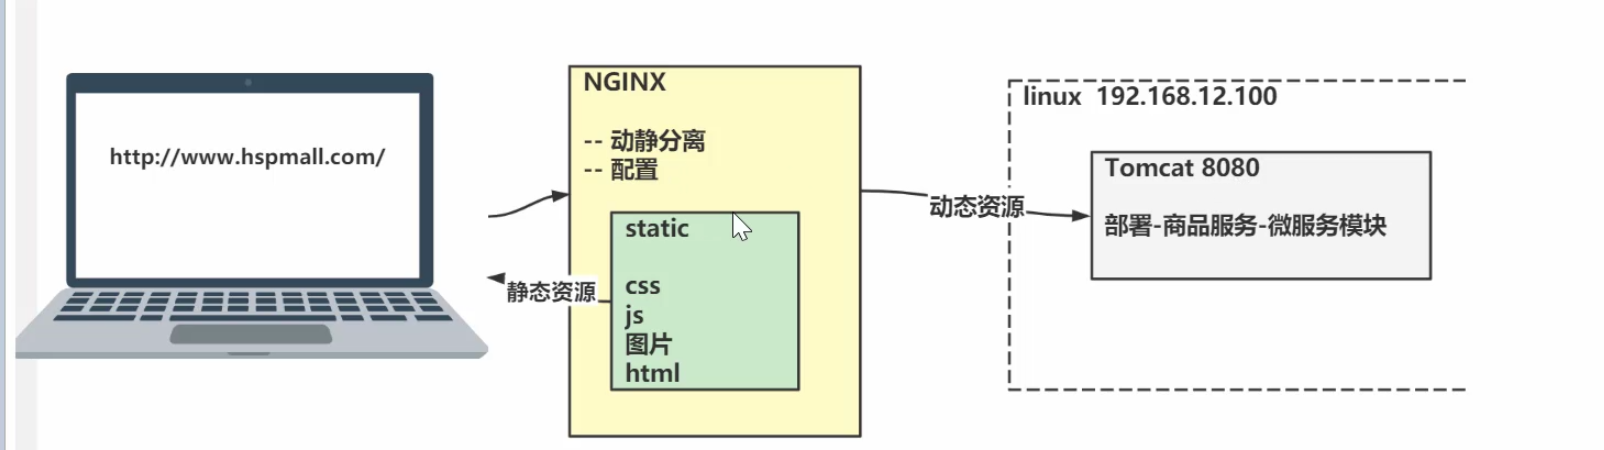
Nginx(动静分离)
1.基本介绍

2.需求分析
3.思路分析
4.先使用传统的方式
1.配置win的tomcat
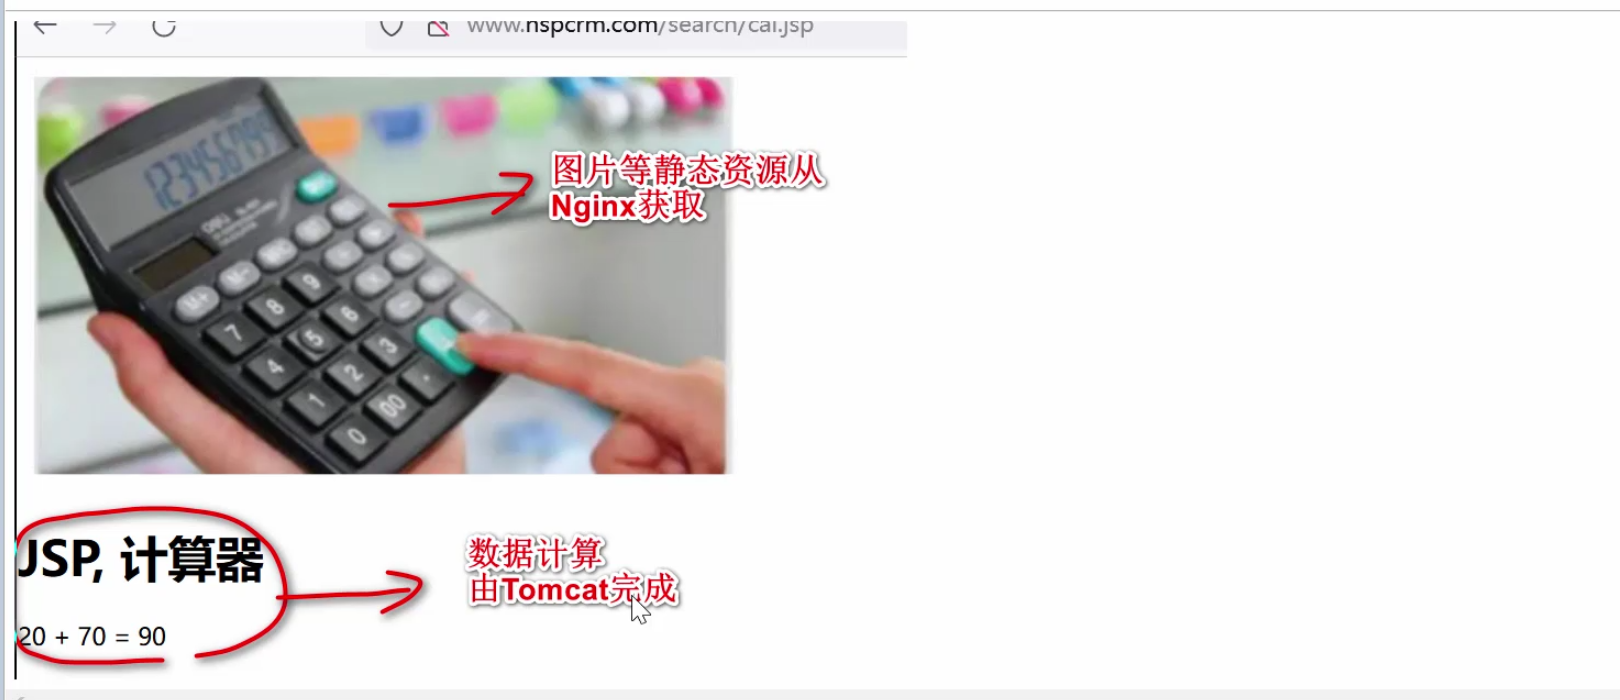
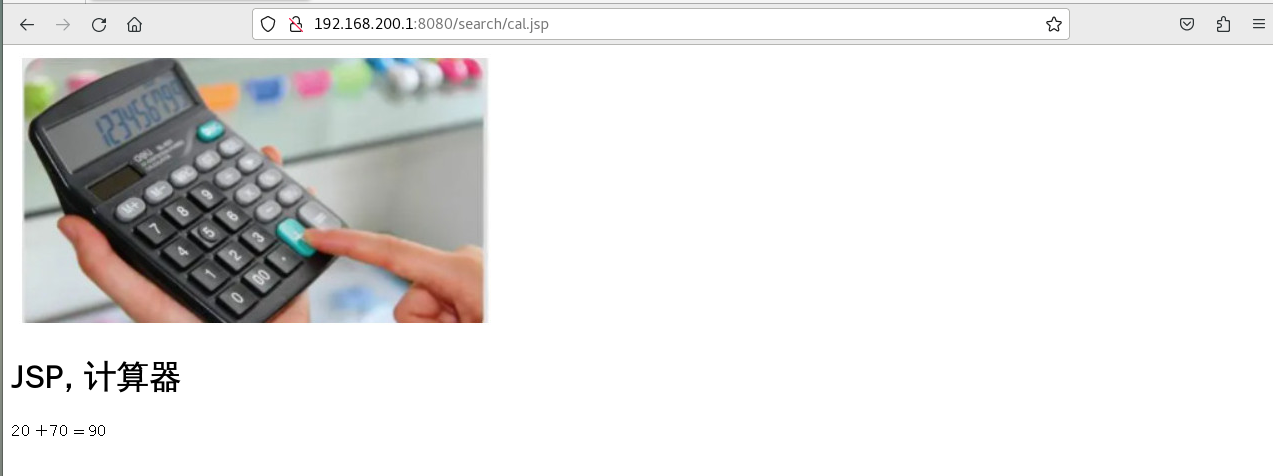
1.webapps\search\cal.jsp
<%@ page contentType="text/html;charset=UTF-8" language="java" %>

<html>
<head>
<title>hello, jsp</title>
</head>
<body>
<img src="image/cal.jpg"/>
<h1>JSP, 计算器</h1>

<%
int i = 20;

int j = 70;

int res = i + j;

out.println(i + " + " + j + " = " + res);

%>

</body>
</html>
2.webapps\search\image\cal.jpg

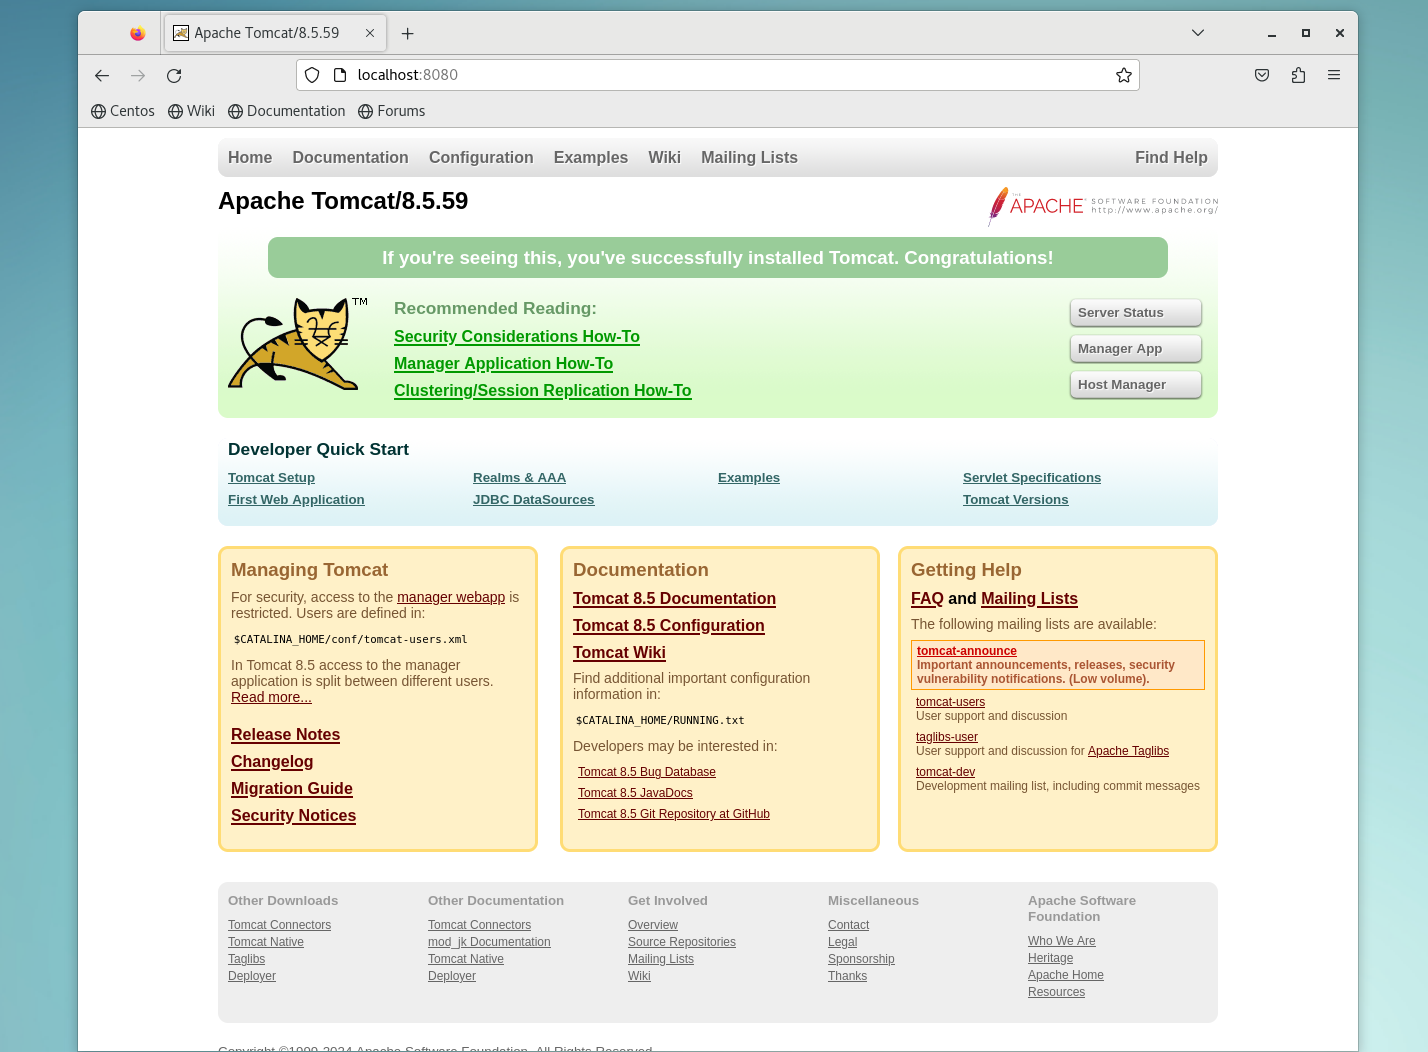
3.启动tomcat,访问 http://192.168.200.1:8080/search/cal.jsp

2.配置linux的tomcat
1.将image和cal.jsp移动到linux的search目录下

2.启动tomcat,访问 http://192.168.200.128:8080/search/cal.jsp
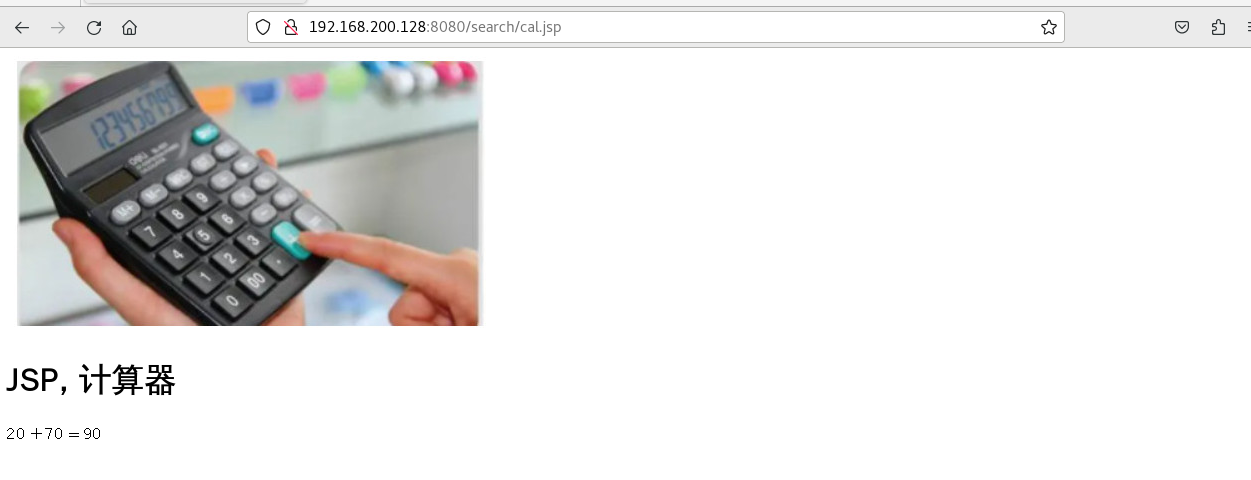
3.访问 http://192.168.200.1:8080/search/cal.jsp
3.配置nginx.conf(之前配过)
http全局块

server块
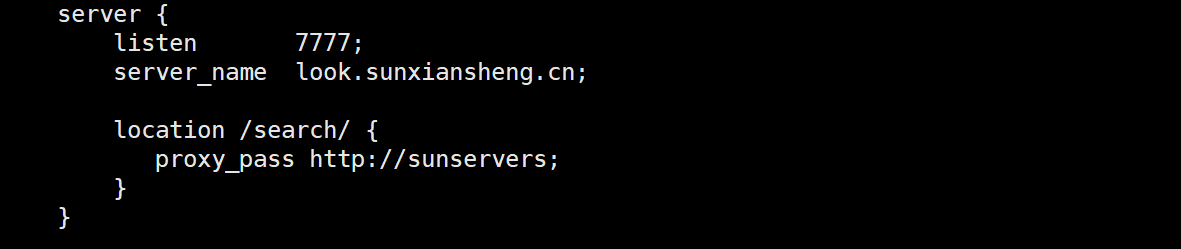
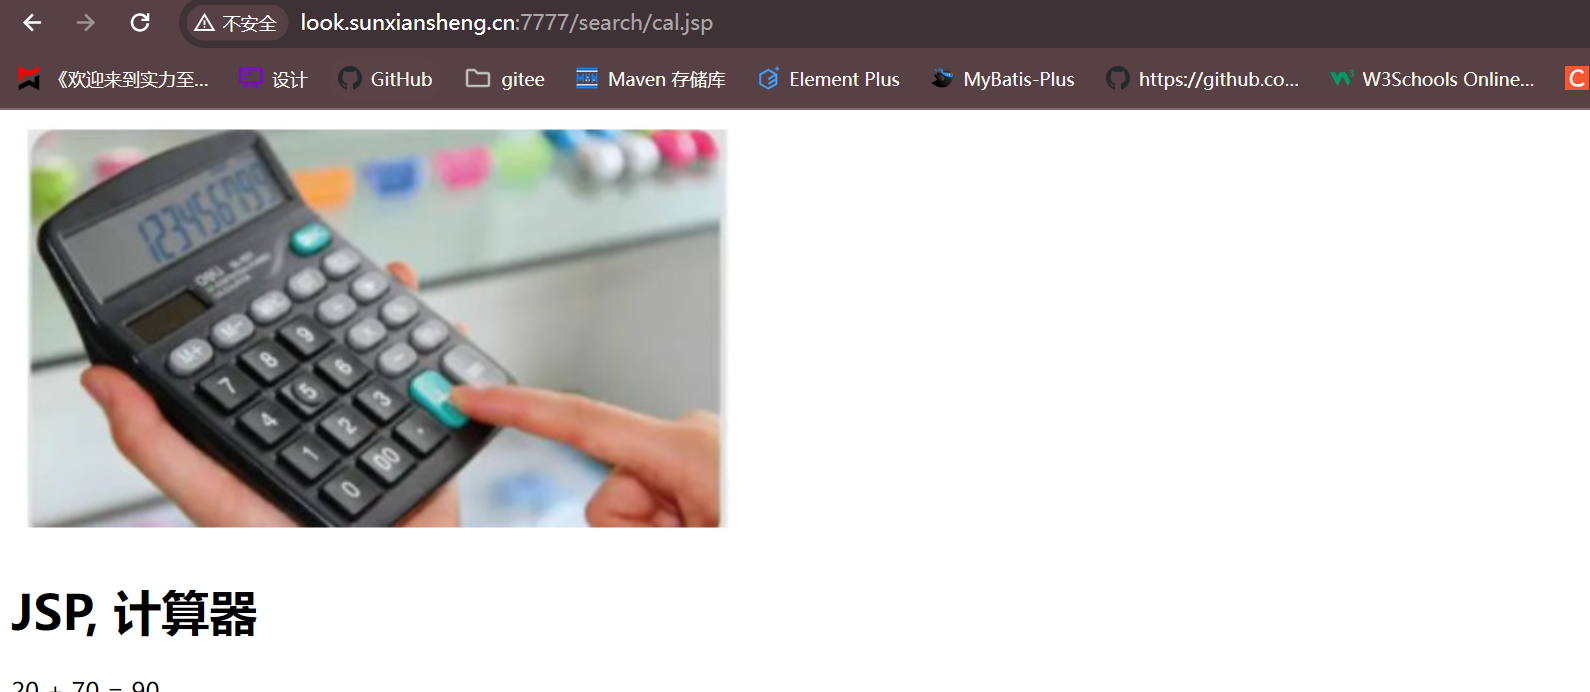
4.启动nginx,访问 http://look.sunxiansheng.cn:7777/search/cal.jsp
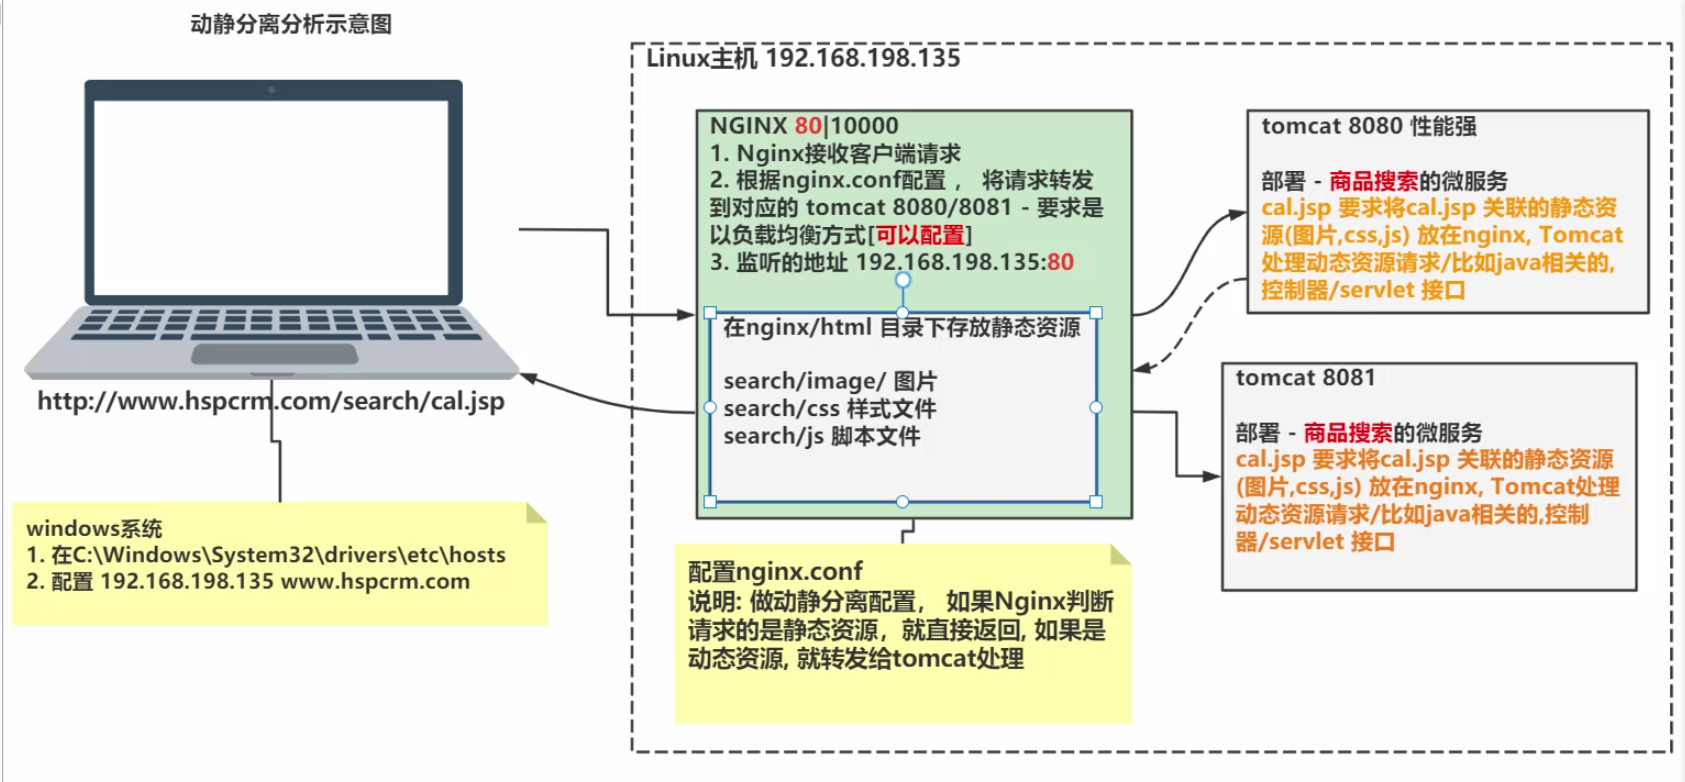
5.动静分离优化
1.分析静态资源请求路径
资源路径为/search/image/cal.jpg

2.在nginx的安装目录下创建/search/image/来存放静态资源

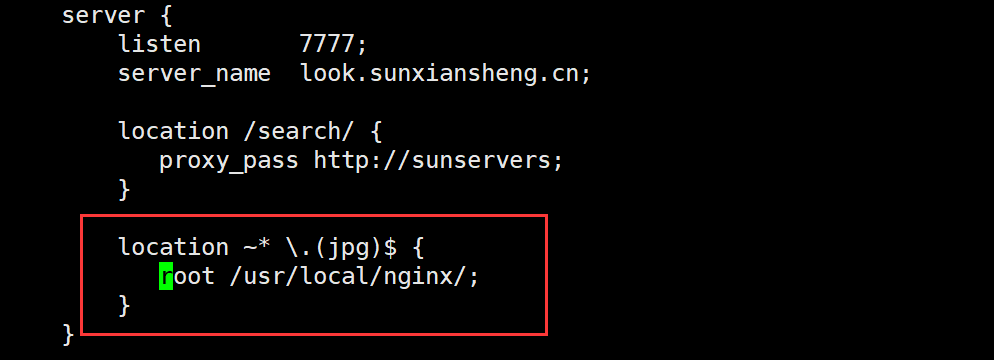
3.修改nginx.conf 配置动静分离
- 这样配置就表示当匹配到jpg结尾的文件时,假如是/search/image/cal.jpg,会将/usr/local/nginx/与/search/image/cal.jpg拼接,来寻找资源
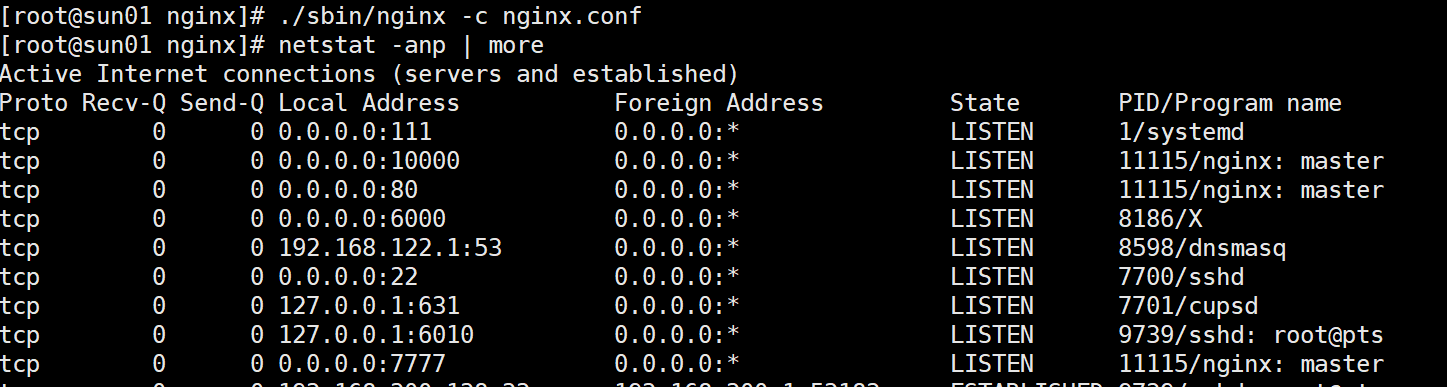
4.重载使配置生效
./sbin/nginx -s reload
5.浏览器访问 http://look.sunxiansheng.cn:7777/search/cal.jsp
6.Nginx配置核心
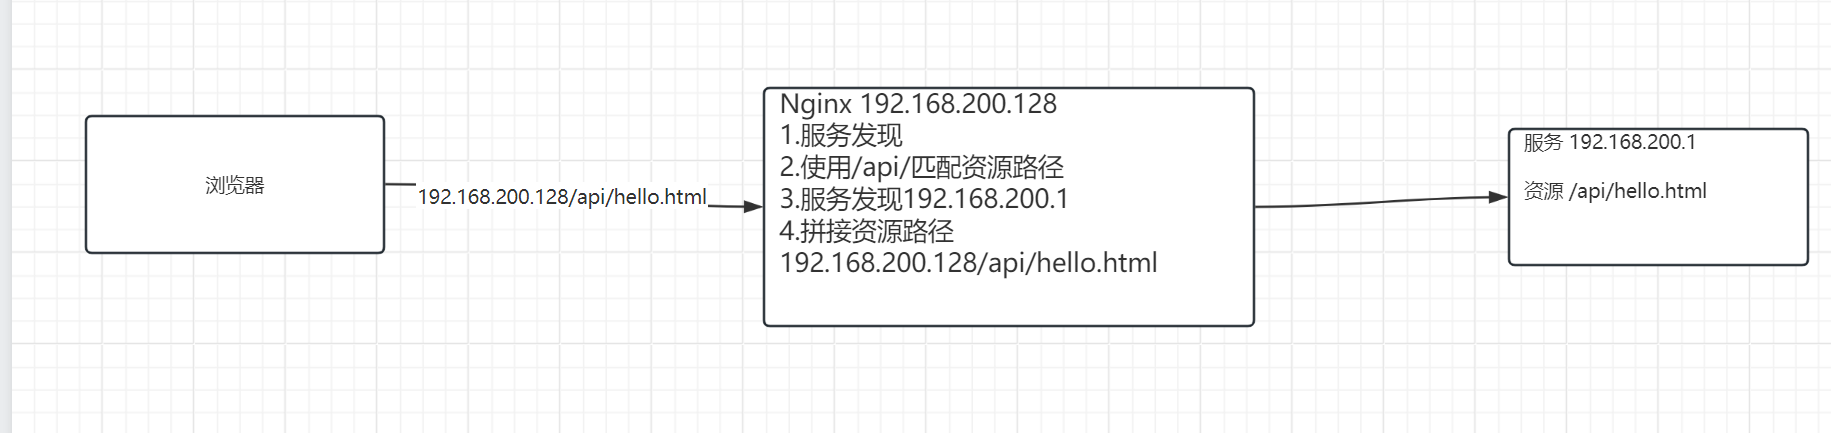
- 服务发现 + 匹配资源路径
- 服务发现 + 拼接资源路径
- 首先部署服务,然后写出使用浏览器怎么访问服务,最后配置Nginx
Nginx(反向代理)
1.反向代理快速入门
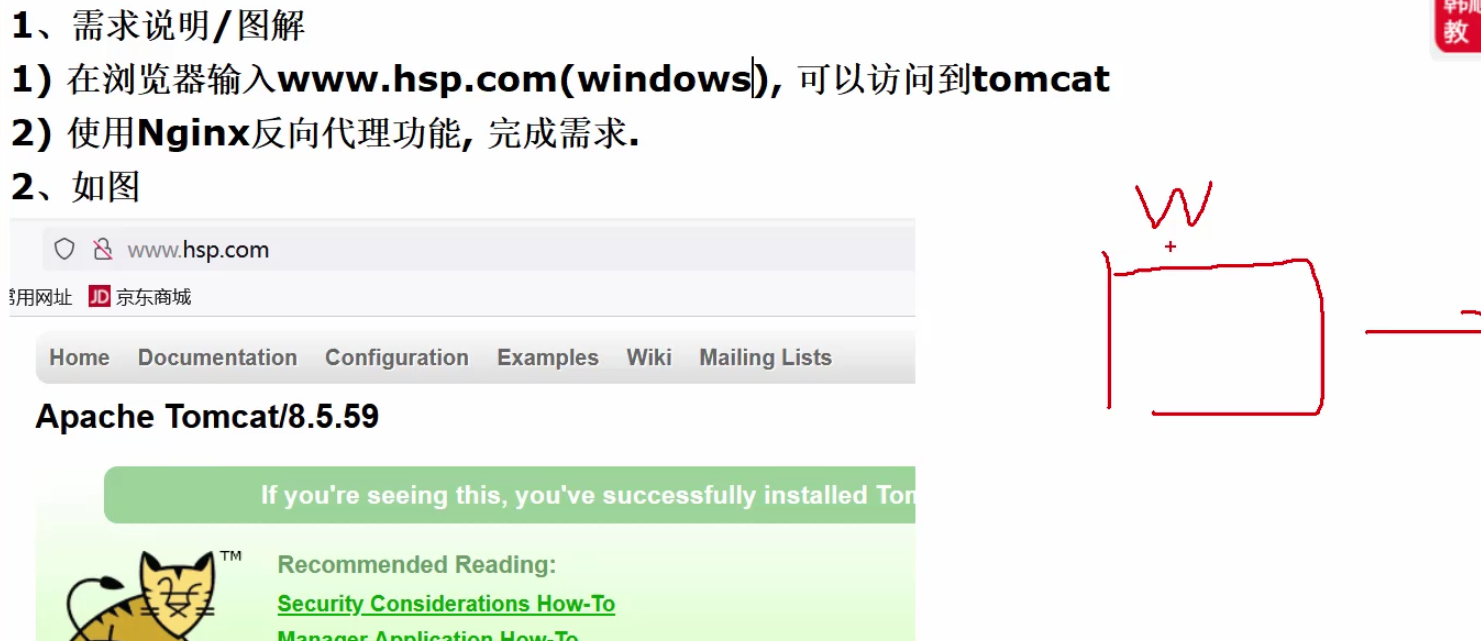
1.需求分析
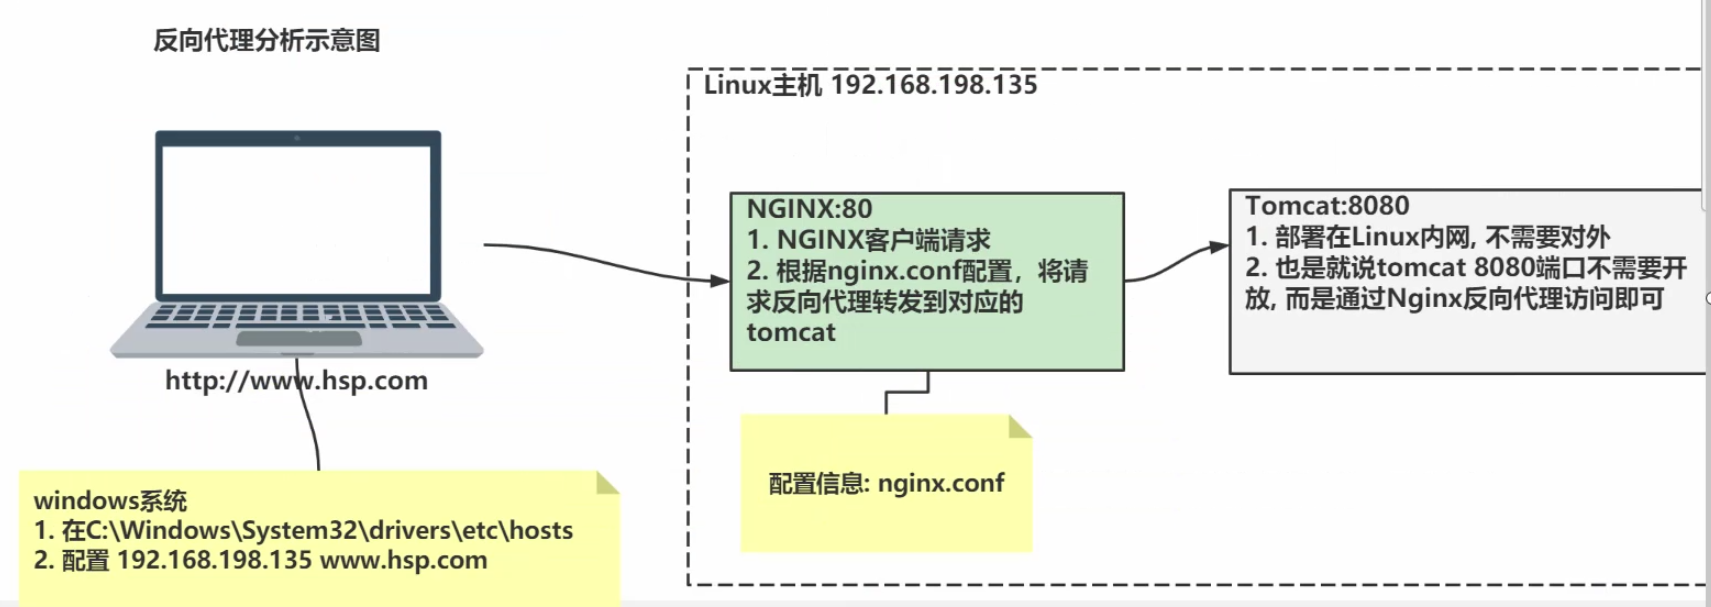
2.思路分析
3.配置前提
1.安装JDK8
2.安装Tomcat8
3.测试是否安装成功
测试java:输入java -version

测试tomcat:进入安装的bin目录
cd /opt/tomcat/apache-tomcat-8.5.59/bin
执行
./startup.sh
4.测试win下访问tomcat
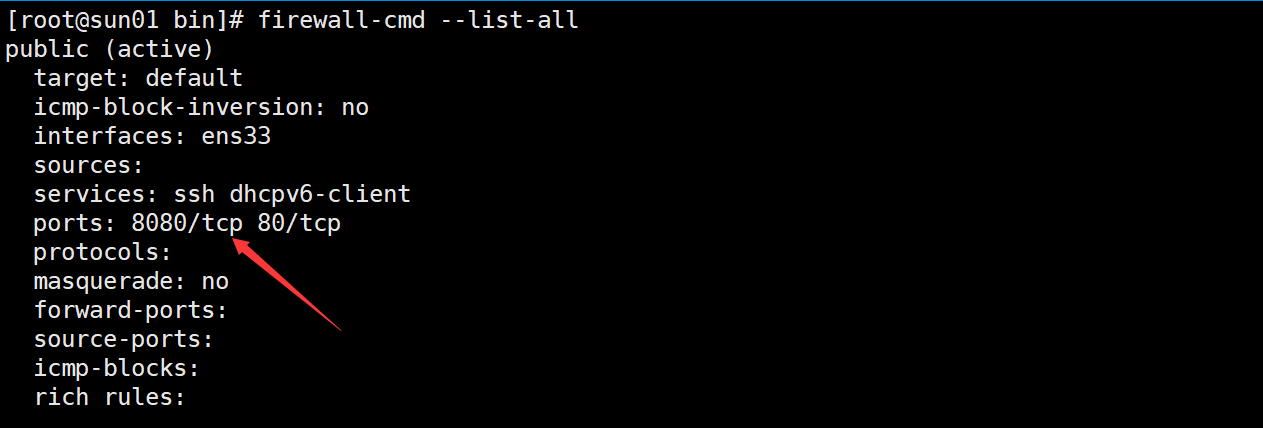
1.查看8080端口是否开放
firewall-cmd --list-all
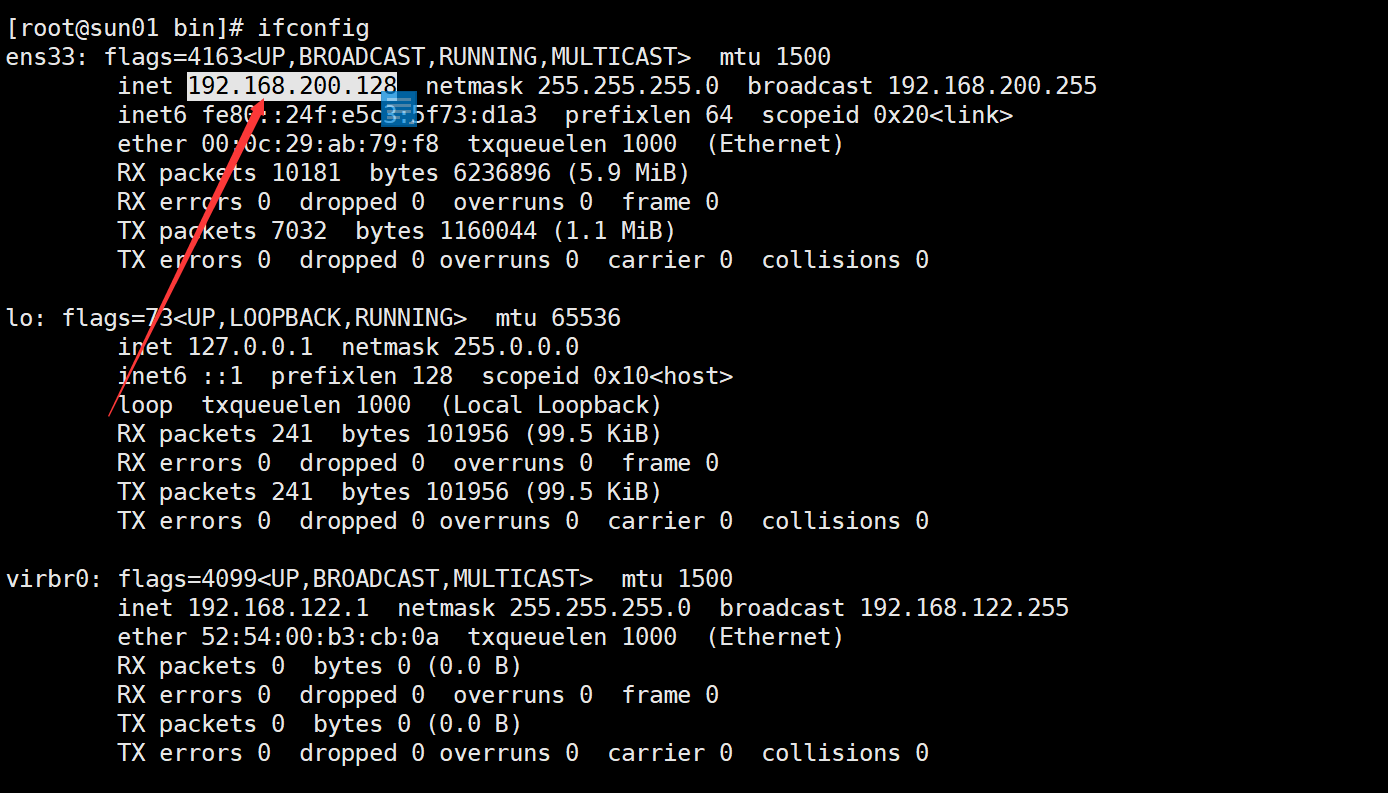
2.查看虚拟机ip,
ifconfig
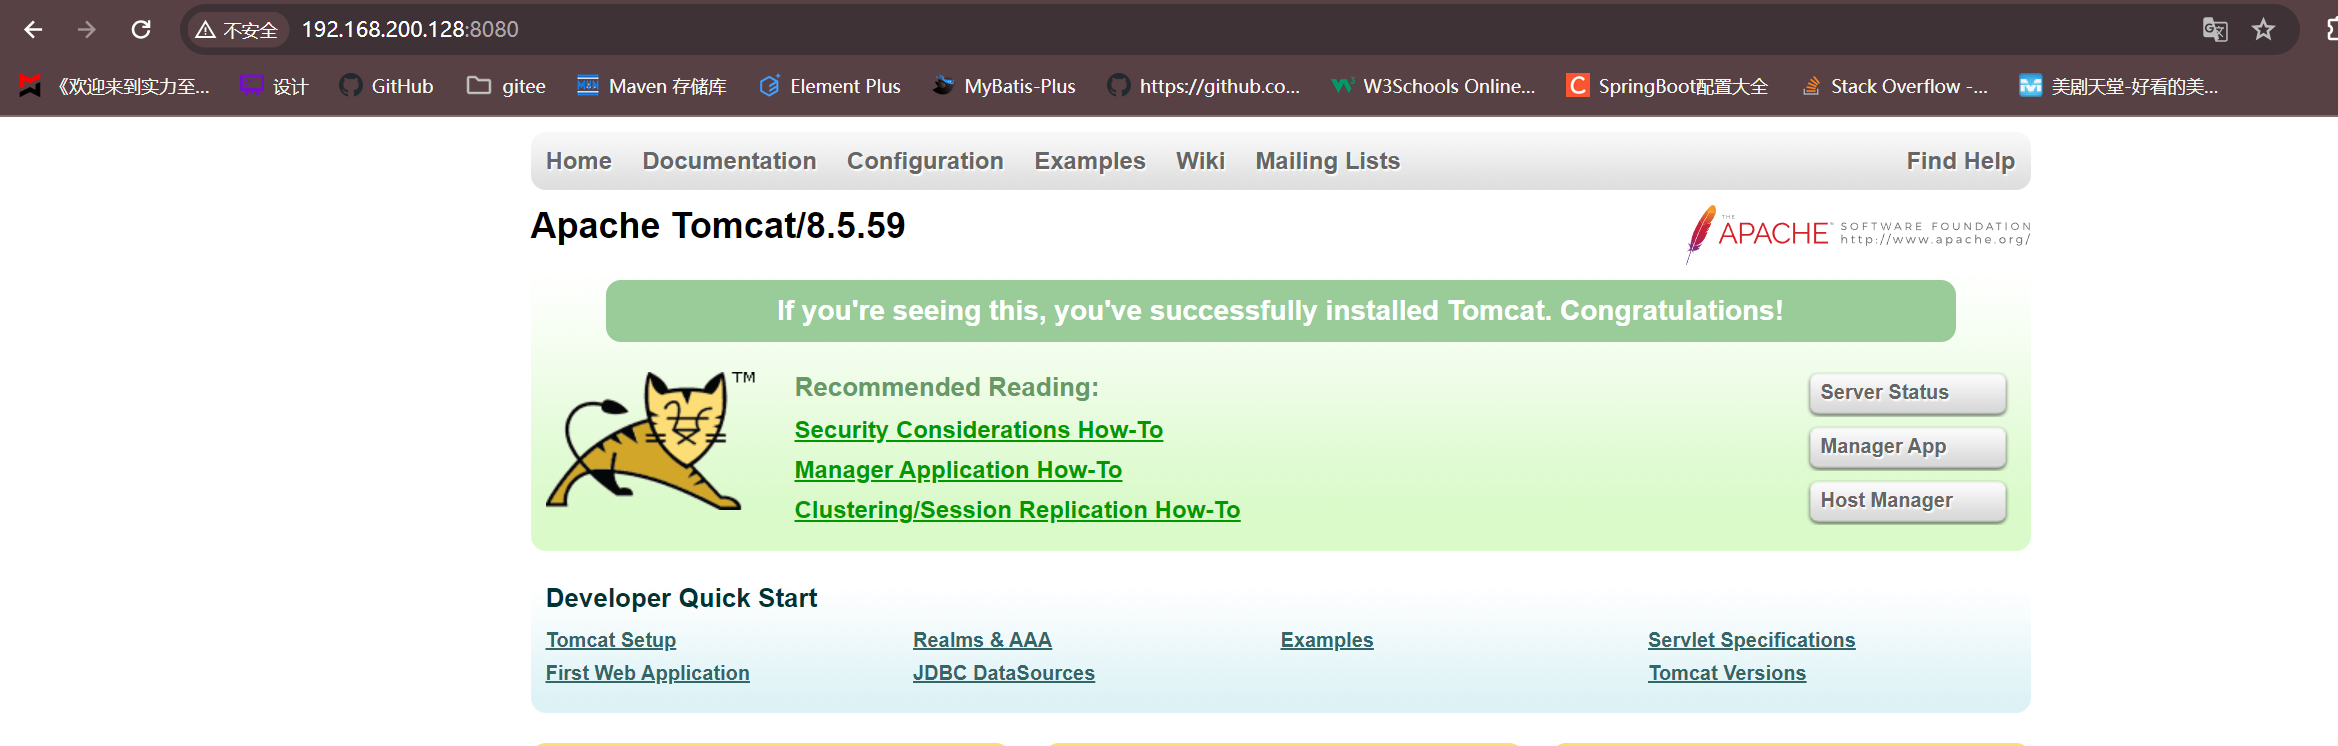
3.win浏览器访问 http://192.168.200.128:8080/
4.反向代理不需要开放8080端口,所以关闭
firewall-cmd --permanent --remove-port=8080/tcp
然后重载
firewall-cmd --reload

4.配置域名解析到虚拟机的ip

5.修改安装目录\nginx.conf
1.检测配置文件是否正确,进入nginx安装目录
cd /usr/local/nginx/
输入
./sbin/nginx -t
则会检测安装目录下的nginx.conf文件的语法

2.上面显示46行有问题,发现少加了一个分号

3.重载nginx 使配置文件生效
./sbin/nginx -s reload
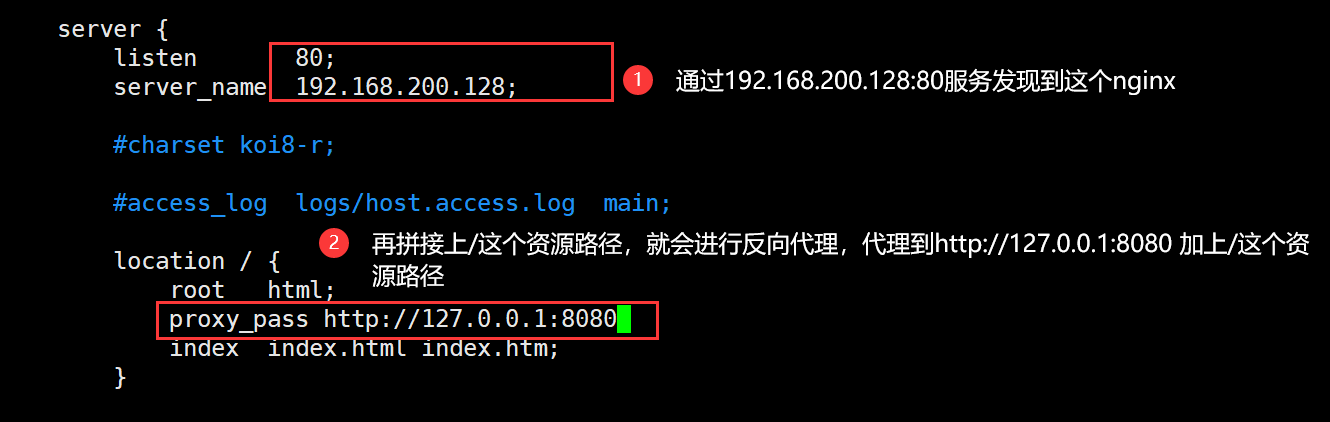
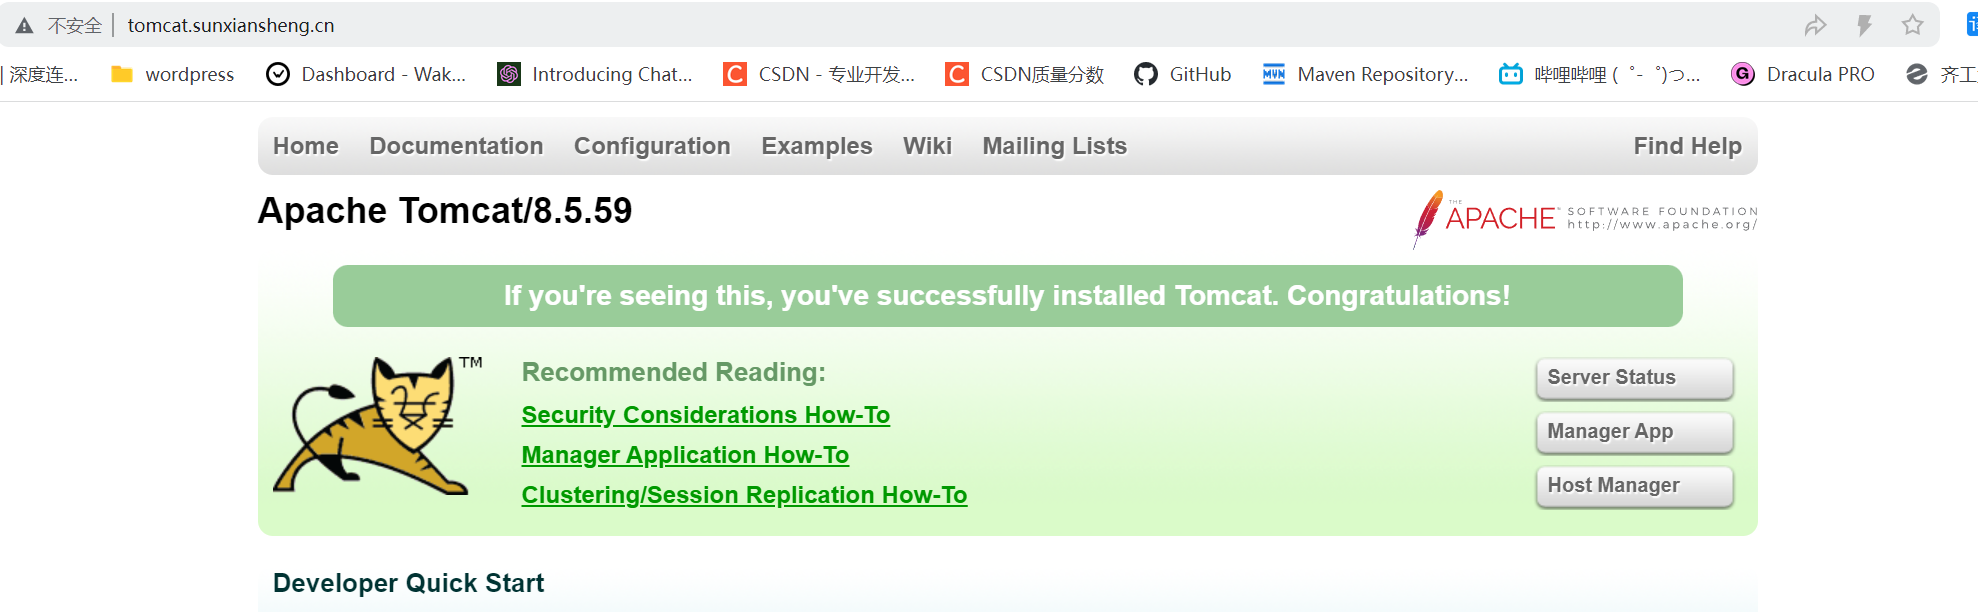
6.浏览器访问 http://tomcat.sunxiansheng.cn/ 反向代理成功
2.反向代理配置-Location实例
1.需求分析
2.思路分析
3.location语法规则
1.语法

2.优先级
- **=**:精确匹配
- **^~**:匹配以某个路径开头的
- **~**:正则匹配,区分大小写
- **~***:正则匹配,不区分大小写
- 普通匹配
3.匹配的规则
- 非普通匹配:只要按照优先级匹配到了,就直接返回
- 普通匹配:会匹配符合要求的最长路径
- 关于普通匹配 /api/ 就相当于/api/* 即只要资源路径的前缀是/api/即可
- 只要是服务就记住两句话 1. 服务发现 = ip + 端口 + 上下文路径(可选)2. 查找资源 = 服务发现 + 资源路径
4.实际常用规则(重点)
1.第一个必选规则-精确匹配网站根目录(匹配到即返回)
- 服务发现 + / 可以匹配到这个location
- proxy_pass 表示,当匹配到这个的时候,将请求转发到 http://tomcat:8080/index + /
    location = / {
       proxy_pass http://tomcat:8080/index
    }
2.第二个必选规则-处理静态文件请求(匹配到即返回)
有两种配置模式,目录匹配或后缀匹配,任选其一或搭配使用
- 服务发现 + /static/* 可以匹配到这个location
- root表示,匹配到之后在本服务下找 /webroot/res/ + **/static/***中间的
/会自动去掉
    location ^~ /static/ {# 请求/static/a.txt 将被映射到实际目录文件:/webroot/res/static/a.txt
       root /webroot/res/;}
- *服务发现 + .(gif|jpg|jpeg|png|css|js|html|ico) 可以匹配到这个location
- root表示,匹配到之后在本服务下找**/webroot/res/ + .(gif|jpg|jpeg|png|css|js|html|ico)* 中间的
/会自动去掉
    location ~* \.(gif|jpg|jpeg|png|css|js|html|ico)$ {
       root /webroot/res/;}
3.第三个规则就是通用规则,用来转发动态请求到后端应用服务器(匹配符合要求的最长location)
- 服务发现 + /* 可以匹配到这个location
- 如果匹配到则会将请求转发到 http://tomcat:8080/ + /*
    location / {
       proxy_pass http://tomcat:8080/
    }
4.常用规则小结
- 实际上使用的也就是一个精确匹配,一个处理静态文件的匹配,还有一堆通用匹配
- 前两个匹配是正则匹配,只要匹配到了就返回
- 最后的一堆都是通用匹配,匹配到了不一定马上返回,直到匹配到符合要求的最长location才会返回
5.应用实例
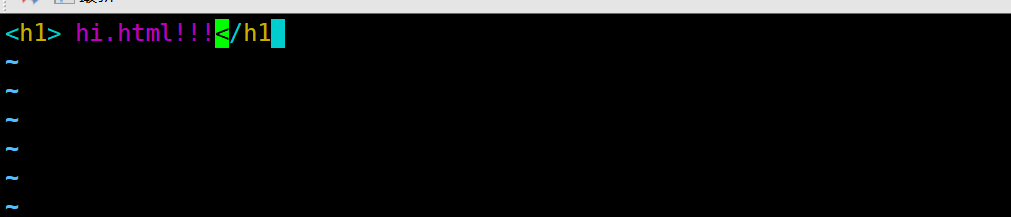
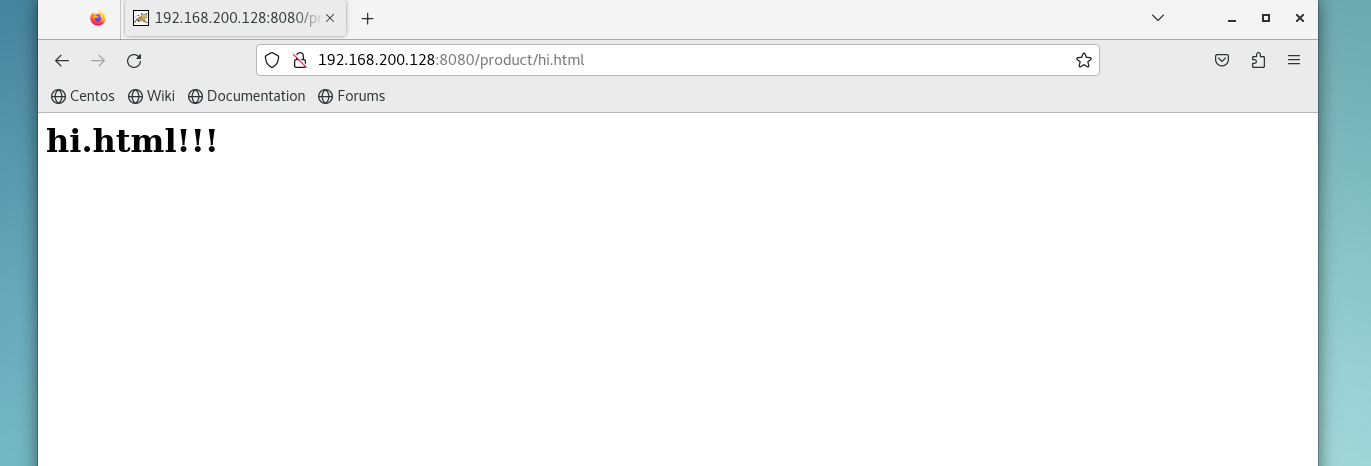
1.在linux的tomcat下编写 webapps\product\hi.html
1.这样的资源完整路径就是http://192.168.200.128:8080/product/hi.html
2.进入webapps目录
cd /opt/tomcat/apache-tomcat-8.5.59/webapps
3.创建product文件夹
mkdir product
4.编辑hi.html文件
vim product/hi.html
5.本机测试访问 http://192.168.200.128:8080/product/hi.html
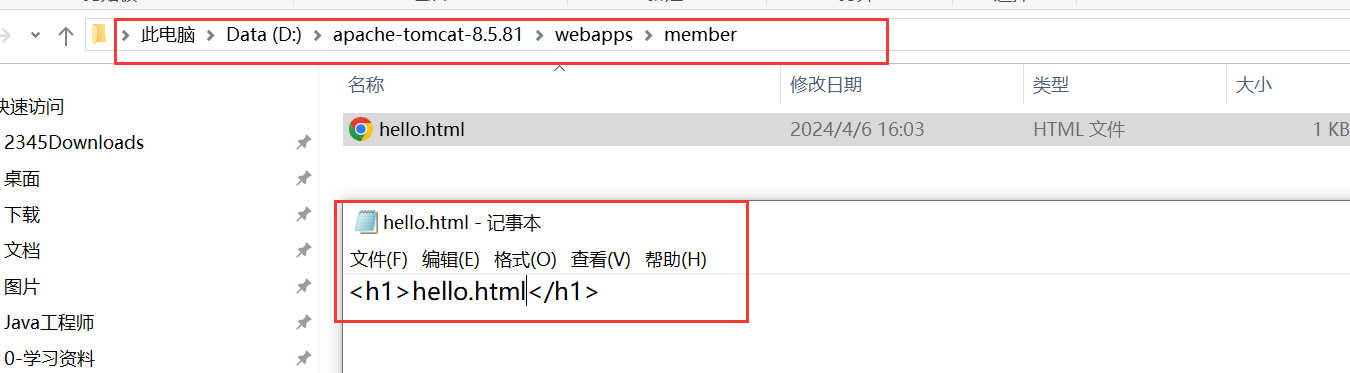
2.在win的tomcat下编写 webapps\member\hello.html
1.查看win的ip为 192.168.200.1

2.这样资源的完整路径就是http://192.168.200.1:8080/member/hello.html
3.webapps下创建member文件夹并编写hello.html文件
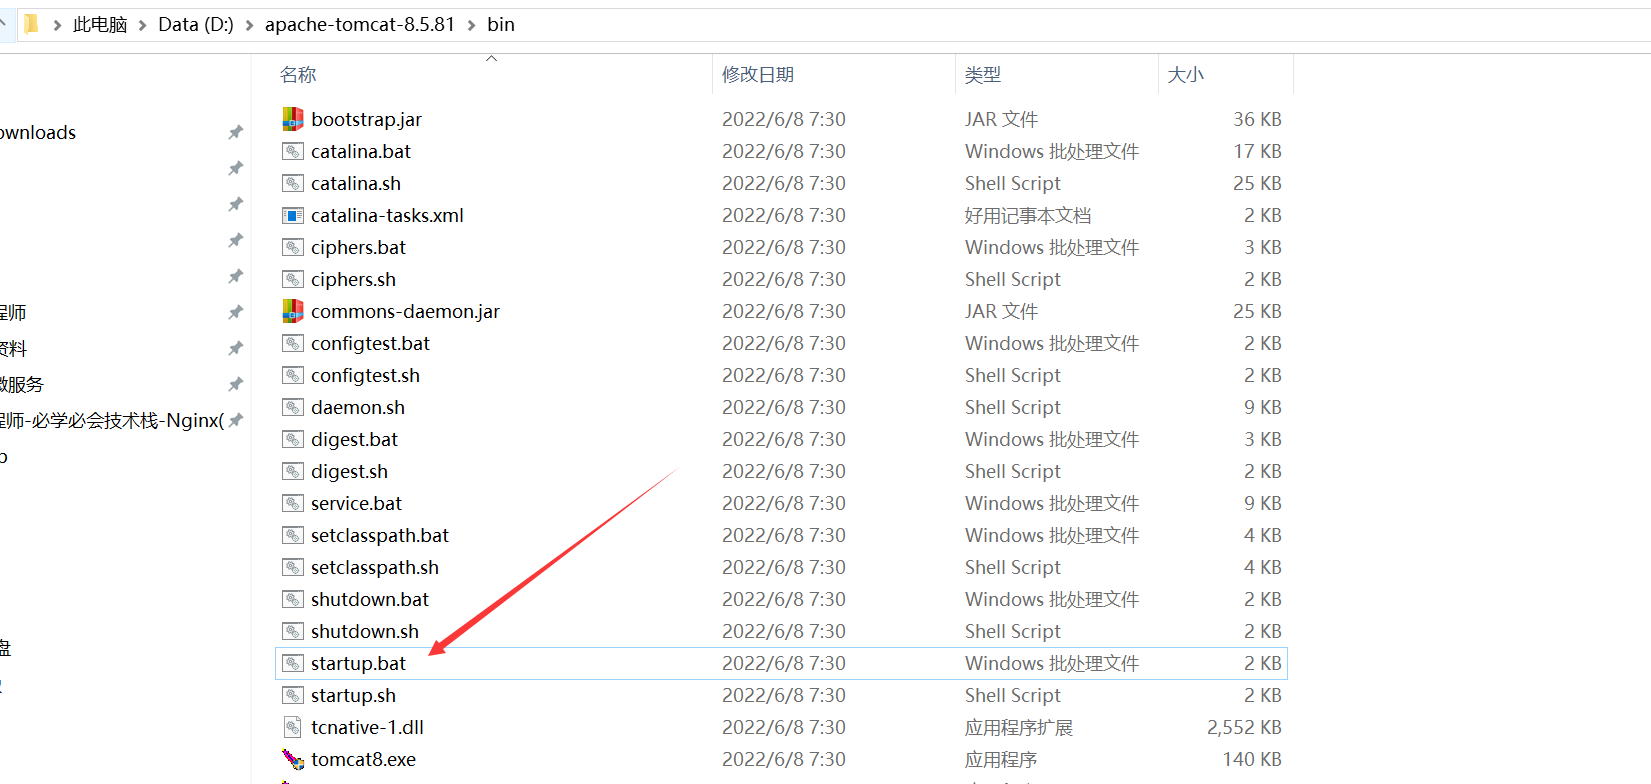
4.启动win的tomcat
5.本机测试访问 http://192.168.200.1:8080/member/hello.html

3.保证两端网络连通
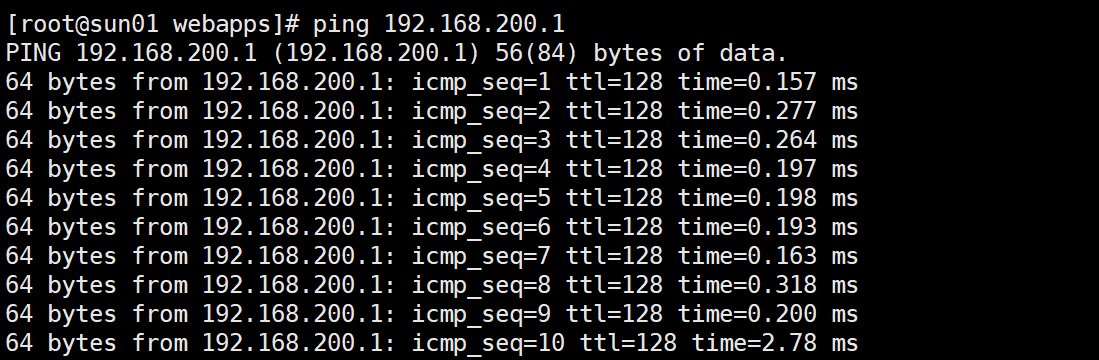
1.虚拟机ping 192.168.200.1 不通

2.关闭win防火墙,再次ping,确定网络互通
3.虚拟机直接访问 http://192.168.200.1:8080/member/hello.html

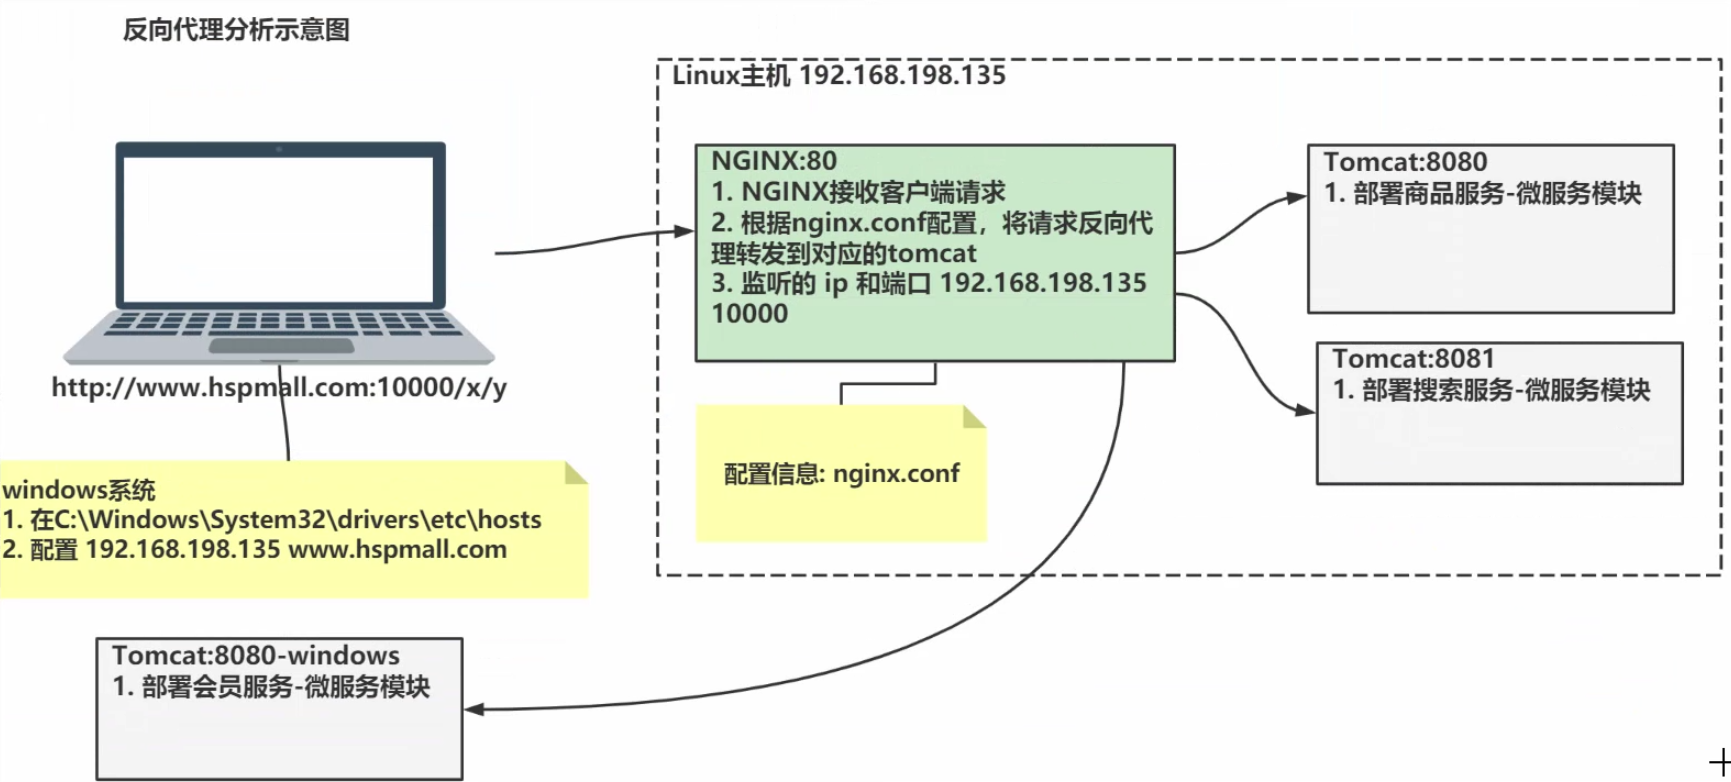
4.配置nginx.conf
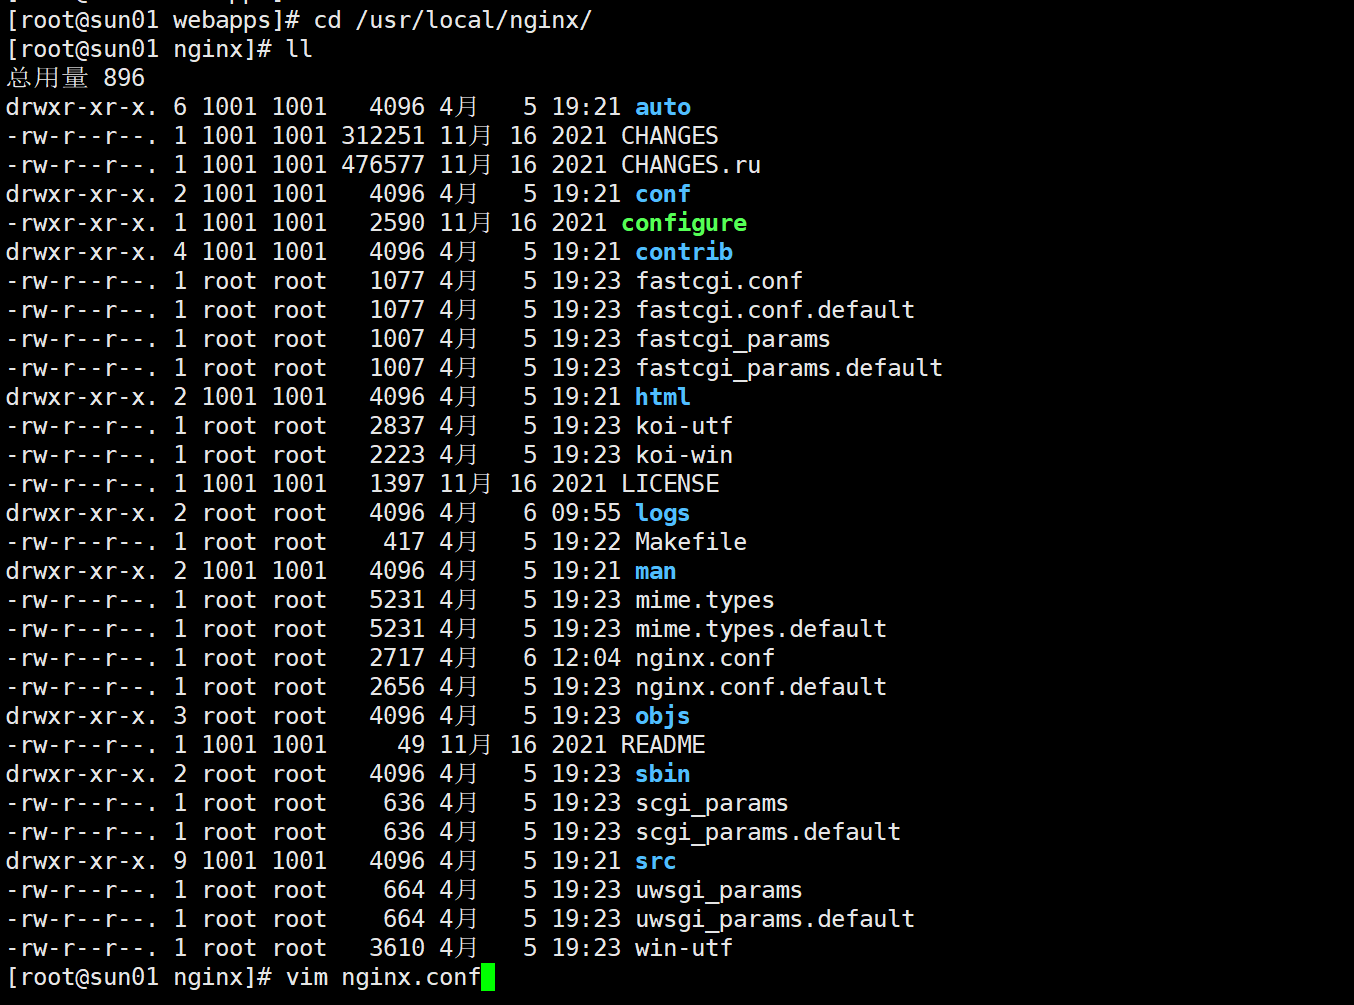
1.打开nginx.conf
cd /usr/local/nginx/
vim nginx.conf
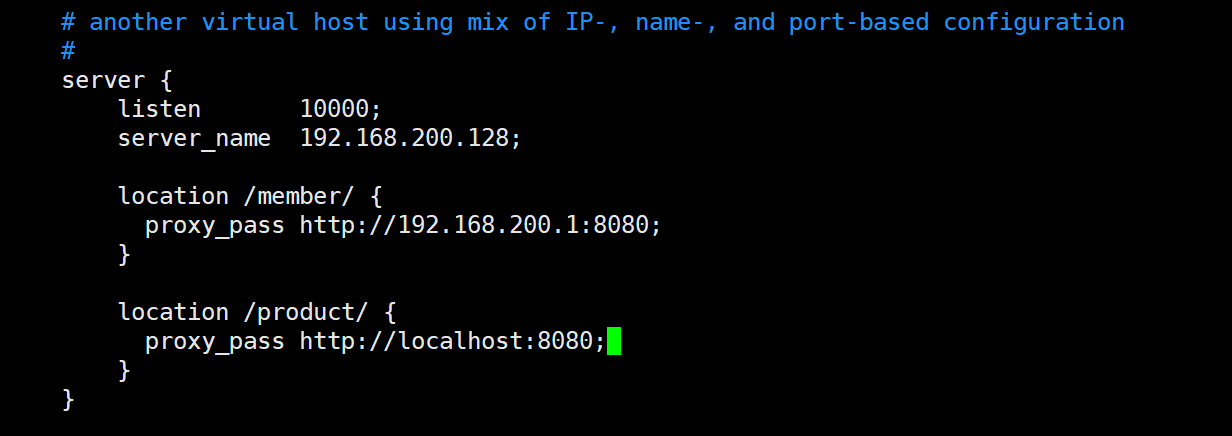
2.配置nginx.conf
3.重载nginx 使配置文件生效
./sbin/nginx -s reload
4.查看10000端口是否在监听
netstat -anp | grep 10000

5.开启10000端口的防火墙
firewall-cmd --permanent --add-port=10000/tcp
firewall-cmd --reload
firewall-cmd --query-port=10000/tcp

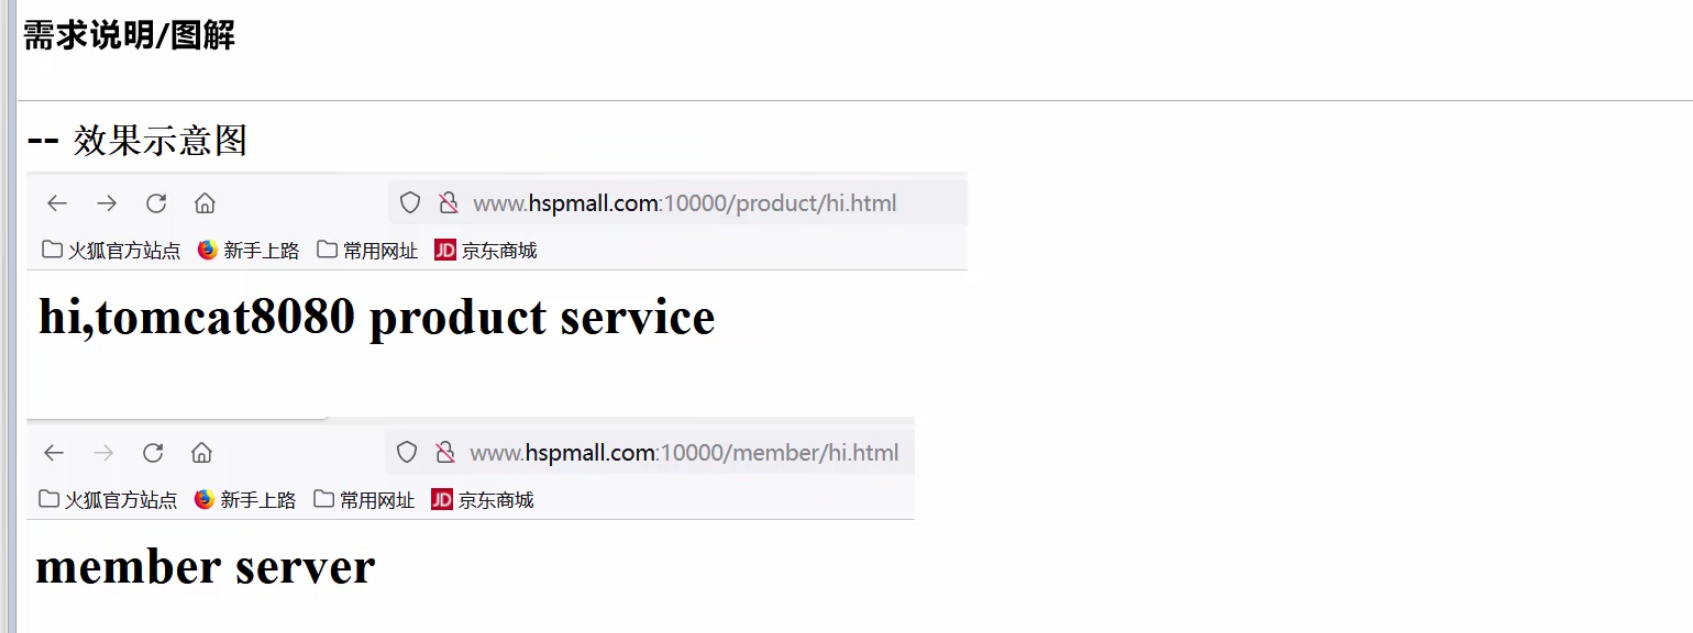
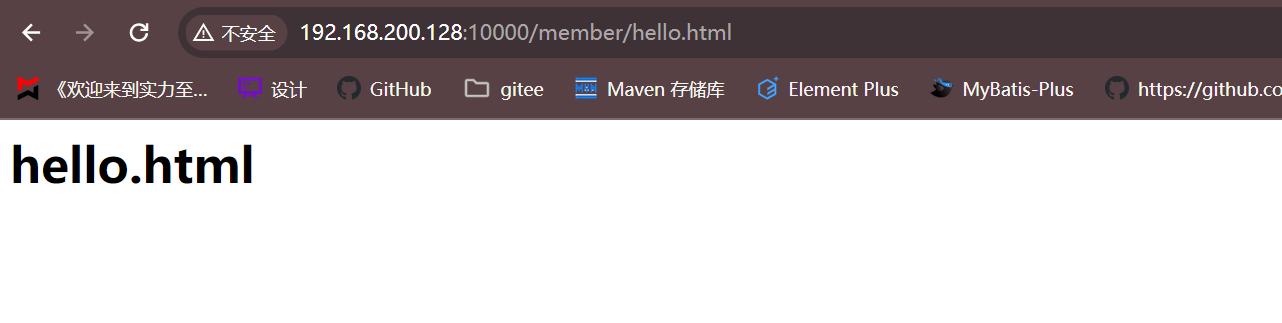
6.windows测试访问
http://192.168.200.128:10000/member/hello.html
http://192.168.200.128:10000/product/hi.html
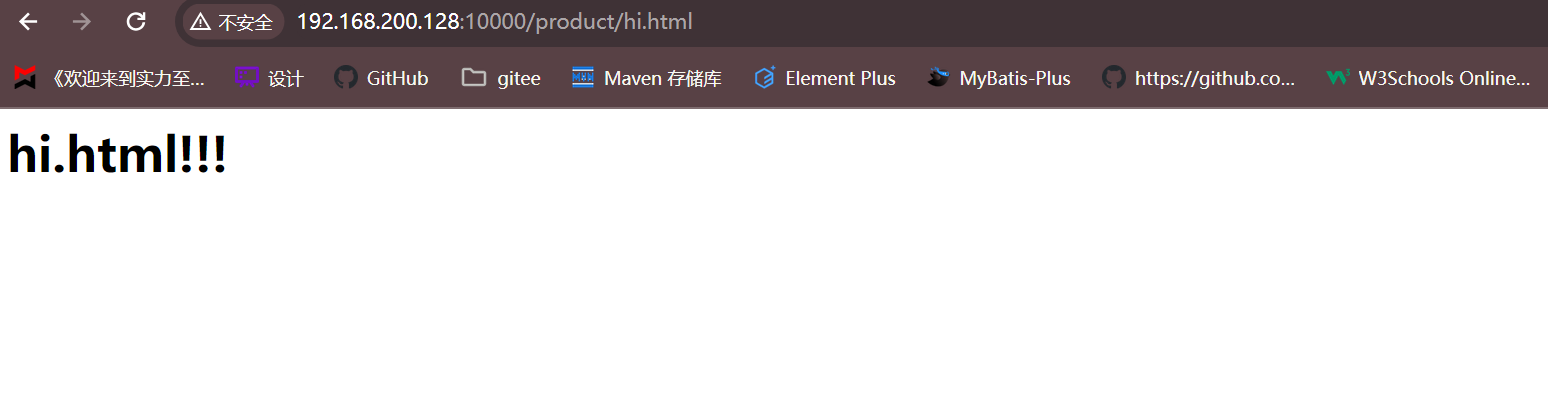
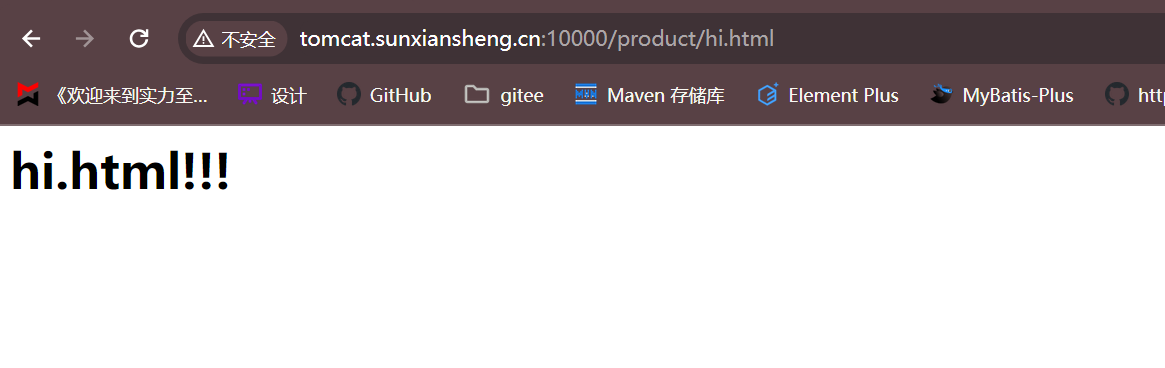
http://tomcat.sunxiansheng.cn:10000/product/hi.html
Nginx(负载均衡)
1.需求分析

2.思路分析
3.负载均衡配置规则
1.轮询(默认)

2.weight

3.ip_hash

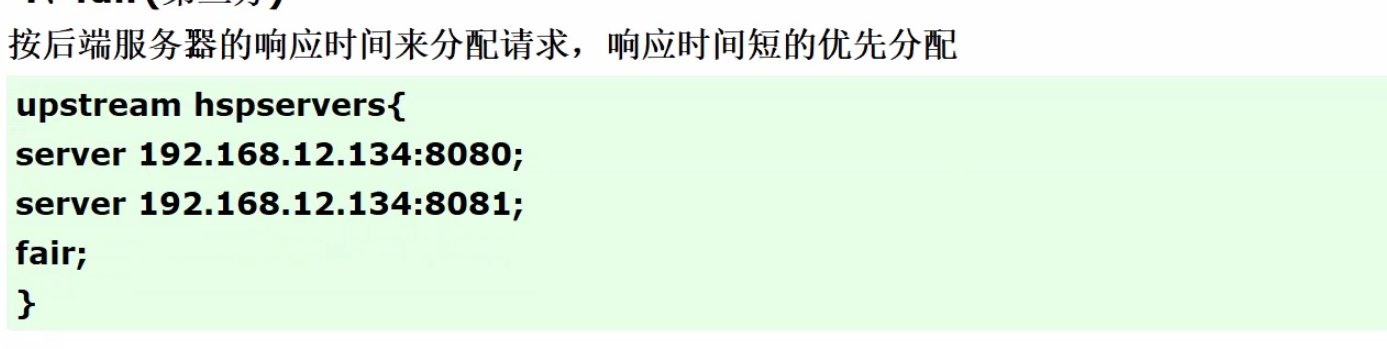
4.fair
4.具体实现
1.部署两个服务
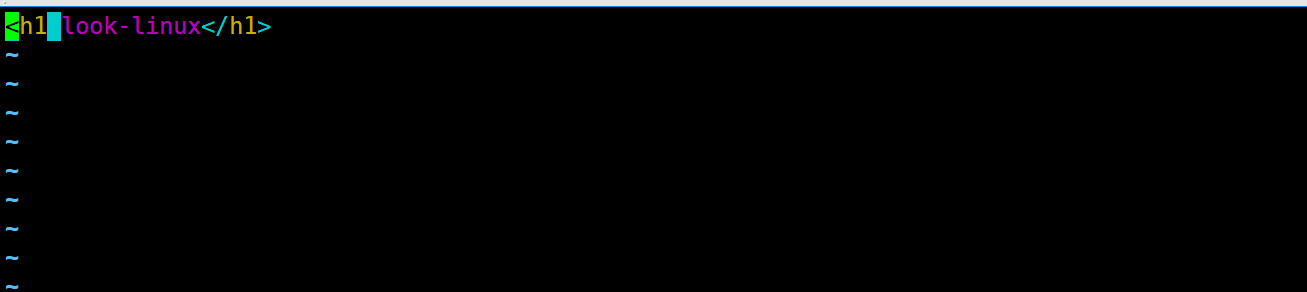
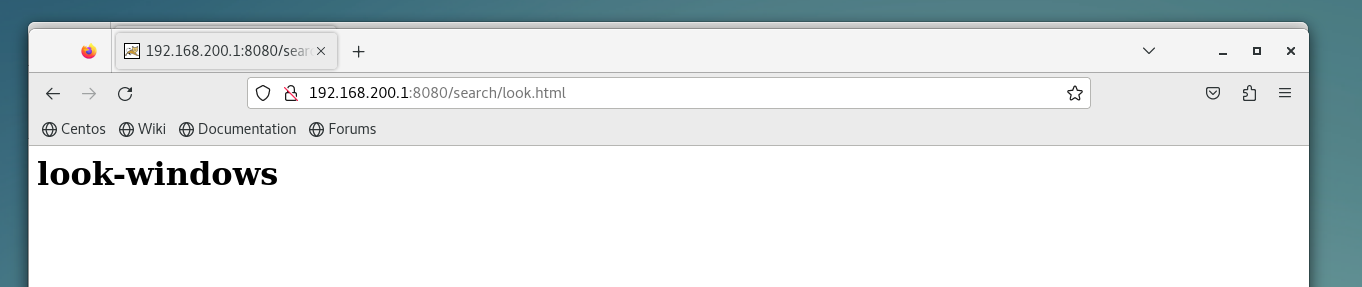
1.在linux的tomcat下的webapps中创建/search/look.html

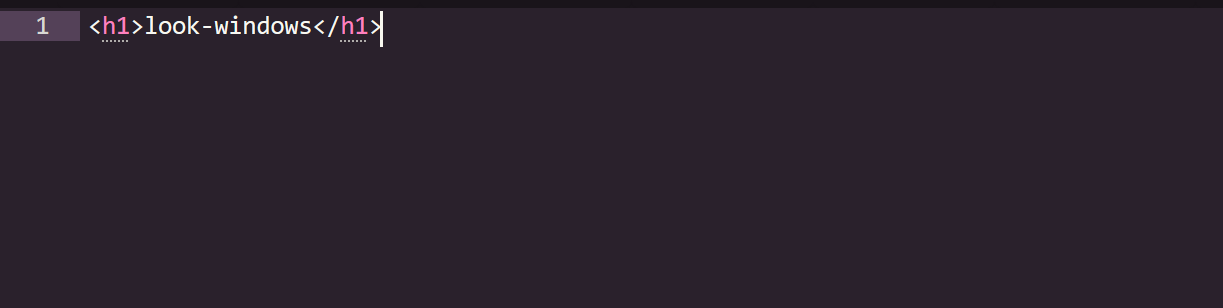
2.在win的tomcat下的webapps中创建/search/look.html

3.重启两个tomcat,并测试nginx服务是否可以访问其他服务
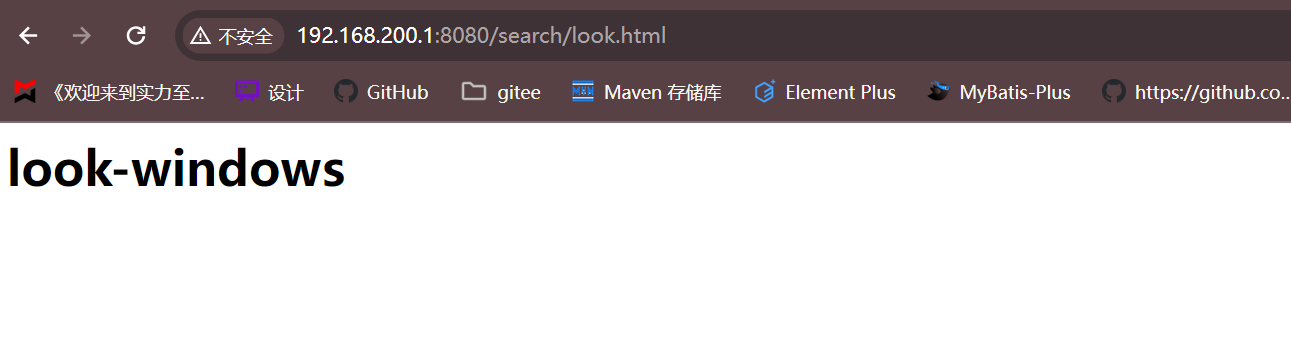
1.重启win的tomcat后测试本机访问 http://192.168.200.1:8080/search/look.html
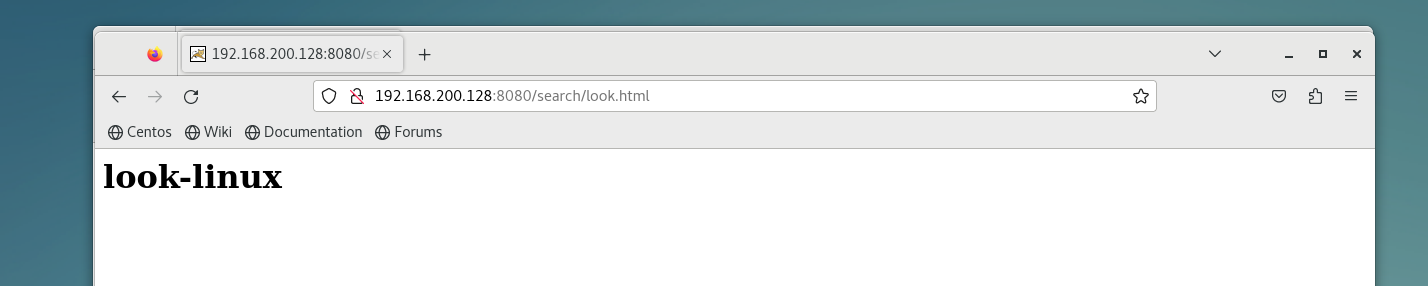
2.重启linux的tomcat后测试本机访问 http://192.168.200.128:8080/search/look.html
3.测试linux访问 http://192.168.200.1:8080/search/look.html
2.配置域名解析到linux服务器

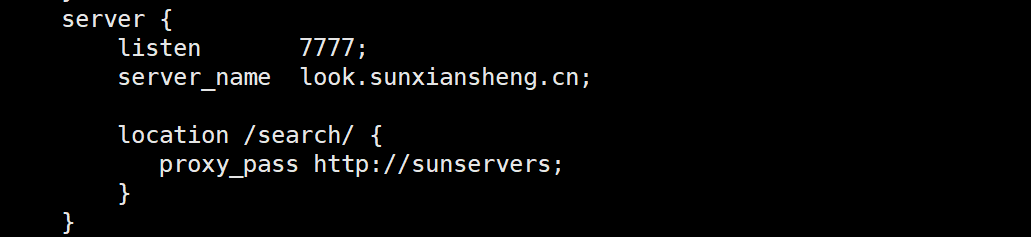
3.配置nginx.conf
1.在http全局块配置

2.在server块配置
3.重载nginx 使配置文件生效
./sbin/nginx -s reload
4.开启7777端口的防火墙
firewall-cmd --permanent --add-port=7777/tcp && firewall-cmd --reload&& firewall-cmd --query-port=7777/tcp

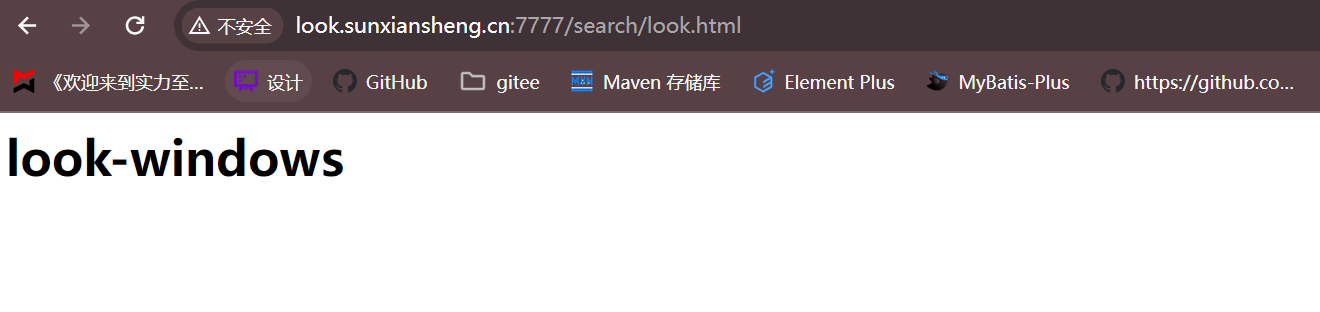
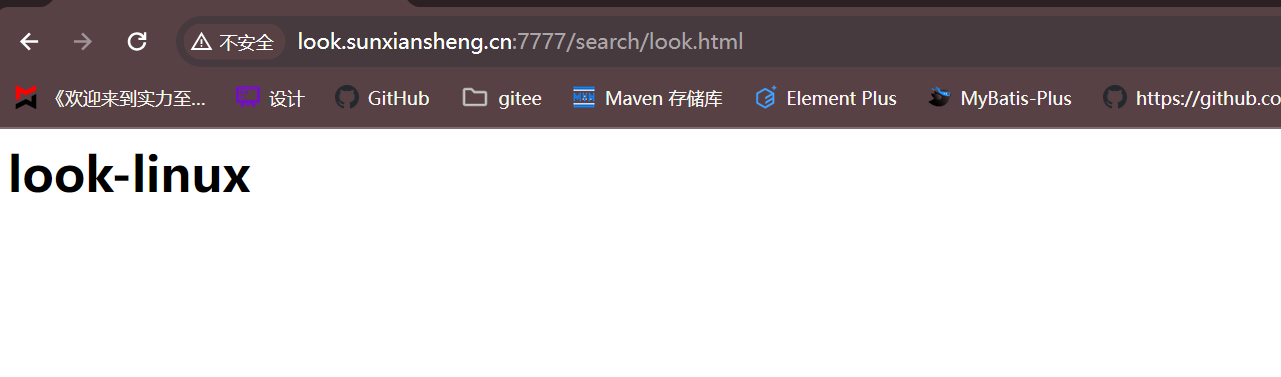
5.测试
win访问 http://look.sunxiansheng.cn:7777/search/look.html
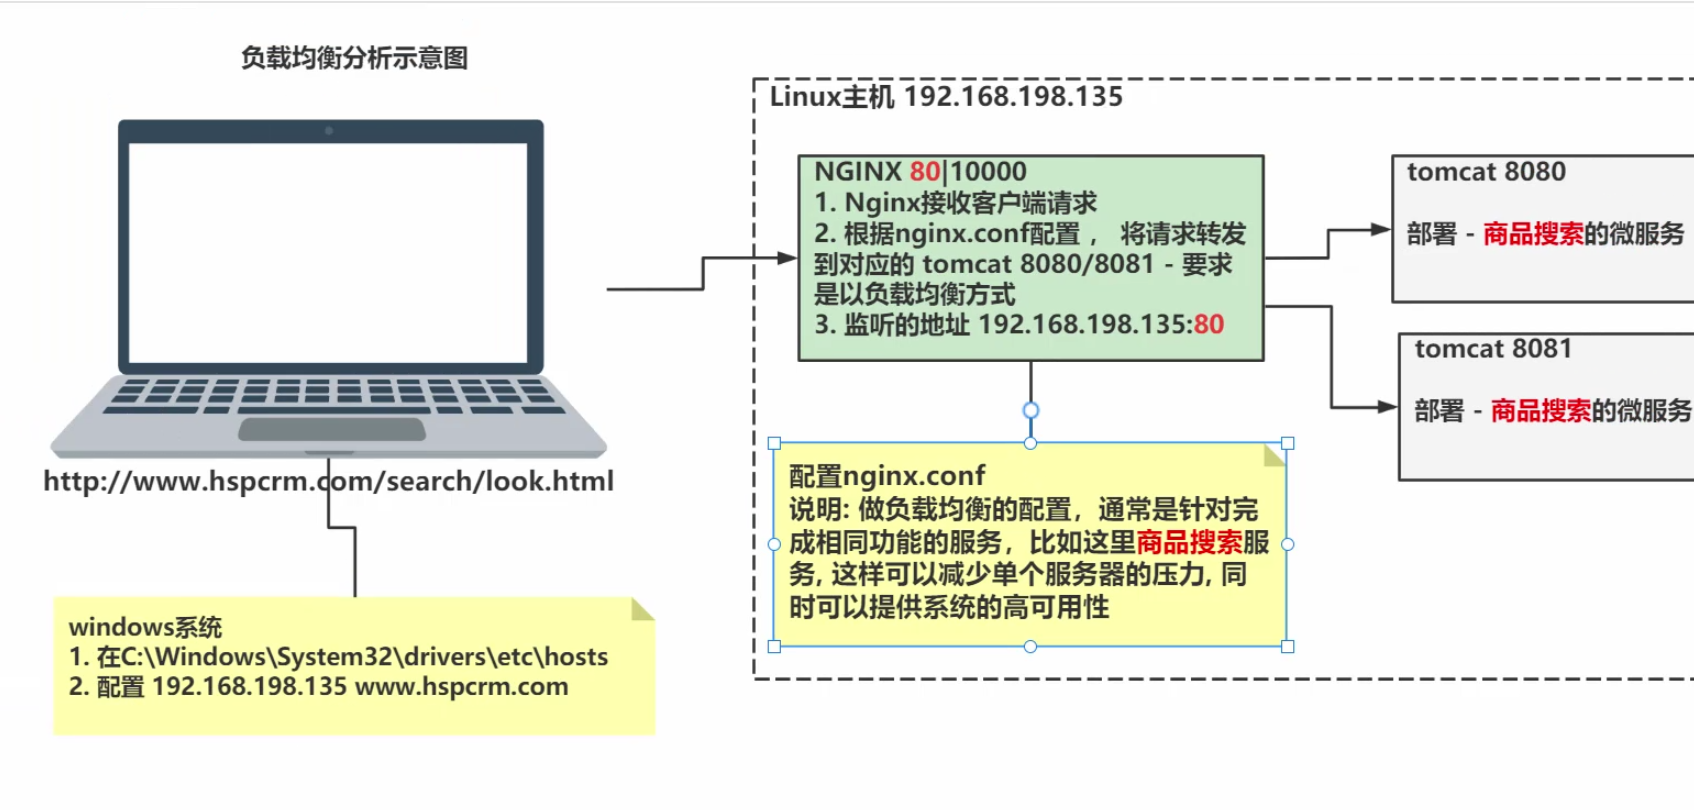
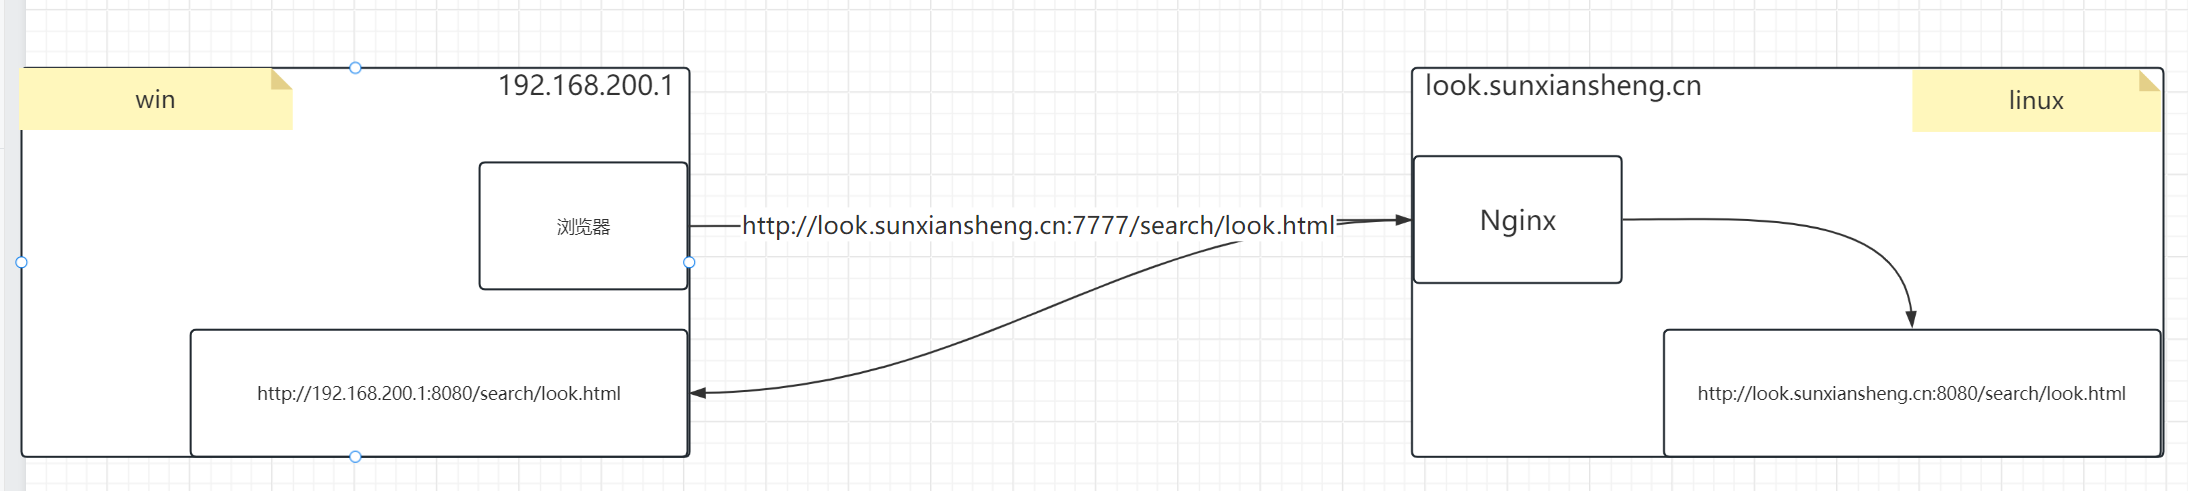
6.示意图
- 首先将所有需要Nginx管理的服务都列出来
- 1.Nginx服务发现(server) + 2.匹配服务的资源路径(location)
- 3.服务发现(proxy_pass)
- 发送请求时,Nginx服务发现 + 服务的资源路径
7.注意事项
1.nginx.conf的upstream不能带下划线

2.浏览器不能是无痕的

3.tomcat没有监听端口问题

8.负载均衡配置
本文转载自: https://blog.csdn.net/m0_64637029/article/details/138424632
版权归原作者 S-X-S 所有, 如有侵权,请联系我们删除。
版权归原作者 S-X-S 所有, 如有侵权,请联系我们删除。