〇、抓包与批量转换cap文件
1. Network Monitor 抓包
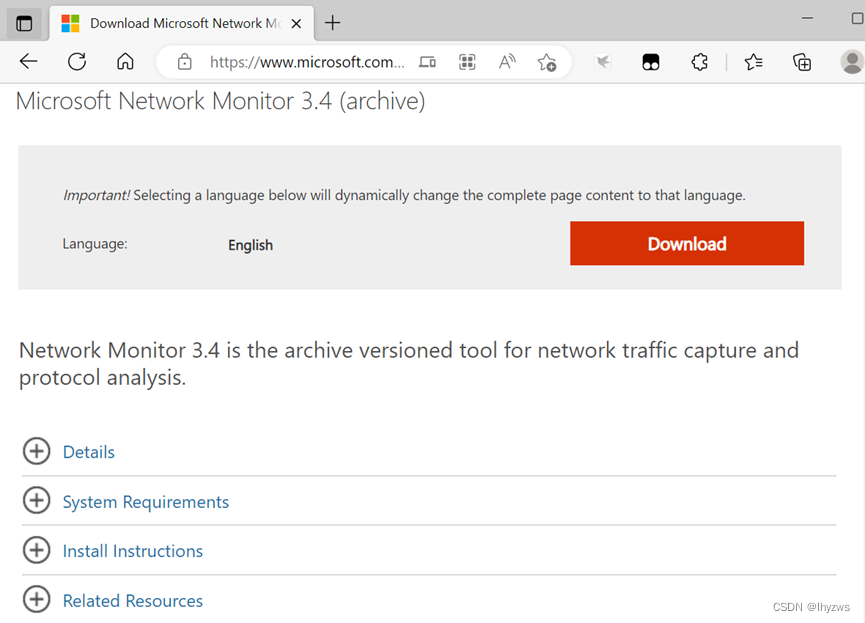
我们在CENTO OS上的网络安全工具(十七)搭建Cascade的Docker开发环境中捎带脚介绍了以下windows下的抓包软件。大意就是微软又一款不错的抓包分析软件,名曰nmcap,可在Download Microsoft Network Monitor 3.4 (archive) from Official Microsoft Download Center下载

而且,这个软件有个不错的不间断抓包功能,使用如下命令可对所有网卡(如果对指定网卡,可以先用displaynetwork命令查出网卡序号进行指定)抓包,并根据指定大小将文件编号存储在给定的路径下:
PS C:\Users\lhyzw> nmcap /DisplayNetwork

Network Monitor Command Line Capture (nmcap) 3.4.2350.0

0. vEthernet (WSL) (Hyper-V Virtual Ethernet Adapter)

1. WLAN (MediaTek Wi-Fi 6 MT7921 Wireless LAN Card)

2. * 3 (Microsoft Wi-Fi Direct Virtual Adapter #3)

3. * 4 (Microsoft Wi-Fi Direct Virtual Adapter #4)

4.  (Realtek PCIe GbE Family Controller)

PS C:\Users\lhyzw> nmcap /Network * /Capture /File d:\downlaod\test.chn:2MB

Network Monitor Command Line Capture (nmcap) 3.4.2350.0

Saving info to: d:\downlaod\test.cap - using chain captures of size 2.00 MB.

ATTENTION: Conversations Disabled: Some filters require conversations and will not work correctly (see Help for details)

ATTENTION: Process Tracking Disabled: Use /CaptureProcesses to enable (see Help for details)

Note: Process Filtering Disabled.

Exit by Ctrl+C

Capturing   | Received: 16165 Pending: 0 Saved: 16165 Dropped: 0 | Time: 57 seconds.
2. 批量转换cap文件
    不幸的是network monitor抓取的文件采用nmcap格式存放,yaf并不支持这个格式。好在windows下,还有一个著名的wireshark软件可以完成这个转换工作。

    wireshark软件的安装目录下自带名为editcap.exe的文件,可以用来转换:
C:\Program Files\Wireshark>editcap -F pcap -T ether g:\pcap\testmine(2).cap g:\t\testmine(2).pcap
    其中,-F标识转换后的格式,-T标识转换前的格式。使用-F或者-T携带空的参数,可以打印出editcap所支持的所有格式。然后指定输入文件和输出文件,即可以实现转换。

    不幸在于editcap仅支持一分多、多合一和一对一,我并没有找到可批量转换的参数。最后逼不得已只能上批处理了。在cap文件所在目录下vim(因为前面为了编译hadoop我装了个gitbash嘛)一个test.bat文件如下:
for /r . %%i in (*.cap) do C:\Progra~1\Wireshark\editcap -F pcap -T ether %%i g:\t\%%~ni.pcap
    就一行,含义是对当前目录下的所有后缀为cap的文件,使用editcap(注意绝对路径,因为并没有将其加入PATH环境变量中)进行转换,转换后文件名,使用%~ni,即提取%i变量所对应的文件名进行构造。

    然后执行test.bat就可以实现批量转换了:
G:\pcap>test.bat

G:\pcap>for /R . %i in (*.cap) do C:\Progra~1\Wireshark\editcap -F pcap -T ether %i g:\t\%~ni.pcap

G:\pcap>C:\Progra~1\Wireshark\editcap -F pcap -T ether G:\pcap\testmine(103).cap g:\t\testmine(103).pcap

G:\pcap>C:\Progra~1\Wireshark\editcap -F pcap -T ether G:\pcap\testmine(104).cap g:\t\testmine(104).pcap

G:\pcap>C:\Progra~1\Wireshark\editcap -F pcap -T ether G:\pcap\testmine(105).cap g:\t\testmine(105).pcap

G:\pcap>C:\Progra~1\Wireshark\editcap -F pcap -T ether G:\pcap\testmine(106).cap g:\t\testmine(106).pcap

G:\pcap>C:\Progra~1\Wireshark\editcap -F pcap -T ether G:\pcap\testmine(107).cap g:\t\testmine(107).pcap
………………
…………
……
一、编译YAF3
首先声明,为了偷懒,并没有在centos7环境下做下面的事情。所以下面的编译操作是在centos stream 8的环境下进行的。
1. 编译环境安装
按照官网的指南,首先安装编译环境
[root@bogon share]# yum install gcc gcc-c++ make pkgconfig -y
或者直接使用群组安装方式,将所有的开发工具安装上去,大约需下载170MB左右
[root@bogon share]# yum -y group install "Development Tools"
上次元数据过期检查:0:01:24 前,执行于 2023年06月24日 星期六 20时32分35秒。
依赖关系解决。
===================================================================================================================================================================================================================
 软件包                                                        架构                                 版本                                                             仓库                                     大小
===================================================================================================================================================================================================================
升级:
 binutils                                                      x86_64                               2.30-121.el8                                                     baseos                                  5.9 M
 elfutils-libelf                                               x86_64                               0.189-2.el8                                                      baseos                                  232 k
 elfutils-libs                                                 x86_64                               0.189-2.el8                                                      baseos                                  302 k
 glibc                                                         x86_64                               2.28-228.el8                                                     baseos                                  2.2 M
……………………
…………
 kernel-devel                                                  x86_64                               4.18.0-497.el8                                                   baseos                                   27 M
 openssl-devel                                                 x86_64                               1:1.1.1k-6.el8                                                   baseos                                  2.3 M
启用模块流:
 javapackages-runtime                                                                               201801
安装组:
 Development Tools

事务概要
===================================================================================================================================================================================================================
安装  97 软件包
升级  19 软件包
2. 抓包依赖库安装
libpcap依赖库很容易安装,在centos stream 8下,只需要yum install就行了
[root@bogon share]# yum install libpcap -y
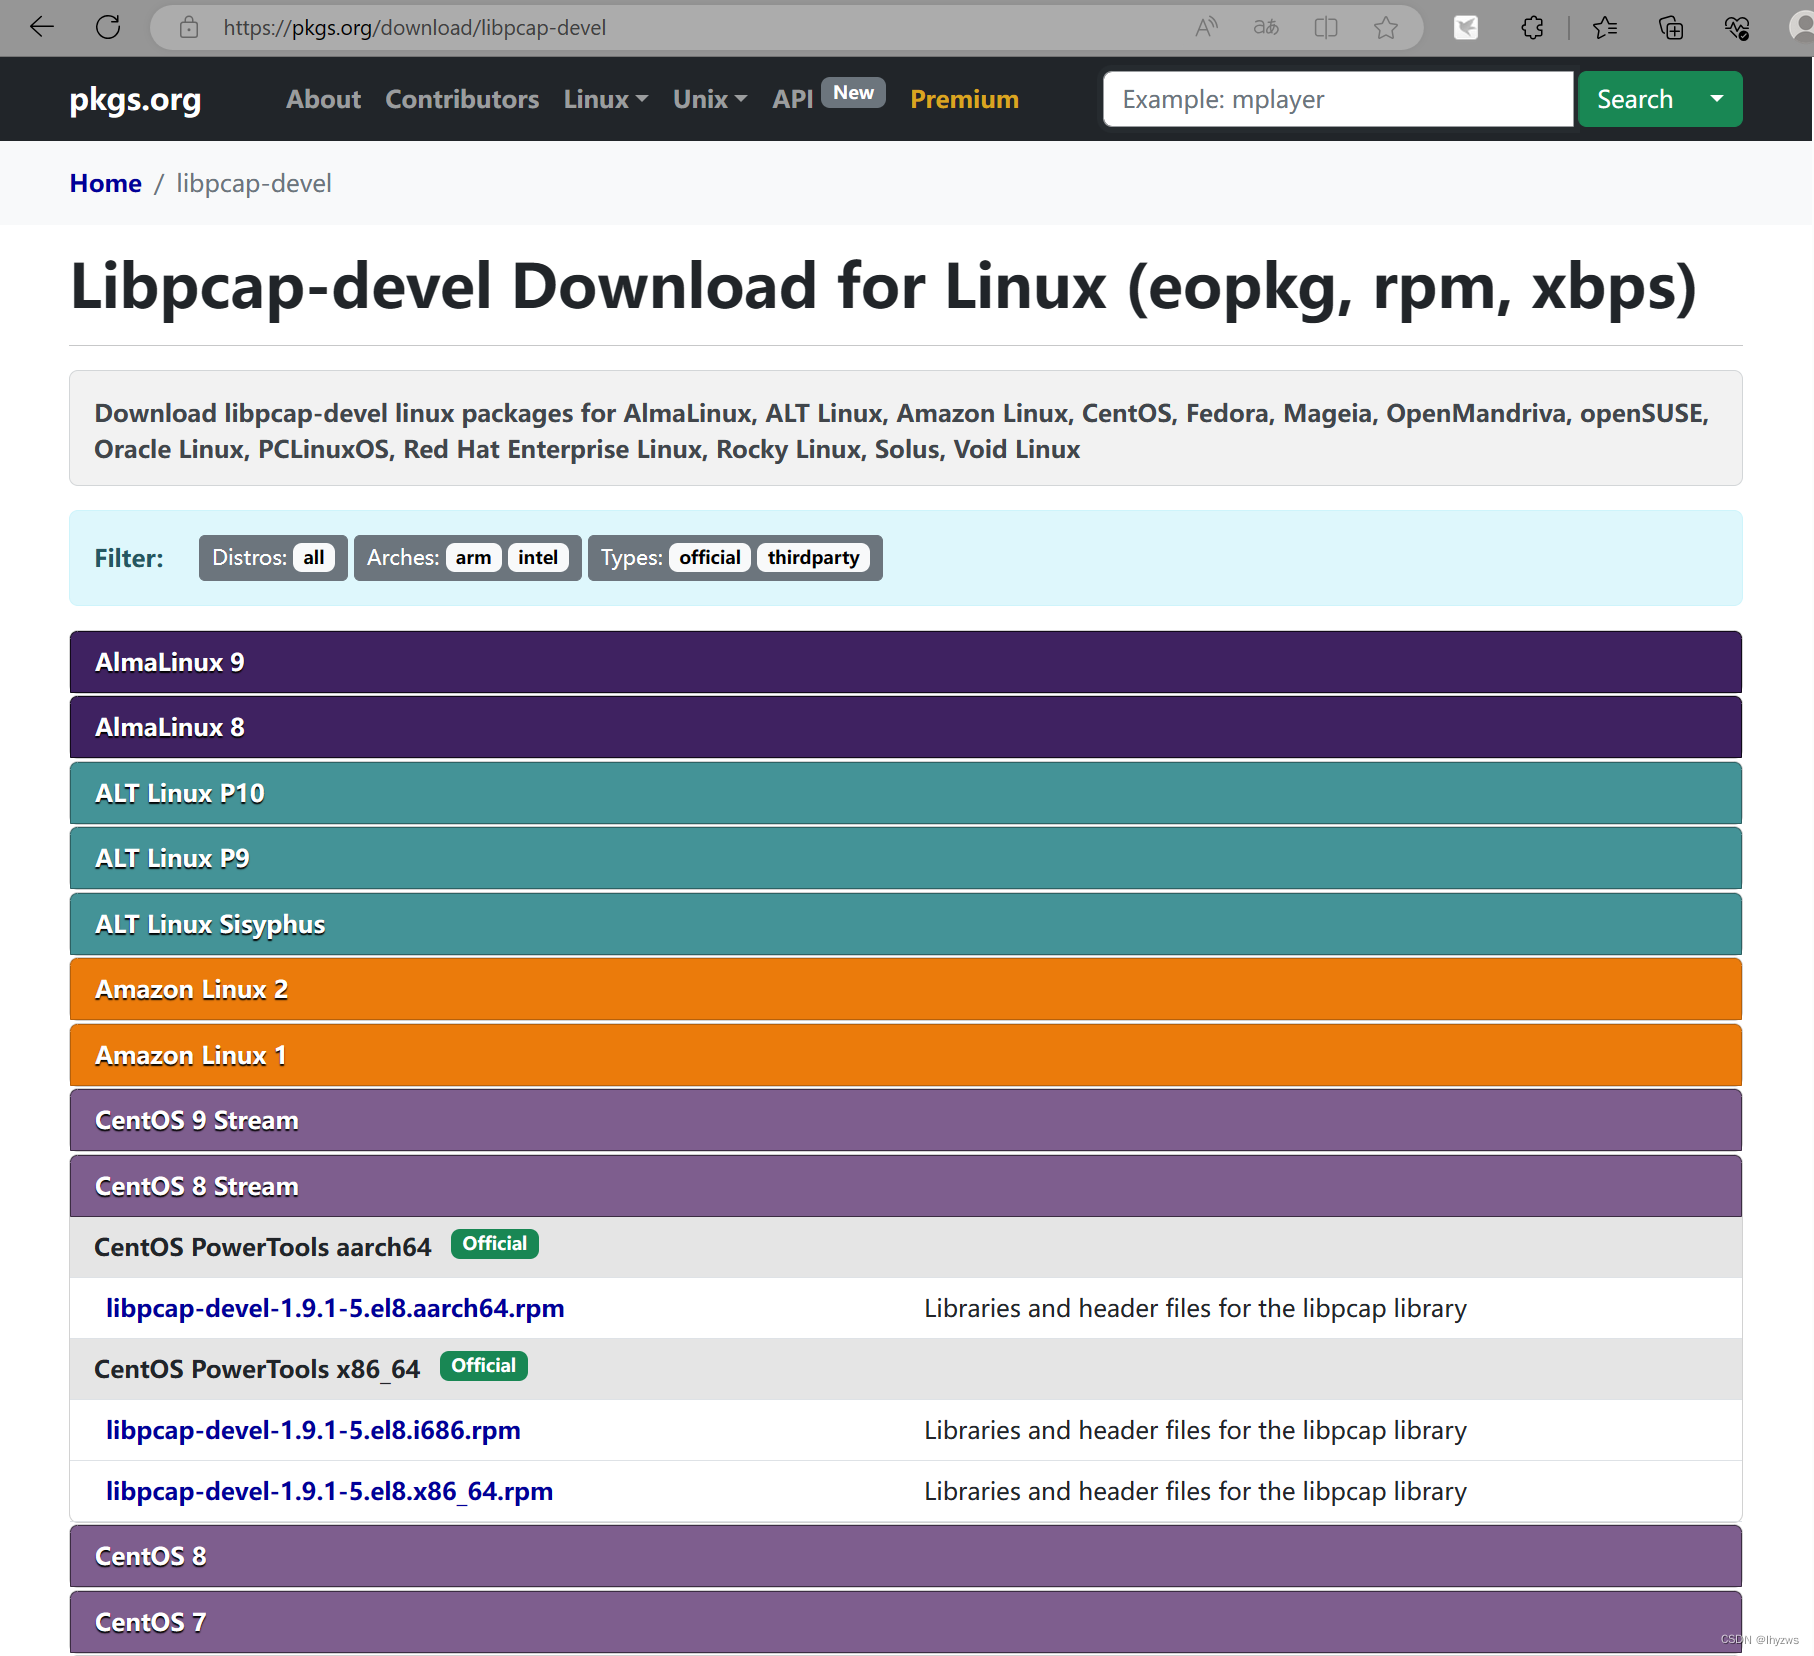
    但是libpcap-devel库在centos stream 8下没有,不安装的话会在编译时产生找不到pcap.h头文件的错误。因此需要手工下载安装。

    直接到pkgs.org网站https://pkgs.org/download/libpcap-devel上下载:

或者启动Powertools库后安装:
[root@bogon share]# dnf config-manager --set-enabled powertools
或者直接在参数中指定powertools库。需要注意的是,按照官方的说法,这个库在某些版本的Centos中叫做“PowerTools”……
[root@bogon share]# dnf --enablerepo=powertools install libpcap-devel
CentOS Stream 8 - PowerTools                                                                                                                                                       3.7 MB/s | 6.0 MB     00:01
上次元数据过期检查:0:00:02 前,执行于 2023年06月24日 星期六 20时47分46秒。
依赖关系解决。
===================================================================================================================================================================================================================
 软件包                                               架构                                          版本                                                   仓库                                               大小
===================================================================================================================================================================================================================
安装:
 libpcap-devel                                        x86_64                                        14:1.9.1-5.el8                                         powertools                                        144 k

事务概要
===================================================================================================================================================================================================================
安装  1 软件包

总下载:144 k
安装大小:227 k
确定吗?[y/N]: y
下载软件包:
libpcap-devel-1.9.1-5.el8.x86_64.rpm                                                                                                                                               534 kB/s | 144 kB     00:00
-------------------------------------------------------------------------------------------------------------------------------------------------------------------------------------------------------------------
总计                                                                                                                                                                               164 kB/s | 144 kB     00:00
运行事务检查
事务检查成功。
运行事务测试
事务测试成功。
运行事务
  准备中  :                                                                                                                                                                                                    1/1
  安装    : libpcap-devel-14:1.9.1-5.el8.x86_64                                                                                                                                                                1/1
  运行脚本: libpcap-devel-14:1.9.1-5.el8.x86_64                                                                                                                                                                1/1
  验证    : libpcap-devel-14:1.9.1-5.el8.x86_64                                                                                                                                                                1/1

已安装:
  libpcap-devel-14:1.9.1-5.el8.x86_64

完毕!
[root@bogon share]#
3. 其它依赖库安装
(1)GLib-2.0
按照官方的说法,GLib实际被包含在了大多数操作系统的基础环境中,我们只需要检查一下安装了没有:
[root@bogon share]# rpm -qa|grep glib
avahi-glib-0.7-20.el8.x86_64
ModemManager-glib-1.18.2-1.el8.x86_64
glibmm24-2.56.0-2.el8.x86_64
geocode-glib-3.26.0-3.el8.x86_64
spice-glib-0.38-6.el8.x86_64
glibc-langpack-zh-2.28-228.el8.x86_64
pulseaudio-libs-glib2-14.0-2.el8.x86_64
libappstream-glib-0.7.14-3.el8.x86_64
glib2-2.56.4-158.el8.x86_64
json-glib-1.4.4-1.el8.x86_64
glibc-common-2.28-228.el8.x86_64
glibc-2.28-228.el8.x86_64
glibc-devel-2.28-228.el8.x86_64
PackageKit-glib-1.1.12-6.el8.x86_64
dbus-glib-0.110-2.el8.x86_64
taglib-1.11.1-8.el8.x86_64
glib-networking-2.56.1-1.1.el8.x86_64
glibc-gconv-extra-2.28-228.el8.x86_64
libvirt-glib-3.0.0-1.el8.x86_64
glibc-headers-2.28-228.el8.x86_64
glibc-langpack-en-2.28-228.el8.x86_64
poppler-glib-20.11.0-4.el8.x86_64
glibc-all-langpacks-2.28-228.el8.x86_64
貌似是都装了,但是一个大坑在这:
[root@bogon libfixbuf-3.0.0.alpha2]# yum install glib2-devel -y
如果没有装这个开发版本的话,执行./configure时仍然会报错,而且只告诉你你的glib版本不高于2.18……,所以找起来那是相当生气。
(2)libfixbuf
YAF3对应3.0版本的libfixbuf,这个需要我们预先编译号。源代码包在此处fixbuf — Latest Downloads (cert.org)下载

1)准备源代码
[root@bogon ~]# tar zxvf libfixbuf-3.0.0.alpha2.tar.gz
[root@bogon ~]# cd libfixbuf-3.0.0.alpha2/
[root@bogon libfixbuf-3.0.0.alpha2]#
2)安装依赖
    除了glib2和glib2-devel以外,如果需要加入openssl支持(--with-openssl),则系统也需要安装openssl和openssl-devel。

    如果需要SCTP支持(--with-sctp),也需要实现使内核支持SCTP协议。

    为了确保我们编译的库最大可能的兼容性,此处我们还是能减则减了。
3)配置libfixbuf
由于仅需要更新libfixbuf库,所以使用了--disable-tools参数
[root@bogon libfixbuf-3.0.0.alpha2]# ./configure --disable-tools
checking for a BSD-compatible install... /usr/bin/install -c
checking whether build environment is sane... yes
………………
…………
……
checking that generated files are newer than configure... done
configure: creating ./config.status
config.status: creating Makefile
config.status: creating src/Makefile
config.status: creating src/infomodel/Makefile
config.status: creating include/Makefile
config.status: creating include/fixbuf/version.h
config.status: creating libfixbuf.pc
config.status: creating libfixbuf.spec
config.status: creating Doxyfile
config.status: creating include/fixbuf/config.h
config.status: executing depfiles commands
config.status: executing libtool commands
config.status: executing print-config commands

    * Configured package:           libfixbuf 3.0.0.alpha2
    * Host type:                    x86_64-pc-linux-gnu
    * Source files ($top_srcdir):   .
    * Install directory:            NONE
    * Build command-line tools:     NO
    * pkg-config path:
    * GLIB:                         -lgthread-2.0 -pthread -lglib-2.0
    * OpenSSL Support:              YES
    * DTLS Support:                 YES
    * SCTP Support:                 NO
    * Compiler (CC):                gcc
    * Compiler flags (CFLAGS):      -I. -I$(top_srcdir)/include -Wall -Wextra -Wshadow -Wpointer-arith -Wformat=2 -Wunused -Wundef -Wduplicated-cond -Wwrite-strings -Wmissing-prototypes -Wstrict-prototypes -DNDEBUG -DG_DISABLE_ASSERT -g -O2
    * Linker flags (LDFLAGS):
    * Libraries (LIBS):             -lssl -lcrypto -lpthread
4)make && make install libfixbuf
由于我们没有在configure时指定--prefix和--exe-prefix参数,所以使用了默认目录安装,后期可能会设计更改LIBDIR环境变量。
[root@bogon libfixbuf-3.0.0.alpha2]# make && make install
Making all in src
make[1]: 进入目录“/root/libfixbuf-3.0.0.alpha2/src”
srcdir='' ; test -f ./make-infomodel || srcdir=./ ; /usr/bin/perl "${srcdir}make-infomodel" --package libfixbuf cert ipfix netflowv9 || { rm -f infomodel.c infomodel.h ; exit 1 ; }
make  all-recursive
………………
…………
……
 /usr/bin/mkdir -p '/usr/local/lib'
 /bin/sh ../libtool   --mode=install /usr/bin/install -c   libfixbuf.la '/usr/local/lib'
libtool: install: /usr/bin/install -c .libs/libfixbuf.so.10.0.0 /usr/local/lib/libfixbuf.so.10.0.0
libtool: install: (cd /usr/local/lib && { ln -s -f libfixbuf.so.10.0.0 libfixbuf.so.10 || { rm -f libfixbuf.so.10 && ln -s libfixbuf.so.10.0.0 libfixbuf.so.10; }; })
libtool: install: (cd /usr/local/lib && { ln -s -f libfixbuf.so.10.0.0 libfixbuf.so || { rm -f libfixbuf.so && ln -s libfixbuf.so.10.0.0 libfixbuf.so; }; })
libtool: install: /usr/bin/install -c .libs/libfixbuf.lai /usr/local/lib/libfixbuf.la
libtool: install: /usr/bin/install -c .libs/libfixbuf.a /usr/local/lib/libfixbuf.a
libtool: install: chmod 644 /usr/local/lib/libfixbuf.a
libtool: install: ranlib /usr/local/lib/libfixbuf.a
libtool: finish: PATH="/usr/local/bin:/usr/local/sbin:/usr/bin:/usr/sbin:/root/bin:/sbin" ldconfig -n /usr/local/lib
----------------------------------------------------------------------
Libraries have been installed in:
   /usr/local/lib

If you ever happen to want to link against installed libraries
in a given directory, LIBDIR, you must either use libtool, and
specify the full pathname of the library, or use the '-LLIBDIR'
flag during linking and do at least one of the following:
   - add LIBDIR to the 'LD_LIBRARY_PATH' environment variable
     during execution
   - add LIBDIR to the 'LD_RUN_PATH' environment variable
     during linking
   - use the '-Wl,-rpath -Wl,LIBDIR' linker flag
   - have your system administrator add LIBDIR to '/etc/ld.so.conf'

See any operating system documentation about shared libraries for
more information, such as the ld(1) and ld.so(8) manual pages.
----------------------------------------------------------------------
……………………
…………
[root@bogon libfixbuf-3.0.0.alpha2]#
4. 编译安装
(1)准备YAF3源码
下载并解压源码:
(2)configure YAF3
[root@bogon ~]# cd yaf-3.0.0.alpha2/
[root@bogon yaf-3.0.0.alpha2]# ls
acinclude.m4  airframe  autoconf   configure.ac  etc      infomodel  libyaf.pc.in  lua  Makefile.am  make-infomodel  README     scripts  xml2fixbuf.xslt
aclocal.m4    AUTHORS   configure  doc           include  libltdl    LICENSE.txt   m4   Makefile.in  NEWS            README.in  src      yaf.spec.in
[root@bogon yaf-3.0.0.alpha2]# ./configure --enable-plugins --enable-applabel --enable-dpi --enable-entropy --enable-zlib
checking build system type... x86_64-pc-linux-gnu
checking host system type... x86_64-pc-linux-gnu
………………
…………
……
config.status: executing depfiles commands
config.status: executing libtool commands
config.status: executing yaf_summary commands

    * Configured package:           yaf 3.0.0.alpha2
    * pkg-config path:              /usr/local/lib/pkgconfig
    * Host type:                    x86_64-pc-linux-gnu
    * OS:                           linux-gnu
    * Source files ($top_srcdir):   .
    * Install directory:            /usr/local
    * GLIB:                         -lglib-2.0
    * Timezone support:             UTC
    * Libfixbuf version:            3.0.0.alpha2
    * DAG support:                  NO
    * NAPATECH support:             NO
    * PFRING support:               NO
    * NETRONOME support:            NO
    * BIVIO support:                NO
    * Compact IPv4 support:         YES
    * Plugin support:               YES
    * PCRE support:                 YES
    * Application Labeling:         YES
    * Deep Packet Inspection:       YES
    * nDPI Support:                 NO
    * Payload Processing Support:   YES
    * Entropy Support:              YES
    * Fingerprint Export Support:   NO
    * OpenSSL Support:              YES (-lssl -lcrypto)
    * P0F Support:                  NO
    * MPLS NetFlow Enabled:         NO
    * Non-IP Flow Enabled:          NO
    * IE/Template Metadata Export:  YES
    * GCC Atomic Builtin functions: NO
    * Compiler (CC):                gcc
    * Compiler flags (CFLAGS):      -I$(top_srcdir)/include -I$(top_srcdir)/airframe/include -Wall -Wextra -Wshadow -Wpointer-arith -Wformat=2 -Wunused -Wundef -Wduplicated-cond -Wwrite-strings -Wmissing-prototypes -Wstrict-prototypes -Wno-unused-parameter -g -O2
    * Linker flags (LDFLAGS):       -lpcre
    * Libraries (LIBS):             -lpcap -lm -lz
为了避免复杂性,很多可选的支持我们都没有选,要实现DPI支持所必须的--enable-applabel和--enable-dpi是不能丢的,另外捎带着我们也选了plugin、entropy和zlib,看看后面有没有用上的机会。
(3)make && make install YAF3
make && make install以后,同样,需要到默认目录下去寻找编译结果
 /usr/bin/mkdir -p '/usr/local/lib'
 /bin/sh ../libtool   --mode=install /usr/bin/install -c   libyaf.la '/usr/local/lib'
libtool: install: /usr/bin/install -c .libs/libyaf-3.0.0.alpha2.so.4.0.0 /usr/local/lib/libyaf-3.0.0.alpha2.so.4.0.0
libtool: install: (cd /usr/local/lib && { ln -s -f libyaf-3.0.0.alpha2.so.4.0.0 libyaf-3.0.0.alpha2.so.4 || { rm -f libyaf-3.0.0.alpha2.so.4 && ln -s libyaf-3.0.0.alpha2.so.4.0.0 libyaf-3.0.0.alpha2.so.4; }; })
libtool: install: (cd /usr/local/lib && { ln -s -f libyaf-3.0.0.alpha2.so.4.0.0 libyaf.so || { rm -f libyaf.so && ln -s libyaf-3.0.0.alpha2.so.4.0.0 libyaf.so; }; })
libtool: install: /usr/bin/install -c .libs/libyaf.lai /usr/local/lib/libyaf.la
libtool: finish: PATH="/usr/local/bin:/usr/local/sbin:/usr/bin:/usr/sbin:/root/bin:/sbin" ldconfig -n /usr/local/lib
----------------------------------------------------------------------
Libraries have been installed in:
   /usr/local/lib

If you ever happen to want to link against installed libraries
in a given directory, LIBDIR, you must either use libtool, and
specify the full pathname of the library, or use the '-LLIBDIR'
flag during linking and do at least one of the following:
   - add LIBDIR to the 'LD_LIBRARY_PATH' environment variable
     during execution
   - add LIBDIR to the 'LD_RUN_PATH' environment variable
     during linking
   - use the '-Wl,-rpath -Wl,LIBDIR' linker flag
   - have your system administrator add LIBDIR to '/etc/ld.so.conf'

See any operating system documentation about shared libraries for
more information, such as the ld(1) and ld.so(8) manual pages.
----------------------------------------------------------------------
(4)测试执行:
[root@bogon yaf-3.0.0.alpha2]# yaf --version
yaf version 3.0.0.alpha2  Build Configuration:
    * Timezone support:                 UTC
    * Fixbuf version:                   3.0.0.alpha2
    * DAG support:                      NO
    * Napatech support:                 NO
    * Netronome support:                NO
    * Bivio support:                    NO
    * PFRING support:                   NO
    * Compact IPv4 support:             YES
    * Plugin support:                   YES
    * Application Labeling:             YES
    * Payload Processing Support:       YES
    * Deep Packet Inspection Support:   YES
    * Entropy support:                  YES
    * Fingerprint Export Support:       NO
    * P0F Support:                      NO
    * MPLS Support:                     NO
    * Non-IP Support:                   NO
    * Separate Interface Support:       NO
    * nDPI Support:                     NO
    * IE/Template Metadata Export:      YES
 (c) 2000-2023 Carnegie Mellon University.
GNU General Public License (GPL) Rights pursuant to Version 2, June 1991
Some included library code covered by LGPL 2.1; see source for details.
Send bug reports, feature requests, and comments to [email protected].
[root@bogon yaf-3.0.0.alpha2]#
二、编译super mediator
[root@bogon ~]# tar zxvf super_mediator-2.0.0.alpha2.tar.gz
[root@bogon ~]# cd super_mediator-2.0.0.alpha2/
[root@bogon super_mediator-2.0.0.alpha2]# ./configure --with-mysql --with-zlib
[root@bogon super_mediator-2.0.0.alpha2]# make && make install
…………………………
make[4]: 进入目录“/root/super_mediator-2.0.0.alpha2/src”
 /usr/bin/mkdir -p '/usr/local/bin'
  /usr/bin/install -c super_mediator '/usr/local/bin'
 /usr/bin/mkdir -p '/usr/local/share/man/man1'
 /usr/bin/install -c -m 644 super_mediator.1 super_mediator.conf.1 '/usr/local/share/man/man1'
make[4]: 离开目录“/root/super_mediator-2.0.0.alpha2/src”
make[3]: 离开目录“/root/super_mediator-2.0.0.alpha2/src”
make[2]: 离开目录“/root/super_mediator-2.0.0.alpha2/src”
make[1]: 离开目录“/root/super_mediator-2.0.0.alpha2/src”
Making install in etc
make[1]: 进入目录“/root/super_mediator-2.0.0.alpha2/etc”
make[2]: 进入目录“/root/super_mediator-2.0.0.alpha2/etc”
 /usr/bin/mkdir -p '/usr/local/etc'
 /usr/bin/install -c -m 644 super_mediator.conf '/usr/local/etc'
make[2]: 对“install-data-am”无需做任何事。
make[2]: 离开目录“/root/super_mediator-2.0.0.alpha2/etc”
make[1]: 离开目录“/root/super_mediator-2.0.0.alpha2/etc”
Making install in doc
make[1]: 进入目录“/root/super_mediator-2.0.0.alpha2/doc”
…………………………
    同样,我们选择平平无奇的安装,不过虽然这里我们选择了--with-mysql,后面检查版本的时候任然被报没有mysql支持,可能是选项没选够的原因吧。

    如果此时直接执行测试,大概率会找不到libfixbuf.so文件:
[root@bogon local]# super_mediator --version
super_mediator: error while loading shared libraries: libfixbuf.so.10: cannot open shared object file: No such file or directory
    其主要原因其实已经在前面的编译结果中了。也就是 环境变量'LD_LIBRARY_PATH'必须被设置到/usr/local/lib上:

    在~/.bashrc文件中添加环境变量,并且source一下就好了。
# .bashrc

# User specific aliases and functions

alias rm='rm -i'
alias cp='cp -i'
alias mv='mv -i'

# Source global definitions
if [ -f /etc/bashrc ]; then
        . /etc/bashrc
fi

export LTDL_LIBRARY_PATH=/usr/local/lib/yaf
export LD_LIBRARY_PATH=/usr/local/lib
此时,再执行super_mediator --version就没问题了:
[root@bogon local]# super_mediator --version
super_mediator version 2.0.0.alpha2
Build Configuration:
    * Fixbuf version:                   3.0.0.alpha2
    * MySQL support:                    NO
    * OpenSSL support:                  NO
    * SiLK IPSet support:               NO
Copyright (C) 2012-2023 Carnegie Mellon University
GNU General Public License (GPL) Rights pursuant to Version 2, June 1991
Send bug reports, feature requests, and comments to [email protected].
之所以要编译super-mediator,原因就在这里,因为yaf3需要libfixbuf3支持,libfixbuf3对应的super mediator版本至少应该是2。
三、测试使用YAF3+Super_mediator
    既然是测试,我们还是从一开始就整最简单的用法。看看自找麻烦的编译后是不是获得了DPI的加持。

    简单的对一个pcap文件进行转IPFIX处理,其中设定applable为[53,80,443]。对应去查内置的applabel号,代表对DNS、Http和TLS协议进行解析。不过貌似我的样例数据中没有足够完整的Http数据,所以最终只得到了DNS和TLS相关的数据。
** 【这个命令是错的,文末分解】**
[root@bogon pcap]# yaf --in /root/share/pcap/test2.pcap --out /root/test.yaf --dpi --dpi-select=[80,53,443] --applabel --max-payload=2048
[2023-06-25 09:35:14] Rejected 63574 out-of-sequence packets.
然后使用super_mediator进行提取转换,也就是简单的讲IPFIX数据转换为TEXT类型输出。
[root@bogon ~]# super_mediator -o result.txt -m text test.yaf
Initialization Successful, starting...
[2023-06-25 09:39:18] Running as root in --live mode, but not dropping privilege
简单查看一下数据,这个和官方文件中的描述是一致的。也就是流数据以时间开始的一行,和流相关的元数据在流数据的下面追加行:
2022-11-15 03:02:22.560|2022-11-15 03:02:23.075|0.515|0.004|6|2.20.192.41|443|5|1521|0|00:00:00:00:00:00|192.168.137.113|62629|3|807|0|00:00:00:00:00:00|AP|AP|AP|AP|1363957954|3883502200|0|0|0|0|0|72|eof|C1|||
2022-11-15 03:02:23.066|2022-11-15 03:02:23.093|0.027|0.006|6|192.168.137.113|62636|4|487|0|00:00:00:00:00:00|42.81.247.1|80|4|1724|0|00:00:00:00:00:00|S|AP|AS|AP|2964962409|62197094|0|0|0|0|80|0|eof|C1|||
2022-11-15 02:55:32.228|2022-11-15 03:02:23.167|410.939|0.011|17|192.168.137.113|65520|8|549|0|00:00:00:00:00:00|192.168.137.1|53|8|1436|0|00:00:00:00:00:00|||||0|0|0|0|0|0|53|0|eof|C1|||
|dns|Q|16475|0|0|0|1|0|dss0.bdstatic.com.|
|dns|R|16475|1|0|0|5|7126|dss0.bdstatic.com.|sslbaiduv6.jomodns.com.
|dns|R|16475|1|0|0|1|25|sslbaiduv6.jomodns.com.|106.38.179.33
2022-11-15 03:02:22.751|2022-11-15 03:02:23.407|0.656|0.215|6|192.168.137.113|62635|5|555|0|00:00:00:00:00:00|2.20.192.41|443|7|6078|0|00:00:00:00:00:00|S|AP|AS|AP|3356565209|283469080|0|0|0|0|443|0|eof|C1|||
tls|187|I|0|0xc030
tls|186|I|0|3
tls|288|I|0|0x0303
2022-11-15 03:02:22.704|2022-11-15 03:02:23.416|0.712|0.229|6|192.168.137.113|62633|5|555|0|00:00:00:00:00:00|2.20.192.41|443|7|6078|0|00:00:00:00:00:00|S|AP|AS|AP|614308801|272455679|0|0|0|0|443|0|eof|C1|||
tls|187|I|0|0xc030
tls|186|I|0|3
tls|288|I|0|0x0303
2022-11-15 02:47:48.069|2022-11-15 03:02:23.484|875.415|0.008|17|192.168.137.113|64236|15|1022|0|00:00:00:00:00:00|192.168.137.1|53|15|2344|0|00:00:00:00:00:00|||||0|0|0|0|0|0|53|0|eof|C1|||
     使用grep看一下tls类元数据:

    能够看出元数据采取了“表名“+”information element id“+”data“的记法:

    表明其实对应的就是app label,ie id=31,代表cRLDistributionPoints (吊销证书列表发布点),32代表CertificatePolicies 证书策略对象。
[root@bogon ~]# cat result.txt|grep http
tls|32|E|0|http://www.digicert.com/CPS
tls|32|E|0|http://www.digicert.com/CPS
tls|32|E|0|http://www.digicert.com/CPS
tls|31|E|0|http://crl3.digicert.com/SecureSiteCAG2.crl
tls|31|E|0|http://crl4.digicert.com/SecureSiteCAG2.crl
tls|32|E|0|http://www.digicert.com/CPS
tls|31|E|0|http://crl.digicert.cn/GeoTrustRSACNCAG2.crl
tls|32|E|0|http://www.digicert.com/CPS
tls|31|E|0|http://crl3.digicert.com/GeoTrustCNRSACAG1.crl
tls|31|E|0|http://crl4.digicert.com/GeoTrustCNRSACAG1.crl
tls|32|E|0|http://www.digicert.com/CPS
tls|32|E|0|https://sectigo.com/CPS
tls|31|E|0|http://crl.digicert.cn/GeoTrustRSACNCAG2.crl
tls|32|E|0|http://www.digicert.com/CPS
tls|32|E|0|http://www.digicert.com/CPS
tls|31|E|0|http://crl.digicert.cn/TrustAsiaOVTLSProCAG3.crl
tls|32|E|0|http://www.digicert.com/CPS
tls|32|E|0|http://www.digicert.com/CPS
tls|31|E|0|http://crl3.digicert.com/GeoTrustCNRSACAG1.crl
tls|31|E|0|http://crl4.digicert.com/GeoTrustCNRSACAG1.crl
tls|32|E|0|http://www.digicert.com/CPS
tls|31|E|0|http://crl3.digicert.com/SecureSiteCAG2.crl
tls|31|E|0|http://crl4.digicert.com/SecureSiteCAG2.crl
……………………
使用grep看一下DNS类元数据。anzhao guanfang de shuofa ,DNS、SSL/TLS和DNP3采用不同的输出方法。
[root@bogon ~]# cat result.txt|grep dns
|dns|Q|37404|0|0|0|1|0|pagead2.googlesyndication.com.|
|dns|R|37404|1|0|0|1|254|pagead2.googlesyndication.com.|180.163.150.166
|dns|Q|14041|0|0|0|1|0|SMS_SLP.|
|dns|Q|14041|0|0|0|1|0|SMS_SLP.|
|dns|Q|60145|0|0|0|1|0|hub5pr.v6.phub.sandai.net.|
|dns|R|60145|2|0|0|6|1412|sandai.net.|localhost.
|dns|Q|39275|0|0|0|1|0|pr.x.hub.sandai.net.|
|dns|R|39275|1|0|0|1|342|pr.x.hub.sandai.net.|180.163.56.147
|dns|R|39275|1|0|0|1|342|pr.x.hub.sandai.net.|123.182.51.211
|dns|Q|33362|0|0|0|28|0|hub5pr.v6.phub.sandai.net.|
|dns|R|33362|1|0|0|28|1001|hub5pr.v6.phub.sandai.net.|2408:4004:0100:2e02:2c2c:fbe3:74d9:6d44
|dns|R|33362|1|0|0|28|1001|hub5pr.v6.phub.sandai.net.|2408:4004:0100:2e02:2c2c:fbe3:74d9:6d45
|dns|Q|46802|0|0|0|28|0|pr.x.hub.sandai.net.|
|dns|R|46802|2|0|0|6|1323|sandai.net.|localhost.
|dns|Q|59395|0|0|0|1|0|SMS_SLP.|
|dns|Q|59395|0|0|0|1|0|SMS_SLP.|
|dns|Q|31369|0|0|0|1|0|XTZJ-20211028AW.|
|dns|Q|31369|0|0|0|1|0|XTZJ-20211028AW.|
|dns|Q|47261|0|0|0|28|0|XTZJ-20211028AW.|
|dns|Q|47261|0|0|0|28|0|XTZJ-20211028AW.|
|dns|Q|19998|0|0|0|12|0|126.40.4.11.in-addr.arpa.|
|dns|Q|45562|0|0|0|1|0|wpad.|
|dns|Q|45562|0|0|0|1|0|wpad.|
|dns|Q|49129|0|0|0|28|0|wpad.|
|dns|Q|49129|0|0|0|28|0|wpad.|
|dns|Q|0|0|0|0|1|0|wpad.local.|
|dns|Q|0|0|0|0|1|0|wpad.local.|
|dns|Q|25633|0|0|0|12|0|252.0.0.224.in-addr.arpa.|
|dns|Q|47544|0|0|0|1|0|XTZJ-20211028AW.|
|dns|Q|47544|0|0|0|1|0|XTZJ-20211028AW.|
|dns|Q|29209|0|0|0|28|0|XTZJ-20211028AW.|
|dns|Q|29209|0|0|0|28|0|XTZJ-20211028AW.|
|dns|Q|60062|0|0|0|12|0|3.0.0.0.1.0.0.0.0.0.0.0.0.0.0.0.0.0.0.0.0.0.0.0.0.0.0.0.2.0.f.f.ip6.arpa.|
三、镜像化YAF3+Super-mediator
    一致觉得NetSA的官方支持做得不好,依靠官方的安装部署指南部署总会遇到大大小小的问题,需要通读大量说明文档和熟练掌握Linux系统才有可能解决。至少,如上在Centos stream 8上安装的过程就有不少问题,而安装官方的指南,在CentOS 7上的安装会遇到更多莫名的问题。

    经过一系列磕磕绊绊的尝试,总算在下面这种情况下配通了,不过好多我想用的配置项没法打开,因为打开就会报错,且我还不知道时什么东西没装齐整,或者什么东西装错版本了。比如,按照官方的说法,只安装gcc、gcc-c++、pkgconfig、make是无法完成libfixbuf的编译的,而整个“Development Tools”包的安装就没有问题……

    Dockerfile文件如下:
FROM centos:centos7

#RUN yum install gcc gcc-c++ make pkgconfig -y
RUN yum group install "Development Tools" -y
RUN yum install libpcap libpcap-devel -y
RUN yum install glib2 glib2-devel -y
RUN yum install zlib zlib-devel -y

ADD src/libfixbuf-3.0.0.alpha2.tar.gz /root/.
ADD src/super_mediator-2.0.0.alpha2.tar.gz /root/.
ADD src/yaf-3.0.0.alpha2.tar.gz /root/.
ADD src/mothra-1.6.0-src.tar.gz /root/.

RUN mv /root/libfixbuf-3.0.0.alpha2 /root/libfixbuf3
RUN mv /root/super_mediator-2.0.0.alpha2 /root/super_mediator2
RUN mv /root/yaf-3.0.0.alpha2 /root/yaf3
RUN mv /root/mothra-1.6.0-src /root/mothra160

RUN cd /root/libfixbuf3 \
 && ./configure --disable-tools \
 && make \
 && make install

RUN cd /root/yaf3 \
 && ./configure --enable-plugins --enable-applabel --enable-dpi --enable-entropy --enable-zlib \
 && make \
 && make install

RUN cd /root/super_mediator2 \
 && ./configure --with-zlib \
 && make \
 && make install

RUN echo 'export LD_LIBRARY_PATH=$LD_LIBRARY_PATH:/usr/local/lib' >> /root/.bashrc
RUN echo 'export LTDL_LIBRARY_PATH=$LTDL_LIBRARY_PATH:/usr/local/lib/yaf' >> /root/.bashrc

CMD ["./init-silk.sh"]
四、测试使用mothra
简单的mothra使用似乎不涉及从cert网站上下载源码编译等等之类的过程。仅仅需要在搭建好的spark-shell环境——比如我们前面搭建过的windows下的spark环境进行操作即可。
PS F:\tmp> spark-shell --packages "org.cert.netsa:mothra_2.12:1.6.0"
:: loading settings :: url = jar:file:/C:/spark/jars/ivy-2.5.1.jar!/org/apache/ivy/core/settings/ivysettings.xml
Ivy Default Cache set to: C:\Users\lhyzw\.ivy2\cache
The jars for the packages stored in: C:\Users\lhyzw\.ivy2\jars
org.cert.netsa#mothra_2.12 added as a dependency
:: resolving dependencies :: org.apache.spark#spark-submit-parent-36498b97-d9d5-492f-81e2-0cbe1ac02c77;1.0
        confs: [default]
        found org.cert.netsa#mothra_2.12;1.6.0 in central
        found org.cert.netsa#mothra-analysis_2.12;1.6.0 in central
        found org.cert.netsa#netsa-data_2.12;1.6.0 in central
        found org.cert.netsa#netsa-io-silk_2.12;1.6.0 in central
        found com.beachape#enumeratum_2.12;1.7.0 in central
        found com.beachape#enumeratum-macros_2.12;1.6.1 in central
        found org.scala-lang#scala-reflect;2.12.11 in central
        found org.anarres.lzo#lzo-core;1.0.6 in central
        found com.google.code.findbugs#annotations;2.0.3 in central
        found commons-logging#commons-logging;1.1.1 in local-m2-cache
        found org.scala-lang.modules#scala-parser-combinators_2.12;1.1.2 in central
        found org.xerial.snappy#snappy-java;1.1.8.4 in local-m2-cache
        found org.cert.netsa#mothra-datasources_2.12;1.6.0 in central
        found org.cert.netsa#mothra-datasources-base_2.12;1.6.0 in central
        found org.cert.netsa#mothra-datasources-ipfix_2.12;1.6.0 in central
        found com.typesafe.scala-logging#scala-logging_2.12;3.9.4 in central
        found org.scala-lang#scala-reflect;2.12.13 in central
        found org.slf4j#slf4j-api;1.7.30 in local-m2-cache
        found com.github.scopt#scopt_2.12;3.7.1 in central
        found org.cert.netsa#netsa-io-ipfix_2.12;1.6.0 in central
        found org.apache.commons#commons-text;1.1 in central
        found org.apache.commons#commons-lang3;3.5 in local-m2-cache
        found org.scala-lang.modules#scala-xml_2.12;1.3.0 in central
        found org.cert.netsa#mothra-datasources-silk_2.12;1.6.0 in central
        found org.cert.netsa#netsa-util_2.12;1.6.0 in central
        found org.cert.netsa#mothra-functions_2.12;1.6.0 in central
downloading https://repo1.maven.org/maven2/org/cert/netsa/mothra_2.12/1.6.0/mothra_2.12-1.6.0.jar ...
        [SUCCESSFUL ] org.cert.netsa#mothra_2.12;1.6.0!mothra_2.12.jar (511ms)
downloading https://repo1.maven.org/maven2/org/cert/netsa/mothra-analysis_2.12/1.6.0/mothra-analysis_2.12-1.6.0.jar ...
        [SUCCESSFUL ] org.cert.netsa#mothra-analysis_2.12;1.6.0!mothra-analysis_2.12.jar (2321ms)
downloading https://repo1.maven.org/maven2/org/cert/netsa/mothra-datasources_2.12/1.6.0/mothra-datasources_2.12-1.6.0.jar ...
        [SUCCESSFUL ] org.cert.netsa#mothra-datasources_2.12;1.6.0!mothra-datasources_2.12.jar (577ms)
downloading https://repo1.maven.org/maven2/org/cert/netsa/mothra-functions_2.12/1.6.0/mothra-functions_2.12-1.6.0.jar ...
        [SUCCESSFUL ] org.cert.netsa#mothra-functions_2.12;1.6.0!mothra-functions_2.12.jar (1751ms)
downloading https://repo1.maven.org/maven2/org/cert/netsa/netsa-data_2.12/1.6.0/netsa-data_2.12-1.6.0.jar ...
        [SUCCESSFUL ] org.cert.netsa#netsa-data_2.12;1.6.0!netsa-data_2.12.jar (2050ms)
downloading https://repo1.maven.org/maven2/org/cert/netsa/netsa-io-ipfix_2.12/1.6.0/netsa-io-ipfix_2.12-1.6.0.jar ...
        [SUCCESSFUL ] org.cert.netsa#netsa-io-ipfix_2.12;1.6.0!netsa-io-ipfix_2.12.jar (5512ms)
downloading https://repo1.maven.org/maven2/org/cert/netsa/netsa-io-silk_2.12/1.6.0/netsa-io-silk_2.12-1.6.0.jar ...
        [SUCCESSFUL ] org.cert.netsa#netsa-io-silk_2.12;1.6.0!netsa-io-silk_2.12.jar (4328ms)
downloading https://repo1.maven.org/maven2/org/cert/netsa/netsa-util_2.12/1.6.0/netsa-util_2.12-1.6.0.jar ...
        [SUCCESSFUL ] org.cert.netsa#netsa-util_2.12;1.6.0!netsa-util_2.12.jar (632ms)
downloading https://repo1.maven.org/maven2/com/beachape/enumeratum_2.12/1.7.0/enumeratum_2.12-1.7.0.jar ...
        [SUCCESSFUL ] com.beachape#enumeratum_2.12;1.7.0!enumeratum_2.12.jar (853ms)
downloading https://repo1.maven.org/maven2/org/anarres/lzo/lzo-core/1.0.6/lzo-core-1.0.6.jar ...
        [SUCCESSFUL ] org.anarres.lzo#lzo-core;1.0.6!lzo-core.jar (777ms)
downloading https://repo1.maven.org/maven2/org/scala-lang/modules/scala-parser-combinators_2.12/1.1.2/scala-parser-combinators_2.12-1.1.2.jar ...
        [SUCCESSFUL ] org.scala-lang.modules#scala-parser-combinators_2.12;1.1.2!scala-parser-combinators_2.12.jar(bundle) (1531ms)
……………………
………………
…………
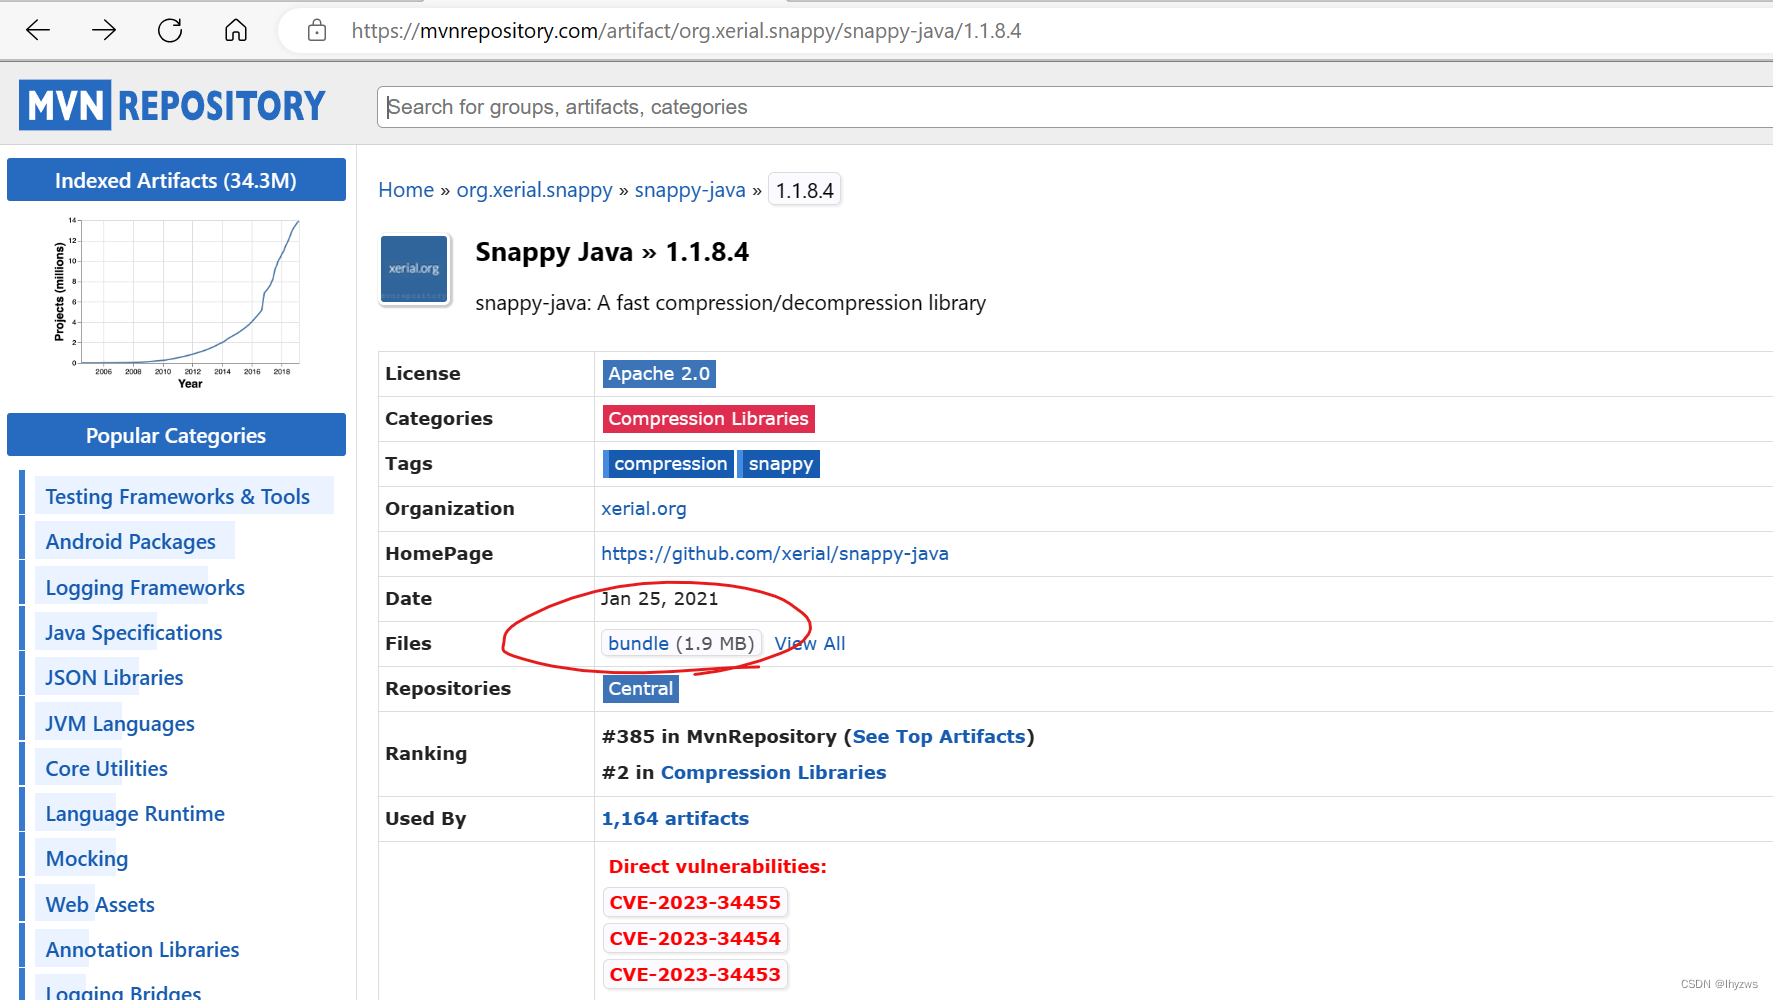
一般来说,这个过程总会有点小坎坷,比如说有若干jar包安装不上,但命名这些包就是在maven repository centra中能找到的,我也不知到为什么:
:: problems summary ::
:::: WARNINGS
                [NOT FOUND  ] org.xerial.snappy#snappy-java;1.1.8.4!snappy-java.jar(bundle) (2ms)
        ==== local-m2-cache: tried
          file:/C:/Users/lhyzw/.m2/repository/org/xerial/snappy/snappy-java/1.1.8.4/snappy-java-1.1.8.4.jar
                [NOT FOUND  ] commons-logging#commons-logging;1.1.1!commons-logging.jar (1ms)
        ==== local-m2-cache: tried
          file:/C:/Users/lhyzw/.m2/repository/commons-logging/commons-logging/1.1.1/commons-logging-1.1.1.jar
                [NOT FOUND  ] org.slf4j#slf4j-api;1.7.30!slf4j-api.jar (1ms)
        ==== local-m2-cache: tried
          file:/C:/Users/lhyzw/.m2/repository/org/slf4j/slf4j-api/1.7.30/slf4j-api-1.7.30.jar
                ::::::::::::::::::::::::::::::::::::::::::::::

                ::              FAILED DOWNLOADS            ::

                :: ^ see resolution messages for details  ^ ::

                ::::::::::::::::::::::::::::::::::::::::::::::
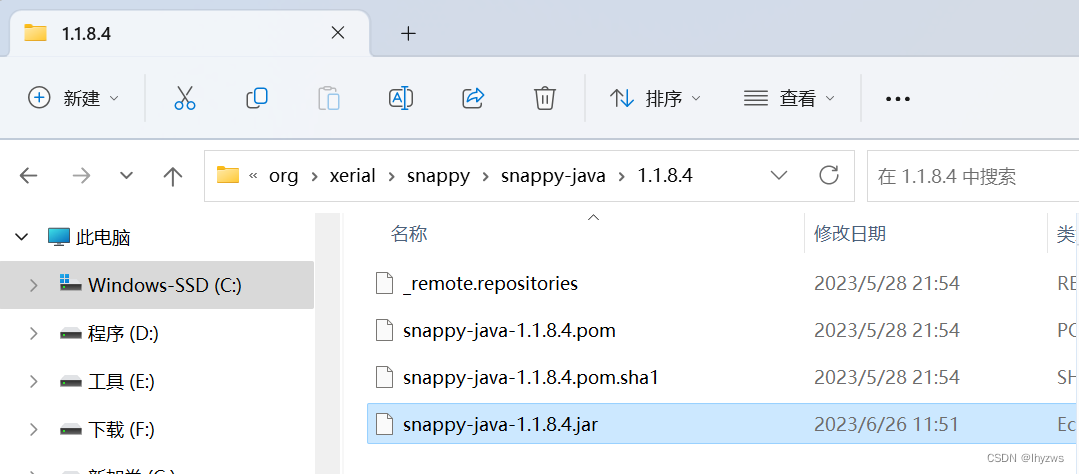
好在错误信息指示很明确,去repository中下载就是了
 下载完成后放到错误信息所指定的那个目录中:

然后再运行就可以成功启动了:
PS C:\Users\lhyzw> spark-shell --packages "org.cert.netsa:mothra_2.12:1.6.0"
:: loading settings :: url = jar:file:/C:/spark/jars/ivy-2.5.1.jar!/org/apache/ivy/core/settings/ivysettings.xml
Ivy Default Cache set to: C:\Users\lhyzw\.ivy2\cache
The jars for the packages stored in: C:\Users\lhyzw\.ivy2\jars
org.cert.netsa#mothra_2.12 added as a dependency
:: resolving dependencies :: org.apache.spark#spark-submit-parent-771cfadc-626d-41ae-9ce3-6976e01a4db7;1.0
        confs: [default]
        found org.cert.netsa#mothra_2.12;1.6.0 in central
        found org.cert.netsa#mothra-analysis_2.12;1.6.0 in central
        found org.cert.netsa#netsa-data_2.12;1.6.0 in central
        found org.cert.netsa#netsa-io-silk_2.12;1.6.0 in central
        found com.beachape#enumeratum_2.12;1.7.0 in central
        found com.beachape#enumeratum-macros_2.12;1.6.1 in central
        found org.scala-lang#scala-reflect;2.12.11 in central
        found org.anarres.lzo#lzo-core;1.0.6 in central
        found com.google.code.findbugs#annotations;2.0.3 in central
        found commons-logging#commons-logging;1.1.1 in local-m2-cache
        found org.scala-lang.modules#scala-parser-combinators_2.12;1.1.2 in central
        found org.xerial.snappy#snappy-java;1.1.8.4 in local-m2-cache
        found org.cert.netsa#mothra-datasources_2.12;1.6.0 in central
        found org.cert.netsa#mothra-datasources-base_2.12;1.6.0 in central
        found org.cert.netsa#mothra-datasources-ipfix_2.12;1.6.0 in central
        found com.typesafe.scala-logging#scala-logging_2.12;3.9.4 in central
        found org.scala-lang#scala-reflect;2.12.13 in central
        found org.slf4j#slf4j-api;1.7.30 in local-m2-cache
        found com.github.scopt#scopt_2.12;3.7.1 in central
        found org.cert.netsa#netsa-io-ipfix_2.12;1.6.0 in central
        found org.apache.commons#commons-text;1.1 in central
        found org.apache.commons#commons-lang3;3.5 in local-m2-cache
        found org.scala-lang.modules#scala-xml_2.12;1.3.0 in central
        found org.cert.netsa#mothra-datasources-silk_2.12;1.6.0 in central
        found org.cert.netsa#netsa-util_2.12;1.6.0 in central
        found org.cert.netsa#mothra-functions_2.12;1.6.0 in central
downloading file:/C:/Users/lhyzw/.m2/repository/org/xerial/snappy/snappy-java/1.1.8.4/snappy-java-1.1.8.4.jar ...
        [SUCCESSFUL ] org.xerial.snappy#snappy-java;1.1.8.4!snappy-java.jar(bundle) (9ms)
downloading file:/C:/Users/lhyzw/.m2/repository/commons-logging/commons-logging/1.1.1/commons-logging-1.1.1.jar ...
        [SUCCESSFUL ] commons-logging#commons-logging;1.1.1!commons-logging.jar (5ms)
downloading file:/C:/Users/lhyzw/.m2/repository/org/slf4j/slf4j-api/1.7.30/slf4j-api-1.7.30.jar ...
        [SUCCESSFUL ] org.slf4j#slf4j-api;1.7.30!slf4j-api.jar (4ms)
:: resolution report :: resolve 426ms :: artifacts dl 51ms
        :: modules in use:
        com.beachape#enumeratum-macros_2.12;1.6.1 from central in [default]
        com.beachape#enumeratum_2.12;1.7.0 from central in [default]
        com.github.scopt#scopt_2.12;3.7.1 from central in [default]
        com.google.code.findbugs#annotations;2.0.3 from central in [default]
        com.typesafe.scala-logging#scala-logging_2.12;3.9.4 from central in [default]
        commons-logging#commons-logging;1.1.1 from local-m2-cache in [default]
        org.anarres.lzo#lzo-core;1.0.6 from central in [default]
        org.apache.commons#commons-lang3;3.5 from local-m2-cache in [default]
        org.apache.commons#commons-text;1.1 from central in [default]
        org.cert.netsa#mothra-analysis_2.12;1.6.0 from central in [default]
        org.cert.netsa#mothra-datasources-base_2.12;1.6.0 from central in [default]
        org.cert.netsa#mothra-datasources-ipfix_2.12;1.6.0 from central in [default]
        org.cert.netsa#mothra-datasources-silk_2.12;1.6.0 from central in [default]
        org.cert.netsa#mothra-datasources_2.12;1.6.0 from central in [default]
        org.cert.netsa#mothra-functions_2.12;1.6.0 from central in [default]
        org.cert.netsa#mothra_2.12;1.6.0 from central in [default]
        org.cert.netsa#netsa-data_2.12;1.6.0 from central in [default]
        org.cert.netsa#netsa-io-ipfix_2.12;1.6.0 from central in [default]
        org.cert.netsa#netsa-io-silk_2.12;1.6.0 from central in [default]
        org.cert.netsa#netsa-util_2.12;1.6.0 from central in [default]
        org.scala-lang#scala-reflect;2.12.13 from central in [default]
        org.scala-lang.modules#scala-parser-combinators_2.12;1.1.2 from central in [default]
        org.scala-lang.modules#scala-xml_2.12;1.3.0 from central in [default]
        org.slf4j#slf4j-api;1.7.30 from local-m2-cache in [default]
        org.xerial.snappy#snappy-java;1.1.8.4 from local-m2-cache in [default]
        :: evicted modules:
        org.scala-lang#scala-reflect;2.12.11 by [org.scala-lang#scala-reflect;2.12.13] in [default]
        ---------------------------------------------------------------------
        |                  |            modules            ||   artifacts   |
        |       conf       | number| search|dwnlded|evicted|| number|dwnlded|
        ---------------------------------------------------------------------
        |      default     |   26  |   0   |   0   |   1   ||   25  |   3   |
        ---------------------------------------------------------------------
:: retrieving :: org.apache.spark#spark-submit-parent-771cfadc-626d-41ae-9ce3-6976e01a4db7
        confs: [default]
        25 artifacts copied, 0 already retrieved (9958kB/59ms)
Setting default log level to "WARN".
To adjust logging level use sc.setLogLevel(newLevel). For SparkR, use setLogLevel(newLevel).
Spark context Web UI available at http://192.168.137.14:4040
Spark context available as 'sc' (master = local[*], app id = local-1687751809117).
Spark session available as 'spark'.
Welcome to
      ____              __
     / __/__  ___ _____/ /__
    _\ \/ _ \/ _ `/ __/  '_/
   /___/ .__/\_,_/_/ /_/\_\   version 3.4.0
      /_/

Using Scala version 2.12.17 (OpenJDK 64-Bit Server VM, Java 1.8.0_302)
Type in expressions to have them evaluated.
Type :help for more information.

scala>
打印版本号,导入数据源驱动都没有问题:
scala> org.cert.netsa.util.versionInfo("mothra")
res0: Option[String] = Some(1.6.0)
scala> import org.cert.netsa.mothra.datasources._
import org.cert.netsa.mothra.datasources._
导入数据也木有问题:
scala> var df = spark.read.ipfix("f:/tmp/test2.ipfix")
df: org.apache.spark.sql.DataFrame = [startTime: timestamp, endTime: timestamp ... 17 more fields]

scala> df.count
res3: Long = 3418
查看数据,有点大,就不全打印了:
scala> df.show
+--------------------+--------------------+---------------+----------+--------------------+---------------+------------------+-------------------+------+-------------+------------+-----------+------------------+----------+-----------------+---------------+----------------------+-------------+--------------------+
|           startTime|             endTime|sourceIPAddress|sourcePort|destinationIPAddress|destinationPort|protocolIdentifier|observationDomainId|vlanId|reverseVlanId|silkAppLabel|packetCount|reversePacketCount|octetCount|reverseOctetCount|initialTCPFlags|reverseInitialTCPFlags|unionTCPFlags|reverseUnionTCPFlags|
+--------------------+--------------------+---------------+----------+--------------------+---------------+------------------+-------------------+------+-------------+------------+-----------+------------------+----------+-----------------+---------------+----------------------+-------------+--------------------+
|2022-11-15 10:34:...|2022-11-15 10:34:...|  47.110.20.149|       443|      192.168.182.76|          62116|                 6|                  0|     0|            0|           0|          3|                 4|       674|              253|             24|                    24|           25|                  21|
|2022-11-15 10:34:...|2022-11-15 10:34:...| 192.168.182.76|     62126|        40.90.184.73|            443|                 6|                  0|     0|            0|         443|         11|                10|      3328|             7410|              2|                    18|           25|                  25|
|2022-11-15 10:34:...|2022-11-15 10:34:...|192.168.137.113|     56138|        40.90.184.73|            443|                 6|                  0|     0|            0|         443|         11|                 9|      3281|             7230|              2|                    18|           25|                  25|
|2022-11-15 10:34:...|2022-11-15 10:34:...|192.168.137.113|     56145|       183.47.103.43|          36688|                 6|                  0|     0|            0|           0|         11|                16|      4977|              780|              2|                    24|           25|                  25|
|2022-11-15 10:34:...|2022-11-15 10:34:...|192.168.137.113|     56065|        220.181.33.6|            443|                 6|                  0|     0|         null|           0|          3|              null|       120|             null|             17|                  null|           20|                null|
|2022-11-15 10:34:...|2022-11-15 10:34:...|192.168.137.113|     56064|        220.181.33.6|            443|                 6|                  0|     0|         null|           0|          2|              null|        80|             null|             17|                  null|           20|                null|
    【这一段的说法是错的】不过看起来只有流数据被存在ipfix文件中,DPI数据似乎并没有被导入进来。其实折腾mothra的目的就是希望官方驱动源能够帮助我们将dpi信息导入spark,如果只是流数据,依赖SiLK工具集就够用,完全没必要折腾spark。可能ipfix的导出格式就不支持dpi信息吧,具体为何我也不知,只能下回分解了。

    【这是一个悲伤的故事】后面我们打算再开一篇仔细分解以下如何查看“完整”的DPI信息。然而,即使是把下一篇的问题都解决了,按照上面的过程,也无法得到http的DPI信息——除了AppLabel=80这种情况下的http元数据没有被提取出来,dns和ssl的元数据都已经被提取出来了。所以我花了好几天的时间来排查——包括在高铁上的时间……最终发现这个错误在于使用--applabel参数的时候相当然的用[]将applabel框了起来——而官方的指南中式不需要带这个中括号的。然而结果就是,yaf程序并不会报错,而是将“[80”识别为一个applabel——那自然式不存在的,所以从--verbose信息中显示,它只解析了2个protocol:

所以,正确的命令应该是:

如此,在spark中就可以看到完整的http信息了:
scala> my-http-dataframe.show(1,0,true)
-RECORD 0----------------------------------------------------------------------------------------
 startTime                                | 2022-11-15 10:34:55.611
 endTime                                  | 2022-11-15 10:34:55.708
 sourceIPAddress                          | 192.168.…………
 sourcePort                               | 49845
 destinationIPAddress                     | 180.163.…………
 destinationPort                          | 80
 protocolIdentifier                       | 6
 observationDomainId                      | 0
 vlanId                                   | 0
 reverseVlanId                            | 0
 silkAppLabel                             | 80
 packetCount                              | 5
 reversePacketCount                       | 5
 octetCount                               | 533
 reverseOctetCount                        | 379
 initialTCPFlags                          | 2
 reverseInitialTCPFlags                   | 18
 unionTCPFlags                            | 25
 reverseUnionTCPFlags                     | 29
………………
 httpAcceptList                           | []
 httpAcceptCharsetList                    | []
 httpAcceptLanguageList                   | []
 httpAgeList                              | []
 httpAllowList                            | []
 httpAuthorizationList                    | []
 httpConnectionList                       | [Close, close]
 httpContentEncodingList                  | []
 httpContentLanguageList                  | []
 httpContentLengthList                    | [192, 36]
 httpContentLocationList                  | []
 httpContentTypeList                      | [application/octet-stream, application/octet-stream]
 httpCookieList                           | []
 httpDNTList                              | []
 httpDateList                             | []
 httpExpectList                           | []
 httpExpiresList                          | []
 httpFromList                             | []
 httpGetList                              | [POST /]
 httpHostList                             | [pr.x.hub.sandai.net:80]
 httpIMEIList                             | []
 httpIMSIList                             | []
 httpLastModifiedList                     | []
 httpLocationList                         | []
 httpMSISDNList                           | []
 httpProxyAuthenticationList              | []
 httpRefererList                          | []
 httpRefreshList                          | []
 httpResponseList                         | [200 OK]
 httpServerStringList                     | []
 httpSetCookieList                        | []
 httpSubscriberList                       | []
 httpUpgradeList                          | []
 httpUserAgentList                        | []
 httpVersionList                          | [HTTP/1.1, HTTP/1.1]
 httpViaList                              | []
 httpWarningList                          | []
 httpXDeviceIdList                        | []
 httpXForwardedForList                    | []
 httpXForwardedHostList                   | []
 httpXForwardedProtoList                  | []
 httpXForwardedServerList                 | []
 httpXProfileList                         | []
 httpXUaCompatibleList                    | []
………………
 reverseStandardDeviationPayloadLength    | null
 tcpSequenceNumber                        | 2466486182
 reverseTcpSequenceNumber                 | 472507334
 ndpiL7Protocol                           | null
 ndpiL7SubProtocol                        | null
 mplsTopLabelStackSection                 | null
 mplsLabelStackSection2                   | null
 mplsLabelStackSection3                   | null
 yafFlowKeyHash                           | 3065966287
only showing top 1 row
本文转载自: https://blog.csdn.net/lhyzws/article/details/131344757
版权归原作者 lhyzws 所有, 如有侵权,请联系我们删除。
版权归原作者 lhyzws 所有, 如有侵权,请联系我们删除。