3. 单元测试
单元测试在日常项目开发中必不可少,目前流行的有 JUnit 或 TestNG等测试框架。Spring Boot封装了单元测试组件spring-boot-starter-test。
引入依赖
<dependency><groupId>org.springframework.boot</groupId><artifactId>spring-boot-starter-test</artifactId><scope>test</scope><exclusions><exclusion><groupId>org.junit.vintage</groupId><artifactId>junit-vintage-engine</artifactId></exclusion></exclusions></dependency>
在test文件下创建HelloworldApplicationTests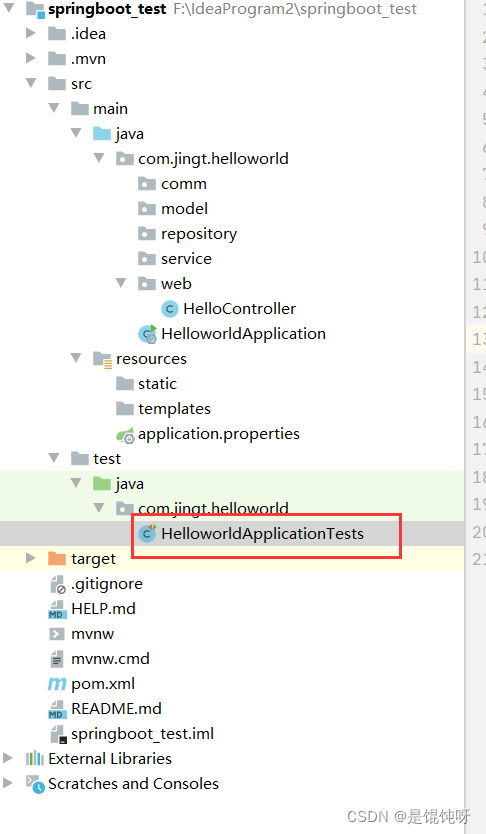
importorg.junit.jupiter.api.Test;importorg.springframework.boot.test.context.SpringBootTest;@SpringBootTestclassHelloworldApplicationTests{@TestvoidcontextLoads(){}@Testvoidhello(){System.out.println("Hello Spring Boot !!!");}}
在方法上右键 run 进行运行
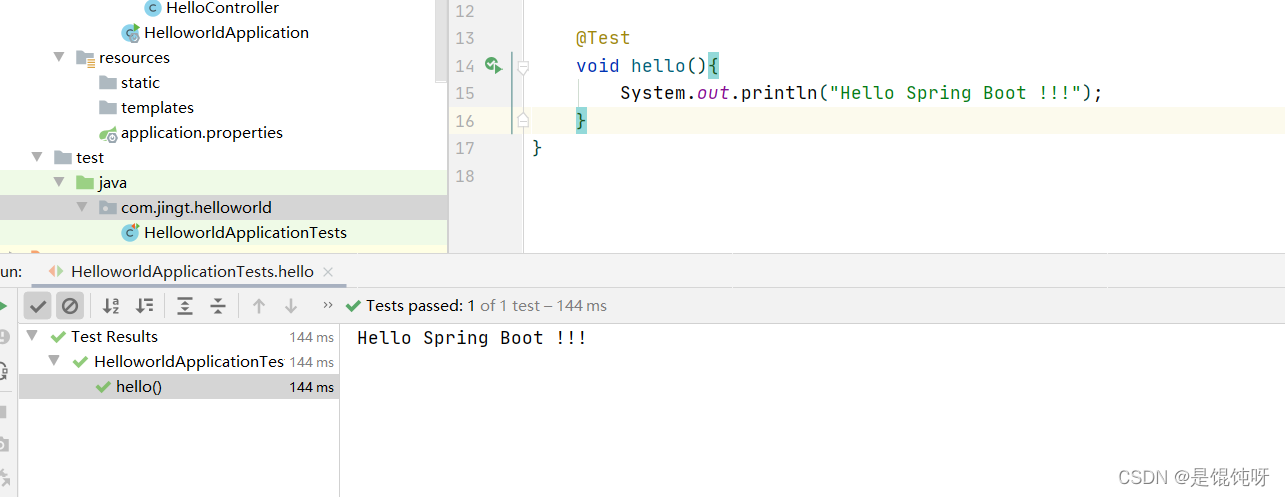
可以显示是否通过、运行时间、测试通过数和测试总数。
3.1 测试 Service 方法
创建 Service层方法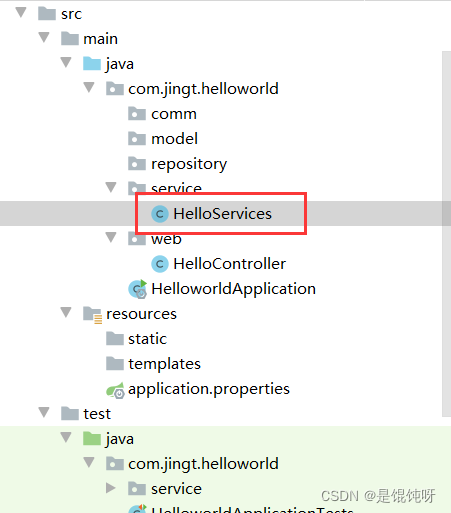
importorg.springframework.stereotype.Service;/**
 * @ClassName HelloServices
 * @Description
 * @Author asus
 * @Date 2022/4/15 22:58
 * @Version 1.0
 **/@ServicepublicclassHelloServices{publicStringhello(){return"1002";}}
右键点击 goto,点击Test

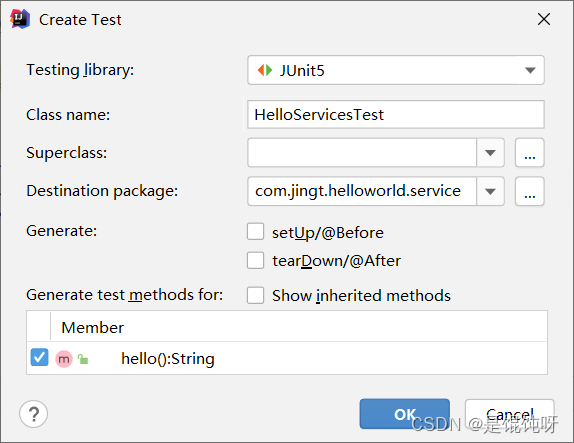
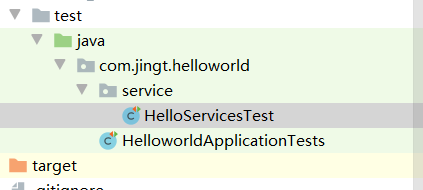
这样在test文件下就会有一个HelloServicesTest文件。
importorg.junit.Assert;importorg.junit.jupiter.api.Test;importorg.springframework.beans.factory.annotation.Autowired;importorg.springframework.boot.test.context.SpringBootTest;@SpringBootTestpublicclassHelloServicesTest{@AutowiredprivateHelloServices helloServices;@Testvoidhello(){Assert.assertEquals("1002",helloServices.hello());}}
在 HelloServicesTest 上增加
@SpringBootTest
注解,首先注入需要测试的Service,然后在单元测试中调用该方法,最后通过Assert断句判断返回结果是否正确。
将鼠标放在hello方法上进行运行即可。

3.2 测试Controller接口方法
有时需要对Controller进行测试,需要用到MockMvc类,MockMvc能够模拟HTTP请求,使用网络的形式请求Controller中的方法,这样可以使得测试速度快、不依赖网络环境,而且它提供了一套完善的结果验证工具,测试和验证也非常简单、高效。
使用
@WebMvcTest
等注解实现模拟HTTP请求测试。
@RestControllerpublicclassHelloController{@RequestMapping("/hello")publicStringhello(){return"Hello Spring Boot !!!";}}
按照ServiceTest的方法创建controllerTets类

importorg.junit.jupiter.api.Test;importorg.junit.runner.RunWith;importorg.springframework.beans.factory.annotation.Autowired;importorg.springframework.boot.test.autoconfigure.web.servlet.WebMvcTest;importorg.springframework.http.MediaType;importorg.springframework.test.context.junit4.SpringRunner;importorg.springframework.test.web.servlet.MockMvc;importorg.springframework.test.web.servlet.request.MockMvcRequestBuilders;importorg.springframework.test.web.servlet.result.MockMvcResultHandlers;importorg.springframework.test.web.servlet.result.MockMvcResultMatchers;@RunWith(SpringRunner.class)@WebMvcTest(HelloController.class)classHelloControllerTest{@AutowiredprivateMockMvc mockMvc;@Testpublicvoidhello()throwsException{
        mockMvc.perform(MockMvcRequestBuilders.post("/hello").contentType(MediaType.APPLICATION_JSON)).andExpect(MockMvcResultMatchers.status().isOk()).andDo(MockMvcResultHandlers.print());}}
使用 MockMvc 构造一个 Post 请求,MockMvcRequestBuilders可以支持post和get请求,调用print()方法将请求和相应的过程都打印出来。
- MockMvcRequestBuilders.post("/hello"):构造一个post请求。
- contentType (MediaType.APPLICATION_JSON)):设置JSON返回编码,避免出现中文乱码的问题。
- andExpect(status().isOk()):执行完成后的断句,请求的状态响应码是否为200,如果不是则测试不通过。
- andDo(print()):添加一个结果处理程序,表示要对结果进行处理,比如此处调用print()输出整个响应结果信息。
点击方法,右键run进行运行。

MockHttpServletRequest:
      HTTP Method = POST
      Request URI = /hello
       Parameters = {}
          Headers = [Content-Type:"application/json;charset=UTF-8"]
             Body = null
    Session Attrs = {}

Handler:
             Type = com.jingt.helloworld.web.HelloController
           Method = com.jingt.helloworld.web.HelloController#hello()

Async:
    Async started = false
     Async result = null

Resolved Exception:
             Type = null

ModelAndView:
        View name = null
             View = null
            Model = null

FlashMap:
       Attributes = null

MockHttpServletResponse:
           Status = 200
    Error message = null
          Headers = [Content-Type:"text/plain;charset=UTF-8", Content-Length:"21"]
     Content type = text/plain;charset=UTF-8
             Body = Hello Spring Boot !!!
    Forwarded URL = null
   Redirected URL = null
          Cookies = []
可以看到返回了完整的Http Response,包括Status=200、Body= hello Spring Boot,说明接口请求成功并成功返回。如果接口有登录验证,则需要通过MockHttpSession注入用户登录信息,或者修改登录拦截器取消对单元测试的登录验证。
3.3 常用单元测试注解
在项目开发中,除了
@SpringBootTest
、
@Test
等注解之外,单元测试还有很多非常实用的注解。


版权归原作者 是馄饨呀 所有, 如有侵权,请联系我们删除。