
MQTT客户端下载 使用测试 在我之前文章中 MQTT下载基础使用
下面记录一下前端使用的话的操作
1.安装
npm i mqtt
引入
import * as mqtt from "mqtt/dist/mqtt.min"; //VUE3
import mqtt from 'mqtt'   //VUE2
一、MQTT协议中的方法
Connect。等待与服务器建立连接。
Disconnect。等待MQTT客户端完成所做的工作,并与服务器断开TCP/IP会话。
Subscribe。等待完成订阅。
UnSubscribe。等待服务器取消客户端的一个或多个topics订阅。
Publish。MQTT客户端发送消息请求,发送完成后返回应用程序线程。
二,简单使用 基础使用(VUE2)
下面代码中, options 是客户端连接选项,以下是主要参数说明,其余参数详见https://www.npmjs.com/package/mqtt#connect。
keepalive:心跳时间,默认 60秒,设置 0 为禁用;
clientId: 客户端 ID ,默认通过 ‘mqttjs_’ + Math.random().toString(16).substr(2, 8) 随机生成;
username:连接用户名(如果有);
password:连接密码(如果有);
clean:true,设置为 false 以在离线时接收 QoS 1 和 2 消息;
reconnectPeriod:默认 1000 毫秒,两次重新连接之间的间隔,客户端 ID 重复、认证失败等客户端会重新连接;
connectTimeout:默认 30 * 1000毫秒,收到 CONNACK 之前等待的时间,即连接超时时间。
import mqtt from 'mqtt'

// 连接选项
const options = {
      connectTimeout: 4000, // 超时时间
      // 认证信息
      clientId: 'emqx-connect-via-websocket',
      username: 'emqx-connect-via-websocket',
      password: 'emqx-connect-via-websocket',
}

const client = mqtt.connect('wss://iot.actorcloud.io:8084/mqtt', options)

client.on('reconnect', (error) => {
    console.log('正在重连:', error)
})

client.on('error', (error) => {
    console.log('连接失败:', error)
})

client.on('connect', (e) => {
    console.log('成功连接服务器')

    // 订阅一个主题
    client.subscribe('hello', { qos: 1 }, (error) => {
        if (!error) {
            cosnole.log('订阅成功')
            client.publish('hello', 'Hello EMQ', { qos: 1, rein: false }, (error) => {
                cosnole.log(error || '发布成功')
            })
        }
    })

    // 订阅多个主题
    client.subscribe(['hello', 'one/two/three/#', '#'], { qos: 1 },  onSubscribeSuccess)

    // 订阅不同 qos 的不同主题
    client.subscribe(
        [
            { hello: 1 },
            { 'one/two/three': 2 },
            { '#': 0 }
        ],
        onSubscribeSuccess,
    )
})

// 取消订阅
client.unubscribe(
    // topic, topic Array, topic Array-Onject
    'hello',
    onUnubscribeSuccess,
)

// 监听接收消息事件
client.on('message', (topic, message) => {
    console.log('收到来自', topic, '的消息', message.toString())
})

// 发布消息
if (!client.connected) {
    console.log('客户端未连接')
    return
}

client.publish('hello', 'hello EMQ', (error) => {
    console.log(error || '消息发布成功')
})
三,项目中示例 (VUE3)
//项目中示例 这只是一个简单的链接 订阅 断开链接的案例
import * as mqtt from "mqtt/dist/mqtt.min";
import { onUnmounted, ref, reactive } from 'vue';
import { ElNotification } from 'element-plus'

export default function useMqtt() {
    let client = ref({
        connected: false
    });
    const notifyPromise = ref(Promise.resolve())
    const qosList = [0, 1, 2];
    // 订阅
    const topic = ref('rscu/alertpush/participant/up')
    const qos = ref(1)
    // 链接地址
    const hostUrl = ref('101.37.163.199')
    const connection = reactive({
        // 指明协议类型
        protocol: "ws",
        host: hostUrl.value,
        // ws: 8083; wss: 8084
        //端口号
        port: 8083,
        endpoint: "/mqtt",
        // for more options, please refer to https://github.com/mqttjs/MQTT.js#mqttclientstreambuilder-options
        clean: true,
        connectTimeout: 30 * 1000, // ms
        reconnectPeriod: 4000, // ms
        clientId: "emqx_benYing_" + Math.random().toString(16).substring(2, 8),
        // 账号密码
        username: "admin",
        password: "root",
    });
    const messageValue = ref(false)
    // 订阅的信息
    const receiveNews = ref('')
    const time = ref(null)
    const startMqtt = () => {
        try {
            const { protocol, host, port, endpoint, ...options } = connection;
            const connectUrl = `${protocol}://${host}:${port}${endpoint}`;
            client.value = mqtt.connect(connectUrl, options);
            if (client.value.on) {
                // 连接
                client.value.on("connect", () => {
                    console.log("连接成功 successful");
                });
                // 重连
                client.value.on("reconnect", handleOnReConnect);
                client.value.on("error", (error) => {
                    console.log("重连失败 error:", error);
                });
                // 收到信息
                client.value.on("message", (topic, message) => {
                    // receiveNews.value = receiveNews.value.concat(message.toString());
                    let { phaseValue } = JSON.parse(message)
                    phaseValue.forEach((value, index, array) => {
                        notifyPromise.value = notifyPromise.value.then(() => {
                            ElNotification({
                                type: 'warning',
                                title: '警告',
                                message: value.msg,
                                position: 'bottom-right',
                                offset: 10
                            })
                        })
                    })
                    console.log(`收到信息 message: ${message} from topic: ${topic}`);
                });
            }
        } catch (error) {
            console.log("mqtt.connect error:", error);
        }
    };
    // 订阅
    const link = () => {
        let qosValue = qos.value
        client.value.subscribe(
            topic.value,
            { qosValue },
            (error, granted) => {
                if (error) {
                    console.log("订阅失败 error:", error);
                    return;
                }
                console.log("订阅成功 successfully:", granted);
            }
        );
    };
    // 取消订阅
    const UnSubscribe = () => {
        let qosValue = qos.value
        client.value.unsubscribe(topic.value, { qosValue }, (error) => {
            if (error) {
                console.log("取消订阅失败 error:", error);
                return;
            }
            console.log(`取消订阅成功 topic: ${topic}`);
        });
    };
    // 取消连接
    const destroyConnection = () => {
        if (client.value.connected) {
            try {
                client.value.end(false, () => {
                    console.log("断开连接成功 successfully");
                });
            } catch (error) {
                console.log("断开连接失败 error:", error);
            }
        }
    };
       //发送信息  sendMsg //发送的信息
    const SendMessage =(topic, sendMsg)=> {
         let qosValue = qos.value
        client.value.publish(this.topic, JSON.stringify(sendMsg), {qosValue }, (err, a) => {
            if (!err) {
                console.log('发送信息成功');
            } else {
                console.log('发送信息失败');
            }
        })
    }

    const retryTimes = ref(0);
    const handleOnReConnect = () => {
        retryTimes.value += 1;
        if (retryTimes.value > 5) {
            try {
                client.value.end();
                initData();
                console.log("connection maxReconnectTimes limit, stop retry");
            } catch (error) {
                console.log("handleOnReConnect catch error:", error);
            }
        }
    };
    const initData = () => {
        client.value = {
            connected: false,
        };
        retryTimes.value = 0;
    };

    return {
        startMqtt,
        link,
        UnSubscribe,
        destroyConnection
    };
}
四,项目中tcp协议的坑
项目中 后端返回给我链接地址是 tcp://101.37.163.199:1883 但是我测试半天都链接不上
最后搜索才发现 要替换成 ws://101.37.163.199:8083/mqtt 才能调试链接通
五,经典研究案例 ,大家要是上面研究差不多 或者研究半解 可以去仓库拉下代码 下载包本地运行一下这个项目(他这个是参考MQTTX客户端的一个项目 在这上面可以配置配置项 订阅并发布信息)
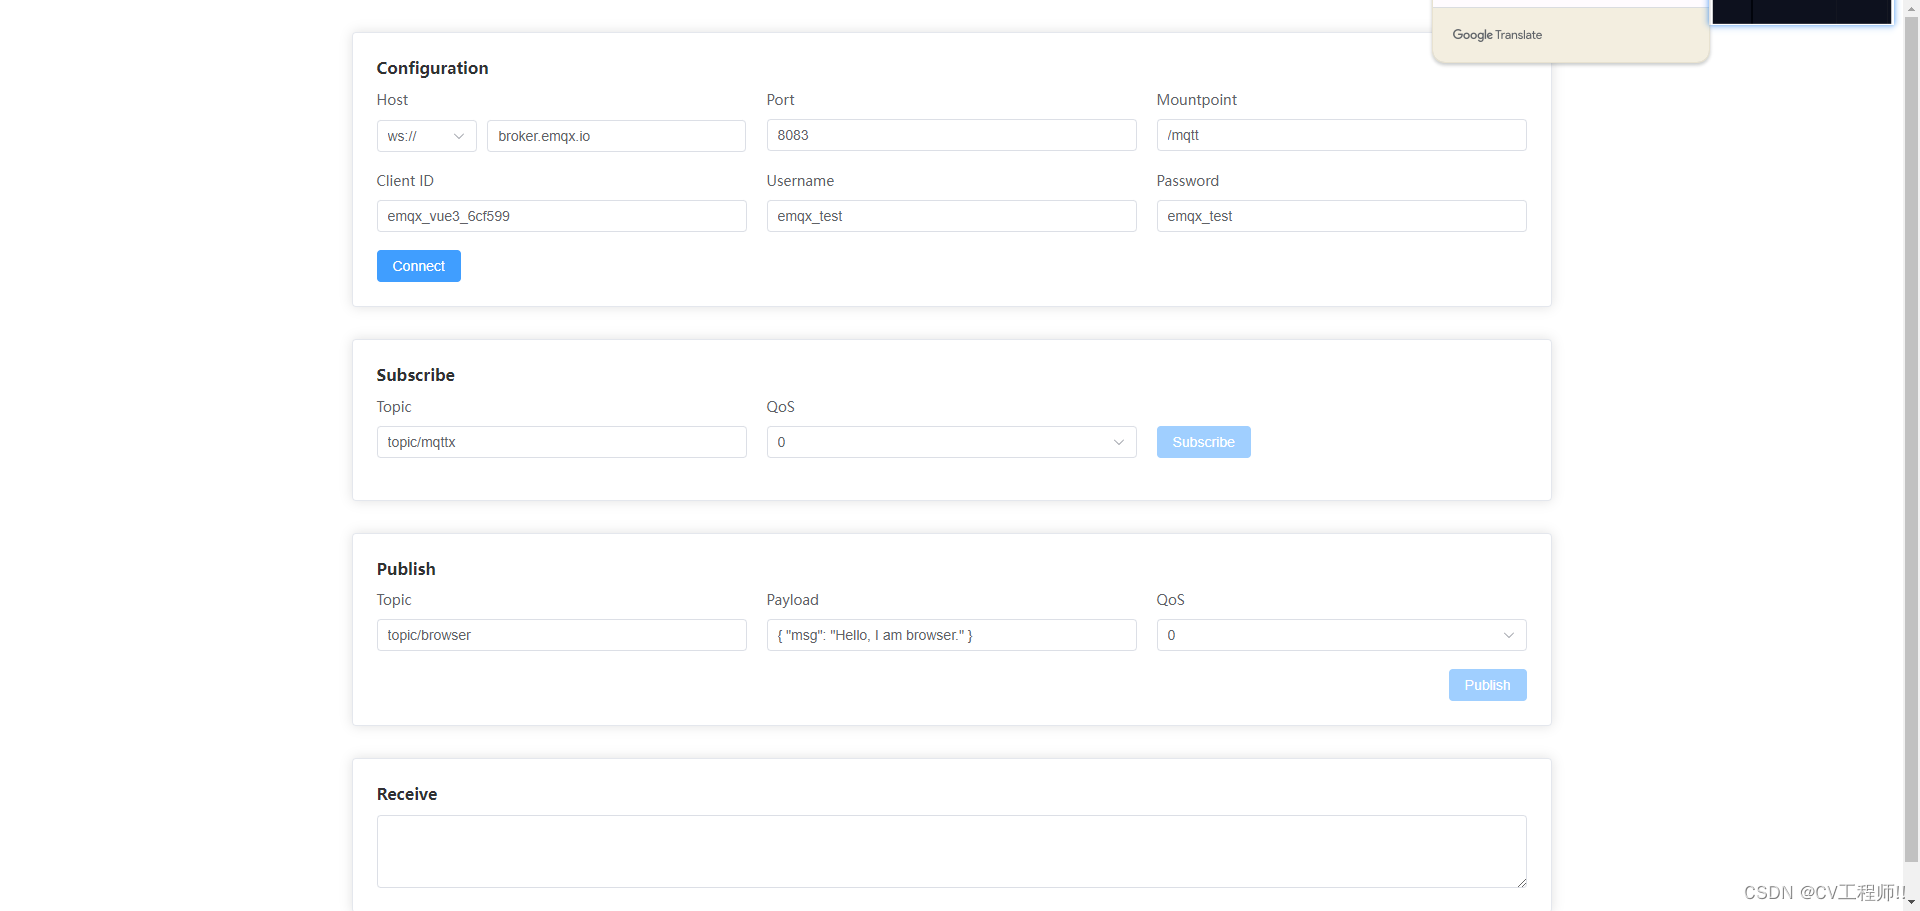
仓库地址 : MQTTdemo
版权归原作者 CV工程师!! 所有, 如有侵权,请联系我们删除。