目录
1.CSS
    CSS,全称为层叠样式表(Cascading Style Sheets),是一种用来控制网页布局和样式的标记语言。它与HTML结合使用,通过为HTML元素应用样式来美化和格式化网页。

    使用CSS,可以将网页的布局、颜色、字体、背景、边框等各个方面进行精确控制,从而使网页呈现出专业、统一和美观的外观。CSS通过选择器和声明来定义样式,选择器用于选中要应用样式的HTML元素,声明则定义元素的样式属性和值。
2.CSS引入
在HTML文件中引入CSS有三种方式:内部样式表、外部样式表和行内样式。
- 内部样式表:将CSS代码写在HTML文件的
<style>标签中。这种方法适用于单个页面的样式定义。示例代码如下:
<!DOCTYPE html>
<html>
<head>
    <style>
        p {
            color: blue;
            font-size: 18px;
        }
    </style>
</head>
<body>
    <p>This is a paragraph with blue color and font size of 18px.</p>
</body>
</html>
- 外部样式表:将CSS代码写在一个单独的CSS文件中,然后在HTML文件中使用
<link>标签引入该CSS文件。外部样式表适用于多个页面共享相同样式的情况,有利于代码复用和维护。示例代码如下:
<!DOCTYPE html>
<html>
<head>
    <link rel="stylesheet" type="text/css" href="styles.css">
</head>
<body>
    <p>This is a paragraph with styles defined in the external CSS file.</p>
</body>
</html>
在上面的例子中,styles.css是一个独立的CSS文件,包含了样式定义。
- 行内样式:将CSS代码直接写在HTML标签的style属性中。这种方法适用于只对某个具体元素应用特定样式的情况。示例代码如下:
<!DOCTYPE html>
<html>
<body>
    <p style="color: red; font-size: 20px;">This is a paragraph with inline styles.</p>
</body>
</html>
    这种方式直接应用样式于指定元素,但不易于维护和复用。

    通常,外部样式表是推荐的方式,因为它可以使CSS和HTML文件分离,使代码更易于维护和管理,并且允许多个页面共享相同的样式。
3.选择器
CSS选择器是用来选中HTML元素并应用样式的一种方式。它可以根据元素的标签名、类名、ID、属性和关系等进行选择。
1.标签选择器
定义:标签选择器通过元素的标签名来选择页面中所有该类型的元素。
<!DOCTYPE html>
<html lang="en">
<head>
    <meta charset="UTF-8">
    <title>Title</title>
    <style>
        p{
            color: red;
            font-size: 40px;
        }
    </style>
</head>
<body>
    <p style="color: green">hello world</p>
    <p>hello 小比特</p>
    <h1 style="color: blue;font-size: 50px">你好</h1>
</body>
</html>

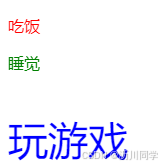
2.类选择器
定义:类选择器通过元素的类属性值来选择页面中所有具有该类名的元素。
<!doctype html>
<html lang="en">
<head>
    <meta charset="UTF-8">
    <meta name="viewport"
          content="width=device-width, user-scalable=no, initial-scale=1.0, maximum-scale=1.0, minimum-scale=1.0">
    <meta http-equiv="X-UA-Compatible" content="ie=edge">
    <title>Document</title>
    <link rel="stylesheet" href="css03.css">
</head>
<body>
    <p class="eat">吃饭</p>
    <p class="sleep">睡觉</p>
    <p class="game">玩游戏</p>
</body>
</html>

.eat{
    color:red;
}
.sleep{
    color: green;
}
.game{
    color: blue;
}
.game{
    font-size: 40px;
}
3.id选择器
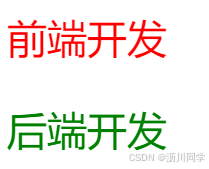
定义:ID选择器通过元素的ID属性值来选择页面中具有该ID的唯一元素。
<!doctype html>
<html lang="en">
<head>
    <meta charset="UTF-8">
    <meta name="viewport"
          content="width=device-width, user-scalable=no, initial-scale=1.0, maximum-scale=1.0, minimum-scale=1.0">
    <meta http-equiv="X-UA-Compatible" content="ie=edge">
    <title>Document</title>
    <link rel="stylesheet" href="css04.css">
</head>
<body>
    <p id="fe">前端开发</p>
    <p id="server">后端开发</p>
</body>
</html>

#fe {
    color: red;
}
#server{
    color: green;
}
*{
    font-size: 40px;
}
4.属性选择器
    定义:属性选择器通过元素的特定属性及其值来选择元素。

    实例:
[attribute]
:选择了所有具有指定属性的元素。
[attribute=value]
:选择了所有属性值恰好为特定值的元素。
5.后代选择器
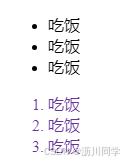
定义:后代选择器通过两个选择器并用空格分隔,选择第一个选择器内部的所有匹配第二个选择器的后代元素。
<!doctype html>
<html lang="en">
<head>
    <meta charset="UTF-8">
    <meta name="viewport"
          content="width=device-width, user-scalable=no, initial-scale=1.0, maximum-scale=1.0, minimum-scale=1.0">
    <meta http-equiv="X-UA-Compatible" content="ie=edge">
    <title>Document</title>
    <style>
        ol li{
            color: rebeccapurple;
        }
    </style>
</head>
<body>
    <ul>
        <li>吃饭</li>
        <li>吃饭</li>
        <li>吃饭</li>
    </ul>
    <ol>
        <li>吃饭</li>
        <li>吃饭</li>
        <li>吃饭</li>
    </ol>
</body>
</html>
5.直接子元素选择器
    定义:直接子元素选择器通过两个选择器并用大于号(>)分隔,选择第一个选择器的直接子元素,这些子元素必须匹配第二个选择器。

    示例:ul>li选择了所有直接位于<ul>元素内部的<li>元素。
6.伪类选择器
定义:伪类选择器用于选择处于特定状态的元素,它们以冒号(:)开头。
<!doctype html>
<html lang="en">
<head>
    <meta charset="UTF-8">
    <meta name="viewport"
          content="width=device-width, user-scalable=no, initial-scale=1.0, maximum-scale=1.0, minimum-scale=1.0">
    <meta http-equiv="X-UA-Compatible" content="ie=edge">
    <title>Document</title>
    <style>
        a{
            color: black;
        }
        a:hover{
            color: red;
        }
        a:active{
            color: green;
        }
        input{
            color: blue;
        }
        input:hover{
            color: #3B475F;
        }
    </style>
</head>
<body>
    <a href="#">不跳转</a>
    <input type="button" value="按钮">
</body>
</html>


链接相关
:link- 选择未被访问的链接。:visited- 选择已被访问的链接。:hover- 选择鼠标悬停在元素上的状态。:active- 选择正在被激活的链接(鼠标按下时)。
动态伪类
:focus- 选择获得焦点的元素(通常是输入字段)。:target- 选择当前活动的锚点目标。
结构化伪类
:first-child- 选择其父元素的第一个子元素。:last-child- 选择其父元素的最后一个子元素。:first-of-type- 选择其父元素下特定类型的第一个子元素。:last-of-type- 选择其父元素下特定类型的最后一个子元素。:only-child- 选择其父元素下唯一的子元素。:only-of-type- 选择其父元素下唯一类型的子元素。:nth-child(n)- 选择其父元素的第n个子元素。:nth-last-child(n)- 选择其父元素的倒数第n个子元素。:nth-of-type(n)- 选择其父元素下特定类型的第n个子元素。:nth-last-of-type(n)- 选择其父元素下特定类型的倒数第n个子元素。
否定伪类
:not(selector)- 选择不符合指定选择器的元素。
其他伪类
:root- 选择文档的根元素,通常是HTML元素。:empty- 选择没有子元素的元素(包括文本节点)。:lang(language)- 选择带有指定语言的语言标签的元素。
UI元素状态伪类
:enabled- 选择已启用的表单元素。:disabled- 选择被禁用的表单元素。:checked- 选择被选中的单选按钮或复选框。:default- 选择默认选中的表单元素。:valid- 选择输入验证正确的元素。:invalid- 选择输入验证错误的元素。
4.字体
CSS字体属性用于定义文本的字体系列、大小、加粗、风格和变体。
1.font-family
font-family
属性用于指定文本的字体族。可以指定一个或多个字体名称作为备选,以防某个字体不可用。
2.font-size
font-size
属性用于设置文本的大小。可以使用多种单位,如像素(px)、点(pt)、em、rem、百分比等。
font-size: 16px; /* 像素单位 /
font-size: 1em; / 相对于父元素的字体大小 /
font-size: 100%; / 相对于父元素的字体大小 */
3.font-style
font-style
属性用于指定文本的字体风格,通常用于指定斜体。
font-style: normal; /* 正常字体 /
font-style: italic; / 斜体 /
font-style: oblique; / 倾斜字体 */
4.font-weight
font-weight
属性用于设置文本的粗细。
font-weight: normal; /* 正常粗细 /
font-weight: bold; / 加粗 /
font-weight: 100; / 数值范围从100到900,400是正常,700是加粗 */
5.font-variant
font-variant
属性用于设置小型大写字母文本。
font-variant: normal; /* 正常字体 /
font-variant: small-caps; / 小型大写字母 */
6.text
在CSS中,
text
是一个简写属性,它允许你一次性设置多个文本相关的属性。
text
属性是CSS中
font
属性的一个子集,专门用于控制文本的外观,不包括字体大小、家族或样式。
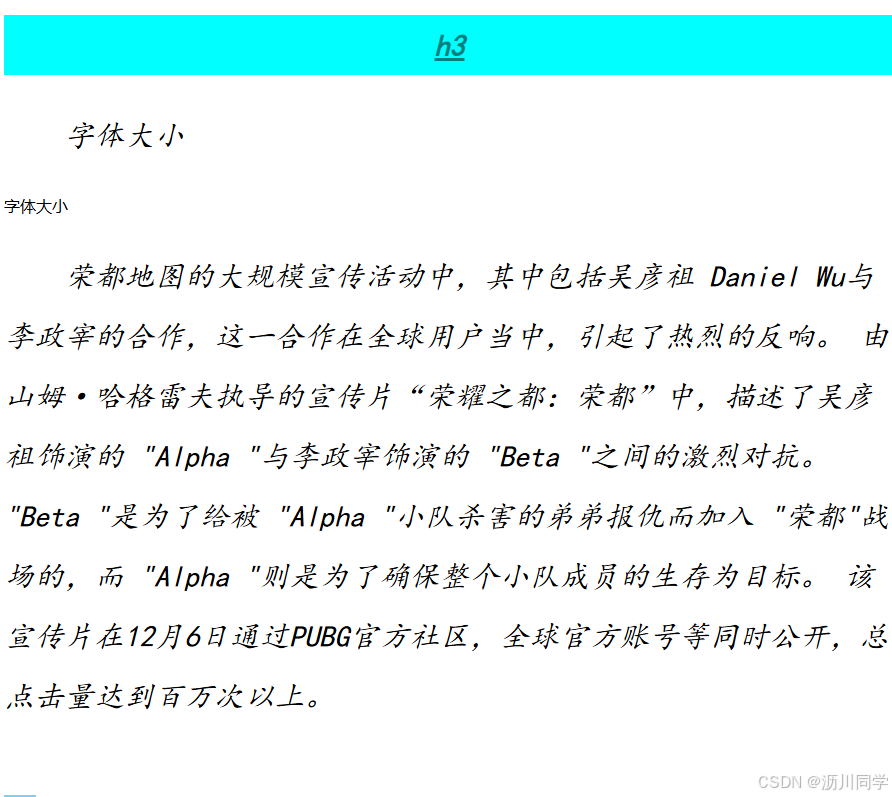
text-align: 设置文本的对齐方式(如左对齐、右对齐、居中对齐或两端对齐)。text-decoration: 设置文本的装饰线(如下划线、上划线、删除线或闪烁)。text-indent: 设置首行文本的缩进。text-transform: 控制文本的大小写(如大写、小写或首字母大写)。line-height: 设置行间的距离。letter-spacing: 设置字符间的距离。word-spacing: 设置单词间的距离。
<!DOCTYPE html>
<html lang="en">

<head>
    <meta charset="UTF-8">
    <meta name="viewport" content="width=device-width, initial-scale=1.0">
    <title>Document</title>
    <style>
        p {
            font-size: 30px;
            font-style: italic;
            line-height: 2;
            font-family: 楷体;
            text-indent: 2em;
        }

        h3 {
            background-color: aqua;
            color: rgb(0, 0, 0, 0.5);
            font-weight: 400;
            font: italic 700 30px/2 楷体;
            text-align: center;
            text-decoration: underline;
        }

        div span {
            font-weight: 700;
            height: 100px;
            background-color: skyblue;
            line-height: 100px;
        }
    </style>
</head>

<body>
    <h3>h3</h3>
    <p>字体大小</p>
    <div>字体大小</div>
    <p>荣都地图的大规模宣传活动中,其中包括吴彦祖 Daniel Wu与李政宰的合作,这一合作在全球用户当中,引起了热烈的反响。
        由山姆·哈格雷夫执导的宣传片“荣耀之都:荣都”中,描述了吴彦祖饰演的 "Alpha "与李政宰饰演的 "Beta "之间的激烈对抗。
        "Beta "是为了给被 "Alpha "小队杀害的弟弟报仇而加入 "荣都"战场的,而 "Alpha "则是为了确保整个小队成员的生存为目标。
        该宣传片在12月6日通过PUBG官方社区,全球官方账号等同时公开,总点击量达到百万次以上。</p>
    <div>
        <span>儿子</span>
    </div>
</body>

</html>
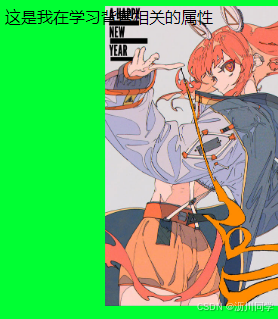
5.background属性
在CSS中,
background
是一个复合属性,它允许你一次性设置多个背景相关的属性。使用
background
属性,你可以控制元素的颜色、图像、位置、尺寸、重复方式、滚动行为和附件等。以下是
background
属性可以设置的子属性:
background-color: 设置元素的背景颜色。background-image: 设置元素的背景图像。background-position: 设置背景图像的位置。background-size: 设置背景图像的尺寸。background-repeat: 设置背景图像是否以及如何重复。background-attachment: 设置背景图像是否随页面滚动。background-origin: 设置背景图像的定位区域。background-clip: 设置背景的绘制区域。background-blend-mode: 设置背景层的混合模式。
<!DOCTYPE html>
<html lang="en">
<head>
    <meta charset="UTF-8">
    <title>Title</title>
    <style>
        body{
            background-color: #00ff33;
        }
        div{
            background-image: url(https://image.meiye.art/pic_afonTgKOO5h3R1lblU4bl?imageMogr2/thumbnail/560x/interlace/1);
            background-repeat: no-repeat;
            width: 300px;
            height: 300px;
            background-position: 100px center;
            background-size: contain;
        }
    </style>
</head>
<body>
    <div>
        这是我在学习背景相关的属性
    </div>
</body>
</html>
6.盒子模型
CSS盒子模型是一个用于描述HTML元素布局和定位的概念。每个HTML元素都被视为一个矩形盒子,该盒子由四个主要组件组成:内容区域、内边距、边框和外边距。
内容区域(Content Area):位于盒子的内部,用于显示元素的实际内容,例如文本、图片等。
内边距(Padding):内容区域与边框之间的空白区域。内边距可以设置为固定的像素值或相对于元素大小的百分比。
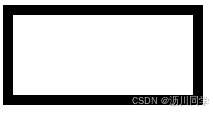
边框(Border):围绕内容区域和内边距的线条,用于定义元素的边界。边框可以设置为不同的样式、宽度和颜色。
外边距(Margin):边框与其他元素之间的空白区域。外边距可以用来控制元素与周围元素之间的距离。
 这四个组件共同构成了一个完整的盒子,它们的宽度和高度都可以通过CSS属性进行设置。实际上,CSS盒子模型中的盒子大小可以通过以下公式计算:

 盒子宽度 = 内容区域宽度 + 左内边距 + 右内边距 + 左边框 + 右边框 + 左外边距 + 右外边距

 盒子高度 = 内容区域高度 + 上内边距 + 下内边距 + 上边框 + 下边框 + 上外边距 + 下外边距
内容区域(Content Area):- 宽度(
width)和高度(height)属性定义了内容区域的尺寸。内边距(Padding):-
padding-top、padding-right、padding-bottom、padding-left属性定义了内容与边框之间的空间。- 也可以使用padding简写属性,它可以一次性设置四个方向的内边距。边框(Border):-
border属性用于设置边框的宽度、样式和颜色。-border-style、border-width、border-color分别用于设置边框的样式、宽度和颜色。- 也可以针对单个边(如border-top、border-right等)或单个边框属性(如border-top-style、border-right-width等)进行设置。外边距(Margin):-
margin-top、margin-right、margin-bottom、margin-left属性定义了元素与其他元素之间的空间。-margin简写属性可以一次性设置四个方向的外边距。box-sizing: content-box;(默认):使用标准盒模型。box-sizing: border-box;:使用替代盒模型,其中width和height包含了内容、内边距和边框。
<!DOCTYPE html>
<html lang="en">
<head>
    <meta charset="UTF-8">
    <title>Title</title>
    <style>
        div{
            width: 200px;
            height: 100px;
            border-color: black;
            border-style: solid;
            border-width: 10px;
            box-sizing: border-box;
        }
    </style>
</head>
<body>
    <div></div>
</body>
</html>
<!doctype html>
<html lang="en">
<head>
    <meta charset="UTF-8">
    <meta name="viewport"
          content="width=device-width, user-scalable=no, initial-scale=1.0, maximum-scale=1.0, minimum-scale=1.0">
    <meta http-equiv="X-UA-Compatible" content="ie=edge">
    <title>Document</title>
    <style>
        div{
            width: 200px;
            height: 100px;
            padding-left: 5px;
            padding-right: 5px;
            padding-top: 5px;
            padding-bottom: 5px;
        }
    </style>
</head>
<body>
    <div>这是一个div</div>
</body>
</html>

7.圆角和阴影
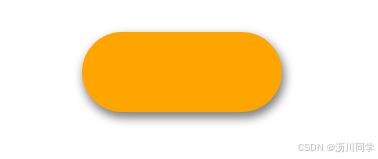
圆角(border-radius)是CSS属性,用于为一个盒子的边框添加圆角效果。它可以接受一个长度值或一个百分比值作为参数,表示边框的圆角大小。以下是一些示例:
/* 添加一个相同大小的圆角 */
.box {
  border-radius: 10px;
}

/* 添加不同大小的圆角 */
.box {
  border-radius: 10px 20px 30px 40px;
}

/* 添加水平方向的圆角 */
.box {
  border-radius: 10px 20px;
}

/* 添加垂直方向的圆角 */
.box {
  border-radius: 20px / 10px;
}
阴影(box-shadow)是CSS属性,用于为一个盒子添加阴影效果。它可以接受多个参数,包括阴影的颜色、偏移量、模糊半径和扩散半径。以下是一些示例:
/* 添加一个黑色的阴影 */
.box {
  box-shadow: 2px 2px 4px rgba(0, 0, 0, 0.5);
}

/* 添加一个红色的阴影 */
.box {
  box-shadow: 0 0 10px red;
}

/* 添加一个带有偏移量和扩散半径的阴影 */
.box {
  box-shadow: 5px 5px 10px 2px rgba(0, 0, 0, 0.5);
}
通过使用这两个属性,我们可以为盒子元素添加圆角和阴影效果,从而实现更加美观和独特的视觉效果。
<!DOCTYPE html>
<html lang="en">

<head>
    <meta charset="UTF-8">
    <meta name="viewport" content="width=device-width, initial-scale=1.0">
    <title>Document</title>
    <style>
        div {
            margin: 50px auto;
            width: 200px;
            height: 80px;
            background-color: orange;
            border-radius: 20px;
            border-radius: 40px;
            box-shadow: 2px 5px 10px 1px rgba(0, 0, 0, 0.5);
        }
    </style>
</head>

<body>
    <div></div>
</body>

</html>
8.动画
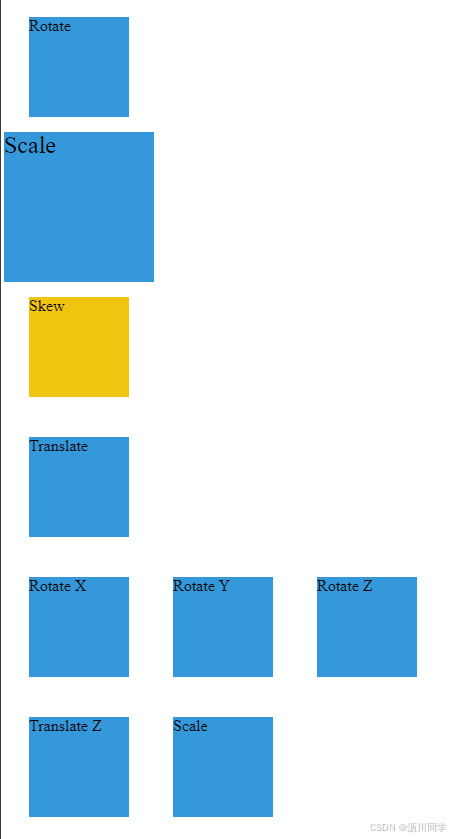
CSS3 提供了 2D 和 3D 变换的功能,可以通过 transform 属性来实现。下面分别介绍 2D 变换和 3D 变换的方法和示例:
- 2D 变换(2D Transformations):
- 平移(Translate):使用 translate() 函数可以将元素沿 X 和 Y 轴进行平移。
.box {
  transform: translate(50px, 50px);
}
- 缩放(Scale):使用 scale() 函数可以按比例缩放元素的大小。
.box {
  transform: scale(1.5);
}
- 旋转(Rotate):使用 rotate() 函数可以将元素沿 Z 轴旋转。
.box {
  transform: rotate(45deg);
}
- 倾斜(Skew):使用 skew() 函数可以将元素沿 X 和 Y 轴进行倾斜。
.box {
  transform: skew(20deg, 10deg);
}
- 3D 变换(3D Transformations):
- 平移(Translate):使用 translate3d() 函数可以将元素在三个轴上进行平移。
.box {
  transform: translate3d(50px, 50px, 0);
}
- 缩放(Scale):使用 scale3d() 函数可以在三个轴上按比例缩放元素的大小。
.box {
  transform: scale3d(1.5, 1.5, 1);
}
- 旋转(Rotate):使用 rotateX()、rotateY() 和 rotateZ() 函数可以分别围绕 X、Y 和 Z 轴旋转元素。
.box {
  transform: rotateX(45deg);
}
- 透视(Perspective):使用 perspective 属性可以为 3D 变换添加透视效果。
.container {
  perspective: 1000px;
}

.box {
  transform: rotateY(45deg);
}
<!doctype html>
<html lang="en">
<head>
    <meta charset="UTF-8">
    <meta name="viewport"
          content="width=device-width, user-scalable=no, initial-scale=1.0, maximum-scale=1.0, minimum-scale=1.0">
    <meta http-equiv="X-UA-Compatible" content="ie=edge">
    <title>Document</title>
    <style>
        .transform-box {
            width: 100px;
            height: 100px;
            background-color: #3498db;
            margin: 20px;
            transition: transform 0.5s; /* 过渡效果 */
        }

        .transform-box:hover {
            transform: rotate(180deg); /* 旋转180度 */
        }

        .scale-box {
            width: 100px;
            height: 100px;
            background-color: #2ecc71;
            margin: 20px;
            transition: transform 0.5s;
        }

        .scale-box:hover {
            transform: scale(1.5); /* 缩放1.5倍 */
        }

        .skew-box {
            width: 100px;
            height: 100px;
            background-color: #f1c40f;
            margin: 20px;
            transition: transform 0.5s;
        }

        .skew-box:hover {
            transform: skew(20deg, 10deg); /* 倾斜20度X轴和10度Y轴 */
        }

        .translate-box {
            width: 100px;
            height: 100px;
            background-color: #e74c3c;
            margin: 20px;
            transition: transform 0.5s;
        }

        .translate-box:hover {
            transform: translate(50px, 50px); /* 向右和向下移动50像素 */
        }
        .container {
            perspective: 1000px; /* 视角距离,增强3D效果 */
        }

        .rotate-box, .translate-box, .scale-box {
            width: 100px;
            height: 100px;
            background-color: #3498db;
            margin: 20px;
            display: inline-block;
            transition: transform 0.5s;
        }

        .rotate-box:hover {
            transform: rotateX(180deg); /* 绕X轴旋转 */
        }

        .rotate-box:nth-child(2):hover {
            transform: rotateY(180deg); /* 绕Y轴旋转 */
        }

        .rotate-box:nth-child(3):hover {
            transform: rotateZ(180deg); /* 绕Z轴旋转 */
        }

        .translate-box:hover {
            transform: translateZ(100px); /* 沿Z轴移动 */
        }

        .scale-box:hover {
            transform: scale3d(1.5, 1.5, 1.5); /* 在三个轴上缩放 */
        }

    </style>
</head>
<body>
    <div class="transform-box">Rotate</div>
    <div class="scale-box">Scale</div>
    <div class="skew-box">Skew</div>
    <div class="translate-box">Translate</div>
    <div class="container">
        <div class="rotate-box">Rotate X</div>
        <div class="rotate-box">Rotate Y</div>
        <div class="rotate-box">Rotate Z</div>
        <div class="translate-box">Translate Z</div>
        <div class="scale-box">Scale</div>
    </div>

</body>
</html>
9.弹性布局
在CSS中,弹性布局使用弹性盒模型(Flexbox)来实现。以下是一些常用的CSS属性和值来创建弹性布局:
- display: flex; 设置父容器为弹性容器。
- flex-direction: row | row-reverse | column | column-reverse; 设置弹性项目在主轴上的排列方向,默认是从左到右(row)。
- flex-wrap: nowrap | wrap | wrap-reverse; 设置弹性项目是否换行,默认是不换行(nowrap)。
- justify-content: flex-start | flex-end | center | space-between | space-around; 设置弹性项目在主轴上的对齐方式,默认是靠左对齐(flex-start)。
- align-items: flex-start | flex-end | center | baseline | stretch; 设置弹性项目在交叉轴上的对齐方式,默认是靠上对齐(flex-start)。
- align-content: flex-start | flex-end | center | space-between | space-around | stretch; 设置多行弹性项目在交叉轴上的对齐方式,默认是靠上对齐(flex-start)。
- flex-grow: <number>; 设置弹性项目的放大比例,默认为0,表示不放大。
- flex-shrink: <number>; 设置弹性项目的缩放比例,默认为1,表示可以缩小。
- flex-basis: <length> | auto; 设置弹性项目在主轴上的初始大小,默认为auto。
- flex: none | [ <'flex-grow'> <'flex-shrink'>? || <'flex-basis'> ]; 综合设置弹性项目的放大比例、缩放比例和初始大小。
版权归原作者 沥川同学 所有, 如有侵权,请联系我们删除。