1 执行 npm install --registry=https://registry.npm.taobao.org,报错信息如下
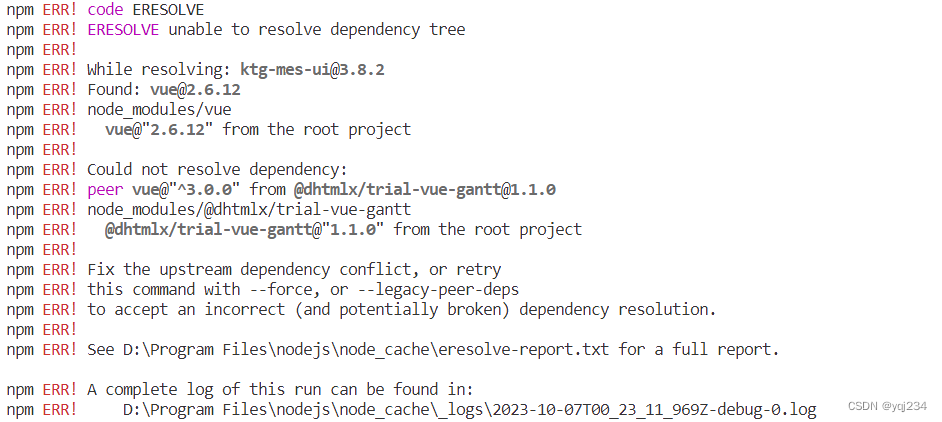
npm ERR! code ERESOLVE
npm ERR! ERESOLVE unable to resolve dependency tree
npm ERR!
npm ERR! While resolving: ktg-mes-ui@3.8.2
npm ERR! Found: vue@2.6.12
npm ERR! node_modules/vue
npm ERR! vue@"2.6.12" from the root project
npm ERR!
npm ERR! Could not resolve dependency:
npm ERR! peer vue@"^3.0.0" from @dhtmlx/trial-vue-gantt@1.1.0
npm ERR! node_modules/@dhtmlx/trial-vue-gantt
npm ERR! @dhtmlx/trial-vue-gantt@"1.1.0" from the root project
npm ERR!
npm ERR! Fix the upstream dependency conflict, or retry
npm ERR! this command with --force, or --legacy-peer-deps
npm ERR! to accept an incorrect (and potentially broken) dependency resolution.
npm ERR!
npm ERR! See D:\Program Files\nodejs\node_cache\eresolve-report.txt for a full report.
npm ERR! A complete log of this run can be found in:
npm ERR! D:\Program Files\nodejs\node_cache_logs\2023-10-07T00_23_11_969Z-debug-0.log

解决方法如下
用我的中式英语翻译一下就是:不能解析依赖树 ,需要先修复上面依赖关系冲突或者重新执行一下npm install命令,后面跟–force或者–legacy-peer-deps去接受不正确的(并可能被破坏的)依赖解析。
根据它的建议,我们去执行npm install --force 或者 npm install --legacy-peer-deps
过了一些时间发现依赖安装好了,你开心坏了,但有些 “顽固” 的项目可不会就此善罢甘休,有些项目执行完这两条命令之后依然还是上面那个报错。这时候你就应该去看一下你的npm版本了,
其实npm@7与ERESOLVE有关的问题还是比较常见的,这是因为npm7.x对于某些事情要比npm6.x更加严格,通常解决办法就是使用 npm install --legacy-peer-deps 或者使用 npm@6。
如果这些办法不能立即生效的话,可以先把项目中的 node_modules 和 package-lock.json 删除,它们将会被重新创建。
温馨提示:使用 npm@6 不需要卸载 npm@7,可以使用 npx 去指定 npm 的版本。即可以这么使用:npx -p npm@6 npm install --legacy-peer-deps
2 执行 npm run dev 提示如下所示错误信息 INFO Starting development server...
95% emitting CompressionPlugin ERROR Error: error:0308010C:digital envelope routines::unsupported
Error: error:0308010C:digital envelope routines::unsupported

解决方法如下
问题原因:查了下原因,主要是 nodeJs V17 版本发布了 OpenSSL3.0 对算法和秘钥大小增加了更为严格的限制,nodeJs v17 之前版本没影响,但 V17 和之后版本会出现这个错误,确认本机电脑的node版本是多少,用如下命令查看
node -v
解决方式(仅 windows):
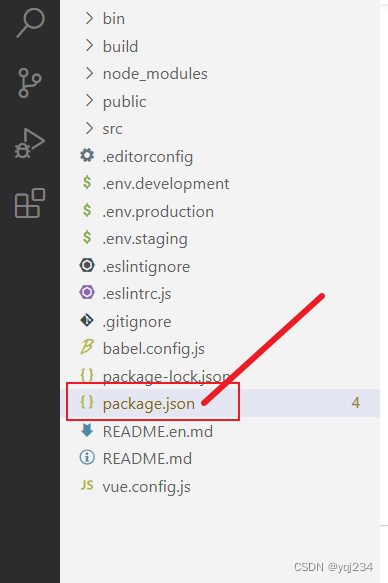
在 package.json 的 scripts 中新增 SET NODE_OPTIONS=--openssl-legacy-provider

添加前:
"scripts": {

"dev": "vue-cli-service serve",

"build:prod": "vue-cli-service build"

},
添加后
"scripts": {

"dev": "SET NODE_OPTIONS=--openssl-legacy-provider && vue-cli-service serve",

"build:prod": "SET NODE_OPTIONS=--openssl-legacy-provider && vue-cli-service build"

},
3 执行 npm install 出现如下图所示,

npm ERR! code EJSONPARSE
npm ERR! JSON.parse Unexpected token " " (0xA0) in JSON at position 216 while parsing near "...cli-service serve",\n "build:prod": "S..."
npm ERR! JSON.parse Failed to parse JSON data.
npm ERR! JSON.parse Note: package.json must be actual JSON, not just JavaScript.
npm ERR! A complete log of this run can be found in:
npm ERR! D:\Program Files\nodejs\node_cache_logs\2023-10-07T10_30_07_338Z-debug-0.log
PS D:\ideaProjects\ktg-mes-ui-master> npm install --registry=https://registry.npm.taobao.org
npm ERR! code EJSONPARSE
npm ERR! path D:\ideaProjects\ktg-mes-ui-master/package.json
npm ERR! JSON.parse Unexpected token " " (0xA0) in JSON at position 216 while parsing near "...cli-service serve",\n "build:prod": "S..."
npm ERR! JSON.parse Failed to parse JSON data.
npm ERR! JSON.parse Note: package.json must be actual JSON, not just JavaScript.
npm ERR! A complete log of this run can be found in:
npm ERR! D:\Program Files\nodejs\node_cache_logs\2023-10-07T10_31_19_041Z-debug-0.log
解决方法:
执行如下命令可解决,npm install -force 强制安装,解决有冲突的依懶包
npm install --force
4 后台运行Jar程序,挂起运行,带log文件功能,执行如下命令以后,返回结果[1] 80800,表示成功, 如下
nohup java -jar rymes-admin.jar > rymes.log 2>&1 &

注意:jar包文件的路径下执行,生成log也在当前路径下,建立是统一放在路径下
- 执行行 npm run dev时出现 'vue-cli-service' 不是内部或外部命令,也不是可运行的程序
或批处理文件。

PS D:\ideaProject\ktg-mes-ui-master> npm run dev
ktg-mes-ui@3.8.2 dev
vue-cli-service serve
'vue-cli-service' 不是内部或外部命令,也不是可运行的程序
或批处理文件。
原因:未安装node module相关的内容 ,检查工程根目录下有没有node_modules目录,如果没有则是未nodejs的模块
解决方案:
在工程根目录下执行,出现如图所示,则安装成功
npm install -force

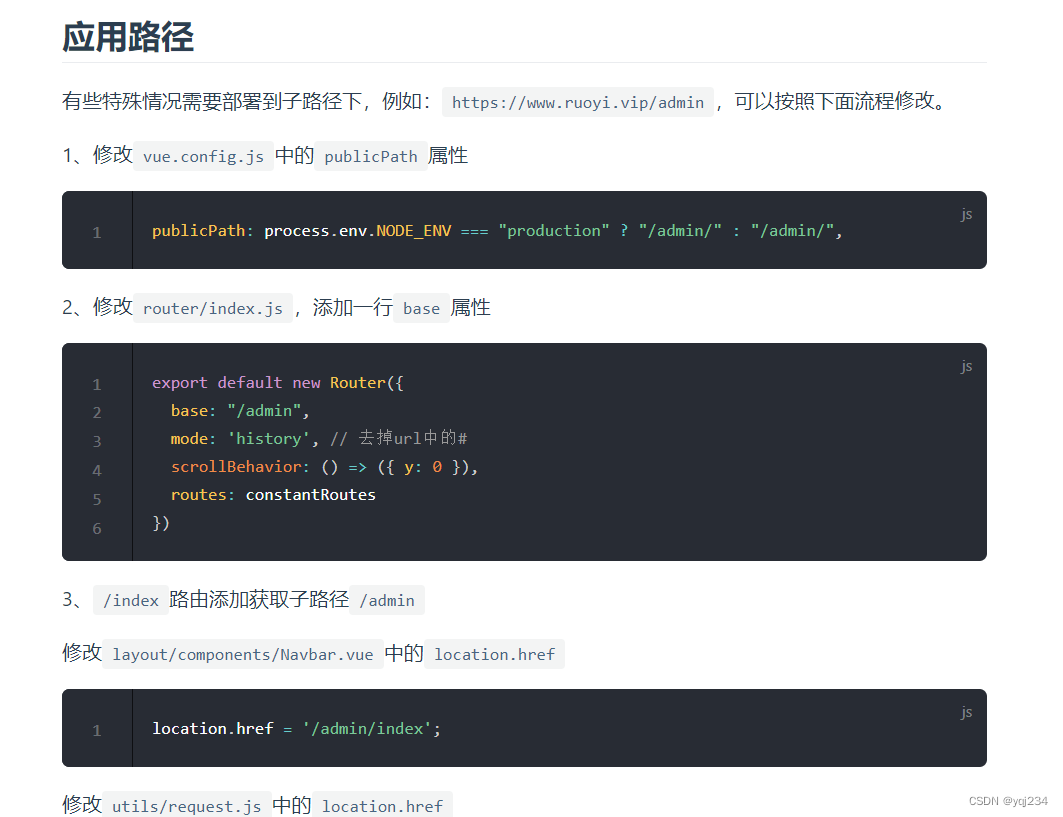
6 前端应用程序安装在 有些特殊情况需要部署到子路径下,例如:**
https://xxx.xxx.xxx/admin
**,可以按照下面流程修改。
解决思路:按照官方的说明修改有关路径的文件,如下图所示,参考说明文件
前端手册 | RuoYi


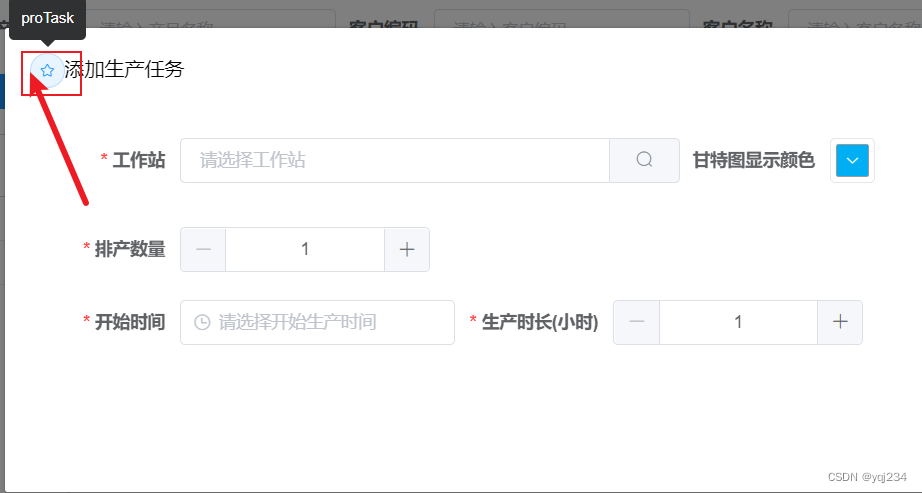
- 自定义弹窗的标准栏样式,代码如下所示
      <div slot="title" class="header-title">
        <el-tooltip content="proTask" placement="top">
          <el-button size="mini" icon="el-icon-star-off" circle></el-button>
        </el-tooltip><span v-html="title" style=""></span>
      </div>

呈现的效果

版权归原作者 yqj234 所有, 如有侵权,请联系我们删除。