
产自:后端三郎
时间:刚刚
参考:B站编程不良人
1.MQ安装教程
** Docker安装MQ(没有docker的先安装docker,第一篇是安装docker,第二篇是docker安装MQ)**
三郎之——Centos7安装Docker_后端三郎@ZYJ的博客-CSDN博客Centos7安装Dockerhttps://blog.csdn.net/ZhAoYaJ/article/details/122457714?spm=1001.2014.3001.5501
Docker安装Rabbitmq--快捷实用_后端三郎@ZYJ的博客-CSDN博客Docker安装Rabbitmq--快捷实用https://blog.csdn.net/ZhAoYaJ/article/details/123821638?spm=1001.2014.3001.5501
2.什么是MQ
MQ(Message Quene):翻译为消息队列,通过典型的生产者和消费者模型,生产者不断向消息队列生产消息,消费者不断的从队列中获取消息。因为消息的生产和消费都是异步,而且只关心消息的发送和接收,没有业务逻辑的侵入,轻松实现系统间解耦。别名为消息中间件,通过利用高效可靠的消息传递机制进行平台无关的数据交流,并基于数据通信来进行分布式系统的集成。
3.MQ有哪些
当今市面上有很多主流的消息中间件,如老牌的ActiveMQ,RabbitMQ,炙手可热的Kafka,阿里巴巴自主开发的RocketMQ等。
4.不同MQ特点
#1.ActiveMQ特点
**ActiveMQ是Apache出品,最流行的,能力强劲的开源消息总线。他是一个完全支持JMS规范的消息中间件。丰富的API,多种集群架构模式让ActiveMQ在业界成为老牌的消息中间件,在中小型企业颇受欢迎。**#2.Kafka特点
**Kafka是LinkedIn开源的分布式发布-订阅消息系统,目前归属于Apache顶级项目。Kafka主要特点是基于Pull的模式来处理消息消费。**** 追求高吞吐量,一开始的目的就是用于日志的传输和收集。0.8版本开始支持复制,不支持事务,对消息的重复,丢失,错误没有严格要求。**
** 适合产生大量的互联网服务的数据收集业务。**
#3.RocketMQ特点
**RocketMQ是阿里开源的消息中间件,它是纯Java开发,具有高吞吐量,高可用性,使用大规模分布式系统应用的特点。RocketMQ思路起源于Kafka,但并不是Kafka的一个Copy,他对消息的可靠传输以及事务做了优化,目前在阿里集团被广泛应用于交易,充值,流计算,消息推送,日志流式处理,binglog分发等场景。**#4.RabbitMQ特点
**RabbitMQ是使用Erlang语言开发的开源消息队列系统,基于AMQP协议来实现,AMQP主要特征是面向消息,队列,路由(包括点对点和发布/订阅),可靠性,安全。 **** AMQP协议更多用在企业系统内对数据的一致性,稳定性和可靠性要求很高的场景。**
** 对性能和吞吐量的要求还在其次。**
**注:RabbitMQ安全系数高,更加可靠,kafka更适用于日志的处理。**
5.web管理页面介绍
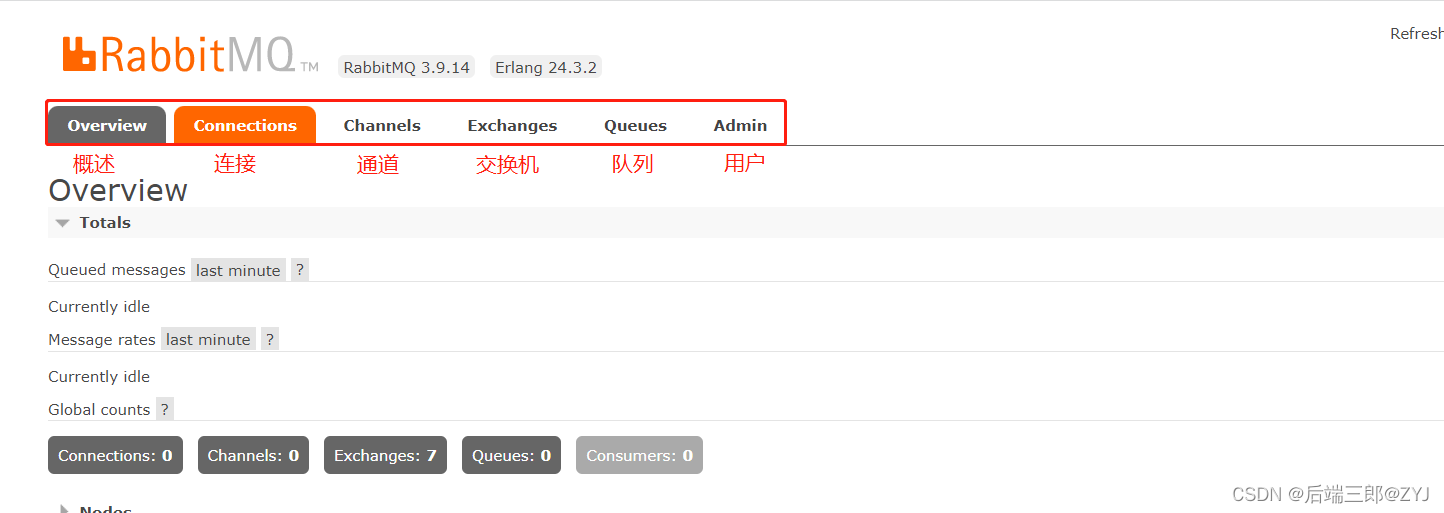
Connections:无论生产者还是消费者,都需要与RabbitMQ建立连接后才可以完成消息的生产和消费,在这里可以查看连接情况Channels:通道,建立连接后,会形成通道,消息的投递获取依赖通道。Exchanges:交换机,用来实现消息的路由Queues:队列,即消息队列,消息存放在队列中,等待消费,消费后被移除队列。Admin:用户管理,用户权限设置,新增用户等操作。
5.1Admin用户和虚拟主机管理
(1)添加用户
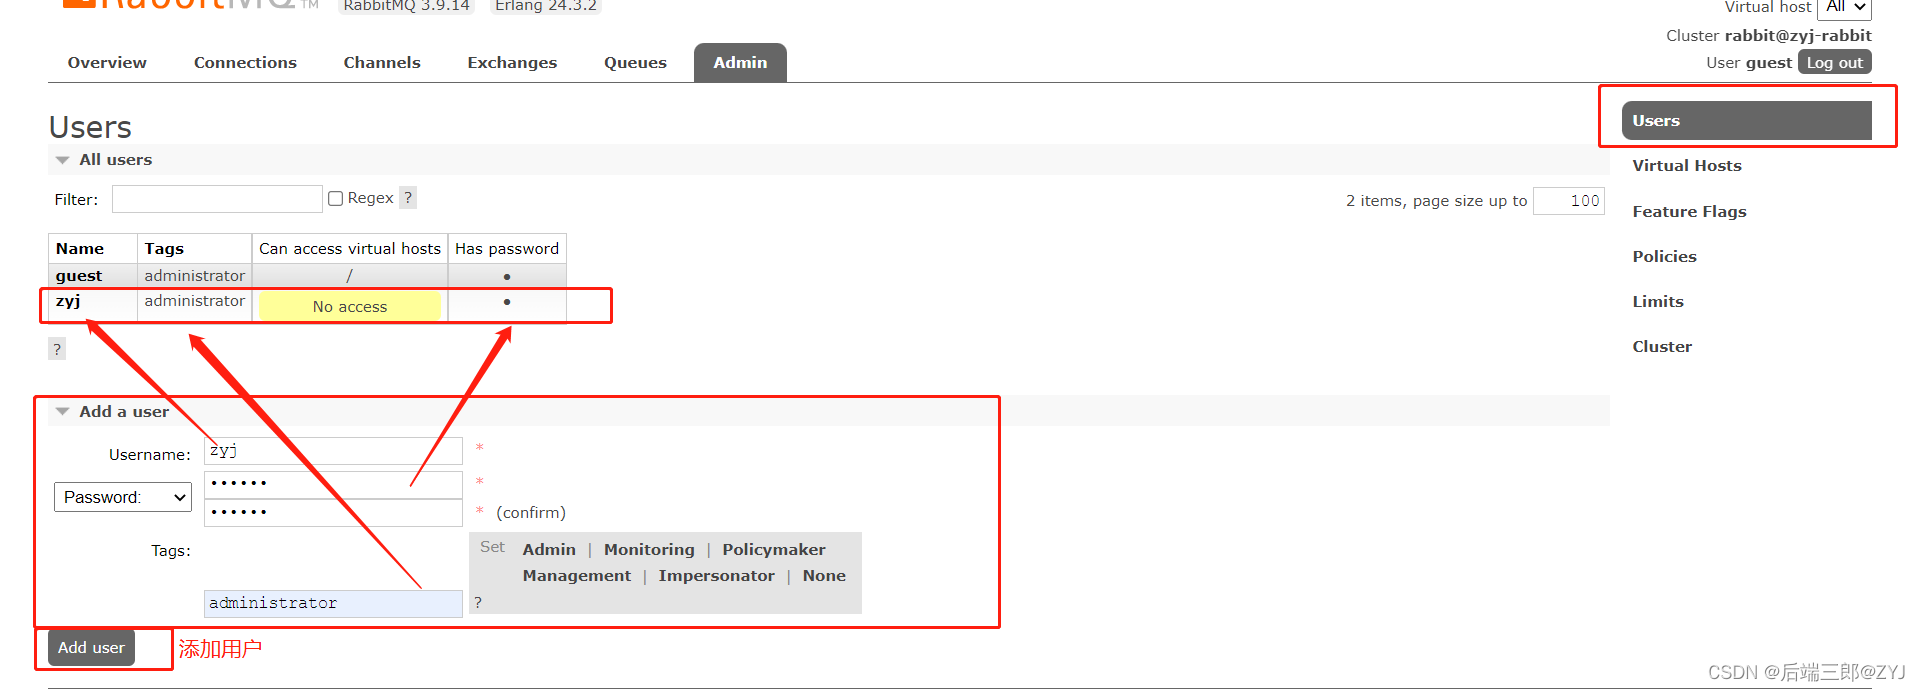
上面的Tags选项,其实是指定用户的角色,可选的有以下几个:
超级管理员(Administrator)可登陆管理控制台,可查看所有的信息,并且可以对用户,策略(policy)进行操作。
监控者(Monitoring)可登陆管理控制台,同时可以查看rabbitmq节点的相关信息(进程数,内存使用情况,磁盘使用情况等)
策略制定者(policymaker)可登陆管理控制台, 同时可以对policy进行管理。但无法查看节点的相关信息(上图红框标识的部分)。
普通管理者(Management)仅可登陆管理控制台,无法看到节点信息,也无法对策略进行管理。
其他无法登陆管理控制台,通常就是普通的生产者和消费者。
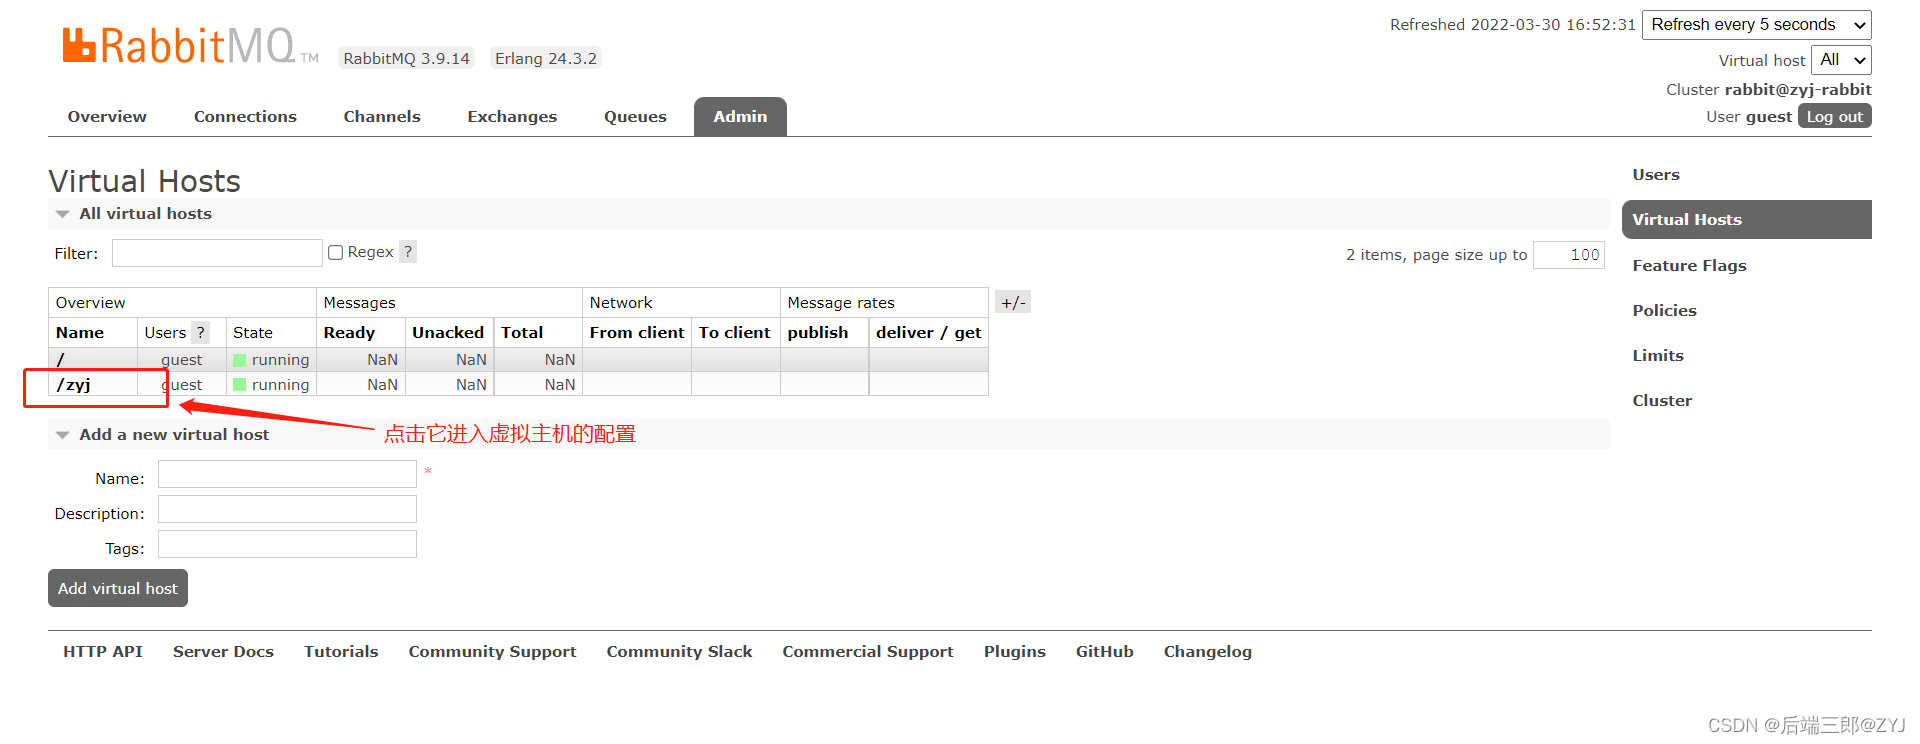
(2)创建虚拟主机
解释:****为了让各个用户可以互不干扰的工作,RabbitMQ添加了虚拟主机(Virtual Hosts)的概念。其实就是一个独立的访问路径,不同用户使用不同路径,各自有自己的队列、交换机,互相不会影响。

(3)虚拟主机和用户绑定
** 进入虚拟主机配置**
** 绑定用户和虚拟主机 **
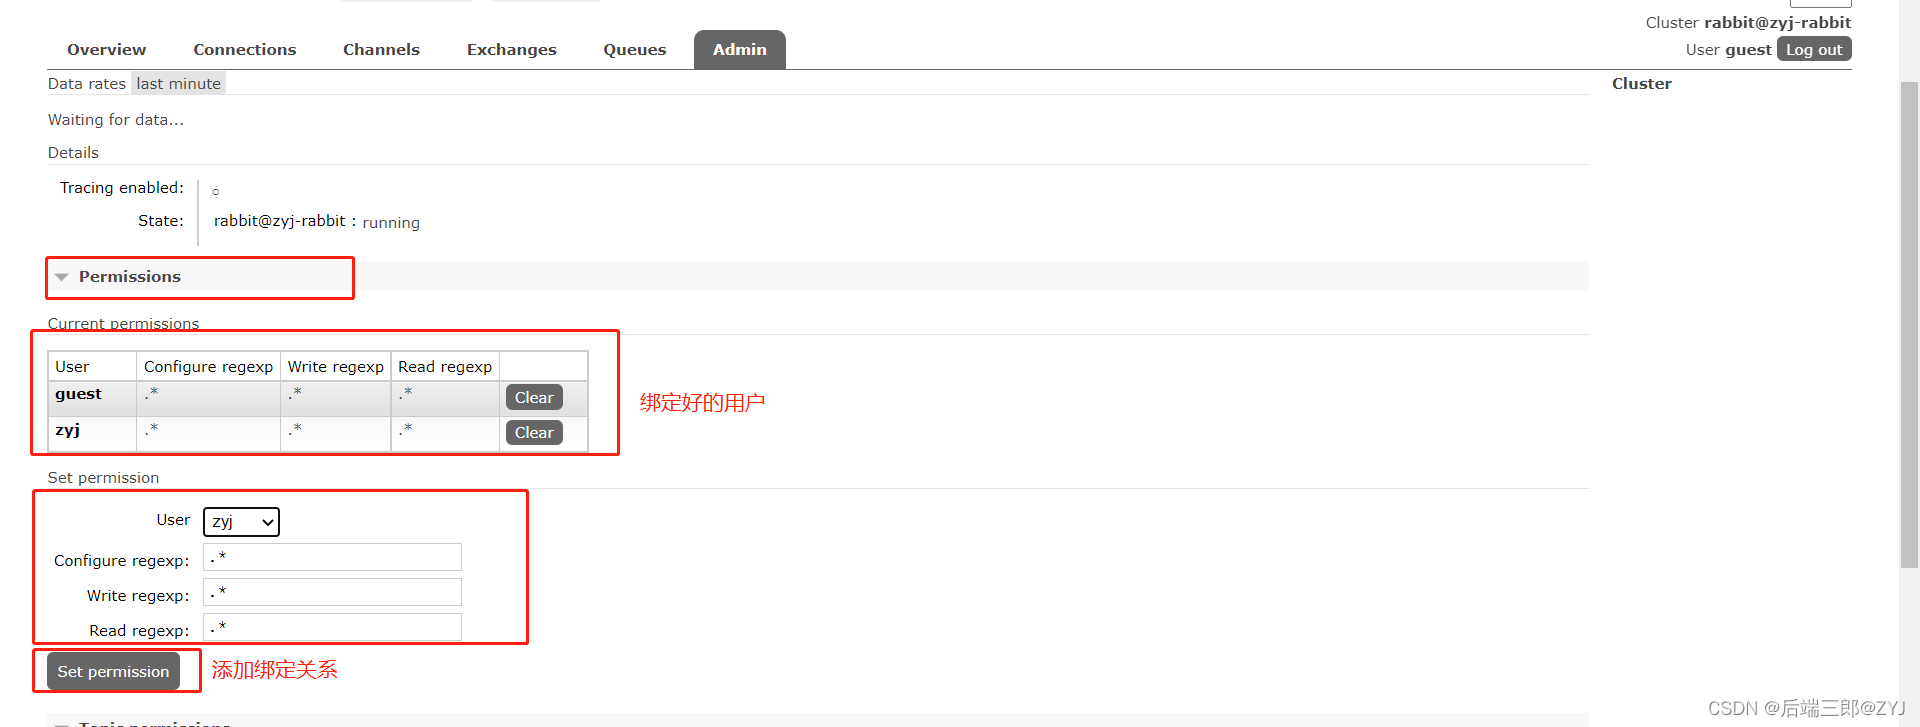
** 用户和虚拟主机绑定成功**

6.RabbitMQ支持的消息模型
第一种模型:直连
第二种模型:work quene
第三种模型:Publish/Subscribe
第四种模型:Routing
第五种模型:Topic


6.1引入依赖
        <dependency>
            <groupId>com.rabbitmq</groupId>
            <artifactId>amqp-client</artifactId>
            <version>5.7.2</version>
        </dependency>
6.1.1第一种模型(直连)
P:生产者,就是要发送消息的程序。
C:消费者,会一直等待消息的到来。
queue:消息队列,图中红色部分,类似一个邮箱,可以缓存消息,生产者向其中投递消息,消费者从其中取出消息。
开发生产者
public static void main(String[] args) throws IOException, TimeoutException {
        //创建连接MQ的连接工厂对象
        ConnectionFactory connectionFactory = new ConnectionFactory();
        //设置连接rabbitmq主机
        connectionFactory.setHost("8.141.53.148");
        //设置端口号
        connectionFactory.setPort(5672);
        //设置访问虚拟主机的用户名
        connectionFactory.setUsername("guest");
        //设置访问虚拟主机的密码
        connectionFactory.setPassword("guest");
        //设置连接哪个虚拟主机
        connectionFactory.setVirtualHost("/zyj");
        //获取连接对象
        Connection connection = connectionFactory.newConnection();
        //获取连接中的通道
        Channel channel = connection.createChannel();
        //通道绑定消息队列
        //参数1: 队列名称(不存在的情况下自动创建)
        //参数2:用来定义队列是否要持久化 true持久化 false不持久化,如果不持久化在重新启动rabbitmq之后队列会消失
        //参数3:是否独占队列 true独占  false不独占
        //参数4:是否在消费完成后自动删除队列 true自动删除 false不删除
        //参数5:额外附加参数
        channel.queueDeclare("hello",false,false,false,null);
        //发布消息
        //参数1:交换机名称
        //参数2:队列名称
        //参数3:传递消息额外设置,此参数可以设置消息的持久化,不设置持久化重启之后消息会消失,设置为MessageProperties.PERSISTENT_TEXT_PLAIN即是消息持久化
        channel.basicPublish("","hello", MessageProperties.PERSISTENT_TEXT_PLAIN,"hello rabbitmq".getBytes());
        //关闭通道
        channel.close();
        //关闭主机
        connection.close();
    }
** 注:虚拟需要开通5672的端口,云服务器需要安全组配置5672的端口。**
执行代码,创建队列,向队列中发送消息
开发消费者
public static void main(String[] args) throws Exception {
        //创建连接工厂
        ConnectionFactory connectionFactory = new ConnectionFactory();
        //设置连接rabbitmq主机
        connectionFactory.setHost("8.141.53.148");
        //设置端口号
        connectionFactory.setPort(5672);
        //设置访问虚拟主机的用户名
        connectionFactory.setUsername("guest");
        //设置访问虚拟主机的密码
        connectionFactory.setPassword("guest");
        //设置连接哪个虚拟主机
        connectionFactory.setVirtualHost("/zyj");
        //获取连接对象
        Connection connection = connectionFactory.newConnection();
        //获取连接中的通道
        Channel channel = connection.createChannel();
        //通道绑定消息队列
        //参数1: 队列名称(不存在的情况下自动创建)
        //参数2:用来定义队列是否要持久化 true持久化 false不持久化
        //参数3:是否独占队列 true独占  false不独占
        //参数4:是否在消费完成后自动删除队列 true自动删除 false不删除
        //参数5:额外附加参数
        channel.queueDeclare("hello",false,false,false,null);
        //消费消息
        //参数1:消息队列名称
        //参数2:开始消息的自动确认机制
        //参数3:消费时的回调接口
        channel.basicConsume("hello",true,new DefaultConsumer(channel){
            @Override//最后一个参数:消息队列中取出的消息
            public void handleDelivery(String consumerTag, Envelope envelope, AMQP.BasicProperties properties, byte[] body) {
                System.out.println("==============="+new String(body));
            }
        });
        //需要不断的监测队列,不推荐关闭(因为我们需要不停的监控回调接口的处理)
        //关闭不输出消费者信息,不关闭可以打印出消费着信息
        //channel.close();
        //connection.close();
    }
执行代码,获取队列中的消息进行消费,输出队列中的参数。


代码优化封装工具类
package com.example.demo.test.studyRabbitmq;

import com.rabbitmq.client.Channel;
import com.rabbitmq.client.Connection;
import com.rabbitmq.client.ConnectionFactory;

public class RabbitMqUtils {

    private static ConnectionFactory connectionFactory;

    //static静态代码块的作用是它是在类加载的时候执行
    static{
        //创建连接MQ的连接工厂对象
        connectionFactory = new ConnectionFactory();
        //设置连接rabbitmq主机
        connectionFactory.setHost("8.141.53.148");
        //设置端口号
        connectionFactory.setPort(5672);
        //设置访问虚拟主机的用户名
        connectionFactory.setUsername("guest");
        //设置访问虚拟主机的密码
        connectionFactory.setPassword("guest");
        //设置连接哪个虚拟主机
        connectionFactory.setVirtualHost("/zyj");
    }

    //提供连接对象的方法
    public static Connection getConnection(){
        try {
            //获取连接对象
            return connectionFactory.newConnection();
        }catch (Exception e){
            e.printStackTrace();
        }
        return null;
    }

    //关闭通道和关闭连接对象的方法
    public static void closeConnectionAndChannel(Connection connection, Channel channel){
        try {
            if(channel!=null)    channel.close();
            if(connection!=null)  connection.close();
        } catch (Exception e) {
            e.printStackTrace();
        }
    }

}
生产者代码
package com.example.demo.test.studyRabbitmq;

import com.rabbitmq.client.*;

import java.io.IOException;
import java.util.concurrent.TimeoutException;

public class RabbitmqPublishTest {

    public static void main(String[] args) throws IOException, TimeoutException {
        //调用工具类
        Connection connection = RabbitMqUtils.getConnection();
        //获取连接中的通道
        Channel channel = connection.createChannel();
        //通道绑定消息队列
        //参数1: 队列名称(不存在的情况下自动创建)
        //参数2:用来定义队列是否要持久化 true持久化 false不持久化,如果不持久化在重新启动rabbitmq之后队列会消失
        //参数3:是否独占队列 true独占  false不独占
        //参数4:是否在消费完成后自动删除队列 true自动删除 false不删除
        //参数5:额外附加参数
        channel.queueDeclare("hello",false,false,false,null);
        //发布消息
        //参数1:交换机名称
        //参数2:队列名称
        //参数3:传递消息额外设置,此参数可以设置消息的持久化,不设置持久化重启之后消息会消失,设置为MessageProperties.PERSISTENT_TEXT_PLAIN即是消息持久化
        //参数4:消息的具体内容
        channel.basicPublish("","hello", null,"hello rabbitmq".getBytes());
        //关闭通道和主机
        RabbitMqUtils.closeConnectionAndChannel(connection,channel);
    }

}
消费者代码
package com.example.demo.test.studyRabbitmq;

import com.rabbitmq.client.*;

public class RabbitmqConsumeTest {

    public static void main(String[] args) throws Exception {
        //调用工具类
        Connection connection = RabbitMqUtils.getConnection();
        //获取连接中的通道
        Channel channel = connection.createChannel();
        //通道绑定消息队列
        //参数1: 队列名称(不存在的情况下自动创建)
        //参数2:用来定义队列是否要持久化 true持久化 false不持久化
        //参数3:是否独占队列 true独占  false不独占
        //参数4:是否在消费完成后自动删除队列 true自动删除 false不删除
        //参数5:额外附加参数
        channel.queueDeclare("hello",false,false,false,null);
        //消费消息
        //参数1:消息队列名称
        //参数2:开始消息的自动确认机制
        //参数3:消费时的回调接口
        channel.basicConsume("hello",true,new DefaultConsumer(channel){
            @Override//最后一个参数:消息队列中取出的消息
            public void handleDelivery(String consumerTag, Envelope envelope, AMQP.BasicProperties properties, byte[] body) {
                System.out.println("==============="+new String(body));
            }
        });
        //需要不断的监测队列,不推荐关闭(因为我们需要不停的监控回调接口的处理)
//        channel.close();
//        connection.close();
    }

}
6.1.2第二种模型(work quene)
P:生产者
C1:消费者1
C2:消费者2
在消息处理比较耗时的时候,可能产生的消息的速度远远大于消息消费的速度,长此以往,消息就会堆积的越来越多,无法及时处理,此时就可以使用第二种模型 work quene ,让多个消费者绑定一个队列,共同消费队列中的消息。
开发生产者
package com.example.demo.test.studyRabbitmq.workQuene;

import com.example.demo.test.studyRabbitmq.RabbitMqUtils;
import com.rabbitmq.client.Channel;
import com.rabbitmq.client.Connection;

import java.io.IOException;

public class Provider {

    public static void main(String[] args) throws IOException {
        //获取连接对象
        Connection connection = RabbitMqUtils.getConnection();
        //获取对象通道
        Channel channel = connection.createChannel();
        //通过通道生命队列
        channel.queueDeclare("work",false,false,false,null);
        //循环生产10条消息
        for (int i = 0; i < 10; i++) {
            System.out.println(i);
            //生产消息
            channel.basicPublish("","work",null,(i+"hello word").getBytes());
        }
        RabbitMqUtils.closeConnectionAndChannel(connection,channel);
    }

}
开发消费者1
package com.example.demo.test.studyRabbitmq.workQuene;

import com.example.demo.test.studyRabbitmq.RabbitMqUtils;
import com.rabbitmq.client.*;

import java.io.IOException;

public class Customer1 {

    public static void main(String[] args) throws IOException {
        //获取连接对象
        Connection connection = RabbitMqUtils.getConnection();
        //获取对象通道
        Channel channel = connection.createChannel();
        //通过通道绑定队列
        channel.queueDeclare("work",false,false,false,null);
        //消费消息
        channel.basicConsume("work",true,new DefaultConsumer(channel){
            @Override//最后一个参数:消息队列中取出的消息
            public void handleDelivery(String consumerTag, Envelope envelope, AMQP.BasicProperties properties, byte[] body) {
                System.out.println("消费者1:"+new String(body));
            }
        });
    }

}
开发消费者2
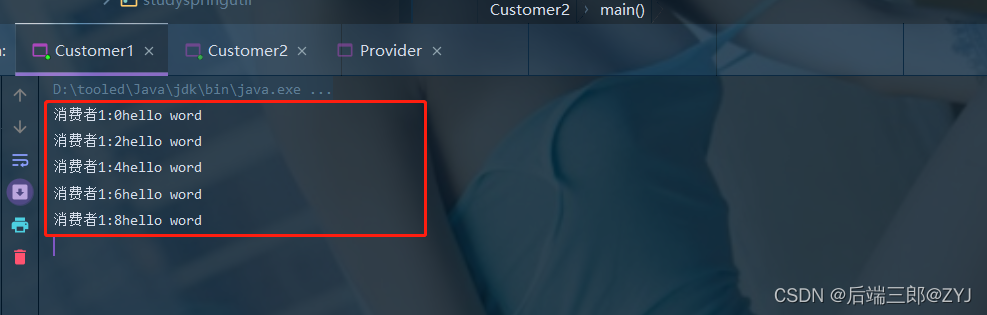
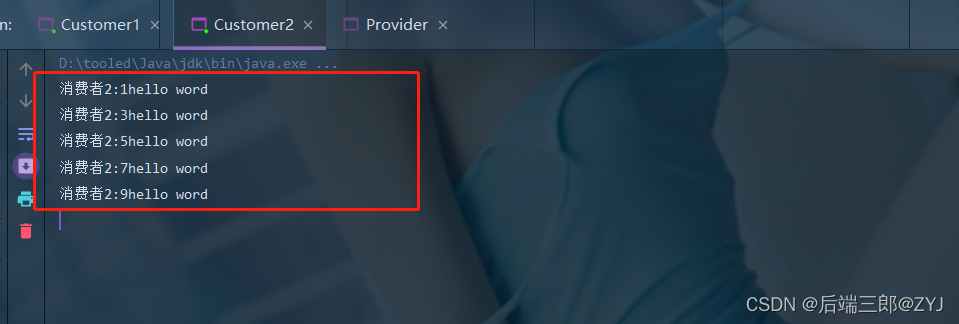
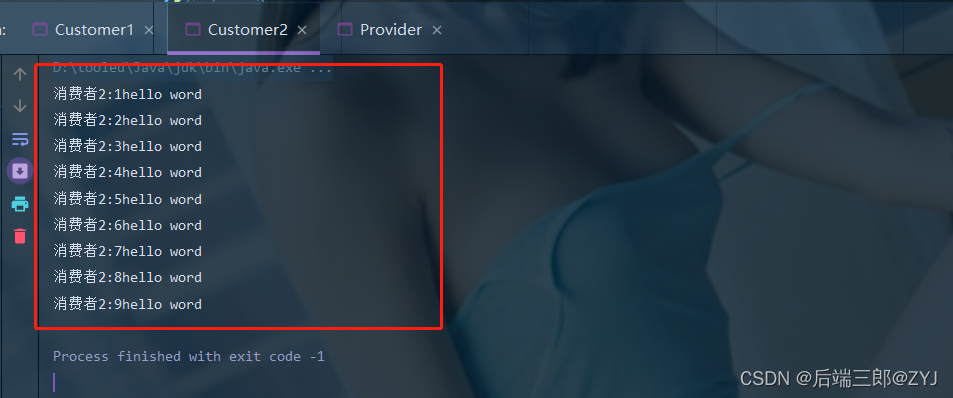
package com.example.demo.test.studyRabbitmq.workQuene;

import com.example.demo.test.studyRabbitmq.RabbitMqUtils;
import com.rabbitmq.client.*;

import java.io.IOException;

public class Customer2 {

    public static void main(String[] args) throws IOException {
        //获取连接对象
        Connection connection = RabbitMqUtils.getConnection();
        //获取对象通道
        Channel channel = connection.createChannel();
        //通过通道绑定队列
        channel.queueDeclare("work",false,false,false,null);
        //消费消息
        channel.basicConsume("work",true,new DefaultConsumer(channel){
            @Override//最后一个参数:消息队列中取出的消息
            public void handleDelivery(String consumerTag, Envelope envelope, AMQP.BasicProperties properties, byte[] body) {
                System.out.println("消费者2:"+new String(body));
            }
        });
    }

}
测试结果
总结
默认这种方式是按照顺序将每条消息发送给消费者,每个消费者会收到相同的数量,这种分发消息的方式称为循环。(缺点:假设一个消费者处理快,一个处理慢,会拖垮我们的项目,理想效果是能者多劳,处理快的多处理点,慢的少处理点)
能者多劳
消息确认机制:队列一股脑将10条消息发送给消费者,队列自动确认消息消费完毕(告诉了消费者就认为消费者处理完毕),队列就会删除队列中的数据。但是此时,消费者1处理第二条消息宕机了,队列也会认为处理完毕了消息,就会丢失剩余的消息。如果避免这种情况发生,首先就是关闭消息自动确认机制,不能一次性将消息全部消费。
其次设置每次通道传送给消费者几条消息,当通道关闭将所有消息一股脑的全部发给消费者的时候,也就实现了能者多劳,通道中一条数据,谁执行的快,谁执行下一个消息。
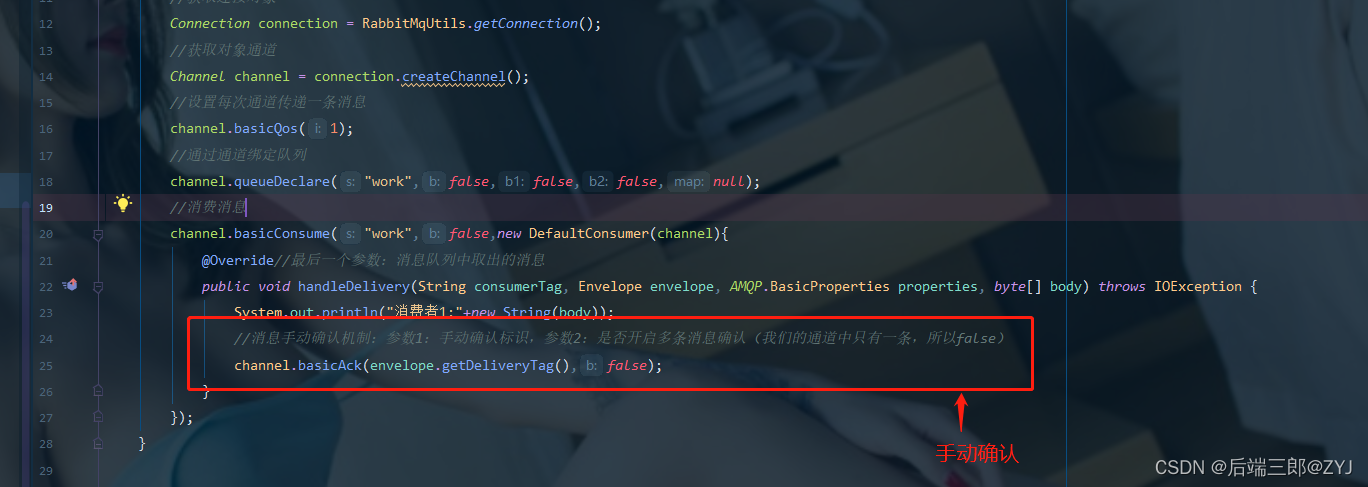
最后每条消息消费完毕之后进行手动确认(好处:完成一条确认一条,保证消息永不丢失)
修改完的消费者1
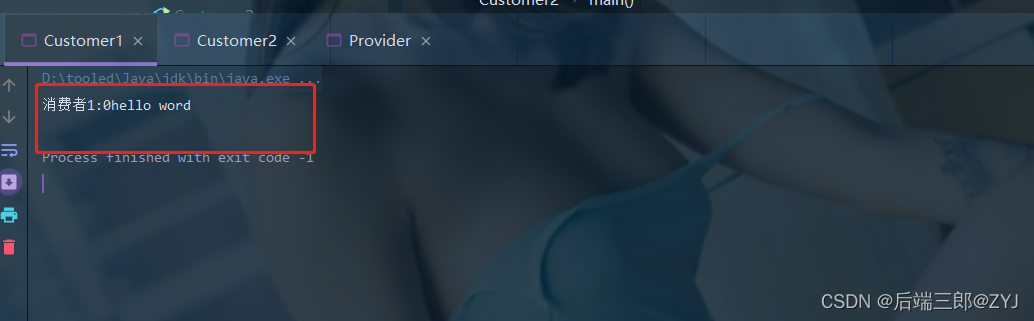
为了测试效果更加明显,让消费者1处理消息前睡眠1秒或者更多,效果更加明显
package com.example.demo.test.studyRabbitmq.workQuene;

import com.example.demo.test.studyRabbitmq.RabbitMqUtils;
import com.rabbitmq.client.*;

import java.io.IOException;

public class Customer1 {

    public static void main(String[] args) throws IOException {
        //获取连接对象
        Connection connection = RabbitMqUtils.getConnection();
        //获取对象通道
        Channel channel = connection.createChannel();
        //设置每次通道传递一条消息
        channel.basicQos(1);
        //通过通道绑定队列
        channel.queueDeclare("work",false,false,false,null);
        //消费消息
        channel.basicConsume("work",false,new DefaultConsumer(channel){
            @Override//最后一个参数:消息队列中取出的消息
            public void handleDelivery(String consumerTag, Envelope envelope, AMQP.BasicProperties properties, byte[] body) throws IOException {
                try {
                    Thread.sleep(1000);
                    System.out.println("消费者1:"+new String(body));
                    //消息手动确认机制:参数1:手动确认标识,参数2:是否开启多条消息确认(我们的通道中只有一条,所以false)
                    channel.basicAck(envelope.getDeliveryTag(),false);
                } catch (InterruptedException e) {
                    e.printStackTrace();
                }

            }
        });
    }

}
修改完的消费者2
package com.example.demo.test.studyRabbitmq.workQuene;

import com.example.demo.test.studyRabbitmq.RabbitMqUtils;
import com.rabbitmq.client.*;

import java.io.IOException;

public class Customer2 {

    public static void main(String[] args) throws IOException {
        //获取连接对象
        Connection connection = RabbitMqUtils.getConnection();
        //获取对象通道
        Channel channel = connection.createChannel();
        //设置每次通道传递一条消息
        channel.basicQos(1);
        //通过通道绑定队列
        channel.queueDeclare("work",false,false,false,null);
        //消费消息
        channel.basicConsume("work",false,new DefaultConsumer(channel){
            @Override//最后一个参数:消息队列中取出的消息
            public void handleDelivery(String consumerTag, Envelope envelope, AMQP.BasicProperties properties, byte[] body) throws IOException {
                System.out.println("消费者2:"+new String(body));
                //消息手动确认机制:参数1:手动确认标识,参数2:是否开启多条消息确认(我们的通道中只有一条,所以false)
                channel.basicAck(envelope.getDeliveryTag(),false);
            }
        });
    }

}
测试结果
至此:完美实现能者多劳


6.1.3第三种模型(publish/subscribe)
这种模式称为广播模式
可以有多个消费者
每个消费者都有自己的队列
每个队列都需要绑定到交换机
生产者发送消息,只能发送到交换机,由交换机绝对发送给哪个队列,生产者无法决定
交换机把消息发送给所有绑定过的队列
实现了一条消息被多个消费者消费
生产者代码
package com.example.demo.test.studyRabbitmq.fanout;

import com.example.demo.test.studyRabbitmq.RabbitMqUtils;
import com.rabbitmq.client.Channel;
import com.rabbitmq.client.Connection;

import java.io.IOException;

public class Provider {

    public static void main(String[] args) throws IOException {
        //获取连接对象
        Connection connection = RabbitMqUtils.getConnection();
        //获取对象通道
        Channel channel = connection.createChannel();
        //将通道声明交换机
        channel.exchangeDeclare("logs","fanout");
        //发送消息到交换机
        channel.basicPublish("logs","",null,"fanout type".getBytes());
        //关闭连接
        RabbitMqUtils.closeConnectionAndChannel(connection,channel);

    }

}
消费者代码1
package com.example.demo.test.studyRabbitmq.fanout;

import com.example.demo.test.studyRabbitmq.RabbitMqUtils;
import com.rabbitmq.client.*;

import java.io.IOException;

public class Customer1 {

    public static void main(String[] args) throws IOException {
        //获取连接对象
        Connection connection = RabbitMqUtils.getConnection();
        //获取对象通道
        Channel channel = connection.createChannel();
        //通道绑定交换机
        channel.exchangeDeclare("logs","fanout");
        //临时队列
        String queue = channel.queueDeclare().getQueue();
        //绑定交换机和队列
        channel.queueBind(queue,"logs","");
        //消费消息
        channel.basicConsume(queue,true,new DefaultConsumer(channel){
            @Override
            public void handleDelivery(String consumerTag, Envelope envelope, AMQP.BasicProperties properties, byte[] body){
                System.out.println("消费者1:"+new String(body));
            }
        });


    }

}
消费者代码2
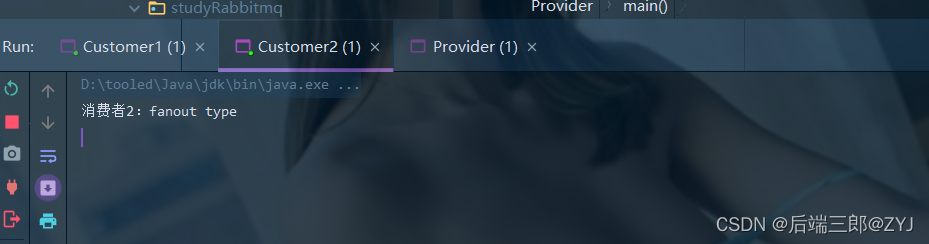
package com.example.demo.test.studyRabbitmq.fanout;

import com.example.demo.test.studyRabbitmq.RabbitMqUtils;
import com.rabbitmq.client.*;

import java.io.IOException;

public class Customer2 {

    public static void main(String[] args) throws IOException {
        //获取连接对象
        Connection connection = RabbitMqUtils.getConnection();
        //获取对象通道
        Channel channel = connection.createChannel();
        //通道绑定交换机
        channel.exchangeDeclare("logs","fanout");
        //临时队列
        String queue = channel.queueDeclare().getQueue();
        //绑定交换机和队列
        channel.queueBind(queue,"logs","");
        //消费消息
        channel.basicConsume(queue,true,new DefaultConsumer(channel){
            @Override
            public void handleDelivery(String consumerTag, Envelope envelope, AMQP.BasicProperties properties, byte[] body){
                System.out.println("消费者2:"+new String(body));
            }
        });

    }

}
测试结果

6.1.4第四种模型(Routing)
在某些场景下,我们希望不同的消息被不同的队列进行消费,就需要用到这种模型
在Routing的模型下也是(direct路由模式):
- 队列与交换机的绑定,不能是任意绑定,而是需要指定一个Routing key(路由key)
- 消息的发送方在向Exchange发消息时,也必须指定消息的Routing key
- Exchange不再把消息交给每一个绑定的队列,而是根据消息的Routingkey进行判断,只有队列的Routingkey和消息的Routingkey完全一致,才能接收到消息。
生产者代码
package com.example.demo.test.studyRabbitmq.routing;

import com.example.demo.test.studyRabbitmq.RabbitMqUtils;
import com.rabbitmq.client.Channel;
import com.rabbitmq.client.Connection;

import java.io.IOException;

public class Provider {

    public static void main(String[] args) throws IOException {
        //获取连接对象
        Connection connection = RabbitMqUtils.getConnection();
        //获取连接通道对象
        Channel channel = connection.createChannel();
        //将通道声明交换机 参数1交换机名称  参数2路由模式
        channel.exchangeDeclare("logs-routing","direct");
        //发送消息  参数2 Routing-key名称
        channel.basicPublish("logs-routing","info",null,"direct路由模式生产者测试".getBytes());
        //关闭资源
        RabbitMqUtils.closeConnectionAndChannel(connection,channel);
    }

}
消费者代码1
package com.example.demo.test.studyRabbitmq.routing;

import com.example.demo.test.studyRabbitmq.RabbitMqUtils;
import com.rabbitmq.client.*;

import java.io.IOException;

public class Customer1 {

    public static void main(String[] args) throws IOException {
        //获取连接对象
        Connection connection = RabbitMqUtils.getConnection();
        //获取连接通道对象
        Channel channel = connection.createChannel();
        //声明交换机和交换机类型
        channel.exchangeDeclare("logs-routing","direct");
        //创建一个临时队列
        String queue = channel.queueDeclare().getQueue();
        //基于Routing key 绑定交换机和队列,绑定key为error的队列,此处可以绑定多个Routingkey,如下我就绑定了两个info和error
        channel.queueBind(queue,"logs-routing","info");
        channel.queueBind(queue,"logs-routing","error");
        //获取消费消息
        channel.basicConsume(queue,true,new DefaultConsumer(channel){
            @Override
            public void handleDelivery(String consumerTag, Envelope envelope, AMQP.BasicProperties properties, byte[] body) throws IOException {
                System.out.println("消费者1的消息:"+new String(body));
            }
        });
    }

}
消费者代码2
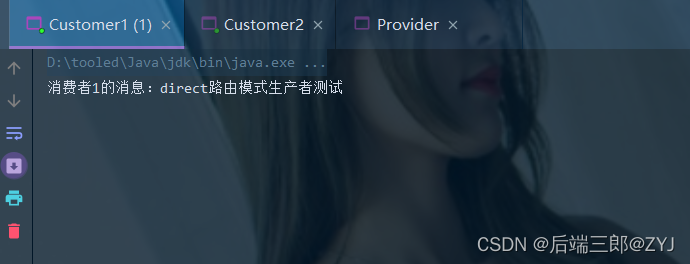
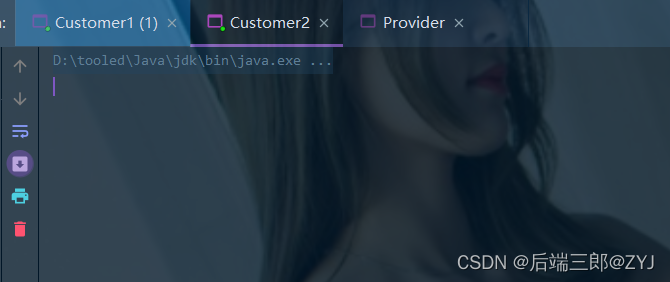
package com.example.demo.test.studyRabbitmq.routing;

import com.example.demo.test.studyRabbitmq.RabbitMqUtils;
import com.rabbitmq.client.*;

import java.io.IOException;

public class Customer2 {

    public static void main(String[] args) throws IOException {
        //获取连接对象
        Connection connection = RabbitMqUtils.getConnection();
        //获取连接通道对象
        Channel channel = connection.createChannel();
        //声明交换机和交换机类型
        channel.exchangeDeclare("logs-routing","direct");
        //创建一个临时队列
        String queue = channel.queueDeclare().getQueue();
        //基于Routing key 绑定交换机和队列,绑定key为error的队列
        channel.queueBind(queue,"logs-routing","error");
        //获取消费消息
        channel.basicConsume(queue,true,new DefaultConsumer(channel){
            @Override
            public void handleDelivery(String consumerTag, Envelope envelope, AMQP.BasicProperties properties, byte[] body) throws IOException {
                System.out.println("消费者2的消息:"+new String(body));
            }
        });
    }
}
测试结果
测试结果可以看出消费者1成功接收到消息,消费者2没有收到消息
6.1.5第五种模型(Topic)
和路由模式不用的是这种方法不用再写死Routing key,可以使用通配符的方式进行匹配
通配符有两种 * 和 # 两种用法如下:例如
user.* 可以匹配user.name user.sex user.key等
user.# 可以匹配user.name.sex.key
*只能代表一个单词,而#可以代表一个或者多个单词
生产者代码
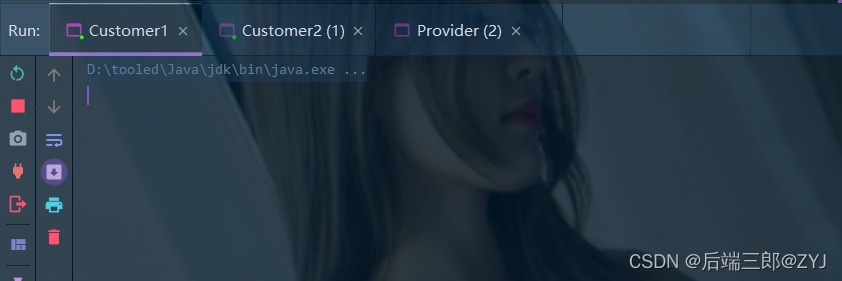
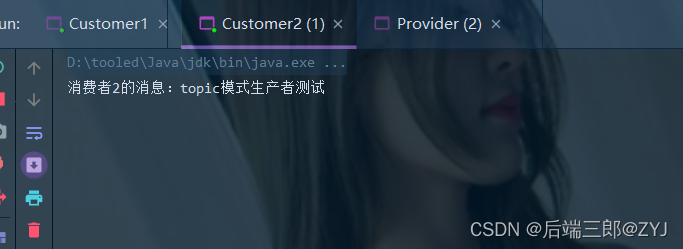
package com.example.demo.test.studyRabbitmq.topic;

import com.example.demo.test.studyRabbitmq.RabbitMqUtils;
import com.rabbitmq.client.Channel;
import com.rabbitmq.client.Connection;

import java.io.IOException;

public class Provider {

    public static void main(String[] args) throws IOException {
        //获取连接对象
        Connection connection = RabbitMqUtils.getConnection();
        //获取连接通道对象
        Channel channel = connection.createChannel();
        //将通道声明交换机 参数1交换机名称  参数2路由模式
        channel.exchangeDeclare("topics","topic");
        //发送消息  参数2 Routing-key名称
        channel.basicPublish("topics","user.login.topic",null,"topic模式生产者测试".getBytes());
        //关闭资源
        RabbitMqUtils.closeConnectionAndChannel(connection,channel);
    }

}
消费者代码1
package com.example.demo.test.studyRabbitmq.topic;

import com.example.demo.test.studyRabbitmq.RabbitMqUtils;
import com.rabbitmq.client.*;

import java.io.IOException;

public class Customer1 {

    public static void main(String[] args) throws IOException {
        //获取连接对象
        Connection connection = RabbitMqUtils.getConnection();
        //获取连接通道对象
        Channel channel = connection.createChannel();
        //声明交换机和交换机类型
        channel.exchangeDeclare("topics","topic");
        //创建一个临时队列
        String queue = channel.queueDeclare().getQueue();
        //基于通配符的方式绑定Routingkey
        channel.queueBind(queue,"topics","user.*");
        //获取消费消息
        channel.basicConsume(queue,true,new DefaultConsumer(channel){
            @Override
            public void handleDelivery(String consumerTag, Envelope envelope, AMQP.BasicProperties properties, byte[] body) throws IOException {
                System.out.println("消费者1的消息:"+new String(body));
            }
        });
    }
}
消费者代码2
package com.example.demo.test.studyRabbitmq.topic;

import com.example.demo.test.studyRabbitmq.RabbitMqUtils;
import com.rabbitmq.client.*;

import java.io.IOException;

public class Customer2 {

    public static void main(String[] args) throws IOException {
        //获取连接对象
        Connection connection = RabbitMqUtils.getConnection();
        //获取连接通道对象
        Channel channel = connection.createChannel();
        //声明交换机和交换机类型
        channel.exchangeDeclare("topics","topic");
        //创建一个临时队列
        String queue = channel.queueDeclare().getQueue();
        //基于通配符的方式绑定Routingkey
        channel.queueBind(queue,"topics","user.#");
        //获取消费消息
        channel.basicConsume(queue,true,new DefaultConsumer(channel){
            @Override
            public void handleDelivery(String consumerTag, Envelope envelope, AMQP.BasicProperties properties, byte[] body) throws IOException {
                System.out.println("消费者1的消息:"+new String(body));
            }
        });
    }
}
测试结果
** 完结 **
版权归原作者 后端三郎@ZYJ 所有, 如有侵权,请联系我们删除。