背景
本文来自CODE.FUN ,讲述如何用纯 CSS 实现优惠券效果的实践案例,分享给大家。

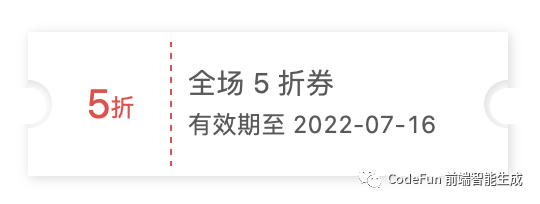
优惠券视觉效果
上面是优惠券的视觉效果,本文分享如何使用纯 CSS 实现它的主要框架,希望对大家有帮助。
0. 分析
首先,我们来分析一下这个优惠券的实现方案。
左边是摘要,右边是详情,这个部分用 display:flex 很容易就能搞定。中间的虚线,使用任意一个容器边框 + 少许 padding 即可实现。其它部分,也就是些字体行高,都不是很复杂。难点在于投影,尤其是左右两个挖空的半圆。
1. 尝试实现挖空效果
- 首先,我们给整个优惠券矩形加上投影
- 然后,我们给两边加上两个包含内投影的圆形
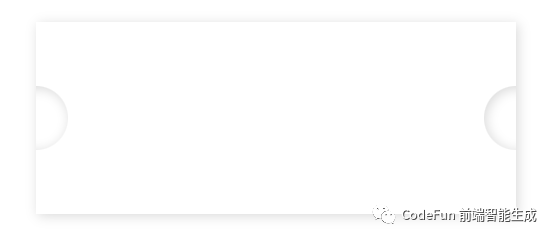
- 这个时候,两边的内投影原型会多出来一块,我们需要把它们盖住。但是,不能让矩形 overflow:hidden,因为投影也会变,如下图。

中间效果
.coupon {
  width: 15rem;
  height: 6rem;
  background: white;
  box-shadow: 1px 1px 6px rgba(0,0,0,.15);
  position: relative;
  overflow: hidden;

  &::before,
  &::after {
    background-color: white;
    border-radius: 1rem;
    box-shadow: inset 1px 1px 6px rgba(0, 0, 0, 0.15);
    content: '';
    width: 2rem;
    height: 2rem;
    position: absolute;
    top: 2rem;
    z-index: 1;
  }

  &::before {
    left: -1rem;
  }
  &::after {
    right: -1rem;
  }
}
2. 增加父容器
我的第一反应是增加父容器,让父容器 overflow:hidden 来隐藏多出来的部分。但是不行,会影响投影。
但是转念一想,我们可以不让父容器限制显示内容,而是在父容器内部增加一些元素,遮蔽多出来的内容。比如用两个纯色圆形,把竖着的阴影遮起来。
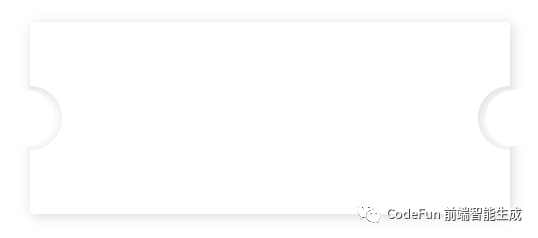
于是我把上面的样式更名为 .coupon-inner,然后增加一个父容器。父容器的 ::before ::after 伪元素都搞成略小一圈的纯色圆形,把竖着的投影挡住,最终效果如下图。

接近最终效果
3. 总结
到这里,效果就基本让人满意了。最终完成的代码如下:
.coupon {
  width: 15rem;
  height: 6rem;
  position: relative;

  &::before,
  &::after {
    content: '';
    position: absolute;
    top: calc(2rem + 2px);
    width: calc(2rem - 4px);
    height: calc(2rem - 4px);
    background-color: white;
    z-index: 2;
  }

  &::before {
    left: -1rem;
    border-radius: 0 calc(1rem - 2px) calc(1rem - 2px) 0;
  }

  &::after {
    right: -1rem;
    border-radius: calc(1rem - 2px) 0 0 calc(1rem - 2px);
  }
}

.coupon-inner {
  width: 100%;
  height: 100%;
  background: white;
  box-shadow: 1px 1px 6px rgba(0,0,0,.15);
  position: relative;
  overflow: hidden;

  &::before,
  &::after {
    background-color: white;
    border-radius: 1rem;
    box-shadow: inset 1px 1px 6px rgba(0, 0, 0, 0.15);
    content: '';
    width: 2rem;
    height: 2rem;
    position: absolute;
    top: 2rem;
    z-index: 1;
  }

  &::before {
    left: -1rem;
  }

  &::after {
    right: -1rem
  }
}
你也可以在 codepen 里做进一步的调整:
前往 CodePen
使用纯 CSS 的好处,在于体积小、加载快,调整起来非常灵活。我们建议前端开发者,能用 CSS 最好都用 CSS。
有任何问题和建议,欢迎评论、讨论。
版权归原作者 CodeFunTeam 所有, 如有侵权,请联系我们删除。