一、Web Serial API介绍
Web Serial API 是一项 Web 技术,用于在浏览器中访问串行端口设备(如 Arduino、传感器等)并与之通信。它提供了一组 JavaScript 接口,使得 Web 应用程序可以通过 USB 串行端口连接到硬件设备,并进行数据发送和接收操作。
二、软件环境介绍
    浏览器版本:Google Chrome 版本 113.0.5672.127

    Node.js版本:Node.js v16.9.1

    Vue脚手架版本:@vue/cli 5.0.8

    Vue版本:vue : 3.2.13

    Element-plus版本:element-plus: 2.3.5
三、Web Serial API接口函数简介
Web Serial API 提供了一些接口函数,用于在浏览器中访问串行端口设备并与之通信。以下是常用的 Web Serial API 接口函数:
- navigator.serial.requestPort():弹出一个选择对话框,让用户选择一个串行端口设备。
- port.open(baudrate): 打开指定的串行端口,并指定波特率。
- port.write(data): 将数据写入打开的串行端口。
- port.readable.getReader(): 获取可读取流。
- reader.read(): 从串行端口读取数据。
- reader.cancel(): 取消当前读取操作。
- port.close(): 关闭已打开的串行端口。
四、功能实现
4.1判断是否当前浏览器是否支持API
/*
生命周期函数
当挂载完成之后,对浏览器是否支持本网页进行检查
*/
onMounted(() => {
    if ("serial" in navigator) {
    } else {
        ElNotification({
            title: '浏览器版本低',
            message: '您的浏览器版本太低,可能不支持浏览器串口的使用',
            type: 'error',
            duration: 20000
        })
    }
})
4.2 选择串口
按键click的响应函数
// 选择串口
const chooseSerial = async () => {
    // 提示用户选择一个串口
    try {
        port.value = await navigator.serial.requestPort();
        console.log(port.value);
    } catch (error) {
        // 错误提示弹窗
        ElNotification({title: '选择串口失败',message: '错误信息:' + error,type: 'warning',duration: 2000})
        return;
    }
    ElNotification({title: '选择串口成功',message: '打开串口接收信息',type: 'success',duration: 2000})
}
4.3 串口配置信息
// 串口配置
const port = ref(null)
const reader = ref(null)
const message = ref(null)
const connected = ref(null)
const serialOptions = {
    baudRate: 9600,
    flowControl: 'none',
    dataBits: 8
};
4.4 打开串口接收信息
// 2.打开串口
const openSerial = async () => {
    try {
        await port.value.open(serialOptions)
        reader.value = port.value.readable.getReader()
        connected.value = true
    } catch (error) {
        ElNotification({title: '打开串口失败',message: error,type: 'warning',duration: 2000})
        return;
    }
    ElNotification({title: '打开串口成功',message: '串口等待接收信息中',type: 'success',duration: 2000})
    readLoop()
}
// readLoop()串口读取函数
async function readLoop() {
    try {
        while (connected.value) {
            const { value, done } = await reader.value.read()
            if (done) {
                reader.value.releaseLock()
                break
            }
            message.value = new TextDecoder().decode(value)
        }
    } catch (error) {
        ElNotification({title: '读取串口失败',message: `串口读取信息失败:${error}`,type: 'error',duration: 2000})
    }
}
4.5 关闭串口
// 3.关闭串口
const closeSerial = async () => {
    try {
        await reader.value.cancel()
        await port.value.close()
        connected.value = false
    } catch (error) {
        ElNotification({title: '关闭串口失败',message: '请检查后重新关闭串口',type: 'warning',duration: 2000})
        return;
    }
    ElNotification({title: '关闭串口成功',message: `已关闭串口:${port.value.name}`,type: 'success',duration: 2000})
}
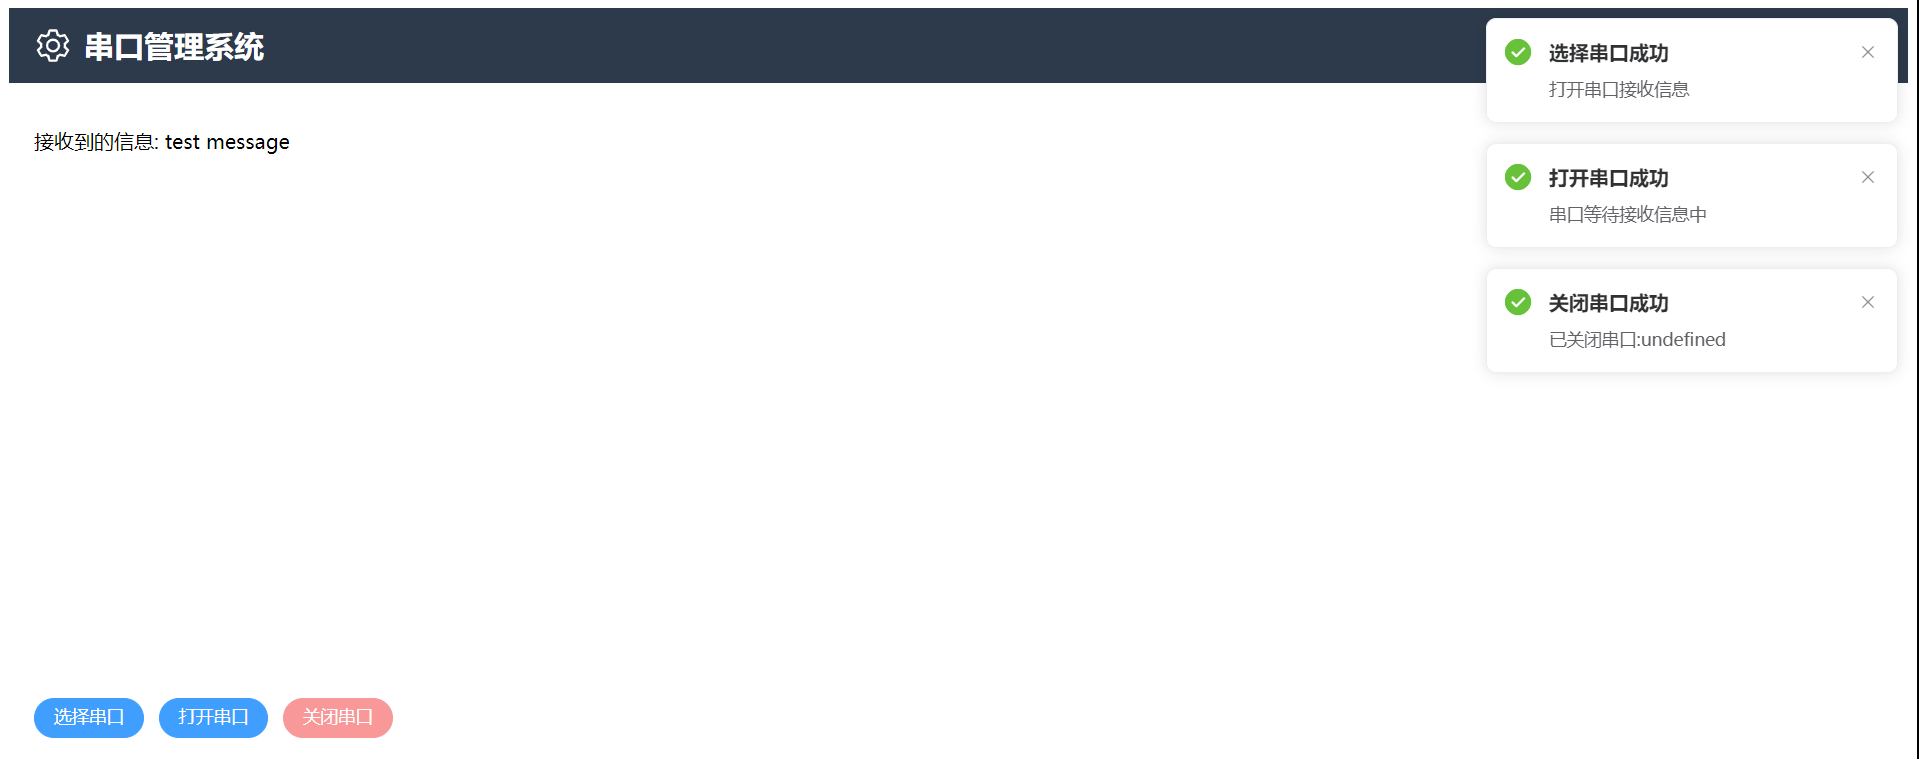
4.6 实现效果

功能完美实现,可以选择串口,打开串口,接收信息,在不使用之后,也可以关闭串口。美中不足的就是没有实现串口配置的功能,只能是代码写多少,就有多少。
五、完整代码
    链接:点击进入
     提取码:ea9d
本文转载自: https://blog.csdn.net/Stanford_sun/article/details/131016379
版权归原作者 Stanford_sun 所有, 如有侵权,请联系我们删除。
版权归原作者 Stanford_sun 所有, 如有侵权,请联系我们删除。