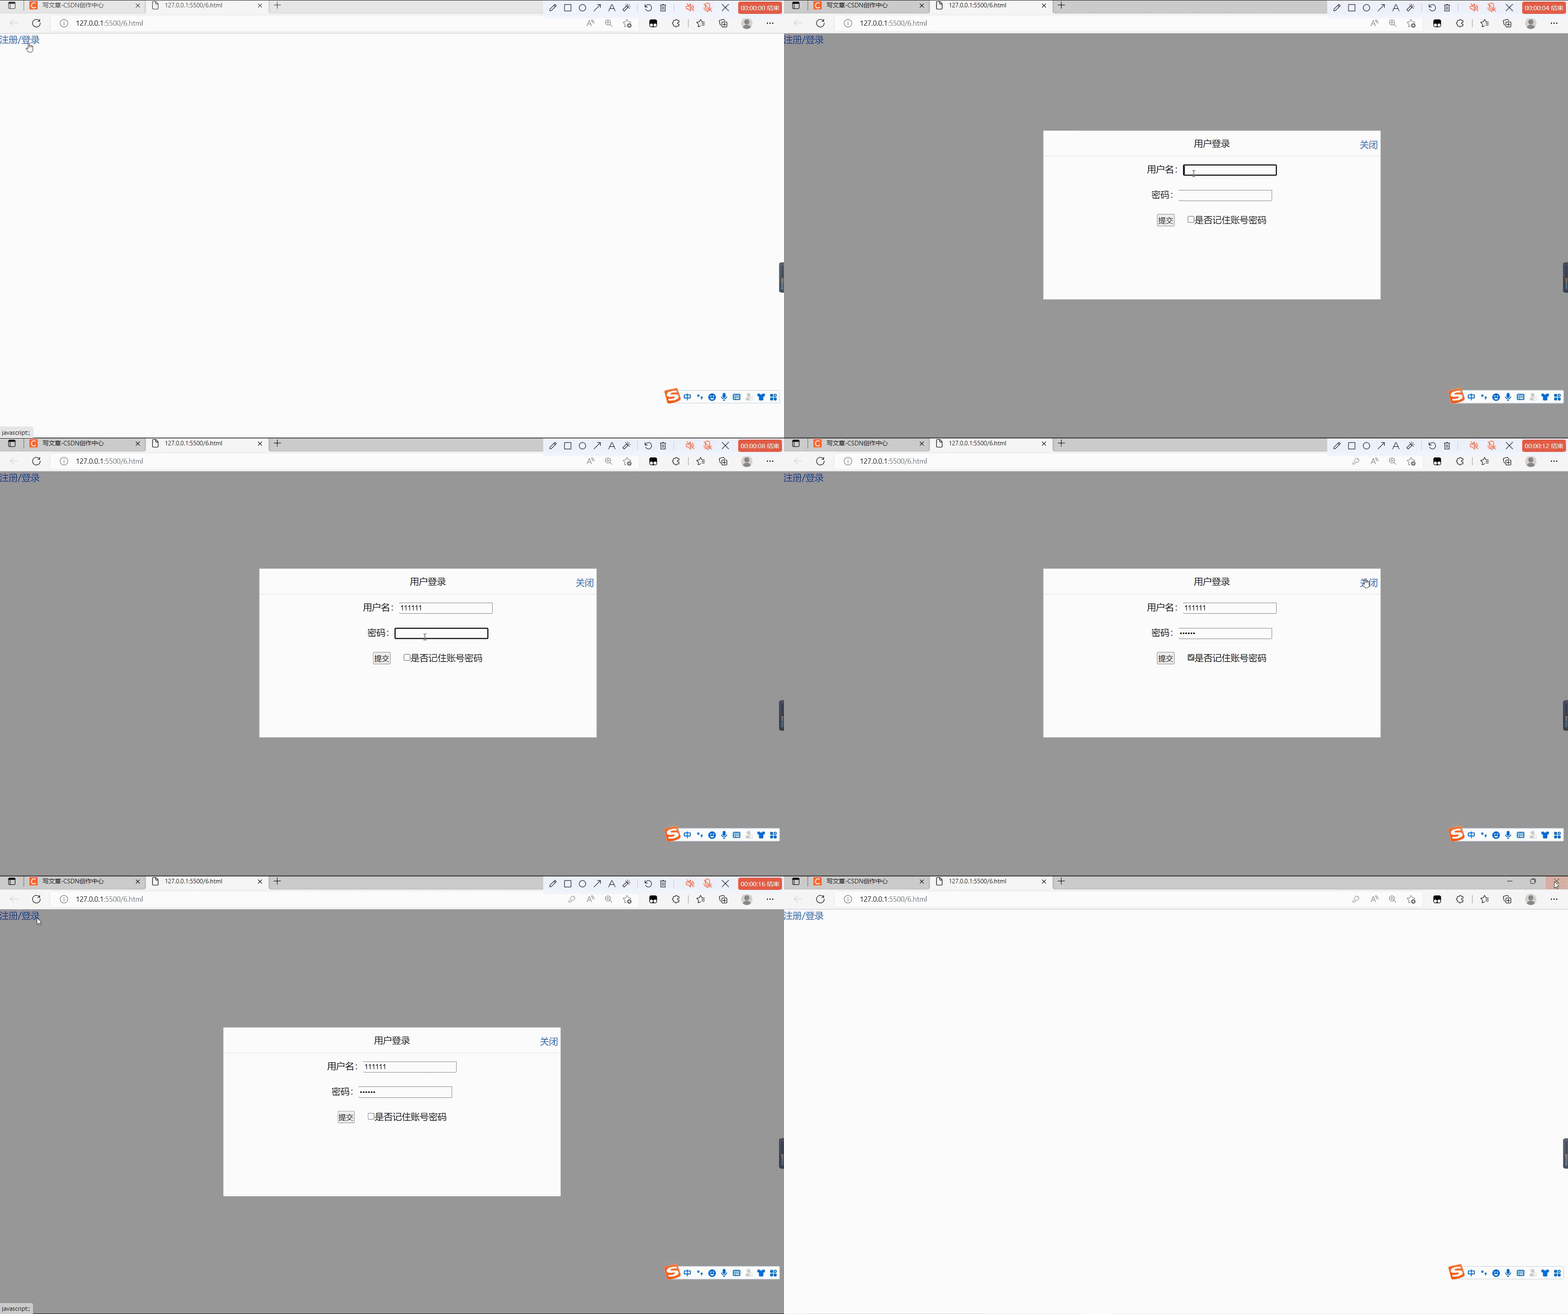
一、效果展示

整体效果
二、H5布局
网页结构分为三大块,第一部分点击a标签会弹出登录框,第二部分是登录框用户填写表单,需要注意A标签中使用javascript:;
第三部分是设置突出背景。
<a href="javascript:;" id="loginA">注册/登录</a>//第一部分
<div class="login">//第二部分
<div class="title">
用户登录 <a href="javascript:;" id="close">关闭</a>
</div>
<div class="content">
<p> 用户名:<input type="text" value="" class="username"/> </p>
<p> 密码:<input type="password" value="" class="rusername"/> </p>
<p> <input type="button" value="提交" /> <input type="checkbox" id="iusername">是否记住账号密码</p>
</div>
</div>
<div class="bg"></div>//第三部分
三、css的布局
需要注意登录弹窗和背景板的权重
            *{
                padding: 0px;
                margin: 0px;
            }
            li{
                list-style: none;
            }
            a{
                text-decoration: none;
            }
            .title{
            height: 45px;
             line-height: 45px;
            text-align: center;
            border-bottom: 1px solid #DCDCDC;
            position: relative;
            cursor: move;
            }
            .content p{
                 text-align: center;
                 line-height: 45px;
            }
            .title a{
                 display: block;
                 position: fixed;
                top:2px;
                 right: 5px;
                 z-index: 9999;
            }
布局的时候就需要将,背景板和弹窗使用display: none;来实现消失的效果,在后续的步骤中来实现显现和消失的效果
            .bg{
                width: 100%;
                height: 100%;
               position: fixed;
                top: 0px;
                left:0px;
                 background: rgb(0,0,0,.4);
                 z-index: 9998;
                 display: none;
            }
            .login{
                 width: 600px;
                 height: 300px;
                 position: fixed;
                 top:50%;
                left:50%;
                transform: translate(-50%,-50%);
                z-index: 9999;
                background: #fff;
                display: none;

            }
四、获取元素
需要将所有元素获取,注意class和Id选择器的方式
            var a = document.querySelector('#loginA');
            var div = document.querySelector('.title');
            var close = document.querySelector('#close');
            var bg = document.querySelector('.bg');
            var login = document.querySelector('.login');
            var username = document.querySelector('.username');
            var rusername = document.querySelector('.rusername');
            var iusername = document.querySelector('#iusername');
六、设置登录弹窗出现与关闭
设置点击事件,来实现显示和消失,要注意设置点击对象
            a.onclick=function(){
                bg.style.display = 'block';
                login.style.display='block';
            }
            close.onclick=function(){
                bg.style.display = 'none';
                login.style.display='none';
            }
七、设置弹窗的移动
先设置鼠标点下事件,需要获取鼠标在一定的范围内才能实现鼠标点下事件,接着设置鼠标移动事件,也要获取距离,最后在赋值给左边和右边的距离,最后设置鼠标抬起事件,来结束鼠标的移动事件。
       div.addEventListener('mousedown',function(e){
                var x = e.pageX-login.offsetLeft;
                var y = e.pageY-login.offsetTop;
            document.addEventListener("mousemove",move)
            function move(e){
                var newx=e.pageX-x;
                var newy=e.pageY-y;
            login.style.left=newx+'px';
            login.style.top=newy+'px';
            }
            document.addEventListener('mouseup',function(e){
                document.removeEventListener("mousemove",move);
            })
            })
八、设置保存信息
 在表单<input type="checkbox" id="iusername">中对‘iusername’设置点击事件,来判断改变的值,在function中需要用if来判是否选中,进行保存信息,为了实现保存后,页面可以显示用户信息,需要再次使用if来完成判断,在把所得到的值,给到到表单中的value。从而实现保存用户信息,在下一次打开后,依旧显示该用户的信息。

 在保存后,使用iusername.checked=true,再次打开,保存键会处于选中状态,想要取消保存,可以直接取消保存键的选中,关闭后内容就会被删除(此小节内容在开始的效果展示中没有显示,是因为是后期的优化,本人较懒没有去跟换视频)
        iusername.addEventListener('change',function(){
                if(iusername.checked){
                    localStorage.setItem('username',username.value)
                    localStorage.setItem('rusername',rusername.value)
                }else{
                    localStorage.removeItem('username');
                    localStorage.removeItem('rusername');
                }
            })
         if(localStorage.getItem('username')){
            username.value=localStorage.getItem('username');
            iusername.checked=true;
         }
         if(localStorage.getItem('rusername')){
            rusername.value=localStorage.getItem('rusername');
           iusername.checked=true;
         }
版权归原作者 小余努力搬砖 所有, 如有侵权,请联系我们删除。