
一、什么是websocket
WebSocket是HTML5下一种新的协议(websocket协议本质上是一个基于tcp的协议)
它实现了浏览器与服务器全双工通信,能更好的节省服务器资源和带宽并达到实时通讯的目的
Websocket是一个持久化的协议
二、新建SpringBoot工程
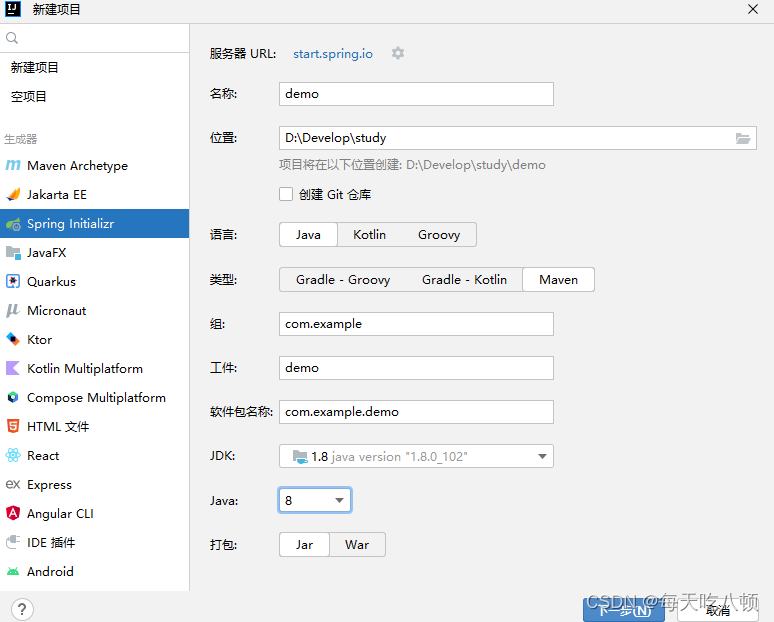
按照上图这样配置即可,点击下一步
因为本文章只实现websocket功能,所以只勾选SpringWeb,同时要保证springboot版本要低于3.0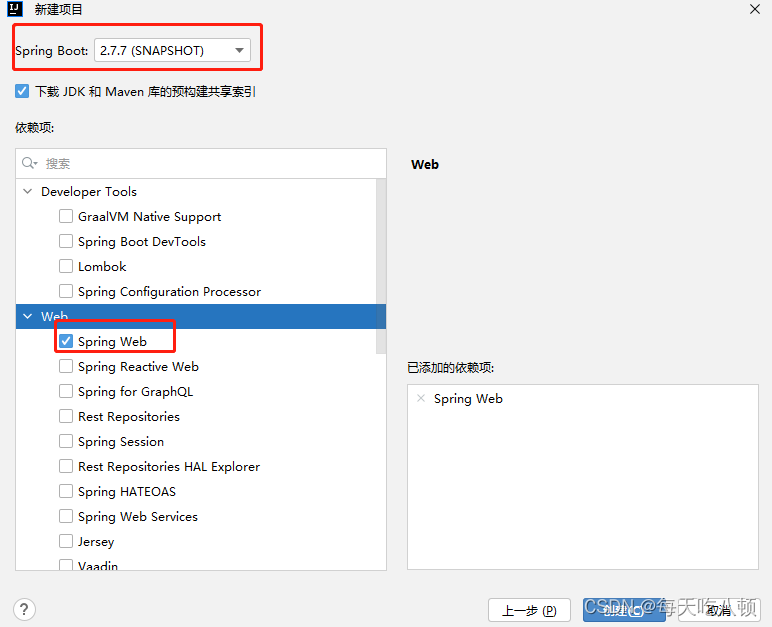
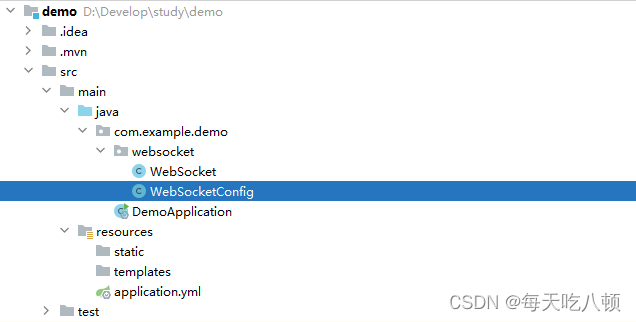
创建完的工程目录如下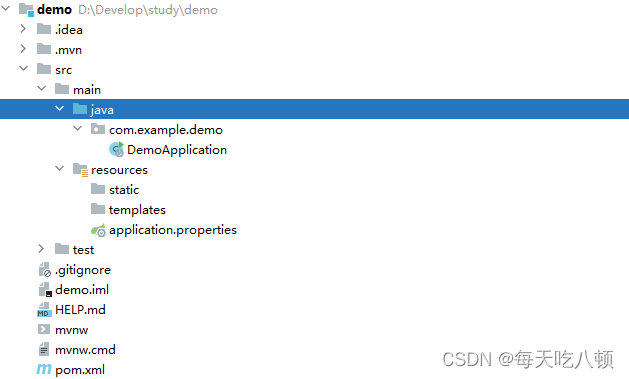
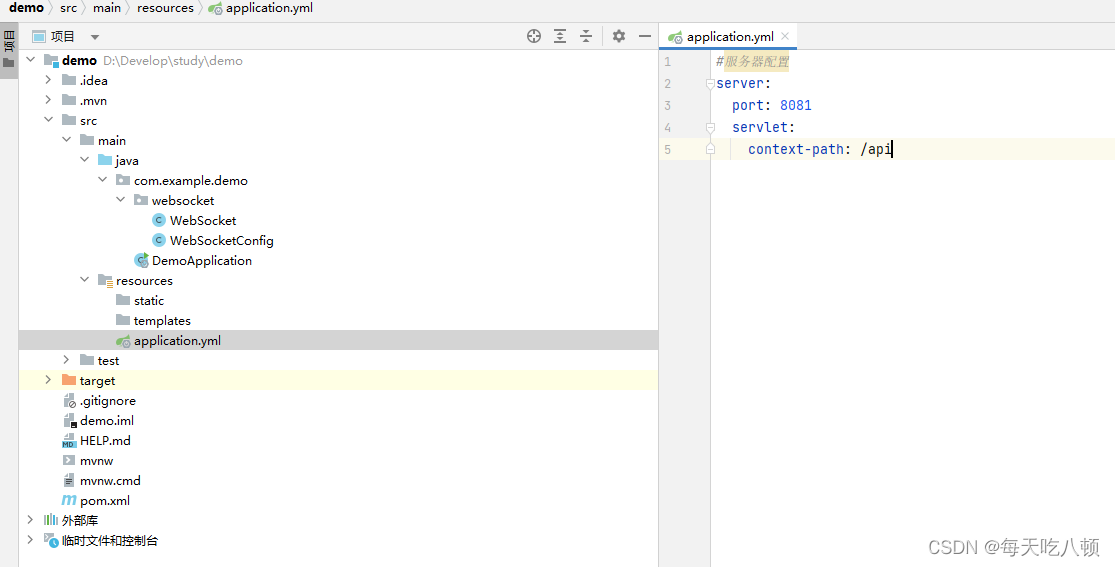
三、修改配置文件
将application.properties修改为application.yml,然后修改内容为
#服务器配置
server:
  port:8081
  servlet:
    context-path:/api
修改POM.xml,在dependencies下加入所需依赖,加入后在空白处右键点击重新加载项目,下载对应依赖
<dependency><groupId>org.springframework</groupId><artifactId>spring-websocket</artifactId><version>5.2.8.RELEASE</version></dependency><!--工具类 --><dependency><groupId>cn.hutool</groupId><artifactId>hutool-all</artifactId><version>5.4.1</version></dependency>
新建一个websocket包,包中新建两个类,代码如下
packagecom.example.demo.websocket;importcn.hutool.json.JSONUtil;importorg.springframework.stereotype.Component;importjavax.websocket.OnClose;importjavax.websocket.OnMessage;importjavax.websocket.OnOpen;importjavax.websocket.Session;importjavax.websocket.server.PathParam;importjavax.websocket.server.ServerEndpoint;importjava.io.IOException;importjava.util.concurrent.ConcurrentHashMap;@ServerEndpoint(value ="/websocket/{userId}")@ComponentpublicclassWebSocket{privatestaticConcurrentHashMap<String,WebSocket> webSocketMap =newConcurrentHashMap<>();//实例一个session,这个session是websocket的sessionprivateSession session;//新增一个方法用于主动向客户端发送消息publicstaticvoidsendMessage(Object message,String userId){WebSocket webSocket = webSocketMap.get(userId);if(webSocket !=null){try{
                webSocket.session.getBasicRemote().sendText(JSONUtil.toJsonStr(message));System.out.println("【websocket消息】发送消息成功,用户="+userId+",消息内容"+message.toString());}catch(IOException e){
                e.printStackTrace();}}}publicstaticConcurrentHashMap<String,WebSocket>getWebSocketMap(){return webSocketMap;}publicstaticvoidsetWebSocketMap(ConcurrentHashMap<String,WebSocket> webSocketMap){WebSocket.webSocketMap = webSocketMap;}//前端请求时一个websocket时@OnOpenpublicvoidonOpen(Session session,@PathParam("userId")String userId){this.session = session;
        webSocketMap.put(userId,this);sendMessage("CONNECT_SUCCESS", userId);System.out.println("【websocket消息】有新的连接,连接id"+userId);}//前端关闭时一个websocket时@OnClosepublicvoidonClose(@PathParam("userId")String userId){
        webSocketMap.remove(userId);System.out.println("【websocket消息】连接断开,总数:"+ webSocketMap.size());}//前端向后端发送消息@OnMessagepublicvoidonMessage(String message){if(!message.equals("ping")){System.out.println("【websocket消息】收到客户端发来的消息:"+message);}}}
packagecom.example.demo.websocket;importorg.springframework.context.annotation.Bean;importorg.springframework.context.annotation.Configuration;importorg.springframework.web.socket.server.standard.ServerEndpointExporter;//开启WebSocket的支持,并把该类注入到spring容器中@ConfigurationpublicclassWebSocketConfig{@BeanpublicServerEndpointExporterserverEndpointExporter(){returnnewServerEndpointExporter();}}
四、项目完整结构如下
五、测试功能
点击运行按钮,可以看到控制台对应的输出,输出看到JVM running for 表示启动成功
在桌面新建一个websocket.html,将代码复制进去
<!DOCTYPEhtml><htmllang="en"><head><metacharset="utf-8"/><metahttp-equiv="X-UA-Compatible"content="IE=edge"><metaname="viewport"content="width=device-width, initial-scale=1"><title>本地websocket测试</title><metaname="robots"content="all"/><metaname="keywords"content="本地,websocket,测试工具"/><metaname="description"content="本地,websocket,测试工具"/><style>.btn-group{display: inline-block;}</style></head><body><inputtype='text'value='通信地址, ws://开头..'class="form-control"style='width:390px;display:inline'id='wsaddr'/><divclass="btn-group"><buttontype="button"class="btn btn-default"onclick='addsocket();'>连接</button><buttontype="button"class="btn btn-default"onclick='closesocket();'>断开</button><buttontype="button"class="btn btn-default"onclick='$("#wsaddr").val("")'>清空</button></div><divclass="row"><divid="output"style="border:1px solid #ccc;height:365px;overflow: auto;margin: 20px 0;"></div><inputtype="text"id='message'class="form-control"style='width:810px'placeholder="待发信息"onkeydown="en(event);"><spanclass="input-group-btn"><buttonclass="btn btn-default"type="button"onclick="doSend();">发送</button></span></div></div></body><scriptsrc="https://code.jquery.com/jquery-3.1.1.min.js"></script><scriptlanguage="javascript"type="text/javascript">functionformatDate(now){var year = now.getFullYear();var month = now.getMonth()+1;var date = now.getDate();var hour = now.getHours();var minute = now.getMinutes();var second = now.getSeconds();return year +"-"+(month = month <10?("0"+ month): month)+"-"+(date = date <10?("0"+ date): date)+" "+(hour = hour <10?("0"+ hour): hour)+":"+(minute = minute <10?("0"+ minute): minute)+":"+(
second = second <10?("0"+ second): second);}var output;var websocket;functioninit(){
output = document.getElementById("output");testWebSocket();}functionaddsocket(){var wsaddr =$("#wsaddr").val();if(wsaddr ==''){alert("请填写websocket的地址");returnfalse;}StartWebSocket(wsaddr);}functionclosesocket(){
websocket.close();}functionStartWebSocket(wsUri){
websocket =newWebSocket(wsUri);
websocket.onopen=function(evt){onOpen(evt)};
websocket.onclose=function(evt){onClose(evt)};
websocket.onmessage=function(evt){onMessage(evt)};
websocket.onerror=function(evt){onError(evt)};}functiononOpen(evt){writeToScreen("<span style='color:red'>连接成功,现在你可以发送信息啦!!!</span>");}functiononClose(evt){writeToScreen("<span style='color:red'>websocket连接已断开!!!</span>");
websocket.close();}functiononMessage(evt){writeToScreen('<span style="color:blue">服务端回应 '+formatDate(newDate())+'</span><br/><span class="bubble">'+
evt.data +'</span>');}functiononError(evt){writeToScreen('<span style="color: red;">发生错误:</span> '+ evt.data);}functiondoSend(){var message =$("#message").val();if(message ==''){alert("请先填写发送信息");$("#message").focus();returnfalse;}if(typeof websocket ==="undefined"){alert("websocket还没有连接,或者连接失败,请检测");returnfalse;}if(websocket.readyState ==3){alert("websocket已经关闭,请重新连接");returnfalse;}
console.log(websocket);$("#message").val('');writeToScreen('<span style="color:green">你发送的信息 '+formatDate(newDate())+'</span><br/>'+ message);
websocket.send(message);}functionwriteToScreen(message){var div ="<div class='newmessage'>"+ message +"</div>";var d =$("#output");var d = d[0];var doScroll = d.scrollTop == d.scrollHeight - d.clientHeight;$("#output").append(div);if(doScroll){
d.scrollTop = d.scrollHeight - d.clientHeight;}}functionen(event){var evt = evt ? evt :(window.event ? window.event :null);if(evt.keyCode ==13){doSend()}}</script></html>
双击打开这个html文件,页面的功能如下,websocket的通信地址要以ws://开头,因为我的springboot启动在8081端口,所以我的地址就是 **ws://localhost:8081/api/websocket/{连接id}**,websocket前面加了api是前面在yml文件中配置了context-path,没有配置可以去掉。实际项目中,将连接id换成唯一的用户id即可向指定用户发送消息。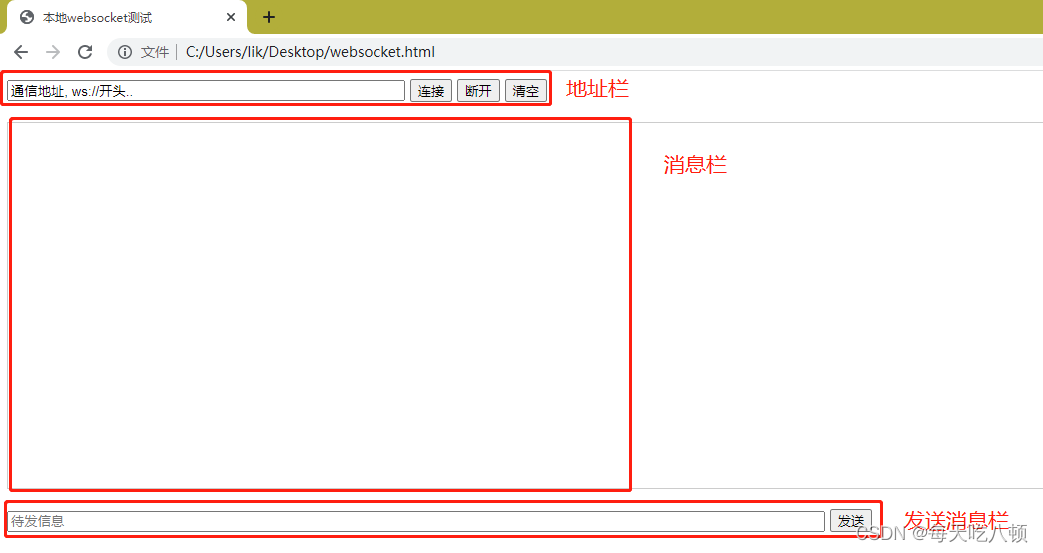
效果如下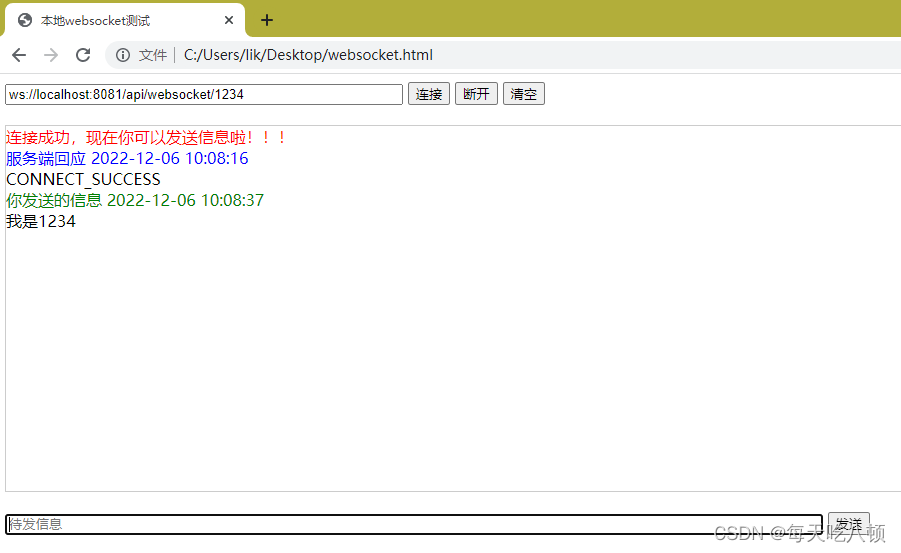
这时候服务器控制台输出为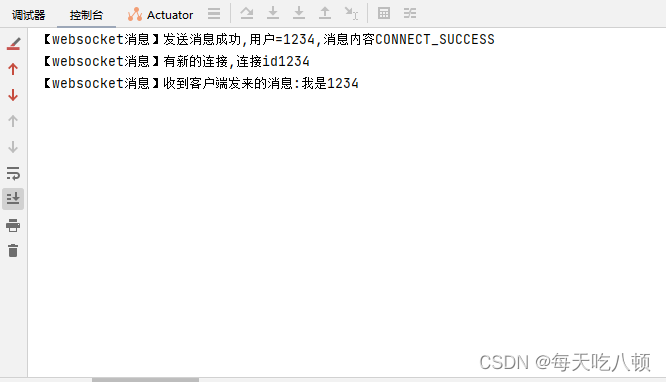
到此,SpringBoot搭建WebSocket就已经完成,还有什么问题可以私信作者~
本文转载自: https://blog.csdn.net/qq_15752347/article/details/128190762
版权归原作者 每天吃八顿 所有, 如有侵权,请联系我们删除。
版权归原作者 每天吃八顿 所有, 如有侵权,请联系我们删除。