
增删改查--查
1、数据库建表,字段如下,(可根据项目实际需求修改)。

2、保存刚才创建的表,名为demo(可根据项目实际需求修改),并且给一条数据

3、在springboot项目中,配置好数据库的信息,注意用户名和密码及数据库库名修改成自己的
创建springboot项目可见前一篇文章(Springboot+mybatis 实现操作数据库,编写第一个数据接口_程序员筱聪的博客-CSDN博客)
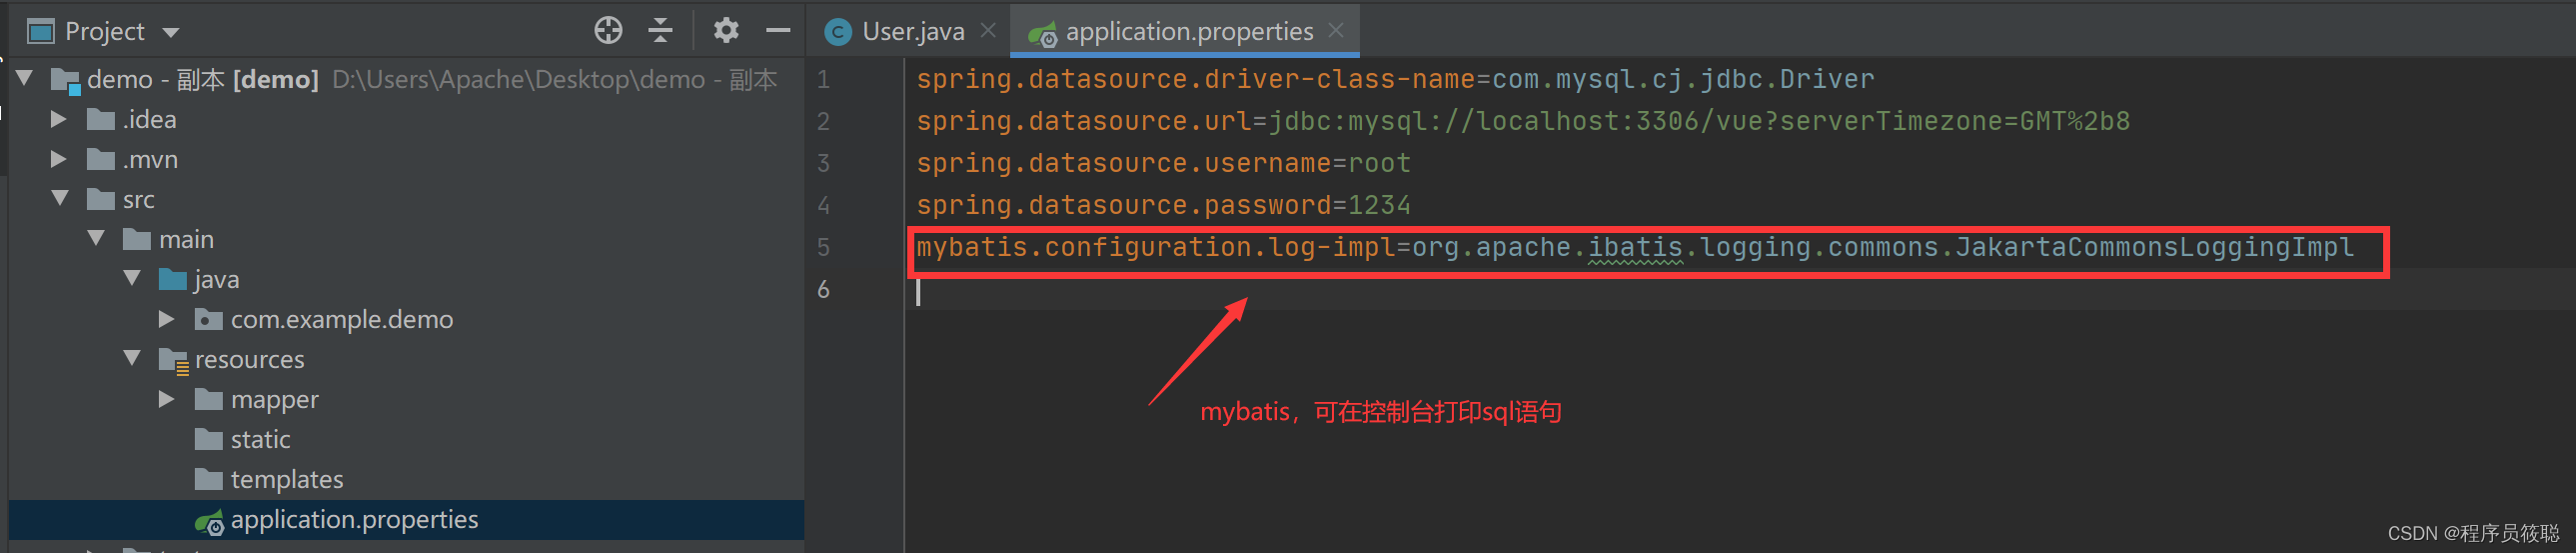
spring.datasource.driver-class-name=com.mysql.cj.jdbc.Driver
spring.datasource.url=jdbc:mysql://localhost:3306/vue?serverTimezone=GMT%2b8
spring.datasource.username=root
spring.datasource.password=1234
mybatis.configuration.log-impl=org.apache.ibatis.logging.commons.JakartaCommonsLoggingImpl
4、在项目包路径下创建 entity包,并且在entity包下创建一个userEntity的类,类中的字段必须和数据库的一一对应。注意加上 @Data 注解,相当于不用写get和set方法。
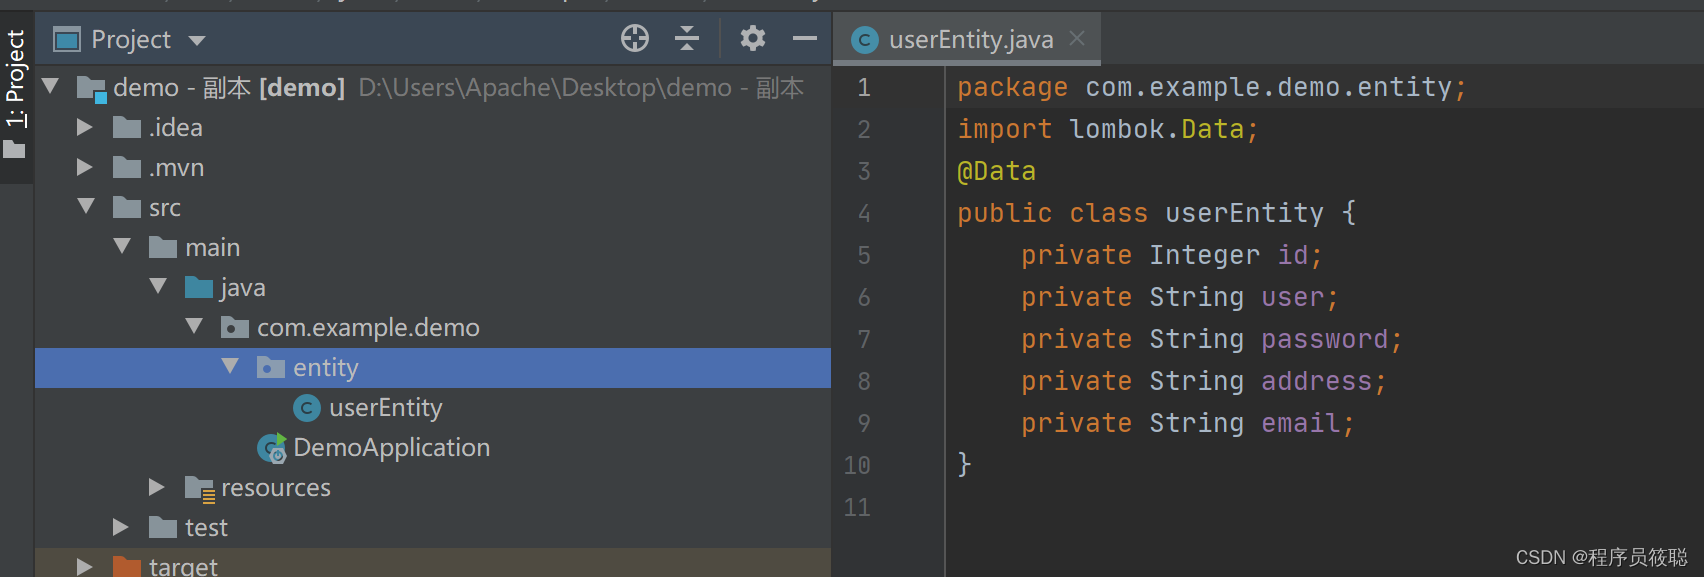
package com.example.demo.entity;
import lombok.Data;
@Data
public class userEntity {
    private Integer id;
    private String user;
    private String password;
    private String address;
    private String email;
}
5、在项目路径包下创建 mapper 包,并且在 mapper 包下创建一个 usermapper的 接口,记得加 @mapper注解****(声明为mapper层) 并且写个方法为 findAll 为查询所有数据的接口,用@select 注解的方式声明 。

package com.example.demo.mapper;
import com.example.demo.entity.userEntity;
import org.apache.ibatis.annotations.Mapper;
import org.apache.ibatis.annotations.Select;

import java.util.List;

@Mapper
public interface usermapper {

    @Select("select * from demo")  //查询所有数据
    List<userEntity> findALL();
}
6、在项目路径包下创建 service包,并且在 service包下创建一个 userservice的 类,记得加 @service注解(声明为service****层) 并且写个方法名为 findall的方法 返回值为int类型,作用,调用mapper层的findall方法,实现查询所有数据。

package com.example.demo.service;

import com.example.demo.entity.userEntity;
import com.example.demo.mapper.usermapper;
import org.springframework.beans.factory.annotation.Autowired;
import org.springframework.stereotype.Service;

import java.util.List;

@Service
public class userservice {
    @Autowired
    private usermapper Usermanager;

    public List<userEntity> findall() {

        return Usermanager.findALL();
    }
}
7、在项目路径包下创建 controller 包,并且在 controller 包下创建一个 usercontroller 的类,记得加 @Restcontroller注解(声明为controller****层) 并且写个方法名为 findall的方法(记得机上@GetMapping 注解) 返回值为List<userEntity>类型 *注意:userEntity 为 entity的类名。*作用,调用service层的findall方法(service在调用mapper中的方法进行查询),实现查询所有数据。
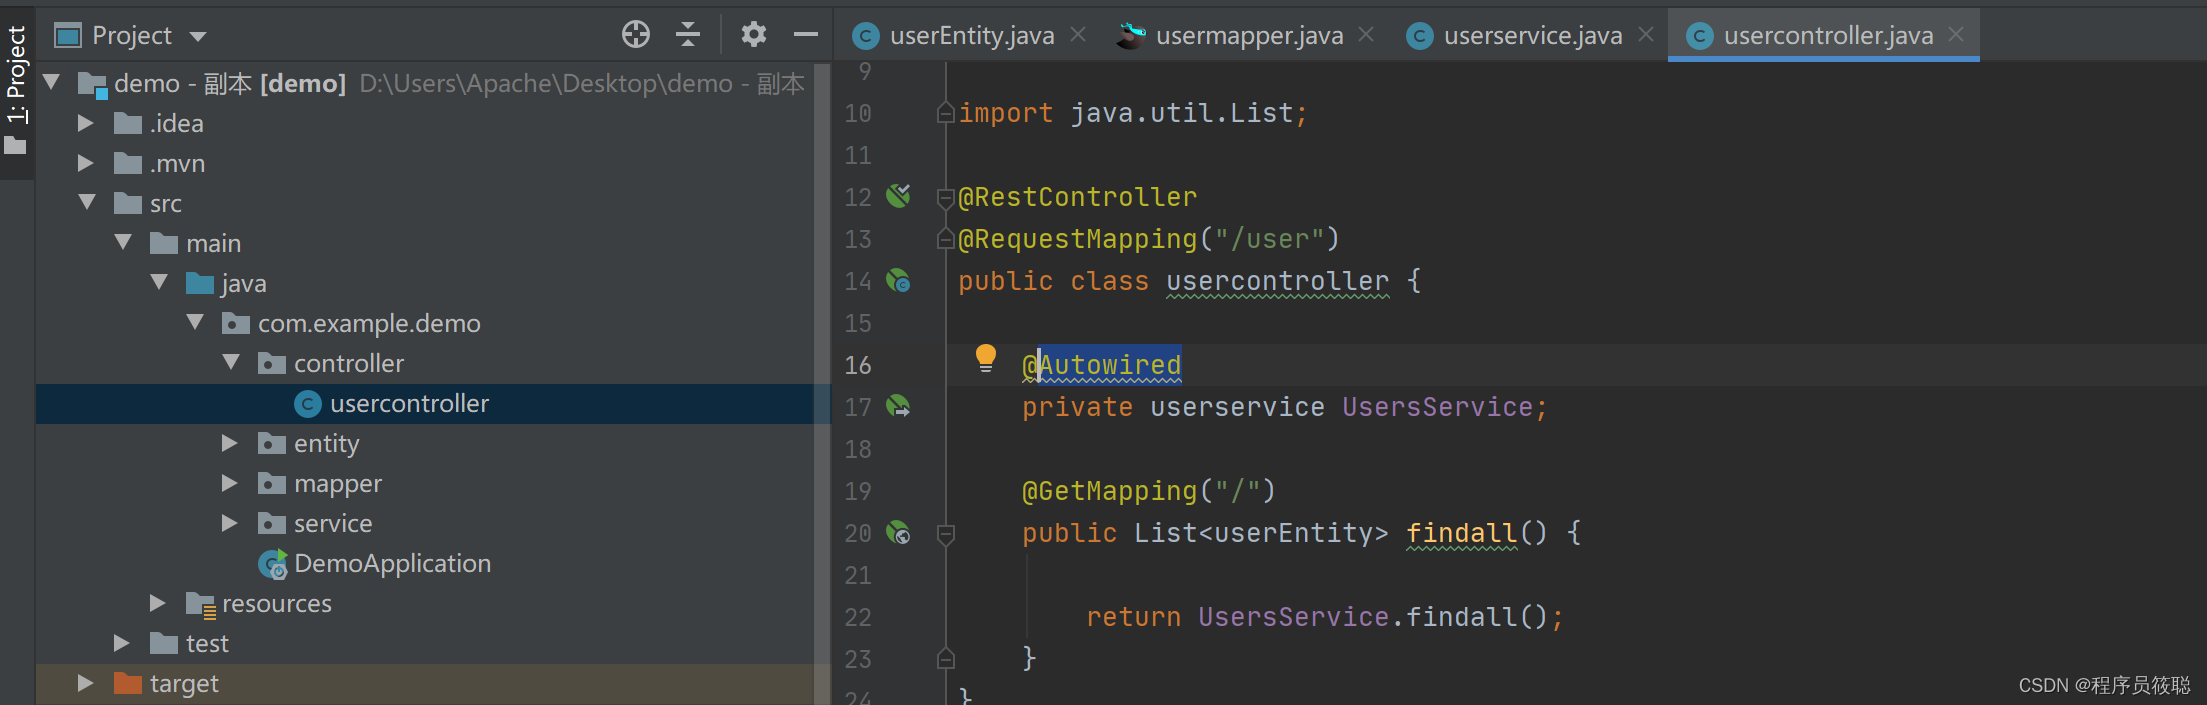
package com.example.demo.controller;

import com.example.demo.entity.userEntity;
import com.example.demo.service.userservice;
import org.springframework.beans.factory.annotation.Autowired;
import org.springframework.web.bind.annotation.GetMapping;
import org.springframework.web.bind.annotation.RequestMapping;
import org.springframework.web.bind.annotation.RestController;

import java.util.List;

@RestController
@RequestMapping("/user")
public class usercontroller {

    @Autowired
    private userservice UsersService;

    @GetMapping("/")
    public List<userEntity> findall() {

        return UsersService.findall();
    }
}
8、点运行,我们用postman 测试
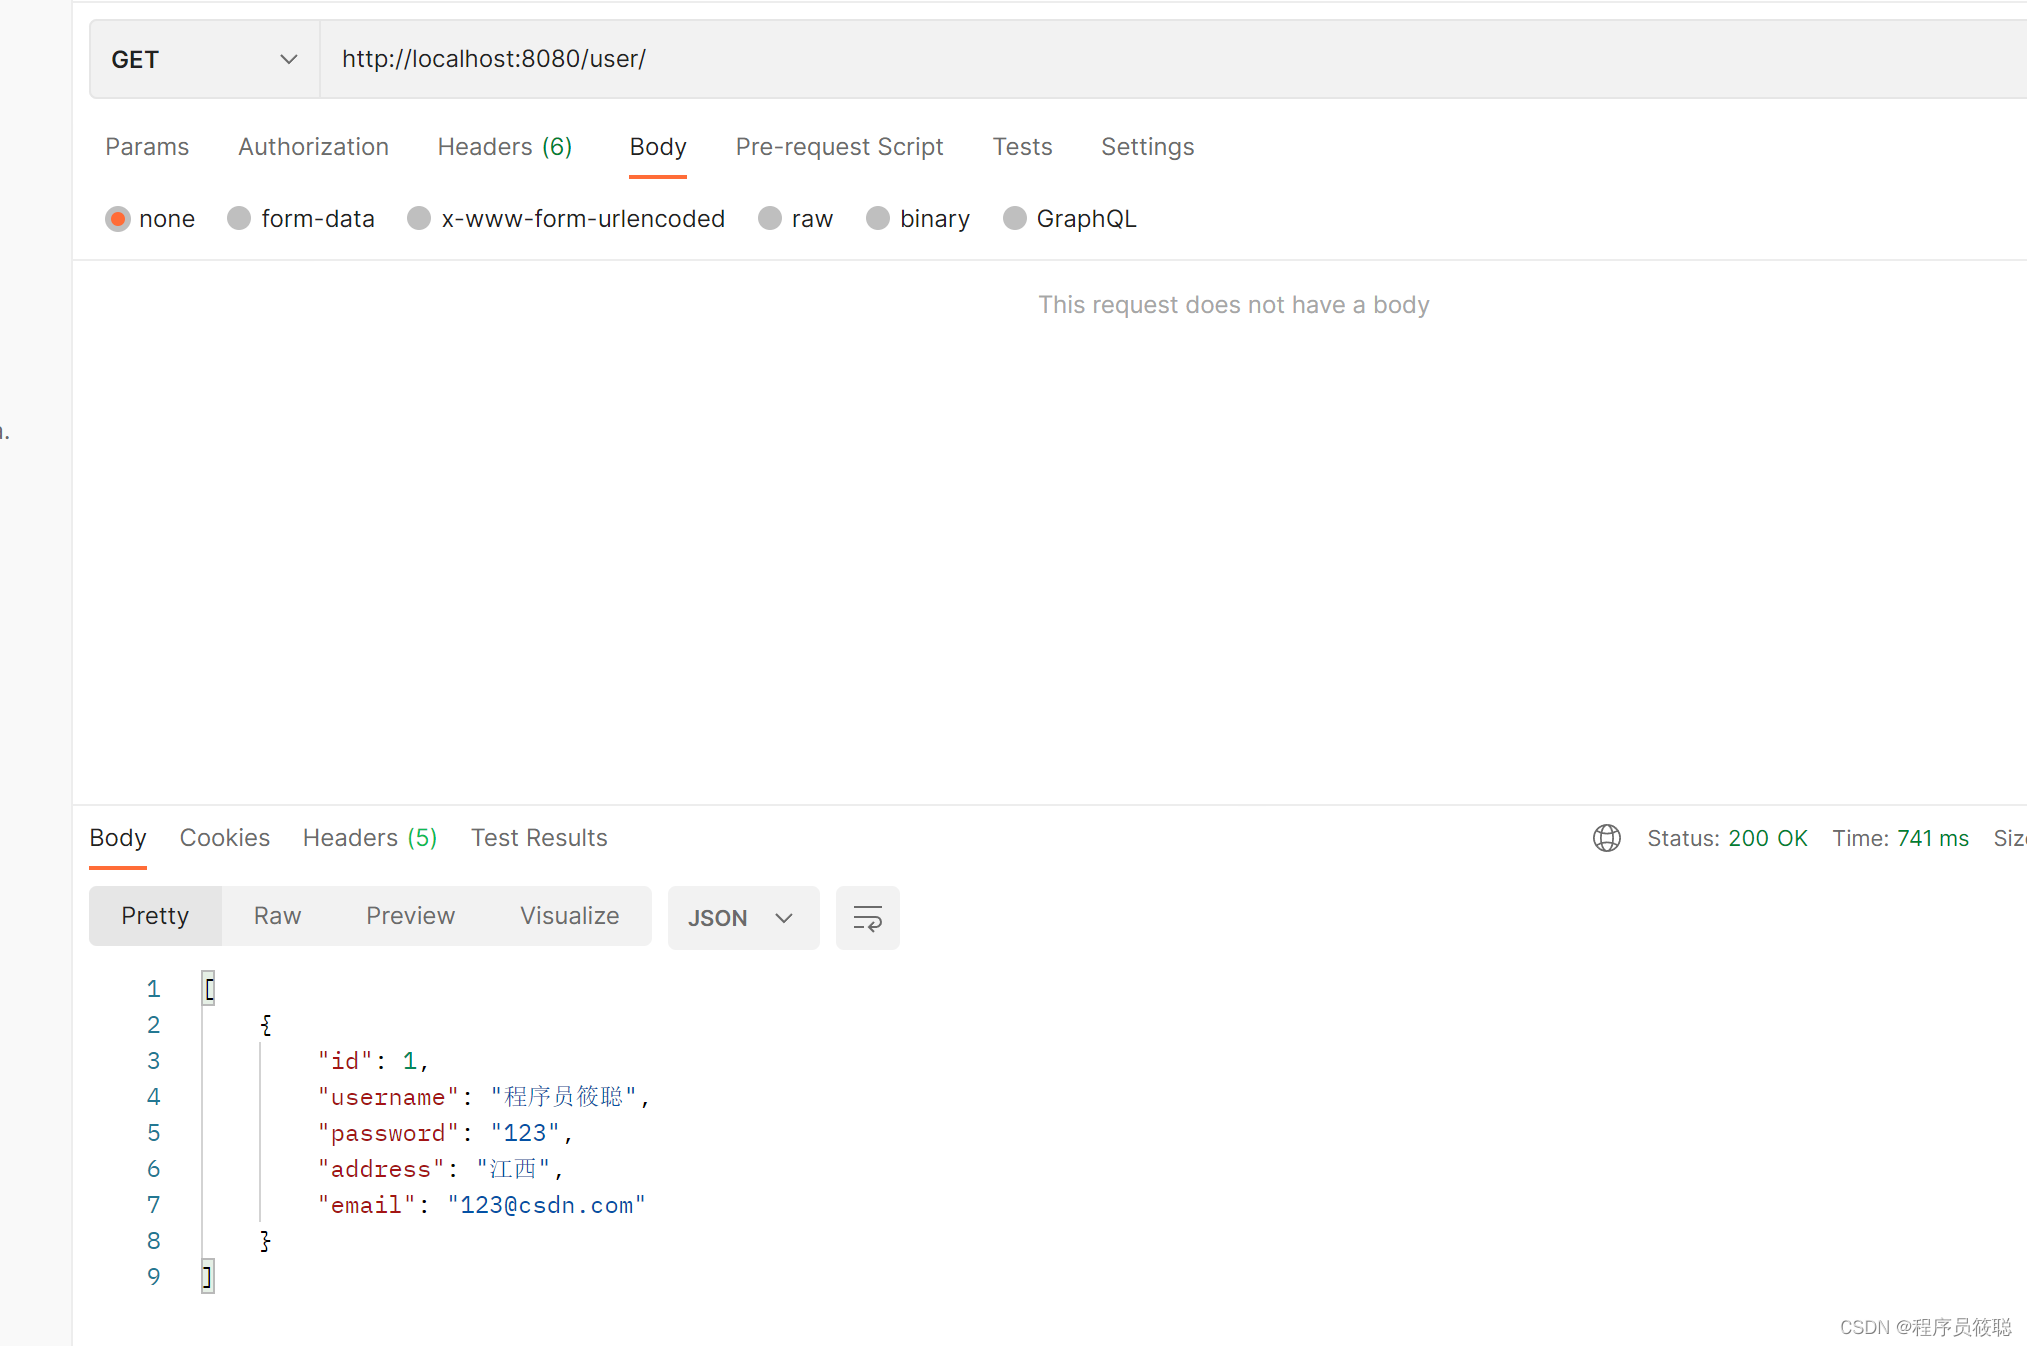
是ok的
增删改查--增、改
1、在usermapper类中,写一个save(增)和update(改)的方法,并增用 @insert 注解的形式声明sql,改用xml的形式写成动态sql

package com.example.demo.mapper;
import com.example.demo.entity.userEntity;
import org.apache.ibatis.annotations.Insert;
import org.apache.ibatis.annotations.Mapper;
import org.apache.ibatis.annotations.Select;
import org.springframework.web.bind.annotation.RequestBody;

import java.util.List;

@Mapper
public interface usermapper {

    @Select("select * from demo")  //查询所有数据
    List<userEntity> findALL();

    @Insert("INSERT into demo (username,password,address,email)VALUES(#{username},#{password},#{address},#{email})")
    Integer save(userEntity entity);

    Integer update(userEntity entity);
}
2、并且在resources文件下创建一个mapper文件,并在mapper文件下创建一个usermapper.xml文件,注意 update id="update",这里update必须和usermapper 里 更新的方法名一致。
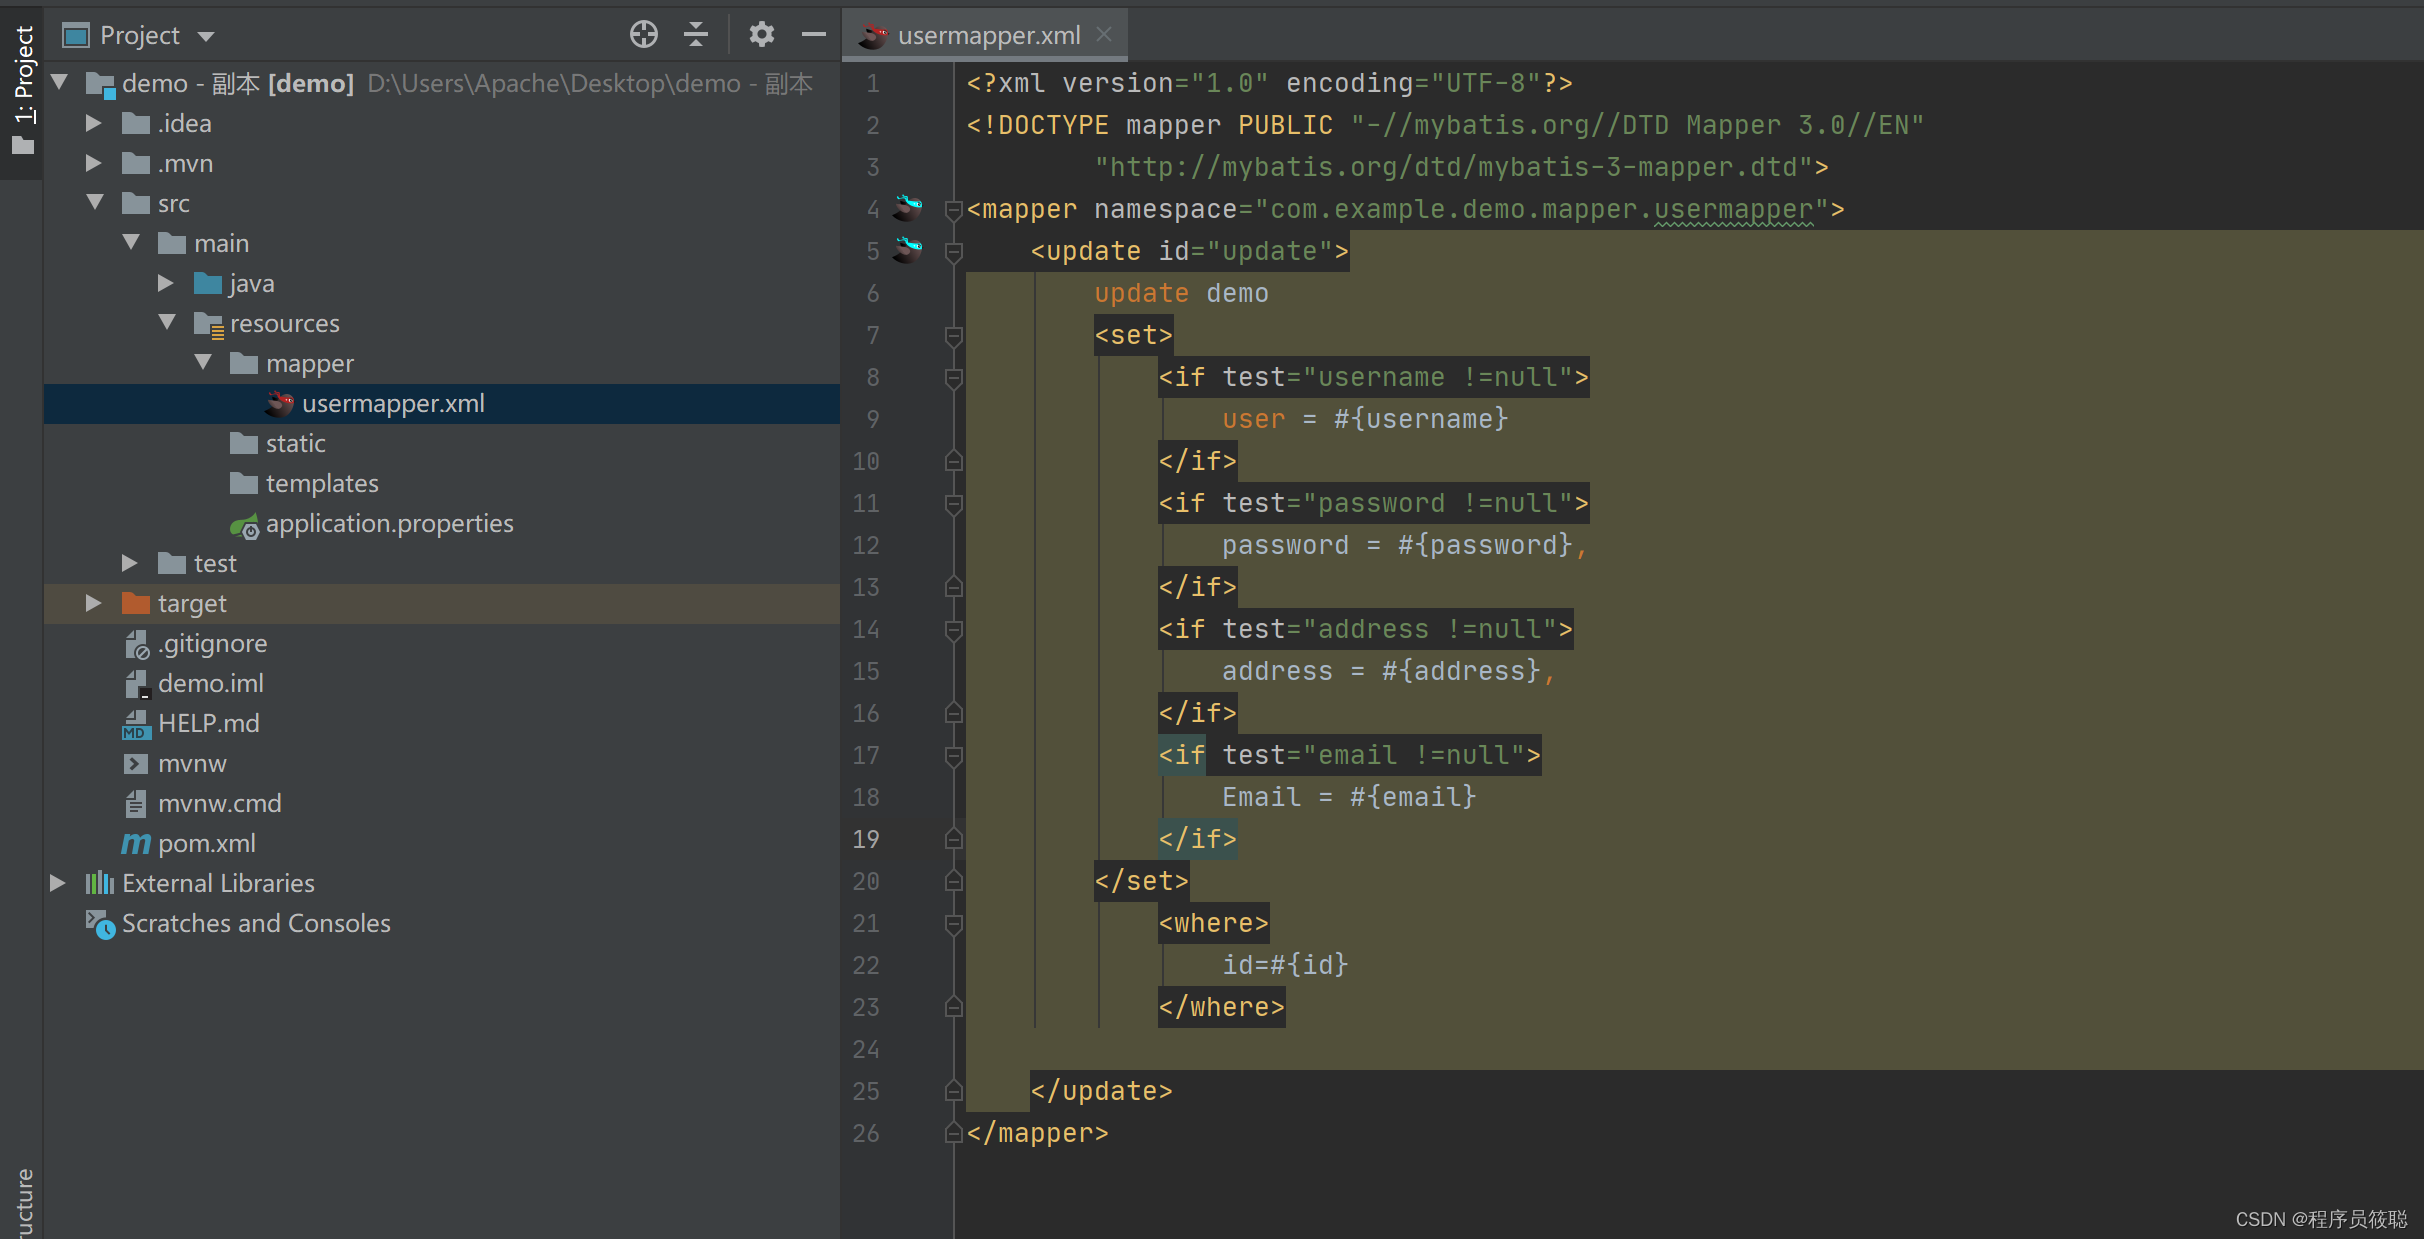
<?xml version="1.0" encoding="UTF-8"?>
<!DOCTYPE mapper PUBLIC "-//mybatis.org//DTD Mapper 3.0//EN"
        "http://mybatis.org/dtd/mybatis-3-mapper.dtd">
<mapper namespace="com.example.demo.mapper.usermapper">
    <update id="update">
        update demo
        <set>
            <if test="username !=null">
                user = #{username}
            </if>
            <if test="password !=null">
                password = #{password},
            </if>
            <if test="address !=null">
                address = #{address},
            </if>
            <if test="email !=null">
                Email = #{email}
            </if>
        </set>
            <where>
                id=#{id}
            </where>

    </update>
</mapper>
3、注意,写了这个xml文件必须在application.properties 声明,
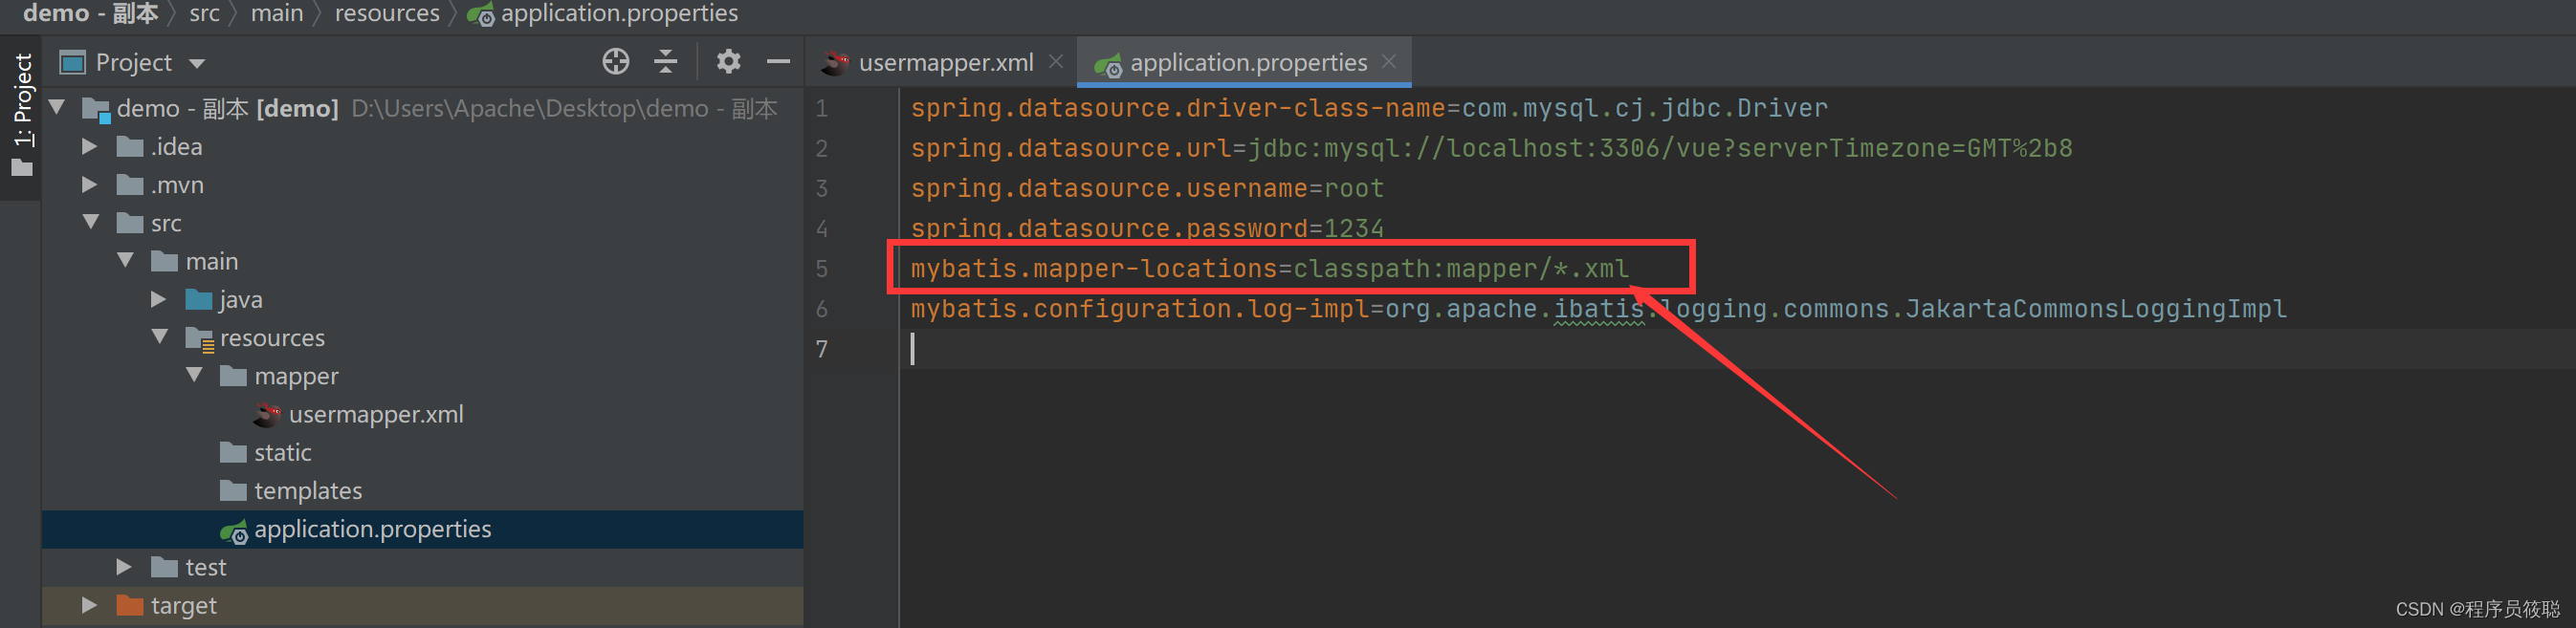
mybatis.mapper-locations=classpath:mapper/*.xml
4、在service 层,userservice里写一个save方法,来操作mapper层的save和update方法
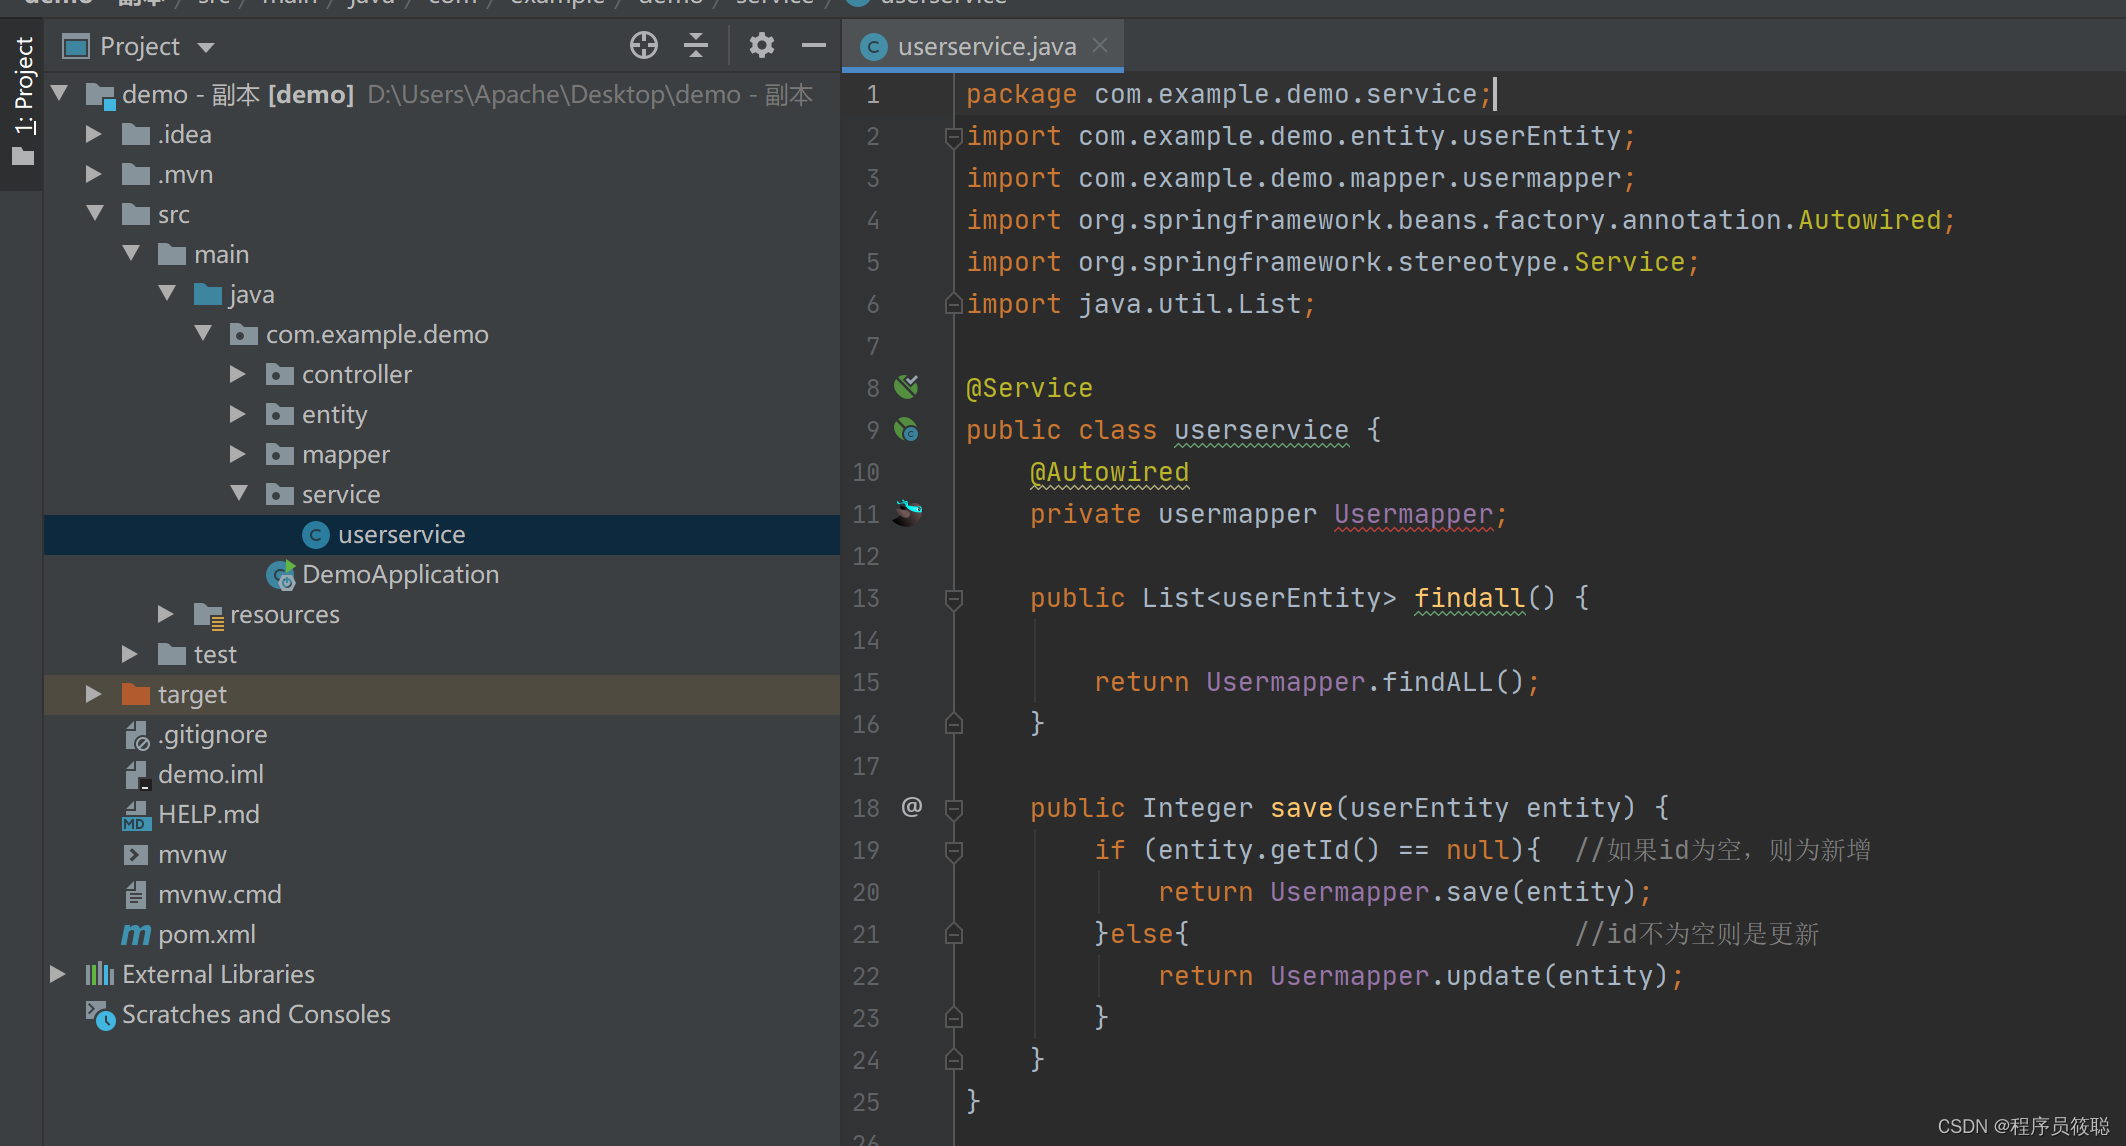
 public Integer save(userEntity entity) {
        if (entity.getId() == null){  //如果id为空,则为新增
            return Usermapper.save(entity);
        }else{                        //id不为空则是更新
            return Usermapper.update(entity);
        }
    }
}
5、在controller层,usercontroller里写一个save方法,用,@Postmapping("/save") 声明,
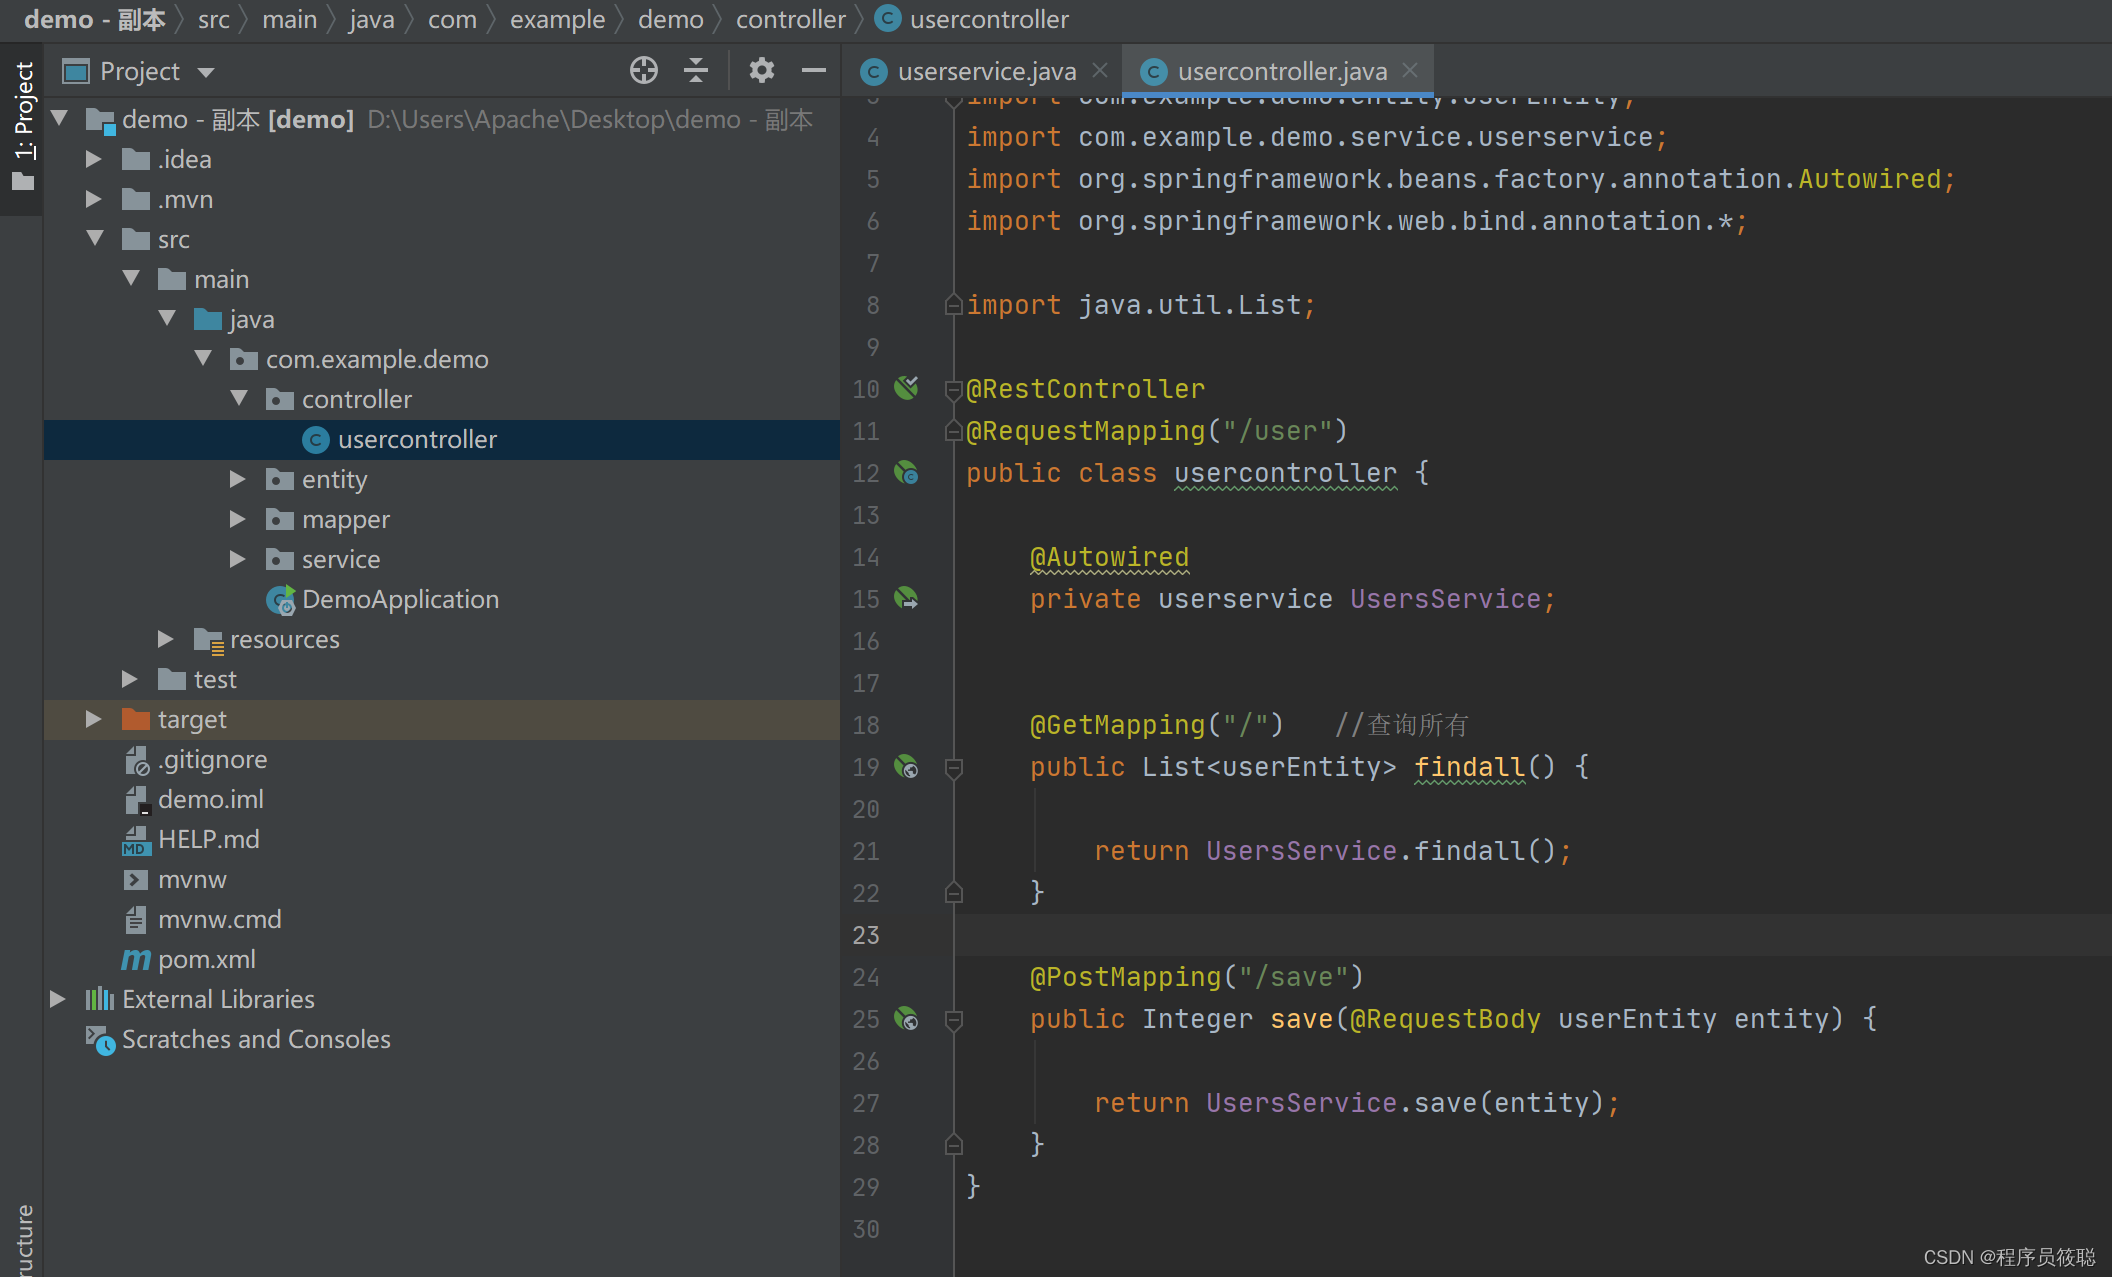
@PostMapping("/save")
    public Integer save(@RequestBody userEntity entity) {

        return UsersService.save(entity);
    }
6、用postman测试,参数带有id,则为更新

不带有id,则为新增

增删改查--删
1、在mapper层。usermapper创建一个删除的方法,用@Delete("sql语句")的方式声明,DELETE为删除方法,由于删除是依据id删除,所以参数为 id

 @Delete("DELETE FROM demo where id=#{id}")
 Integer DELETE(Integer id);
2、在service层,userservice创建一个删除的方法,用于操作mapper层的删除语句,

public Integer DELETE(Integer id){
        return Usermapper.DELETE(id);
    }
3、在controller层,usercontroller创建删除方法,用于操作service层删除的方法,用@DeleteMapping("/{id})声明,并且方法中的@PathVariable 为url中的占位符,即最终路径为:localhost:8080/user/12 (12为你需要删除的id)
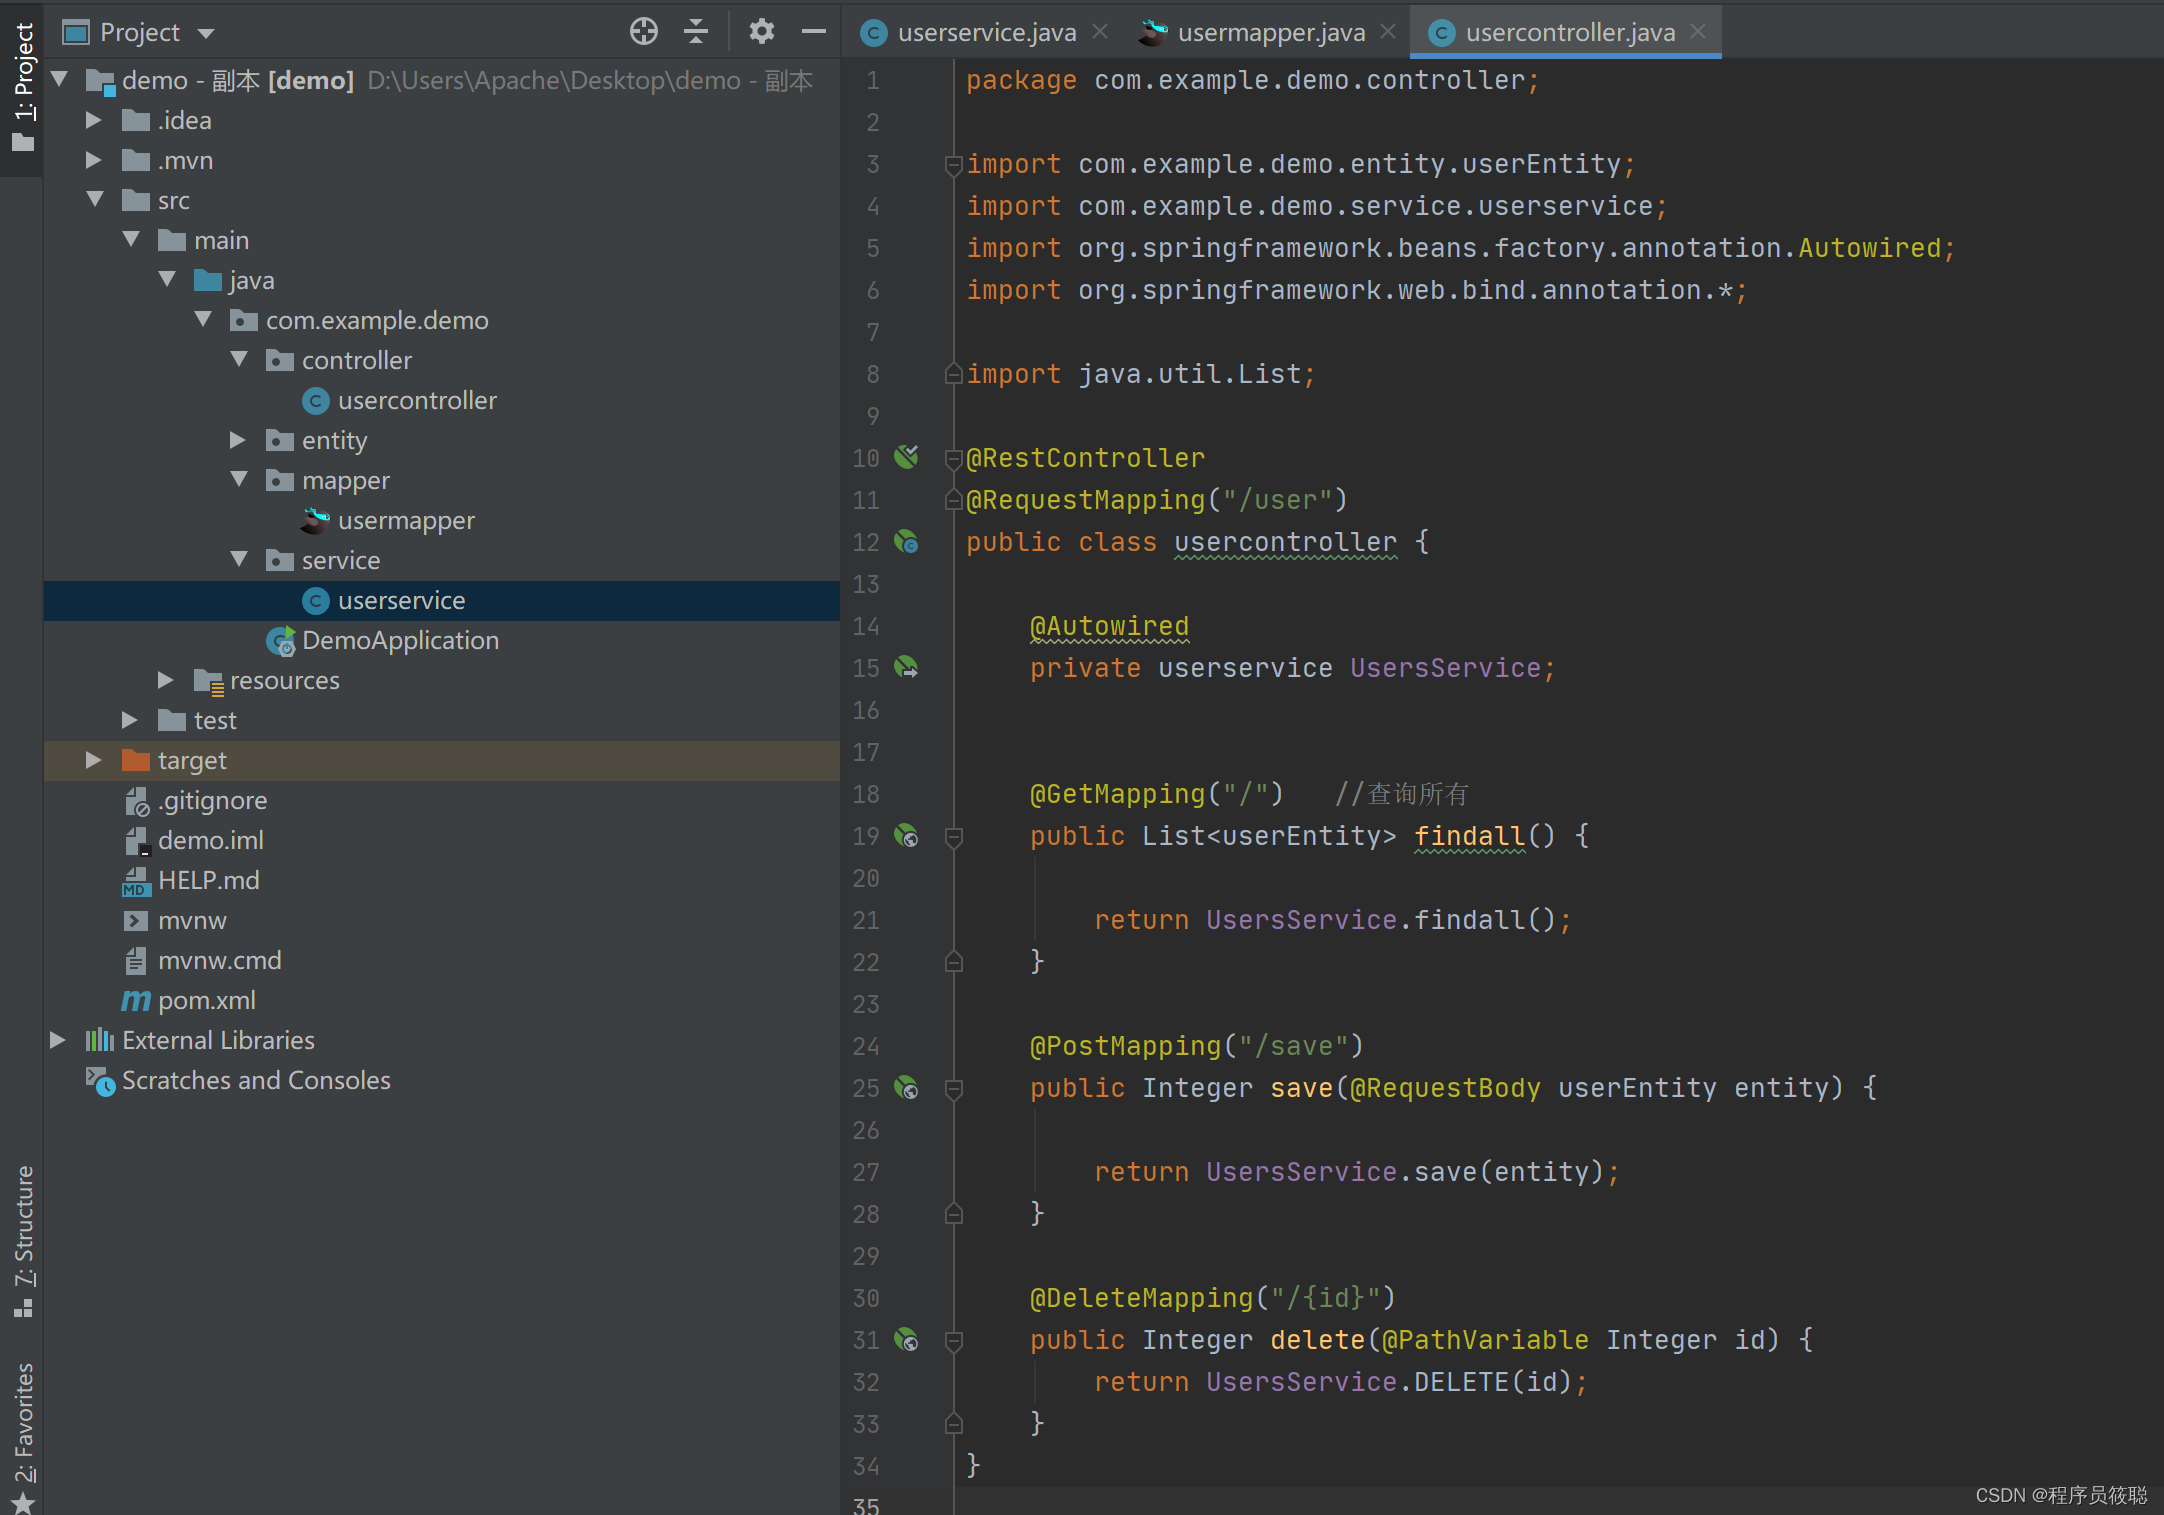
 @DeleteMapping("/{id}")
    public Integer delete(@PathVariable Integer id) {
        return UsersService.DELETE(id);
    }
4、用postman测试
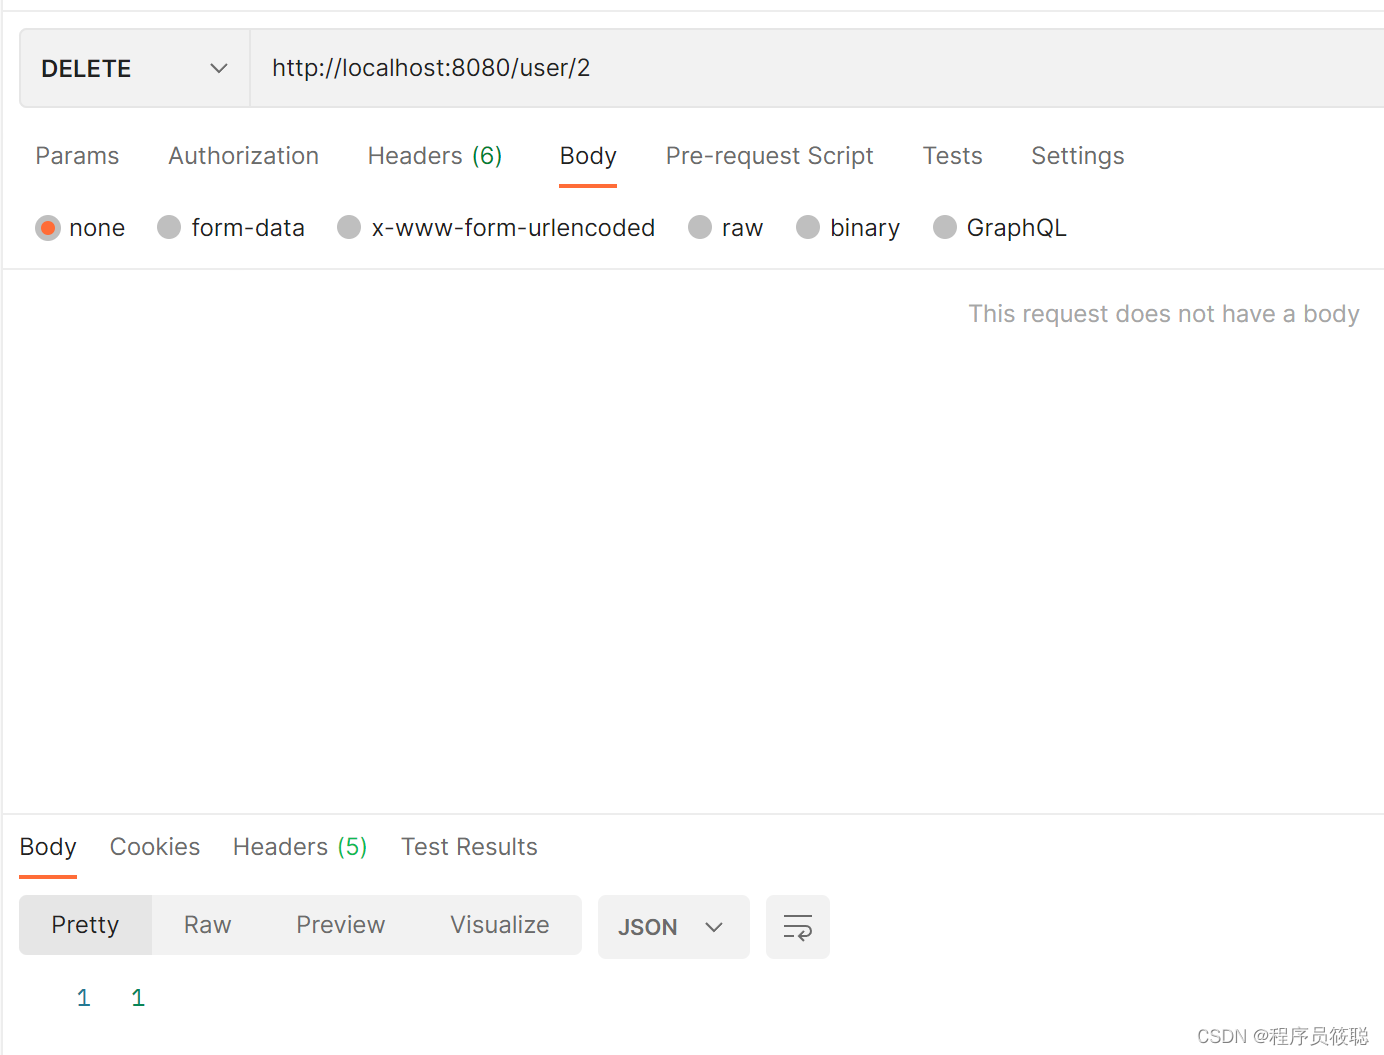
是ok的
好啦,如果对您有帮助,给我点个赞吧,创作不易。
版权归原作者 程序员筱聪 所有, 如有侵权,请联系我们删除。