
1、面向编程概念
AOP的全称是Aspect-Oriented Programming,即面向切面编程(也称面向方面编程)。它是面向对象 编程(OOP)的一种补充,目前已成为一种比较成熟的编程方式。面向对象编程是按业务执行的时间轴 执行,面向切面是对某个时间点的逻辑添加,是一个动态的过程。
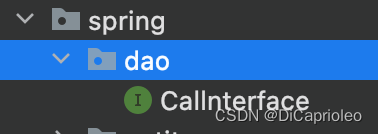
首先:在spring包下闯将dao.Callnterface的java接口(录入以下内容)
package com.test.spring.dao;

public interface Callnterface {
    int add(int num1,int num2);
    int sub(int num1,int num2);
    int mul(int num1,int num2);
    int div(int num1,int num2);
}
接着在spring包底下创建impl包中创建Callmpl类

Callmpl类 内容如下:
package com.test.spring.impl;

import com.test.spring.dao.Callnterface;

public class Callmpl implements Callnterface {
//    @Override
//    public int add(int num1,int num2){
//        System.out.println("参数1" + num1 + "参数2"  + num2);
//        int sum = num1 + num2;
//        System.out.println("sum = " + sum);
//        return sum;
//    }

    @Override
    public int add(int num1, int num2) {
        return num1+num2;
    }

    @Override
    public int sub(int num1, int num2) {
        return num1-num2;
    }

    @Override
    public int mul(int num1, int num2) {
        return num1*num2;
    }

    @Override
    public int div(int num1, int num2) {
        return num1/num2;
    }
}
创建并继承上面Callnterface接口,并构造方法,如上述。
然后在我们spring包底下在构建一个util包创建JDKProxy类在里面继承InvocationHandler如下:

此时希望在业务执行前后记录日志。正常模拟处理在前后加打印语句
构造完整代码:导入包后直接粘贴复制即可注意大小写的区分
package com.test.spring.util;

import com.test.spring.dao.Callnterface;

import java.lang.reflect.InvocationHandler;
import java.lang.reflect.Method;
import java.lang.reflect.Proxy;
import java.util.Arrays;

public class JDKProxy implements InvocationHandler {

    private Callnterface callnterface;

    public Object createProxy(Callnterface callnterface){
        this.callnterface = callnterface;
        ClassLoader classLoader = JDKProxy.class.getClassLoader();
        Class<?>[] interfaces = callnterface.getClass().getInterfaces();

        return Proxy.newProxyInstance(classLoader,interfaces,this);
    }

    @Override
    public Object invoke(Object proxy, Method method, Object[] args) throws Throwable {
        String methodName = method.getName();
        System.out.println("方法:" + methodName + " 执行,参数为:" + Arrays.asList(args));
        Object result = method.invoke(callnterface,args);
        System.out.println("方法:" + methodName + " 执行,结果为:" + result); return result;
    }
}
接着打开之前创建的BeanTest1测试类构造一个@Test方法进行测试内容如下:
@Test
    public void testjdkProxy(){
    Callnterface callnterface = new Callmpl();
    JDKProxy jdkProxy = new JDKProxy();
    Callnterface proxy = (Callnterface)jdkProxy.createProxy(callnterface);
    int num = proxy.add(12, 3);
    System.out.println("num = " + num);

    }
设置参数为(12)(3)
执行查看结果:

可以看到测试通过
2.动态代理
JDK动态代理
第一步:导入依赖 当前模块的pom.xml文件添加依赖:
<dependency>
    <groupId>org.springframework</groupId>
    <artifactId>spring-core</artifactId>
</dependency>
<dependency>
    <groupId>org.springframework</groupId>
    <artifactId>spring-beans</artifactId>
</dependency>
<dependency>
    <groupId>org.springframework</groupId>
    <artifactId>spring-context</artifactId>
</dependency>
<dependency>
    <groupId>org.springframework</groupId>
    <artifactId>spring-expression</artifactId>
</dependency>
在pom.xml中添加上面四个类
再创建包com.test.spring.util,在其下创建JDKProxy类,实现InvocationHandler接口,代码如下:
package com.test.spring.util;

import com.test.spring.dao.Callnterface;

import java.lang.reflect.InvocationHandler;
import java.lang.reflect.Method;
import java.lang.reflect.Proxy;
import java.util.Arrays;

public class JDKProxy implements InvocationHandler {

    private Callnterface callnterface;

    public Object createProxy(Callnterface callnterface){
        this.callnterface = callnterface;
        ClassLoader classLoader = JDKProxy.class.getClassLoader();
        Class<?>[] interfaces = callnterface.getClass().getInterfaces();

        return Proxy.newProxyInstance(classLoader,interfaces,this);
    }

    @Override
    public Object invoke(Object proxy, Method method, Object[] args) throws Throwable {
        String methodName = method.getName();
        System.out.println("方法:" + methodName + " 执行,参数为:" + Arrays.asList(args));
        Object result = method.invoke(callnterface,args);
        System.out.println("方法:" + methodName + " 执行,结果为:" + result); return result;
    }
}
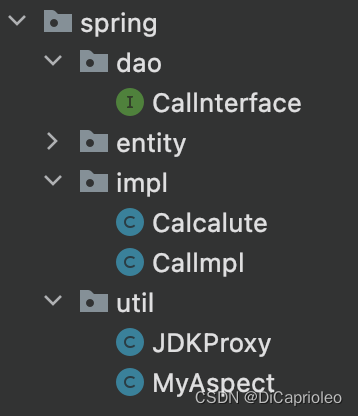
当前项目结构:
在注解方式AOP下再导入:
<dependencyManagement>
    <dependencies>
<!-- 此处省略之前添加的依赖,以下依赖为添加内容 --> <dependency>
            <groupId>org.springframework</groupId>
            <artifactId>spring-aspects</artifactId>
            <version>5.2.9.RELEASE</version>
        </dependency>
        <dependency>
            <groupId>aopalliance</groupId>
            <artifactId>aopalliance</artifactId>
            <version>1.0</version>
        </dependency>
    </dependencies>
</dependencyManagement>
在application.xml文件中一定要导入扫描引用如下:(没导入之前)
<?xmlversion="1.0"encoding="UTF-8"?>
 <beansxmlns="http://www.springframework.org/schema/beans"
 xmlns:xsi="http://www.w3.org/2001/XMLSchema-instance"
 xmlns:context="http://www.springframework.org/schema/context"
 xmlns:aop="http://www.springframework.org/schema/aop"
 xsi:schemaLocation="http://www.springframework.org/schema/beans
 http://www.springframework.org/schema/beans/spring-beans.xsd
 http://www.springframework.org/schema/context
 http://www.springframework.org/schema/context/spring-context.xsd
 http://www.springframework.org/schema/aop
 https://www.springframework.org/schema/aop/spring-aop.xsd">
 <context:component-scan base-package="com.aop.test"/>
 <!-- 开启切面自动代理 默认为JDK动态代理 -->
 <aop:aspectj-autoproxy/>
 </beans>
导入之后:(可直接复制粘贴使用这一类)
<?xml version="1.0" encoding="UTF-8"?>
<beans xmlns="http://www.springframework.org/schema/beans"
       xmlns:xsi="http://www.w3.org/2001/XMLSchema-instance"
       xmlns:p="http://www.springframework.org/schema/p"
       xmlns:c="http://www.springframework.org/schema/c"
       xmlns:util="http://www.springframework.org/schema/util"

       xmlns:aop="http://www.springframework.org/schema/aop"
       xmlns:context="http://www.springframework.org/schema/context"

       xsi:schemaLocation="http://www.springframework.org/schema/beans
        http://www.springframework.org/schema/beans/spring-beans.xsd
        http://www.springframework.org/schema/aop
        http://www.springframework.org/schema/aop/spring-aop.xsd
        http://www.springframework.org/schema/context
http://www.springframework.org/schema/context/spring-context.xsd
        http://www.springframework.org/schema/util
        http://www.springframework.org/schema/util/spring-util.xsd
">
增加部分如下:
xmlns:aop="http://www.springframework.org/schema/aop" 2 xsi:schemaLocation="
 <!-- 此处省略其他内容 -->
 http://www.springframework.org/schema/aop
 https://www.springframework.org/schema/aop/spring-aop.xsd"
接着在aop底下加入spring扫描组件

回到BeanTest1测试类新建一个测试方法如下:
 @Test
    public void testApectj(){
        ApplicationContext applicationContext = new ClassPathXmlApplicationContext("application.xml");
        Calcalute calcalute = applicationContext.getBean("calcalute", Calcalute.class);
        int num = calcalute.add(12, 13);
        System.out.println("num = " + num);

    }
注意认真区分calcalute的单词拼写与大小写
测试结果:

感谢大家观看
本文转载自: https://blog.csdn.net/DiCaprioleo/article/details/127745859
版权归原作者 DiCaprioleo 所有, 如有侵权,请联系我们删除。
版权归原作者 DiCaprioleo 所有, 如有侵权,请联系我们删除。