前言
在使用Qt设计师进行窗口设计时,我们会通过拖拽使用设计师中的原生控件来进行界面的开发,但有时候那些标准窗口部件无法满足我们的需求,这时候就需要我们进行自定义控件的使用。本系列文章主要讲述了使用提升法及插件法来实现自定义控件的使用,如有错误之处,欢迎大家批评指正。
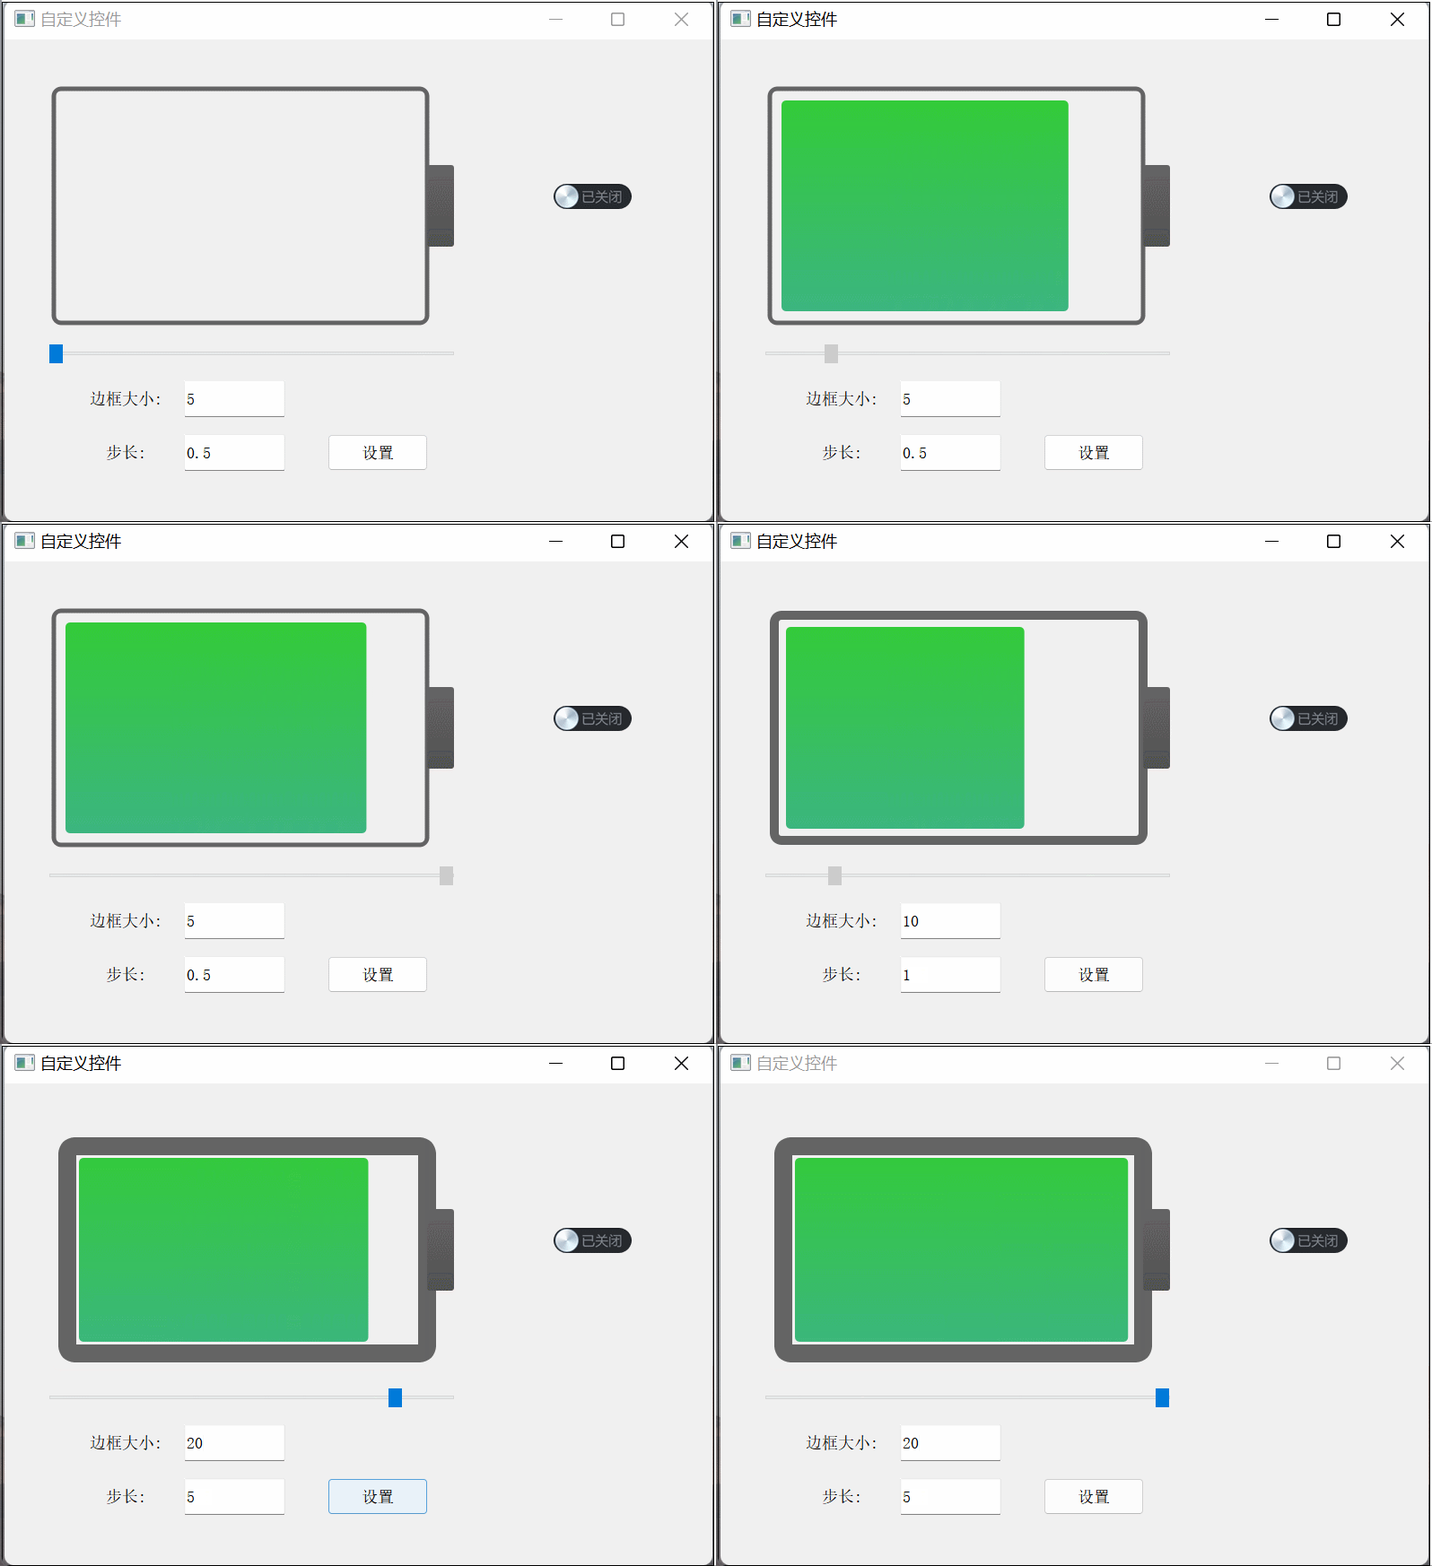
提示:以下是本篇文章正文内容,下面案例可供参考
一、提升一个Qt设计师界面类
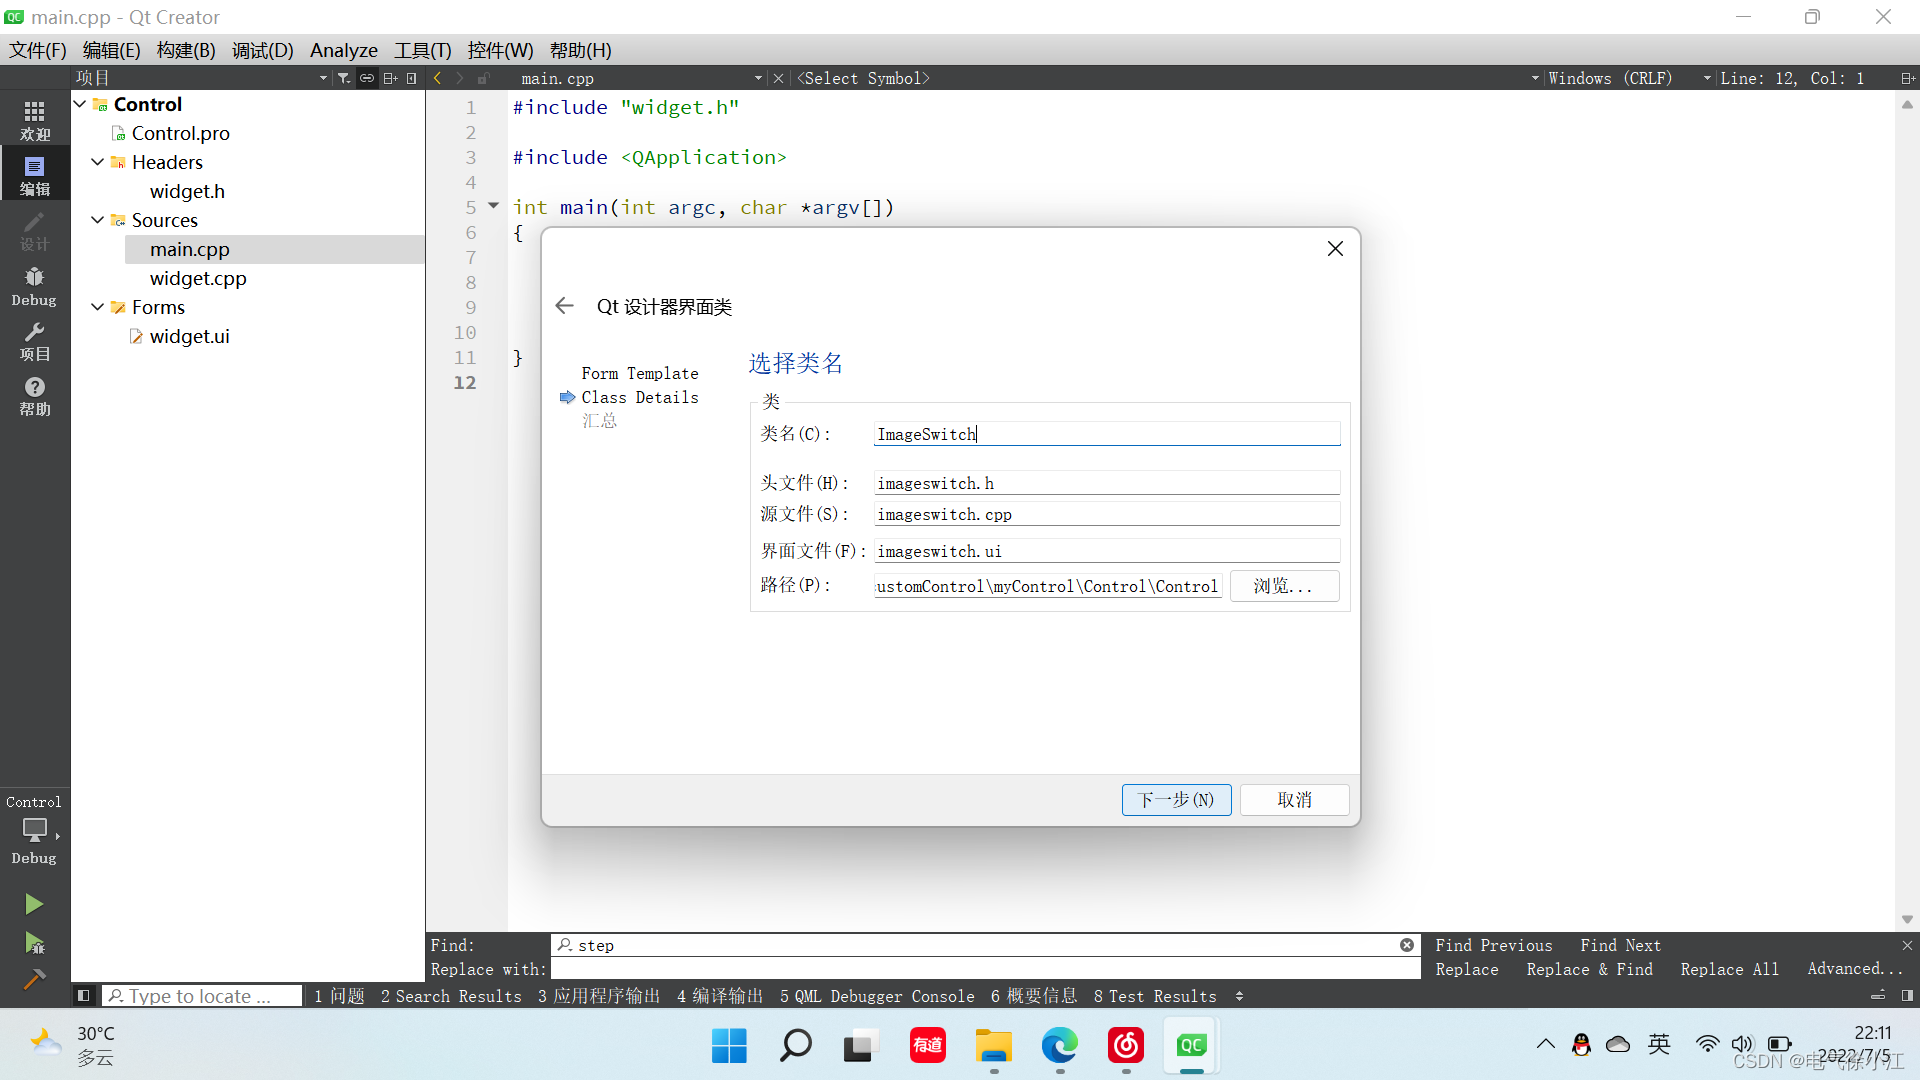
(1)新建界面类
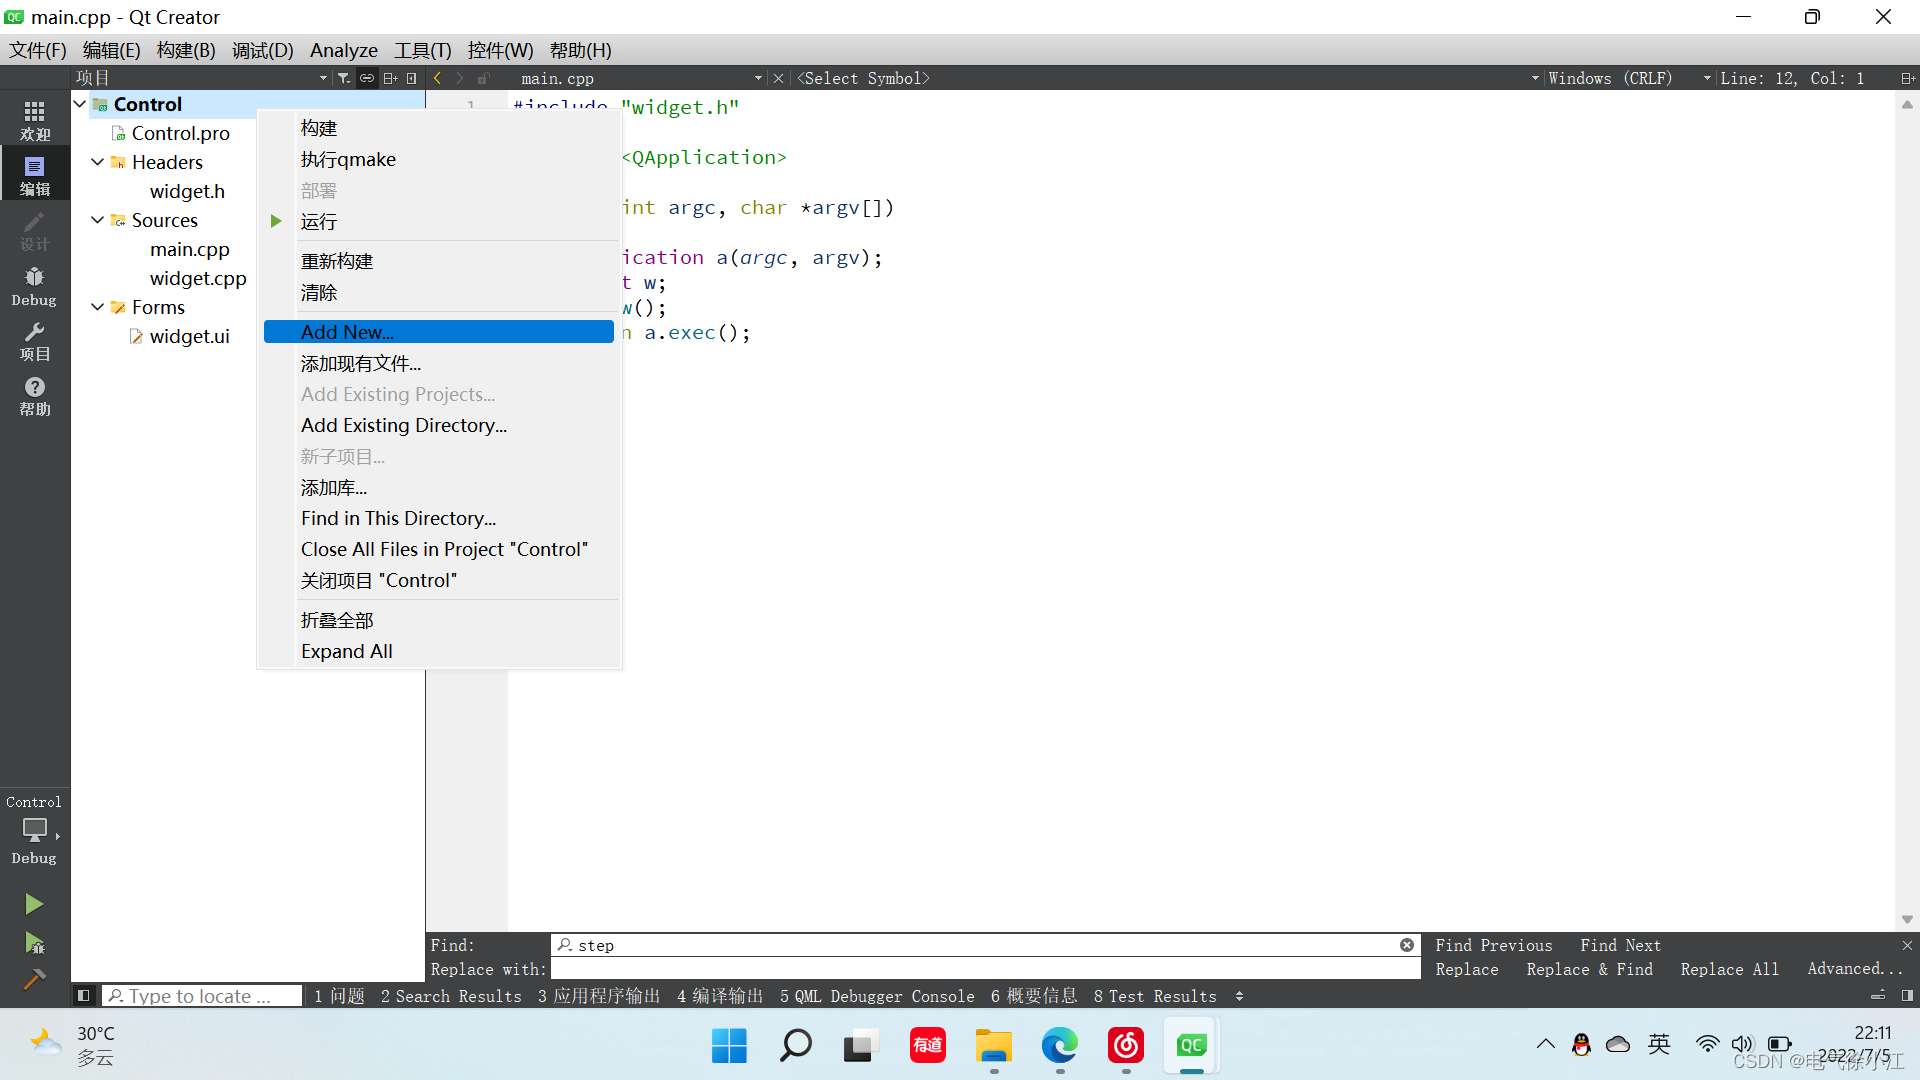
1.鼠标点击项目文件夹,右键Add New…
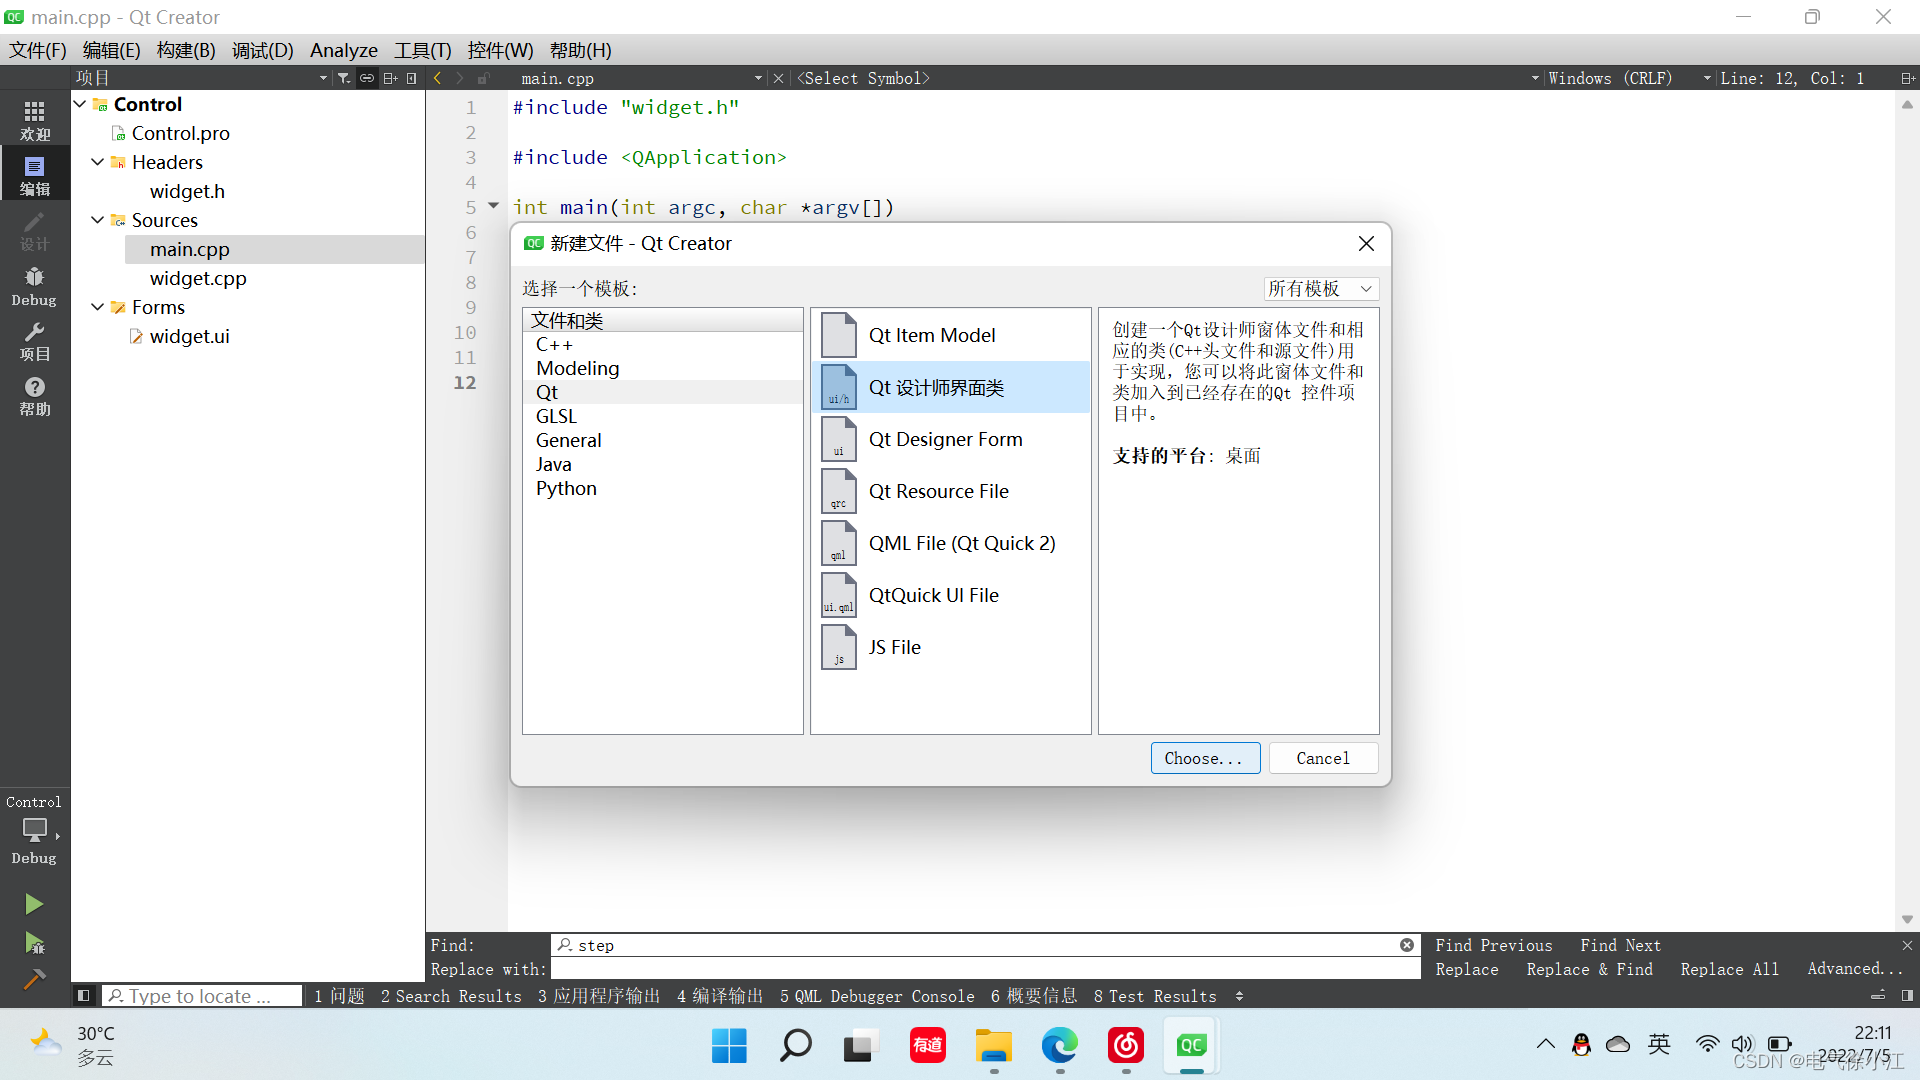
2.选择Qt设计师界面类
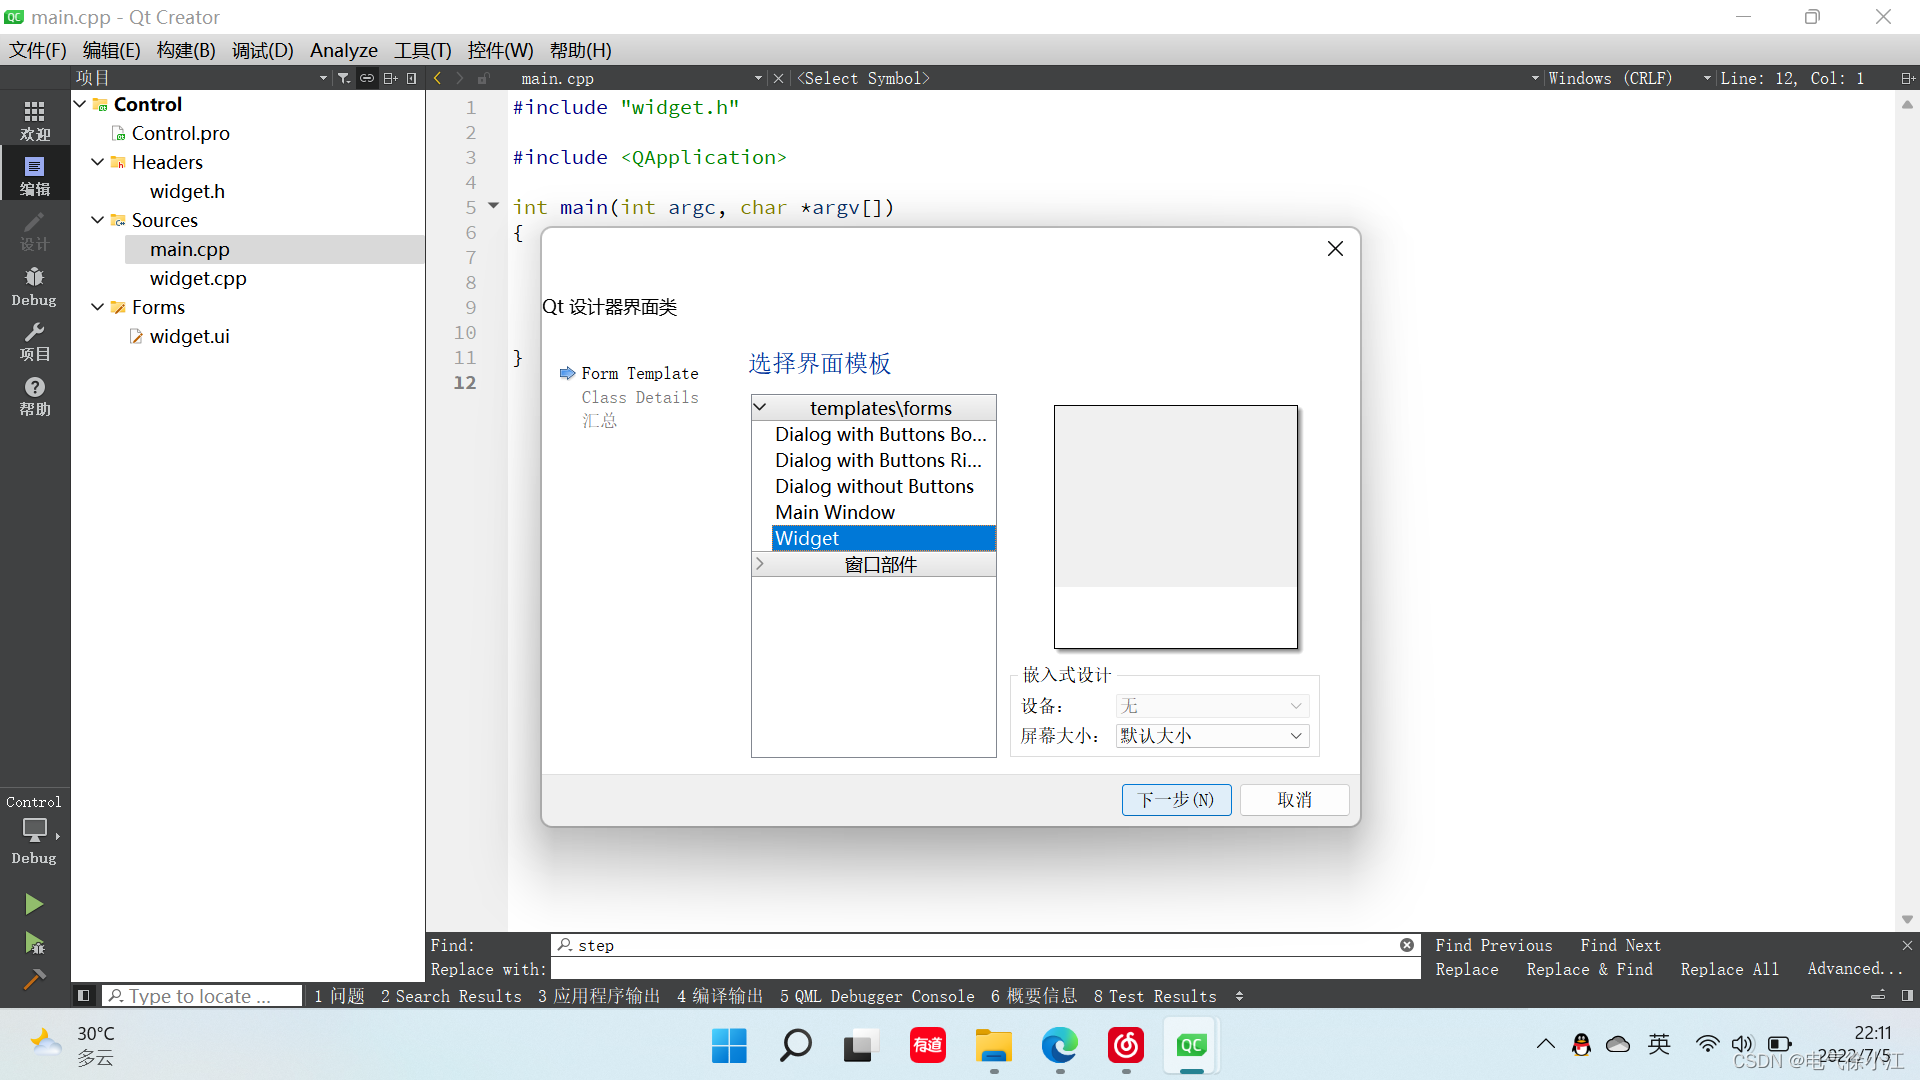
3.这里我选择了Widget,点击下一步
4.设置好自己的类名,点击下一步,直至完成
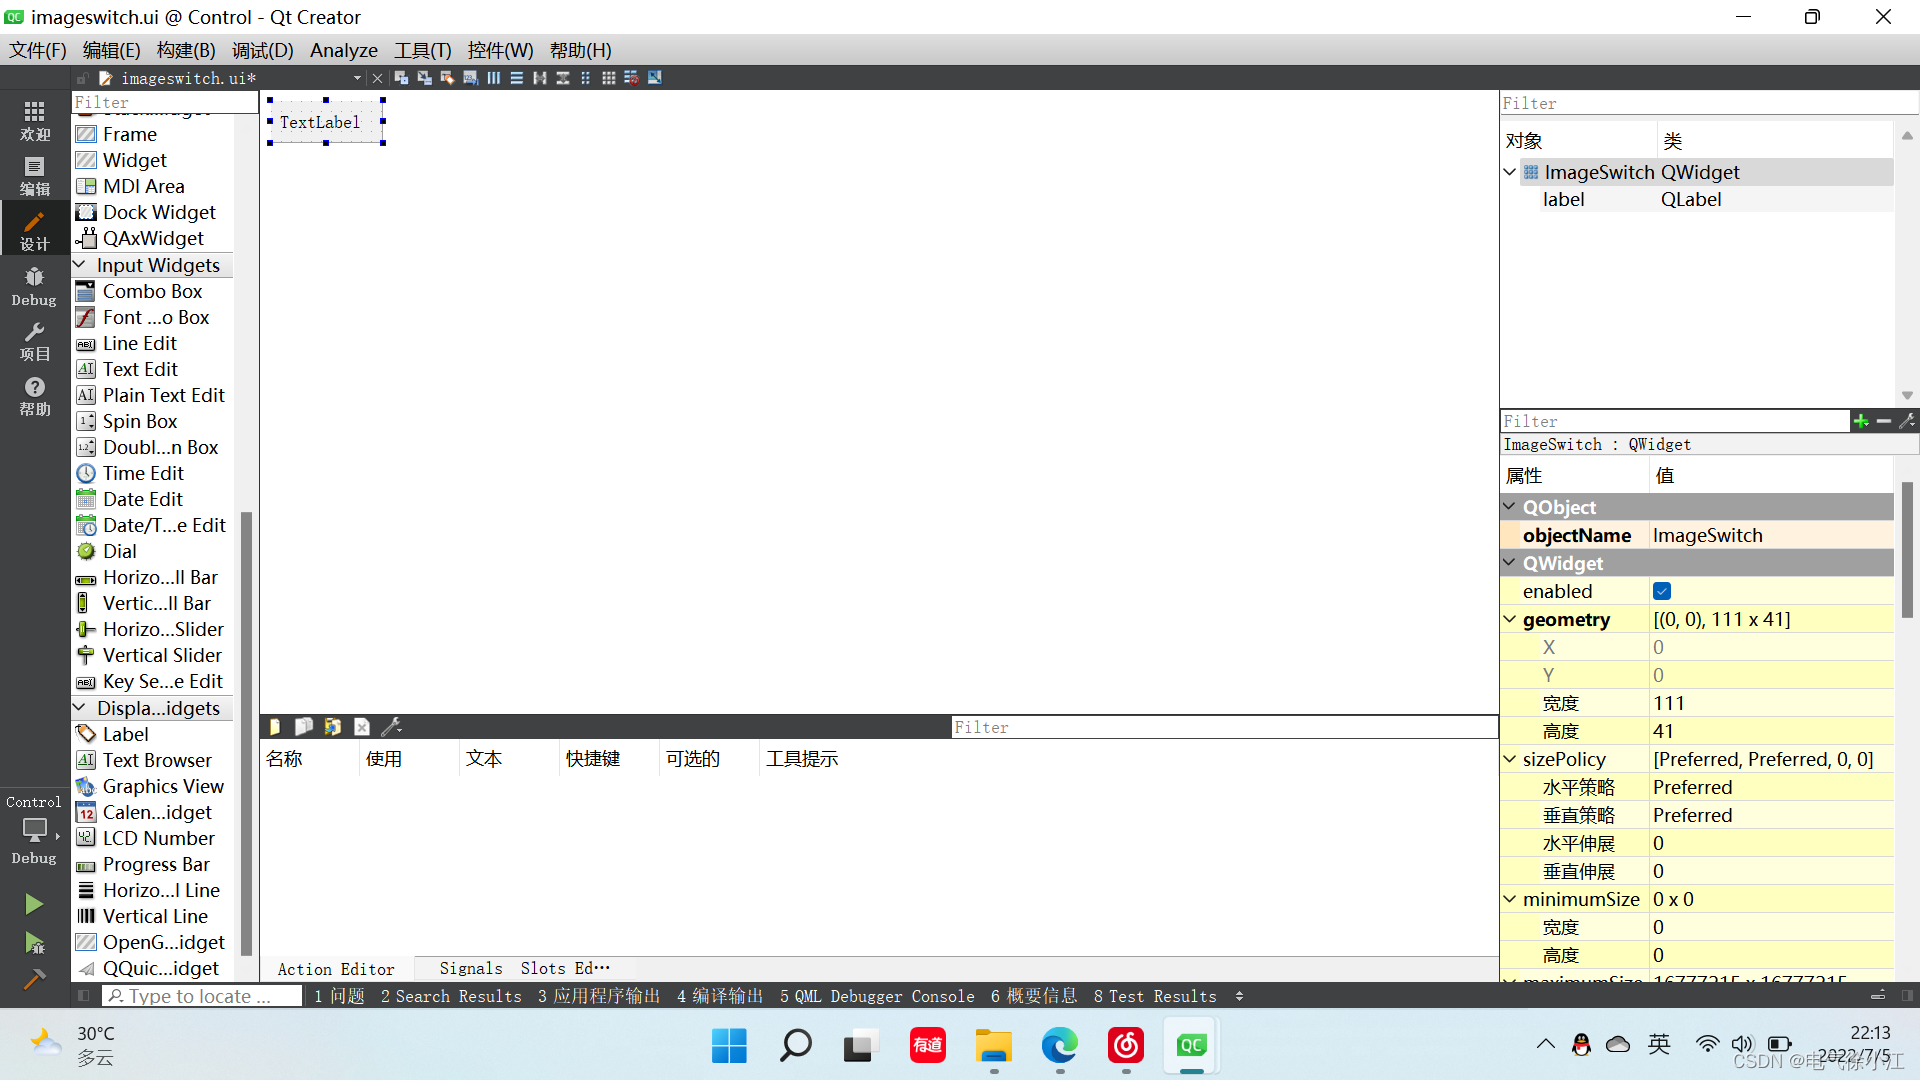
5.这边我要自定义的是一个图片开关,所以选择了在ui界面上添加了一个label,修改控件名称并调整合适大小
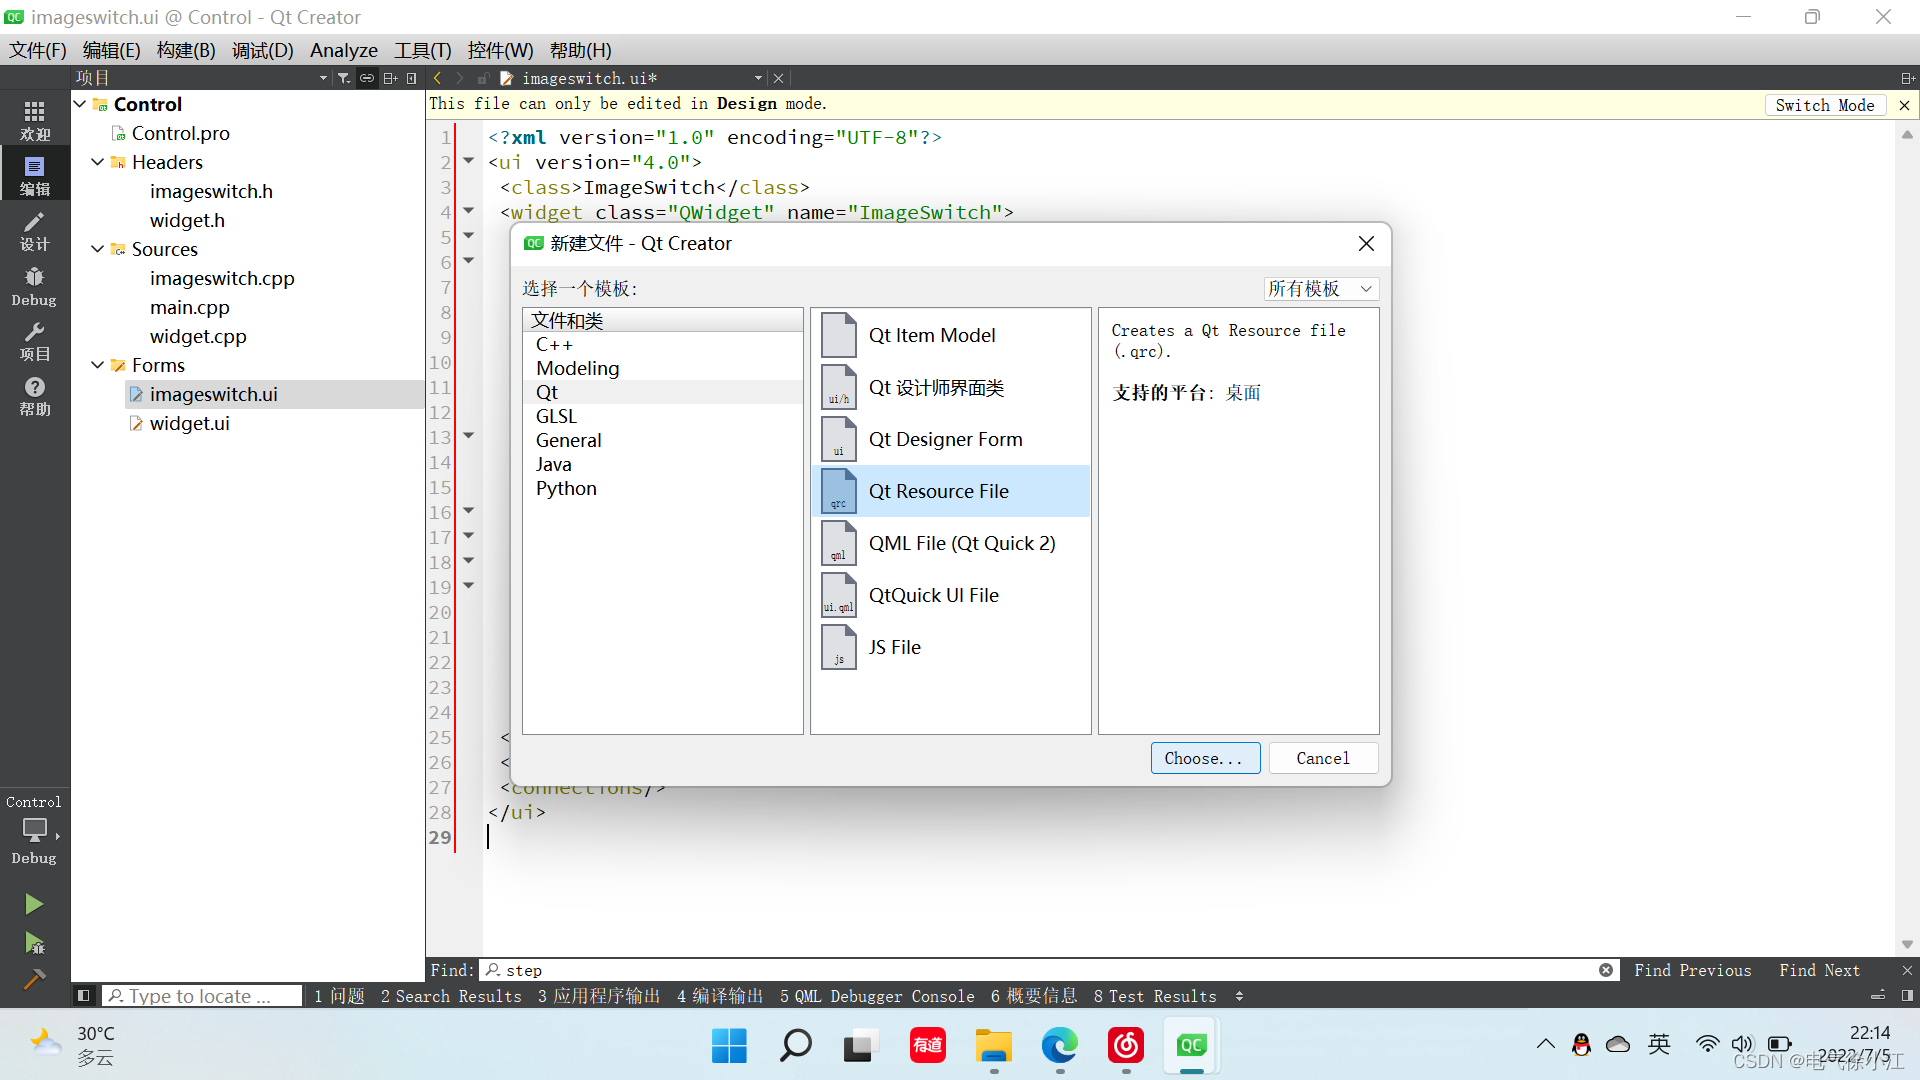
(2)添加资源文件
1.鼠标点击项目文件夹,右键Add New…,选择Qt Resource File,点击Choose…
2.设置好名称,点击下一步
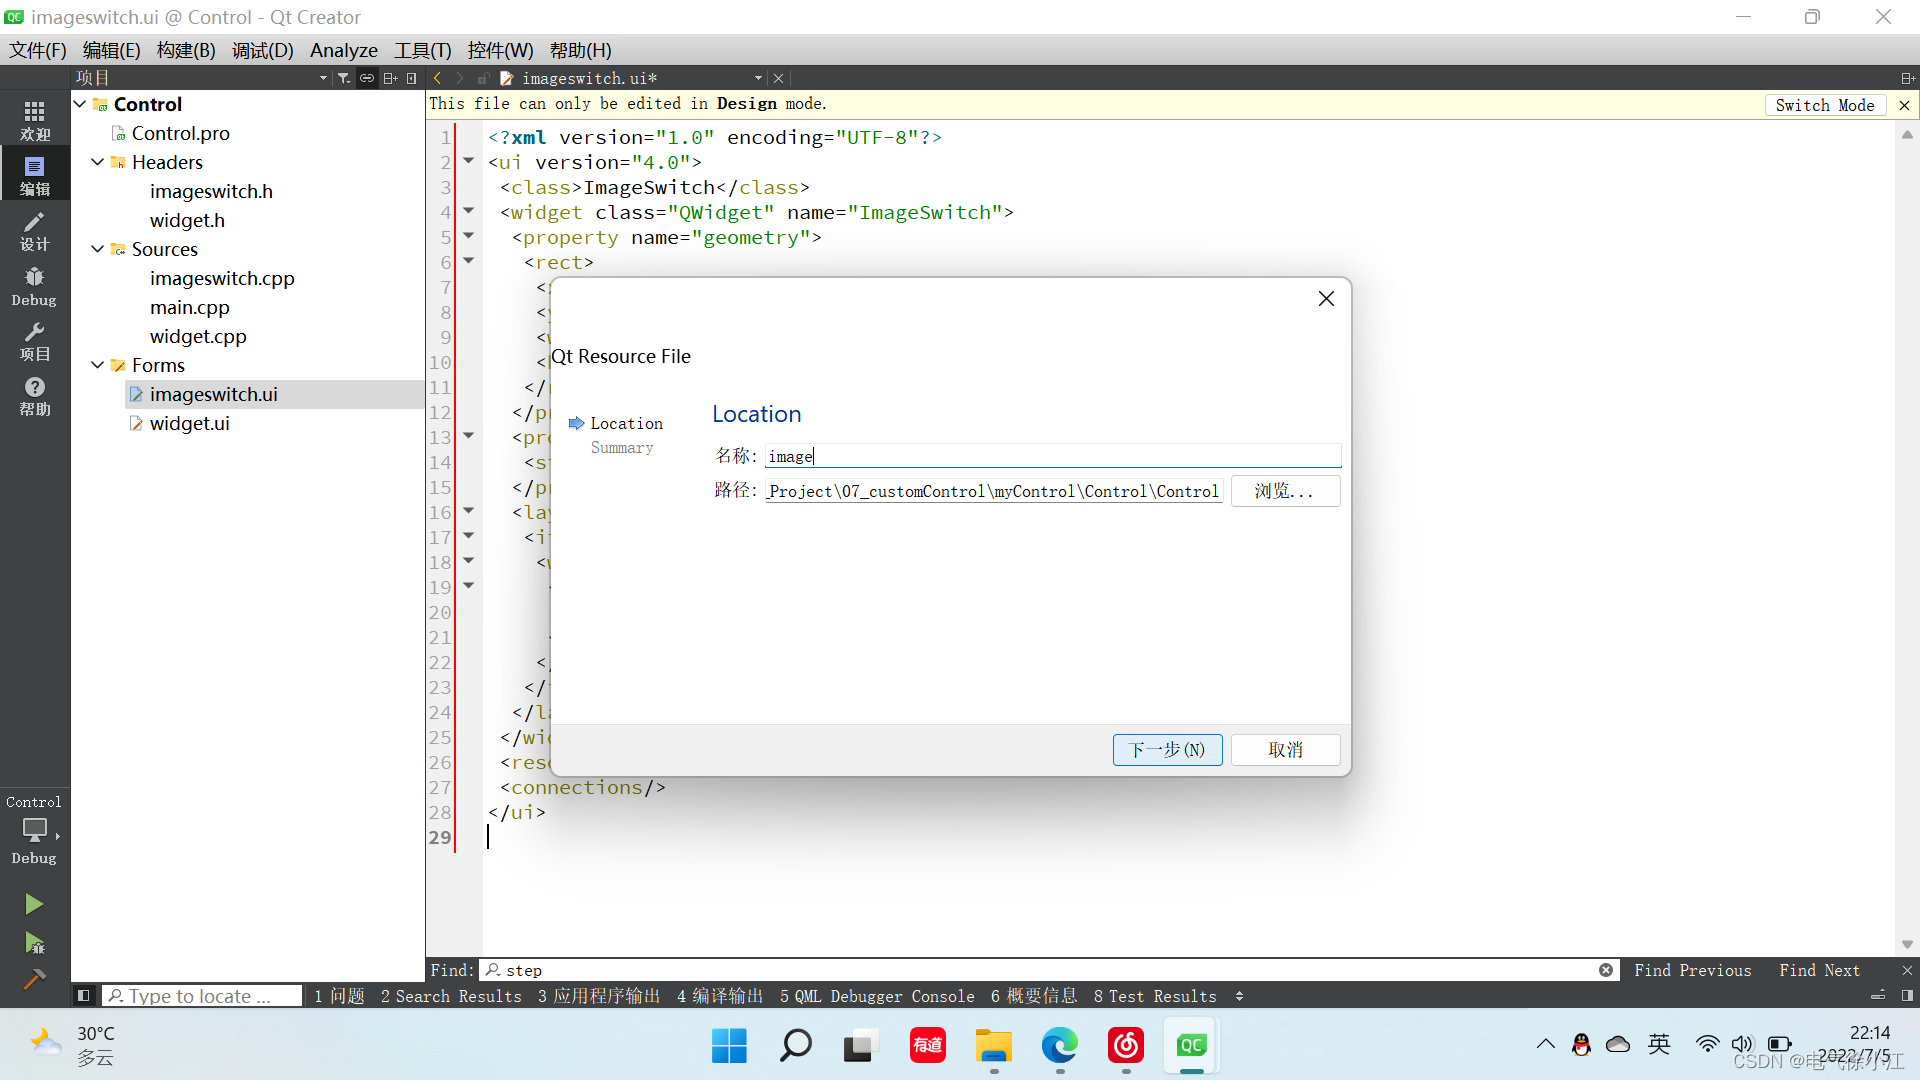
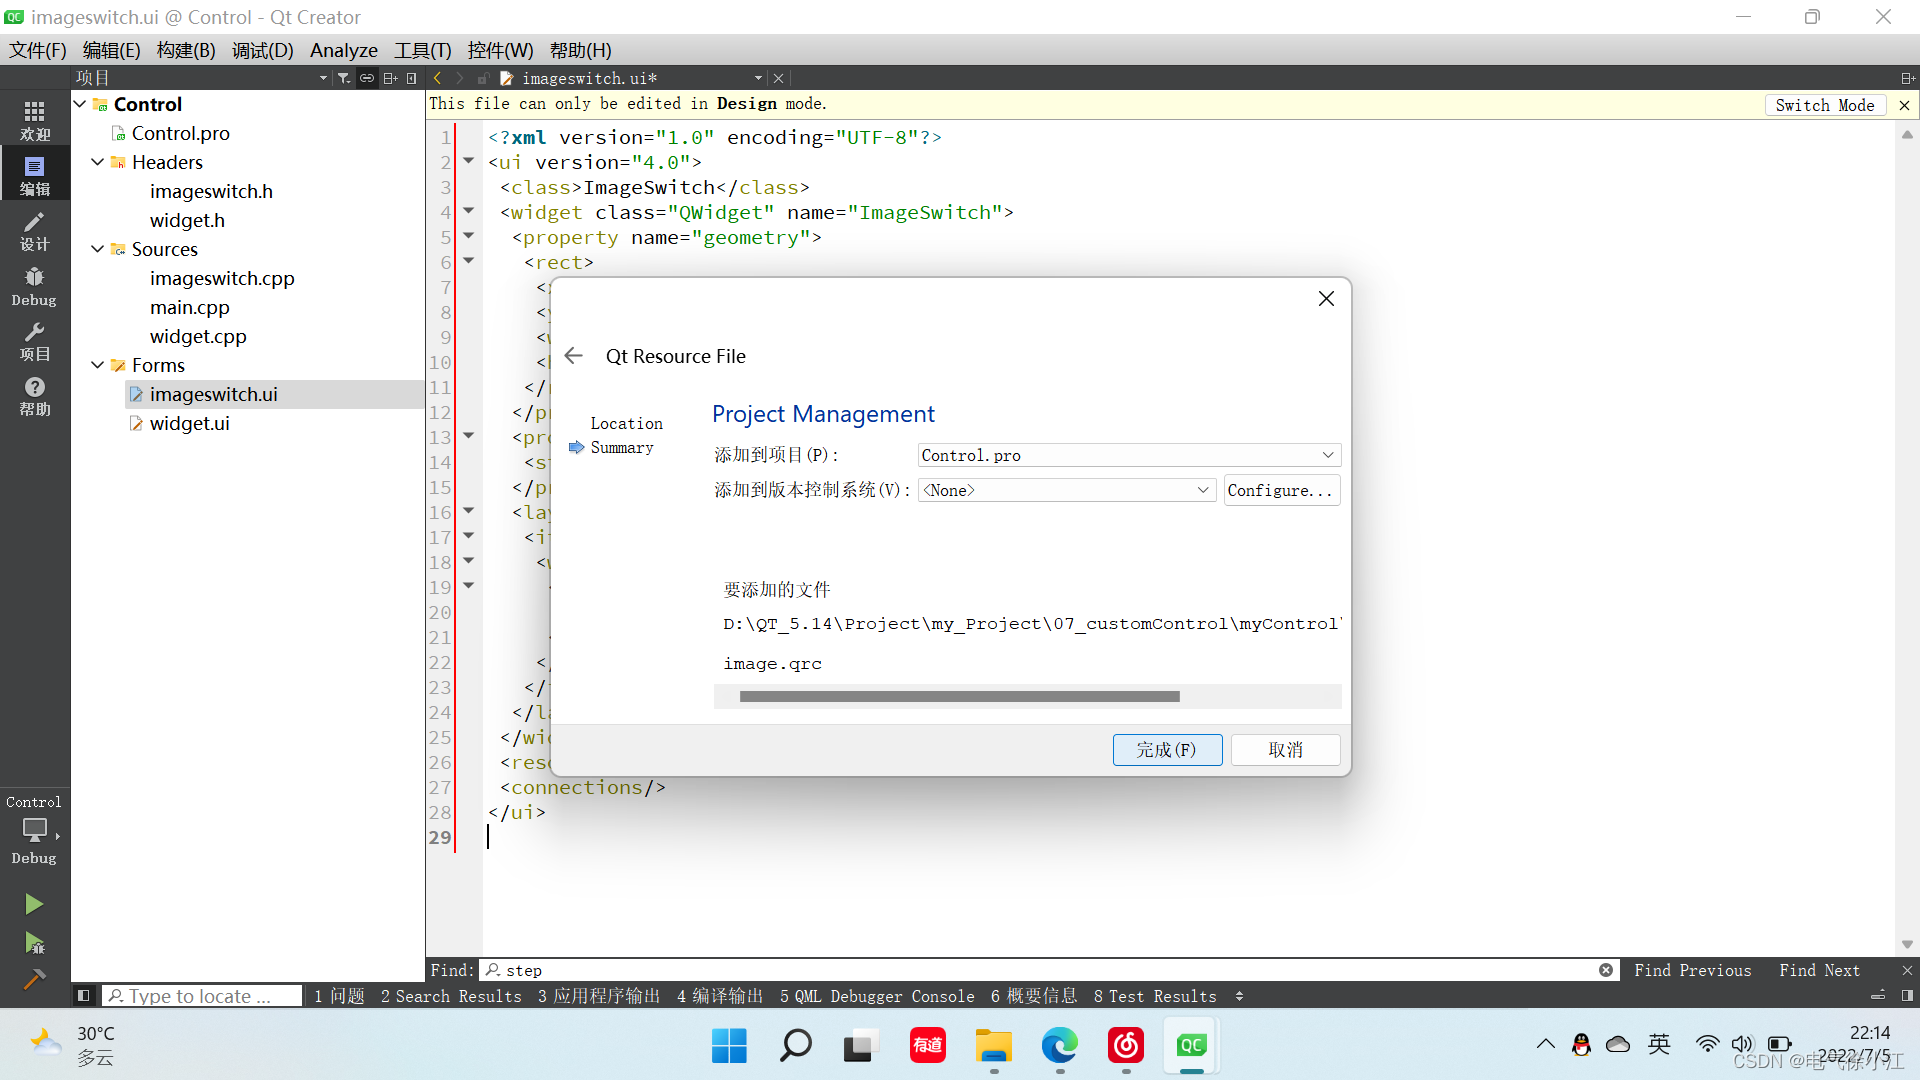
3.可以看到要生成的文件为image.qrc,点击完成
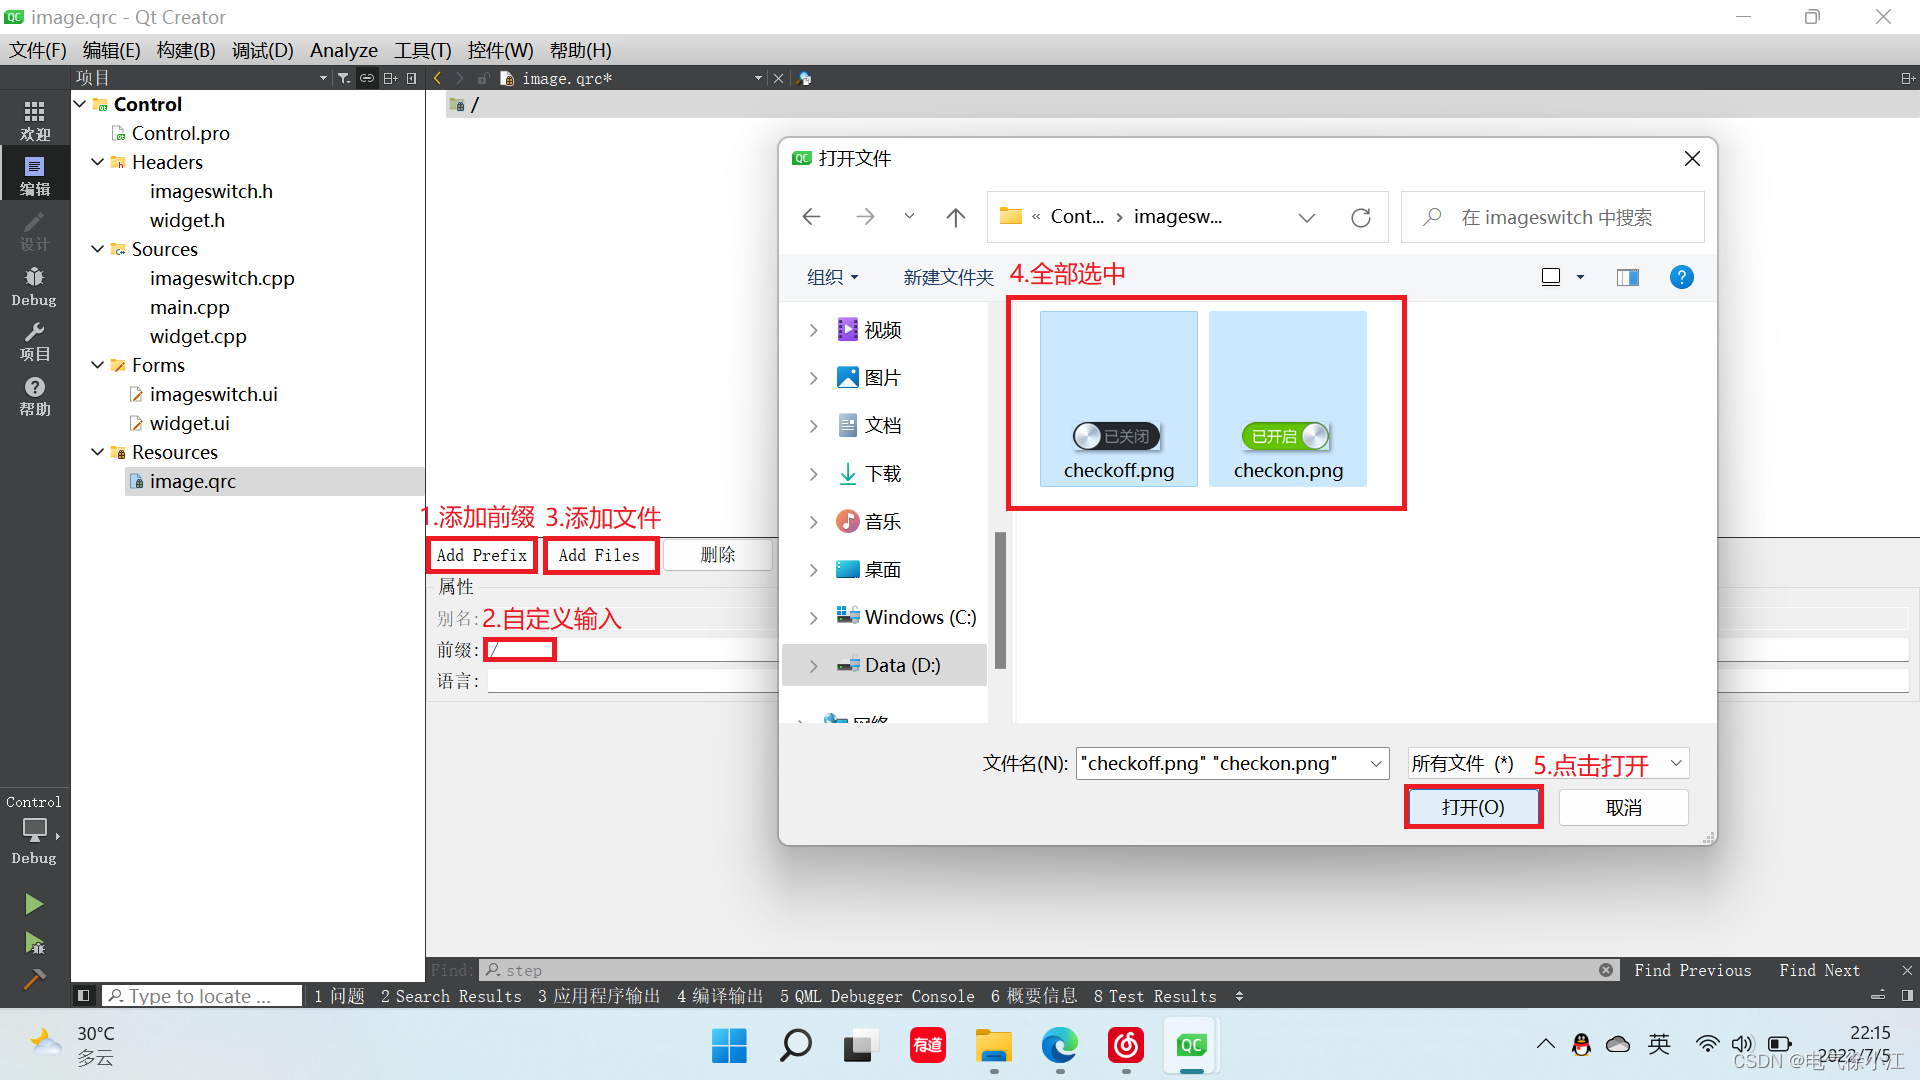
4.如图步骤,添加需要的png图片为资源文件
(3)初始化ui界面label样式
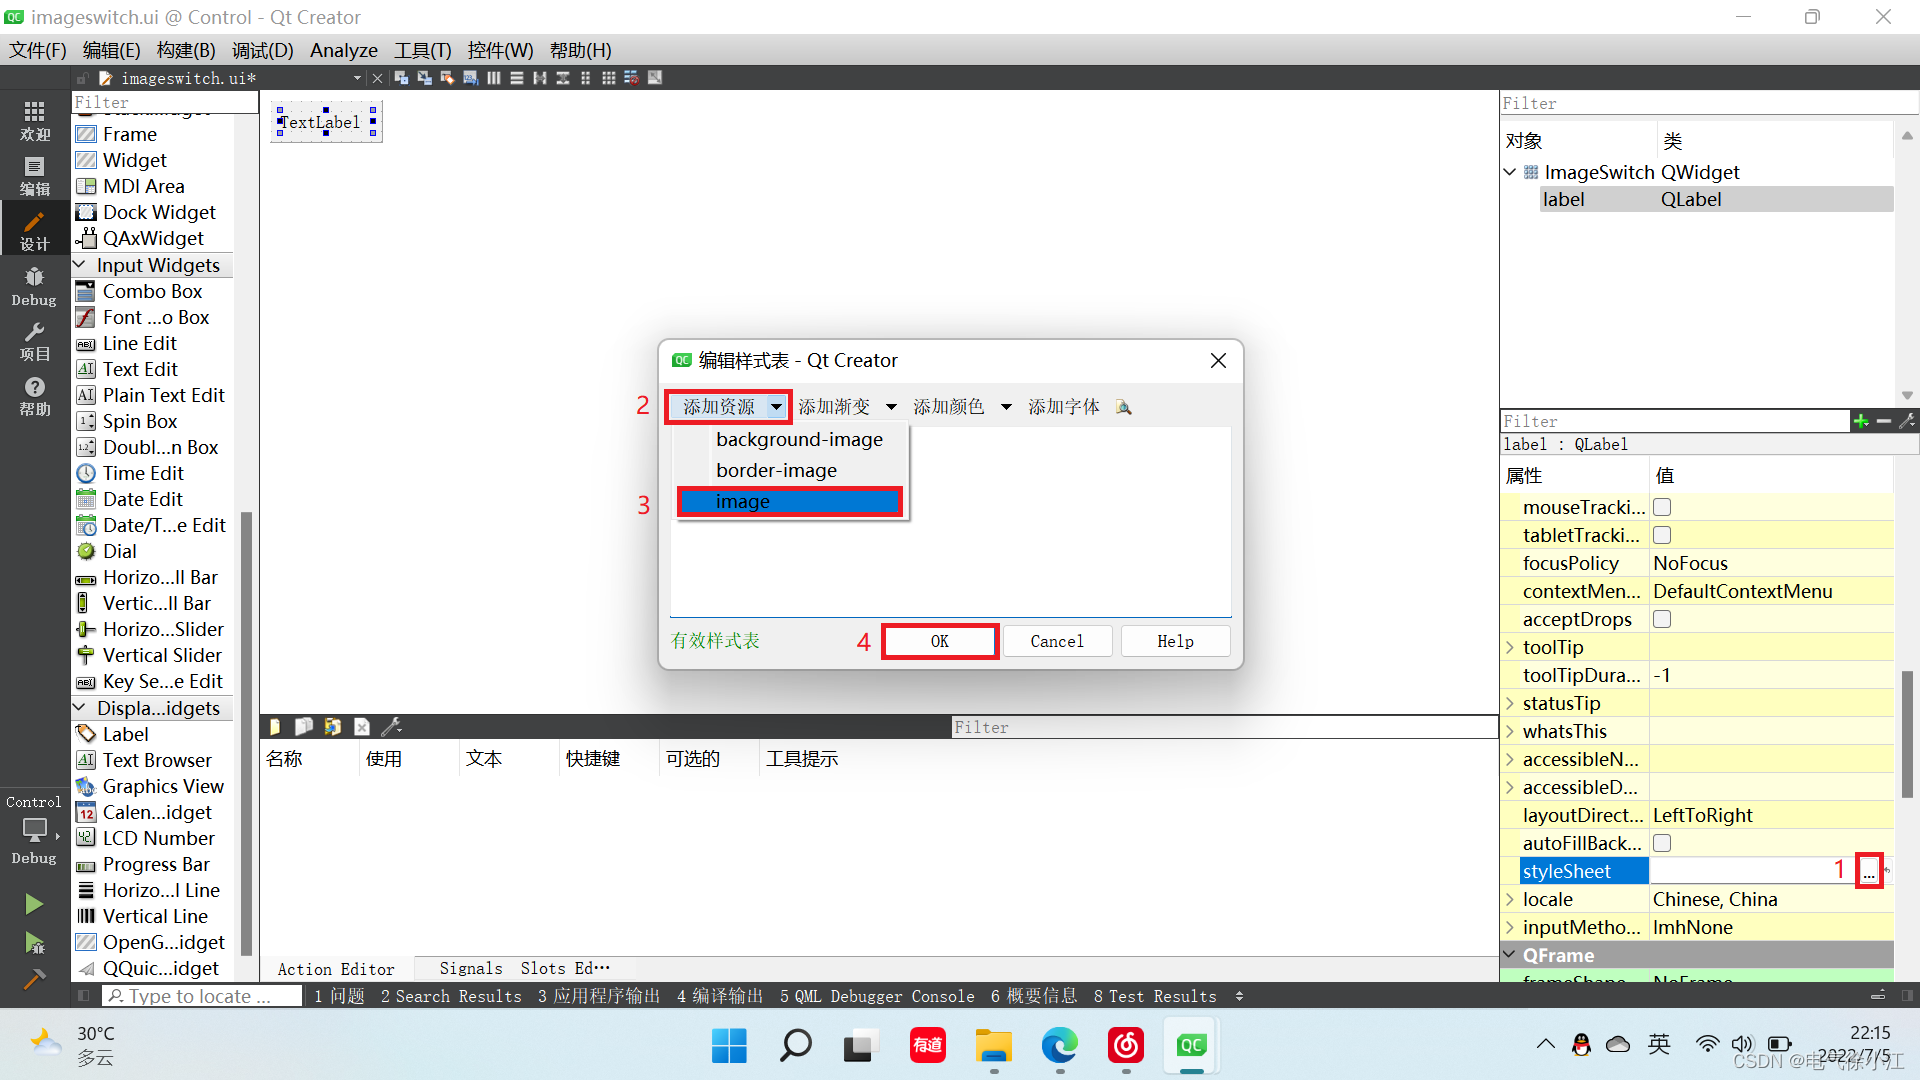
1.选中label控件,找到属性中的styleSheet,添加资源,选择image,点击OK
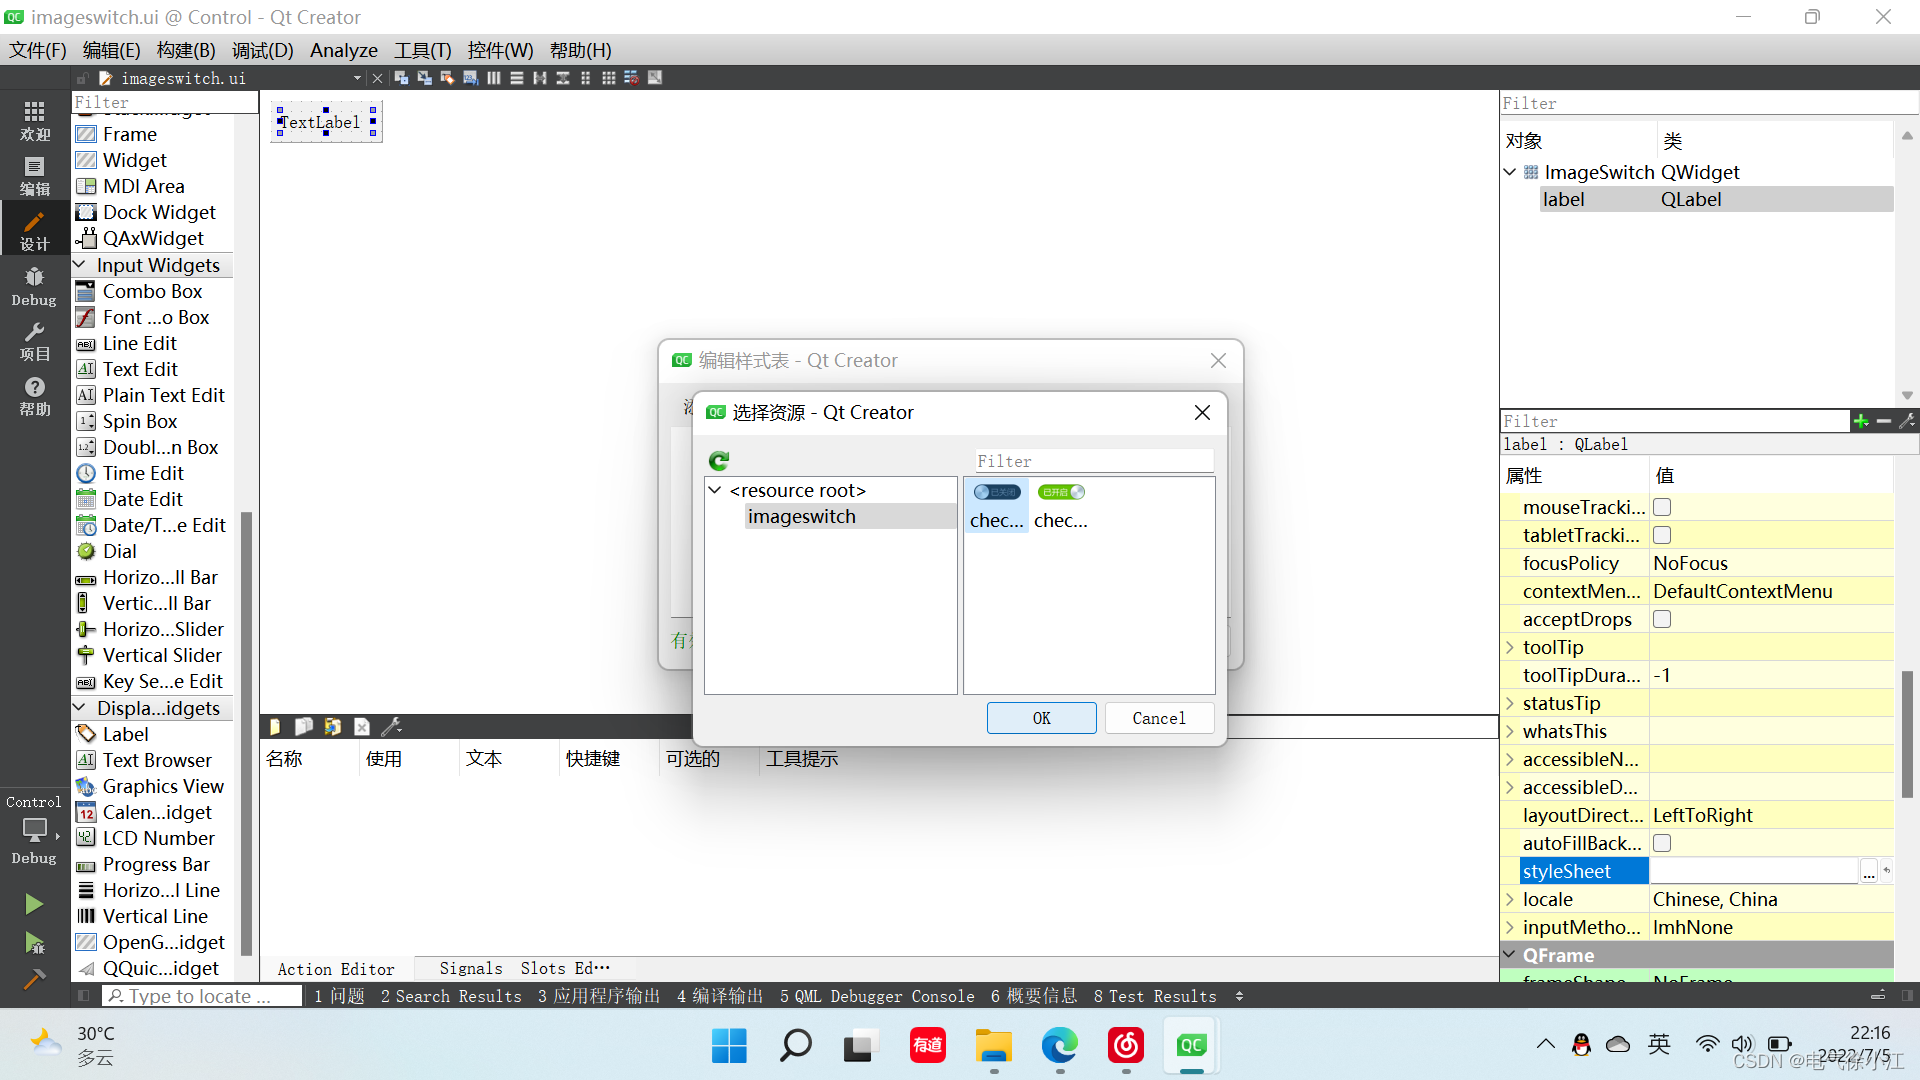
2.选择资源文件,这边选择checkoff.png,点击OK
3.看到出现下列界面(有效样式表),点击OK
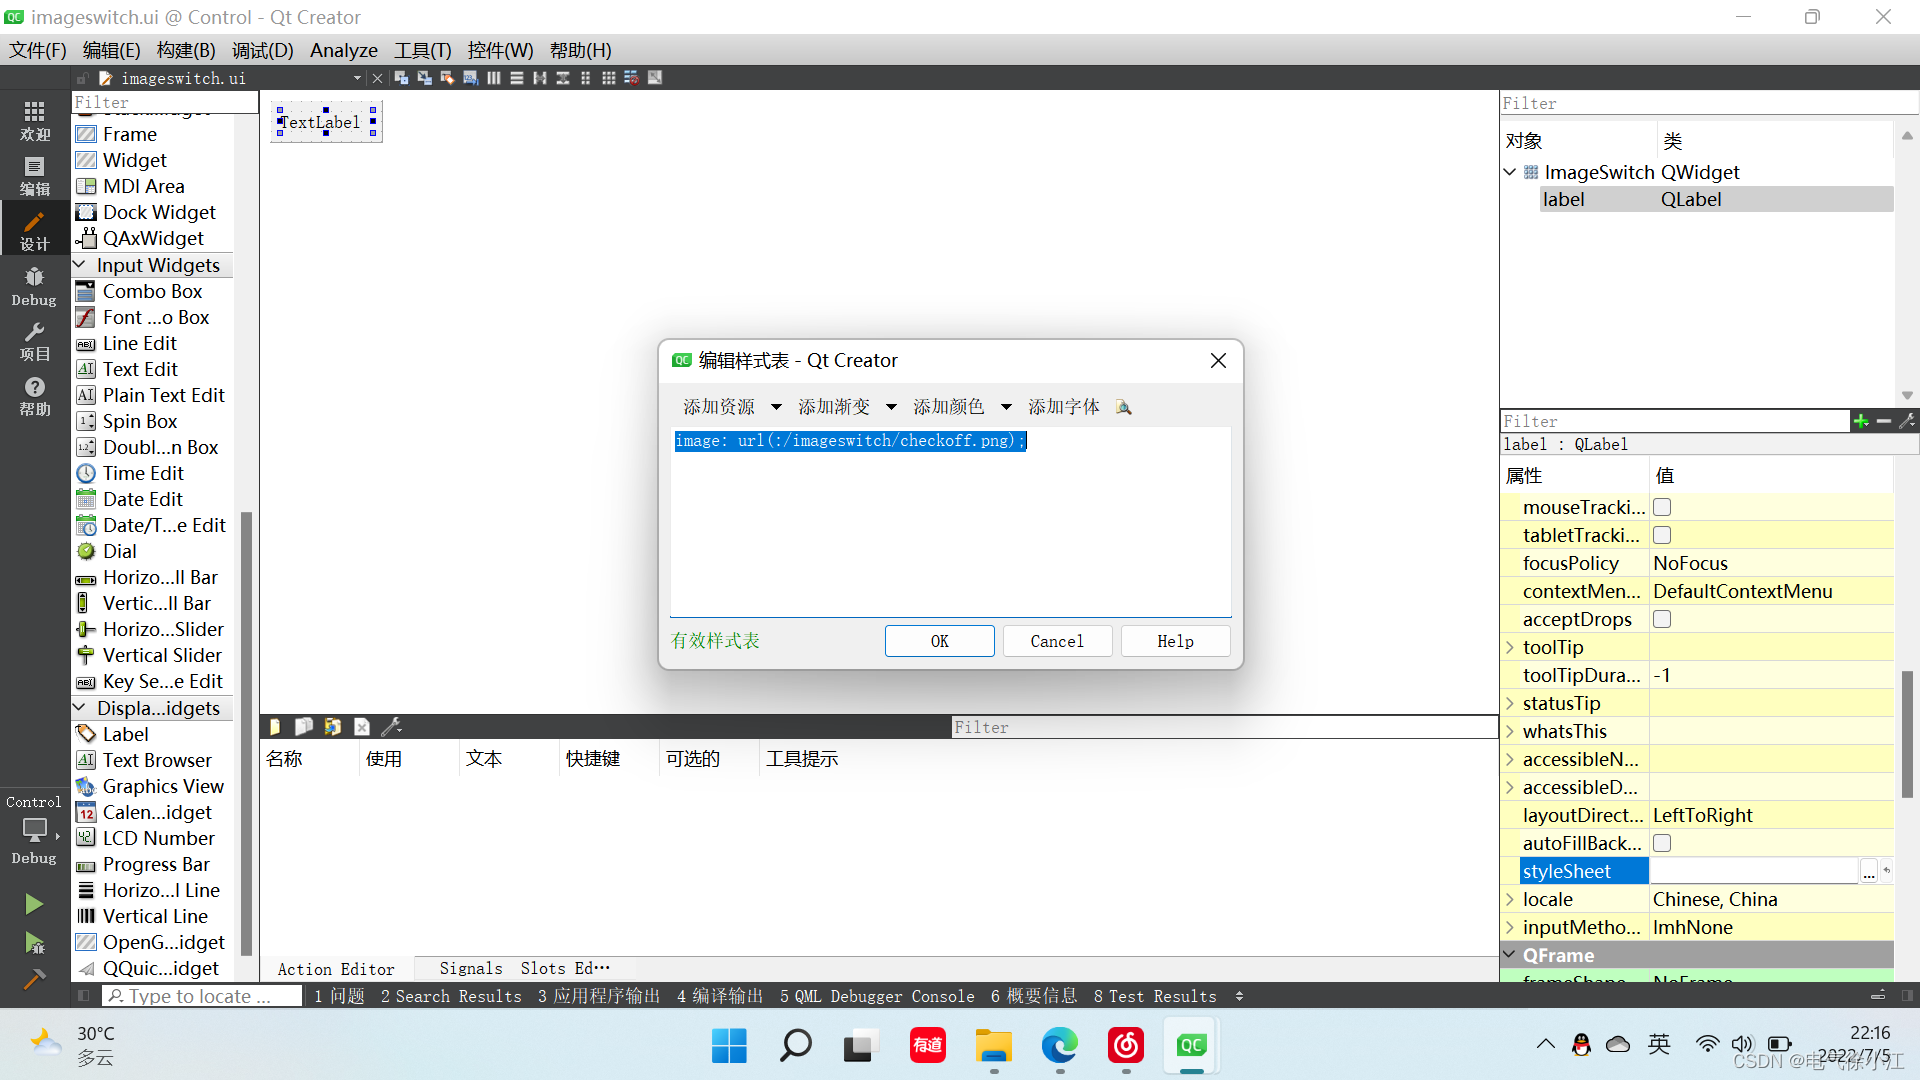
4.这里将label的文本置空,同时修改控件的objectName
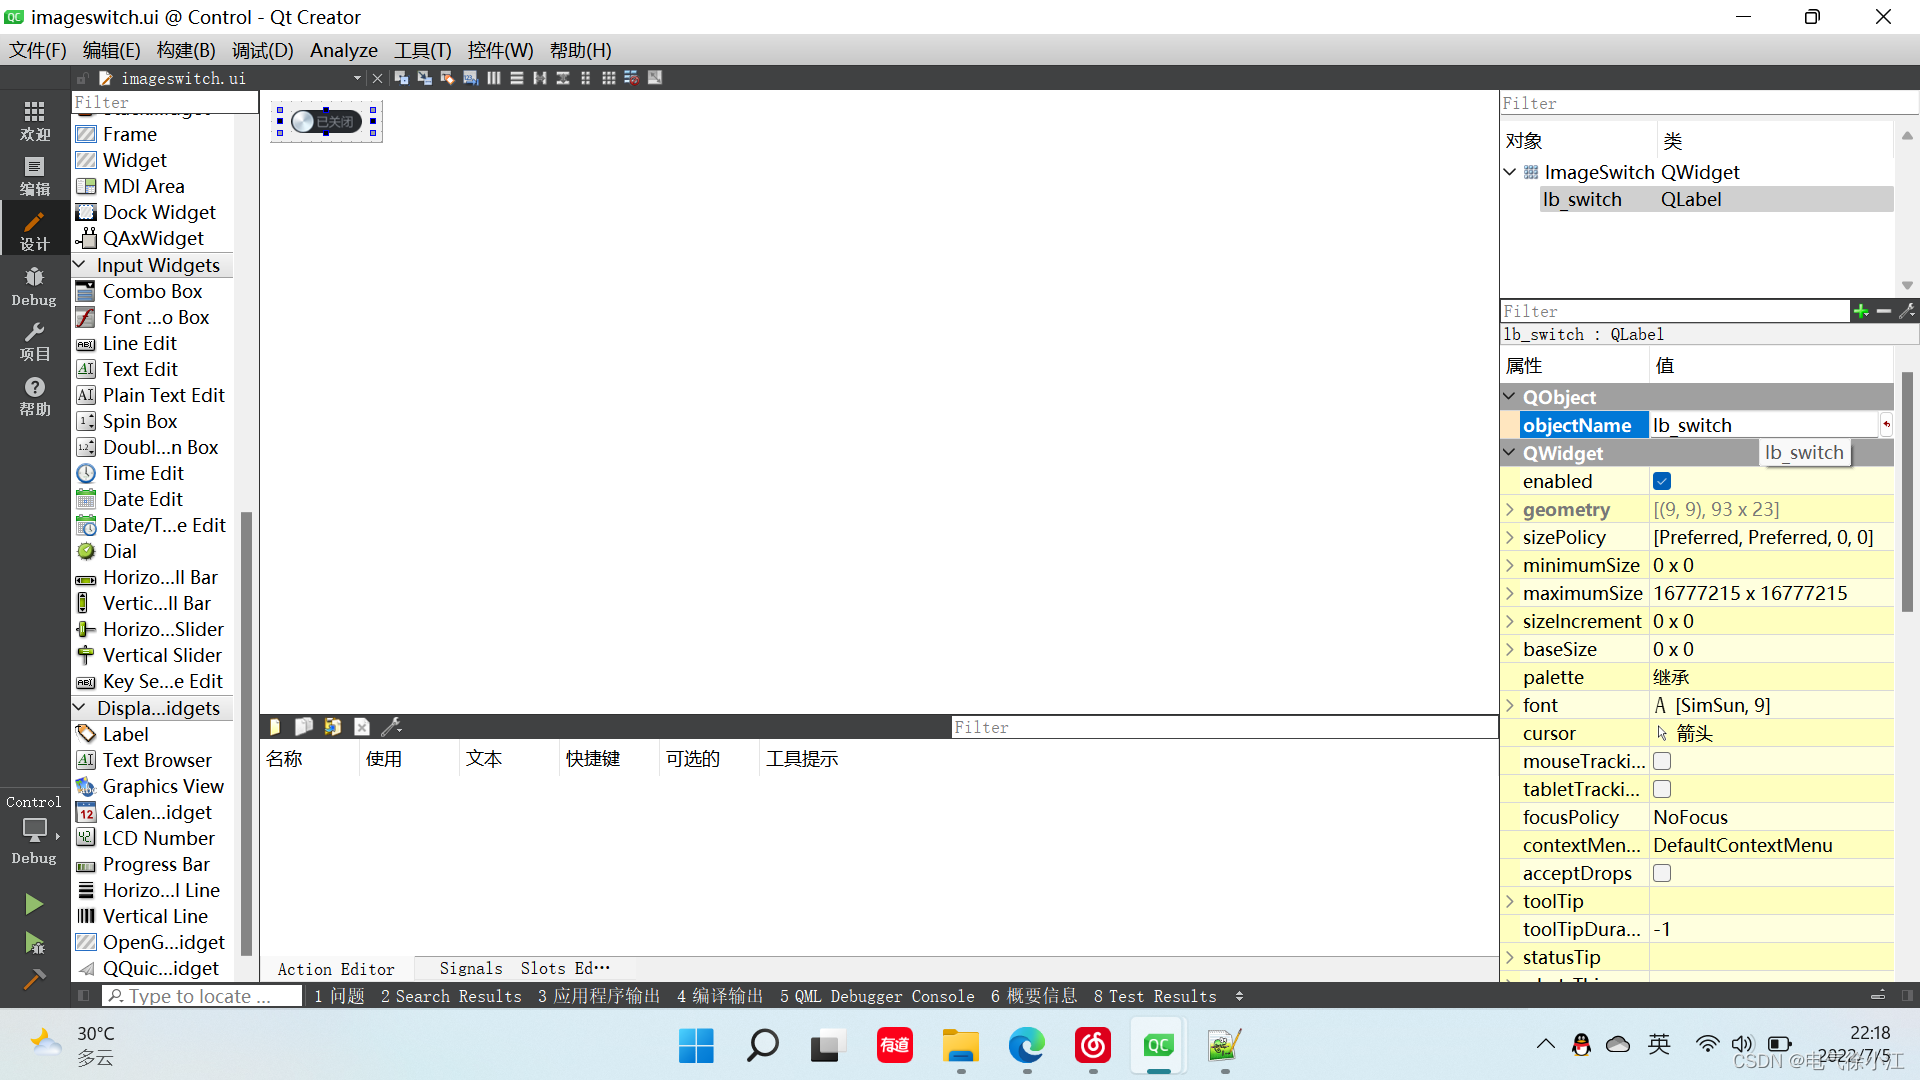
(4)主界面进行提升
1.回到widget.ui,界面中添加一个widget控件,修改名称后选中控件,右键提升为…
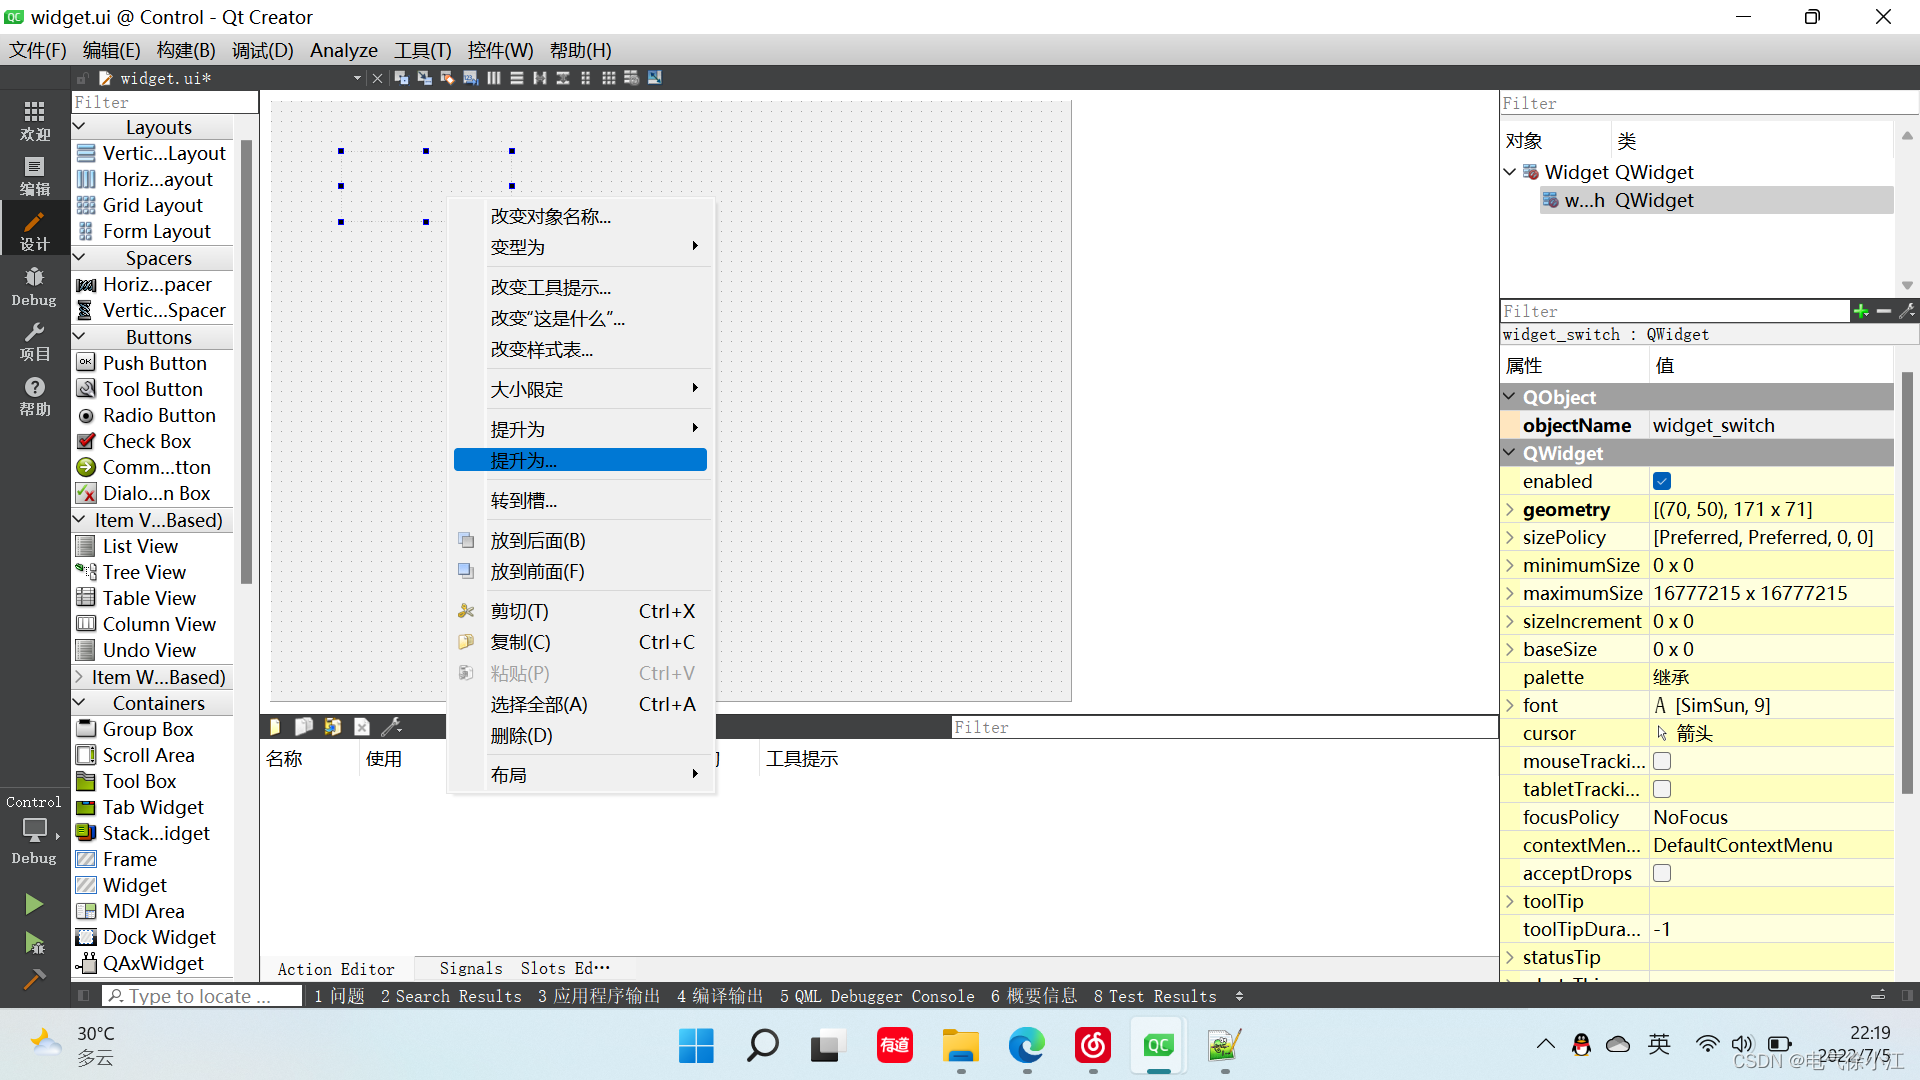
2.如图,新建提升的类,这里输入前面添加的ui界面设计师类名,点击添加
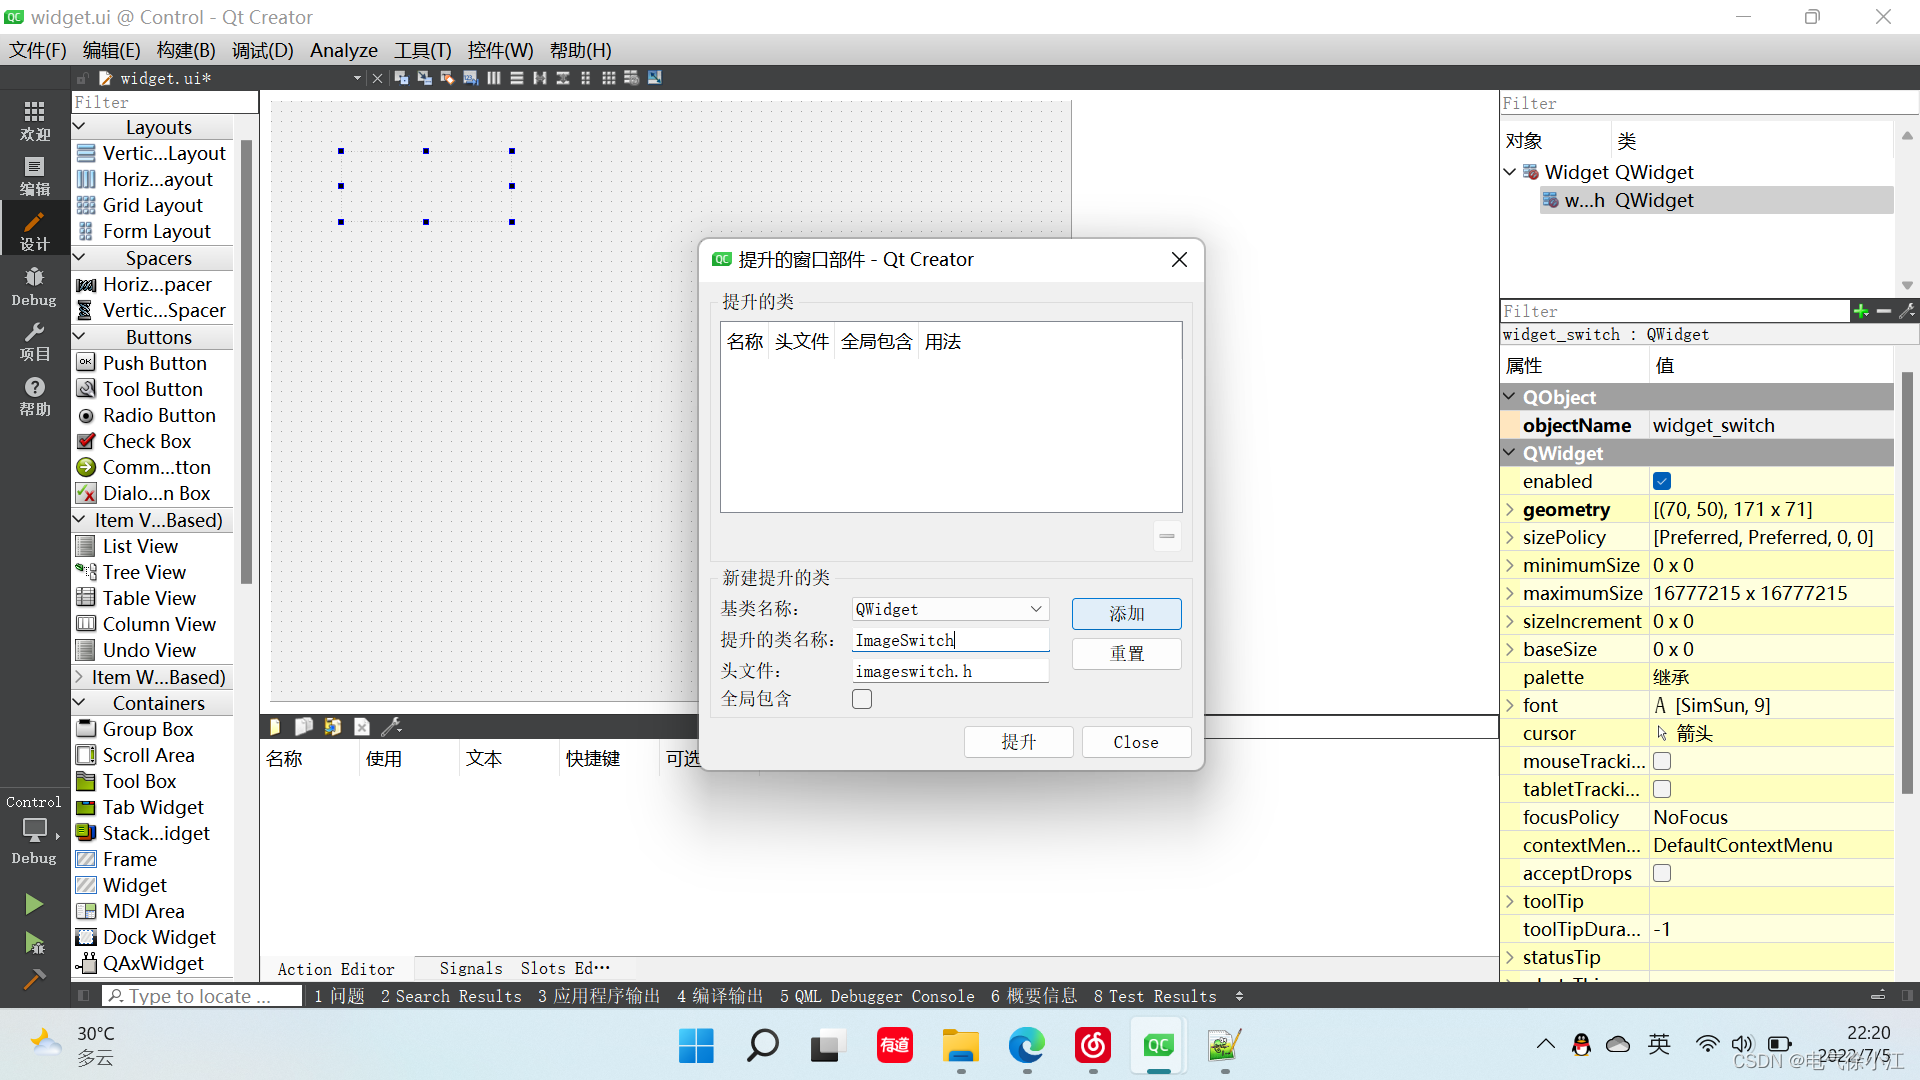
3.勾选中刚刚添加的ImageSwitch类,选择提升
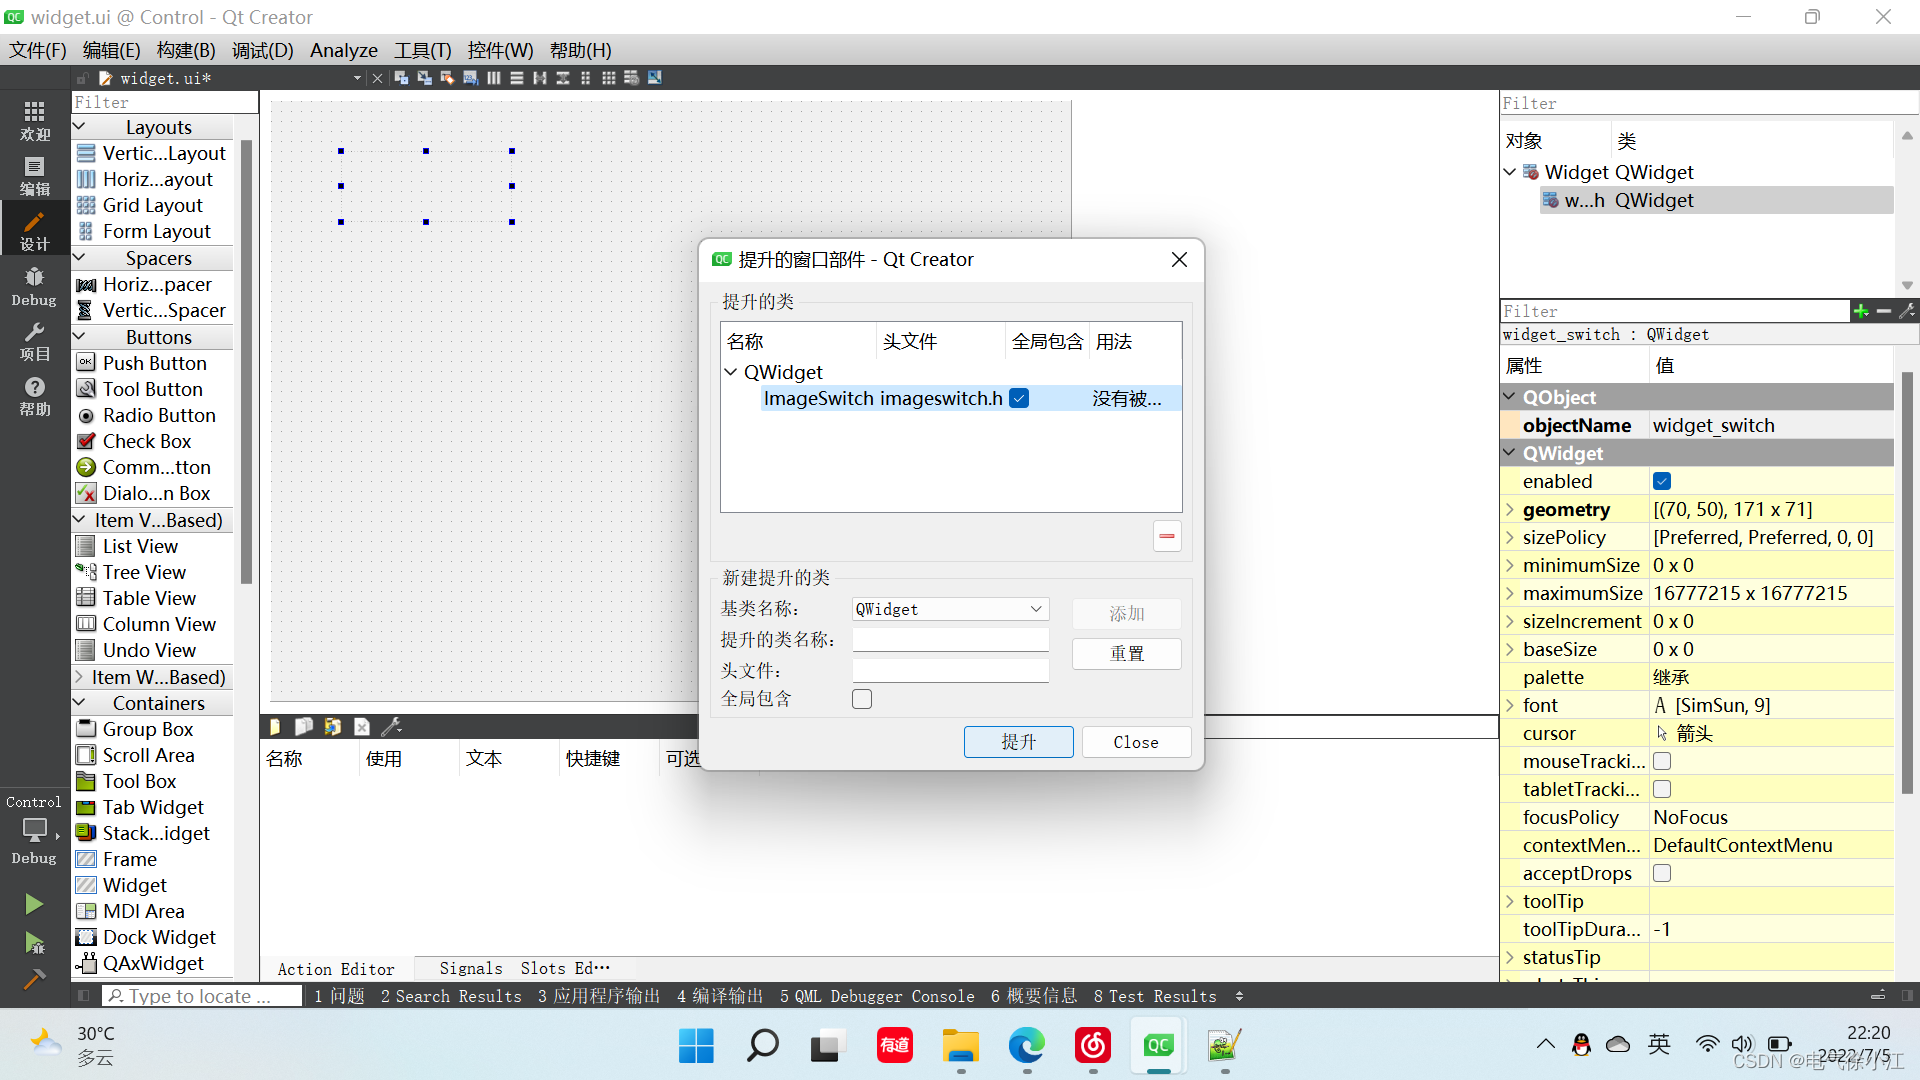
4.这里可以看到widget_switch控件已经成功提升为ImageSwitch类
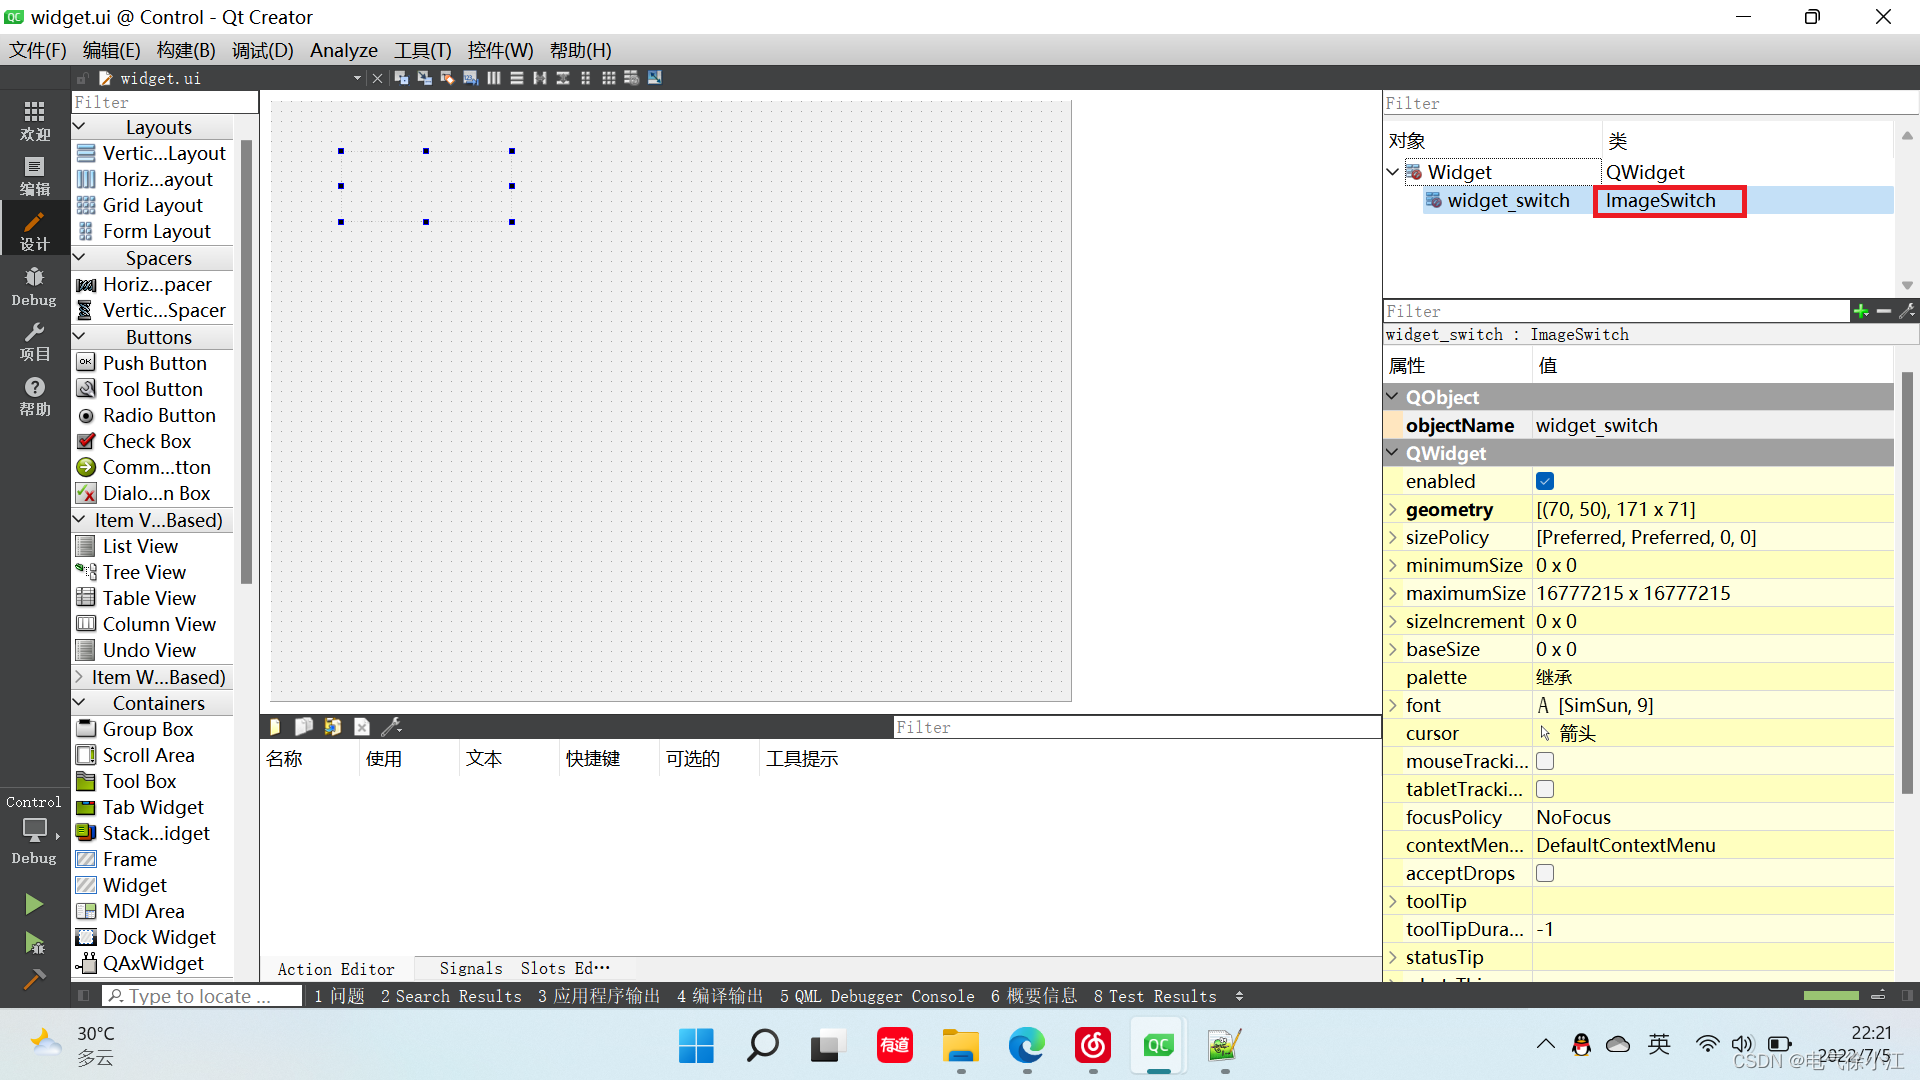
5.这边已经可以进行编译运行,可以看到程序运行后就会出现之前添加的默认关闭的一个图片,这里我们可以重写ImageLabel类的鼠标按下事件来实现图片的切换。
主要代码如下:
void ImageSwitch::mousePressEvent(QMouseEvent *event)
{
    qDebug()<<"event:"<<event;
    if(switchFlag)
    {
        switchFlag = !switchFlag;
        ui->lb_switch->setStyleSheet("image: url(:/imageswitch/checkoff.png);");
    }
    else
    {
        switchFlag = !switchFlag;
        ui->lb_switch->setStyleSheet("image: url(:/imageswitch/checkon.png);");
    }
}
二、提升一个C++类
(1)新建C++类
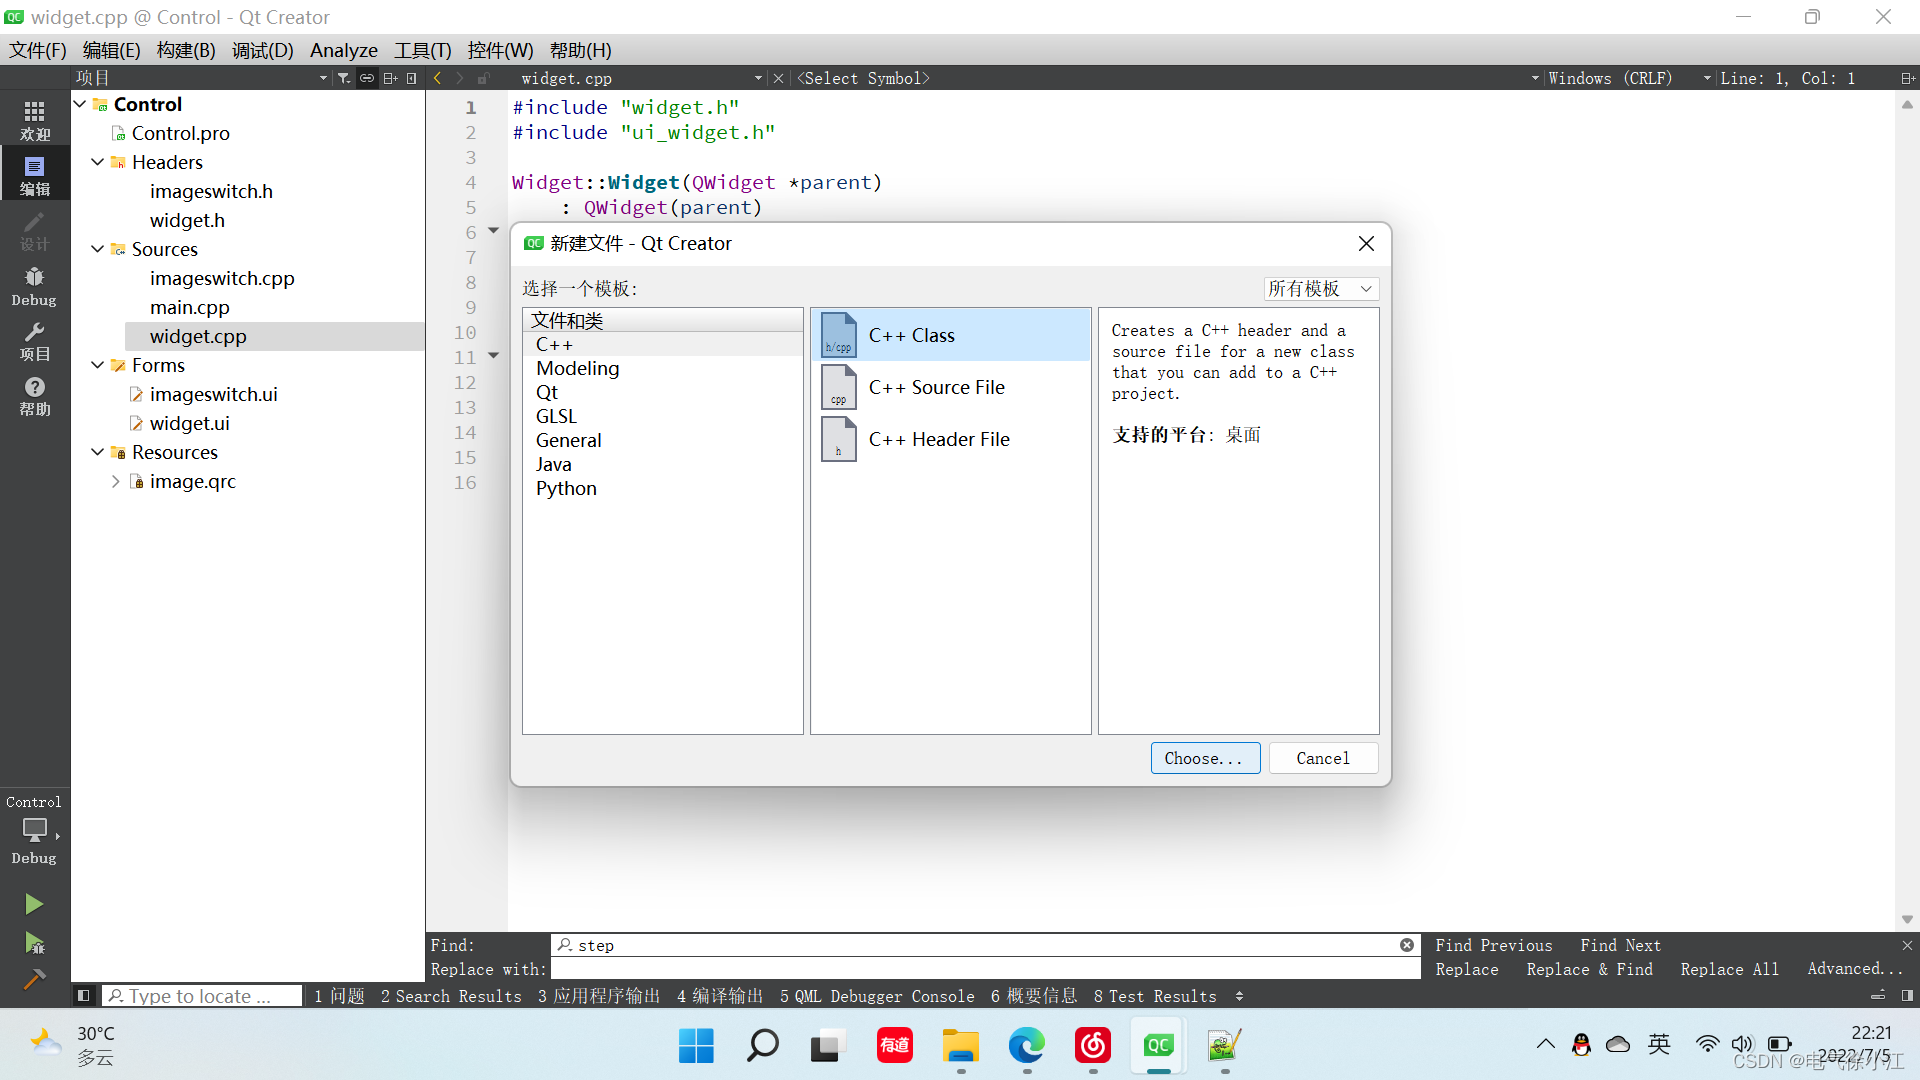
1.鼠标点击项目文件夹,右键Add New…,选择C++ Class,点击Choose…
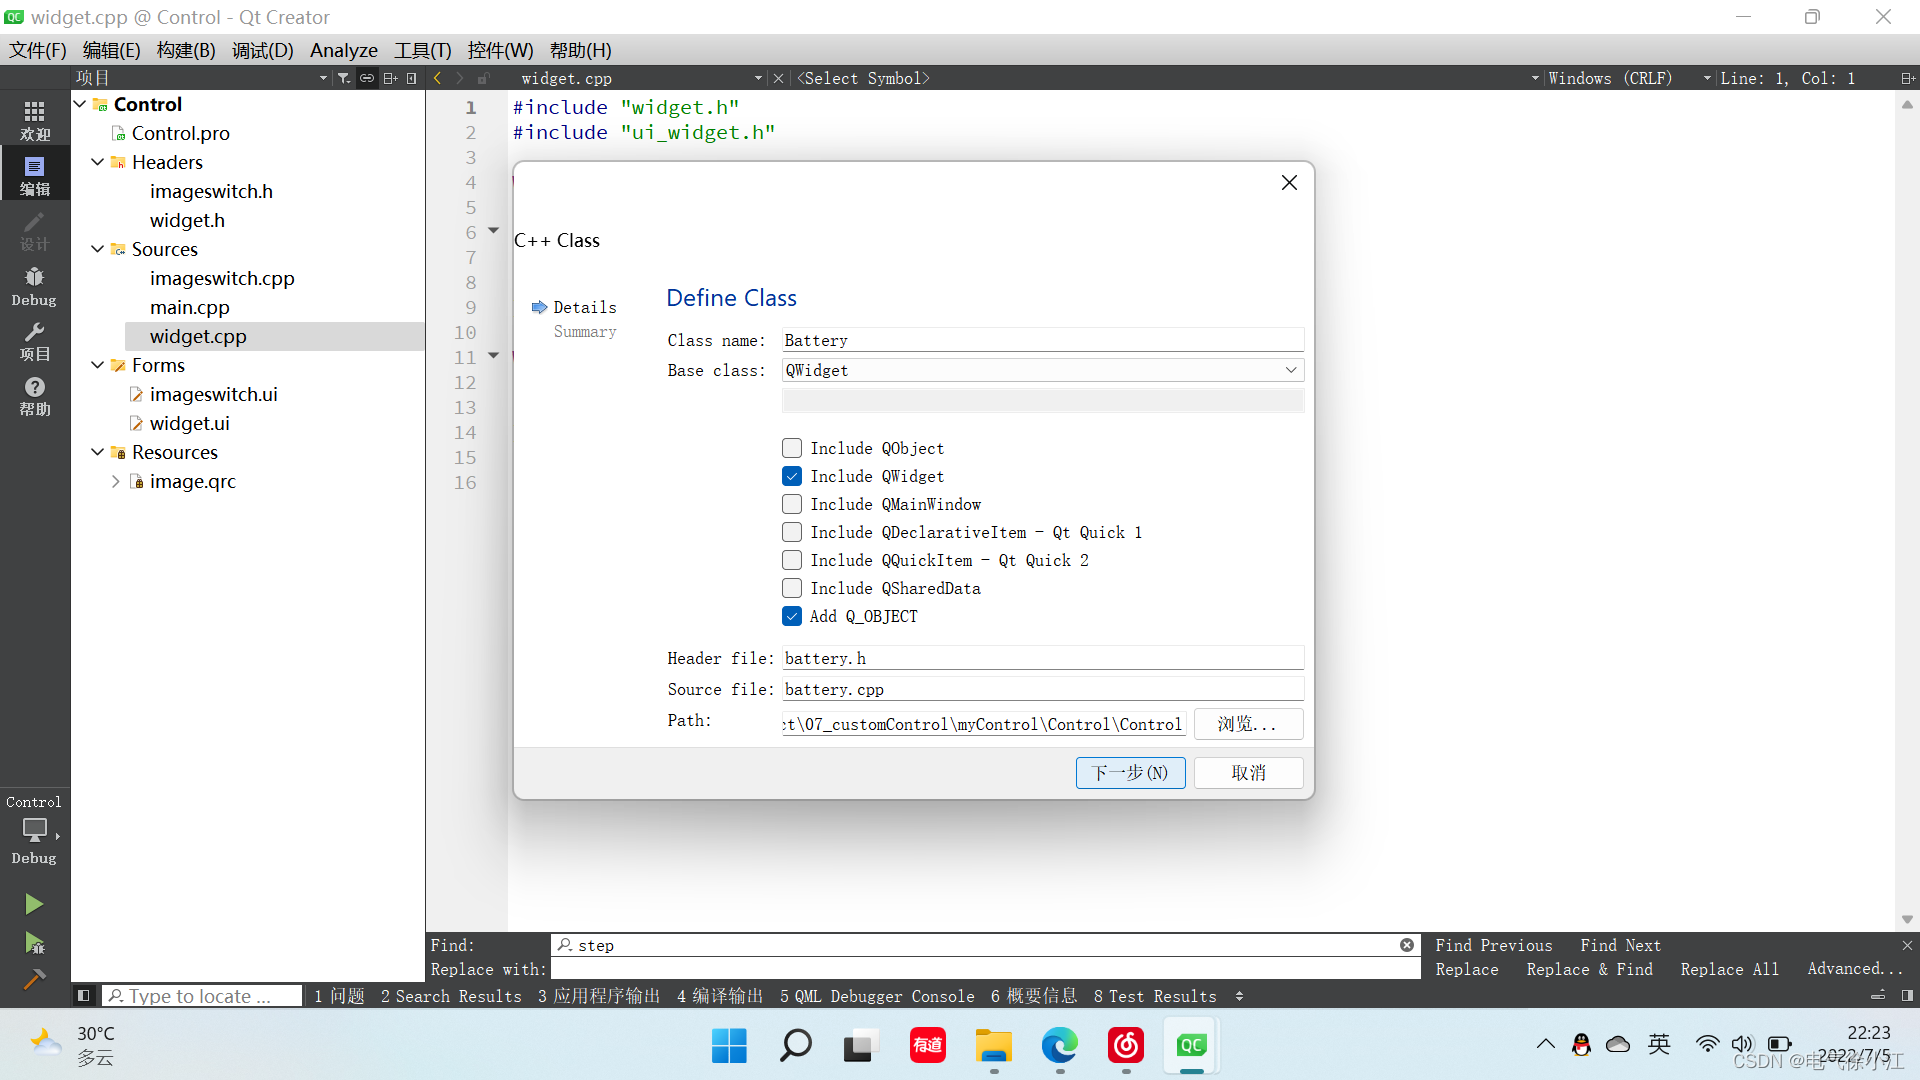
2.这里输入类名,并选择你需要的Base class,这里我的是QWidget,点击下一步
(2)主界面进行提升
1.主界面widget.ui添加一个widget控件,修改名称后选中控件,右键提升为…,新建提升的类,点击添加
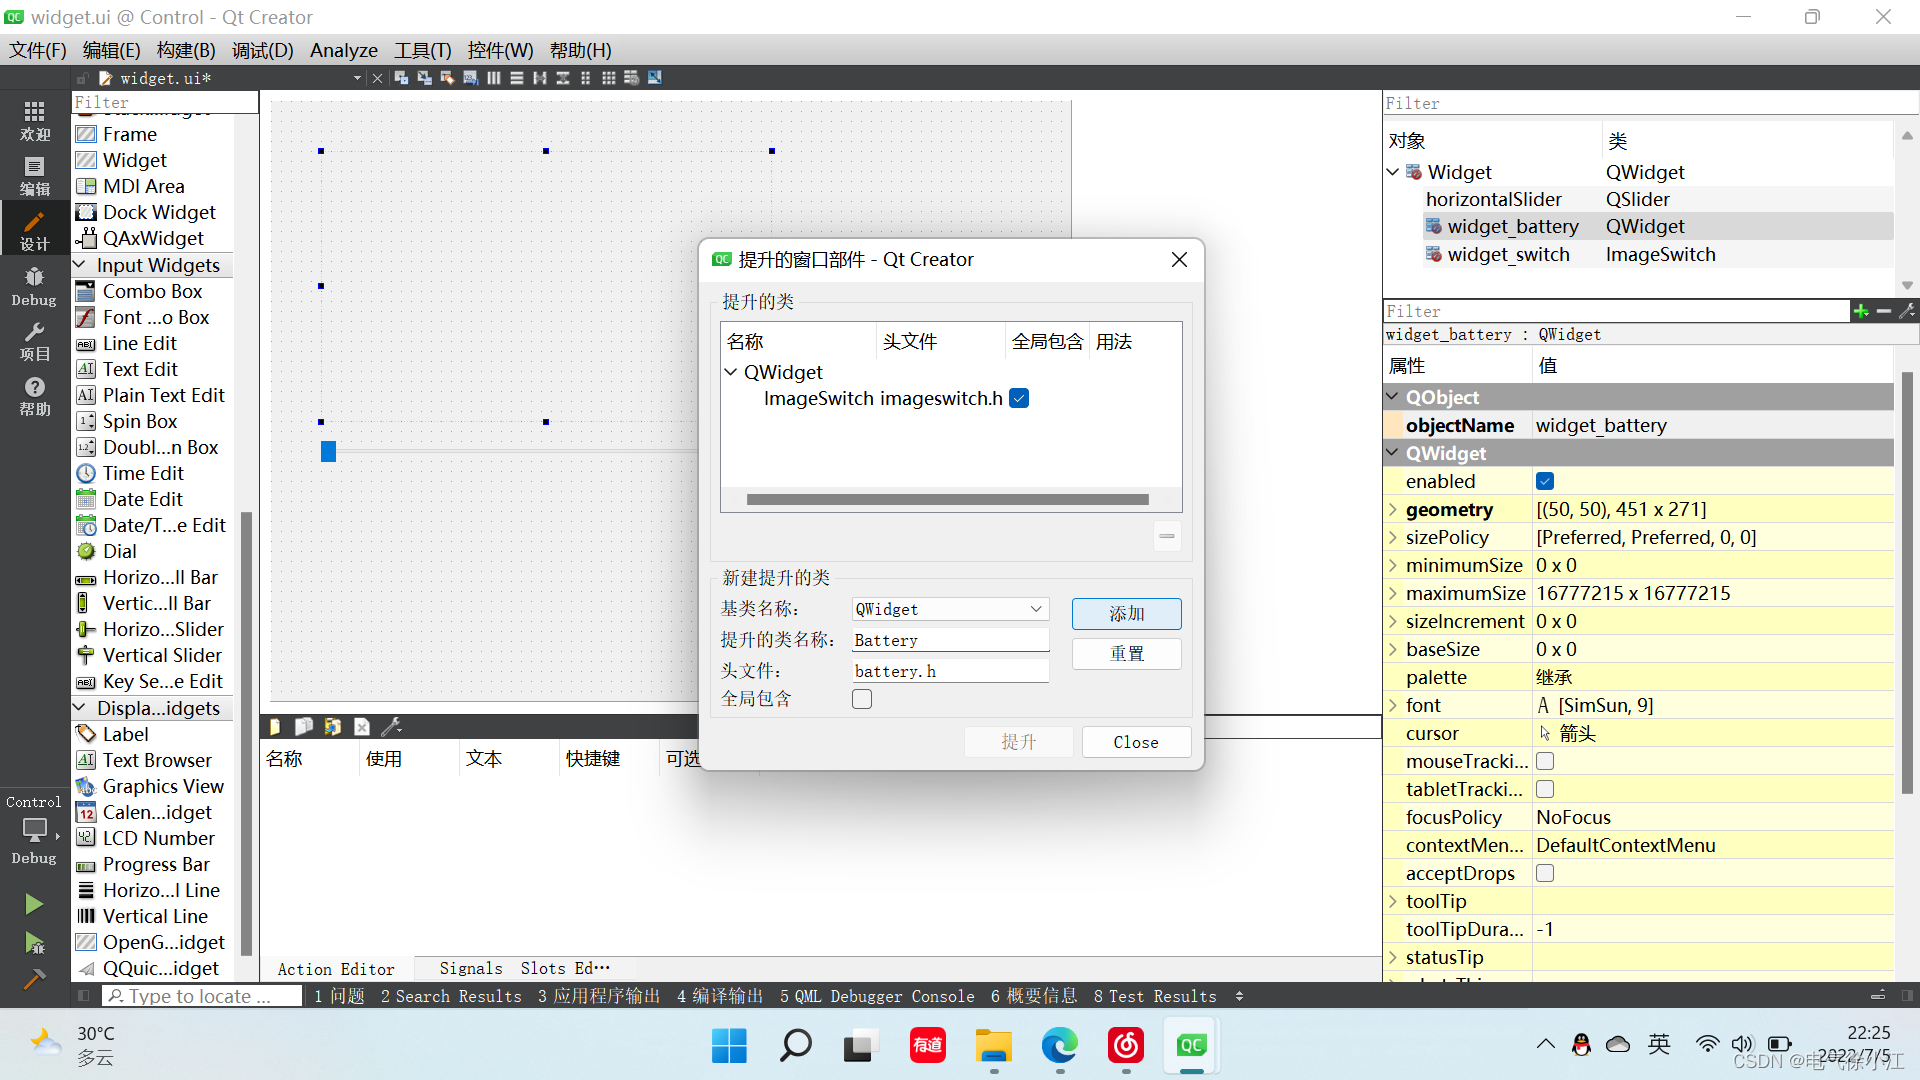
2.勾选中刚刚添加的Battery类,选择提升
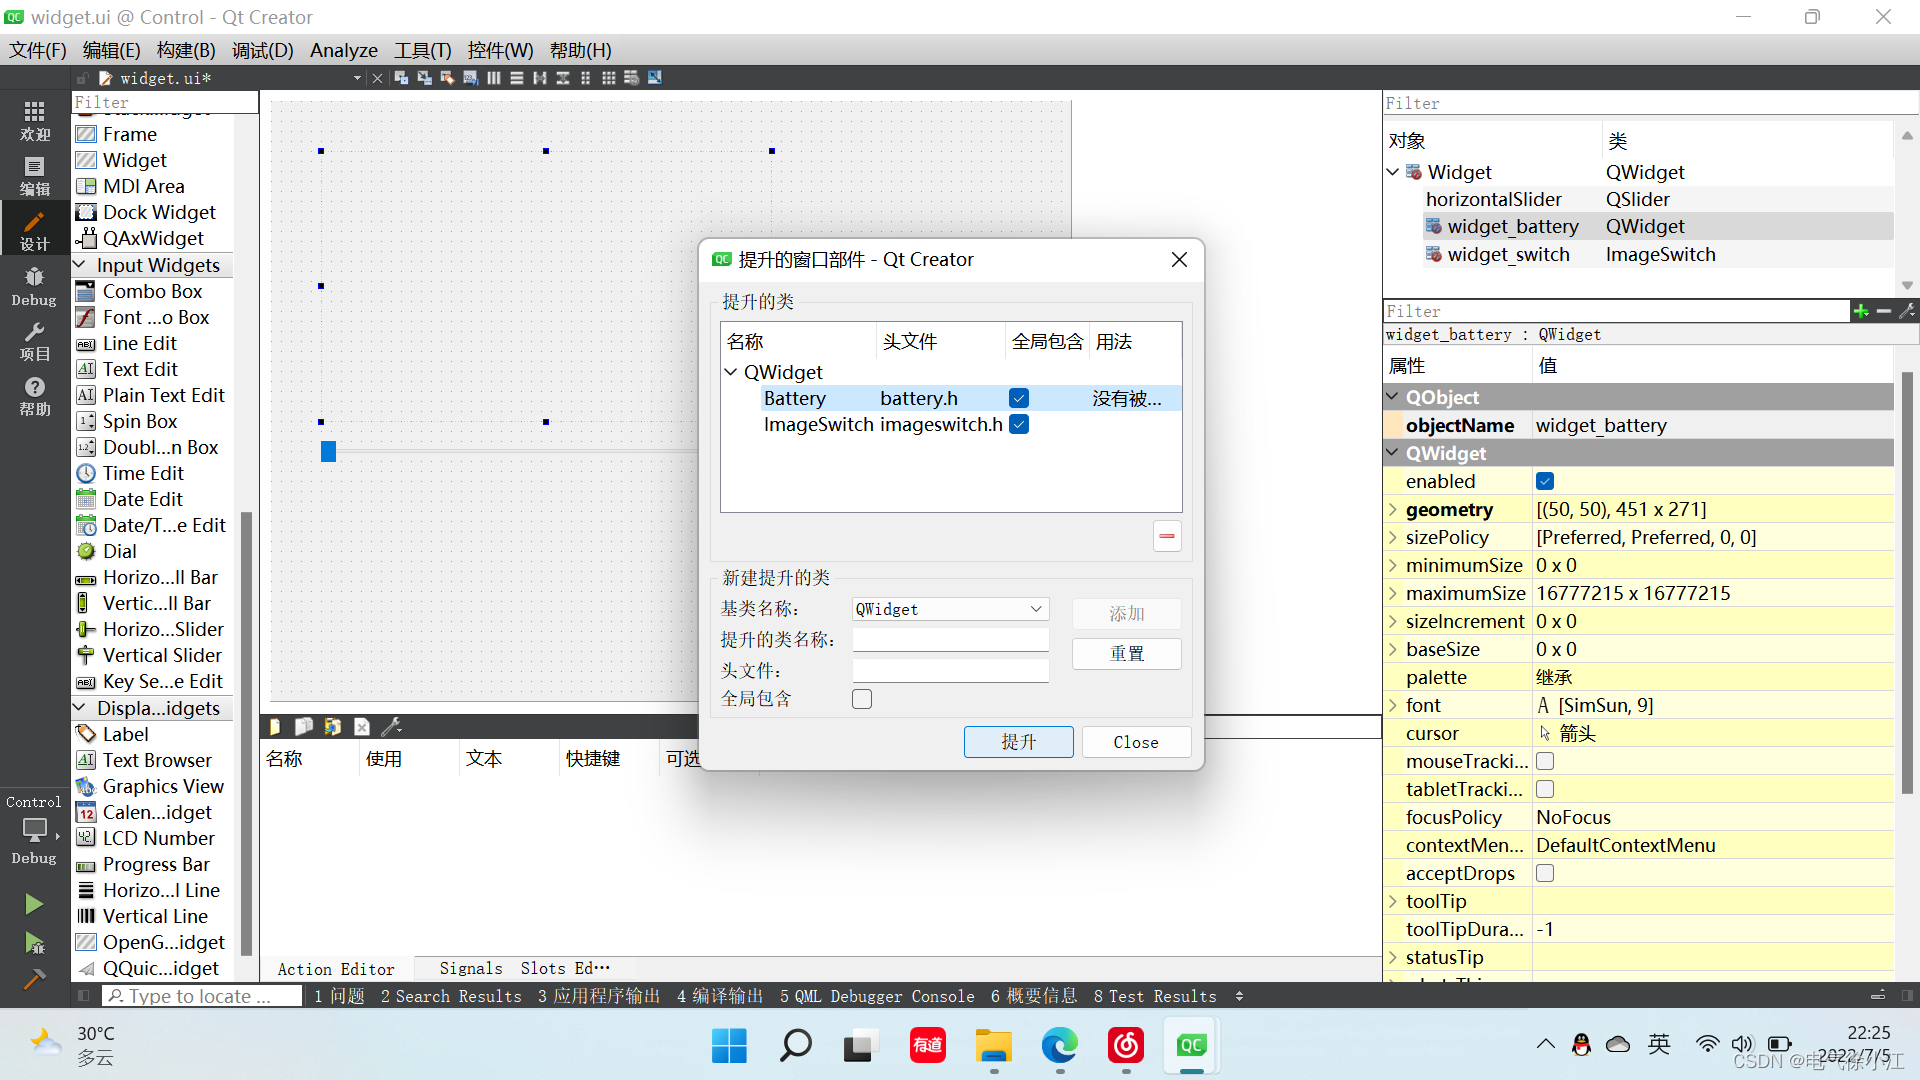
3.这里可以看到widget_battery控件已经成功提升为Battery类
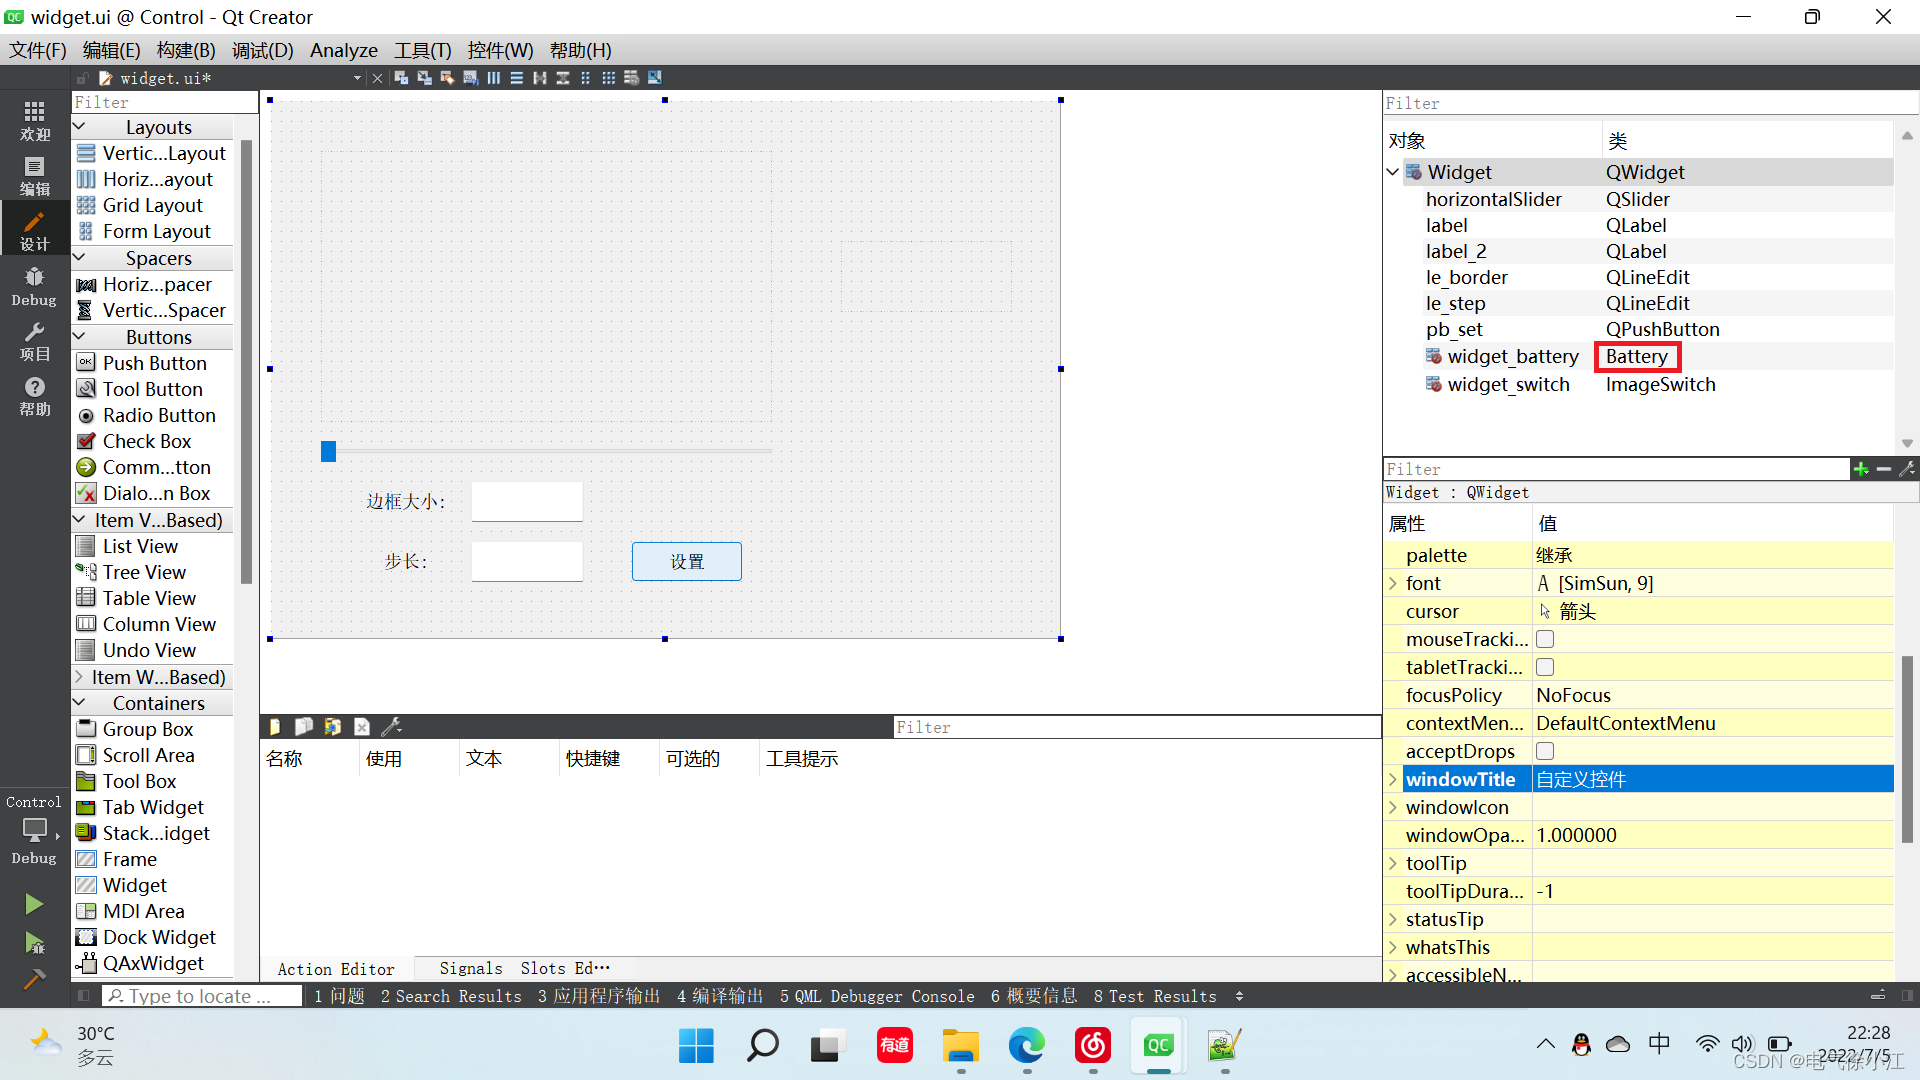
4.这里添加的C++类是不带ui界面的,所以需要自己在Battery类中使用代码来实现各种效果,本例中重写了paintEvent事件来进行界面的变化,该类实例来自feiyangqingyun大佬的Gitee主页,更多详情可点击进入大佬的Gitee进行查看下载,非常的nice。
void Battery::paintEvent(QPaintEvent *)
{
    //绘制准备工作,启用反锯齿
    QPainter painter(this);
    painter.setRenderHints(QPainter::Antialiasing | QPainter::TextAntialiasing);

    //绘制边框
    drawBorder(&painter);
    //绘制背景
    drawBg(&painter);
    //绘制头部
    drawHead(&painter);
}

void Battery::drawBorder(QPainter *painter)
{
    painter->save();

    double headWidth = width() / 15;
    double batteryWidth = width() - headWidth;

    //绘制电池边框
    QPointF topLeft(borderWidth, borderWidth);
    QPointF bottomRight(batteryWidth, height() - borderWidth);
    batteryRect = QRectF(topLeft, bottomRight);

    painter->setPen(QPen(borderColorStart, borderWidth));
    painter->setBrush(Qt::NoBrush);
    painter->drawRoundedRect(batteryRect, borderRadius, borderRadius);

    painter->restore();
}

void Battery::drawBg(QPainter *painter)
{
    if (value == minValue) {
        return;
    }

    painter->save();

    QLinearGradient batteryGradient(QPointF(0, 0), QPointF(0, height()));
    if (currentValue <= alarmValue) {
        batteryGradient.setColorAt(0.0, alarmColorStart);
        batteryGradient.setColorAt(1.0, alarmColorEnd);
    } else {
        batteryGradient.setColorAt(0.0, normalColorStart);
        batteryGradient.setColorAt(1.0, normalColorEnd);
    }

    int margin = qMin(width(), height()) / 20;
    double unit = (batteryRect.width() - (margin * 2)) / 100;
    double width = currentValue * unit;
    QPointF topLeft(batteryRect.topLeft().x() + margin, batteryRect.topLeft().y() + margin);
    QPointF bottomRight(width + margin + borderWidth, batteryRect.bottomRight().y() - margin);
    QRectF rect(topLeft, bottomRight);

    painter->setPen(Qt::NoPen);
    painter->setBrush(batteryGradient);
    painter->drawRoundedRect(rect, bgRadius, bgRadius);

    painter->restore();
}

void Battery::drawHead(QPainter *painter)
{
    painter->save();

    QPointF headRectTopLeft(batteryRect.topRight().x(), height() / 3);
    QPointF headRectBottomRight(width(), height() - height() / 3);
    QRectF headRect(headRectTopLeft, headRectBottomRight);

    QLinearGradient headRectGradient(headRect.topLeft(), headRect.bottomLeft());
    headRectGradient.setColorAt(0.0, borderColorStart);
    headRectGradient.setColorAt(1.0, borderColorEnd);

    painter->setPen(Qt::NoPen);
    painter->setBrush(headRectGradient);
    painter->drawRoundedRect(headRect, headRadius, headRadius);

    painter->restore();
}
总结
    本文主要讲述了提升法来进行自定义控件的实现,并分别讲述了Qt设计师界面类以及不带界面的C++类来进行提升的方法,提升法还是比较简单的,很多时候想要实现各种控件效果还是需要使用代码,这里就要求熟悉对各事件的基本处理,以便于实现你想要的效果。

    Pri文件里面加ui, 来提升成控件,使用ui->SetParents() 以及Widget 控件来实现
版权归原作者 Duffy_Gallagher 所有, 如有侵权,请联系我们删除。