
使用C#开发ChatGPT聊天程序
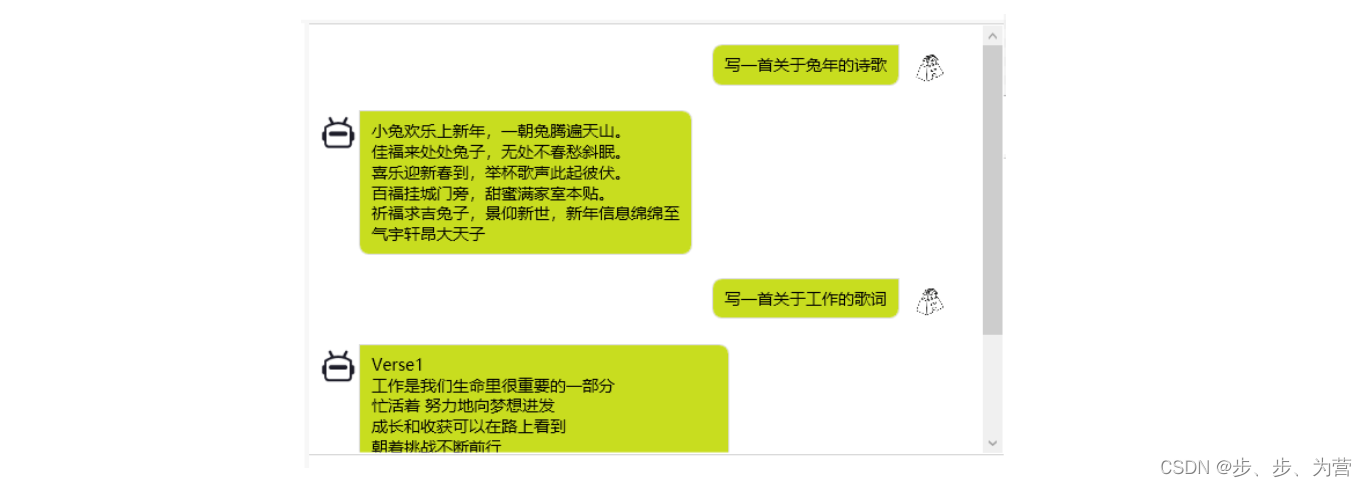
总体效果如下:
源码下载
关键点1:无边框窗口拖动
Window中设置
AllowsTransparency="True"
、
Background="Transparent"
以及
WindowStyle="None"
这样设置的话默认窗口的标题栏为不可见状态,且无法用鼠标拖动,使用windowChorme来解决
<WindowChrome.WindowChrome><WindowChromeCaptionHeight="50"UseAeroCaptionButtons="False"/></WindowChrome.WindowChrome>
该设置的详细讲解参见WPF之Window无边框拖动、特殊形状、Grid拖拽
关键点2:输入栏实现删除按钮

- 定义TextBox的ControlTemplate模板(节取重要部分)
<Stylex:Key="TextBoxPromote"TargetType="{x:Type TextBox}">
<Setter Property="Template">
<Setter.Value>
<ControlTemplate TargetType="{x:Type TextBox}">
<Border
x:Name="border"
CornerRadius="6"
<DockPanel LastChildFill="True">
<!--新增btn按钮,并绑定Click事件-->
<Button
x:Name="btn"
Grid.Column="1"
Background="White"
BorderThickness="0"
Click="Button_Click"
Content=""
DockPanel.Dock="Right"
FontFamily="./img/#iconfont" />
<ScrollViewer
x:Name="PART_ContentHost"
DockPanel.Dock="Left"
Focusable="false"
HorizontalScrollBarVisibility="Hidden"
VerticalScrollBarVisibility="Hidden" />
</DockPanel>
</Border>
<ControlTemplate.Triggers>
<!--新增DataTrigger,当Text属性部位为空时,不显示按钮,Hiddern表示不显示,但是用空格来代替按钮来保持布局,而Collapsed则是不显示且不保留空格-->
<DataTrigger Binding="{Binding RelativeSource={RelativeSource Self}, Path=Text}" Value="">
<Setter TargetName="btn" Property="Visibility" Value="Collapsed" />
</DataTrigger>
</ControlTemplate.Triggers>
</ControlTemplate>
</Setter.Value>
</Setter>
</Style>
- 实现Button按钮事件
privatevoidButton_Click(object sender,RoutedEventArgs e){Button? btn = sender asButton;if(btn !=null){var parent = VisualTreeHelper.GetParent(btn);while(!(parent isTextBox)){
            parent = VisualTreeHelper.GetParent(parent);}TextBox txt = parent asTextBox;if(txt !=null){
            txt.Clear();}}}
关键点3:ListBox实现聊天效果
本文使用ListBox来完成消息框的展示,因为涉及到发送和收到两种类型的消息,应该对应两种不同格式,所以会用到样式选择器,不知道怎么用的小伙伴可以看一下这篇文章WPF控件模板、数据模板、容器样式选择器。
- 定义选择器类
publicclassDateTemplateSelector:DataTemplateSelector{publicDataTemplate SendTemplate {get;set;}publicDataTemplate ResTemplate {get;set;}publicoverrideDataTemplateSelectTemplate(object item,DependencyObject container){Message message =(Message)item;if(message.IsSend){return SendTemplate;}else{return ResTemplate;}}} - 在Windwo.Resources中定义数据模板
发送模板
<DataTemplatex:Key="chatSend"><StackPanelx:Name="SendMsg"Margin="0,12,20,0"HorizontalAlignment="Right"Orientation="Horizontal"><StackPanelMargin="0,0,10,0"Orientation="Vertical"><!-- 消息内容 --><BorderMinWidth="50"MinHeight="30"MaxWidth="{Binding Path=ActualWidth,ElementName=borderWidth}"Background="#c8dd1f"BorderBrush="#ddd"BorderThickness="1"CornerRadius="8,0,8,8"><TextBoxMinWidth="30"Margin="8"VerticalAlignment="Center"Background="Transparent"BorderThickness="0"FontSize="14"IsReadOnly="True"Text="{Binding Msg}"TextWrapping="WrapWithOverflow"/></Border></StackPanel><!-- 头像 --><BorderWidth="35"Height="35"Margin="0,2,0,0"VerticalAlignment="Top"BorderThickness="0"><Border.Background><ImageBrushImageSource="/img/user.jpg"/></Border.Background></Border></StackPanel></DataTemplate>
接收模板
<DataTemplatex:Key="chatRes"><StackPanelx:Name="SendMsg"Margin="0,12,20,0"HorizontalAlignment="Right"Orientation="Horizontal"><!-- 头像 --><BorderWidth="35"Height="35"Margin="0,2,0,0"VerticalAlignment="Top"BorderThickness="0"><Border.Background><ImageBrushImageSource="/img/图标ChatGPT.ico"/></Border.Background></Border><StackPanelMargin="0,0,10,0"Orientation="Vertical"><!-- 消息内容 --><BorderMinWidth="50"MinHeight="30"MaxWidth="{Binding Path=ActualWidth,ElementName=borderWidth}"Background="#c8dd1f"BorderBrush="#ddd"BorderThickness="1"CornerRadius="0,8,8,8"><TextBoxMinWidth="30"Margin="8"VerticalAlignment="Center"Background="Transparent"BorderThickness="0"FontSize="14"IsReadOnly="True"MaxLength="25"Text="{Binding Msg}"TextWrapping="WrapWithOverflow"/></Border></StackPanel></StackPanel></DataTemplate>
- 因为发送消息和接受消息的对齐方式不同,一个是左一个是右,所以要定义下
ListBox.ItemContainerStyle
<Stylex:Key="listViewItemStyle"TargetType="{x:Type ListBoxItem}">
    <Setter Property="FocusVisualStyle" Value="{x:Null}" />
    <Setter Property="Template">
        <Setter.Value>
            <ControlTemplate TargetType="{x:Type ListBoxItem}">
                <Border
                    Name="Bd"
                    Margin="1"
                    Padding="{TemplateBinding Padding}"
                    Background="{TemplateBinding Background}"
                    BorderBrush="{TemplateBinding BorderBrush}"
                    BorderThickness="{TemplateBinding BorderThickness}"
                    SnapsToDevicePixels="true">
                    <ContentPresenter
                        Margin="1"
                        HorizontalAlignment="{TemplateBinding HorizontalContentAlignment}"
                        VerticalAlignment="{TemplateBinding VerticalContentAlignment}"
                        SnapsToDevicePixels="{TemplateBinding SnapsToDevicePixels}" />
                </Border>
            </ControlTemplate>
        </Setter.Value>
    </Setter>
    <!--判断是否为发送,从而使用不同的对齐方式-->
    <Style.Triggers>
        <DataTrigger Binding="{Binding IsSend}" Value="True">
            <Setter Property="HorizontalContentAlignment" Value="Stretch" />
        </DataTrigger>
        <DataTrigger Binding="{Binding IsSend}" Value="False">
            <Setter Property="HorizontalContentAlignment" Value="Left" />
        </DataTrigger>
    </Style.Triggers>
</Style>
- 为了实现ListBox始终保持下拉到最后的状态,自定义类,重写OnItemsChanged方法
classScrollingListBox:ListBox{protectedoverridevoidOnItemsChanged(System.Collections.Specialized.NotifyCollectionChangedEventArgs e){if(e.NewItems ==null)return;var newItemCount = e.NewItems.Count;if(newItemCount >0)this.ScrollIntoView(e.NewItems[newItemCount -1]);base.OnItemsChanged(e);}}
- XAML中设置
<!-- 消息显示区 --><!--设置ScrollViewer.CanContentScroll="False"可以使得滚动条更加丝滑--><local:ScrollingListBoxGrid.Row="0"BorderBrush="#D3D3D3"BorderThickness="0,1,0,1"ItemsSource="{Binding Path=Messages, ElementName=mainWindow}"ScrollViewer.HorizontalScrollBarVisibility="Disabled"ScrollViewer.CanContentScroll="False"SelectionMode="Extended"><ListBox.ItemTemplateSelector><local:DateTemplateSelectorResTemplate="{StaticResource chatRes}"SendTemplate="{StaticResource chatSend}"/></ListBox.ItemTemplateSelector><ListBox.ItemContainerStyle><StyleBasedOn="{StaticResource listViewItemStyle}"TargetType="{x:Type ListBoxItem}"/></ListBox.ItemContainerStyle></local:ScrollingListBox>
如何调用OpenAI的接口,及各种常用参数的设置参见C#/.Net开发chatGPT、openAI
源码下载
本文转载自: https://blog.csdn.net/weixin_44064908/article/details/128675960
版权归原作者 步、步、为营 所有, 如有侵权,请联系我们删除。
版权归原作者 步、步、为营 所有, 如有侵权,请联系我们删除。