简介
本文主要讲解axios的概念和基本使用。
axios时目前最流行的ajax封装库之一,用于很方便地实现ajax请求的发送。
支持的功能:
- 从浏览器发出 XMLHttpRequests请求。
- 从 node.js 发出 http 请求。
- 支持 Promise API。
- 能拦截请求和响应。
- 能转换请求和响应数据。
- 取消请求。
- 实现JSON数据的自动转换。
- 客户端支持防止 XSRF攻击。
先借助json-server创建一个简单的服务,供ajax发送请求,json-server是一个简单的可以接收restful的服务。
github地址:https://github.com/typicode/json-server
第一步:安装:
npm install -g json-server

第二步:创建一个名为db.json的文件,把网站的数据复制进去。
{"posts":[{"id":1,"title":"json-server","author":"typicode"}],"comments":[{"id":1,"body":"some comment","postId":1}],"profile":{"name":"typicode"}}
第三步:启动命令:
json-server --watch db.json

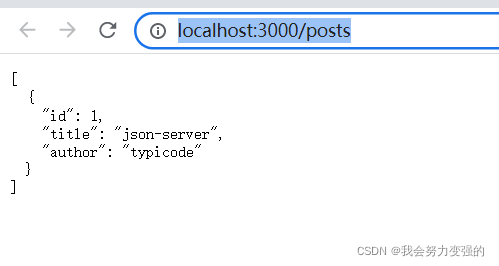
访问http://localhost:3000/posts 下面页面为成功
使用axios
GitHub地址:https://github.com/axios/axios
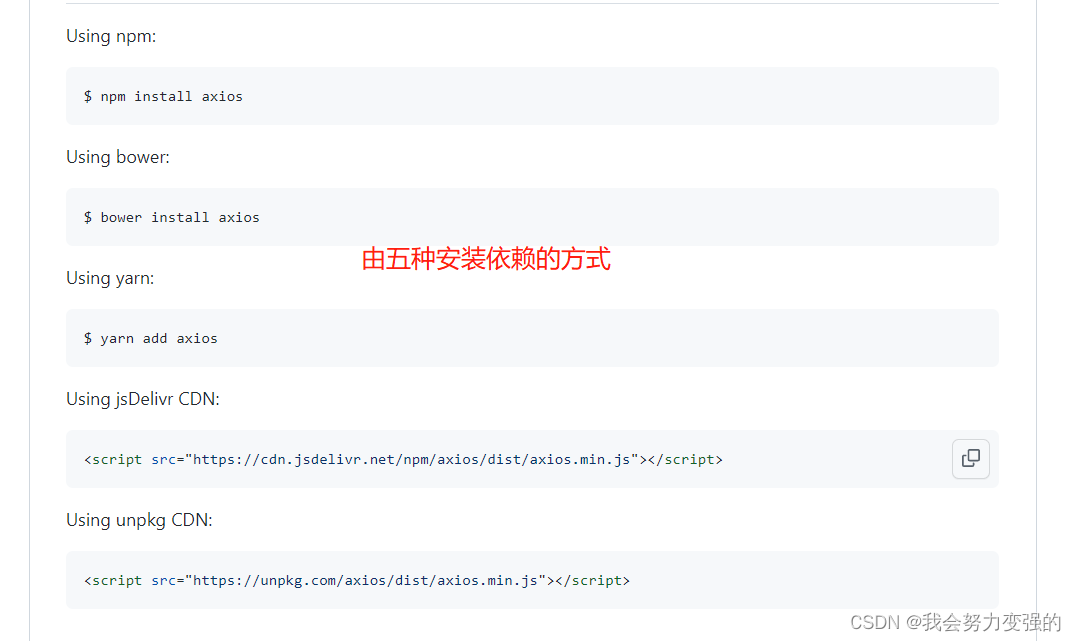
为了方便,我们直接使用第四种。
<!DOCTYPEhtml><htmllang="en"><head><metacharset="UTF-8"><title>axios基本使用</title></head><body><buttonid="btn1">发送get请求</button><br><br><buttonid="btn2">发送post请求</button><br><br><buttonid="btn3">发送put请求</button><br><br><buttonid="btn4">发送delete请求</button><hr><div>其他发送请求的api:</div><br><br><buttonid="btn5">发送get请求1</button><br><br><buttonid="btn6">发送post请求1</button><br><br><buttonid="btn7">发送put请求1</button><br><br><buttonid="btn8">发送delete请求1</button></body><scriptsrc="https://cdn.jsdelivr.net/npm/axios/dist/axios.min.js"></script><script>//发送get
    document.getElementById("btn1").onclick=function(){axios({
        method:"GET",
        url:"http://localhost:3000/posts/1"}).then(response=>{
           console.log(response);})};//发送post
    document.getElementById("btn2").onclick=function(){axios({
        method:"POST",
        url:"http://localhost:3000/posts",
        data:{
            title:"axios学习",
            author:"Yehaocong"}}).then(response=>{
           console.log(response);})};//发送put
    document.getElementById("btn3").onclick=function(){axios({
        method:"PUT",
        url:"http://localhost:3000/posts/2",
        data:{
            title:"axios学习",
            author:"Liaoxiaoyan"}}).then(response=>{
           console.log(response);})};
    document.getElementById("btn4").onclick=function(){axios({
        method:"DELETE",
        url:"http://localhost:3000/posts/2",}).then(response=>{
           console.log(response);})};//其他发送请求的api


    document.getElementById("btn5").onclick=function(){//发送get,使用get,第一个参数时url,第二个参数时config配置对象
       axios.get("http://localhost:3000/posts/1").then(response=>{
           console.log(response);})};//发送post
    document.getElementById("btn6").onclick=function(){//发送post请求,第一个参数时url,第二个参数时请求体,第三个参数时config配置对象
        axios.post("http://localhost:3000/posts",{title:"axios学习2",
            author:"Yehaocong2"}).then(response=>{
           console.log(response);})};//发送put,
    document.getElementById("btn7").onclick=function(){//发送put,接收三个参数,url  请求体 、 config配置对象
       axios.put("http://localhost:3000/posts/2",{title:"axios学习",
            author:"Liaoxiaoyan"}).then(response=>{
           console.log(response);})};
    document.getElementById("btn8").onclick=function(){//发送delete请求,接收2个参数, url config配置对象
        axios.delete("http://localhost:3000/posts/3").then(response=>{
           console.log(response);})};//这个与axios({})基本相同// axios.request({// })</script></html>
请求的响应结果结构分析:
配置对象常用的配置项:
{// 路径url
  url:'/user',// 请求方法,默认get
  method:'get',//基础url,最终请求的url是 baseURL+url拼接,所以再全局设置默认,可以使得发送请求时的url变得简洁
  baseURL:'https://some-domain.com/api/',//设置请求头
  headers:{'X-Requested-With':'XMLHttpRequest'},//设置请求url的query参数,可以使得url简洁。//比如url是https://some-domain.com/api/user  然后params如下设置,那么最终的url是://https://some-domain.com/api/user?ID=12345&name=Jack
  params:{ID:12345,
    name:"Jack"},//设置请求体
  data:{
    firstName:'Fred'},//设置请求的另外一种格式,不过这个是直接设置字符串的
  data:'Country=Brasil&City=Belo Horizonte',//请求超时,单位毫秒,默认0,不超时。
  timeout:1000,//响应数据类型,默认json
  responseType:'json',//响应数据的编码规则,默认utf-8
  responseEncoding:'utf8',//响应体的最大长度
  maxContentLength:2000,// 请求体的最大长度
  maxBodyLength:2000,//设置响应状态码为多少时是成功,调用resolve,否则调用reject失败//默认是大于等于200,小于300validateStatus:function(status){return status >=200&& status <300;},
默认配置
可以设置全局默认配置,是为了避免多种重复配置在不同请求中重复,比如baseURL、timeout等,这里设置baseURL。
<!DOCTYPEhtml><htmllang="en"><head><metacharset="UTF-8"><title>默认配置</title></head><body><scriptsrc="https://cdn.jsdelivr.net/npm/axios/dist/axios.min.js"></script><script>
        axios.defaults.baseURL="http://localhost:3000";//因为上面配置了baseURL,所以我们之后的请求只需要配置url不用像之前那样的全路径
        axios.get("/posts/1").then(response=>{
           console.log(response);})</script></body></html>

axios拦截器
实质就是函数。
分为两种类型:
- 请求拦截器:用于拦截请求,自定义做一个逻辑后再把请求发送,可以用于配置公用的逻辑,就不用每个请求都配一遍。
- 响应拦截器:用于拦截响应,做一些处理后再出发响应回调。
<!DOCTYPEhtml><htmllang="en"><head><metacharset="UTF-8"><title>axios拦截器</title></head><body><scriptsrc="https://cdn.jsdelivr.net/npm/axios/dist/axios.min.js"></script><script>//这个是设置请求拦截器的api,传入两个回调,第一个成功回调,第二个失败回调。
        axios.interceptors.request.use(function(config){
                console.log("请求拦截器1调用成功");return config;},function(error){
                console.log("请求拦截器1调用失败");return Promise.reject(error)})//这个是设置响应拦截器的api,第一个成功回调,第二个失败回调
        axios.interceptors.response.use(function(response){
                console.log("响应拦截器1调用成功");return response;},function(error){
                console.log("响应拦截器1调用失败");return Promise.reject(error);})

        axios.get("http://localhost:3000/posts/1").then(function(response){//
            console.log("请求回调成功");}).catch(function(error){
            console.log("请求回调失败");})</script></body></html>
效果:
要理解这些个拦截器需要由一定的es6 Promise基础,出现上面效果的原因是,发送请求前,请求被请求拦截器拦截了,并且请求拦截器返回了一个非Promise实例的对象config,所以下一个拦截器是调用成功回调的,所以就打印响应拦截器成功,然后响应拦截器成功的回调返回的是非Promise实例的对象response,所以最终的请求回调是调用成功的回调,所以返回请求调用成功。
尝试以下再请求拦截器的成功回调中,返回reject状态的Promise。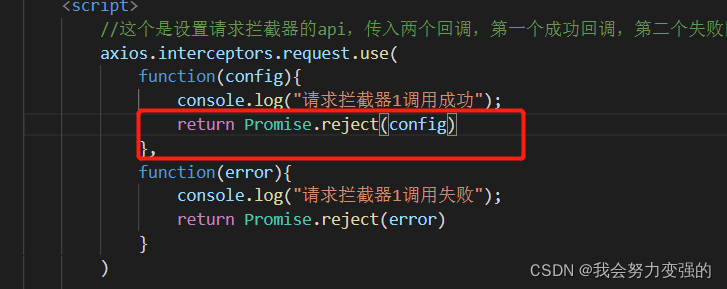
效果:
出现上面效果的原因是,请求拦截器的成功回调中最后返回了reject状态的Promise实例对象,被判断为失败,到了回调链的下一回调,也就是响应拦截器的回调时,调用的时失败的回调,失败的回调中又返回了reject状态的Promise实例对象,所以到了真正请求的回调页调用了失败回调。
上面的效果与Promise如出一辙。
多个拦截器的效果:加了一个请求拦截器一个响应拦截器: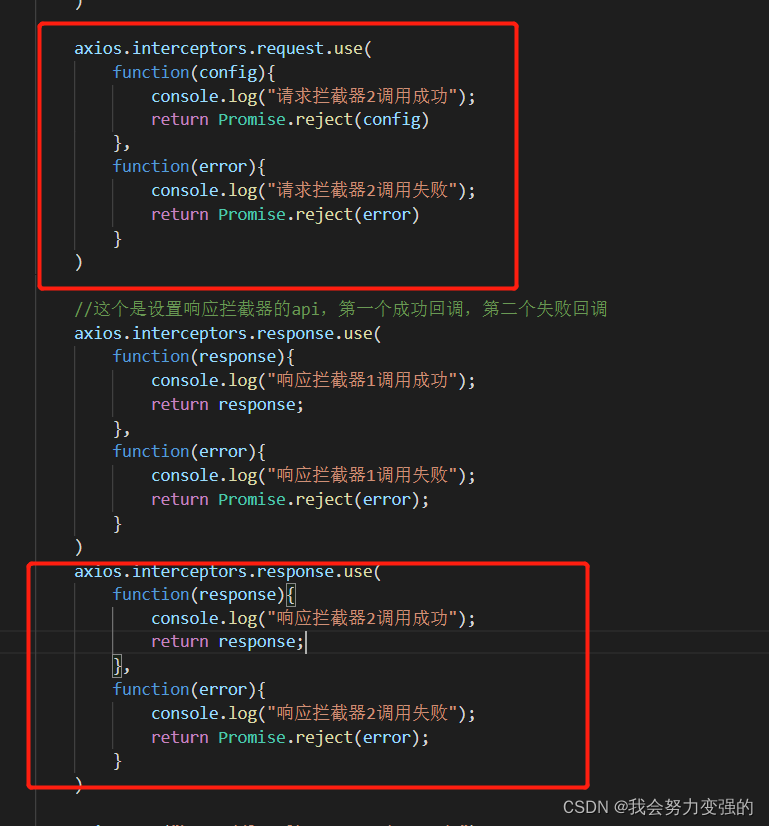
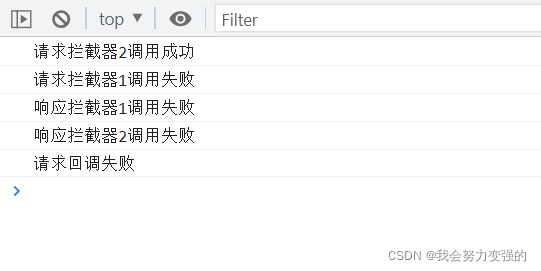
可以看到请求拦截器类似栈,后进先出,响应拦截器类似队列,先进先出。
可以在请求拦截器中对config进行调整,比如添加一个超时什么的,可以在响应拦截器中对response返回值进行调整,比如我返回到回调函数中只想要响应体部分。
<!DOCTYPEhtml><htmllang="en"><head><metacharset="UTF-8"><title>axios拦截器</title></head><body><scriptsrc="https://cdn.jsdelivr.net/npm/axios/dist/axios.min.js"></script><script>//这个是设置请求拦截器的api,传入两个回调,第一个成功回调,第二个失败回调。
        axios.interceptors.request.use(function(config){
                console.log("请求拦截器1调用成功");return config;},function(error){
                console.log("请求拦截器1调用失败");return Promise.reject(error)})

        axios.interceptors.request.use(function(config){//设置请求超时时间
                config.timeout =5000;
                console.log("请求拦截器2调用成功");return config;},function(error){
                console.log("请求拦截器2调用失败");return Promise.reject(error)})//这个是设置响应拦截器的api,第一个成功回调,第二个失败回调
        axios.interceptors.response.use(function(response){
                console.log("响应拦截器1调用成功");
                 console.log(response);//返回到请求回调时,只要data数据return response.data;},function(error){
                console.log("响应拦截器1调用失败");return Promise.reject(error);})
        axios.interceptors.response.use(function(response){
                console.log("响应拦截器2调用成功");return response;},function(error){
                console.log("响应拦截器2调用失败");return Promise.reject(error);})

        axios.get("http://localhost:3000/posts/1").then(function(response){//
            console.log("请求回调成功");
            console.log(response);}).catch(function(error){
            console.log("请求回调失败");})</script></body></html>
效果:
取消请求
取消请求就是发送了请求后,等待一段时间得不到回应,可以取消他。
<!DOCTYPEhtml><htmllang="en"><head><metacharset="UTF-8"><title>axios取消请求</title></head><body><buttonid="btn1">发送请求</button><buttonid="btn2">取消请求</button><scriptsrc="https://cdn.jsdelivr.net/npm/axios/dist/axios.min.js"></script><script>//第一步:定义一个全局的cancel变量,初始值是nulllet cancel =null;
        document.getElementById("btn1").onclick=function(){
            axios.get("http://localhost:3000/posts/1",{//第二步:在请求的配置对象中,配置cancelToken属性值,并把函数的c参数赋值给全局变量cancel
                cancelToken:newaxios.CancelToken(function(c){
                    cancel = c;})}).then(function(response){//
            console.log(response);}).catch(function(error){
            console.log("请求回调失败");})}

        document.getElementById("btn2").onclick=function(){//第三步:调用cancel函数就是取消请求接收cancel();}</script></body></html>
需要把服务器的响应时间调到3秒,不然太快的话,演示不了取消请求。。
json-server --watch db.json -d 3000

版权归原作者 我会努力变强的 所有, 如有侵权,请联系我们删除。