
文章目录
一、项目进行多环境配置的必要性
在实际开发中,应用程序通常需要部署到不同的运行环境中,例如开发环境、测试环境、生产环境等。不同的环境可能需要不同的环境配置,针对这种情况,不可能手动变更配置文件来适应不同的开发环境,通常需要对项目进行多环境配置,Spring Boot框架提供了两种多环境配置的方式,分别是Profile文件多环境配置和@Profile注解多环境配置。同时,会额外讲解在Spring Boot配置文件中设置属性时,除了可以像前面示例中显示的配置属性值外,还可以使用随机值和参数间引用对属性值进行设置。
二、使用Profile文件进行多环境配置
(一)创建Spring Boot项目
使用Spring Initializr模板创建Spring Boot项目——ProfileDemo01,配置好后,单击【Next】按钮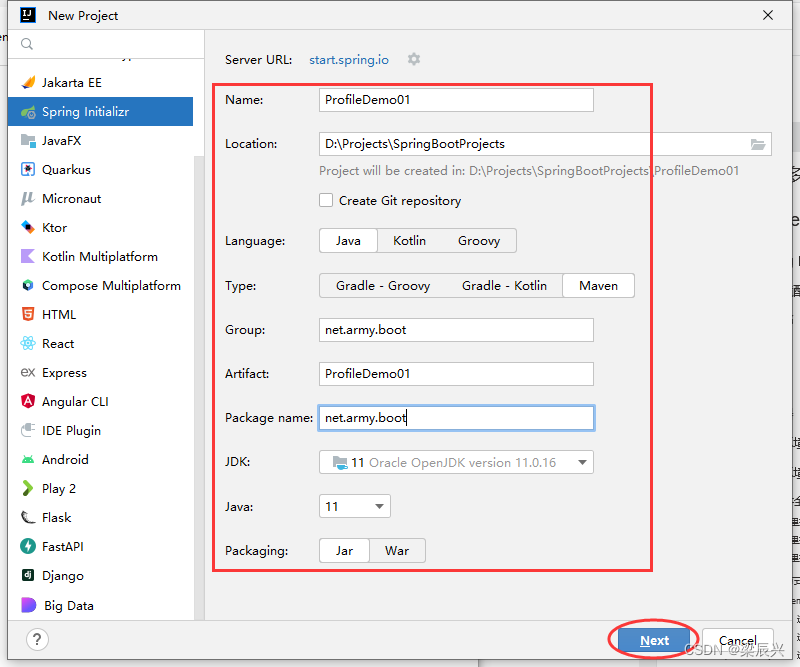
选择Spring Boot版本,添加相关依赖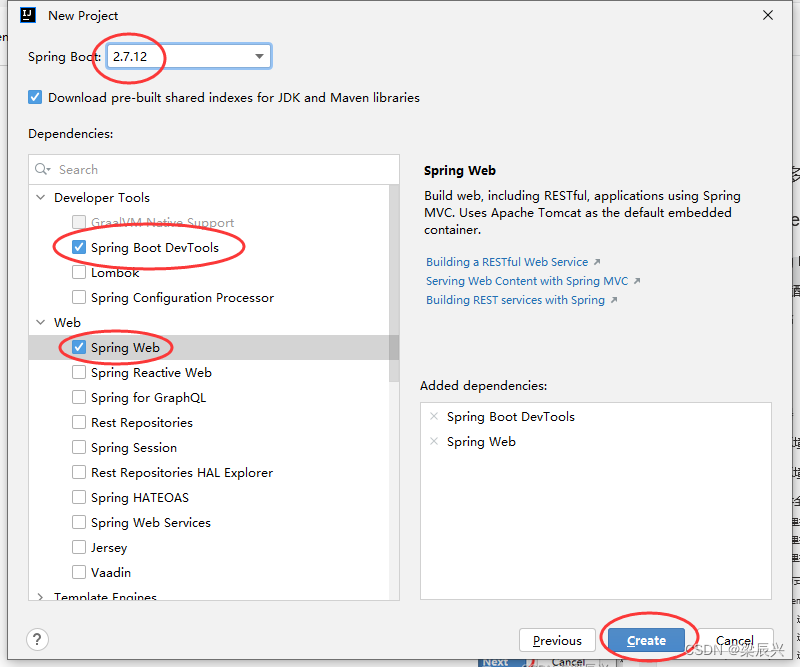
单击【Create】按钮
(二)创建多环境配置文件
配置文件命名格式:application-xxx.yaml
此例仅演示端口号与虚拟路径的配置,实际应用中可以配置许多内容
1、全局配置文件改名
将application.properties更名为application.yaml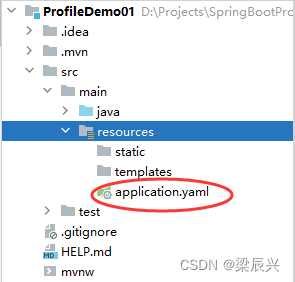
2、模拟开发环境
在resources里创建配置文件 - application-dev.yaml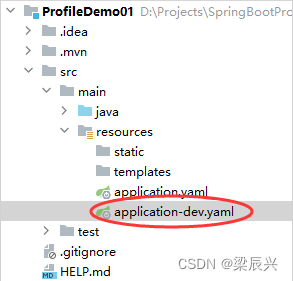
# 配置服务器
server:
  port:8081
  servlet:
    context-path:/lzy01
3、模拟测试环境
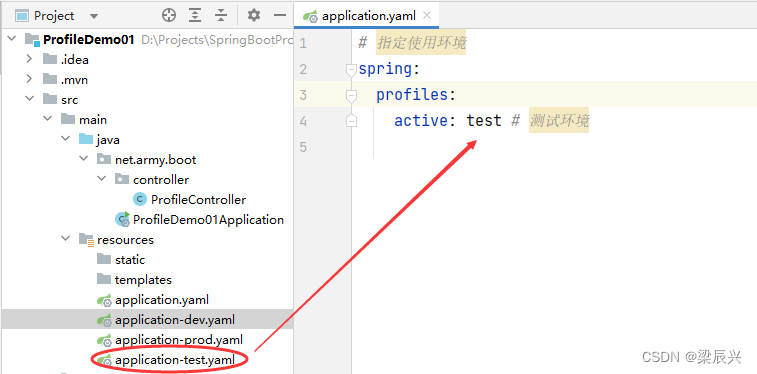
在resources里创建配置文件 - application-test.yaml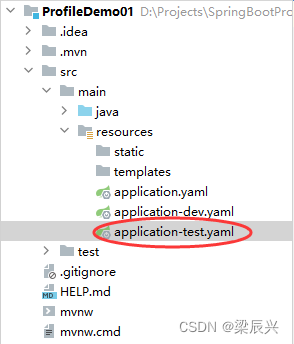
# 配置服务器
server:
  port:8082
  servlet:
    context-path:/lzy02
4、模拟生产环境
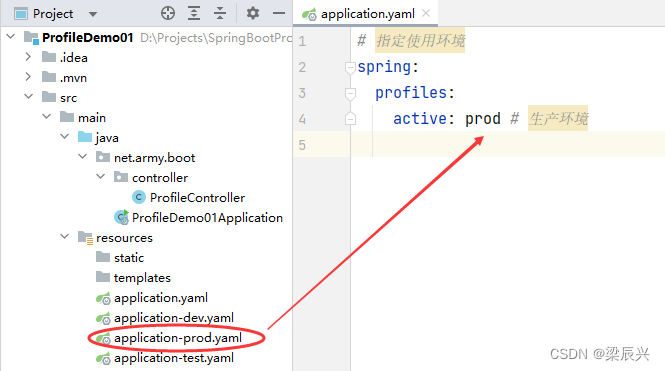
在resources里创建配置文件 - application-prod.yaml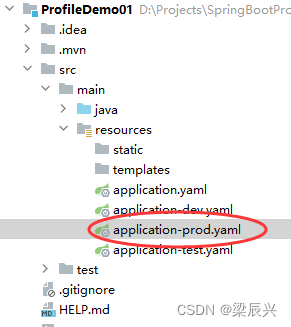
# 配置服务器
server:
  port:8083
  servlet:
    context-path:/lzy03
(三)创建控制器
在net.army.boot包里创建controller子包,在子包里创建ProfileController类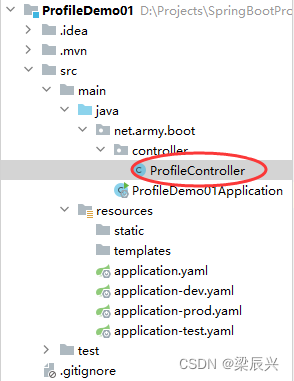
packagenet.army.boot.controller;importorg.springframework.web.bind.annotation.GetMapping;importorg.springframework.web.bind.annotation.RestController;/**
 * 作者:梁辰兴
 * 日期:2023/5/31
 * 功能:概况控制器
 */@RestControllerpublicclassProfileController{@GetMapping("/welcome")publicStringwelcome(){return"<h1 style='color: red; text-align: center'>欢迎访问Spring Boot世界~</h1>";}}
(四)采用默认环境
默认采用配置文件application.yaml,启动服务器,访问:http://localhost:8080/welcome
(五)指定使用环境
方式1、使用配置文件全局指定使用环境
(1) 在全局配置文件里指定当前使用环境 - 开发环境

spring: profiles: active: dev
,表明当前生效的环境配置文件是application-dev.yaml
启动项目,查看采用的使用环境:服务器端口号与虚拟路径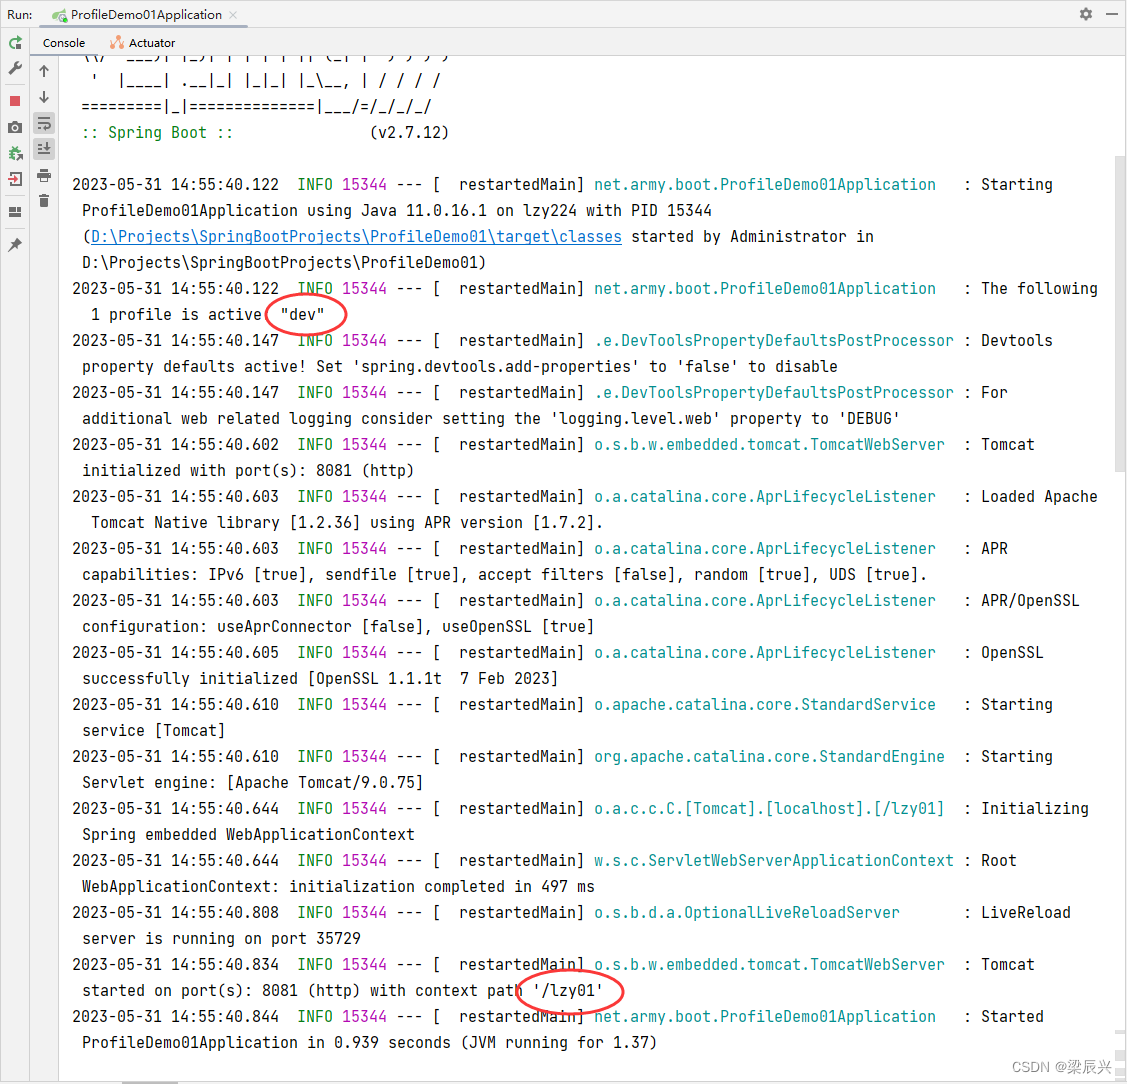
访问:http://localhost:8081/lzy01/welcome
(2) 在全局配置文件里指定当前使用环境 - 测试环境
spring: profiles: active: test
,表明当前生效的环境配置文件是application-test.yaml
启动项目,查看采用的使用环境:服务器端口号与虚拟路径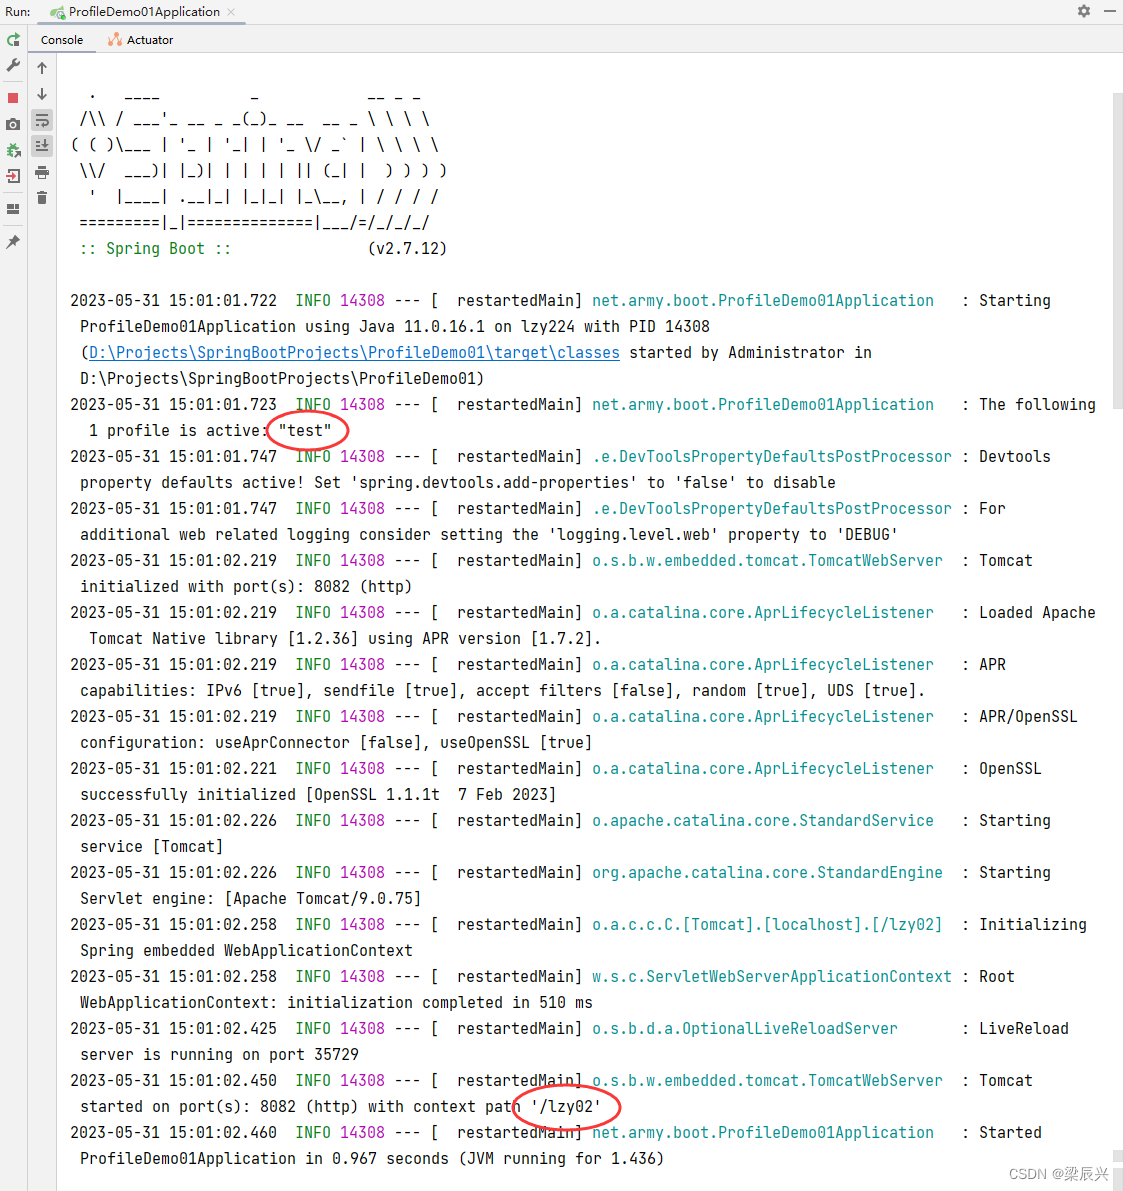
访问:http://localhost:8082/lzy02/welcome
(3) 在全局配置文件里指定当前使用环境 - 生产环境
spring: profiles: active: prod
,表明当前生效的环境配置文件是application-prod.yaml
启动项目,查看采用的使用环境:服务器端口号与虚拟路径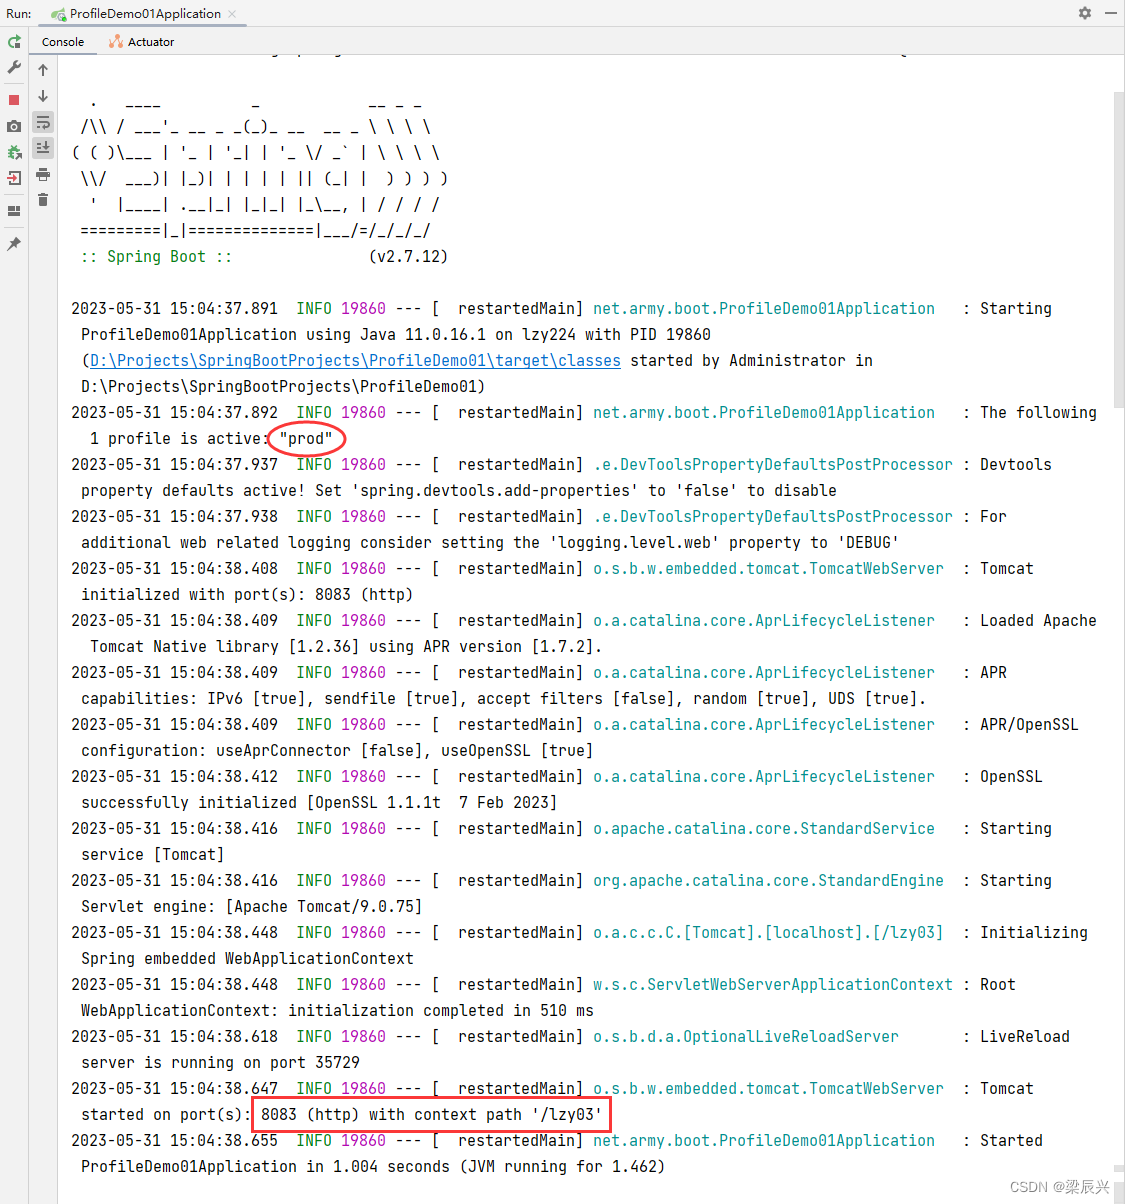
访问:http://localhost:8083/lzy03/welcome
方式2、通过命令行方式指定使用环境
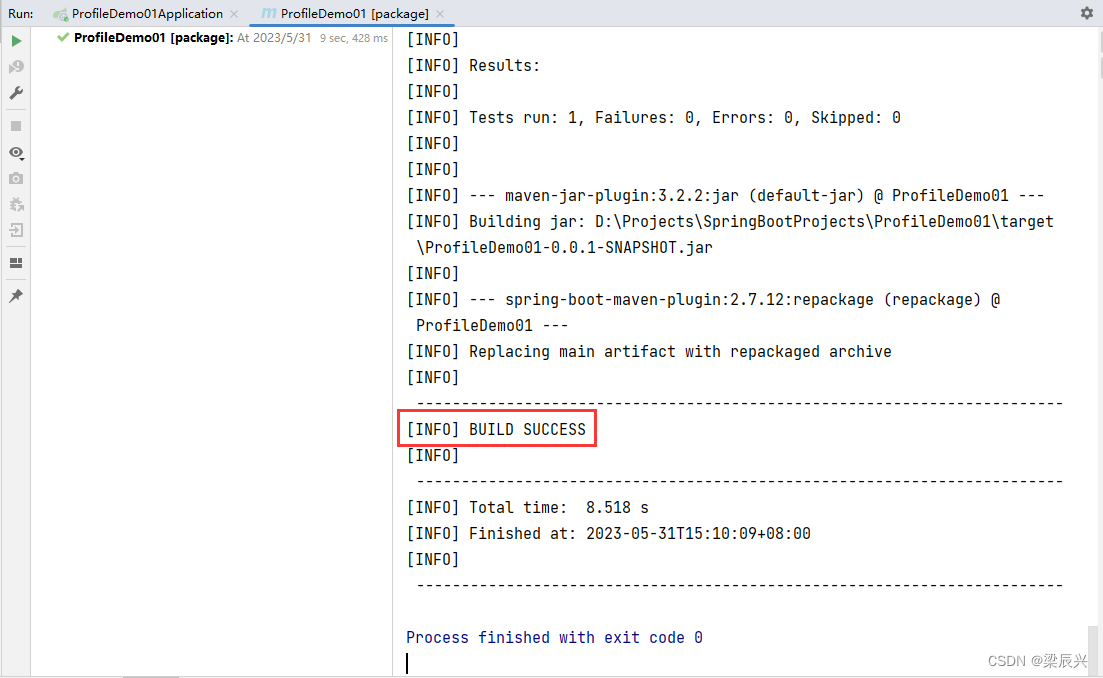
(1)使用IDEA将Maven项目打成jar包
Maven - ProfileDemo01 - LifeCycle - package,单击右键,在快捷菜单里执行“Run Maven Build”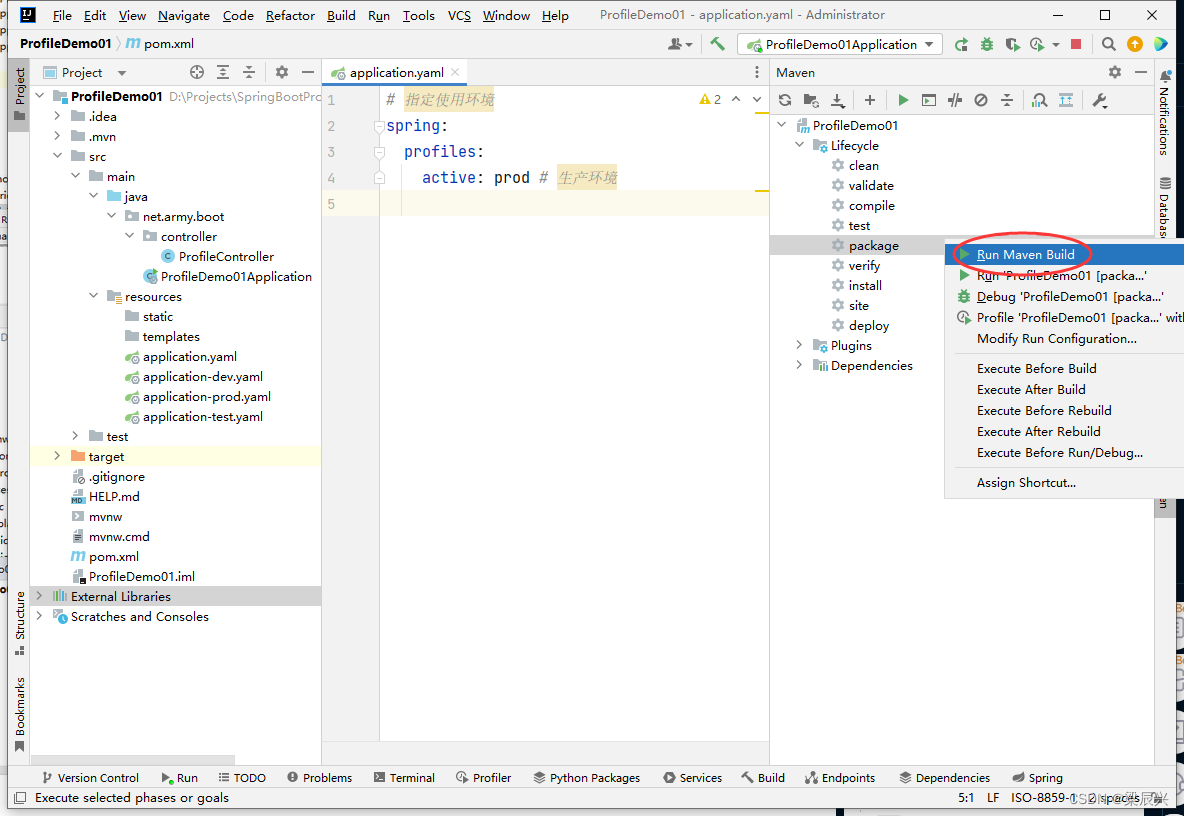
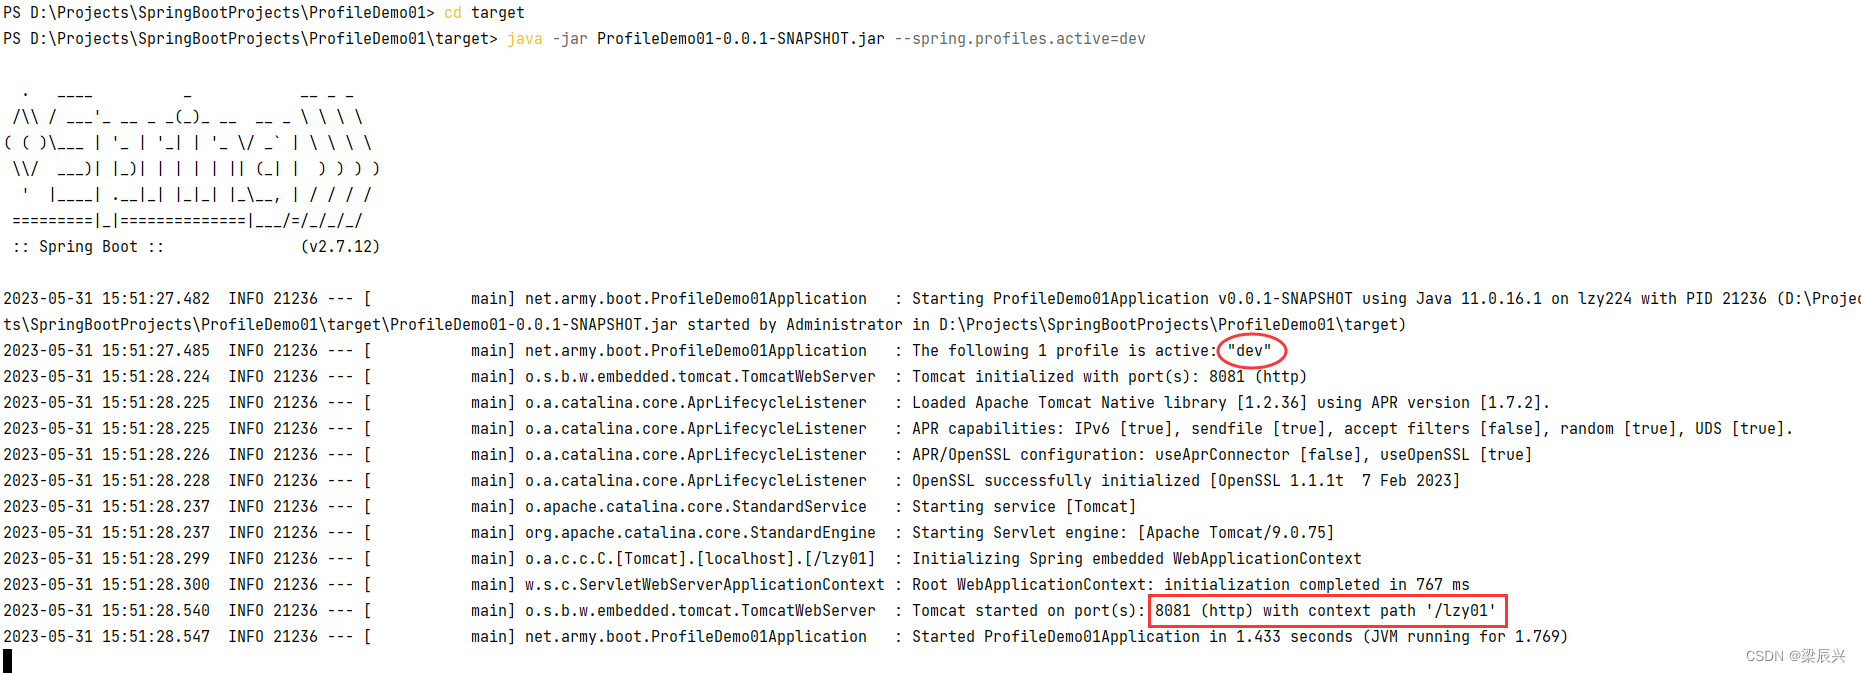
(2)在终端执行jar包,选择使用环境 - 开发环境
D:\Projects\SpringBootProjects\ProfileDemo01> cd target
D:\Projects\SpringBootProjects\ProfileDemo01\target> java -jar ProfileDemo01-0.0.1-SNAPSHOT.jar --spring.profiles.active=dev
(3)在终端执行jar包,选择使用环境 - 测试环境
D:\Projects\SpringBootProjects\ProfileDemo01> cd target
D:\Projects\SpringBootProjects\ProfileDemo01\target> java -jar ProfileDemo01-0.0.1-SNAPSHOT.jar --spring.profiles.active=test

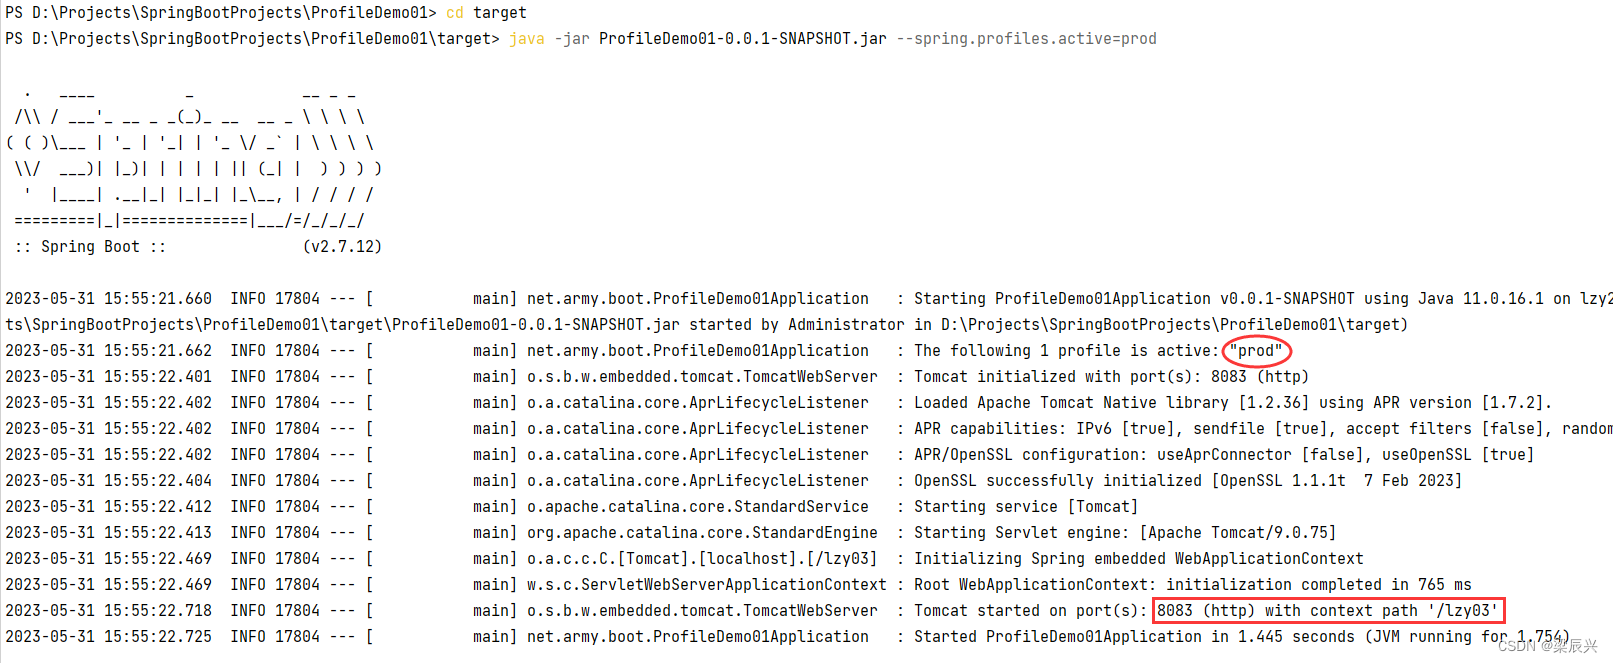
(4)在终端执行jar包,选择使用环境 - 生产环境
D:\Projects\SpringBootProjects\ProfileDemo01> cd target
D:\Projects\SpringBootProjects\ProfileDemo01\target> java -jar ProfileDemo01-0.0.1-SNAPSHOT.jar --spring.profiles.active=prod
三、使用@Profile注解进行多环境配置
如果项目可能用到三种不同的数据库环境,比如MySQL、Oracle和Sybase,那么我们如何利用@Profile注解来实现多数据库环境配置呢?
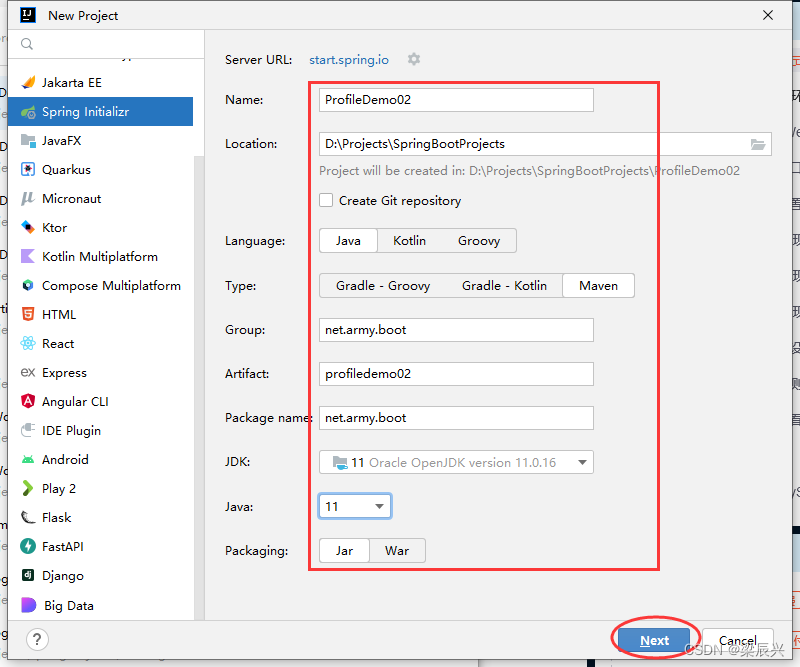
(一)创建Spring Boot项目ProfileDemo02
使用Spring Initializr模板创建Spring Boot项目——ProfileDemo02,配置好后,单击【Next】按钮
 选择Spring Boot版本,添加相关依赖
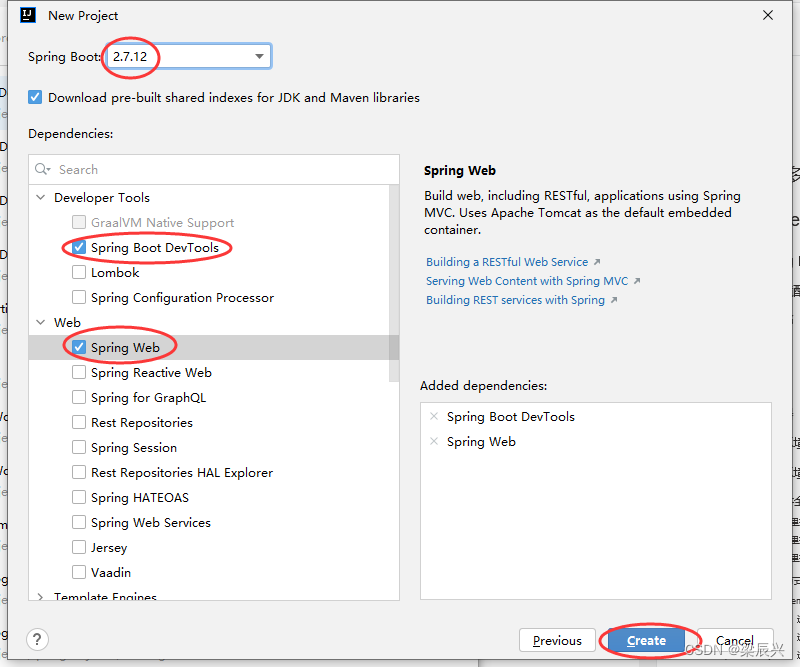
单击【Create】按钮
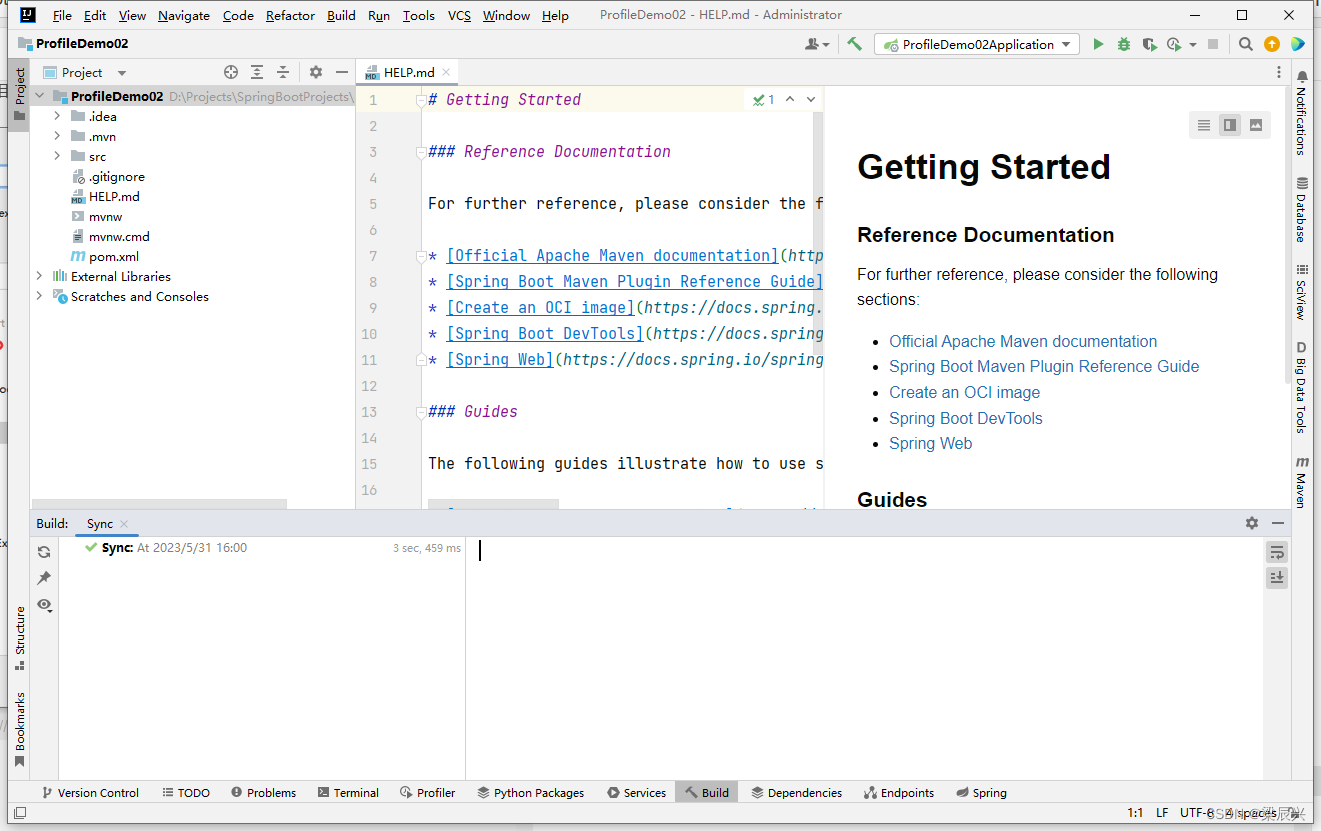 将项目进行热部署
(二)创建数据库配置接口DatabaseConfig
在net.army.boot里创建config子包,在子包里创建DatabaseConfig接口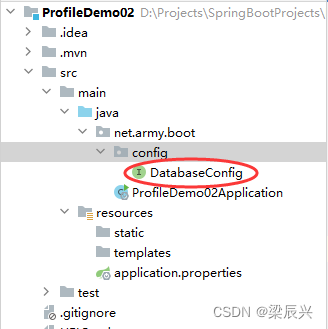
packagenet.army.boot.config;/**
 * 作者:梁辰兴
 * 日期:2023/5/31
 * 功能:数据库配置接口
 */publicinterfaceDatabaseConfig{voidconnect();}
(三)创建三个数据库配置实现类
1、创建数据库配置实现类MySQLConfig
在net.army.boot.config包里创建impl子包,在子包里创建MySQLConfig类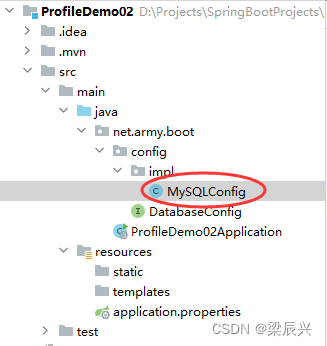
packagenet.army.boot.config.impl;importnet.army.boot.config.DatabaseConfig;importorg.springframework.context.annotation.Configuration;importorg.springframework.context.annotation.Profile;/**
 * 作者:梁辰兴
 * 日期:2023/5/31
 * 功能:MySQL数据库配置实现类
 */@Configuration// 标识为配置类@Profile("mysql")// 指定使用环境名称publicclassMySQLConfigimplementsDatabaseConfig{@Overridepublicvoidconnect(){System.out.println("项目使用MySQL数据库环境~");}}
2、创建数据库配置实现类OracleConfig
在net.army.boot.config.impl包里创建OracleConfig类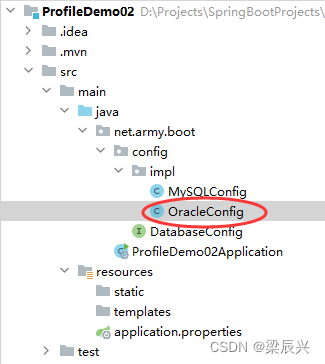
packagenet.army.boot.config.impl;importnet.army.boot.config.DatabaseConfig;importorg.springframework.context.annotation.Configuration;importorg.springframework.context.annotation.Profile;/**
 * 作者:梁辰兴
 * 日期:2023/5/31
 * 功能:Oracle数据库配置类
 */@Configuration// 标识为配置类@Profile("oracle")// 指定使用环境名称publicclassOracleConfigimplementsDatabaseConfig{@Overridepublicvoidconnect(){System.out.println("项目使用Oracle数据库环境~");}}
3、创建数据库配置实现类SybaseConfig
在net.army.boot.config.impl包里创建SybaseConfig类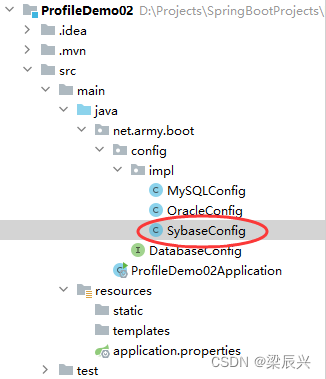
packagenet.army.boot.config.impl;importnet.army.boot.config.DatabaseConfig;importorg.springframework.context.annotation.Configuration;importorg.springframework.context.annotation.Profile;/**
 * 作者:梁辰兴
 * 日期:2023/5/31
 * 功能:Sybase数据库配置类
 */@Configuration// 标识为配置类@Profile("sybase")// 指定使用环境名称publicclassSybaseConfigimplementsDatabaseConfig{@Overridepublicvoidconnect(){System.out.println("项目使用Sybase数据库环境~");}}
(四)在全局配置文件里设置使用环境
在全局配置文件application.properties里配置使用环境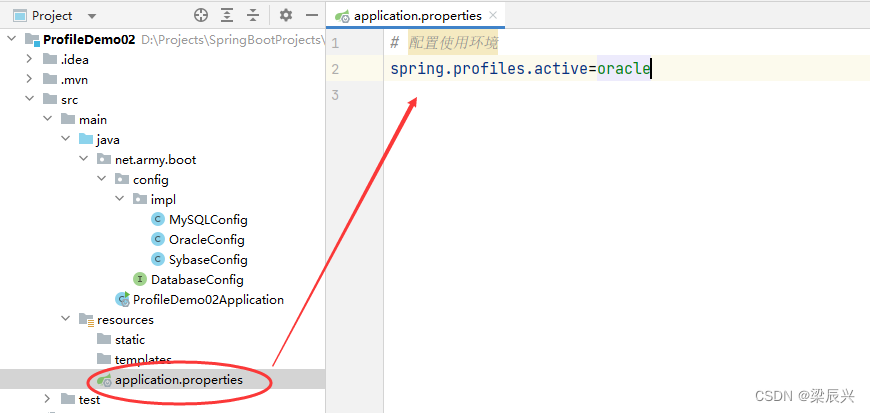
(五)打开测试类,编写测试方法
打开自带的测试类ProfileDemo02ApplicationTests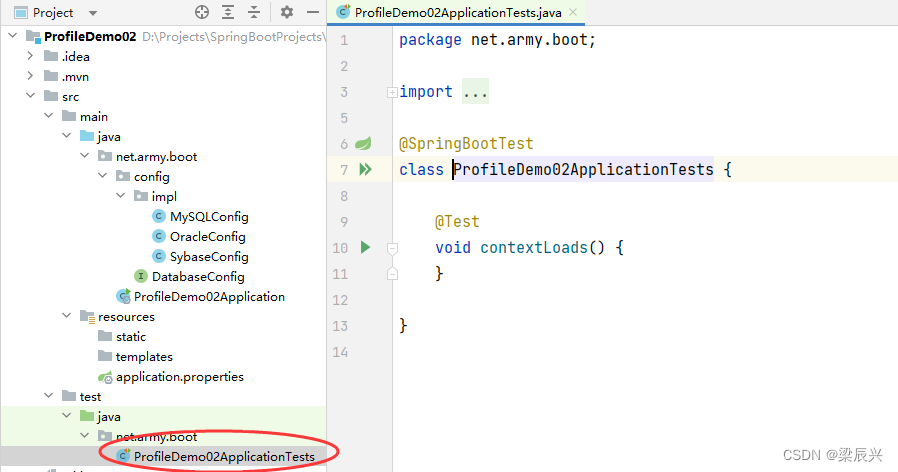
注入数据配置实体,调用数据库配置实体的方法
packagenet.army.boot;importnet.army.boot.config.DatabaseConfig;importorg.junit.jupiter.api.Test;importorg.springframework.beans.factory.annotation.Autowired;importorg.springframework.boot.test.context.SpringBootTest;@SpringBootTestclassProfileDemo02ApplicationTests{@Autowired// 注入数据库配置实体privateDatabaseConfig databaseConfig;@TestvoidcontextLoads(){// 调用数据库配置实体的方法
        databaseConfig.connect();}}
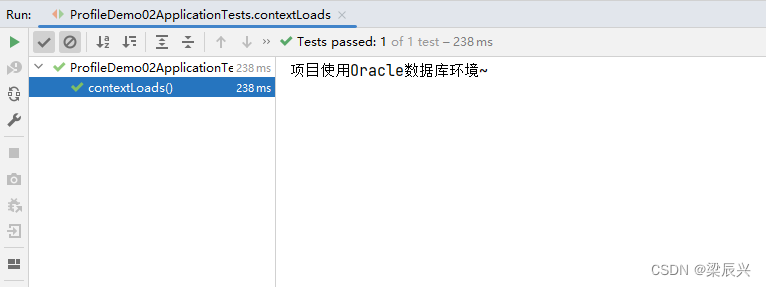
(六)运行测试方法,查看结果
运行contextLoads()测试方法,查看结果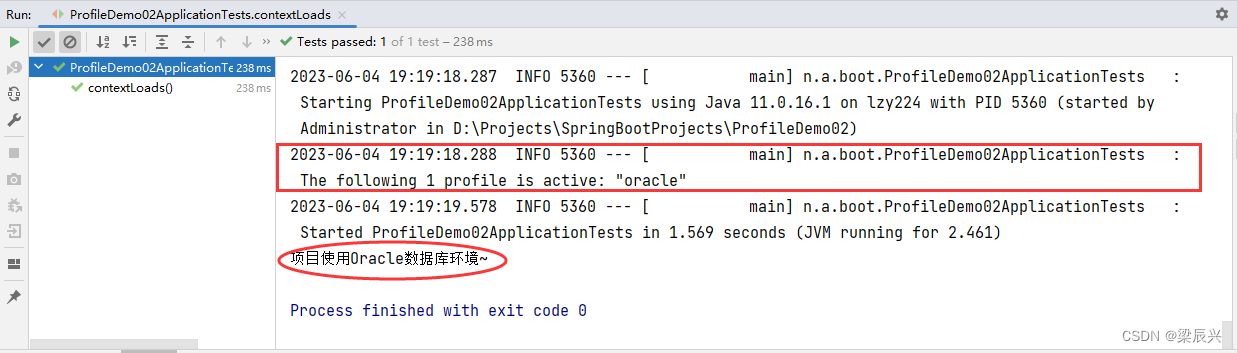
练习
1、设置使用环境 - MySQL数据库环境,并测试
2、设置使用环境 - Sybase数据库环境,并测试
四、随机值设置以及参数间引用
(一)创建Spring Boot Web项目RandomSetDemo
使用Spring Initializr模板创建Spring Boot项目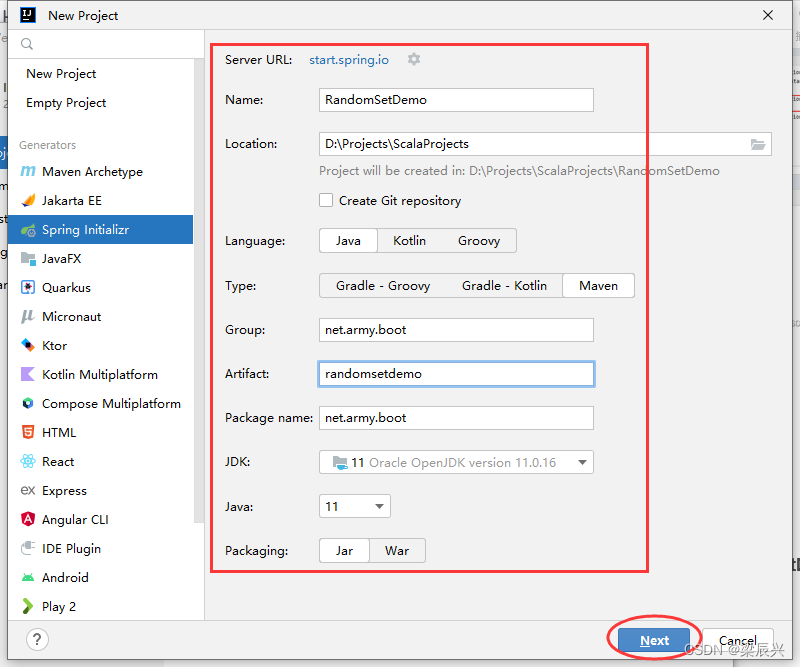
单击【Next】按钮,选择Spring Boot版本,添加相关依赖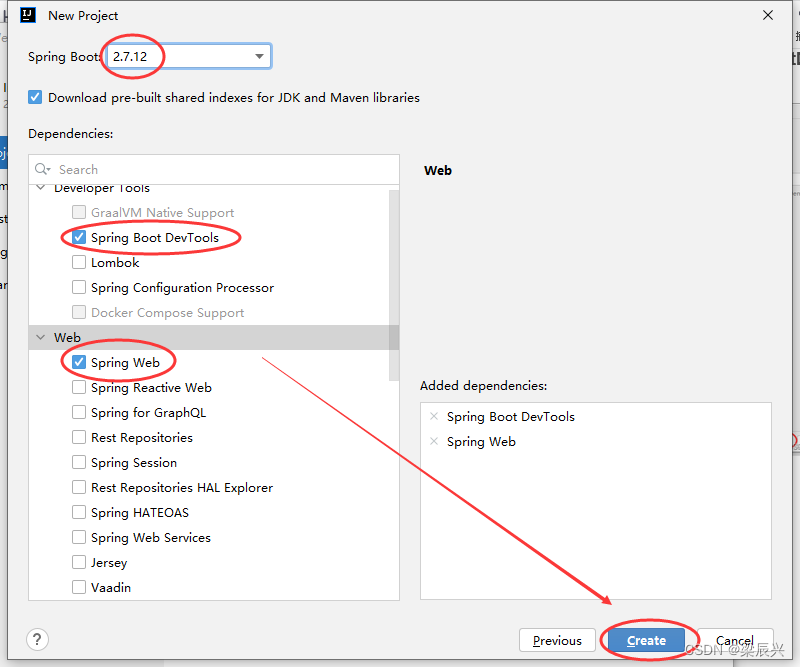
单击【Create】按钮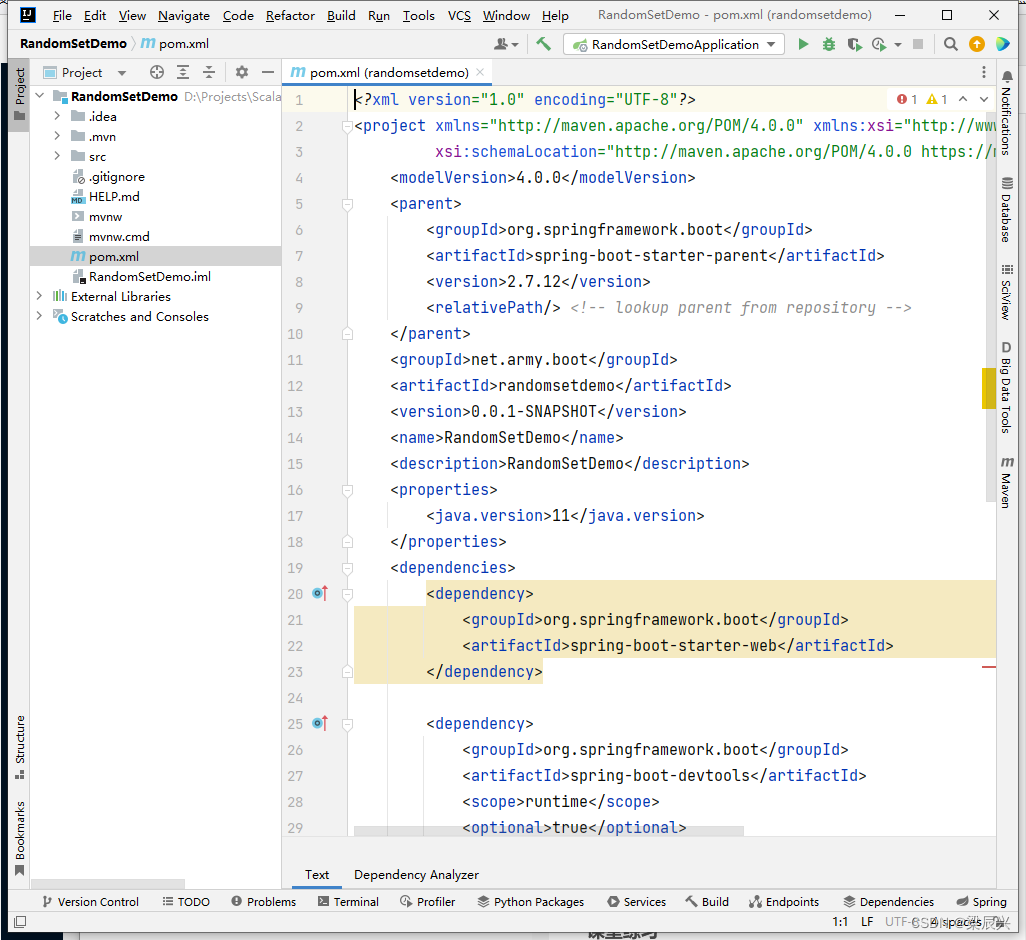
(二)在全局配置文件里配置随机值
在application.properties文件里配置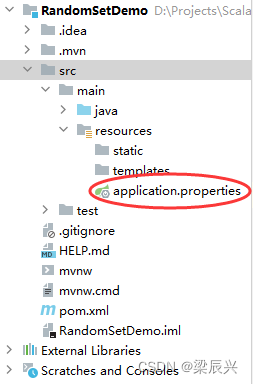
#一个随机值
lzy.value=${random.value}
#一个随机整数
lzy.integer=${random.int}
#一个长整型随机数
lzy.long=${random.long}
#获取一个随机UUID值
lzy.uuid=${random.uuid}
#小于10的随机整数
lzy.number.less=${random.int(10)}
#随机产生1024至65535之间的数
lzy.number.range=${random.int[1024,65535]}
(三)在测试类里测试配置的随机数
打开自带的测试类 - RandomSetDemoApplicationTests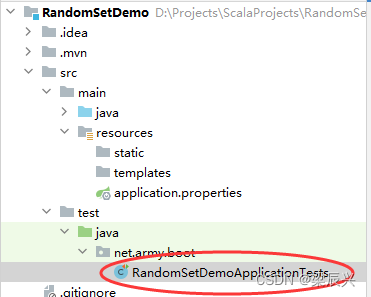
1、测试随机数my.number
注入配置文件里的属性
输出配置文件里的属性
packagenet.army.boot;importorg.junit.jupiter.api.Test;importorg.springframework.beans.factory.annotation.Value;importorg.springframework.boot.test.context.SpringBootTest;@SpringBootTestclassRandomSetDemoApplicationTests{// 注入配置文件里的随机值@Value("${lzy.value}")privateString value;@TestpublicvoidtestRandomValue(){// 输出配置文件里的随机值System.out.println("随机值:"+ value);}}
运行testRandonValue()方法,查看结果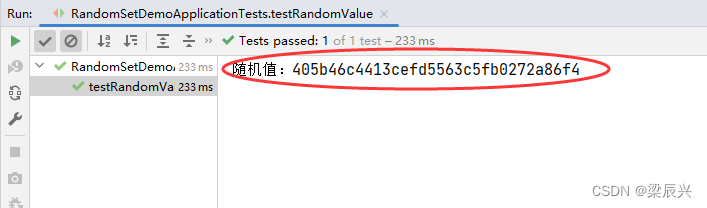 大家可以看到,产生的是32位的十六进制数对应的字符串,思考一下,能否将其变成128位的二进制串?
2、测试随机整数my.integer
注入配置文件里的属性
输出配置文件里的属性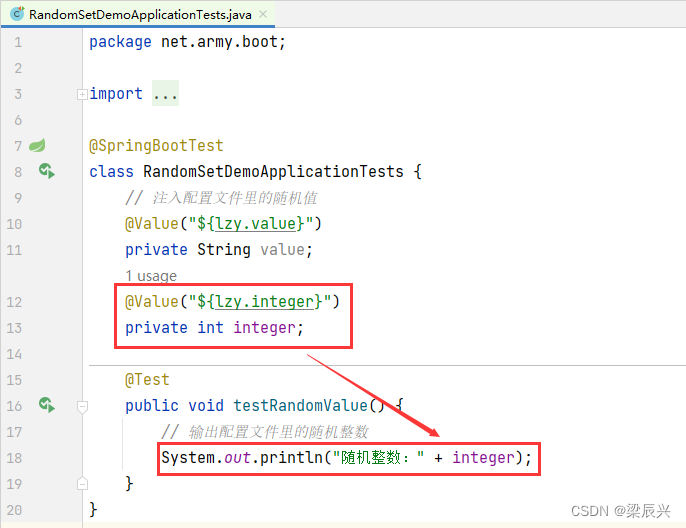
运行testRandomInteger()方法,查看结果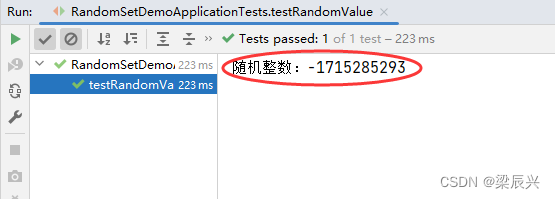
再运行testRandomInteger()方法,查看结果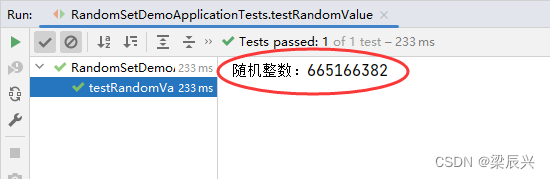
练习
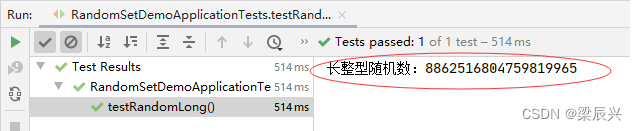
1、测试长整型随机数my.long
2、测试随机UUID值my.uuid

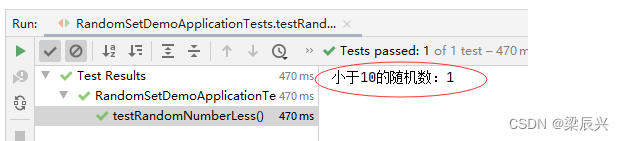
3、测试小于10的随机整数my.number.less

4、测试1024至65535之间的随机整数my.number.range
(四)演示参数间的引用
在appication.properties文件里,后定义的属性可引用前面定义的属性
定义三个属性year、month和day
定义属性user.name
定义属性user.birthday,引用属性year、month和day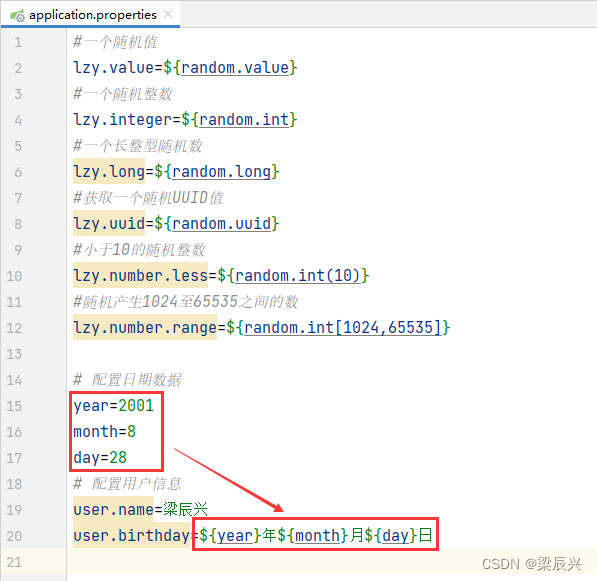
# 配置日期数据
year=2001
month=8
day=28
# 配置用户信息
user.name=梁辰兴
user.birthday=${year}年${month}月${day}日
在测试类里编写testUser()方法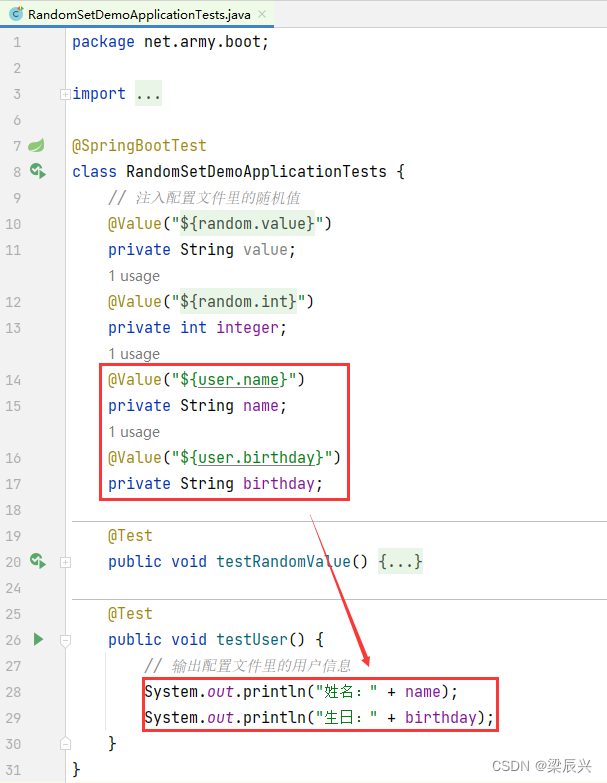
运行testUser()方法,查看结果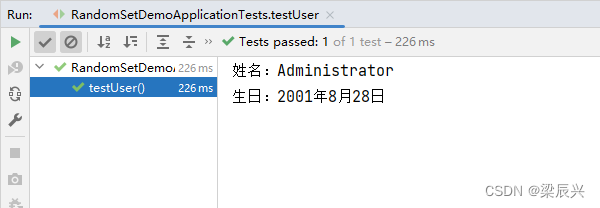
有点问题,明明在配置文件里,user.name=梁辰兴,但结果并非如此,原因何在?
user.name得到是系统用户名,而不是配置文件里定义的用户名。
修改配置文件,不使用user前缀,改用person前缀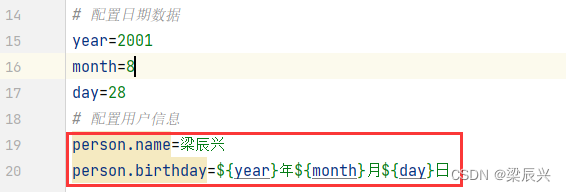
修改测试代码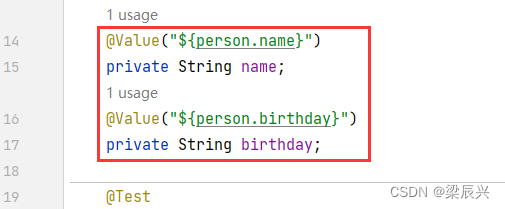
运行testUser()方法,查看结果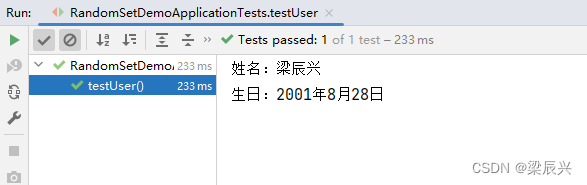
版权归原作者 梁辰兴 所有, 如有侵权,请联系我们删除。