功能说明
开发一个类似微信的主页面框架,UI布局为上中下结构,包含4个tab界面:
页面顶部为页面标题
页面底部为导航栏
页面中部为内容展示界面
开发技术
layout xml,控件,监听,fragment
设计流程及代码详解
创建项目
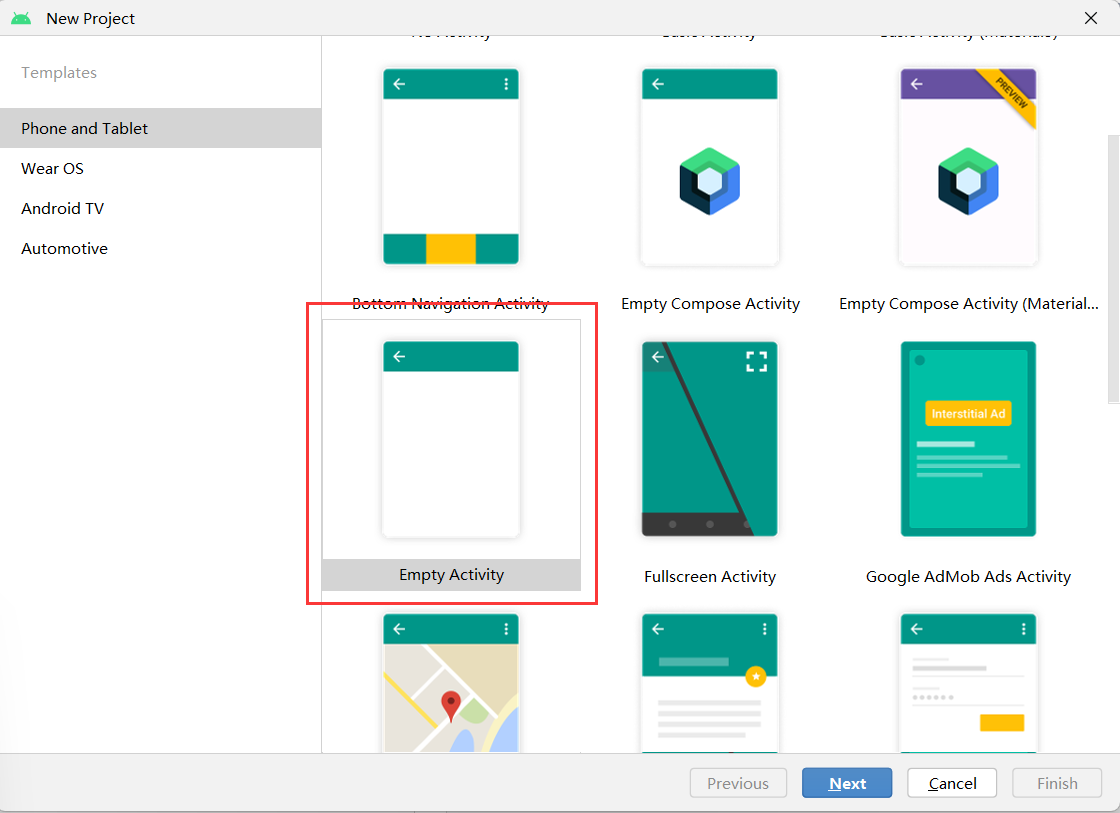
- 选择File->New->New Project

- 空项目
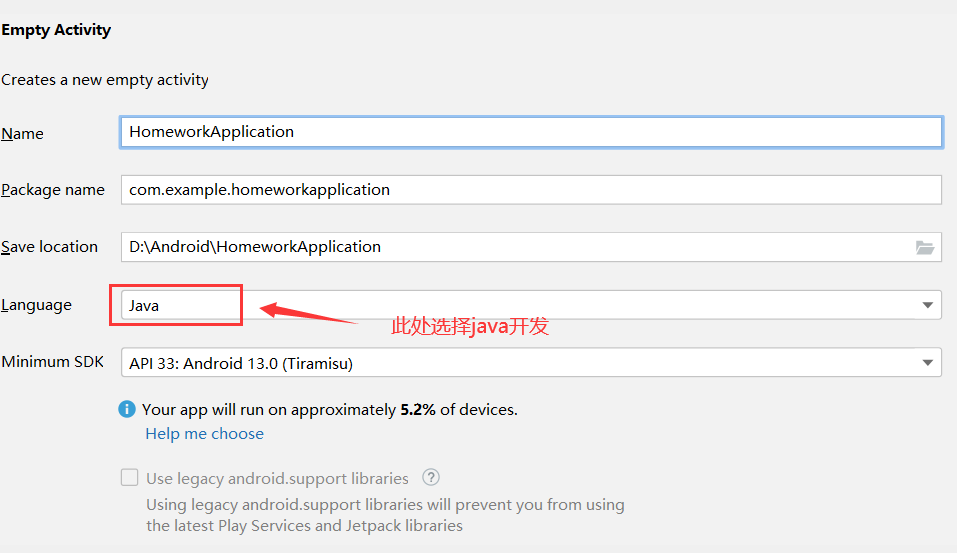
- 项目设置
选择java项目
UI界面
该UI界面由多个xml布局页面组成:
顶部标题栏 : app的标题,即"微信",标题居中显示
中间内容界面 : 共"微信""通讯录""发现""我"四个界面,分别显示不同内容
底部导航栏 : 一共四个图标,分别控制中间内容界面
顶部标题栏
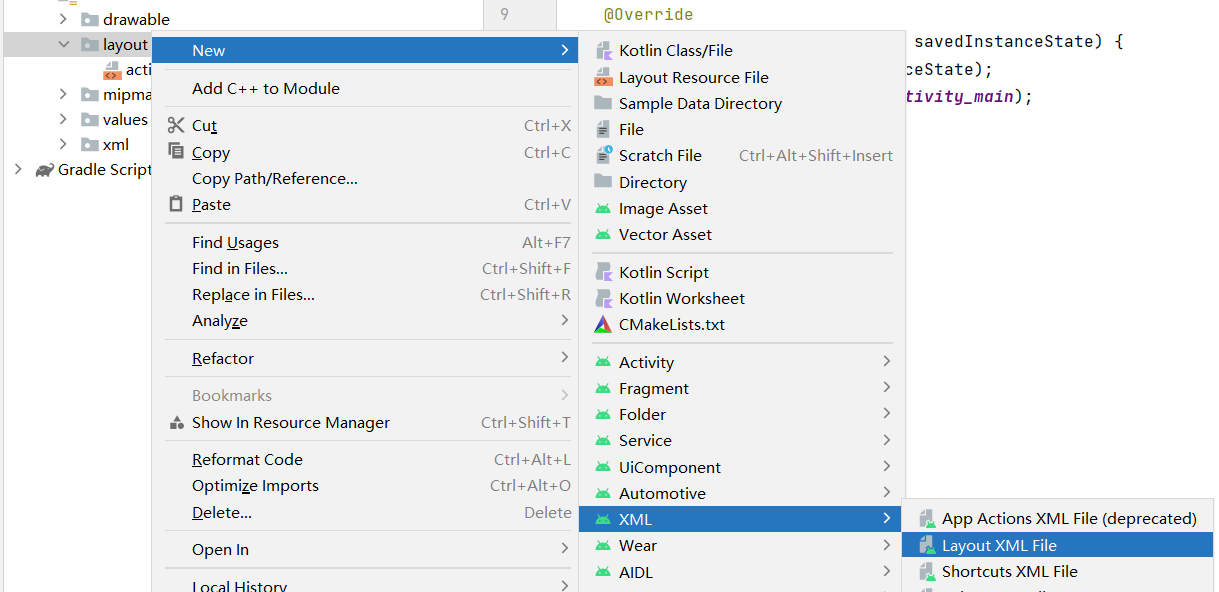
由于页面顶部就只有微信两个字,所以使用线性布局

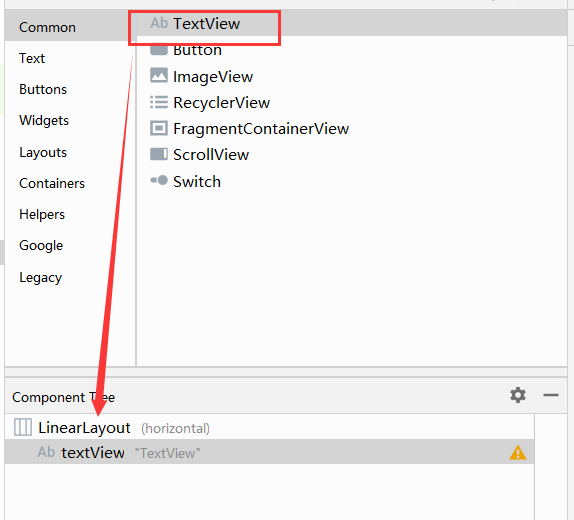
在Design界面将TextView拖到下面
在Code界面按照下图设置
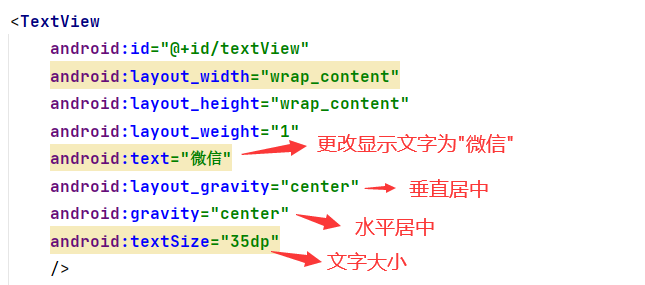
标题栏toplayout.xml
<?xml version="1.0" encoding="utf-8"?>
<LinearLayout xmlns:android="http://schemas.android.com/apk/res/android"
    android:layout_width="match_parent"
    android:layout_height="match_parent">

    <TextView
        android:id="@+id/textView"
        android:layout_width="wrap_content"
        android:layout_height="wrap_content"
        android:layout_weight="1"
        android:text="微信"
        android:layout_gravity="center"
        android:gravity="center"
        android:textSize="35dp"
        />
</LinearLayout>
底部导航栏
按照上述方式创建底部导航栏,页面布局同样选择LinearLayout
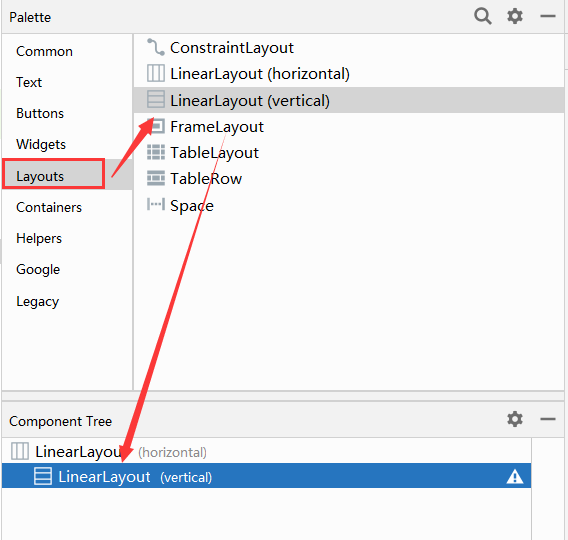
对于底部的导航栏,应该由四个部分组成,水平排列,而这四个部分又分别由两个部分组成——图标和文字。
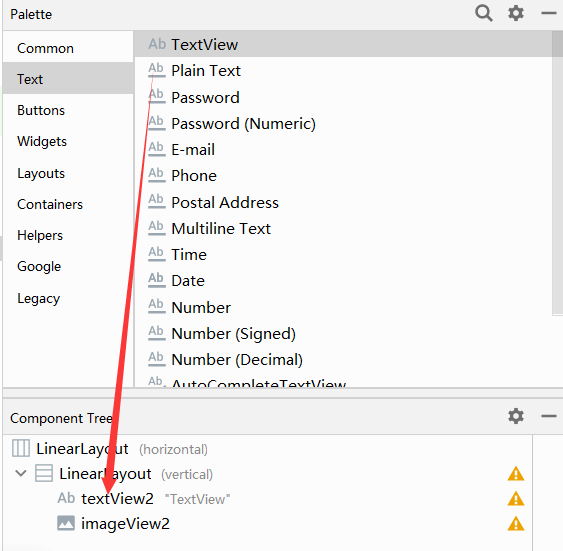
然后将该部分复制4个并重命名
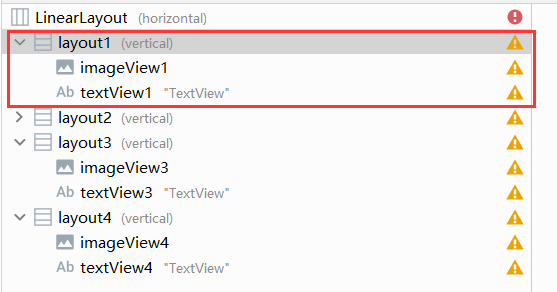
复制后发现只有第一个图标展示,其他的图标全部都在一条线上,所以要对四个部分的代码进行如下图更改
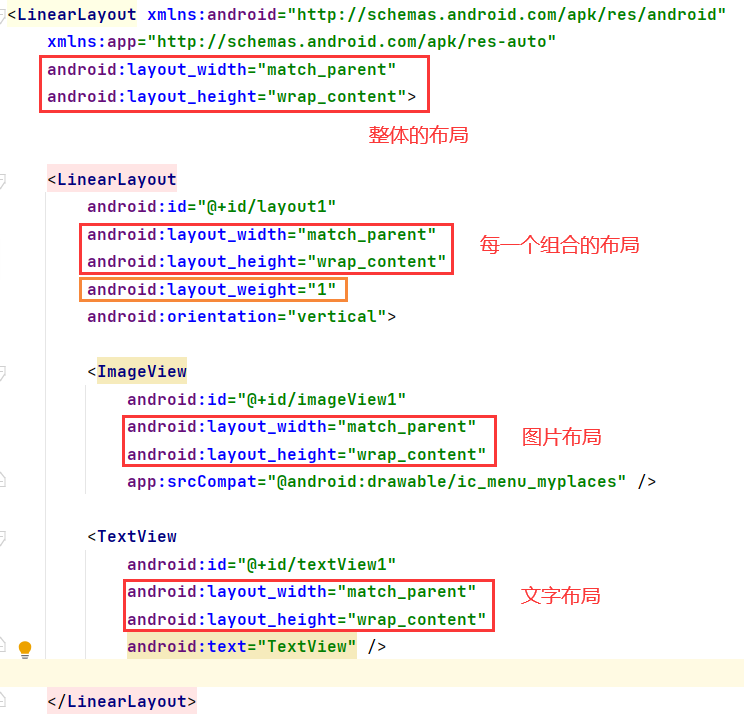
其中layout_weight="1"指的是四个控件平分父控件空间
之后再在每一个TextView中添加文字居中的属性,并且更改每一个部分的图片和文字,即可达到以下效果

底部bottomlayout.xml
<?xml version="1.0" encoding="utf-8"?>
<LinearLayout xmlns:android="http://schemas.android.com/apk/res/android"
    xmlns:app="http://schemas.android.com/apk/res-auto"
    android:layout_width="match_parent"
    android:layout_height="wrap_content">

    <LinearLayout
        android:id="@+id/layout1"
        android:layout_width="match_parent"
        android:layout_height="wrap_content"
        android:layout_weight="1"
        android:orientation="vertical">

        <ImageView
            android:id="@+id/imageView1"
            android:layout_width="match_parent"
            android:layout_height="wrap_content"
            android:layout_weight="1"
            app:srcCompat="@android:drawable/sym_action_chat" />

        <TextView
            android:id="@+id/textView1"
            android:layout_width="match_parent"
            android:layout_height="wrap_content"
            android:gravity="center"
            android:text="微信" />

    </LinearLayout>

    <LinearLayout
        android:id="@+id/layout2"
        android:layout_width="match_parent"
        android:layout_height="wrap_content"
        android:layout_weight="1"
        android:orientation="vertical">

        <ImageView
            android:id="@+id/imageView2"
            android:layout_width="match_parent"
            android:layout_height="wrap_content"
            app:srcCompat="@android:drawable/ic_menu_myplaces" />

        <TextView
            android:id="@+id/textView2"
            android:layout_width="match_parent"
            android:layout_height="wrap_content"
            android:gravity="center"
            android:text="通讯录" />

    </LinearLayout>

    <LinearLayout
        android:id="@+id/layout3"
        android:layout_width="match_parent"
        android:layout_height="wrap_content"
        android:layout_weight="1"
        android:orientation="vertical">

        <ImageView
            android:id="@+id/imageView3"
            android:layout_width="match_parent"
            android:layout_height="wrap_content"
            app:srcCompat="@android:drawable/ic_menu_share" />

        <TextView
            android:id="@+id/textView3"
            android:layout_width="match_parent"
            android:layout_height="wrap_content"
            android:gravity="center"
            android:text="发现" />

    </LinearLayout>

    <LinearLayout
        android:id="@+id/layout4"
        android:layout_width="match_parent"
        android:layout_height="wrap_content"
        android:layout_weight="1"
        android:orientation="vertical">

        <ImageView
            android:id="@+id/imageView4"
            android:layout_width="match_parent"
            android:layout_height="wrap_content"
            app:srcCompat="@android:drawable/ic_menu_search" />

        <TextView
            android:id="@+id/textView4"
            android:layout_width="match_parent"
            android:layout_height="wrap_content"
            android:gravity="center"
            android:text="我" />

    </LinearLayout>
</LinearLayout>
页面整合
由于中间的部分是会随着下面图标的点击变动的,所以后面再设置,我们先把顶部、中部和底部进行页面定位整合.
按照上面的方式创建mainlayout界面,仍然选择的是linearlayout,但是由于上中下三个部分在该页面是垂直分布,所以和上面不同的是要在最大的Linearlayout标签中添加:

然后将前面设置的顶部和底部添加到mainlayout中
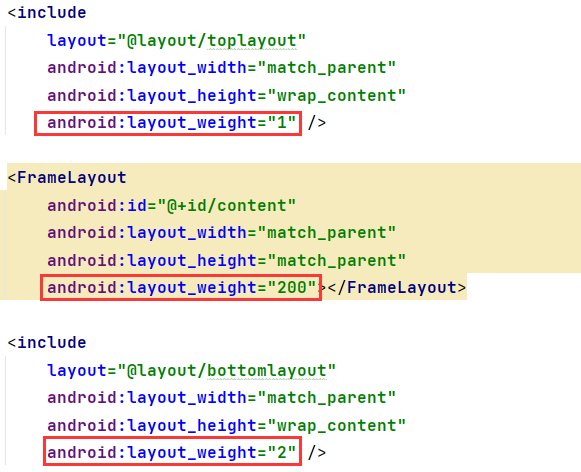
但是如果这样设置,那么三个界面将会贴在一起,所以可以设置layout_weight
(这里不太确定,感觉这样设置有点奇怪,但是最后界面展现是正确的)
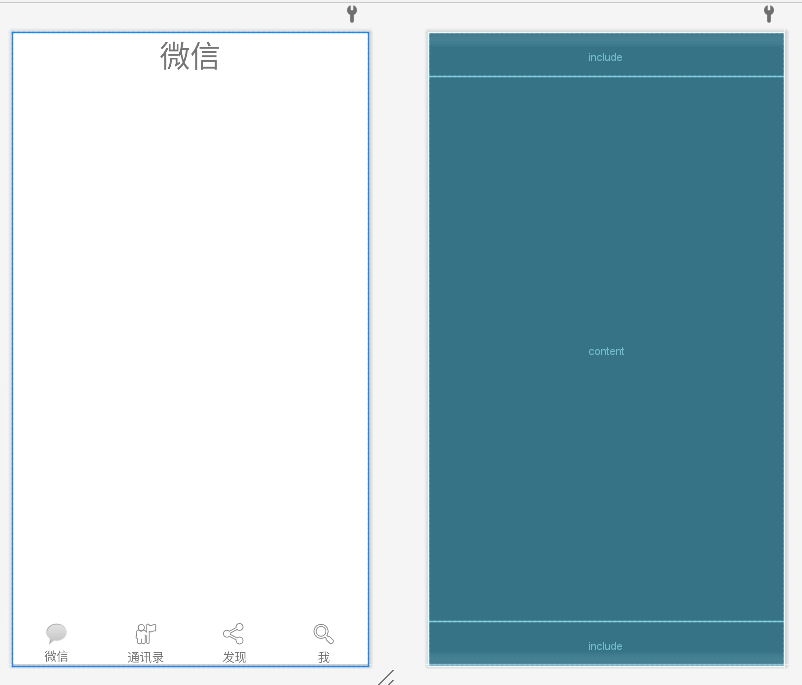
最后界面展现如下:
mainlayout.xml
<?xml version="1.0" encoding="utf-8"?>
<LinearLayout xmlns:android="http://schemas.android.com/apk/res/android"
    android:layout_width="match_parent"
    android:layout_height="match_parent"
    android:orientation="vertical">

    <include
        layout="@layout/toplayout"
        android:layout_width="match_parent"
        android:layout_height="wrap_content"
        android:layout_weight="1" />

    <FrameLayout
        android:id="@+id/content"
        android:layout_width="match_parent"
        android:layout_height="match_parent"
        android:layout_weight="200"></FrameLayout>

    <include
        layout="@layout/bottomlayout"
        android:layout_width="match_parent"
        android:layout_height="wrap_content"
        android:layout_weight="2" />

</LinearLayout>
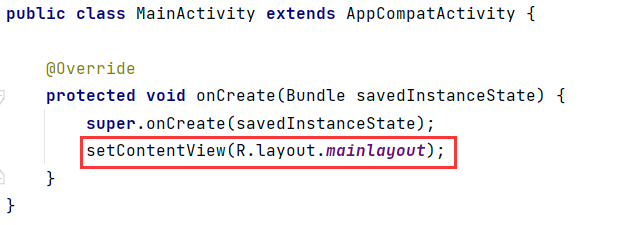
还有要在启动项MainActivity中修改为mainlayout
中间界面切换
创建Fragment(blank)
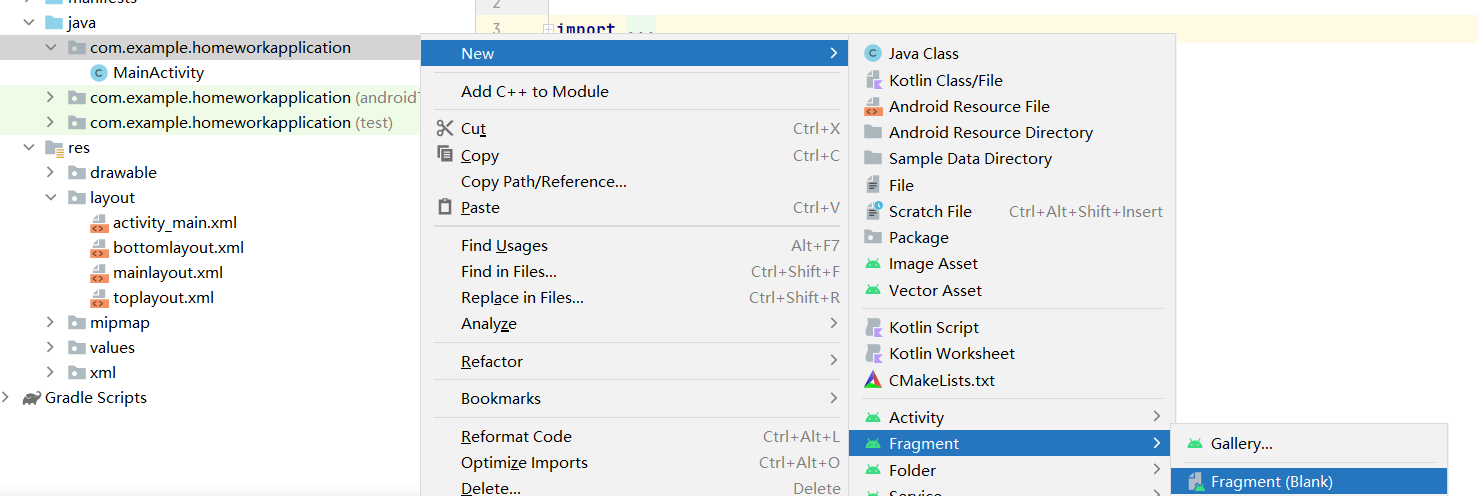

删除其他方法,只留下onCreateView方法

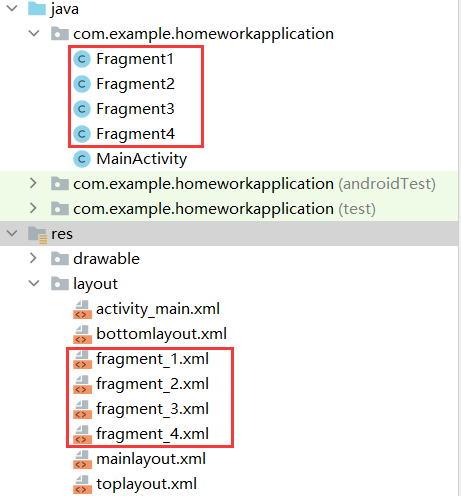
由于共有四个界面的切换,所以一共要创建4个Fragment,创建后项目结构如下:
然后在MainActivity中将四个Fragment和导航栏中的四个创建联系,使用findViewbyId()对应导航栏中四个部分的id
linearLayout1=findViewById(R.id.layout1);
linearLayout2=findViewById(R.id.layout2);
linearLayout3=findViewById(R.id.layout3);
linearLayout4=findViewById(R.id.layout4);
新建init()函数用于Fragment页面初始化
public void initial(){
    transaction=manager.beginTransaction()
                .add(R.id.content,fragment1)
                .add(R.id.content,fragment2)
                .add(R.id.content,fragment3)
                .add(R.id.content,fragment4)
                .commit();
}
由于每一次点击图标后,页面展现的是隐藏当前的界面,展示点击图标对应的界面
新建showfragment展示界面
private void showfragment(Fragment fragment) {
    transaction=manager.beginTransaction()
                .show(fragment)
                .commit();
}
新建fragmentHide隐藏界面
public void fragmentHide(){
    transaction=manager.beginTransaction()
                .hide(fragment1)
                .hide(fragment2)
                .hide(fragment3)
                .hide(fragment4)
                .commit();
}
设置监听程序,完成点击图标时触发事件,并使用switch完成点击不同的图标展现不同的界面
public void onClick(View view){
    fragmentHide();
    switch (view.getId())
    {
        case R.id.layout1:showfragment(fragment1);break;
        case R.id.layout2:showfragment(fragment2);break;
        case R.id.layout3:showfragment(fragment3);break;
        case R.id.layout4:showfragment(fragment4);break;
    }
}
并在主方法中添加如下代码
linearLayout1.setOnClickListener(this);
linearLayout2.setOnClickListener(this);
linearLayout3.setOnClickListener(this);
linearLayout4.setOnClickListener(this);
在中间界面即fragment_1,fragment_2,fragment_3,fragment_4中设置每个界面设置不同的内容
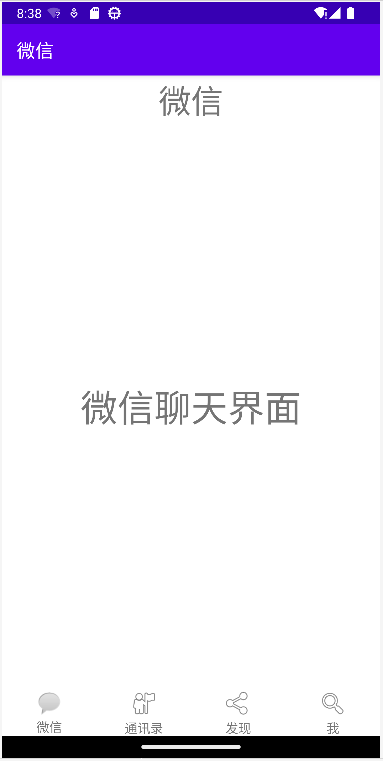
最后在打开App的开始界面应该是显示聊天界面,所以在主方法后添加如下代码:
initial();
fragmentHide();
showfragment(fragment1);
还可以修改App的名字,是在value目录中的strings.xml文件中修改


MainActivity.java
package com.example.homeworkapplication;

import androidx.appcompat.app.AppCompatActivity;
import androidx.fragment.app.Fragment;
import androidx.fragment.app.FragmentManager;

import android.os.Bundle;
import android.view.View;
import android.widget.LinearLayout;

public class MainActivity extends AppCompatActivity implements View.OnClickListener{

    Fragment fragment1,fragment2,fragment3,fragment4;  //声明为父类
    int transaction;
    FragmentManager manager;

    LinearLayout linearLayout1,linearLayout2,linearLayout3,linearLayout4;

    int i;

    @Override
    protected void onCreate(Bundle savedInstanceState) {
        super.onCreate(savedInstanceState);
        setContentView(R.layout.mainlayout);

        linearLayout1=findViewById(R.id.layout1);
        linearLayout2=findViewById(R.id.layout2);
        linearLayout3=findViewById(R.id.layout3);
        linearLayout4=findViewById(R.id.layout4);

        manager=getSupportFragmentManager();

        fragment1=new Fragment1();
        fragment2=new Fragment2();
        fragment3=new Fragment3();
        fragment4=new Fragment4();

        initial();
        fragmentHide();
        showfragment(fragment1);

        linearLayout1.setOnClickListener(this);
        linearLayout2.setOnClickListener(this);
        linearLayout3.setOnClickListener(this);
        linearLayout4.setOnClickListener(this);
    }

    public void initial(){
        transaction=manager.beginTransaction()
                .add(R.id.content,fragment1)
                .add(R.id.content,fragment2)
                .add(R.id.content,fragment3)
                .add(R.id.content,fragment4)
                .commit();
    }

    public void onClick(View view){
        fragmentHide();
        switch (view.getId())
        {
            case R.id.layout1:showfragment(fragment1);break;
            case R.id.layout2:showfragment(fragment2);break;
            case R.id.layout3:showfragment(fragment3);break;
            case R.id.layout4:showfragment(fragment4);break;
        }
    }

    private void showfragment(Fragment fragment) {
        transaction=manager.beginTransaction()
                .show(fragment)
                .commit();
    }

    public void fragmentHide(){
        transaction=manager.beginTransaction()
                .hide(fragment1)
                .hide(fragment2)
                .hide(fragment3)
                .hide(fragment4)
                .commit();
    }

}
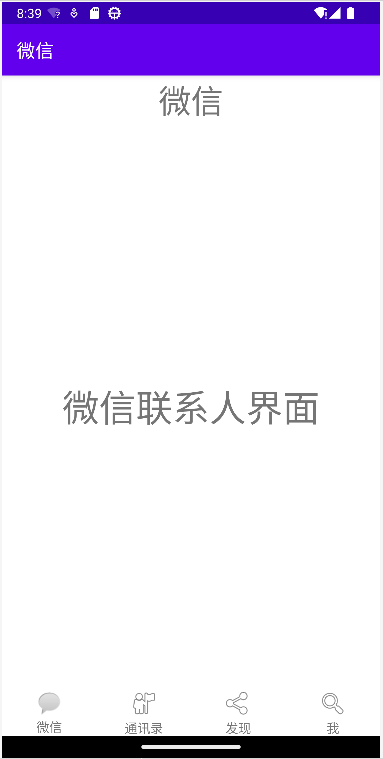
运行结果
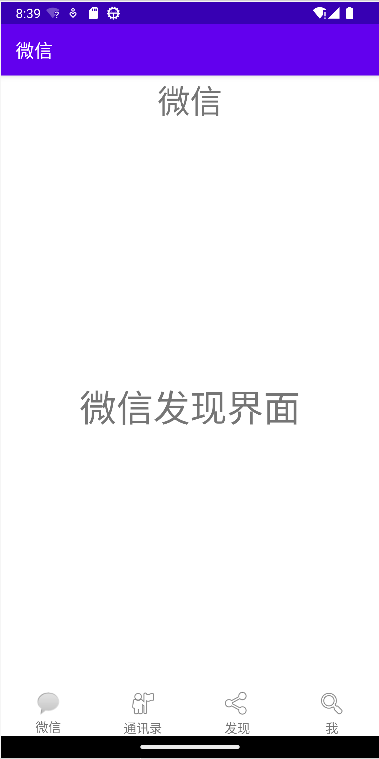
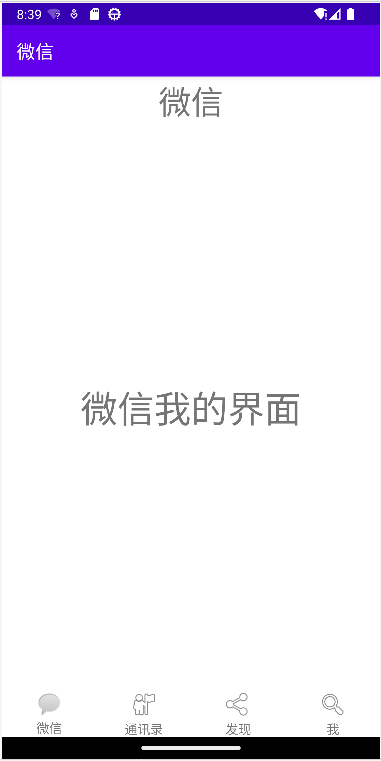
源码开源地址
点击查看源码
版权归原作者 feifei 所有, 如有侵权,请联系我们删除。