- 作者:十余年工作经验, 跨域学习者,从事过全栈研发、项目经理等工作,一个爱折腾的程序员~
在本章中,我们将详细了解Elasticsearch的安装过程。
要在本地计算机上安装Elasticsearch,您将必须执行以下步骤-
第1步−检查计算机上安装的Java版本。它应该是Java 7或更高版本。您可以通过执行以下操作进行检查-
在Windows操作系统(OS)中(使用命令提示符)-
> java -version
java version "1.8.0_211"
Java(TM) SE Runtime Environment (build 1.8.0_211-b12)
Java HotSpot(TM) 64-Bit Server VM (build 25.211-b12, mixed mode)
第2步 - Elasticsearch的安装过程非常容易,下面介绍在不同的操作系统如何安装 -
- Windows操作系统 − 解压缩zip包,并安装Elasticsearch。
- 下载地址如下:
- https://artifacts.elastic.co/downloads/kibana/kibana-8.6.2-windows-x86_64.zip
- https://artifacts.elastic.co/downloads/elasticsearch/elasticsearch-8.6.2-windows-x86_64.zip
在Windows中
> cd elasticsearch-8.6.2/bin
> elasticsearch.bat
第3步 - 注意8.6.2版本之后 默认启用了xpack,需要https访问,同时在启动过程中会输出默认的elasticsearch密码(注意,别忘了!!!也会生成kibana的token),如下文:
 Password for the elastic user (reset with `bin/elasticsearch-reset-password -u elastic`):
  xe5q+Chf=xxxxxxxxxx=nGk

鈩癸笍  HTTP CA certificate SHA-256 fingerprint:
  d5d20f4d5ac29d6932a936f0c144f4995ff6f3b56c60ce0f094b91c10df713ec

鈩癸笍  Configure Kibana to use this cluster:
鈥?Run Kibana and click the configuration link in the terminal when Kibana starts.
鈥?Copy the following enrollment token and paste it into Kibana in your browser (valid for the next 30 minutes):
  eyJ2ZXIiOiI4LjYuMiIsImFkciI6WyIxOTIuMTY4LjMuNDA6OTIwMCJdLCJmZ3IiOiJkNWQyMGY0ZDVhYzI5ZDY5MzJhOTM2ZjBjMTQ0ZjQ5OTVmZjZmM2I1NmMxxxxxxxxxxxxxx2MGNlMGYwOTRiOTFjMTBkZjcxM2VjIiwia2V5IjoicFdmXzZvWUJmOGJBZUNKNXZyN1g6eUV5WFNUa0lRVmVFaFdBQy1KM3R3ZyJ9

鈩癸笍  Configure other nodes to join this cluster:
鈥?On this node:
  鈦?Create an enrollment token with `bin/elasticsearch-create-enrollment-token -s node`.
  鈦?Uncomment the transport.host setting at the end of config/elasticsearch.yml.
  鈦?Restart Elasticsearch.
鈥?On other nodes:
  鈦?Start Elasticsearch with `bin/elasticsearch --enrollment-token <token>`, using the enrollment token that you generated.
第4步 - Elasticsearch Web界面的默认端口是
9200
,或者可以通过更改
bin
目录中的
elasticsearch.yml
文件中的
http.port
字段值来更改。可以通过浏览
https://localhost:9200
来检查服务器是否已启动并正在运行。这里就需要输入用户名密码了!!!!!
如果没有问题,它将返回一个JSON对象,其中包含有关安装的Elasticsearch信息有以下方式:
{
"name": "xxx-PC",
"cluster_name": "elasticsearch",
"cluster_uuid": "J-5AOEBUQ3evriZB9HUUqg",
"version": {
"number": "8.6.2",
"build_flavor": "default",
"build_type": "zip",
"build_hash": "2d58d0f136141f03239816a4e360a8d17b6d8f29",
"build_date": "2023-02-13T09:35:20.314882762Z",
"build_snapshot": false,
"lucene_version": "9.4.2",
"minimum_wire_compatibility_version": "7.17.0",
"minimum_index_compatibility_version": "7.0.0"
},
"tagline": "You Know, for Search"
}
第5步−在此步骤中,让我们安装Kibana。请按照下面给出的相应代码在Linux和Windows上进行安装Kibana 。单击链接后,您将找到如下所示的主页http://localhost:5601/即可。
Chrome插件下载:
下载相关插件安装即可Chrome浏览器直接访问:
Chrome插件下载

Kibana安装方法:
解压缩并转到Kibana主目录,然后运行它。
CD D:\kibana-8.6.2-windows-x86_64
.\bin\kibana.bat

第6步-插件查看相关内容

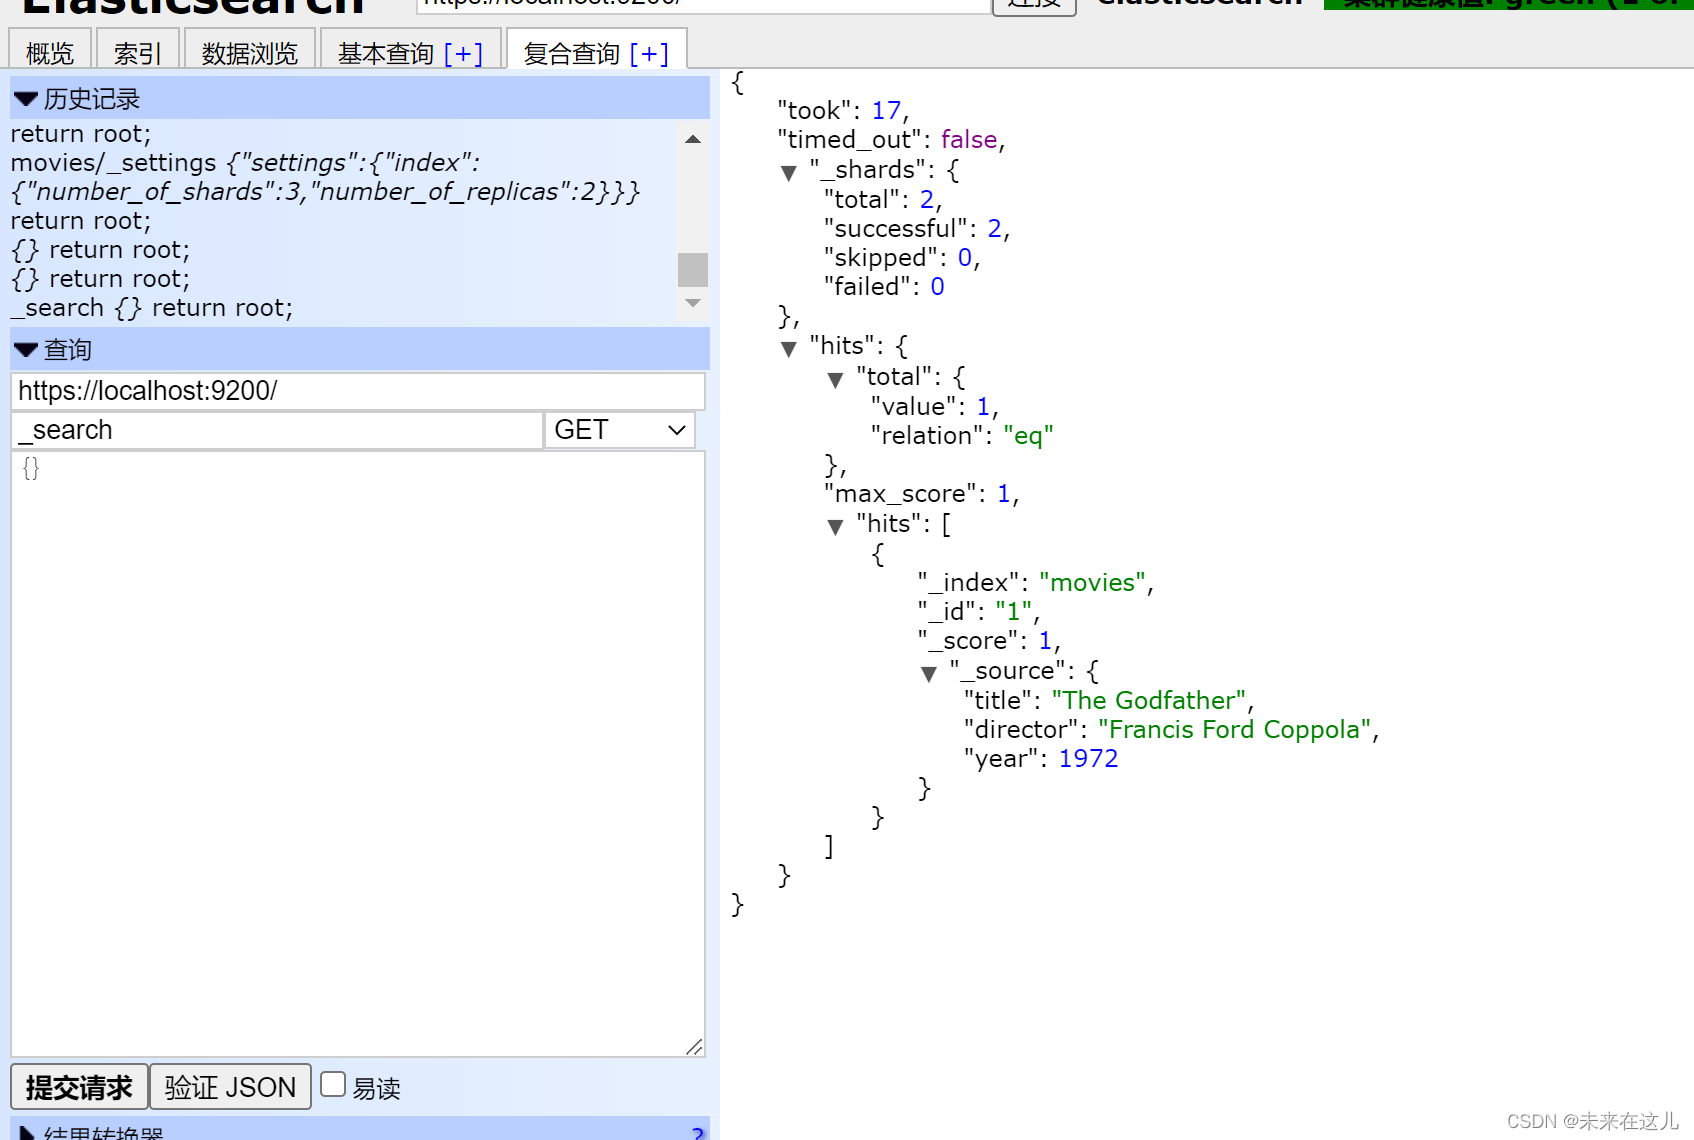
上述请求将执行最简单的搜索查询,匹配服务器上所有索引中的所有文档。针对ElasticSearch运行,Sense提供的最简单的查询,在响应结果的数据中并没有查询到任何数据,因为没有任何索引。如下所示
get  https://localhost:9200/_search

{
"took": 17,
"timed_out": false,
"_shards": {
"total": 2,
"successful": 2,
"skipped": 0,
"failed": 0
},
"hits": {
"total": {
"value": 1,
"relation": "eq"
},
"max_score": 1,
"hits": [
{
"_index": "movies",
"_id": "1",
"_score": 1,
"_source": {
"title": "The Godfather",
"director": "Francis Ford Coppola",
"year": 1972
}
}
]
}
}
下一步我们来学习添加一些数据和索引。敬请期待。
索引
它是不同类型的文档及其属性的集合。索引还使用分片的概念来提高性能。例如,一组文档包含社交网络应用程序的数据。
文档
它是以JSON格式定义的特定方式的字段集合。每个文档都属于一种类型,并且位于索引内。每个文档都与一个称为UID的唯一标识符相关联。
版权归原作者 未来在这儿 所有, 如有侵权,请联系我们删除。