
记录一下对毕设界面的优化
目录
1、美化TableRow,实现下边框
效果图: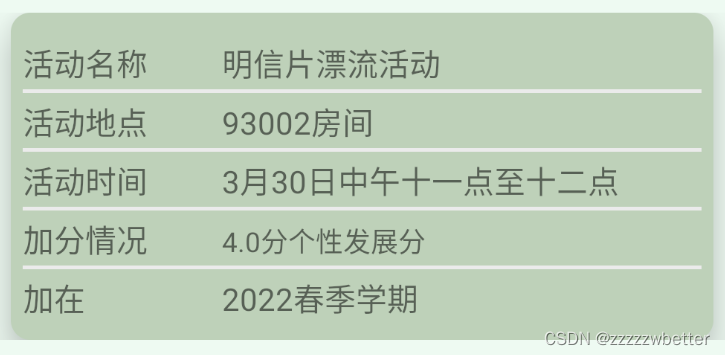
方法:创建xml文件,然后引用该xml文件:
<?xml version="1.0" encoding="utf-8"?>
<layer-list xmlns:android="http://schemas.android.com/apk/res/android"
    android:shape="rectangle">

    <item>
        <shape>
<!--            边框颜色-->
            <solid android:color="#ebebeb" />
        </shape>
    </item>

    <item
        android:bottom="2dp">  //有四个方向可以选择,这里选择底部
        <shape>
<!--            背景颜色-->
            <solid android:color="@color/lightgreen" />
        </shape>
    </item>

</layer-list>
有时候下边框可以直接用view实现,我是因为不想把tablelayout改成linearlayout所以没用这个方法
view方法:
  <View
                android:layout_width="match_parent"
                android:layout_height="1px"
                android:background="@color/lightgreen" />
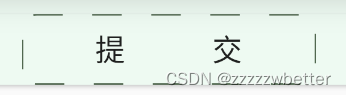
2、美化按钮
- 背景透明并取消阴影 效果图:

android:backgroundTint="#0000" android:stateListAnimator="@null" - 点击按钮变色 效果图
 同样创建xml文件
<?xml version="1.0" encoding="utf-8"?>
<shape xmlns:android="http://schemas.android.com/apk/res/android">
    <!--    设置按钮圆角按钮的步骤-->
    <!--    1.设置圆角的半径-->
    <!--    2.设置按钮的颜色-->
    <!--    3.设置边框大粗细和颜色-->
    <corners android:radius="10dp"/>
    <solid android:color="@color/lightgreen"/>
    <stroke android:width="1dp"
        android:color="@color/lightgreen"/>
</shape>
然后在代码块中设置点击时显示该格式,未点击时格式为空
                activity.setBackground(null);
                goods.setBackground(null);
                feedback.setBackground(getResources().getDrawable(R.drawable.button_shape));
- 虚线框 效果图:
<?xml version="1.0" encoding="utf-8"?>
<shape xmlns:android="http://schemas.android.com/apk/res/android">
    <corners android:radius="10dp"/>
    <!--        dashGap和dashWidth一起作用产生虚线效果-->
    <stroke
        android:dashGap="20dp"
        android:dashWidth="20dp"
        android:width="1dp"
        android:color="@color/iconColor"/>
</shape>
- 预留位置
3、更改icon颜色
效果图:
更改前:
更改后:
方法:在xml文件里使用
app:tint="@color/alarmColor"
即可
4、实现头像位于卡片中间
效果图:
思路:使用relativeLayout布局,使头像位于卡片的下方,然后通过
android:layout_marginTop="-50dp"
调整位置
问题:会发现Imagview会被卡片挡住,而不能显示在卡片的上面
解决办法:cardview引用
android:elevation="10dp"
,头像设为
android:elevation="20dp"
,即头像的值比cardview大就行
ps:要把不必要的嵌套布局都删掉,同时卡片的值最好不要设为0,我设成0的时候即使头像的值比0大也不起作用
5、弹窗的美化
效果图: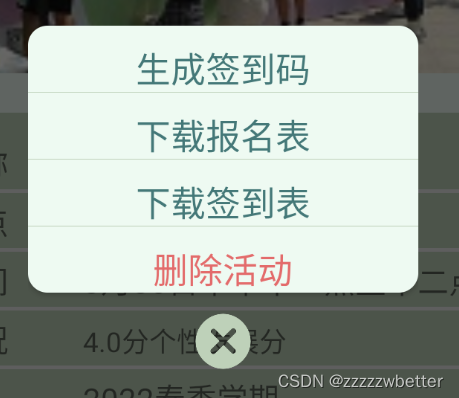
ps:先创建一个xml文件
<?xml version="1.0" encoding="utf-8"?>
<LinearLayout xmlns:android="http://schemas.android.com/apk/res/android"
    android:layout_width="200dp"
    android:layout_gravity="center"
    android:layout_height="match_parent"
    android:layout_alignParentBottom="true"
    xmlns:app="http://schemas.android.com/apk/res-auto"
    app:cardCornerRadius="20dp">

    <RelativeLayout
        android:layout_gravity="center"
        android:layout_width="match_parent"
        android:layout_height="wrap_content">

    <androidx.cardview.widget.CardView
        android:id="@+id/card1"
        android:layout_gravity="center"
        android:layout_width="match_parent"
        android:backgroundTint="@color/mainBackground"
        android:layout_height="wrap_content"
        app:cardCornerRadius="10dp">

        <LinearLayout
            android:id="@+id/lay"
            android:layout_width="match_parent"
            android:layout_height="wrap_content"
            android:orientation="vertical">

            <TextView
                android:id="@+id/tv_createQRCode"
                android:layout_width="match_parent"
                android:layout_height="wrap_content"
                android:layout_marginTop="10dp"
                android:gravity="center"
                android:textSize="18dp"
                android:textColor="@color/textColor"
                android:text="生成签到码" />
            <View
                android:layout_width="match_parent"
                android:layout_height="1px"
                android:background="@color/lightgreen" />

            <TextView
                android:id="@+id/tv_signInForm"
                android:layout_width="match_parent"
                android:layout_height="wrap_content"
                android:layout_marginTop="10dp"
                android:gravity="center"
                android:textSize="18dp"
                android:textColor="@color/textColor"
                android:text="下载报名表" />
            <View
                android:layout_width="match_parent"
                android:layout_height="1px"
                android:background="@color/lightgreen" />

            <TextView
                android:id="@+id/tv_entryForm"
                android:layout_width="match_parent"
                android:layout_height="wrap_content"
                android:layout_marginTop="10dp"
                android:gravity="center"
                android:textSize="18dp"
                android:textColor="@color/textColor"
                android:text="下载签到表" />
            <View
                android:layout_width="match_parent"
                android:layout_height="1px"
                android:background="@color/lightgreen" />

            <TextView
                android:id="@+id/tv_delete"
                android:layout_width="match_parent"
                android:layout_height="wrap_content"
                android:layout_marginTop="10dp"
                android:gravity="center"
                android:textSize="18dp"
                android:textColor="#E36B6B"
                android:text="删除活动" />

        </LinearLayout>

    </androidx.cardview.widget.CardView>

        <LinearLayout
            android:layout_below="@+id/card1"
            android:layout_width="match_parent"
            android:layout_height="wrap_content"
            android:orientation="vertical">

        <ImageView
            android:layout_marginTop="10dp"
            android:id="@+id/imageView6"
            android:layout_gravity="center_horizontal"
            app:tint="@color/lightgreen"
            android:layout_width="30dp"
            android:layout_height="30dp"
            app:srcCompat="@drawable/delete_pic" />

        </LinearLayout>

    </RelativeLayout>

</LinearLayout>
然后在代码块处实现点击图标出现弹窗:
 menu.setOnClickListener(new View.OnClickListener() {
            @Override
            public void onClick(View view) {
                //创建弹窗
                builder = new AlertDialog.Builder(ActivityDetailActivity.this);
                inflater = getLayoutInflater();
                layout = inflater.inflate(R.layout.dialog_menu, null);//获取自定义布局
                builder.setView(layout);//设置对话框的布局
                dialog = builder.create();//生成最终的对话框
                dialog.show();//显示对话框

                //弹窗背景透明
                dialog.setCanceledOnTouchOutside(true);
                Window window = dialog.getWindow();
                window.setContentView(R.layout.dialog_menu);
                ((Window) window).setBackgroundDrawable(new ColorDrawable(0x00000000));
                WindowManager windowManager = ActivityDetailActivity.this.getWindowManager();
                Display display = windowManager.getDefaultDisplay();
                WindowManager.LayoutParams lp = dialog.getWindow().getAttributes();
                lp.height = WindowManager.LayoutParams.MATCH_PARENT; //设置宽度
                lp.width = WindowManager.LayoutParams.MATCH_PARENT; //设置宽度
//                lp.gravity = Gravity.BOTTOM;
                window.setGravity(Gravity.CENTER);
                dialog.getWindow().setAttributes(lp);
                }
                }
ps:但其实这一块的代码我是想实现弹窗位于最低端来着,但是不知道为什么Gravity.Bottom不起作用,后来是在xml的文件里更改弹窗的位置才实现位置的变化,不过误打误撞实现了背景透明
pps:如果弹窗位置始终不变化,试着查看xml的宽和高是不是match_parent,不是的话可能会导致弹窗的位置不改变。
pps:如果
dialog.setCanceledOnTouchOutside(true)
不起作用,可以试着修改宽和高,(我发现直接不设置宽和高倒也行)参考文章:安卓Dialog setCanceledOnTouchOutside(ture) 无效问题
ppps:我发现有的时候这样设置之后弹窗点击失效,这时候只用把
window.setContentView(R.layout.dialog_menu);
注释掉就好
6、editText美化
去除editText的下划线:
两种方法,一种是令background为@null,第二种方法:令background为00FFFFFF。
7、卡片的使用
- 添加阴影:
app:cardElevation="@dimen/fab_margin"
经验总结:
- 如果涉及到很多控件的大小、颜色,尽量采用引用的方式,即用@color/viewColor的方式,而不是直接#FFFFFF,因为这样后期修改比较方便,不用一个一个地修改
- 布局最好用relativelayout(个人觉得最方便)
本文转载自: https://blog.csdn.net/zzzzzwbetter/article/details/129954783
版权归原作者 zzzzzwbetter 所有, 如有侵权,请联系我们删除。
版权归原作者 zzzzzwbetter 所有, 如有侵权,请联系我们删除。