
一、在安装Elasticsearch引擎之前,必须安装ES需要的软件环境,安装Java JDK和配置JAVA_HOME环境变量
二.安装ElasticSearch服务,下载和安装es包
https://www.elastic.co/downloads/past-releases
Elasticsearch 8.6.1 | Elastic


安装成功之后,先不急着初始化。(先解决初始化乱码问题,不解决也可使用,请忽略)
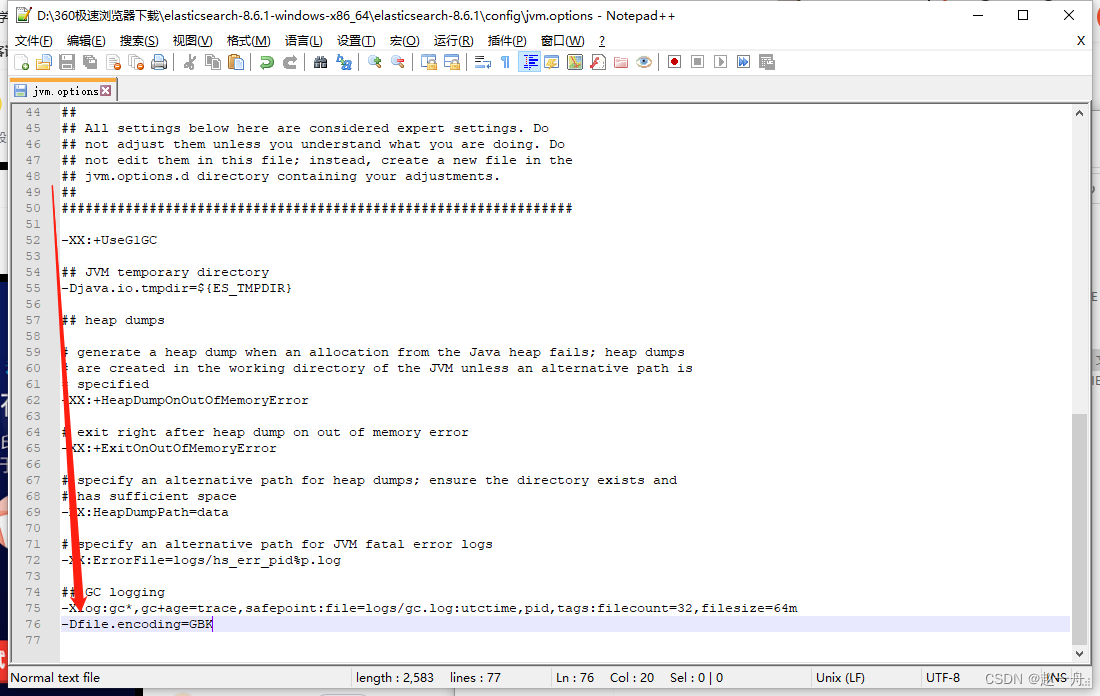
进入config目录找到jvm.options文件,添加
-Dfile.encoding=GBK
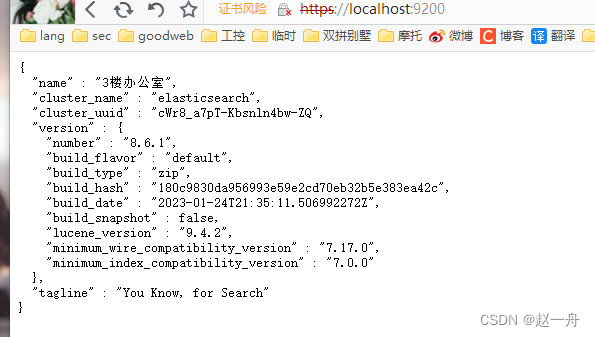
启动elasticsearch.bat,双击执行 elasticsearch.bat,该脚本文件执行 ElasticSearch 安装程序,稍等片刻,打开浏览器,输入 https://localhost:9200/ 注意是https不是http
第一次运行要记住账户密码
-> Password for the elastic user (reset with bin/elasticsearch-reset-password -u elastic):
=FRhl8hr-Qjd4a9EV6NF
-> Elasticsearch security features have been automatically configured!
-> Authentication is enabled and cluster connections are encrypted.

->  Password for the elastic user (reset with `bin/elasticsearch-reset-password -u elastic`):
  =FRhl8hr-Qjd4a9EV6NF

->  HTTP CA certificate SHA-256 fingerprint:
  c61dc60f7cafac75c0a31c34cf59989a4c8dcc78d418e943701cf3e0be4baa08

->  Configure Kibana to use this cluster:
* Run Kibana and click the configuration link in the terminal when Kibana starts.
* Copy the following enrollment token and paste it into Kibana in your browser (valid for the next 30 minutes):
  eyJ2ZXIiOiI4LjYuMSIsImFkciI6WyIxOTIuMTY4LjIuMTA5OjkyMDAiXSwiZmdyIjoiYzYxZGM2MGY3Y2FmYWM3NWMwYTMxYzM0Y2Y1OTk4OWE0YzhkY2M3OGQ0MThlOTQzNzAxY2YzZTBiZTRiYWEwOCIsImtleSI6IjVZd2pDNFlCOGUtNUpSbzQ5UG5YOkpHYnBuQ19mVHFlc1dFUXVlU3YzZWcifQ==

->  Configure other nodes to join this cluster:
* On this node:
  - Create an enrollment token with `bin/elasticsearch-create-enrollment-token -s node`.
  - Uncomment the transport.host setting at the end of config/elasticsearch.yml.
  - Restart Elasticsearch.
* On other nodes:
  - Start Elasticsearch with `bin/elasticsearch --enrollment-token <token>`, using the enrollment token that you generated.
将elasticsearch安装成服务,在安装的es目录下在地址栏输入cmd 进入命令窗口, 输入elasticsearch-service.bat install 即可安装成服务
三、无法访问:
问题一:cmd控制台输出以下内容。
received plaintext http traffic on an https channel, closing connection Netty4HttpChannel{localAddress=/[0:0:0:0:0:0:0:1]:9200,remoteAddress=/[0:0:0:0:0:0:0:1]:61726}
解决方法一:浏览器使用https访问 https://localhost:9200/。(8.0以上默认开启ssl)
解决方法二:修改config目录下的elasticsearch.yml文件中xpack.security.http.ssl.enable:true 为false(修改后只能用http http://localhost:9200/)
问题二:忘记账号密码
解决方法一:逃避式,将xpack.security.enabled: true 改为false
解决方法二:终极大法删除文件夹,重新装。。。
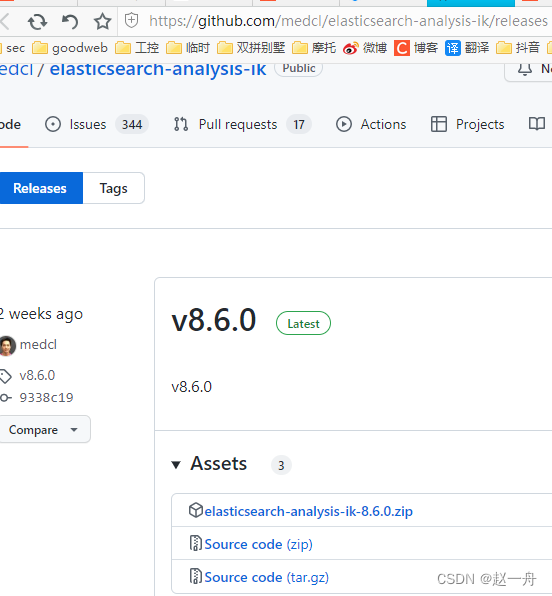
四、安装中文分词ik
Releases · medcl/elasticsearch-analysis-ik · GitHub
把解压后的内容放到 \plugins\ik 文件夹下
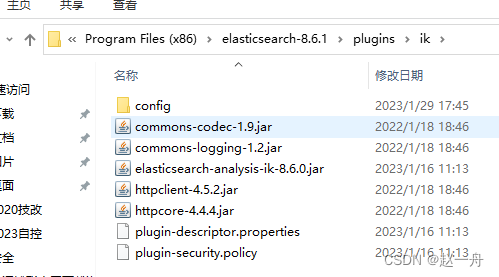
重启ElasticSearch 服务,启动失败原因版本不配
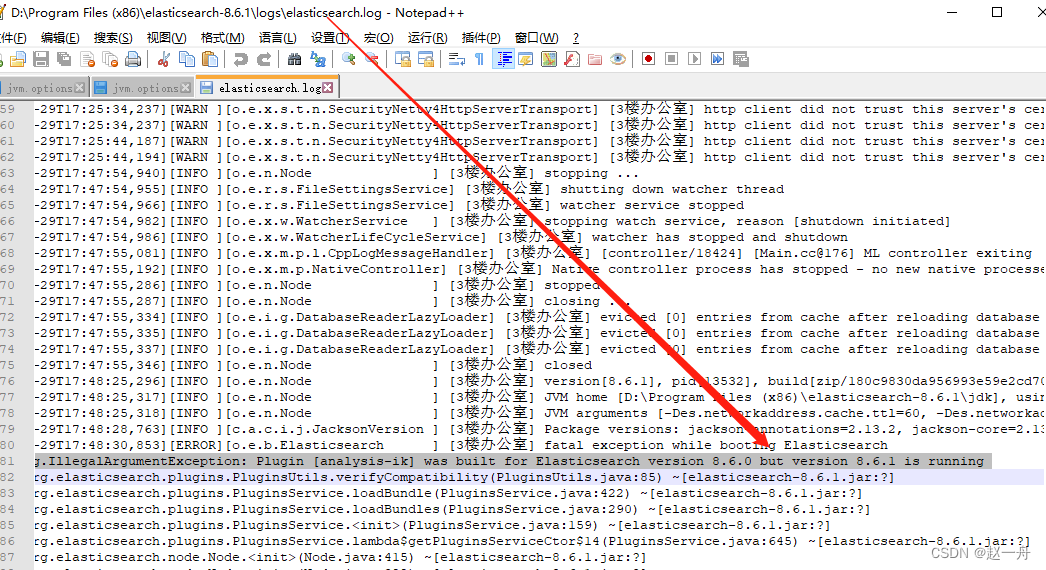
手动改下版本

版权归原作者 赵一舟 所有, 如有侵权,请联系我们删除。