
首先本文参考的是,感谢博主:
net6WebApi上传下载文件_cduoa的博客-CSDN博客_webapi下载文件
在博主的基础上,增加了新的功能,代码中有注明,并且使用VUE3前端实现。
后端部分:
1.首先建立IFileService文件
namespace net6ApiUploadAndDownload
{
    public interface IFileService
    {
        void UploadFile(List<IFormFile> files, string subDirectory);
        (string fileType, byte[] archiveData, string archiveName) DownloadFiles(string subDirectory);  //返回3个值
        string SizeConverter(long bytes);
    }

}
2.建立FileService文件
using System.IO.Compression;

namespace net6ApiUploadAndDownload;

public class FileService : IFileService
{
    #region Property

    private readonly IWebHostEnvironment webHostEnvironment;

    #endregion

    #region Constructor

    public FileService(IWebHostEnvironment webHostEnvironment)
    {
        this.webHostEnvironment = webHostEnvironment;
    }

    #endregion

    #region Upload File

    public void UploadFile(List<IFormFile> files, string subDirectory)
    {
        subDirectory = subDirectory ?? string.Empty;
        var target = Path.Combine(webHostEnvironment.ContentRootPath, subDirectory);

        Directory.CreateDirectory(target);

        //files.ForEach(async file =>
        //{
        //    if (file.Length <= 0) return;
        //    var filePath = Path.Combine(target, file.FileName);
        //    await using var stream = new FileStream(filePath, FileMode.Create);
        //    await file.CopyToAsync(stream);
        //});
        //此处使用async,超过30M的话,会报错
        files.ForEach(file =>
        {
            if (file.Length <= 0) return;
            var filePath = Path.Combine(target, file.FileName);
            using var stream = new FileStream(filePath, FileMode.Create);
            file.CopyTo(stream);
        });
    }

    #endregion

    #region Download File

    public (string fileType, byte[] archiveData, string archiveName) DownloadFiles(string subDirectory)
    {
        var zipName = $"archive-{DateTime.Now:yyyy_MM_dd-HH_mm_ss}.zip";

        //这里进行判断,既能下载文件夹的内容,又能下载单个文件
        List<string> files = new List<string>();
        if (subDirectory.Split('.').Length > 1) //上传的是单个文件
        {
            files.Add(Path.Combine(webHostEnvironment.ContentRootPath, subDirectory));
        }
        else      //上传的是文件夹的内容
        {
            files = Directory.GetFiles(Path.Combine(webHostEnvironment.ContentRootPath, subDirectory)).ToList();
        }

        using var memoryStream = new MemoryStream();
        using (var archive = new ZipArchive(memoryStream, ZipArchiveMode.Create, true))
        {
            files.ForEach(file =>
            {
                var theFile = archive.CreateEntry(Path.GetFileName(file));
                using var binaryWriter = new BinaryWriter(theFile.Open());
                binaryWriter.Write(File.ReadAllBytes(file));
            });
        }

        return ("application/zip", memoryStream.ToArray(), zipName);
    }

    #endregion

    #region Size Converter

    public string SizeConverter(long bytes)
    {
        var fileSize = new decimal(bytes);
        var kilobyte = new decimal(1024);
        var megabyte = new decimal(1024 * 1024);
        var gigabyte = new decimal(1024 * 1024 * 1024);

        return fileSize switch
        {
            _ when fileSize < kilobyte => "Less then 1KB",
            _ when fileSize < megabyte =>
                $"{Math.Round(fileSize / kilobyte, 0, MidpointRounding.AwayFromZero):##,###.##}KB",
            _ when fileSize < gigabyte =>
                $"{Math.Round(fileSize / megabyte, 2, MidpointRounding.AwayFromZero):##,###.##}MB",
            _ when fileSize >= gigabyte =>
                $"{Math.Round(fileSize / gigabyte, 2, MidpointRounding.AwayFromZero):##,###.##}GB",
            _ => "n/a"
        };
    }

    #endregion
}
3.增加FileController文件
using Microsoft.AspNetCore.Http;
using Microsoft.AspNetCore.Mvc;
using System.ComponentModel.DataAnnotations;

namespace net6ApiUploadAndDownload.Controllers
{
    [Route("api/[controller]/action")]
    [ApiController]
    public class FileController : ControllerBase
    {
        private readonly IFileService fileService;

        public FileController(IFileService fileService)
        {
            this.fileService = fileService;
        }
        /// <summary>
        ///  上传功能
        /// </summary>
        /// <param name="formFiles">上传的文件</param>
        /// <param name="subDirectory">把文件上传到的具体的路径</param>
        /// <returns></returns>
        [HttpPost(nameof(Upload))]
        //[RequestFormLimits(ValueLengthLimit = int.MaxValue, MultipartBodyLengthLimit = long.MaxValue)]
        [RequestSizeLimit(long.MaxValue)]        //默认是上传30M,加上之后可,可以增大
        public IActionResult Upload([Required] List<IFormFile> formFiles, [Required] string subDirectory)
        {
            try
            {
                if (formFiles.Count > 0)
                {

                }
                fileService.UploadFile(formFiles, subDirectory);

                return Ok(new { formFiles.Count, Size = fileService.SizeConverter(formFiles.Sum(f => f.Length)) });
            }
            catch (Exception ex)
            {
                return BadRequest(ex.Message);
            }
        }
        /// <summary>
        /// 下载功能
        /// </summary>
        /// <param name="subDirectory">下载文件夹的路径或者下载的文件路径</param>
        /// <returns></returns>
        [HttpGet(nameof(Download))]
        public IActionResult Download([Required] string subDirectory)
        {
            try
            {
                var (fileType, archiveData, archiveName) = fileService.DownloadFiles(subDirectory);

                return File(archiveData, fileType, archiveName);
            }
            catch (Exception ex)
            {
                return BadRequest(ex.Message);
            }
        }

    }
}
4.Program文件中,进行配置和跨域的处理
using net6ApiUploadAndDownload;

var builder = WebApplication.CreateBuilder(args);

// Add services to the container.

builder.Services.AddControllers();
// Learn more about configuring Swagger/OpenAPI at https://aka.ms/aspnetcore/swashbuckle
builder.Services.AddEndpointsApiExplorer();
builder.Services.AddSwaggerGen();

builder.Services.AddTransient<IFileService, FileService>();           //用AddTransient注入,每次都请求不同的实例
                                                                      //配置跨域服务
builder.Services.AddCors(options =>
{
    options.AddPolicy("cors", p =>
    {
        p.AllowAnyOrigin()
        .AllowAnyMethod()
        .AllowAnyHeader();

    });
});
var app = builder.Build();

// Configure the HTTP request pipeline.
if (app.Environment.IsDevelopment())
{
    app.UseSwagger();
    app.UseSwaggerUI();
}
app.UseCors("cors");      //跨域
app.UseHttpsRedirection();

app.UseAuthorization();

app.MapControllers();

app.Run();
5.运行后的效果
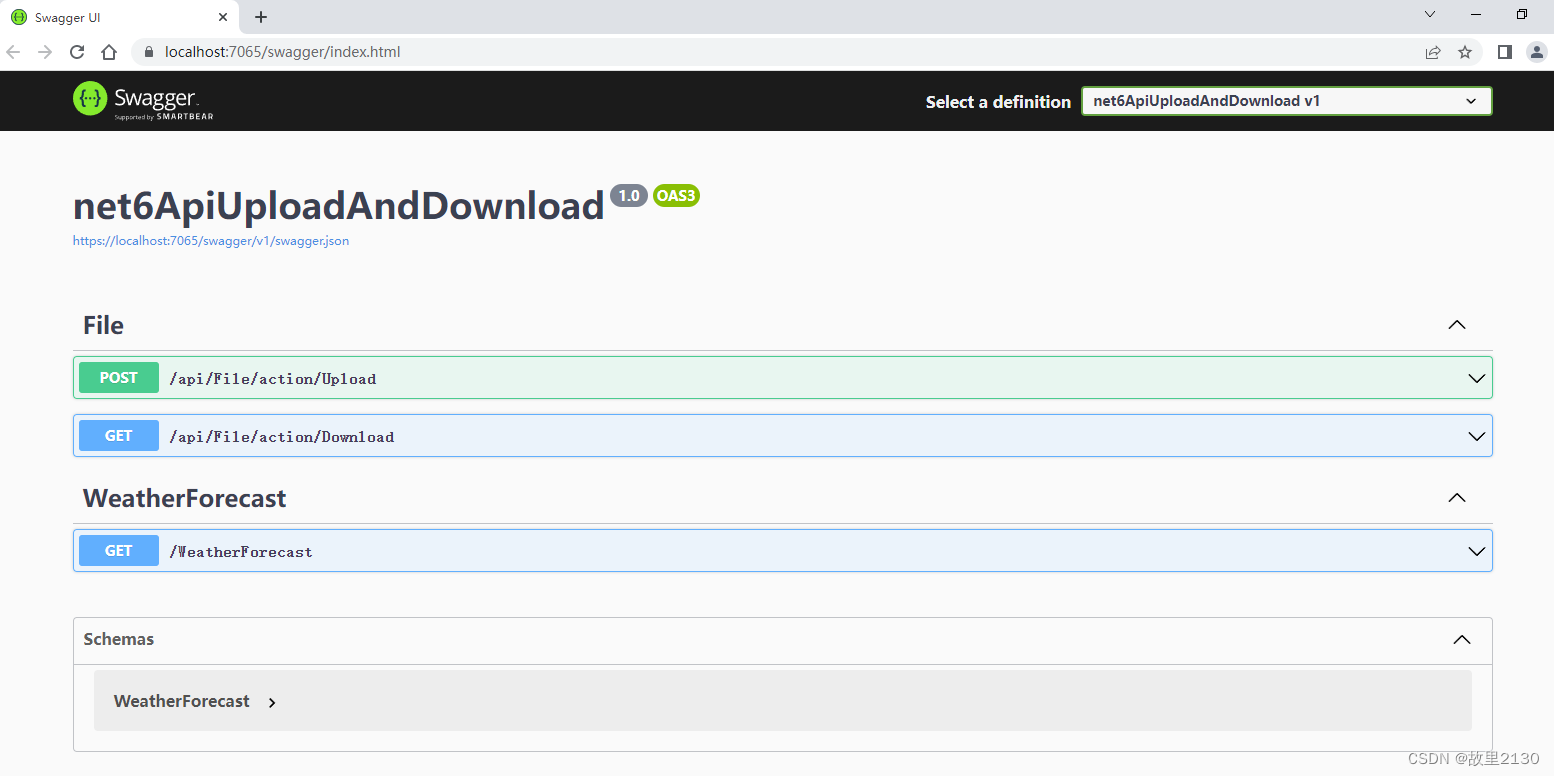
6.Swagger就不用测试了,我们使用postman来测试一下上传的接口
先输入路径

再选择content-type

最后选择form-data,点击发送按钮,就会看到返回的路径了

至此,后端完成。
前端部分:
1.首先使用HBuilder X建立一个可运行的界面

2.然后写入HelloWorld.vue代码
<template>
    <el-upload ref="upload" action="#" multiple :file-list="fileList" :on-change="fileOnChange" :auto-upload="false">
        <el-button type="primary">上传图片</el-button>
    </el-upload>
    <el-button type="primary" @click="confirm">确定</el-button>
    <el-button type="success" @click="download">下载</el-button>
</template>

<script setup>
    import {
        reactive
    } from 'vue'
    import axios from 'axios'

    const fileList = reactive([])
    const formData = new FormData()

    const fileOnChange = (file) => {

        //下面部分可以对文件进行判断
        const isIMAGE = (file.raw.type === 'image/jpeg' || file.raw.type === 'image/png' || file.raw.type ===
            'image/gif');
        const isLt1M = file.size / 1024 / 1024 < 1;

        // if (!isIMAGE) {
        //     alert('上传文件只能是图片格式!');
        //     return false;
        // }
        // if (!isLt1M) {
        //     alert('上传文件大小不能超过 1MB!');
        //     return false;
        // }
        var reader = new FileReader();
        reader.readAsDataURL(file.raw);
        reader.onload = function(e) {
            //console.log(e.currentTarget.result) //图片的base64数据
            //str = str.replace(/^data:image\/\w+;base64,/, "")
        }

        if (file.status === 'ready') {
            console.log(1)
            fileList.push(file)
        }
    }

    //内置地址
    let path = `C:\\Users\\Administrator\\Desktop\\图片\\声音`

    const download = () => {
        console.log(2)
        window.location.href = `https://localhost:7065/api/File/action/Download?subDirectory=${path}`
        // axios.get(`https://localhost:7065/api/File/action/Download?subDirectory=${path}`).then((res) => {
        //     console.log(res)
        //     if (res.status === 200) {
        //         console.log(res.data.size)
        //     }
        // })
    }
    const confirm = () => {
        console.log(formData.has('formFiles'))

        fileList.forEach((item, index) => {
            formData.append("formFiles", item.raw)
            //formData.append("subDirectory", 'file')
            console.log(item + index)
            console.log(2)
        })
        console.log(formData.has('formFiles'))
        uploadFiles(formData)
    }

    function uploadFiles(data) {
        axios.post("https://localhost:7065/api/File/action/Upload?subDirectory=1", data).then((res) => {
            console.log(res)
            if (res.status === 200) {
                console.log(res.data.size)
            }
        })
    }
</script>
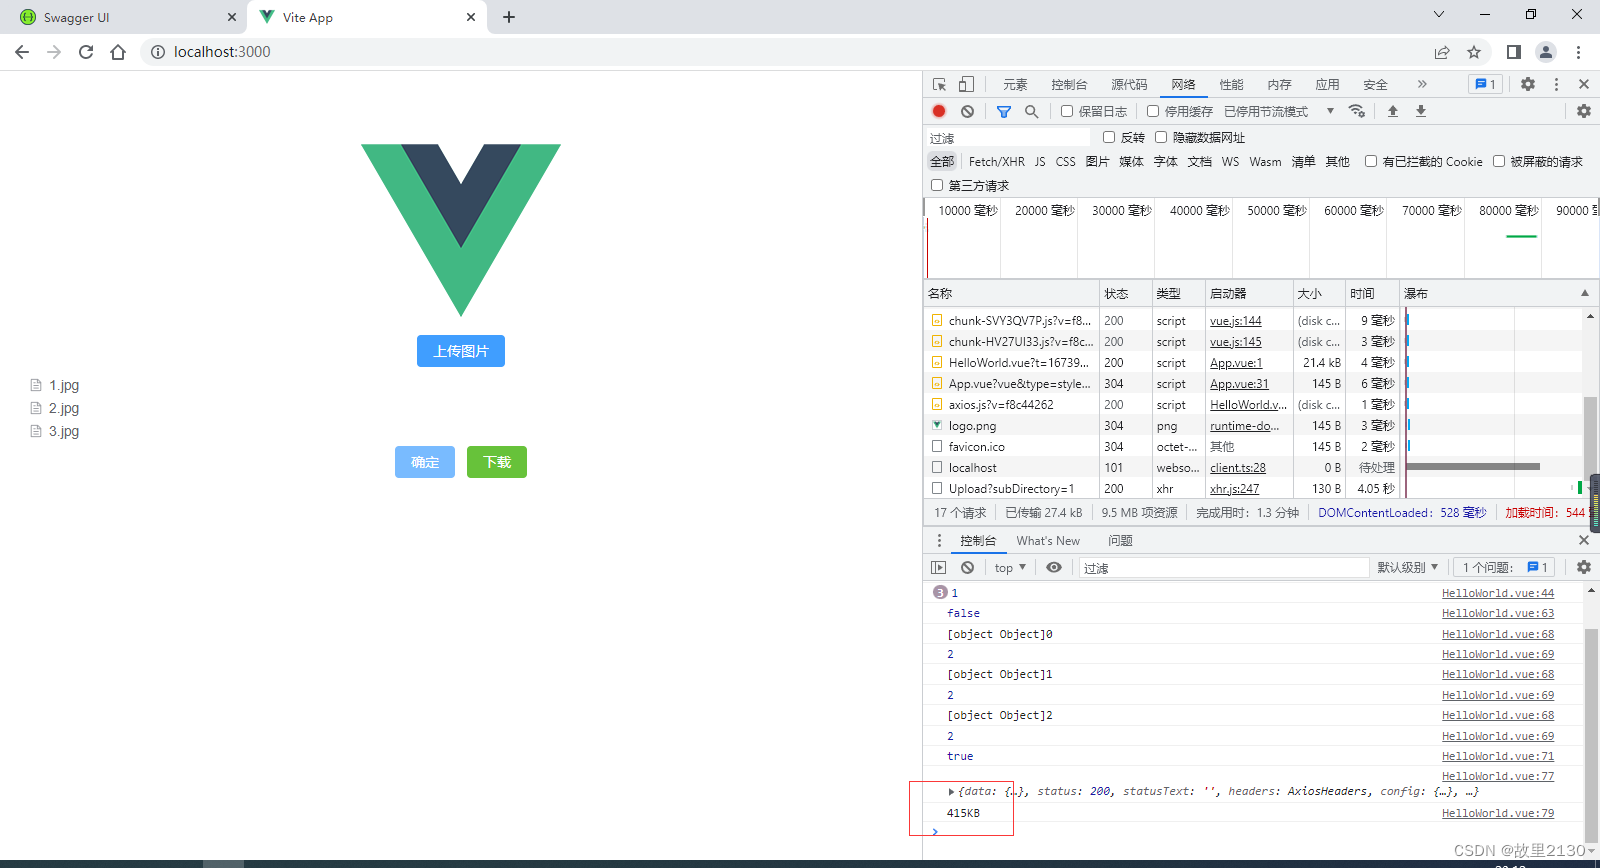
3.点击上传功能
点击上传3张图片,再点击确定按钮,可以看到下面有返回图片的大小
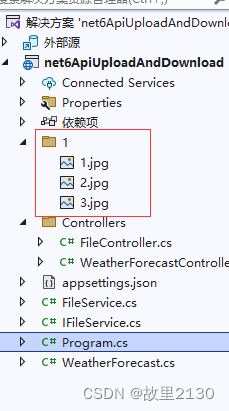
此时api中也就有了图片,1是文件夹的路径
4.点击下载功能
直接点击下载按钮,就会看到内置路径的文件,就会自动下载

5.源码
net6ApiUploadAndDownload: net6ApiUploadAndDownload,VUE3上传和下载功能
来源:.net6Api后台+VUE3前端实现上传和下载文件全过程-CSDN博客
标签:
前端
本文转载自: https://blog.csdn.net/u012563853/article/details/128705895
版权归原作者 故里2130 所有, 如有侵权,请联系我们删除。
版权归原作者 故里2130 所有, 如有侵权,请联系我们删除。