
PostgreSQL我进行升级最新版本后,遇到的问题与其他人的很多不一样,或者我不知道他们是如何解决的也没有说明。我将我如何安装和所遇到的问题还有解决方法归纳总结,是最全的安装步骤。现在我将我的步骤一步步的教给大家,其中包含我的解决方法。该安装步骤较长,请各位帅哥美女大佬们耐心看完。
1、进入官网下载Linux对应最新的版本的PostgreSQL。
PostgreSQL: File Browser 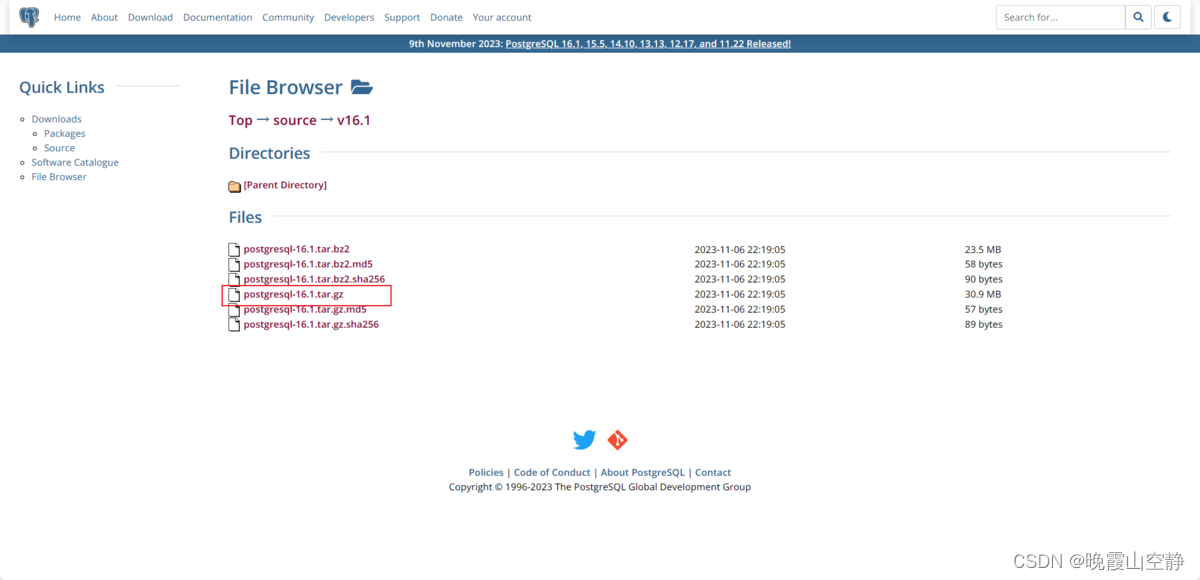 下载此文件即可(我会将安装包发布到CSDN中,进行下载即可)。
2、卸载原有的Postgresql。
# (1)查看原有PostgreSQL的状态
service postgresql-12 status

# (2)将原有的PostgreSQL服务停止
service postgresql-12 stop

# (3)卸载所有的PostgreSQL(注意输入“y”即可)
yum remove postgresql*

# (4)验证PosgreSQL是否被删除
rpm -qa | grep postgresql

3、在要安装postgresql数据库的Linux服务器(hostname:weekend02)上执行以下命令安装所需要的依赖包:
yum install -y perl-ExtUtils-Embed readline-devel zlib-devel pam-devel libxml2-devel libxslt-devel openldap-devel python-devel gcc-c++ openssl-devel cmake

4、将下载好的PostgreSQL放到对应的目录下即可。
我在“/usr/local”下创建了一个文件夹”pgsql“,如下图所示。

5、解压该文件。
tar -zxvf postgresql-16.1.tar.gz

6、进入解压后的文件夹

7、编译postgresql源码
./configure --prefix=/pgsql/postgresql

(1)假如提示这个错误的话,就是没有找到ICU库。
checking for icu-uc icu-i18n... no
configure: error: ICU library not found
If you have ICU already installed, see config.log for details on the
failure.  It is possible the compiler isn't looking in the proper directory.
Use --without-icu to disable ICU support.
(2)输入“icu-config --version”查看是否安装此库。

(3)安装ICU库(输入“y”即可)。
sudo yum install libicu-devel

安装完成
(4)然后再次输入刚才的编译命令执行即可。


8、输入“make”和“make install”命令。


进入“cd /pgsql/postgresql”此目录下可以看到安装后的postgresql的文件:

9、创建用户组postgres并创建用户postgres
# 删除原有的用户组
[root@tssvr1-c1 postgres]# userdel postgres
[root@tssvr1-c1 postgresql-16.1]# ls
aclocal.m4  config  config.log  config.status  configure  configure.ac  contrib  COPYRIGHT  doc  GNUmakefile  GNUmakefile.in  HISTORY  INSTALL  Makefile  meson.build  meson_options.txt  README  src
[root@tssvr1-c1 postgresql-16.1]#
[root@tssvr1-c1 postgresql-16.1]#
[root@tssvr1-c1 postgresql-16.1]#
[root@tssvr1-c1 postgresql-16.1]# groupadd postgres
[root@tssvr1-c1 postgresql-16.1]# useradd -g postgres postgres
[root@tssvr1-c1 postgresql-16.1]# passwd postgres
#设置postgres用户密码为:Zskj@24123
[root@tssvr1-c1 postgresql-16.1]# id postgres
uid=1001(postgres) gid=1001(postgres) 组=1001(postgres)

10、创建postgresql数据库的数据主目录并修改文件所有者
[root@tssvr1-c1 local]# cd /pgsql/postgresql/
[root@tssvr1-c1 postgresql]# ls
bin  include  lib  share
[root@tssvr1-c1 postgresql]# mkdir data
[root@tssvr1-c1 postgresql]# chown postgres:postgres data
[root@tssvr1-c1 postgresql]# ls -al
总用量 20
drwxr-xr-x.  7 root     root       68 12月 20 09:31 .
drwxr-xr-x. 25 root     root     4096 12月 20 09:27 ..
drwxr-xr-x.  2 root     root     4096 12月 20 09:27 bin
drwxr-xr-x.  2 postgres postgres    6 12月 20 09:31 data
drwxr-xr-x.  6 root     root     4096 12月 20 09:27 include
drwxr-xr-x.  4 root     root     4096 12月 20 09:27 lib
drwxr-xr-x.  6 root     root     4096 12月 20 09:27 share
[root@tssvr1-c1 pgsql]#
11、配置环境变量
进入home/postgres目录可以看到.bash_profile文件。
[root@tssvr1-c1 postgresql]# cd /home/postgres/
[root@tssvr1-c1 postgres]# ls -al
总用量 16
drwx------. 6 postgres postgres 142 12月 19 17:31 .
drwxr-xr-x. 4 root     root      56 12月 19 17:11 ..
-rw-------. 1 postgres postgres 159 12月 20 08:50 .bash_history
-rw-r--r--. 1 postgres postgres  18 4月   1 2020 .bash_logout
-rw-r--r--. 1 postgres postgres 273 12月 19 17:31 .bash_profile
-rw-r--r--. 1 postgres postgres 231 4月   1 2020 .bashrc
drwxrwxr-x. 3 postgres postgres  18 12月 19 17:21 .cache
drwxrwxr-x. 3 postgres postgres  18 12月 19 17:21 .config
drwxrwxr-x. 3 postgres postgres  19 12月 19 17:21 .local
drwxr-xr-x. 4 postgres postgres  39 8月   1 11:34 .mozilla
[root@tssvr1-c1 postgres]# vi .bash_profile
编辑修改.bash_profile文件(vi .bash_profile)。
# .bash_profile

# Get the aliases and functions
if [ -f ~/.bashrc ]; then
        . ~/.bashrc
fi

# User specific environment and startup programs
export PGHOME=/usr/local/pgsql/postgresql
export PGDATA=/usr/local/pgsql/postgresql/data
PATH=$PATH:$HOME/.local/bin:$HOME/bin:$PGHOME/bin

export PATH
保存,退出vi。执行以下命令,使环境变量生效
[root@tssvr1-c1 postgres]# source .bash_profile
12、切换用户到postgres并使用initdb初使用化数据库
[root@tssvr1-c1 local]# chown -R postgres:postgres /pgsql
[root@tssvr1-c1 local]#
[root@tssvr1-c1 local]#
[root@tssvr1-c1 local]# su - postgres
上一次登录:三 12月 20 10:22:13 CST 2023pts/0 上
[postgres@tssvr1-c1 ~]$
[postgres@tssvr1-c1 ~]$
[postgres@tssvr1-c1 ~]$ cd /pgsql/postgresql/
[postgres@tssvr1-c1 postgresql]$ initdb
The files belonging to this database system will be owned by user "postgres".
This user must also own the server process.

The database cluster will be initialized with locale "zh_CN.UTF-8".
The default database encoding has accordingly been set to "UTF8".
initdb: could not find suitable text search configuration for locale "zh_CN.UTF-8"
The default text search configuration will be set to "simple".

Data page checksums are disabled.

fixing permissions on existing directory /pgsql/postgresql/data ... ok
creating subdirectories ... ok
selecting dynamic shared memory implementation ... posix
selecting default max_connections ... 100
selecting default shared_buffers ... 128MB
selecting default time zone ... Asia/Shanghai
creating configuration files ... ok
running bootstrap script ... ok
performing post-bootstrap initialization ... ok
syncing data to disk ...

可以看到 /pgsql/postgresql/data已经有文件了。

13、配置服务
(1)修改/pgsql/postgresql/data目录下的两个文件。
**postgresql.conf 配置PostgreSQL数据库服务器的相应的参数。 **
pg_hba.conf 配置对数据库的访问权限。
[postgres@tssvr1-c1 data]$ vi postgresql.conf

listen_addresses = '*'                  # what IP address(es) to listen on;
                                        # comma-separated list of addresses;
                                        # defaults to 'localhost'; use '*' for all
                                        # (change requires restart)
#port = 5432                            # (change requires restart)
其中,参数“listen_addresses”表示监听的IP地址,默认是在localhost处监听,也就是127.0.0.1的ip地址上监听,只接受来自本机localhost的连接请求,这会让远程的主机无法登陆这台数据库,如果想从其他的机器上登陆这台数据库,需要把监听地址改为实际网络的地址,一种简单的方法是,将行开头的#去掉,把这个地址改为*,表示在本地的所有地址上监听。
把“license_addresses = '*'”放开即可。

(2)
[postgres@tssvr1-c1 data]$ vi pg_hba.conf

找到最下面这一行 ,这样局域网的人才能访问。红色为新添加内容。
IPv4 local connections:
host all all 0.0.0.0/0 trust
host all all 127.0.0.1/32 trust
如下图所示:

14、设置PostgreSQL开机自启动
PostgreSQL的开机自启动脚本位于PostgreSQL源码目录的contrib/start-scripts路径下。
linux文件即为linux系统上的启动脚本
[postgres@tssvr1-c1 data]$ cd /usr/local/postgresql/postgresql-16.1/contrib/start-scripts/
[postgres@tssvr1-c1 start-scripts]$ ls
freebsd  linux  macos
[postgres@tssvr1-c1 start-scripts]$
[postgres@tssvr1-c1 start-scripts]$
[postgres@tssvr1-c1 start-scripts]$
[postgres@tssvr1-c1 start-scripts]$ ll
总用量 8
-rw-r--r--. 1 1107 1107 1441 11月  7 06:04 freebsd
-rw-r--r--. 1 1107 1107 3526 11月  7 06:04 linux
drwxrwxrwx. 2 1107 1107   84 11月  7 06:17 macos
[postgres@tssvr1-c1 start-scripts]$
- 切换为root用户,修改linux文件属性,添加X属性
[postgres@tssvr1-c1 start-scripts]$ exit
登出
[root@tssvr1-c1 local]# cd /usr/local/postgresql/postgresql-16.1/contrib/start-scripts/
[root@tssvr1-c1 start-scripts]# chmod a+x linux
[root@tssvr1-c1 start-scripts]# ls
freebsd  linux  macos
[root@tssvr1-c1 start-scripts]#
[root@tssvr1-c1 start-scripts]# ll
总用量 8
-rw-r--r--. 1 1107 1107 1441 11月  7 06:04 freebsd
-rwxr-xr-x. 1 1107 1107 3526 11月  7 06:04 linux
drwxrwxrwx. 2 1107 1107   84 11月  7 06:17 macos
- 复制linux文件到/etc/init.d目录下,更名为postgresql
[root@tssvr1-c1 start-scripts]# cp linux /etc/init.d/postgresql
- 修改/etc/init.d/postgresql文件的两个变量prefix设置为postgresql的安装路径:/pgsql/postgresqlPGDATA设置为postgresql的数据目录路径:/pgsql/postgresql/data
[root@tssvr1-c1 start-scripts]# cd /etc/init.d/
[root@tssvr1-c1 init.d]# ls
functions  netconsole  network  postgresql  README
[root@tssvr1-c1 init.d]#
[root@tssvr1-c1 init.d]# vi postgresql
[root@tssvr1-c1 init.d]#
[root@tssvr1-c1 init.d]#

- 设置postgresql服务开机自启动
[root@tssvr1-c1 init.d]# chkconfig --add postgresql
[root@tssvr1-c1 init.d]#
查看开机自启动服务设置成功。
[root@tssvr1-c1 init.d]# chkconfig

注:该输出结果只显示 SysV 服务,并不包含
原生 systemd 服务。SysV 配置数据
可能被原生 systemd 配置覆盖。

      要列出 systemd 服务,请执行 'systemctl list-unit-files'。
      查看在具体 target 启用的服务请执行
      'systemctl list-dependencies [target]'。

netconsole         0:关    1:关    2:关    3:关    4:关    5:关    6:关
network            0:关    1:关    2:开    3:开    4:开    5:开    6:关
postgresql         0:关    1:关    2:开    3:开    4:开    5:开    6:关
[root@tssvr1-c1 init.d]#
- 编辑/etc/sysconfig/iptables文件开放5432端口。
[root@tssvr1-c1 init.d]# cd /etc/sysconfig/
[root@tssvr1-c1 sysconfig]# vi iptables
[root@tssvr1-c1 sysconfig]#
添加“-A INPUT -p tcp -m tcp --dport 5432 -j ACCEPT”。若有则不用添加。

- 重启服务
vi iptables
[root@tssvr1-c1 sysconfig]# /etc/init.d/iptables restart
-bash: /etc/init.d/iptables: 没有那个文件或目录
[root@tssvr1-c1 sysconfig]#
[root@tssvr1-c1 sysconfig]#
[root@tssvr1-c1 sysconfig]#
[root@tssvr1-c1 sysconfig]#
[root@tssvr1-c1 sysconfig]# systemctl restart iptables
[root@tssvr1-c1 sysconfig]#
[root@tssvr1-c1 sysconfig]# systemctl status iptables
● iptables.service - IPv4 firewall with iptables
   Loaded: loaded (/usr/lib/systemd/system/iptables.service; enabled; vendor preset: disabled)
   Active: active (exited) since 三 2023-12-20 15:03:15 CST; 13s ago
  Process: 14804 ExecStart=/usr/libexec/iptables/iptables.init start (code=exited, status=0/SUCCESS)
 Main PID: 14804 (code=exited, status=0/SUCCESS)

12月 20 15:03:15 tssvr1-c1 systemd[1]: Starting IPv4 firewall with iptables...
12月 20 15:03:15 tssvr1-c1 iptables.init[14804]: iptables: Applying firewall rules: [  确定  ]
12月 20 15:03:15 tssvr1-c1 systemd[1]: Started IPv4 firewall with iptables.
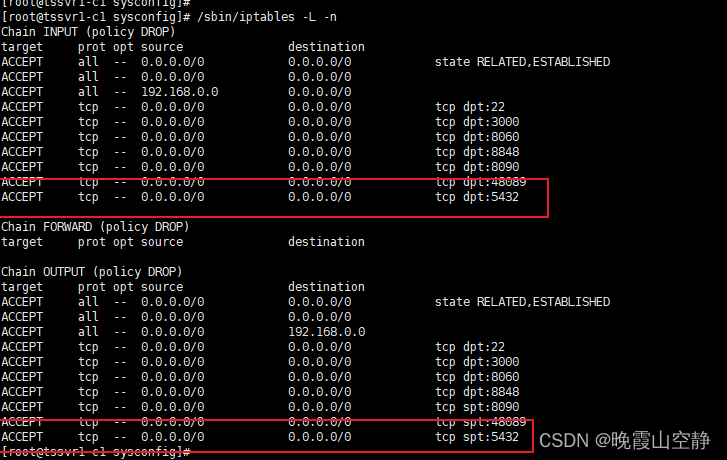
- 查看端口是否开放
[root@tssvr1-c1 sysconfig]# /sbin/iptables -L -n
Chain INPUT (policy DROP)
target     prot opt source               destination
ACCEPT     all  --  0.0.0.0/0            0.0.0.0/0            state RELATED,ESTABLISHED
ACCEPT     all  --  0.0.0.0/0            0.0.0.0/0
ACCEPT     all  --  192.168.0.0          0.0.0.0/0
ACCEPT     tcp  --  0.0.0.0/0            0.0.0.0/0            tcp dpt:22
ACCEPT     tcp  --  0.0.0.0/0            0.0.0.0/0            tcp dpt:3000
ACCEPT     tcp  --  0.0.0.0/0            0.0.0.0/0            tcp dpt:8060
ACCEPT     tcp  --  0.0.0.0/0            0.0.0.0/0            tcp dpt:8848
ACCEPT     tcp  --  0.0.0.0/0            0.0.0.0/0            tcp dpt:8090
ACCEPT     tcp  --  0.0.0.0/0            0.0.0.0/0            tcp dpt:48089
ACCEPT     tcp  --  0.0.0.0/0            0.0.0.0/0            tcp dpt:5432

Chain FORWARD (policy DROP)
target     prot opt source               destination

Chain OUTPUT (policy DROP)
target     prot opt source               destination
ACCEPT     all  --  0.0.0.0/0            0.0.0.0/0            state RELATED,ESTABLISHED
ACCEPT     all  --  0.0.0.0/0            0.0.0.0/0
ACCEPT     all  --  0.0.0.0/0            192.168.0.0
ACCEPT     tcp  --  0.0.0.0/0            0.0.0.0/0            tcp dpt:22
ACCEPT     tcp  --  0.0.0.0/0            0.0.0.0/0            tcp dpt:3000
ACCEPT     tcp  --  0.0.0.0/0            0.0.0.0/0            tcp dpt:8060
ACCEPT     tcp  --  0.0.0.0/0            0.0.0.0/0            tcp dpt:8848
ACCEPT     tcp  --  0.0.0.0/0            0.0.0.0/0            tcp spt:8090
ACCEPT     tcp  --  0.0.0.0/0            0.0.0.0/0            tcp spt:48089
ACCEPT     tcp  --  0.0.0.0/0            0.0.0.0/0            tcp spt:5432
15、启动PostgreSQL服务
- 执行service postgresql start,启动PostgreSQL服务
[root@tssvr1-c1 sysconfig]# service postgresql start
Starting PostgreSQL: ok
- 查看PostgreSQL服务
[root@tssvr1-c1 sysconfig]# ps -ef | grep postgres
postgres 17727     1  0 15:10 ?        00:00:00 /pgsql/postgresql/bin/postgres -D /pgsql/postgresql/data
postgres 17734 17727  0 15:10 ?        00:00:00 postgres: checkpointer
postgres 17735 17727  0 15:10 ?        00:00:00 postgres: background writer
postgres 17737 17727  0 15:10 ?        00:00:00 postgres: walwriter
postgres 17738 17727  0 15:10 ?        00:00:00 postgres: autovacuum launcher
postgres 17739 17727  0 15:10 ?        00:00:00 postgres: logical replication launcher
root     18365 22465  0 15:11 pts/0    00:00:00 grep --color=auto postgres
16、开始测试
[root@tssvr1-c1 postgres]# su postgres
[postgres@tssvr1-c1 ~]$ psql
psql: error: connection to server on socket "/tmp/.s.PGSQL.5432" failed: 没有那个文件或目录
    Is the server running locally and accepting connections on that socket?
[postgres@tssvr1-c1 ~]$ exit
exit
[root@tssvr1-c1 postgres]#
[root@tssvr1-c1 postgres]#
[root@tssvr1-c1 postgres]# service postgresql status
pg_ctl: no server running
[root@tssvr1-c1 postgres]#
[root@tssvr1-c1 postgres]#
[root@tssvr1-c1 postgres]# service postgresql start
Starting PostgreSQL: ok
[root@tssvr1-c1 postgres]#
[root@tssvr1-c1 postgres]#
[root@tssvr1-c1 postgres]#
[root@tssvr1-c1 postgres]# su postgres
[postgres@tssvr1-c1 ~]$
[postgres@tssvr1-c1 ~]$
[postgres@tssvr1-c1 ~]$ psql
psql (16.1)
Type "help" for help.

postgres=#
postgres=#
postgres=#
postgres=#

运行此命令使其生效:
source .bash_profile

source ~/.bashrc


创建数据库用户
postgres=# create user postgres password 'postgres';
CREATE ROLE
赋予账号权限
postgres=# ALTER ROLE pg SUPERUSER;
ALTER ROLE
新建数据库
postgres=# create database pg;
CREATE DATABASE
退出
postgres=# \q
修改“postgres”用户的密码为“xxx”,然后输入“\q”和“exit”退出,重新输入“”进入即可:
ALTER USER postgres WITH PASSWORD 'postgres';
[postgres@tssvr1-c1 ~]$ psql -U postgres -d postgres -h localhost
psql (16.1)
Type "help" for help.

postgres=# \l
                                                       List of databases
   Name    |  Owner   | Encoding | Locale Provider |   Collate   |    Ctype    | ICU Locale | ICU Rules |   Access privileges
-----------+----------+----------+-----------------+-------------+-------------+------------+-----------+-----------------------
 postgres  | postgres | UTF8     | libc            | zh_CN.UTF-8 | zh_CN.UTF-8 |            |           |
 template0 | postgres | UTF8     | libc            | zh_CN.UTF-8 | zh_CN.UTF-8 |            |           | =c/postgres          +
           |          |          |                 |             |             |            |           | postgres=CTc/postgres
 template1 | postgres | UTF8     | libc            | zh_CN.UTF-8 | zh_CN.UTF-8 |            |           | =c/postgres          +
           |          |          |                 |             |             |            |           | postgres=CTc/postgres
(3 rows)

postgres=#
postgres=#
连接“xx.xx.xx.xx”试试,若不行则启动psql服务即可。
[root@tssvr1-c1 sysconfig]# service postgresql start
Starting PostgreSQL: ok
[root@tssvr1-c1 sysconfig]#
[root@tssvr1-c1 sysconfig]#
[root@tssvr1-c1 sysconfig]#
[root@tssvr1-c1 sysconfig]#
[root@tssvr1-c1 sysconfig]# su postgres
[postgres@tssvr1-c1 sysconfig]$
[postgres@tssvr1-c1 sysconfig]$
[postgres@tssvr1-c1 sysconfig]$ psql -U postgres -d postgres -h localhost
psql: error: connection to server at "localhost" (::1), port 5432 failed: FATAL:  the database system is starting up
[postgres@tssvr1-c1 sysconfig]$
[postgres@tssvr1-c1 sysconfig]$
[postgres@tssvr1-c1 sysconfig]$
[postgres@tssvr1-c1 sysconfig]$
[postgres@tssvr1-c1 sysconfig]$ psql
psql (16.1)
Type "help" for help.

postgres=#
postgres=#
postgres=# \q
[postgres@tssvr1-c1 sysconfig]$
[postgres@tssvr1-c1 sysconfig]$
[postgres@tssvr1-c1 sysconfig]$ eix
bash: eix: 未找到命令...
[postgres@tssvr1-c1 sysconfig]$ exit
exit
[root@tssvr1-c1 sysconfig]# service postgresql status
pg_ctl: server is running (PID: 27800)
/pgsql/postgresql/bin/postgres "-D" "/pgsql/postgresql/data"
[root@tssvr1-c1 sysconfig]#
[root@tssvr1-c1 sysconfig]#
[root@tssvr1-c1 sysconfig]#
[root@tssvr1-c1 sysconfig]#
[root@tssvr1-c1 sysconfig]#
[root@tssvr1-c1 sysconfig]# su postgres
[postgres@tssvr1-c1 sysconfig]$
[postgres@tssvr1-c1 sysconfig]$
[postgres@tssvr1-c1 sysconfig]$
[postgres@tssvr1-c1 sysconfig]$ psql -U postgres -d postgres -h localhost
psql (16.1)
Type "help" for help.

postgres=#
postgres=#
postgres=#
postgres=# \1
invalid command \1
Try \? for help.
postgres=# \q
[postgres@tssvr1-c1 sysconfig]$
[postgres@tssvr1-c1 sysconfig]$
[postgres@tssvr1-c1 sysconfig]$ psql -U postgres -d postgres -h 192.168.1.24
Password for user postgres:
psql (16.1)
Type "help" for help.

postgres=#
postgres=#
这样就可以用Navicat进行连接数据库了。
版权归原作者 晚霞山空静 所有, 如有侵权,请联系我们删除。