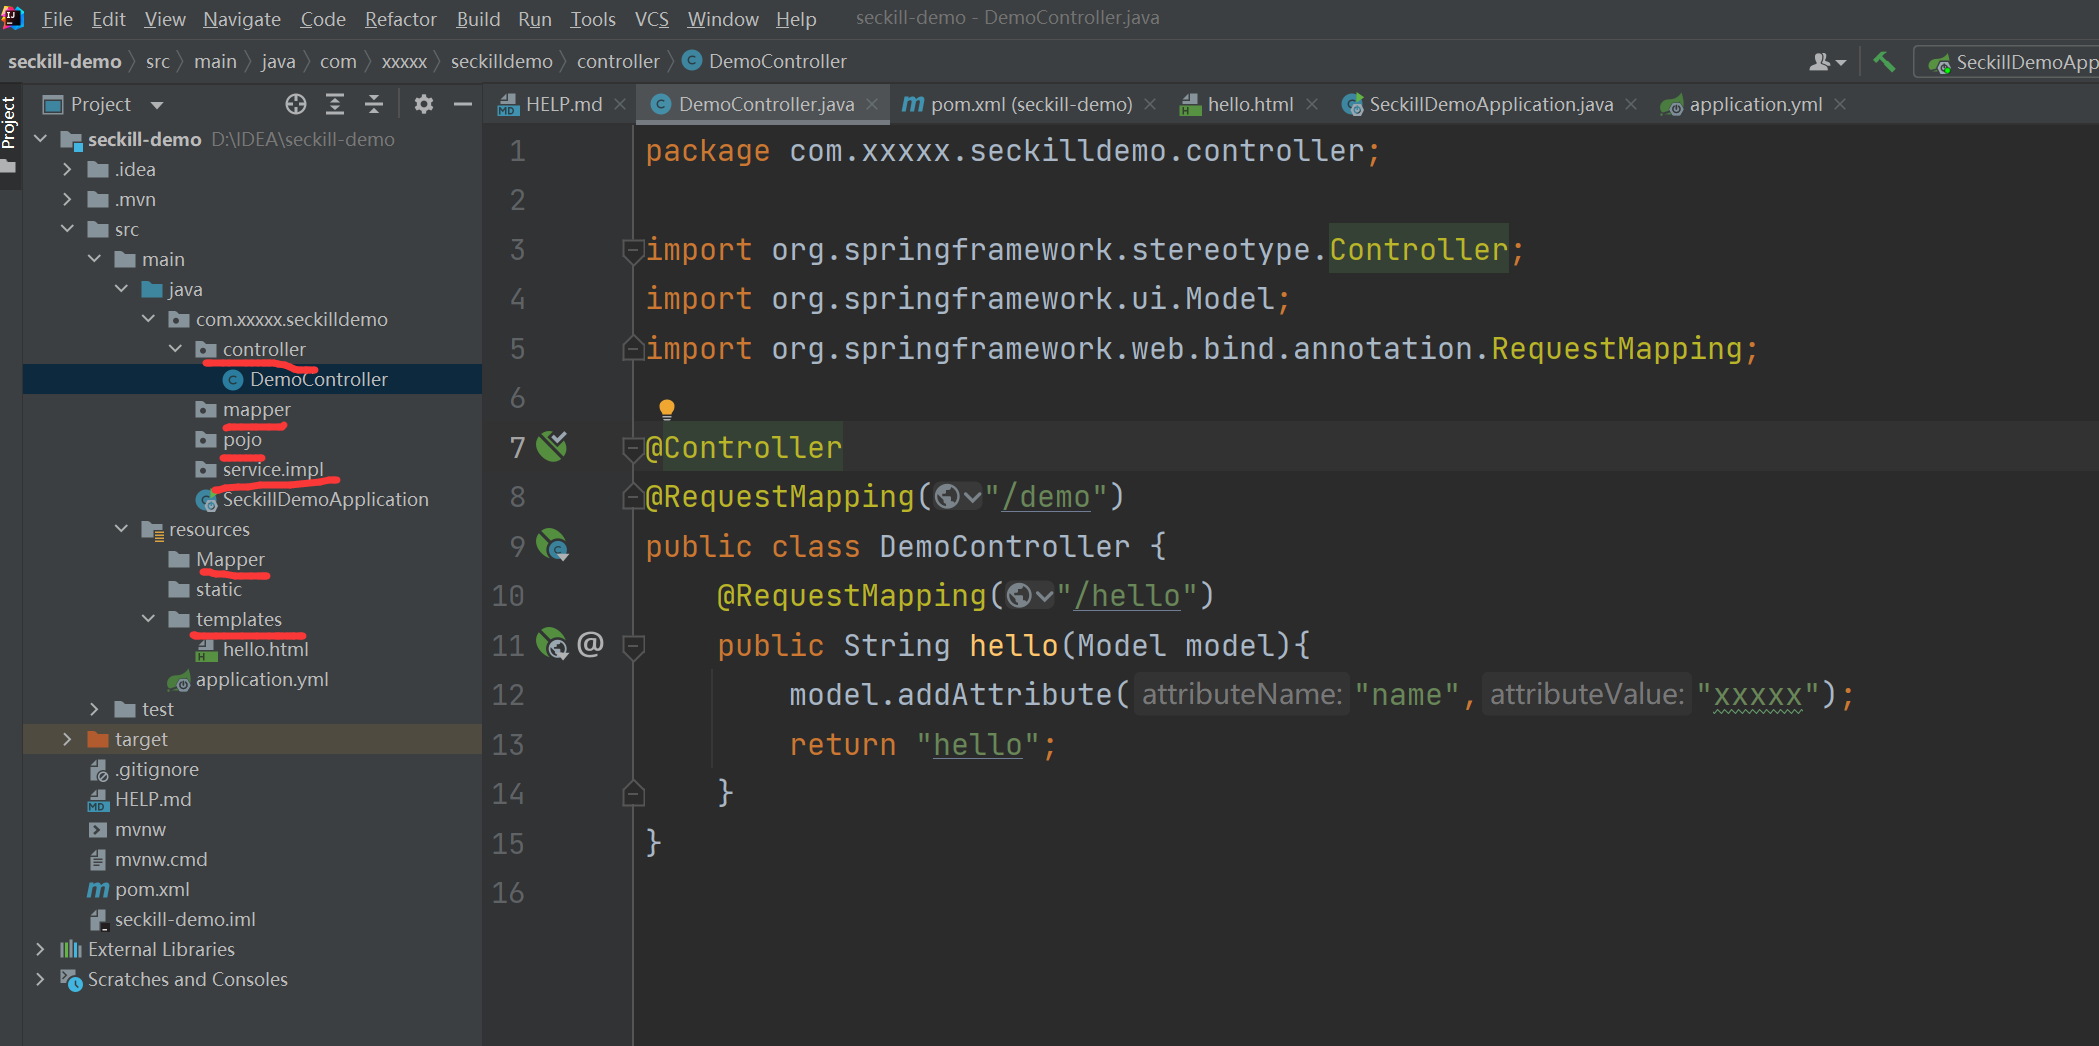
许多小白想入门springboot,但脑子里没有啥框架,今天小编给小白们总结一下springboot的整个开发流程,首先我们从基本的配置和测试讲起:当我们创建完项目后,
   第一我们要配置一下POM文件的依赖(有的在创建项目里勾选,有的需要单独配置,不过小编整理的这个直接拿去用吧,可以保证最基本的测试使用);
   第二配置application.yml文件(这个使我们链接数据库的配置信息等,很重要);
   第三我们把该用的包写一下,这个没啥固定要求,然后我们先写一个控制器和一个对应的访问页面,测试有没有配置成功。
以下是详细步骤及代码。
一:POM文件
<dependencies>
    <dependency>
        <groupId>org.springframework.boot</groupId>
        <artifactId>spring-boot-starter-thymeleaf</artifactId>
    </dependency>
    <dependency>
        <groupId>org.springframework.boot</groupId>
        <artifactId>spring-boot-starter-web</artifactId>
    </dependency>

    <dependency>
        <groupId>mysql</groupId>
        <artifactId>mysql-connector-java</artifactId>
        <scope>runtime</scope>
    </dependency>
    <dependency>
        <groupId>org.projectlombok</groupId>
        <artifactId>lombok</artifactId>
        <optional>true</optional>
    </dependency>
    <dependency>
        <groupId>org.springframework.boot</groupId>
        <artifactId>spring-boot-starter-test</artifactId>
        <scope>test</scope>
    </dependency>
    <dependency>
        <groupId>com.baomidou</groupId>
        <artifactId>mybatis-plus-boot-starter</artifactId>
        <version>3.4.0</version>
    </dependency>

</dependencies>

<build>
    <plugins>
        <plugin>
            <groupId>org.springframework.boot</groupId>
            <artifactId>spring-boot-maven-plugin</artifactId>
            <configuration>
                <excludes>
                    <exclude>
                        <groupId>org.projectlombok</groupId>
                        <artifactId>lombok</artifactId>
                    </exclude>
                </excludes>
            </configuration>
        </plugin>
    </plugins>
</build>
二:Yml文件,用于基础的配置包括数据库连接池(提前把库建好哈,库的内容我会再数据库信息里发出来),数据库连接设置等一系列操作(这里切记,空格啥的规范一定要注意,很严格的书写标准,多一个空格都会报错,按照小编给的这个不要添加其他内容即可。)
spring:
  thymeleaf:
    cache: false
  datasource:
    driver-class-name: com.mysql.cj.jdbc.Driver
# 自己数据库的密码账号,和表的名称不要写错了
    url: jdbc:mysql://localhost:3306/seckill?serverTimezone=GMT%2B8
    username: root
    password: root
    hikari:
      pool-name: DateHikariCP
      minimum-idle: 5
        # 空闲链接存货最大时间,默认600000(10min)
      idle-timeout: 180000
      maximum-pool-size: 10
        # 从连接池返回的连接自动提交
      auto-commit: true
      max-lifetime: 1800000
      connection-timeout: 30000
      connection-test-query: SELECT 1
mybatis-plus:
  mapper-locations: classpath*:/mapper/*Mapper.xml
  type-aliases-package: com.xxxxx.seckill.pojo

logging:
  level:
 # mapper文件扫描
    com.xxxx.seckill.mapper: debug

--------------------------------------------
三:写完我们要用的包后,先写一个测试类(定义一个控制器和前端页面做交互)
代码提供(控制器类)
@Controller
//接收demo路径的请求
@RequestMapping("/demo")
public class DemoController {
//接收demo/hello路径的请求
    @RequestMapping("/hello")
    public String hello(Model model){
        model.addAttribute("name","xxxxx");
        return "hello";
    }
}
这是我们测试类的前端页面(一般我们用templates模板的话,html文件就放在templates的包里):

这是测试前端代码:
<!DOCTYPE html>
<html lang="en"
      xmlns:th="http://www.thymeleaf.org">
<head>
    <meta charset="UTF-8">
    <title>测试</title>
</head>
<body>
<p th:text="'hello'+${name}"></p>
</body>
</html>
四:前面的步骤做好后,启动springboot,访问地址栏如图示,说明测试类成功,前后端成功建立连接。

以上就是我们启动一个springboot项目所需的最简单的配置和测试,是我们开发的第一步。
我会慢慢更新剩下的内容,希望大家能逐步了解springboot项目。期待和大家一同进步,有不懂的地方大家一块讨论!
版权归原作者 weixin_50433115 所有, 如有侵权,请联系我们删除。