一、安装使用
1.如何在idea中安装并且使用Evosuite
1.1介绍
官网: https://www.evosuite.org/
GitHub: https://github.com/EvoSuite
1.2安装插件
(1)直接安装
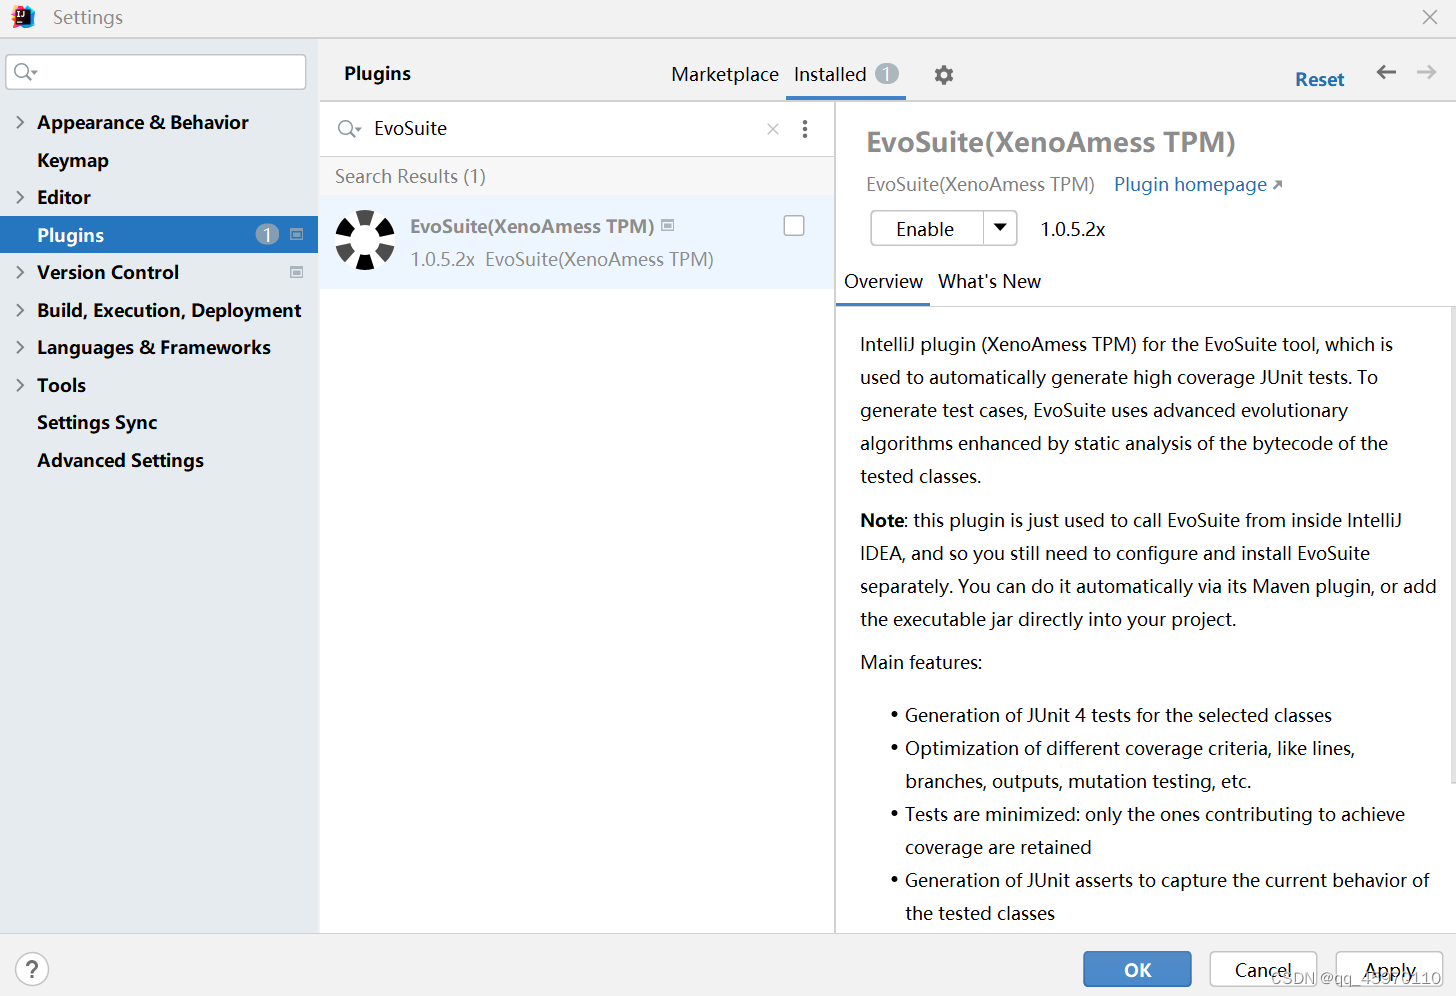
进入settigs中,点击plugins,搜索Evosuite,点击安装
(2)从官网下载安装
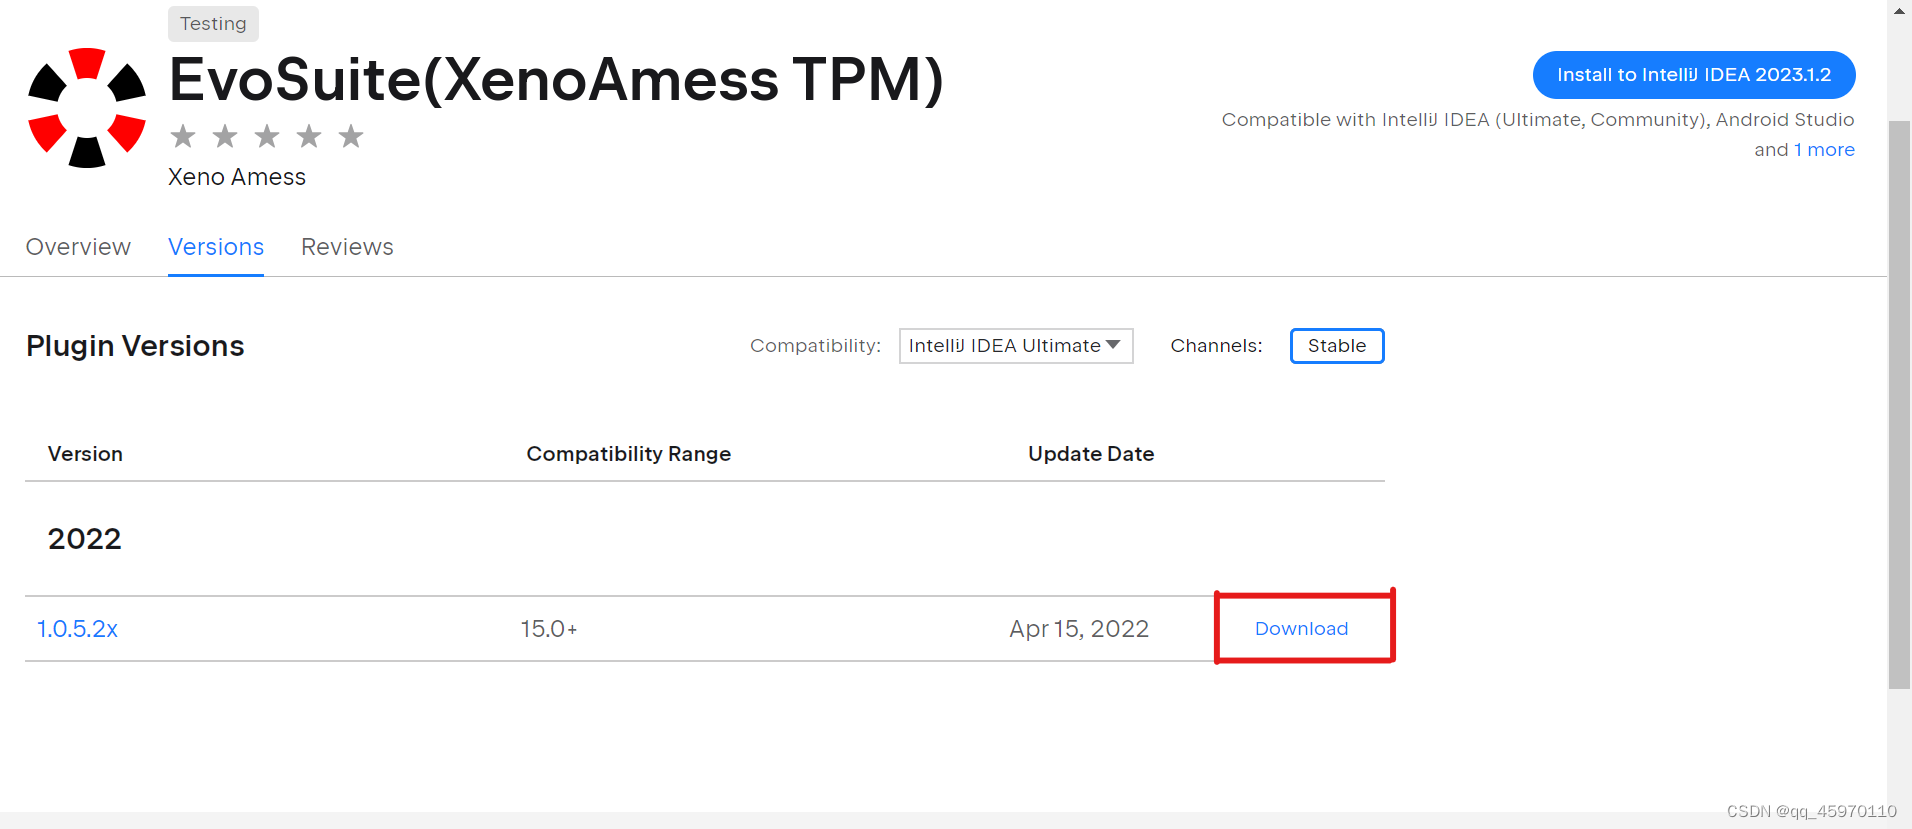
打开网页 https://plugins.jetbrains.com/plugin/18956-evosuite-xenoamess-tpm-/versions ,点击Download按钮下载插件。
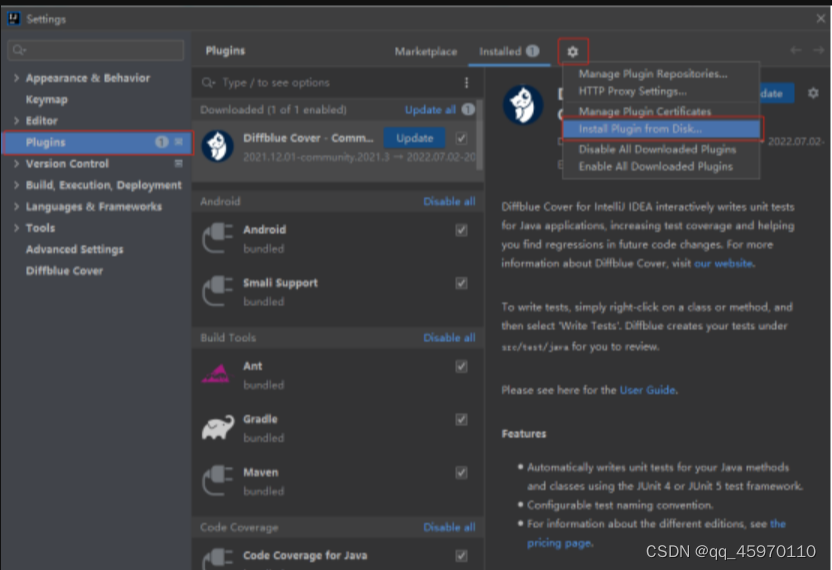
选择菜单File -> Settings,对话框中选择Plugins项目。单击Installed窗口顶部选项卡右边的齿轮图标。从下拉菜单中选择Install Plugin from Disk…,导航到插件的位置,选择zip文件,点击OK。
导入evosuite的jar包。选择File->Project Structure,对话框左侧选择Libraries,点击添加按钮,选择Java菜单项。在弹出的对话框中选择evosuite的jar包路径后,点击OK。后续步骤依次点击OK完成。
相比还是直接从idea中安装插件更加方便
1.3配置使用
命令:
mvn compile -DmemoryInMB=2000 -Dcores=2 -Dcuts=alexp.blog.service.PostServiceImpl -DtargetFolder=src/test/java/evosuite evosuite:generate evosuite:export
简单说明下:
compile表示编译。evosuite 是基于编译后的 .class 文件生成用例的,所以需要先编译。-DmemoryInMB=2000表示使用 2000MB 的内存-Dcores=2表示用 2 个 cpu 来并行加快生成速度-Dcuts=alexp.blog.service.PostServiceImpl表示只针对alexp.blog.service.PostServiceImpl这个类生成用例。多个用例可以用英文逗号分隔-DtargetFolder=src/test/java/evosuite表示生成的用例放到src/test/java/evosuite。evosuite:generate表示执行生成用例evosuite:export表示导出用例到 targetFolder 的值所在的目录中
但是可以直接在Evosuite中配置,右键要生成单元测试的类文件,右键 Run Evosuite
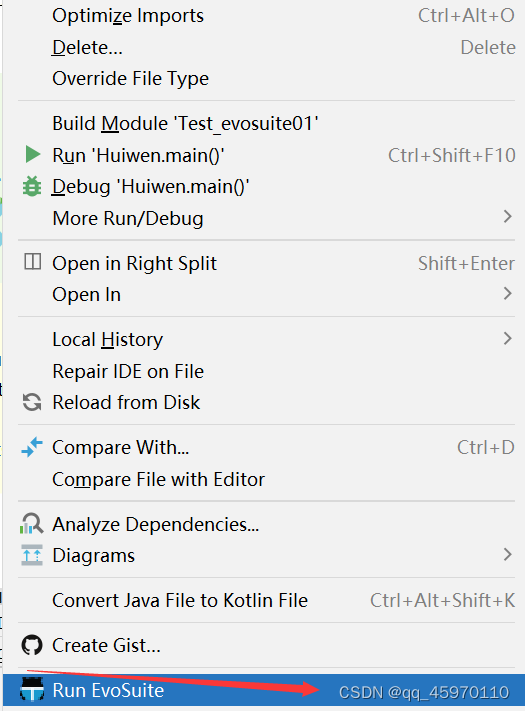
显示如下图配置项
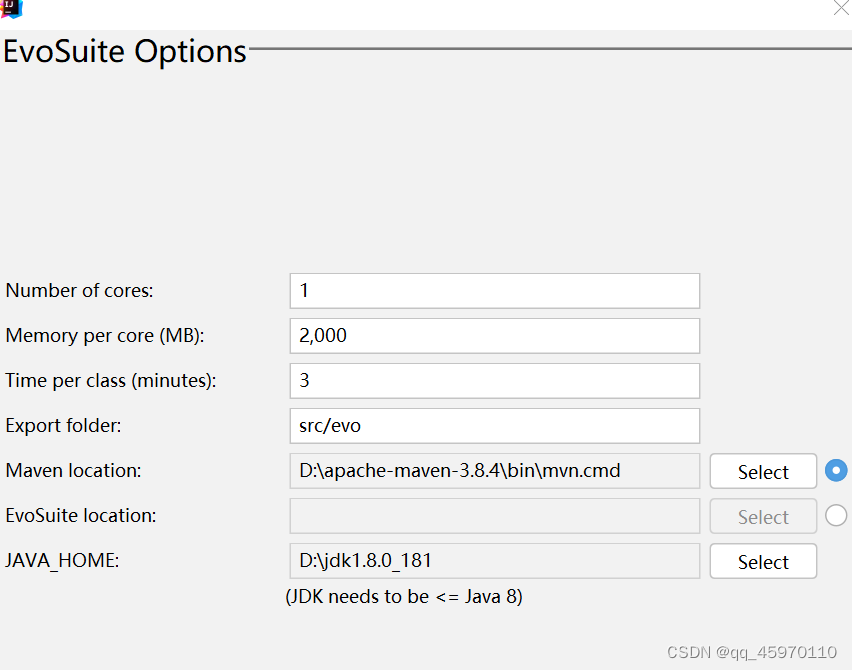
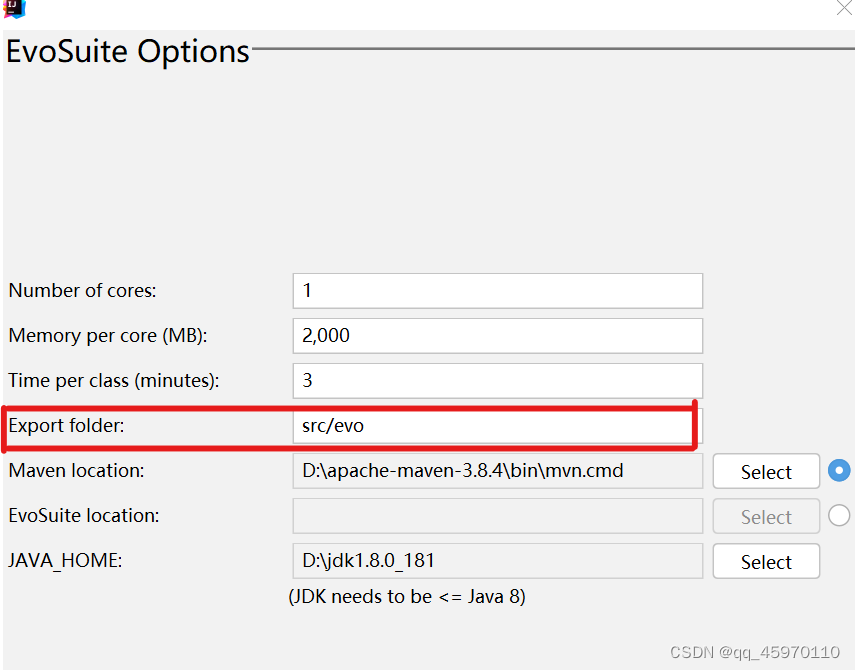
Export folder就是生成的测试文件的导出位置,可以自行配置
也可以使用命令和配置文件来配置导出位置:
(1)直接修改export 命令
mvn evosuite:export -DtargetFolder=src/test/evosuite
(2)修改pom.xml文件,在<project>节点下下,添加<properties> 配置
<properties>
  <targetFolder>src/test/evosuite</targetFolder>
</properties>
(3)右键在Run Evosuite选项中配置
- 在pom.xml文件中引入Junit依赖项:Maven项目集成EvoSuite时,需要当前项目中已经引入Junit
    <dependency>
      <groupId>junit</groupId>
      <artifactId>junit</artifactId>
      <version>4.12</version>
      <scope>test</scope>
    </dependency>
    <dependency>
      <groupId>org.evosuite</groupId>
      <artifactId>evosuite-standalone-runtime</artifactId>
      <version>1.0.6</version>
      <scope>test</scope>
    </dependency>
- 引入Evosuite
  <build>
    <plugins>
      <plugin>
        <groupId>org.evosuite.plugins</groupId>
        <artifactId>evosuite-maven-plugin</artifactId>
        <version>1.0.6</version>
      </plugin>
    </plugins>
  </build>
执行命令
mvn evosuite:help
执行之后显示如下信息则下载成功
[INFO] Maven Plugin for EvoSuite 1.0.6
  Plugin used to run EvoSuite to automatically generate high coverage JUnit
  tests

This plugin has 7 goals:

evosuite:clean
  Remove all local files created by EvoSuite so far

evosuite:coverage
  Execute the manually written test suites (usually located under src/test/java)
  and return the coverage of each class.

evosuite:export
  When run, EvoSuite generate tests in a specific folder. New runs of EvoSuite
  can exploit the tests in such folder, and/or modify them.

  So, with 'export' we can copy all generated tests to a specific folder, which
  by default points to where Maven searches for tests. If another folder is
  rather used (or if we want to run with Maven the tests in the default EvoSuite
  folder), then Maven plugins like build-helper-maven-plugin are needed

evosuite:generate
  Generate JUnit tests

evosuite:help
  Display help information on evosuite-maven-plugin.
  Call mvn evosuite:help -Ddetail=true -Dgoal=<goal-name> to display parameter
  details.

evosuite:info
  Obtain info of generated tests so far

evosuite:prepare
  Mojo needed to prepare the EvoSuite tests for execution. This is needed to
  make sure that bytecode is properly instrumented.
可能出现的问题
如果你的中央仓库没有EvoSuite的包,可以引入EvoSuite的 Maven仓库来解决依赖问题,修改pom.xml文件,添加如下信息:
<pluginRepositories>
  <pluginRepository>
    <id>EvoSuite</id>
    <name>EvoSuite Repository</name>
    <url>http://www.evosuite.org/m2</url>
  </pluginRepository>
</pluginRepositories>
查看Evosuite各个goal的详细信息
例如,获取更多关于generate goal的详细信息,可以执行下面的命令:
mvn evosuite:help -Ddetail=true -Dgoal=generate
生成Test,可以执行命令,也可以直接点击Run Evosuite来执行
mvn evosuite:generate
运行Evosuite的Test
mvn test
生成的测试文件列表
**执行完毕后,在
src/test/evosuite
下会增加一个
alexp/blog/service
文件夹,里面存放生成的测试文件:**
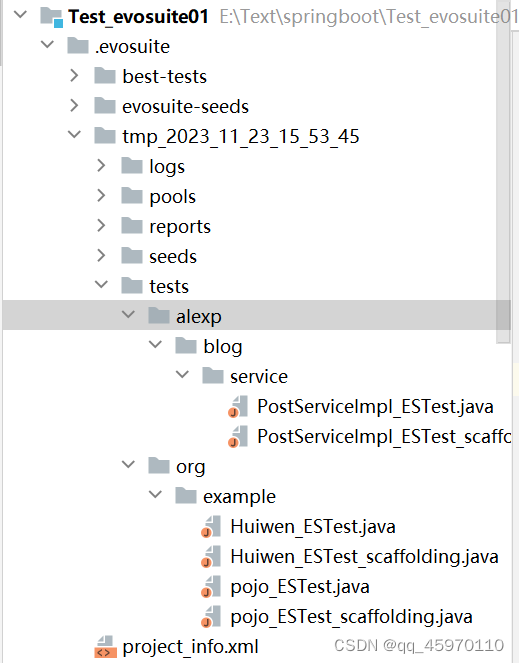
这样子不是很方便执行,建议新建一个test/evosuite文件目录,存放生成的测试文件
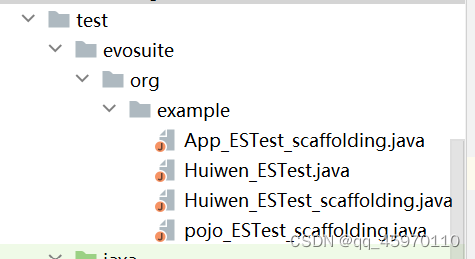
整合测试文件
mvn evosuite:export
你会发现在test 中有很多编译错误:package org.evosuite.runtime does not exist.。
因为EvoSuite测试依赖于EvoSuite运行时库,因为它们使用字节码执行容器(bytecode instrumentation)和其他各种方法来避免脆弱的测试。
引入运行时库:
 <dependency>
  <groupId>org.evosuite</groupId>
  <artifactId>evosuite-standalone-runtime</artifactId>
  <version>1.0.6</version>
  <scope>test</scope>
</dependency>
引入成功后,再次运行mvn test,就可以执行成功。
如何把EvoSuite Test和程序员写的Test分开
如果想把自己写的Test和产生的Tests分开,先从src/test/java 中删除所有之前export过来的EvoSuite Test
rm src/test/java/*ESTest*.java
通过运行下面的命令,我们可以知道export goal的详细用法:
mvn evosuite:help -Ddetail=true -Dgoal=export
得到如下信息:
  Available parameters:

    targetFolder (Default: src/test/java)

      User property: targetFolder
2.如何在eclipse中安装并且使用Evosuite
EvoSuite 插件需要Java 8 的运行环境,并且只支持Eclipse的Lunar和Mars版本,在安装完毕Java 8之后(若系统中有多种Java开发环境,需将Eclipse的默认jre设置成Java 8 版本),需要将jdk1.8/lib/tools.jar 文件复制到 jre8/lib/ 文件夹当中,在此之后Java 8才能保证EvoSuite插件的正常运行。
安装过程如下(由于安装过程可能会出现问题,所以详细列出了安装过程):
1.1打开Eclipse 依次点击菜单栏的help->Install New Software… 截图如下
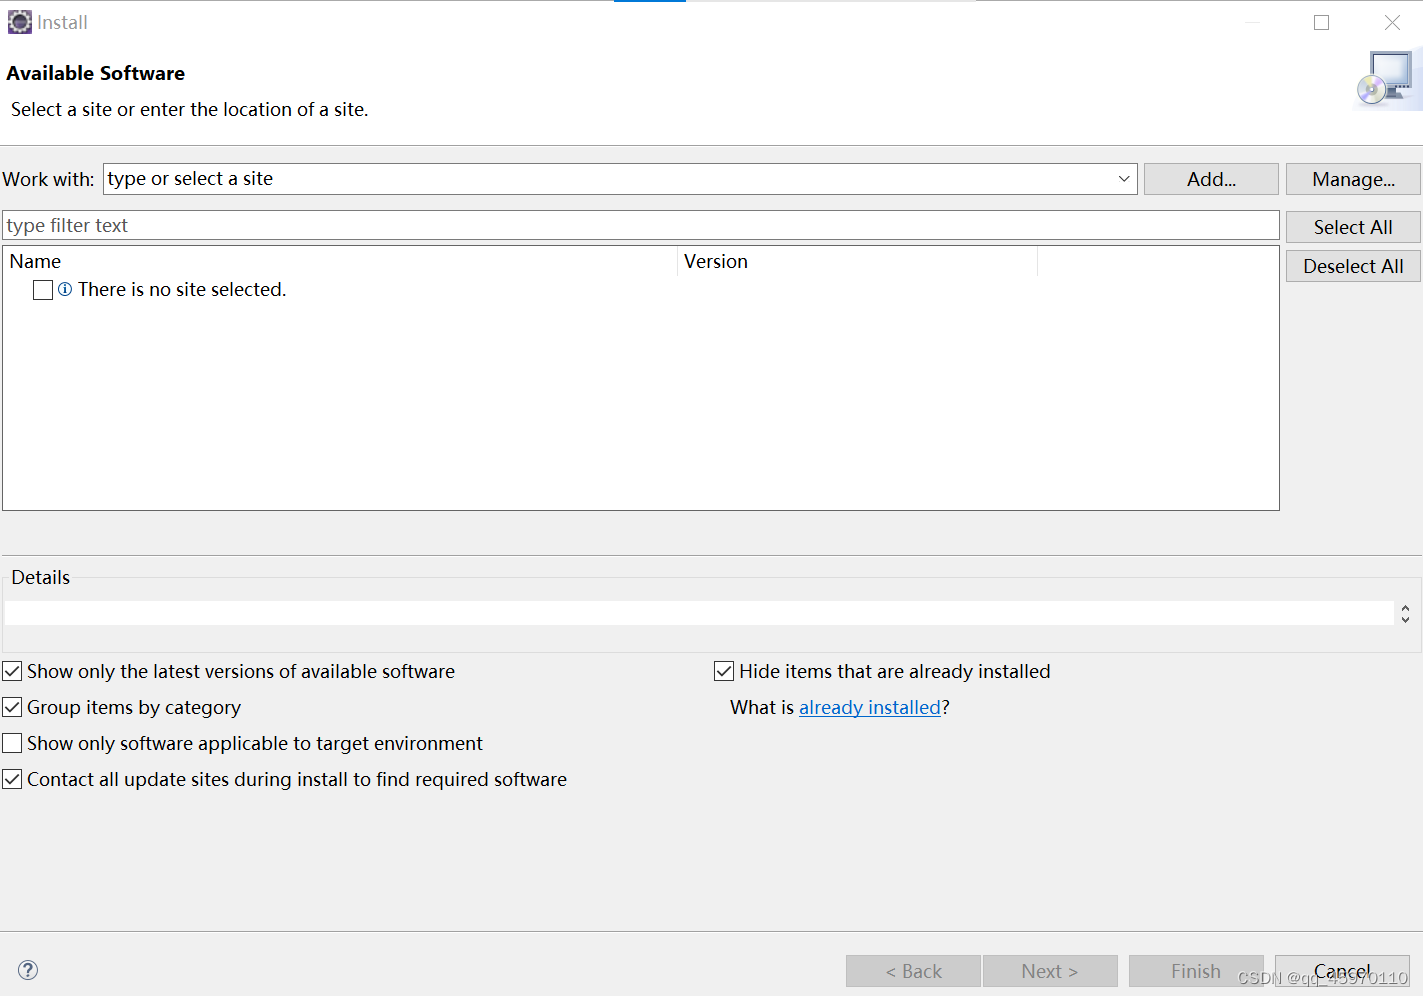
1.2点击Add…按钮,弹出如下对话框

1.3在Location栏中输入EvoSuite Eclipse插件的地址:Index of /update 后,点击OK按钮,结果如下

1.4选中 Junit Test Generation 后,点击Next按钮,运行时间可能过长,请耐心等待,运行完毕后,结果如下

1.5点击Next按钮,选中 I accept the terms of license agreement后,点击Finish按钮后,显示 Installing Software对话框,等待一段时间后,会弹出如下对话框
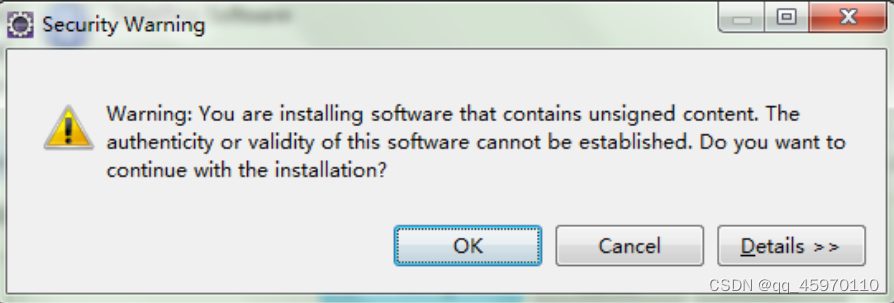
1.6点击OK按钮,等待一段时间后,出现如下对话框点击OK按钮,等待一段时间后,出现如下对话框
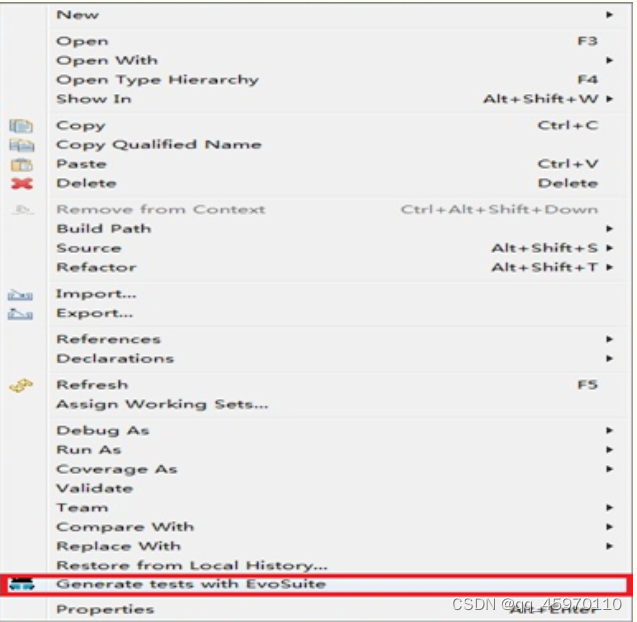
选中需要测试的类,右击鼠标,选择Generate tests with EvoSuite ,则会生成测试用例,测试用例生成在项目中的evosuite-tests文件夹内。生成的测试类为标准的Junit 4 测试类,可以完全按照Junit 4 的操作规范对其测试。
注意:在使用此工具测试Web项目中和Servlet相关的类时,工具加载不到二级目录的jar包,因此应该把 Server Runtime Library和Web App Library中的jar包再重新导入到工程当中。
1.7点击Windows->Preferences ,查找到EvoSuite即可对其进行设置,设置界面如下

参考原文链接:
链接:https://blog.csdn.net/u014163312/article/details/108697883
版权归原作者 qq_45970110 所有, 如有侵权,请联系我们删除。