背景:
在我们初步学习了web前端开发的一些知识时,我们可能会考虑构建一个简单的html网站,但是,如何着手去开始我们的网站,对于新手来说可能是个问题。
在这篇文章中,我将介绍我在构建一个简易的网页时,首先去做的事情。
当然,我本身也并非专业的前端设计师,写此文章主要为了分享我的一些学习过程中的经验,所写内容可能也会存在思想局限以及纰漏,也希望大家批评指出。`
第一步:画出草图
在开始我们的编程之前,我觉得更关键的是设计出我们的网页效果,即使是最简单的框架图,也能够降低我们在编写代码过程中的难度。
首先,我会先思考我的网页需要包括哪些内容,分为哪几块,要达到的作用有什么。
当然,我们有时候会很难想象自己能够设计出那么多不一样的网站,经常会走向一个思维定势的地步,我个人的建议是,可以参考互联网上已有的网站,获取一定的经验。而这,在我看来,对于一个初学者可以起到事半功倍的效果。
在我们的文章中,我列举了下图这样的一个简单的网页设计效果。
第二步:板块分析
对于一个基本的网页,其基本上由三个部分组成,头部
header
,内容
content
,尾部
footer
。
因此,首先我们将网页分成了三个部分,也就是①图中的导航栏在内的前两行,②中间的三个大方块,③尾部的联系我们。
对于我们分好的板块,我们用div标签来表示框架。
这样,我们就可以首先编写最初的代码轮廓。
<!DOCTYPEhtml><htmllang="en"><head><metacharset="UTF-8"><metahttp-equiv="X-UA-Compatible"content="IE=edge"><metaname="viewport"content="width=device-width, initial-scale=1.0"><linkrel="stylesheet"href="CSS/home.css"><scriptsrc="JS/home.js"type="text/javascript"></script><title>示例</title></head><body><!-- 最核心的三个模块 --><divid="header"></div><divid="content"></div><divid="footer"></div></body></html>
当然,编写完成这样的代码之后,我们在网页上什么都看不见,因此,我们需要在css内给添加一些效果。
其中,
#id
是指向标签id的css效果添加方法。
/* 消除默认样式 */*{margin: 0;padding: 0;}#header{/* 宽度占屏幕100%,这样缩放浏览器不会影响效果 */width: 100%;/* 给标签设计高度,否则内部为空的标签将无法显示出来 */height: 50px;/* 给模块添加背景颜色,否则我们无法看到网页布局的效果 */background-color: cyan;}#content{width: 100%;height: 300px;background-color:bisque;}#footer{width: 100%;height: 50px;background-color: greenyellow;}
我们可以看到网页的效果将是这个样子:
第三步:具体分析
在完成初步的分块之后,我们需要按照内容细分模块。
首先,header包括两行,需要分成两块。
content1
与
content2
其次,content包括三个大块:
第一块
content1
包括一个图片
content1img
、文字
content1txt
和链接
content1link
,所以再细分三块
第二块
content2
与第三块
content3
分别包括一个文字
content2txt
、
content3txt
与链接
content3txt
、
content3link
,所以均分为两块
最后,footer不需要再划分。
第四步:具体实现
<!DOCTYPEhtml><htmllang="en"><head><metacharset="UTF-8"><metahttp-equiv="X-UA-Compatible"content="IE=edge"><metaname="viewport"content="width=device-width, initial-scale=1.0"><linkrel="stylesheet"href="CSS/home.css"><scriptsrc="JS/home.js"type="text/javascript"></script><title>示例</title></head><body><!-- 最核心的三个模块 --><divid="header"><divid="header1"></div><divid="header2"></div></div><divid="content"><divid="content1"><divid="content1img"></div><divid="content1txt"></div><divid="content1link"></div></div><divid="content2"><divid="content2txt"></div><divid="content2link"></div></div><divid="content3"><divid="content3txt"></div><divid="content3link"></div></div></div><divid="footer"></div></body></html>
以及css效果 :
/* 消除默认样式 */*{margin: 0;padding: 0;}#header{/* 宽度占屏幕100%,这样缩放浏览器不会影响效果 */width: 100%;/* 给标签设计高度,否则内部为空的标签将无法显示出来 *//* height: 50px; 内部子标签有高度,这里就不用了*//* 给模块添加背景颜色,否则我们无法看到网页布局的效果 *//* background-color: cyan; 去掉大模块的颜色*/}#header1{/* 宽度继承父标签 */height: 20px;background-color: aqua;}#header2{height: 30px;background-color: blueviolet;}#content{width: 100%;height: 550px;background-color:bisque;/* 采用margin来给模块之间添加距离 */margin-top: 30px;}#content1{width: 80%;margin-top: 20px;height: 300px;background-color:lightcoral;/* 左侧占10%,宽度80%,右侧剩10%,达到居中效果 */margin-left:10% ;}#content1img{width: 30%;height: 150px;margin-left: 10%;margin-top: 70px;float: left;background-color: brown;}#content1txt{width: 30%;height: 100px;margin-right: 10%;float: right;margin-top: 20px;background-color: brown;}#content1link{width: 30%;height: 100px;margin-right: 10%;margin-top: 70px;float: right;background-color: brown;}#content2{width: 30%;margin-left: 10%;height: 150px;margin-top: 30px;background-color: cadetblue;float: left;}#content2txt{width: 80%;height: 70px;margin-right: 10%;float: right;margin-top: 20px;background-color: gainsboro;}#content2link{width: 80%;height: 20px;margin-right: 10%;float: right;margin-top: 20px;background-color: gainsboro;}#content3{width: 30%;margin-right: 10%;height: 150px;margin-top: 30px;background-color: cadetblue;float: right;}#content3txt{width: 80%;height: 70px;margin-right: 10%;float: right;margin-top: 20px;background-color: gainsboro;}#content3link{width: 80%;height: 20px;margin-right: 10%;float: right;margin-top: 20px;background-color: gainsboro;}#footer{width: 100%;height: 100px;background-color: greenyellow;}
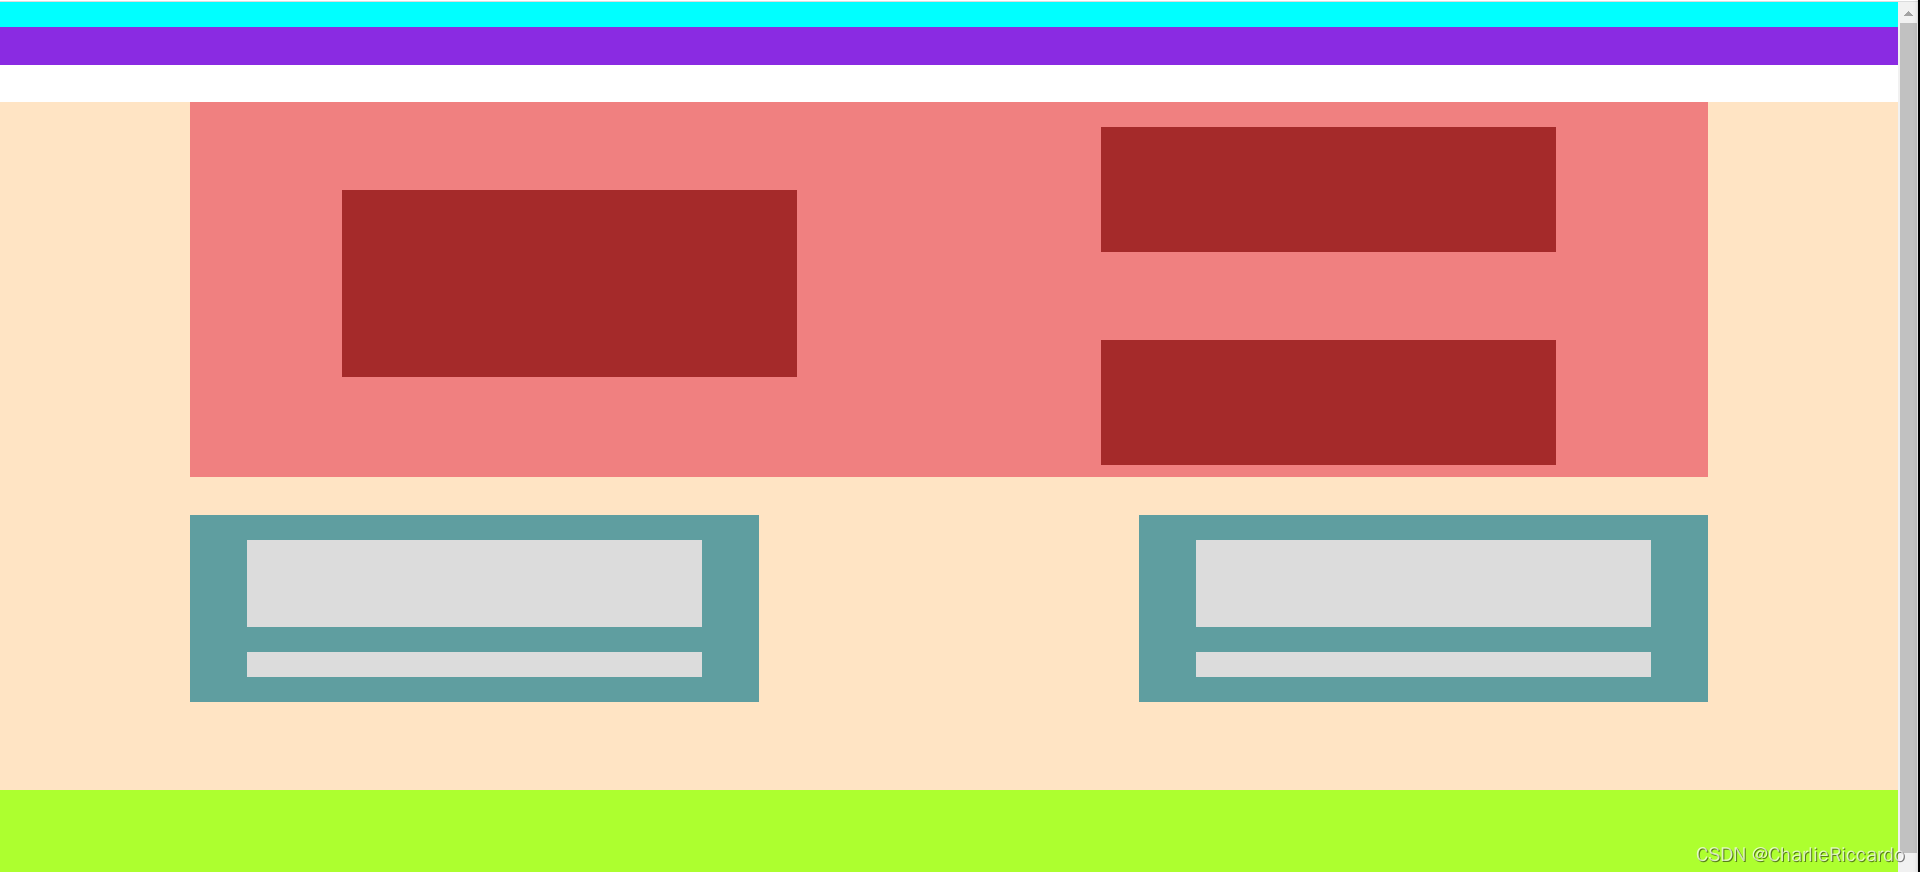
呈现效果:
最终,我们也就呈现出这样的网页效果了:
希望本文在记录我的方法的同时,也能够帮助到你。
感谢您的阅读
版权归原作者 CharlieRiccardo 所有, 如有侵权,请联系我们删除。