
1.创建一个vue3项目
创建指令为:npm creat vite@latest
根据指令依次运行:
这样子我们就创建了一个纯净的vite+vue3+ts的项目模板,运行起来为:
2.添加eslint
(1)安装eslint:
npm install -D eslint
(2)初始化eslint:
npx eslint --init
在package.json中增加一句脚本用于检测和修复代码:
"lint":"eslint . --ext .vue,.js,.jsx,.cjs,.mjs,.ts,.tsx,.cts,.mts --fix"

此时运行npm run lint,会看到这么一串报错:
3.解决引入了eslint之后的报错问题
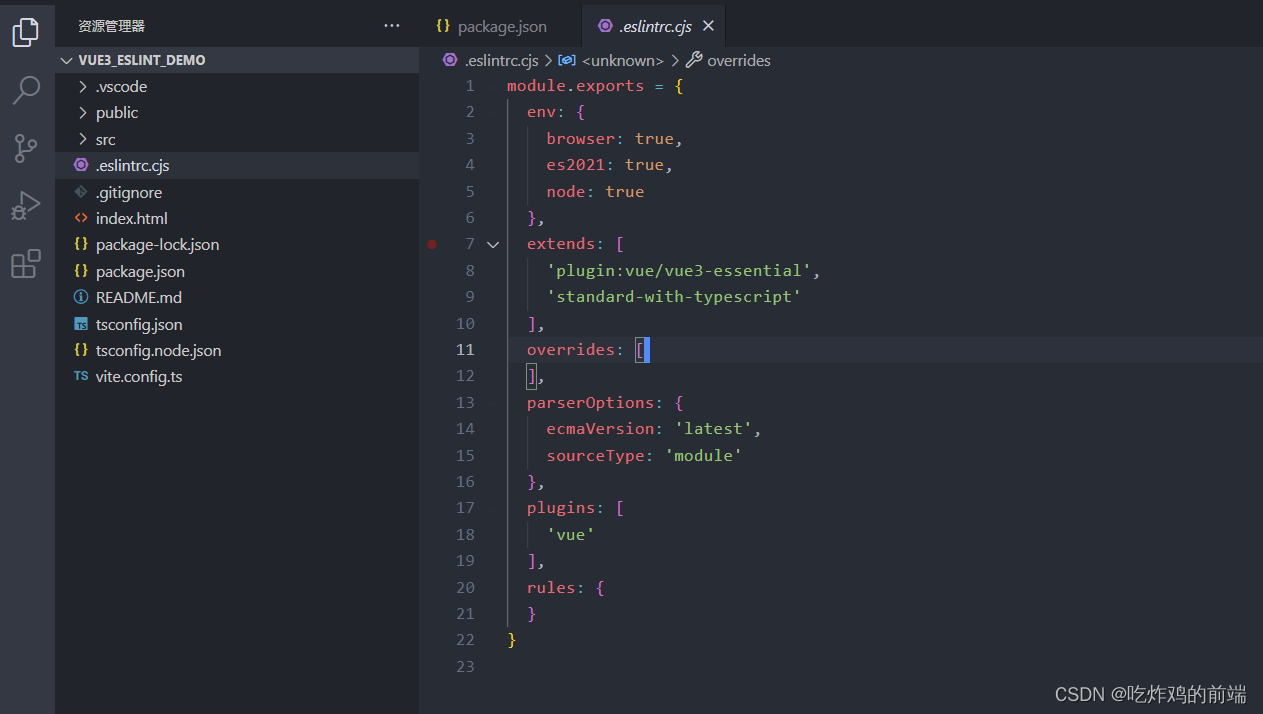
(1.)按照报错信息对 .eslintrc.cjs 中的parserOptions.project进行相应配置:
补充:关于我说了要在parserOptions增加project,请移步eslint官网:
https://typescript-eslint.io/linting/troubleshooting/#more-details
module.exports ={...parserOptions:{ecmaVersion:'latest',sourceType:'module',project:['tsconfig.json'],// 新增...},...}
(2.)再次运行依然有错误
这里圈出的错误是由于解析vue文件错误导致的,在eslint官网中也有这个问题:
移步官方文档:我想在vue中使用eslint,结果发生了解析错误?
https://typescript-eslint.io/linting/troubleshooting#i-am-running-into-errors-when-parsing-typescript-in-my-vue-files
(3)再次运行依然有错误:
这次的错误也是解析vue文件导致的,可参考eslint官网的问题解答:
https://typescript-eslint.io/linting/troubleshooting/#i-get-errors-telling-me-the-file-must-be-included-in-at-least-one-of-the-projects-provided
新增配置:extraFileExtensions:[‘.vue’],
(4)再次运行依然有错误:
参考:https://typescript-eslint.io/linting/troubleshooting/#i-get-errors-telling-me-eslint-was-configured-to-run–however-that-tsconfig-does-not–none-of-those-tsconfigs-include-this-file
官网回答重点是这句话:In that case, viewing the .eslintrc.cjs in an IDE with the ESLint extension will show the error notice that the file couldn’t be linted because it isn’t included in tsconfig.json
告诉我们.eslintrc.cjs和vite.config.ts应该包含在tsconfig.json文件中的includes里面
按照报错信息对 tsconfig.json 进行相应配置:
{...// 新增 .eslintrc.cjs 以及 vite.config.ts"include":["src/**/*.ts","src/**/*.d.ts","src/**/*.tsx","src/**/*.vue",".eslintrc.cjs","vite.config.ts"],...}

(5)再次运行还是有一个错误,我们接着处理
一个是 src 目录下 vite-env.d.ts 中不鼓励使用三斜线引用 /// 而引发的错误,我们通过注释让它忽略这个错误。
报错信息:Do not use a triple slash reference for vite/client, use `import` style instead.eslint(@typescript-eslint/triple-slash-reference)
复制代码
// eslint-disable-next-line @typescript-eslint/triple-slash-reference/// <reference types="vite/client" />

(6)接着我们运行npm run lint,发现所有的报错都已经解决了,写点代码去测试一下,发现通过npm run lint也能帮我们进行检测和格式化。说明我们的eslint已经成功的引入到了vite项目中。此时我们的项目状态为:vite+vue3+eslint。但是eslint的触发需要我们手动使用npm run lint来触发。接下来我们处理下,怎么在commit的时候自动的触发eslint。
4.添加git仓库
运行:git init
5.添加commitLint
工具前置知识,工具介绍:
- lint-staged 是一个专门针对已放入 Git 暂存区的文件进行检查的工具
- husky 能提供监听 Git 操作并执行脚本代码的能力
一:安装配置 lint-staged:实现专门针对 git 暂存区的文件进行风格检查
(1).安装依赖包
npm i lint-staged --save-dev
(2).在 package.json 中配置 lint-staged,利用它来调用 eslint 和 stylelint 去检查暂存区内的代码
{// ..."lint-staged":{"*.{vue,js}":["npm run lint"]}}

二:安装配置 husky:实现在git 提交时执行 lint-staged
(1).安装依赖包
npm i husky --save-dev
(2)在 package.json中配置快捷命令,用来在安装项目依赖时生成 husky 相关文件
{// ..."scripts":{// ..."postinstall":"husky install"},}

(3)配置后执行 npm i 就会在项目根目录生成 .husky/_ 目录。
npm i

(4)执行以下代码,使用 husky 生成 git 操作的监听钩子脚本
npx husky add .husky/pre-commit "npx lint-staged"

执行后成功后会生成脚本文件 .husky/pre-commit (在vscode中可以看到),它包含了命令行语句: npx lint-staged
到此你就完成了git commit时自动去触发eslint的检测和修复。测试一下:
修改部分代码(一定要修改下,因为lint-staged是对暂存区的文件进行检测),然后git add . git commit一下,有以下的代码出现,就说明git commit时自动触发了eslint
6.添加prettier(看自己的需求添不添加)
prettier的添加,主要是看自己需不需要。这个插件添加的原因前面的文章已经说过了,这个就不赘述了。
1.安装必须的包
- prettier - prettier 本体
- eslint-config-prettier - 关闭 ESLint 中与 Prettier 中发生冲突的规则
- eslint-plugin-prettier - 将 Prettier 的规则设置到 ESLint 的规则中
npm i prettier eslint-config-prettier eslint-plugin-prettier -D
2.在根目录添加一个 .prettierrc.cjs 文件(注意是cjs文件,否则会报错的),内容如下:
module.exports ={tabWidth:4,// 指定每个缩进级别的空格数<int>,默认2useTabs:false,// 用制表符而不是空格缩进行<bool>,默认falseprintWidth:300,//一行的字符数,如果超过会进行换行,默认为80singleQuote:true,//字符串是否使用单引号,默认为false,使用双引号endOfLine:'auto',//避免报错delete (cr)的错proseWrap:'always',semi:false,// 不加分号trailingComma:'none',// 结尾处不加逗号htmlWhitespaceSensitivity:'ignore',// 忽略'>'下落问题}
3.修改 ESLint 配置,使 Eslint 兼容 Prettier 规则
plugin:prettier/recommended 的配置需要注意的是,一定要放在最后。因为extends中后引入的规则会覆盖前面的规则。也就是说你可以在.prettierrc.cjs 中定义自己的风格代码。到时候,本地的prettier插件会根据这个文件来格式化,项目安装的prettier也会根据该文件来格式化。且eslint的风格与prettier风格冲突的地方会以prettier为主
module.exports ={env:{browser:true,es2021:true,node:true},extends:['plugin:vue/vue3-essential','standard-with-typescript','plugin:prettier/recommended'// 新增],overrides:[],parser:'vue-eslint-parser',parserOptions:{ecmaVersion:'latest',sourceType:'module',parser:'@typescript-eslint/parser',project:['tsconfig.json'],// 新增extraFileExtensions:['.vue']},plugins:['vue'],rules:{}}
总结:
1.可以看到我们自己新建的vite项目来自己添加standard规则会有各种的bug,虽然这种bug在eslint的官网都能解决,但是还是很费神的,关键还是在于eslint和vite融合的不够完美(也怪更新的太快了),不能直接初始化好了就可以用(像vue2一样)。所以总结下来的话,我认为还是在刚建立项目的时候就去添加eslint,然后使用自定义的规则来做,参考我的上一篇文章。
2.另外的话,此时用npx eslint --init的方式只能添加standard规则和xo规则,并没有airbnb规则。以后应该会有,所以此时还是用standard规则吧,一样的。你也可以去查别人怎么配置airbnb规则的,但是我不太喜欢。因为安装了一堆插件,而且插件之间要配合的太多了,下次你要安装,你还是不知道该安装哪些,该如何去配置。
版权归原作者 吃炸鸡的前端 所有, 如有侵权,请联系我们删除。