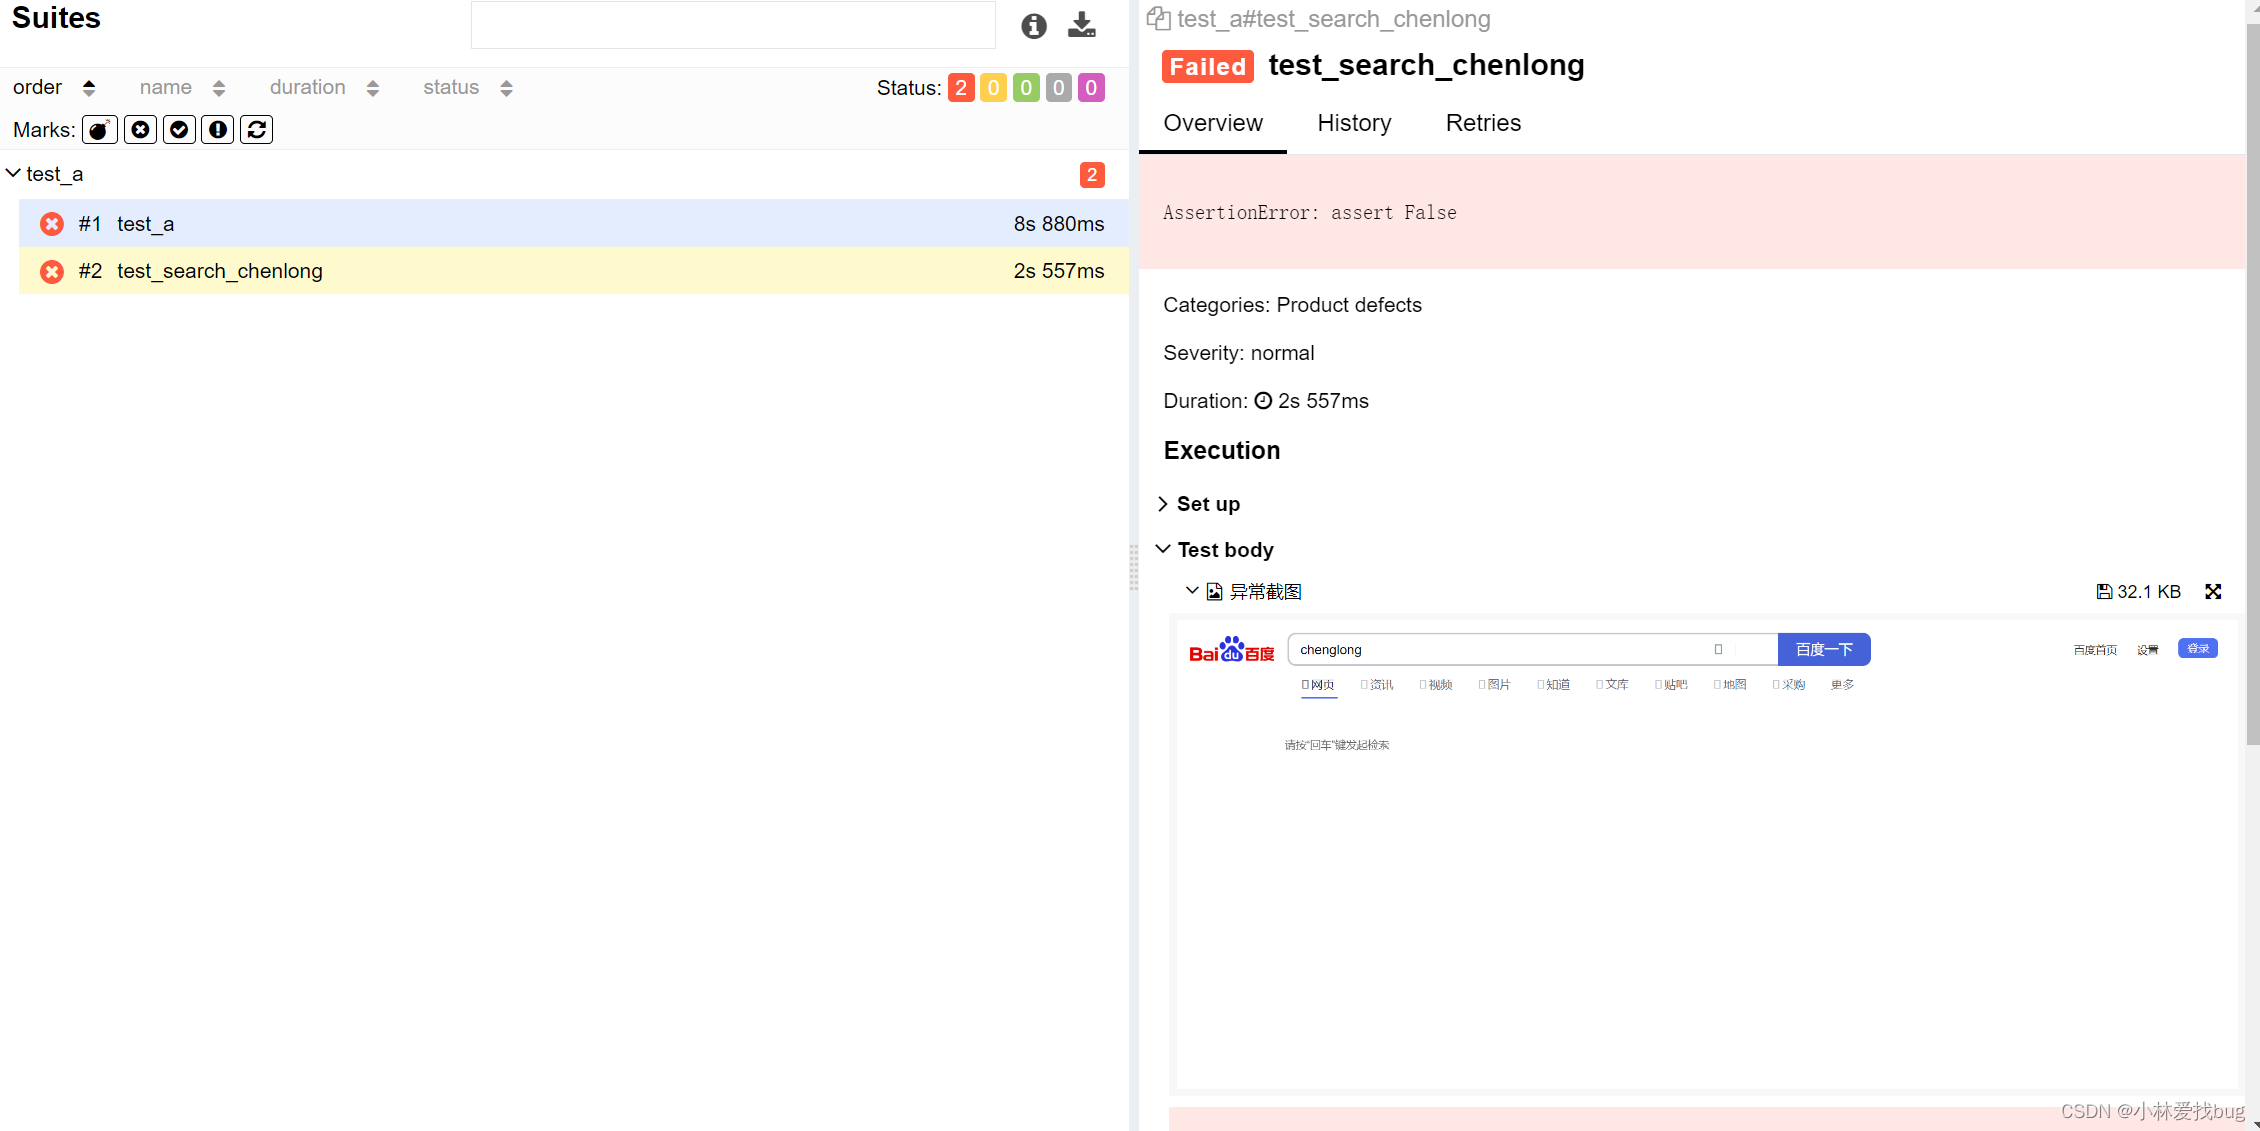
Pytest+Selenium是UI自动化常用得框架,结合Allure可以给出优美得测试报告,失败的case可以查看错误日志,但是对于UI自动化来说,最直观的还是可以通过截图来查看失败原因,更方便测试人员定位问题。
钩子函数pytest_runtest_makereport
pytest提供了pytest_runtest_makereport这个方法,可以捕获用例的执行情况。根据官方提供的示例,在conftest.py文件中添加如下代码就可以捕获每个用例的执行结果。(官方示例链接:
https://docs.pytest.org/en/7.1.x/example/simple.html?highlight=pytest_runtest_makereport)
@pytest.hookimpl(tryfirst=True, hookwrapper=True)
def pytest_runtest_makereport(item, call):
    # execute all other hooks to obtain the report object
    outcome = yield
    rep = outcome.get_result()  # rep可以拿到用例的执行结果详情
上面这段代码每条case执行完成都会执行一次这个方法,可以自己根据不同目的自行编写代码实现,我们这次要做的是case失败截图。
截图并附加到Allure测试报告中
下面的代码是添加异常截图的代码,rep.when和rep.failed判断只有用例执行失败的情况才会进行截图,注意实现截图这部分代码与pytest没有任何关系,你可以根据需要添加任何其他的代码。
@pytest.hookimpl(tryfirst=True, hookwrapper=True)
def pytest_runtest_makereport(item, call):
    # execute all other hooks to obtain the report object
    outcome = yield
    rep = outcome.get_result()

    # 以下为实现异常截图的代码:
    # rep.when可选参数有call、setup、teardown,
    # call表示为用例执行环节、setup、teardown为环境初始化和清理环节
    # 这里只针对用例执行且失败的用例进行异常截图
    if rep.when == "call" and rep.failed:
        # 检查driver对象是否包含get_screenshot_as_png方法
        if hasattr(driver, "get_screenshot_as_png"):
            # get_screenshot_as_png实现截图并生成二进制数据
            # allure.attach直接将截图二进制数据附加到allure报告中
            allure.attach(driver.get_screenshot_as_png(), "异常截图", allure.attachment_type.PNG)
说明:
- allure.attach(body, name, attachment_type, extension)中body为附件的内容,name为附件名,attachment_type为附件类型,extension为扩展名。
- driver为webdriver对象,代表用例执行中的使用的浏览器。
处理dirver对象
这时你肯定会产生疑问driver对象从哪里来的,driver对象肯定是每个测试用例前创建的,就像访问页面必须先打开浏览器一样。然而,如果你是在原有的自动化工程基础上改造以增加异常截图的功能的话,driver对象的创建肯定是写在了别的地方了,这里就需要做下调整,要把打开浏览器对象代码一起放到conftest.py文件中,否则就抛出driver对象不存在的错误。
完整的conftest.py代码如下:
import pytest
import allure
from selenium import webdriver

driver = None

@pytest.hookimpl(tryfirst=True, hookwrapper=True)
def pytest_runtest_makereport(item, call):
    # execute all other hooks to obtain the report object
    outcome = yield
    rep = outcome.get_result()
    if rep.when == "call" and rep.failed:
        if hasattr(driver, "get_screenshot_as_png"):
            allure.attach(driver.get_screenshot_as_png(), "异常截图", allure.attachment_type.PNG)

@pytest.fixture(scope="session")
def browser():
    global driver
    if driver is None:
        driver = webdriver.Chrome()
        driver.maximize_window()
    yield driver
    # 所有用例执行完毕退出浏览器
    driver.quit()
- 使用@pytest.fixture装饰后的方法browser就成为了pytest固件;
- scope="session"表示固件作用范围可以跨.py文件,多个.py都可以使用该固件;
- browser虽然是全局固件,但是通过pytest-xdist插件并发运行的情况下仍然可以同时打开多个浏览器并行运行用例。
完整示例
其中conftest.py就是上面提供的代码,test开头的为测试用例,其中一个用例文件的代码如下,通过在用例参数中传入browser来使用conftest.py中的固件。另外还在用例中故意添加失败的断言来让其中一个用例结果返回失败。
def test_a(browser):
    browser.get("https://www.baidu.com")
    assert False

def test_search_chenlong(browser):
    browser.get("https://www.baidu.com")
    browser.find_element('xpath',"//*[@id='kw']").send_keys("chenglong")
    browser.find_element('xpath','//*[@id="su"]').click()
    assert False
运行完用例,打开allure报告查看失败截图。

版权归原作者 木头渔 所有, 如有侵权,请联系我们删除。