
一、LVGL简介
lvgl是一个开源免费的GUI,对硬件资源要求很低,64 kB Flash,16 kB RAM以上的单片机都可以用,它是一款基于C编写的GUI,能很好的迁移到其他平台,且拥有丰富的图形控件,也能支持多种输入设备。
二、源码获取
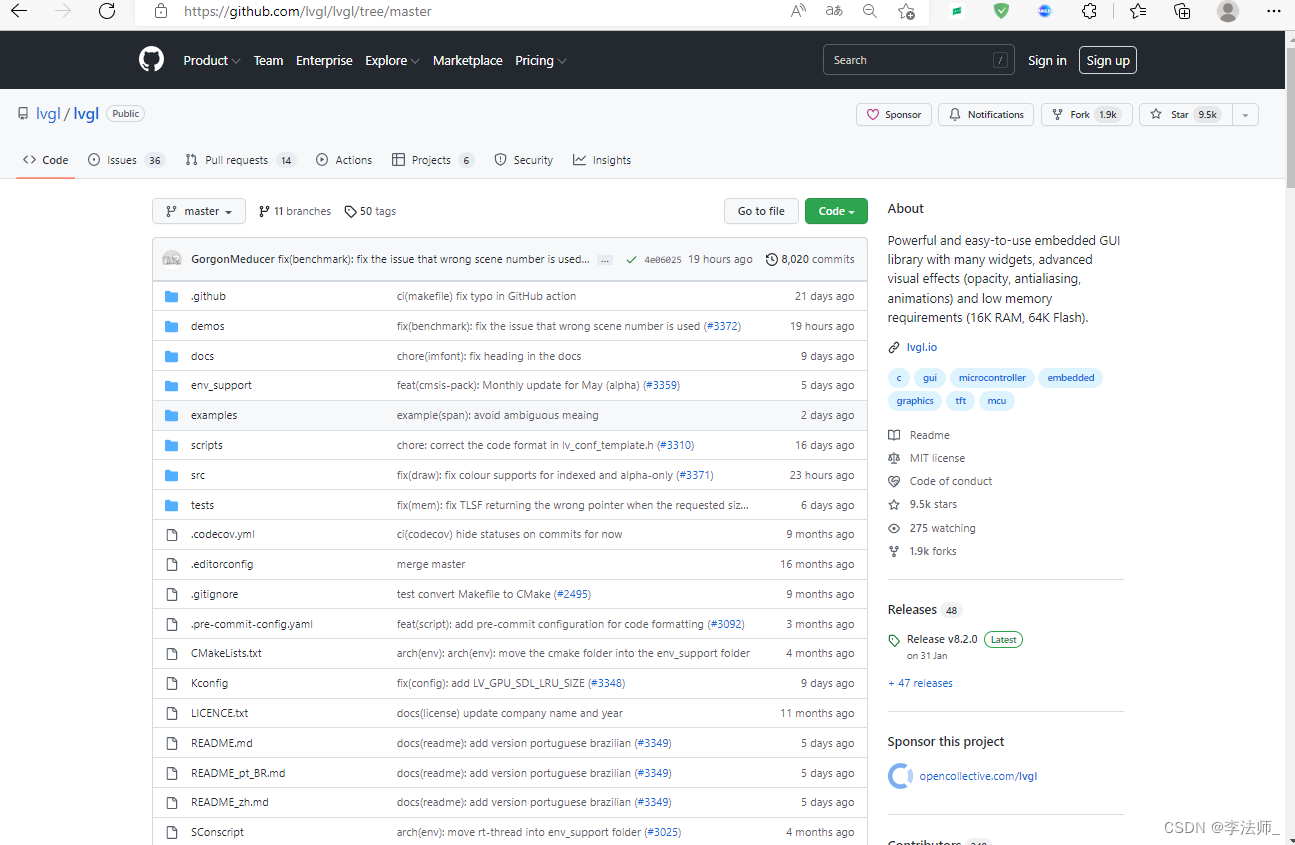
    本文是以V8.3版为例:https://github.com/lvgl/lvgl/tree/master

    百度网盘:链接:https://pan.baidu.com/s/1c7TO5AU9hNv0icGgN6n2gg 提取码:bku8
三、移植工程
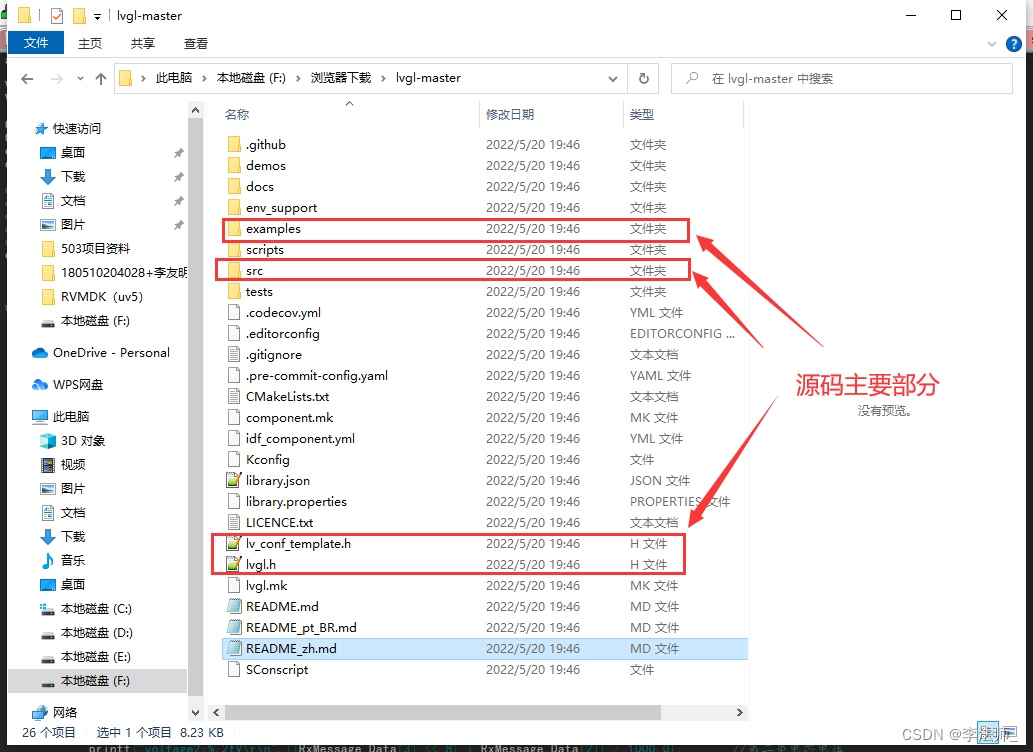
下载后的源码文件
    移植需要用到的文件:

            F:\浏览器下载\lvgl-master\src     (lvgl源码目录)

            F:\浏览器下载\lvgl-master\examples (官方示例 与 接口文件)

            F:\浏览器下载\lvgl-master目录下的   lv_conf_template.h    lvgl.h
下面开始正式移植:
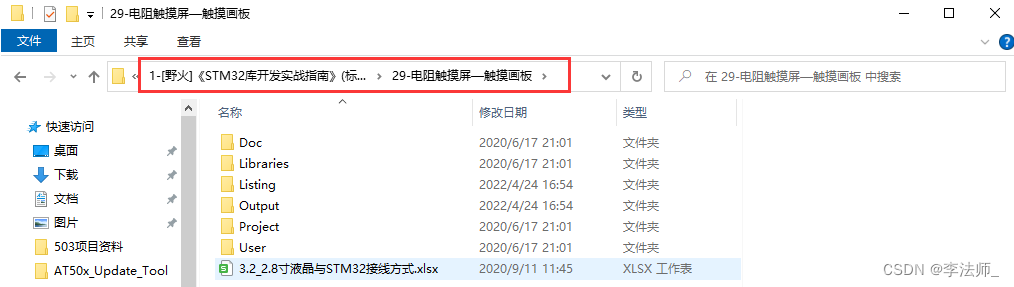
1. 移植工程采用野火指南者的触摸屏实验
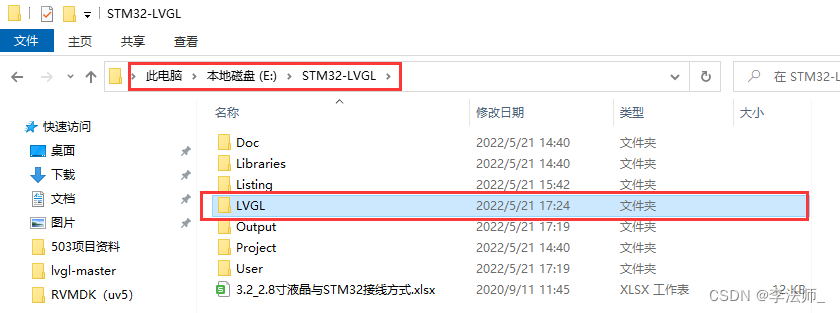
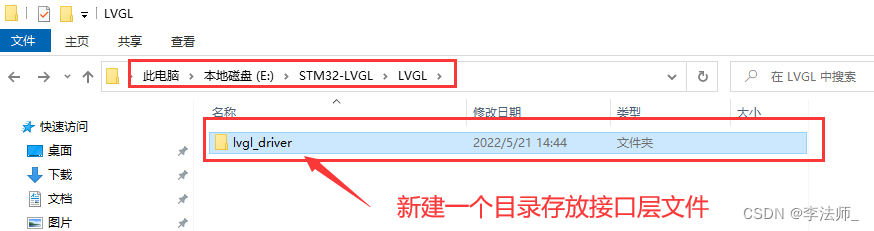
2.把工程复制出来,放到自己喜欢的地方,修改一下名称(尽量不要用中文),工程目录下添加一个LVGL目录(用来存放lvgl源码)
3.在LVGL目录下新建一个lvgl_driver目录,用来存放接口层文件
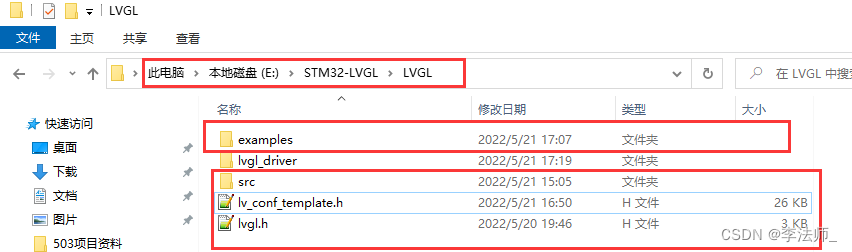
4. 把源码下需要用的文件复制到LVGL目录下
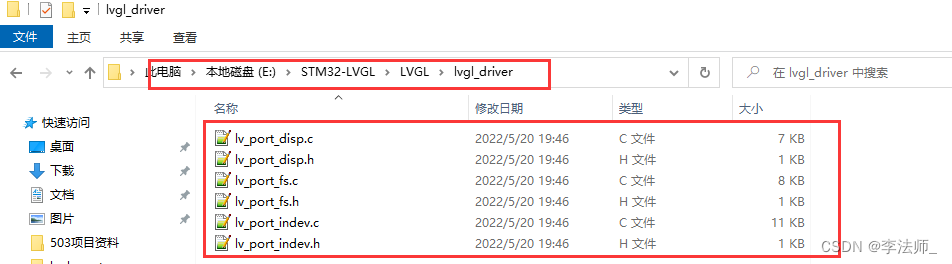
5. 把F:\浏览器下载\lvgl-master\examples\porting的文件复制到E:\STM32-LVGL\LVGL\lvgl_driver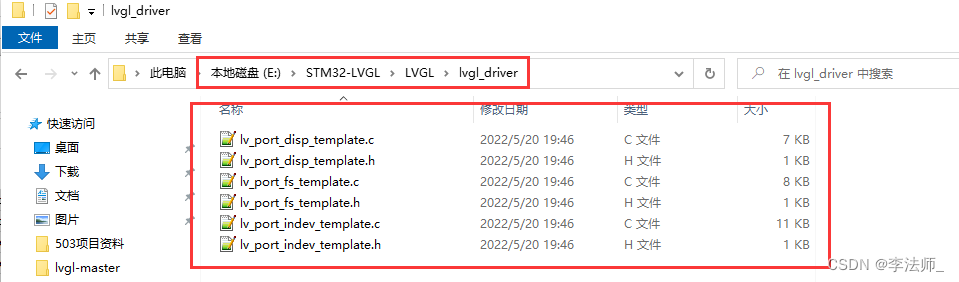
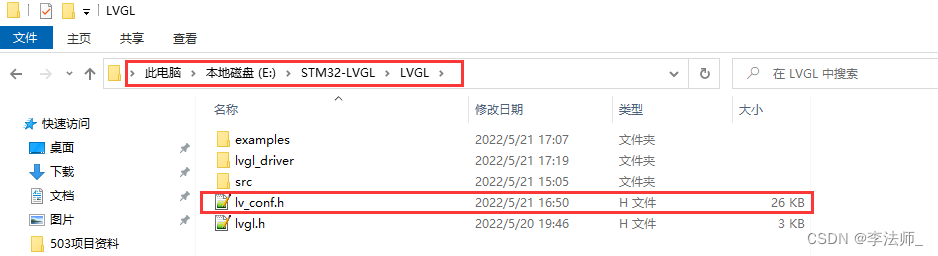
6.部分文件重新命名
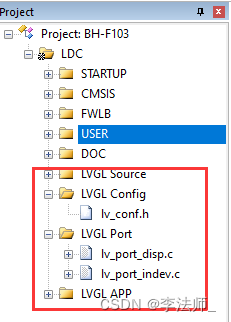
7.文件已经添加完成,现在打开工程,新建四个分组
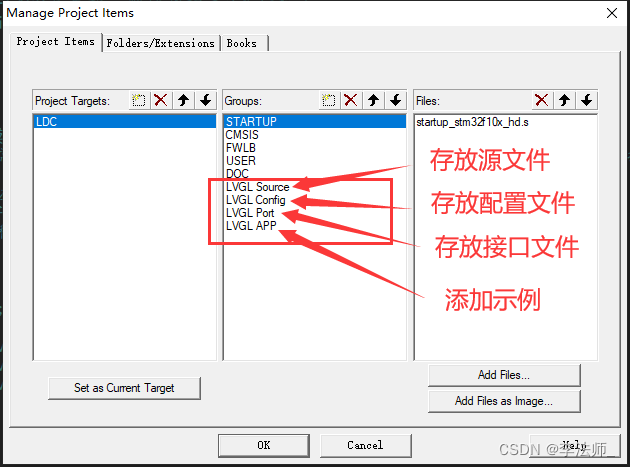
    8. 添加文件:

    把E:\STM32-LVGL\LVGL\src下的.C文件全部添加到 LVGL Source (由于文件太多不太好截图)

    把E:\STM32-LVGL\LVGL下的lv_conf.h添加到LVGL Config

    把E:\STM32-LVGL\LVGL\lvgl_driver下的 lv_port_disp.c  lv_port_indev.c添加到LVGL Port
9.添加文件路径:

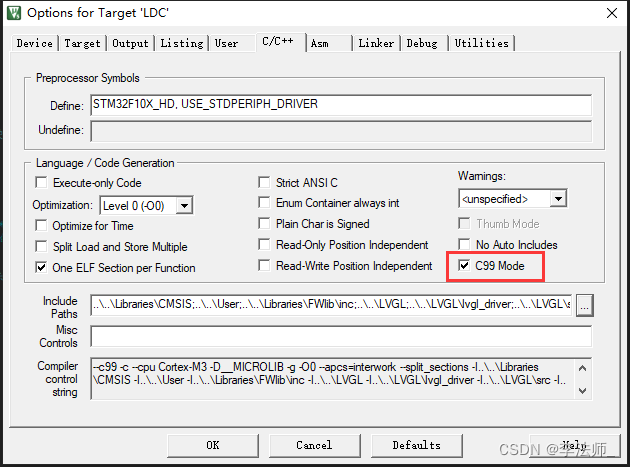
10.勾选C99
11.点击编译程序,此时会有四个错误

12. 因为C99的原因,需要在前面加static

13.此时再编译发现还有一个错误

14.取消勾选 Use MicroLIB

15.编译后就发现零错误

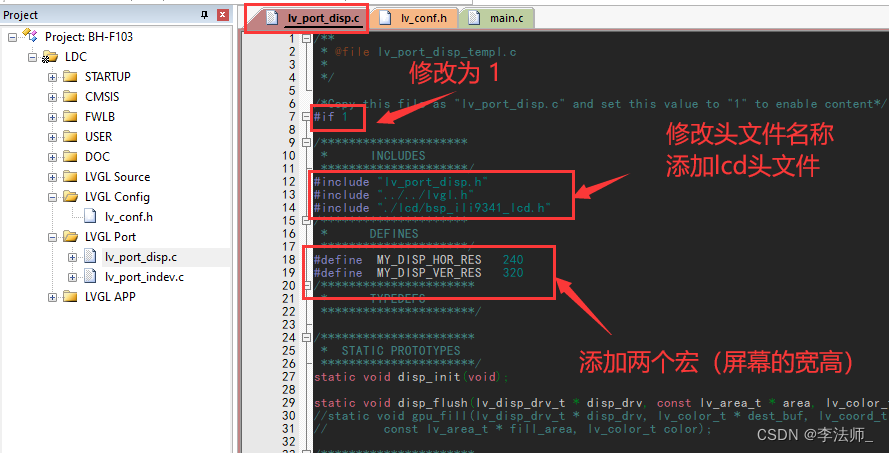
16.修改lv_conf.h配置文件

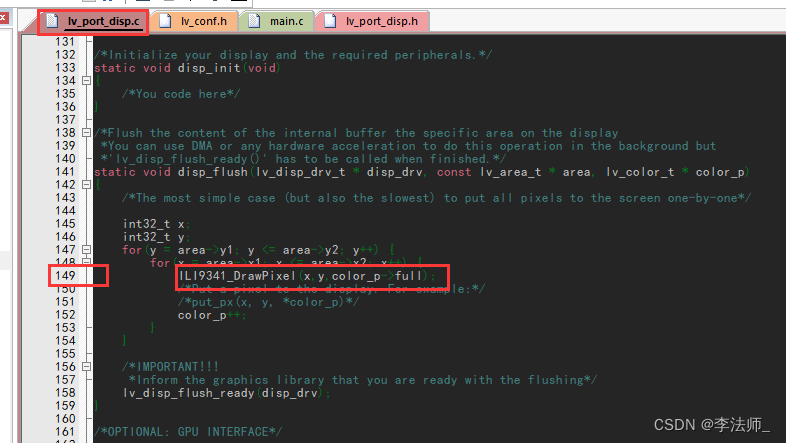
17.修改lv_port_disp.c接口文件
18.修改 lv_port_disp_init(void)函数
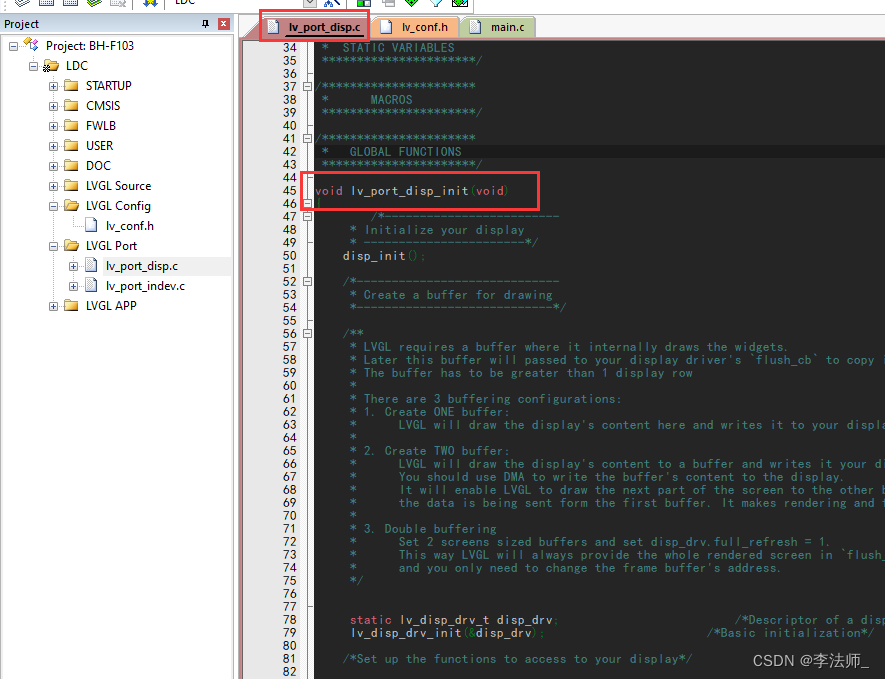
void lv_port_disp_init(void)
{
        /*-------------------------
     * Initialize your display
     * -----------------------*/
    disp_init();

     static lv_disp_drv_t disp_drv;                         /*Descriptor of a display driver*/
     lv_disp_drv_init(&disp_drv);                        /*Basic initialization*/

    /*Set up the functions to access to your display*/

    /*Set the resolution of the display*/
    disp_drv.hor_res = MY_DISP_HOR_RES;
    disp_drv.ver_res = MY_DISP_VER_RES;

    /*Used to copy the buffer's content to the display*/
    disp_drv.flush_cb = disp_flush;

#define  BUFFER_METHOD     2     //设置使用的缓存区大小

#if   BUFFER_METHOD == 1
    static lv_disp_draw_buf_t draw_buf_dsc_1;
    static lv_color_t buf_1[MY_DISP_HOR_RES * 10];                          /*A buffer for 10 rows*/
    lv_disp_draw_buf_init(&draw_buf_dsc_1, buf_1, NULL, MY_DISP_HOR_RES * 10);   /*Initialize the display buffer*/

    disp_drv.draw_buf = &draw_buf_dsc_1;

#elif BUFFER_METHOD == 2

    static lv_disp_draw_buf_t draw_buf_dsc_2;
    static lv_color_t buf_2_1[MY_DISP_HOR_RES * 10];                        /*A buffer for 10 rows*/
    static lv_color_t buf_2_2[MY_DISP_HOR_RES * 10];                        /*An other buffer for 10 rows*/
    lv_disp_draw_buf_init(&draw_buf_dsc_2, buf_2_1, buf_2_2, MY_DISP_HOR_RES * 10);   /*Initialize the display buffer*/
    disp_drv.draw_buf = &draw_buf_dsc_2;

#else

    static lv_disp_draw_buf_t draw_buf_dsc_3;
    static lv_color_t buf_3_1[MY_DISP_HOR_RES * MY_DISP_VER_RES];            /*A screen sized buffer*/
    static lv_color_t buf_3_2[MY_DISP_HOR_RES * MY_DISP_VER_RES];            /*An other screen sized buffer*/
    lv_disp_draw_buf_init(&draw_buf_dsc_3, buf_3_1, buf_3_2, MY_DISP_VER_RES * MY_DISP_VER_RES);   /*Initialize the display buffer*/
    disp_drv.draw_buf = &draw_buf_dsc_3;
    disp_drv.full_refresh = 1;

#endif


    /* Fill a memory array with a color if you have GPU.
     * Note that, in lv_conf.h you can enable GPUs that has built-in support in LVGL.
     * But if you have a different GPU you can use with this callback.*/
    //disp_drv.gpu_fill_cb = gpu_fill;

    /*Finally register the driver*/
    lv_disp_drv_register(&disp_drv);
}
19.在bsp_ili9341_lcd.c添加下面函数,在bsp_ili9341_lcd.h声明
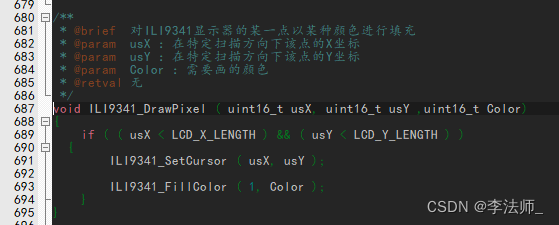
/**
 * @brief  对ILI9341显示器的某一点以某种颜色进行填充
 * @param  usX :在特定扫描方向下该点的X坐标
 * @param  usY :在特定扫描方向下该点的Y坐标
 * @param  Color :需要画的颜色
 * @retval 无
 */
void ILI9341_DrawPixel ( uint16_t usX, uint16_t usY ,uint16_t Color)
{
    if ( ( usX < LCD_X_LENGTH ) && ( usY < LCD_Y_LENGTH ) )
  {
        ILI9341_SetCursor ( usX, usY );

        ILI9341_FillColor ( 1, Color );
    }
}
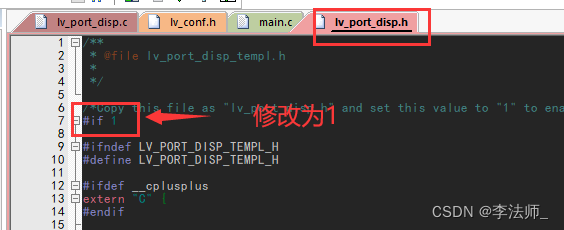
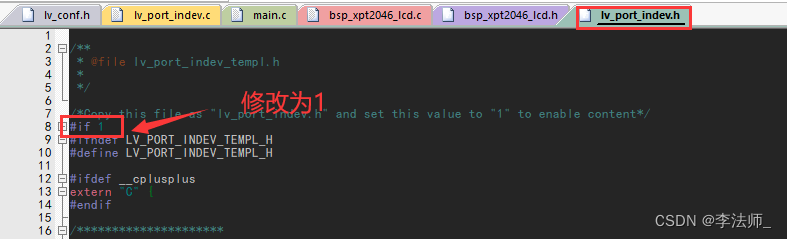
 20.修改lv_port_disp.h
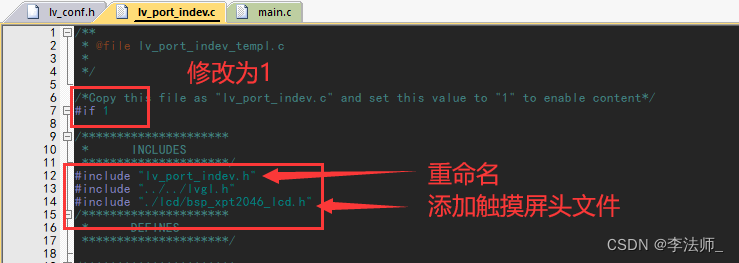
21.修改lv_port_indev.c接口文件
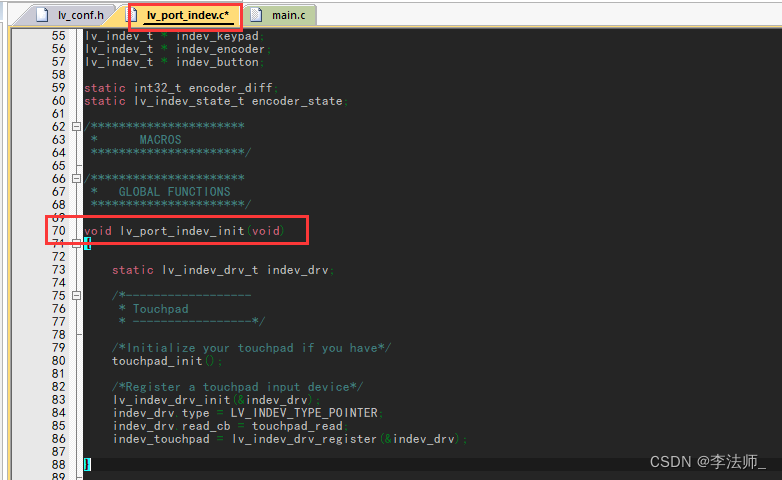
void lv_port_indev_init(void)
{
    /**
     * Here you will find example implementation of input devices supported by LittelvGL:
     *  - Touchpad
     *  - Mouse (with cursor support)
     *  - Keypad (supports GUI usage only with key)
     *  - Encoder (supports GUI usage only with: left, right, push)
     *  - Button (external buttons to press points on the screen)
     *
     *  The `..._read()` function are only examples.
     *  You should shape them according to your hardware
     */

    static lv_indev_drv_t indev_drv;

    /*------------------
     * Touchpad
     * -----------------*/

    /*Initialize your touchpad if you have*/
    touchpad_init();

    /*Register a touchpad input device*/
    lv_indev_drv_init(&indev_drv);
    indev_drv.type = LV_INDEV_TYPE_POINTER;
    indev_drv.read_cb = touchpad_read;
    indev_touchpad = lv_indev_drv_register(&indev_drv);

    /*------------------
     * Mouse
     * -----------------*/

//    /*Initialize your mouse if you have*/
//    mouse_init();

//    /*Register a mouse input device*/
//    lv_indev_drv_init(&indev_drv);
//    indev_drv.type = LV_INDEV_TYPE_POINTER;
//    indev_drv.read_cb = mouse_read;
//    indev_mouse = lv_indev_drv_register(&indev_drv);

//    /*Set cursor. For simplicity set a HOME symbol now.*/
//    lv_obj_t * mouse_cursor = lv_img_create(lv_scr_act());
//    lv_img_set_src(mouse_cursor, LV_SYMBOL_HOME);
//    lv_indev_set_cursor(indev_mouse, mouse_cursor);

//    /*------------------
//     * Keypad
//     * -----------------*/

//    /*Initialize your keypad or keyboard if you have*/
//    keypad_init();

//    /*Register a keypad input device*/
//    lv_indev_drv_init(&indev_drv);
//    indev_drv.type = LV_INDEV_TYPE_KEYPAD;
//    indev_drv.read_cb = keypad_read;
//    indev_keypad = lv_indev_drv_register(&indev_drv);

//    /*Later you should create group(s) with `lv_group_t * group = lv_group_create()`,
//     *add objects to the group with `lv_group_add_obj(group, obj)`
//     *and assign this input device to group to navigate in it:
//     *`lv_indev_set_group(indev_keypad, group);`*/

//    /*------------------
//     * Encoder
//     * -----------------*/

//    /*Initialize your encoder if you have*/
//    encoder_init();

//    /*Register a encoder input device*/
//    lv_indev_drv_init(&indev_drv);
//    indev_drv.type = LV_INDEV_TYPE_ENCODER;
//    indev_drv.read_cb = encoder_read;
//    indev_encoder = lv_indev_drv_register(&indev_drv);

//    /*Later you should create group(s) with `lv_group_t * group = lv_group_create()`,
//     *add objects to the group with `lv_group_add_obj(group, obj)`
//     *and assign this input device to group to navigate in it:
//     *`lv_indev_set_group(indev_encoder, group);`*/

//    /*------------------
//     * Button
//     * -----------------*/

//    /*Initialize your button if you have*/
//    button_init();

//    /*Register a button input device*/
//    lv_indev_drv_init(&indev_drv);
//    indev_drv.type = LV_INDEV_TYPE_BUTTON;
//    indev_drv.read_cb = button_read;
//    indev_button = lv_indev_drv_register(&indev_drv);

//    /*Assign buttons to points on the screen*/
//    static const lv_point_t btn_points[2] = {
//        {10, 10},   /*Button 0 -> x:10; y:10*/
//        {40, 100},  /*Button 1 -> x:40; y:100*/
//    };
//    lv_indev_set_button_points(indev_button, btn_points);
}
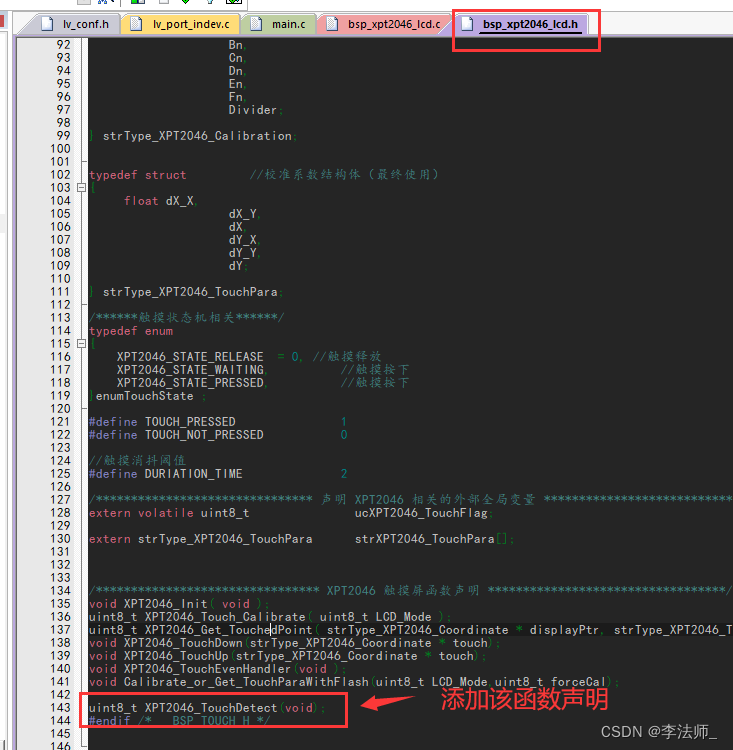
22.在lcd/bsp_xpt2046_lcd.h添加该函数声明
23.在lv_port_indev.c修改部分代码
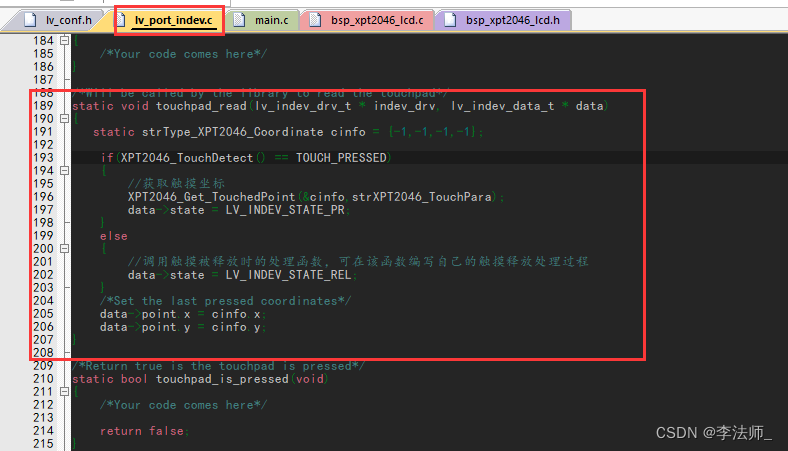
static void touchpad_read(lv_indev_drv_t * indev_drv, lv_indev_data_t * data)
{
   static strType_XPT2046_Coordinate cinfo = {-1,-1,-1,-1};

    if(XPT2046_TouchDetect() == TOUCH_PRESSED)
    {
        //获取触摸坐标
        XPT2046_Get_TouchedPoint(&cinfo,strXPT2046_TouchPara);
        data->state = LV_INDEV_STATE_PR;
    }
    else
    {
        //调用触摸被释放时的处理函数,可在该函数编写自己的触摸释放处理过程
        data->state = LV_INDEV_STATE_REL;
    }
    /*Set the last pressed coordinates*/
    data->point.x = cinfo.x;
    data->point.y = cinfo.y;
}
到此配置完成
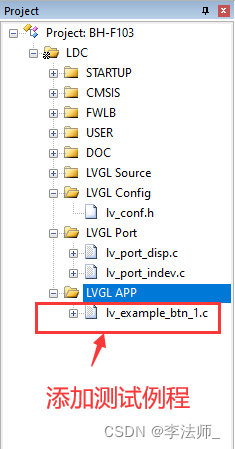
四、例程展示
路径:E:\STM32-LVGL\LVGL\examples\widgets\btn
添加头文件
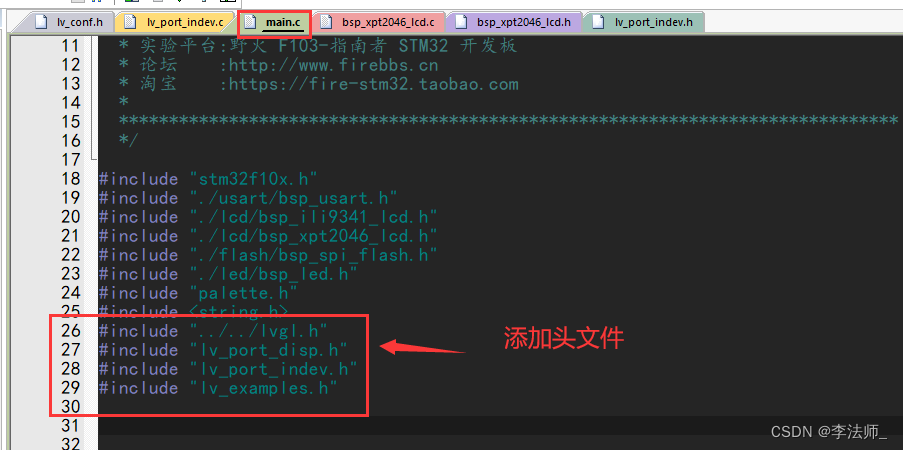
主函数代码
int main(void)
{
    //LCD 初始化
    ILI9341_Init();

    //触摸屏初始化
    XPT2046_Init();
//    //从FLASH里获取校正参数,若FLASH无参数,则使用模式3进行校正
//    Calibrate_or_Get_TouchParaWithFlash(3,0);

//    /* USART config */
//    USART_Config();
//    LED_GPIO_Config();
//
//    printf("\r\n ********** 触摸画板程序 *********** \r\n");
//    printf("\r\n 若汉字显示不正常,请阅读工程中的readme.txt文件说明,根据要求给FLASH重刷字模数据\r\n");
//
    //其中0、3、5、6 模式适合从左至右显示文字,
    //不推荐使用其它模式显示文字    其它模式显示文字会有镜像效果
    //其中 6 模式为大部分液晶例程的默认显示方向
    ILI9341_GramScan ( 6 );

//    //绘制触摸画板界面
//    Palette_Init(LCD_SCAN_MODE);

    lv_init();              //lv 系统初始化
    lv_port_disp_init();    //lvgl 显示接口初始化,放在lv_init后面
    lv_port_indev_init();   //lvgl 输入接口初始化,放在 lv_init后面
    lv_port_disp_init();

    lv_example_btn_1();
    while ( 1 )
    {
        lv_tick_inc(1);
        lv_task_handler();
    }

}
lv_tick_inc(1);一般放在定时器里面,1ms调用一次
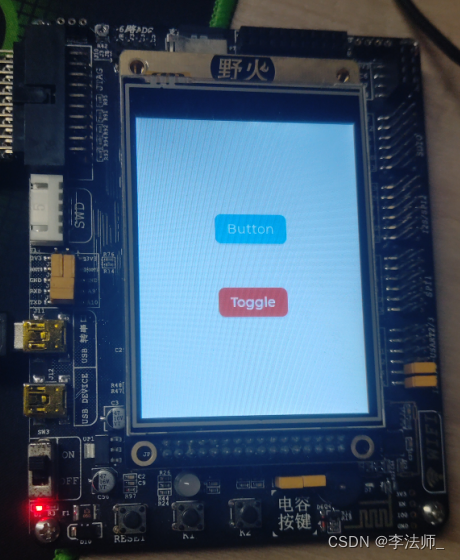
编译下载后的效果如下,点击toggle会变颜色
示例源码:链接:https://pan.baidu.com/s/1s_q1YePpaXyNPnLFbmektg 提取码:z5ks
本文转载自: https://blog.csdn.net/maomaochong666/article/details/124896592
版权归原作者 李法师_ 所有, 如有侵权,请联系我们删除。
版权归原作者 李法师_ 所有, 如有侵权,请联系我们删除。