
文章目录
1.基本介绍
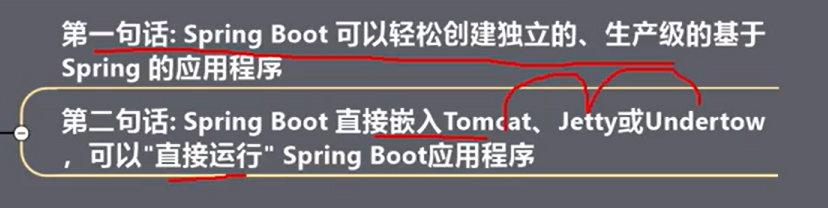
1.springboot是什么?
2.快速入门
1.需求分析

2.环境配置
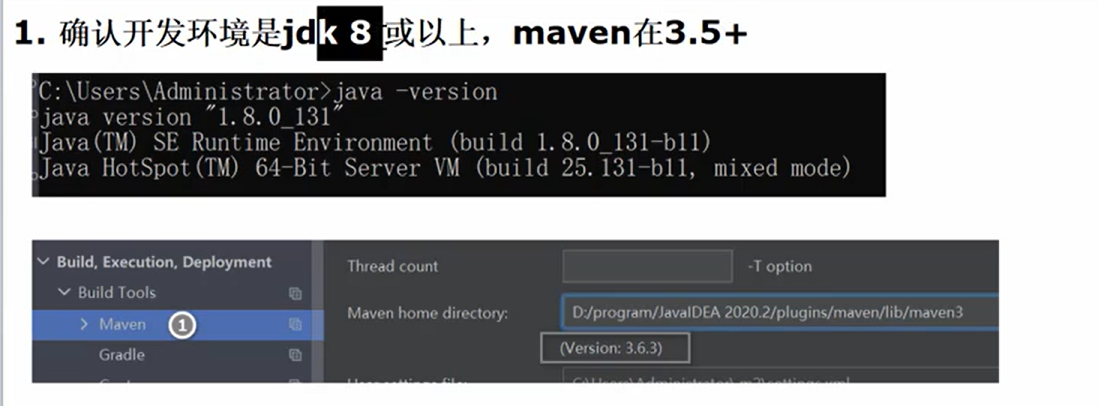
1.确认开发环境
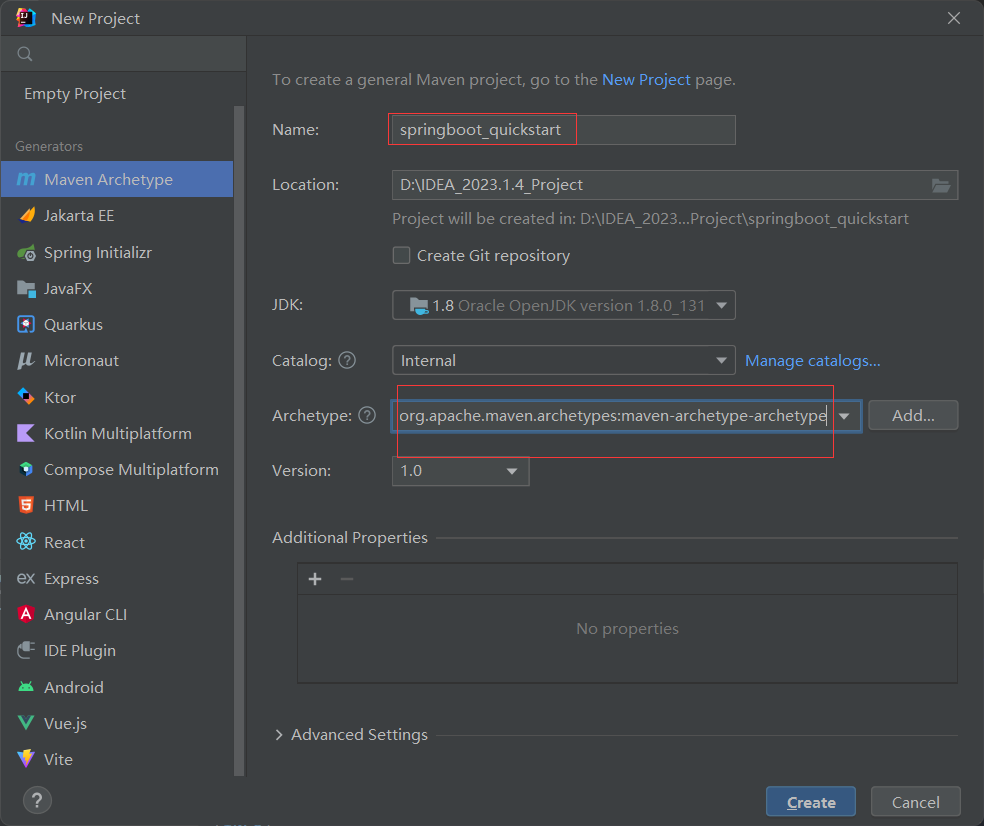
2.创建一个maven项目
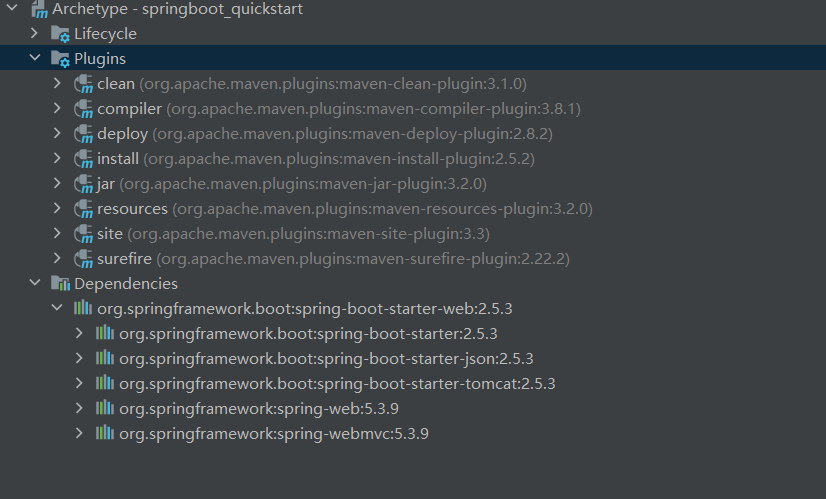
3.依赖配置 pom.xml
<!--导入springboot父工程--><parent><artifactId>spring-boot-starter-parent</artifactId><groupId>org.springframework.boot</groupId><version>2.5.3</version></parent><dependencies><!--配置maven项目场景启动器,自动导入和web相关的包--><dependency><groupId>org.springframework.boot</groupId><artifactId>spring-boot-starter-web</artifactId></dependency></dependencies>
4.文件目录

5.MainApp.java (启动类,常规配置)
packagecom.sun.springboot;importorg.springframework.boot.SpringApplication;importorg.springframework.boot.autoconfigure.SpringBootApplication;/**
 * @author 孙显圣
 * @version 1.0
 *///表示是一个springboot项目@SpringBootApplicationpublicclassMainApp{publicstaticvoidmain(String[] args){//启动springbootSpringApplication.run(MainApp.class, args);}}
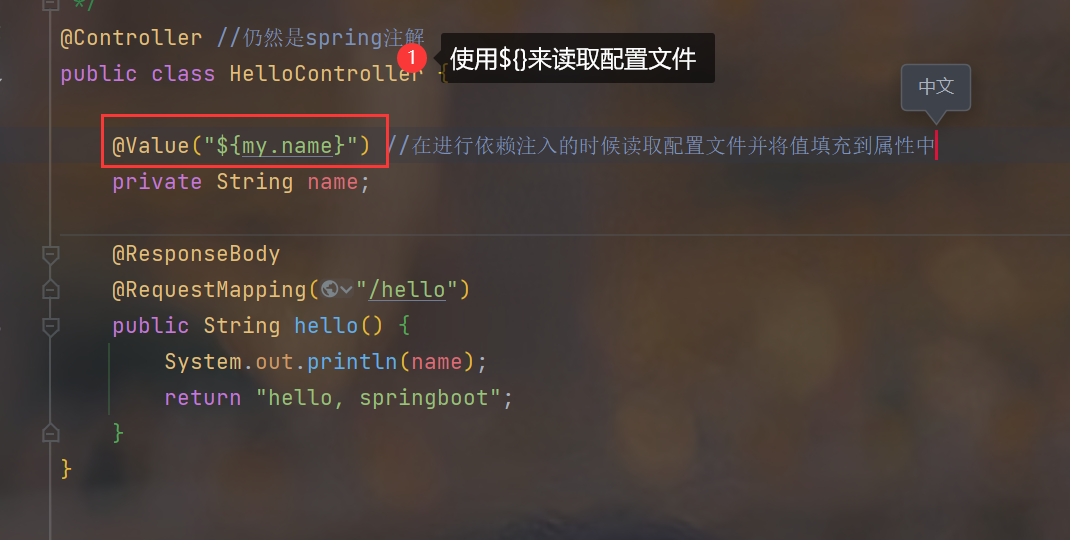
6.HelloController.java (测试Controller)
packagecom.sun.springboot.controller;importorg.springframework.stereotype.Controller;importorg.springframework.web.bind.annotation.RequestMapping;importorg.springframework.web.bind.annotation.ResponseBody;/**
* @author 孙显圣
* @version 1.0
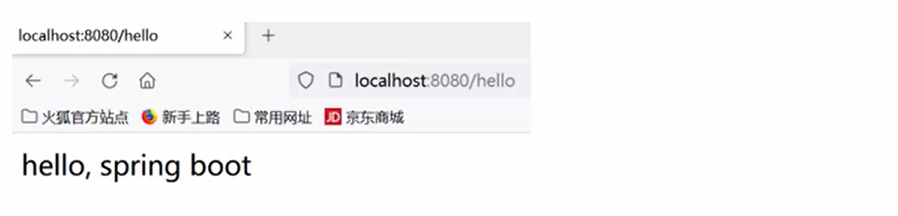
*/@Controller//仍然是spring注解publicclassHelloController{@ResponseBody@RequestMapping("/hello")publicStringhello(){return"hello, springboot";}}
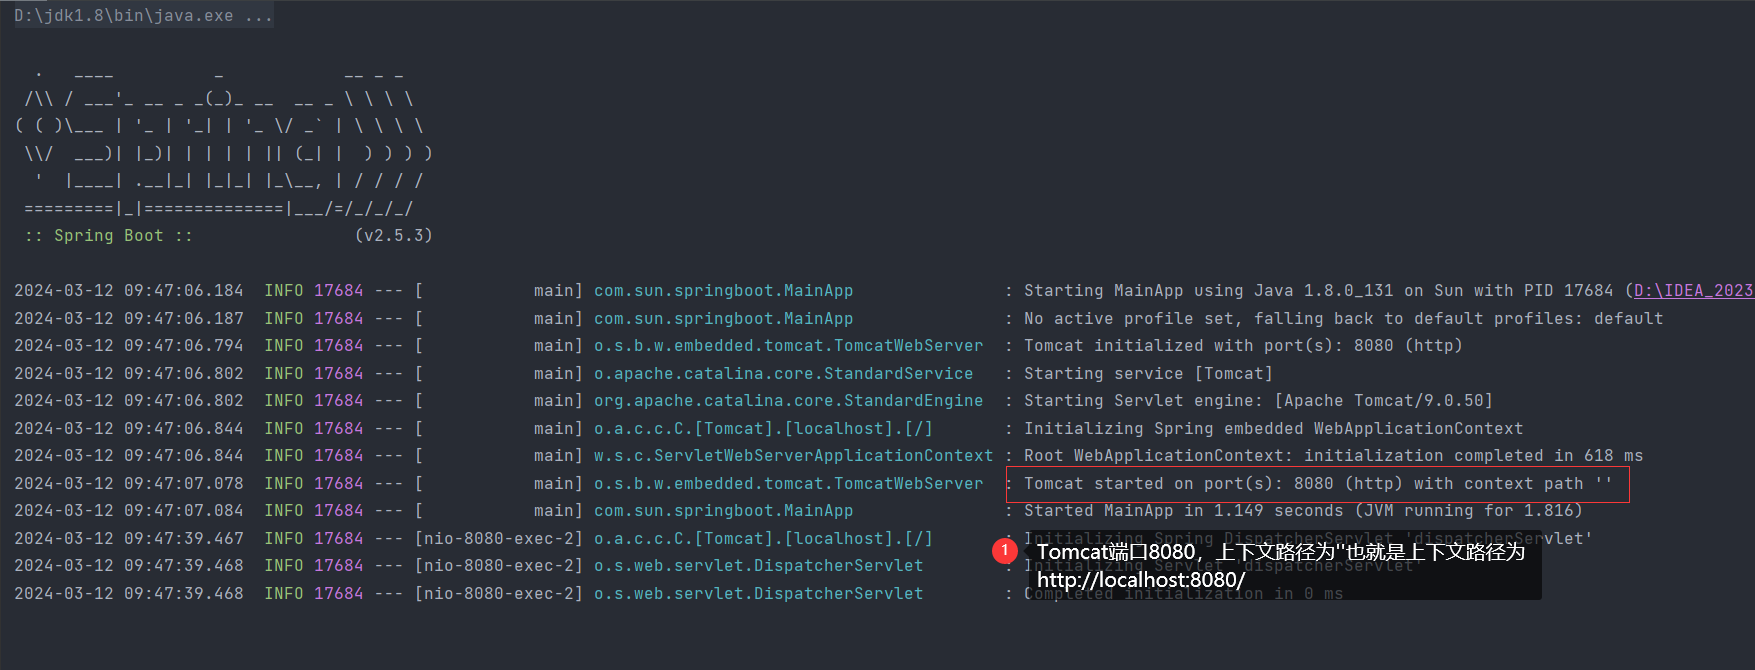
7.运行启动类
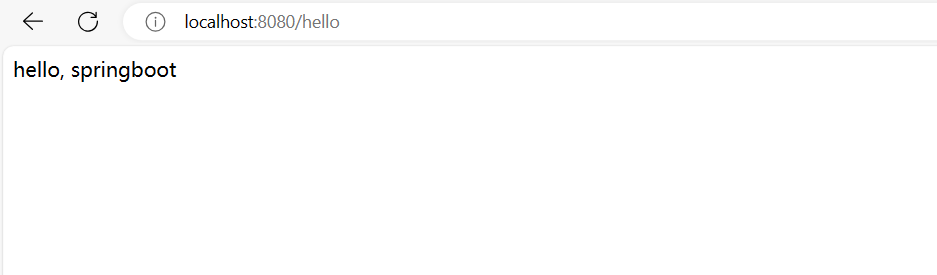
8.浏览器向Conroller发送请求
3.快速入门小结
1.SpringBoot跟SSM的关系

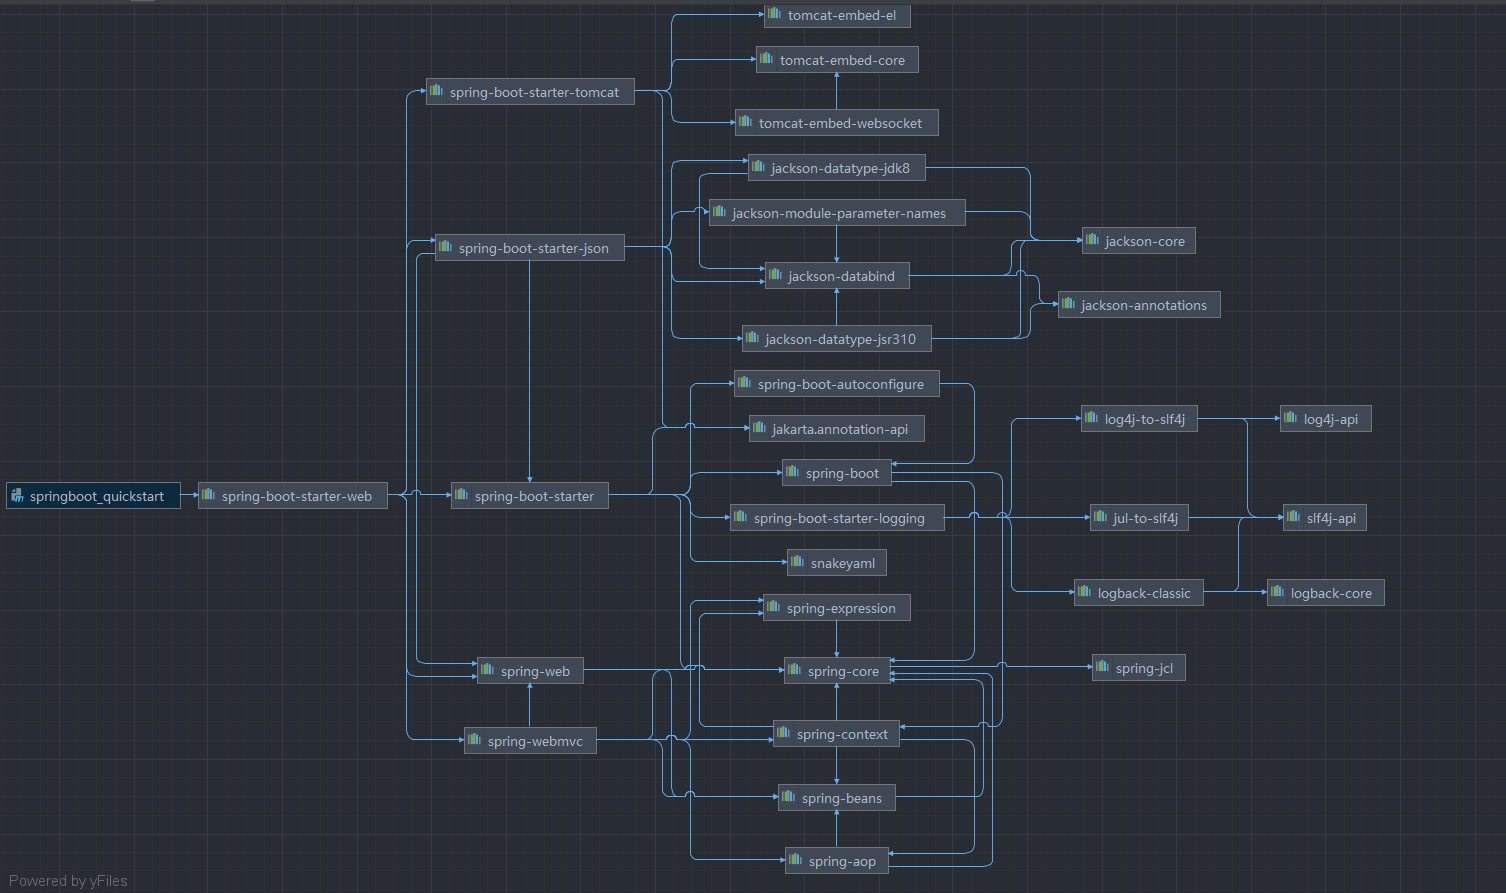
2.pom.xml依赖关系图

3.Sping,SpringMVC,SpringBoot的关系

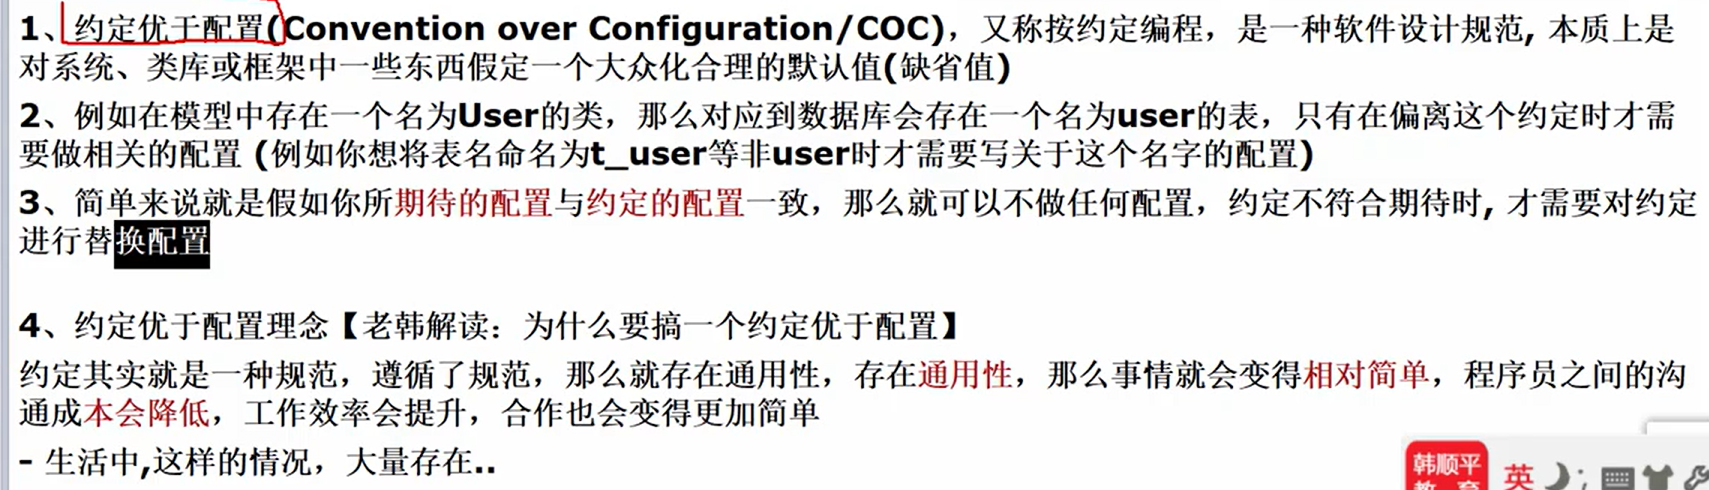
4.约定优于配置
2.依赖管理和自动配置
1.版本仲裁
1.什么是依赖管理?

2.查看SpringBoot父项目的默认依赖版本
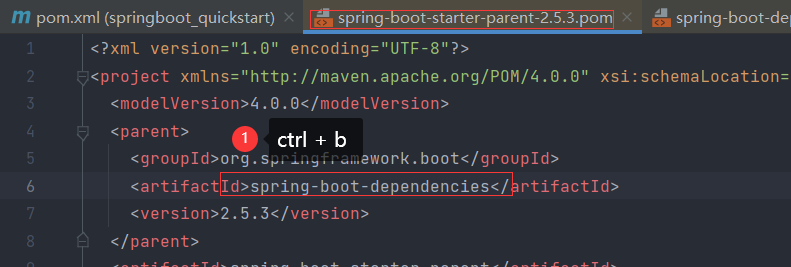
1.pom.xml 找到springboot父工程

2.找到父工程的依赖
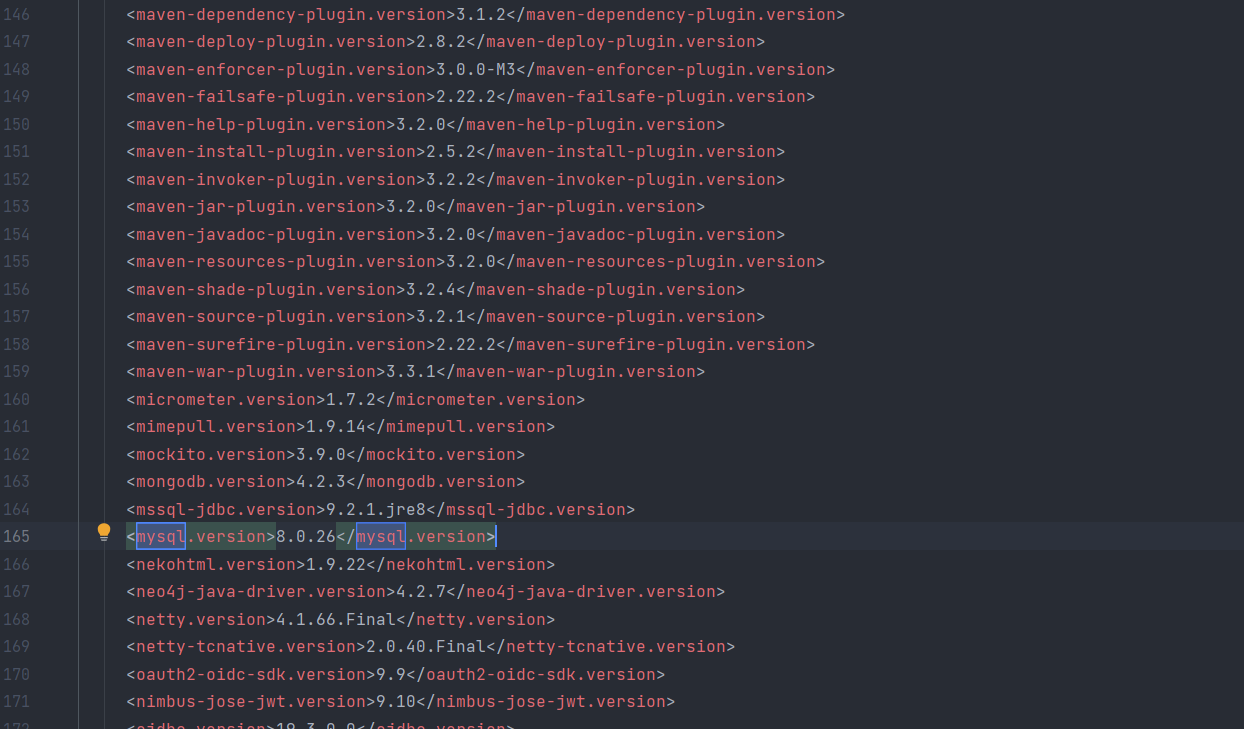
3.所有依赖的默认版本
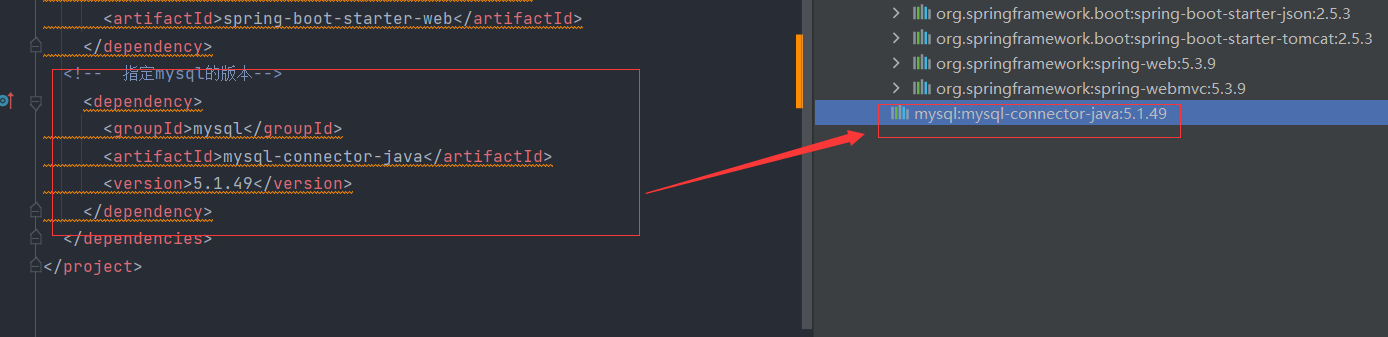
3.自己指定依赖版本
1.方式一:在pom.xml中指定版本
2.方式二:在pom.xml使用
properties
标签指定 version


2.starter场景启动器
1.基本介绍

2.依赖树

3.SpringBoot自动配置核心依赖

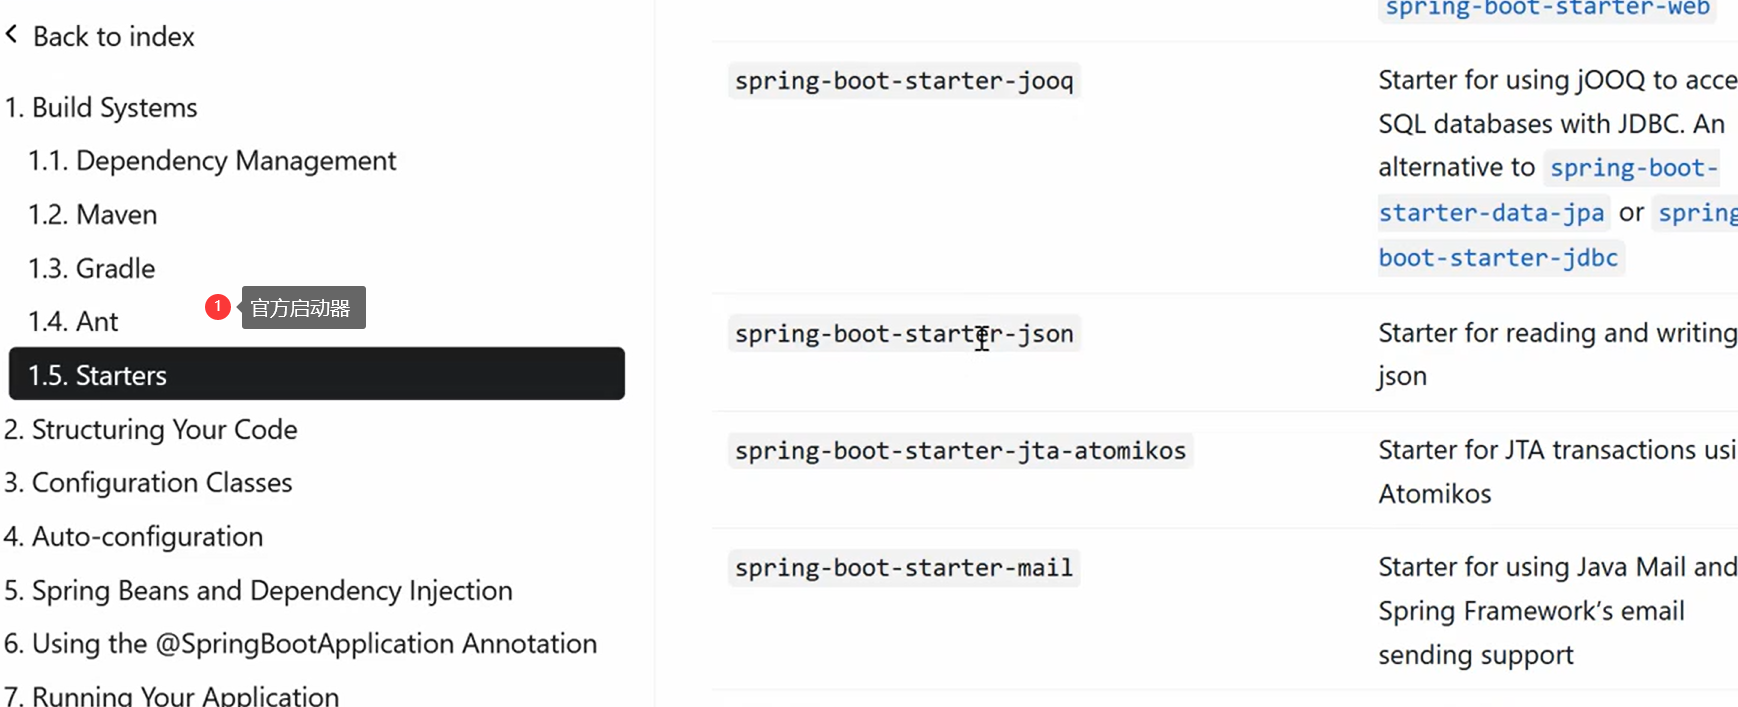
4.官方启动器(spring-boot开头)
5.第三方启动器

3.自动配置
1.基本介绍

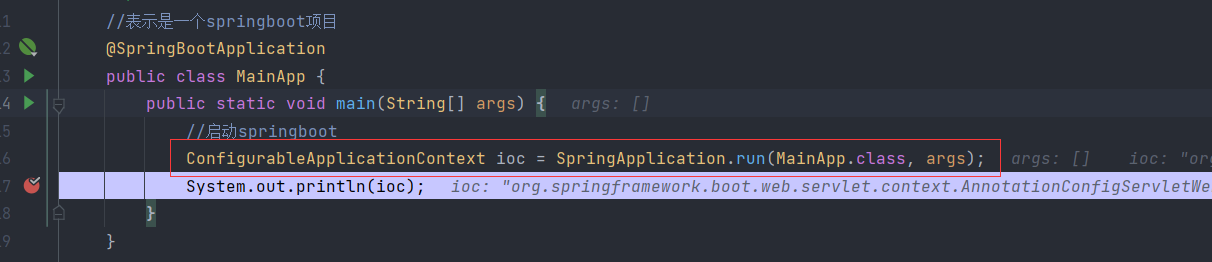
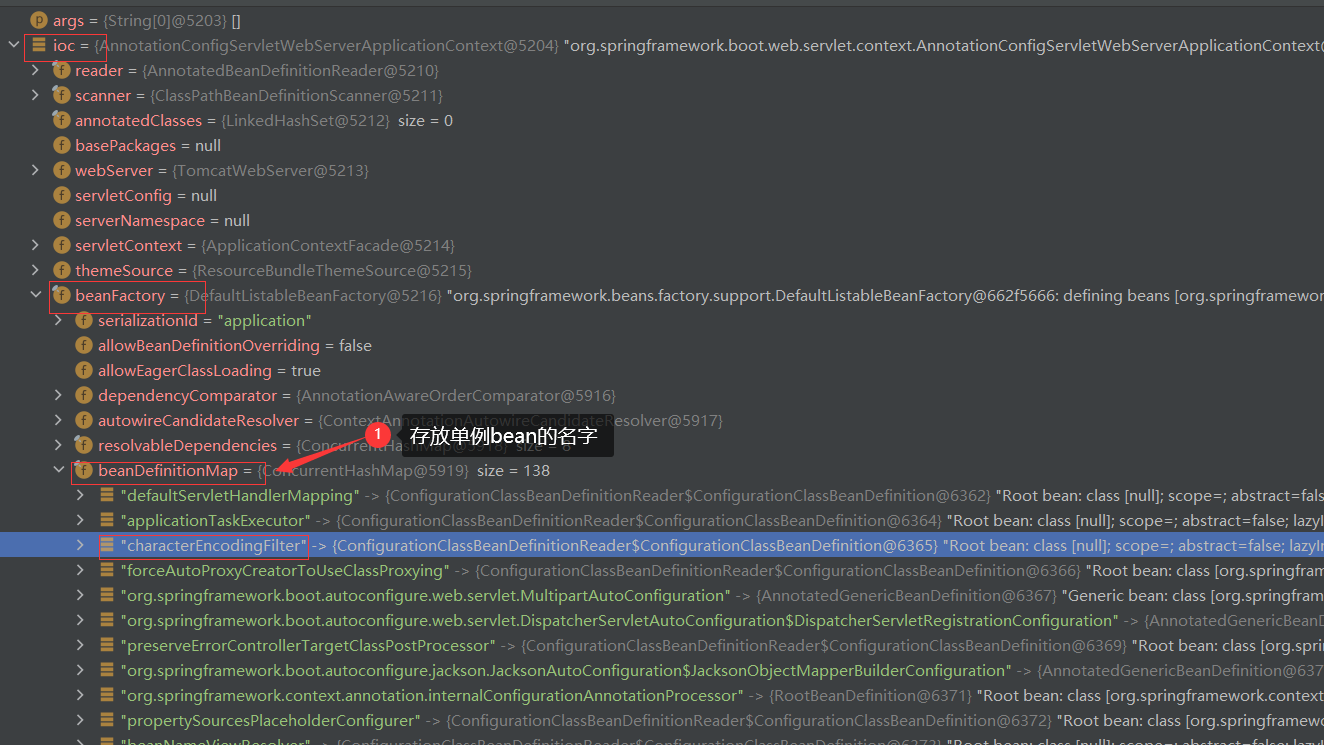
2.获取ioc容器,查看SpringBoot自动配置的bean
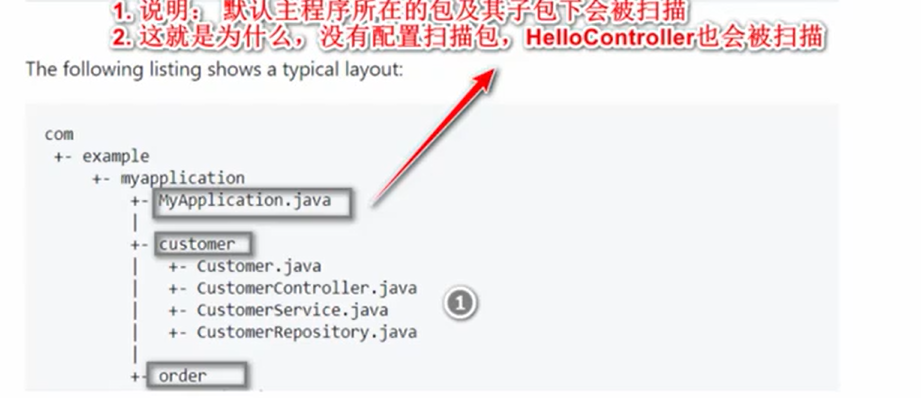
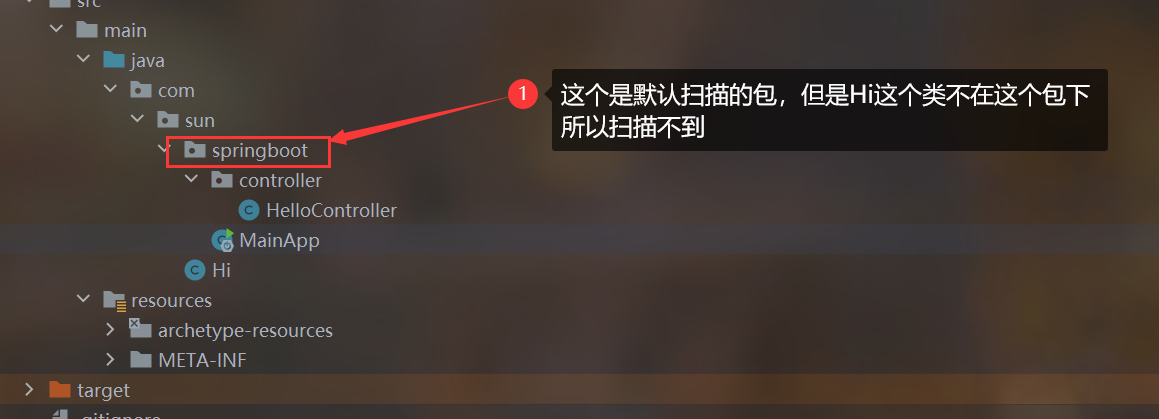
3.SpringBoot默认扫描包
4.修改默认扫描包
1.需求分析

2.修改启动类注解,增加要扫描的包
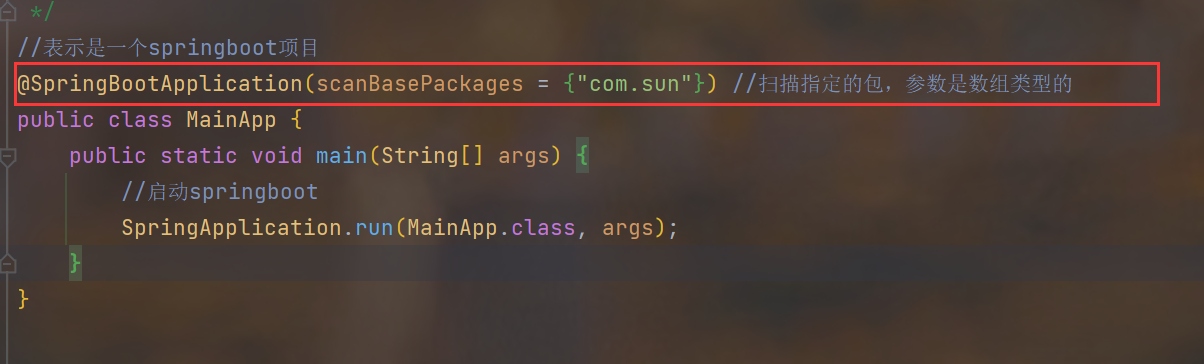
3.启动测试

5.修改默认配置
resources\application.properties
1.基本介绍
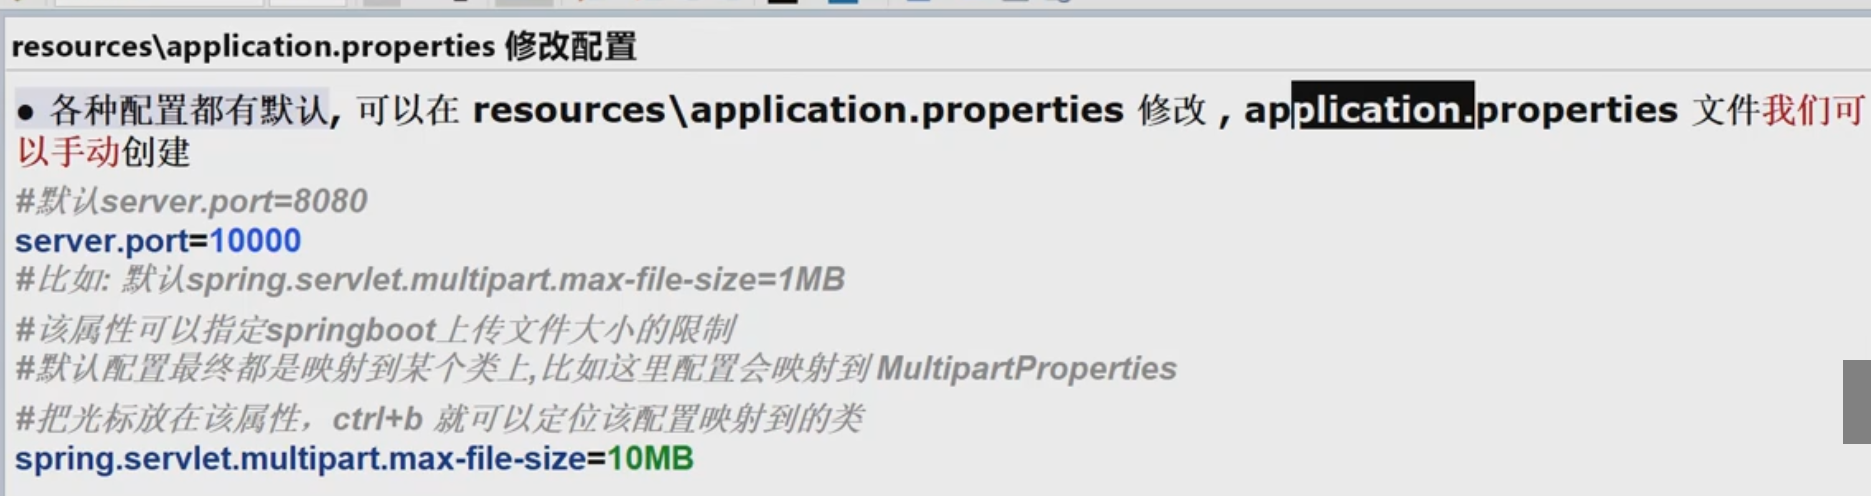
2.创建一个resources\application.properties文件

3.根据SpringBoot的配置大全找到对应的配置并修改
4.关于application.properties配置文件的解释
- 一个配置对应一个类的属性使用alt + b可以查找到对应的配置类
- 对应的配置类会被注入到ioc容器中
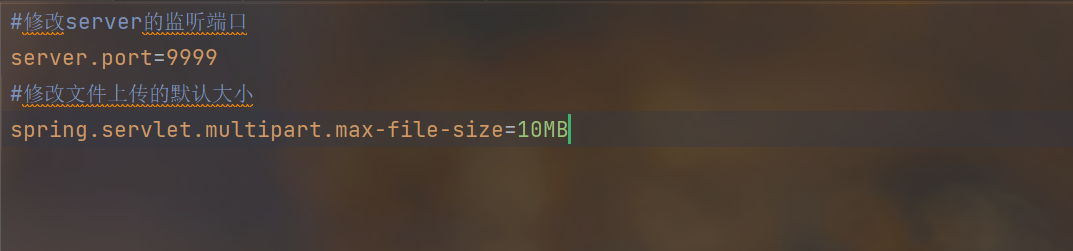
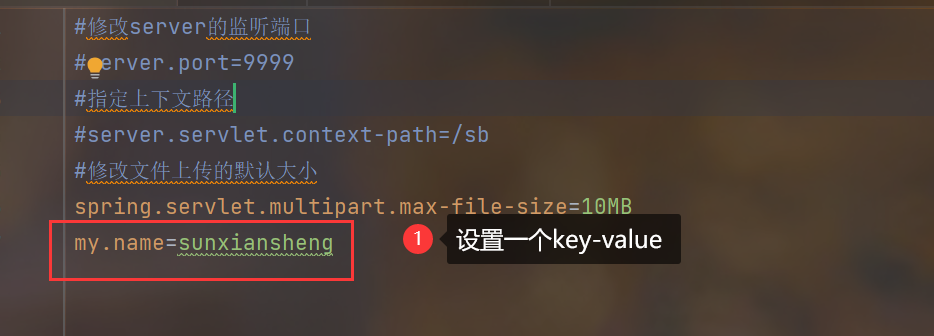
5.自定义配置
6.SpringBoot常用配置一览
#端口号
server.port=10000
#应用的上下文路径(项目路径)
server.servlet.context-path=/allModel
#指定 POJO 扫描包来让 mybatis 自动扫描到自定义的 POJO
mybatis.type-aliases-package=com.cxs.allmodel.model
#指定 mapper.xml 的路径
#(application 上配置了@MapperScan(扫面 mapper 类的路径)和 pom.xml 中放行了 mapper.xml 后,
# 配 置 mapper-locations 没 有 意 义 。 如 果 mapper 类 和 mapper.xml 不 在 同 一 个 路 径 下 时 ,
mapper-locations 就有用了)
mybatis.mapper-locations=classpath:com/cxs/allmodel/mapper
#session 失效时间(单位 s)
spring.session.timeout=18000
#数据库连接配置
#mysql 数据库 url
mysql.one.jdbc-url=jdbc:mysql://127.0.0.1:3306/test?serverTimezone=Asia/Shanghai&useSSL=false
#mysql 数据库用户名
mysql.one.username=
#数据库密码
mysql.one.password=
#线程池允许的最大连接数
mysql.one.maximum-pool-size=15
#日志打印:日志级别 trace<debug<info<warn<error<fatal 默认级别为 info,即默认打印 info 及其以
上级别的日志
#logging.level 设置日志级别,后面跟生效的区域,比如 root 表示整个项目,也可以设置为某个包下,
也可以具体到某个类名(日志级别的值不区分大小写)
logging.level.com.cxs.allmodel.=debug
logging.level.com.cxs.allmodel.mapper=debug
logging.level.org.springframework.web=info
logging.level.org.springframework.transaction=info
logging.level.org.apache.ibatis=info
logging.level.org.mybatis=info
logging.level.com.github.pagehelper = info
logging.level.root=info
#日志输出路径
logging.file=/tmp/api/allmodel.log
#配置 pagehelper 分页插件
pagehelper.helperDialect=mysql
pagehelper.reasonable=true
pagehelper.supportMethodsArguments=true
pagehelper.params=count=countSql
#jackson 时间格式化
spring.jackson.serialization.fail-on-empty-beans=false
#指定日期格式,比如 yyyy-MM-dd HH:mm:ss,或者具体的格式化类的全限定名
spring.jackson.date-format=yyyy-MM-dd HH:mm:ss
#指定日期格式化时区,比如 America/Los_Angeles 或者 GMT+10
spring.jackson.time-zone=GMT+8
#设置统一字符集
spring.http.encoding.charset=utf8
#redis 连接配置
# redis 所在主机 ip 地址
spring.redis.host=
#redis 服务器密码
spring.redis.password=
#redis 服务器端口号
spring.redis.port=
#redis 数据库的索引编号(0 到 15)
spring.redis.database=14
## 连接池的最大活动连接数量,使用负值无限制
#spring.redis.pool.max-active=8
#
## 连接池的最大空闲连接数量,使用负值表示无限数量的空闲连接
#spring.redis.pool.max-idle=8
#
## 连接池最大阻塞等待时间,使用负值表示没有限制
#spring.redis.pool.max-wait=-1ms
#
## 最小空闲连接数量,使用正值才有效果
#spring.redis.pool.min-idle=0
#
## 是否启用 SSL 连接. ##spring.redis.ssl=false
#
## 连接超时,毫秒为单位
#spring.redis.timeout= 18000ms
#
## 集群模式下,集群最大转发的数量
#spring.redis.cluster.max-redirects=
#
## 集群模式下,逗号分隔的键值对(主机:端口)形式的服务器列表
#spring.redis.cluster.nodes=
#
## 哨兵模式下,Redis 主服务器地址
#spring.redis.sentinel.master=
#
## 哨兵模式下,逗号分隔的键值对(主机:端口)形式的服务器列表
#spring.redis.sentinel.nodes= 127.0.0.1:5050,127.0.0.1:506
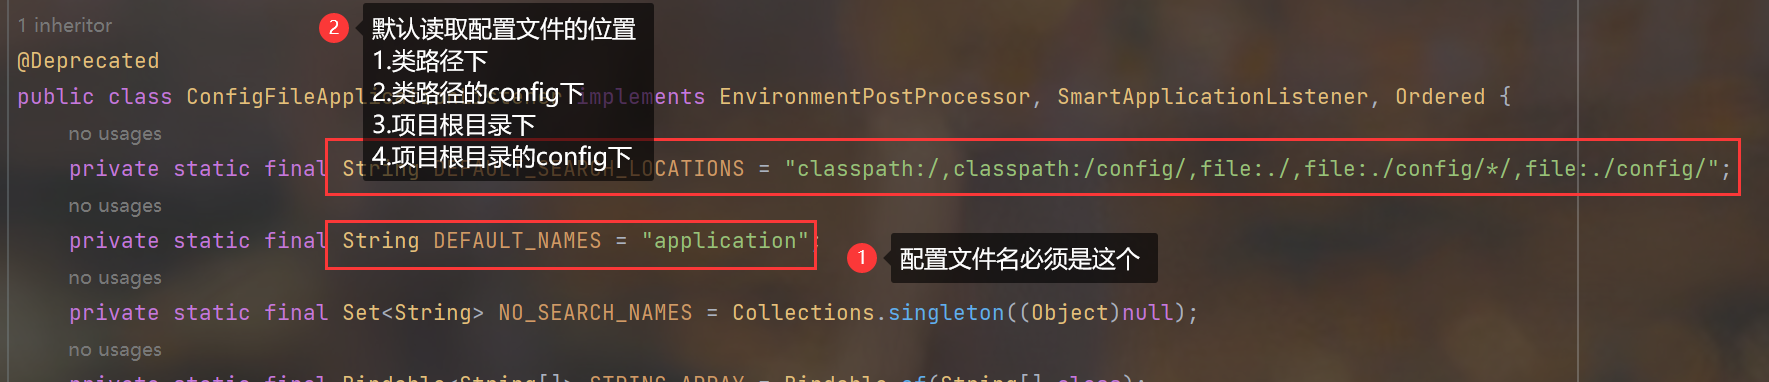
7.解读SpringBoot是从哪里读取的配置文件
ctrl + n 进入ConfigFileApplicationListener
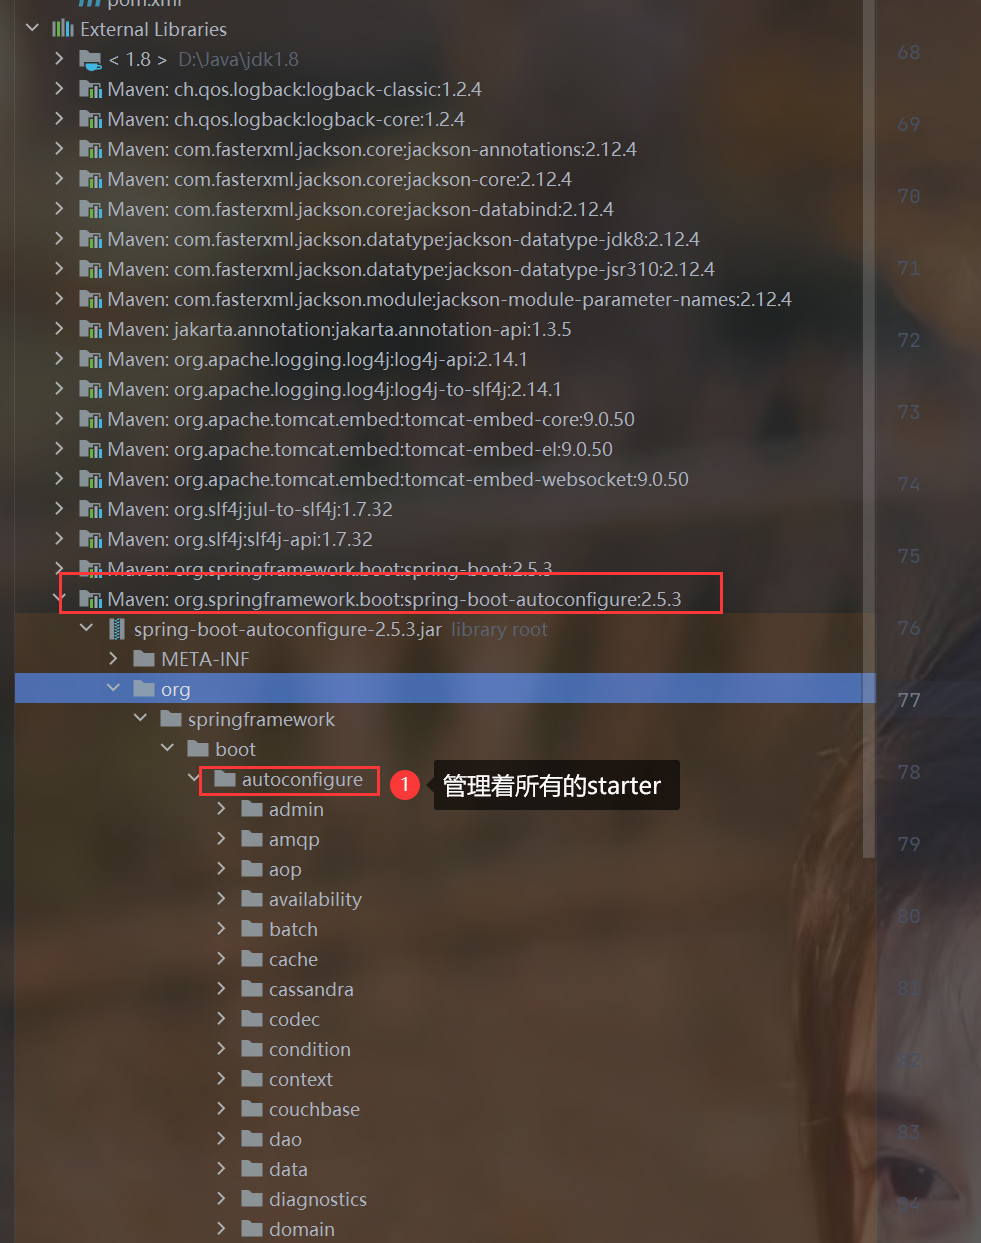
8.按需加载原则
1.基本介绍

2.autoconfigure包管理着所有的starter
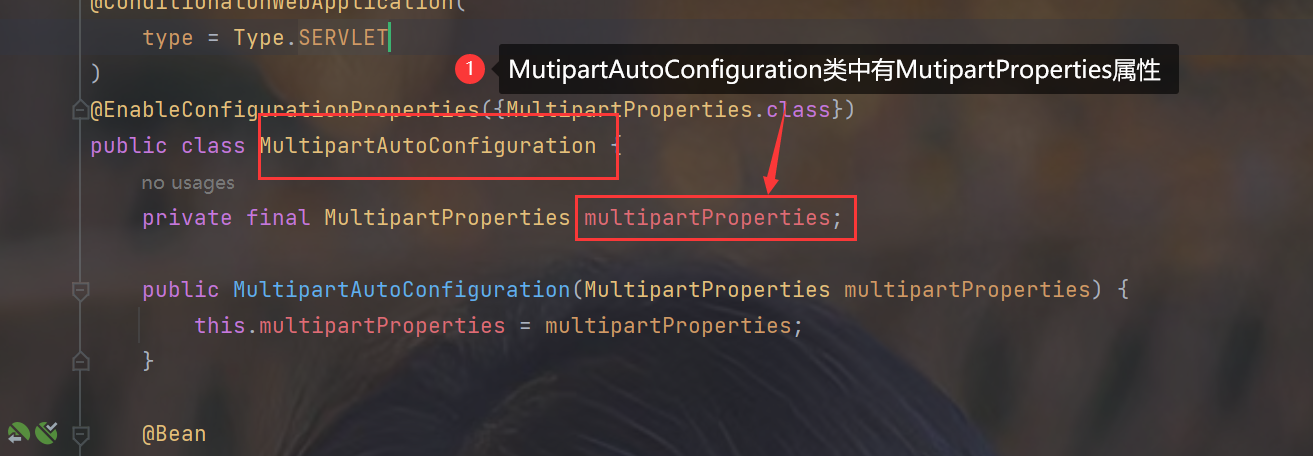
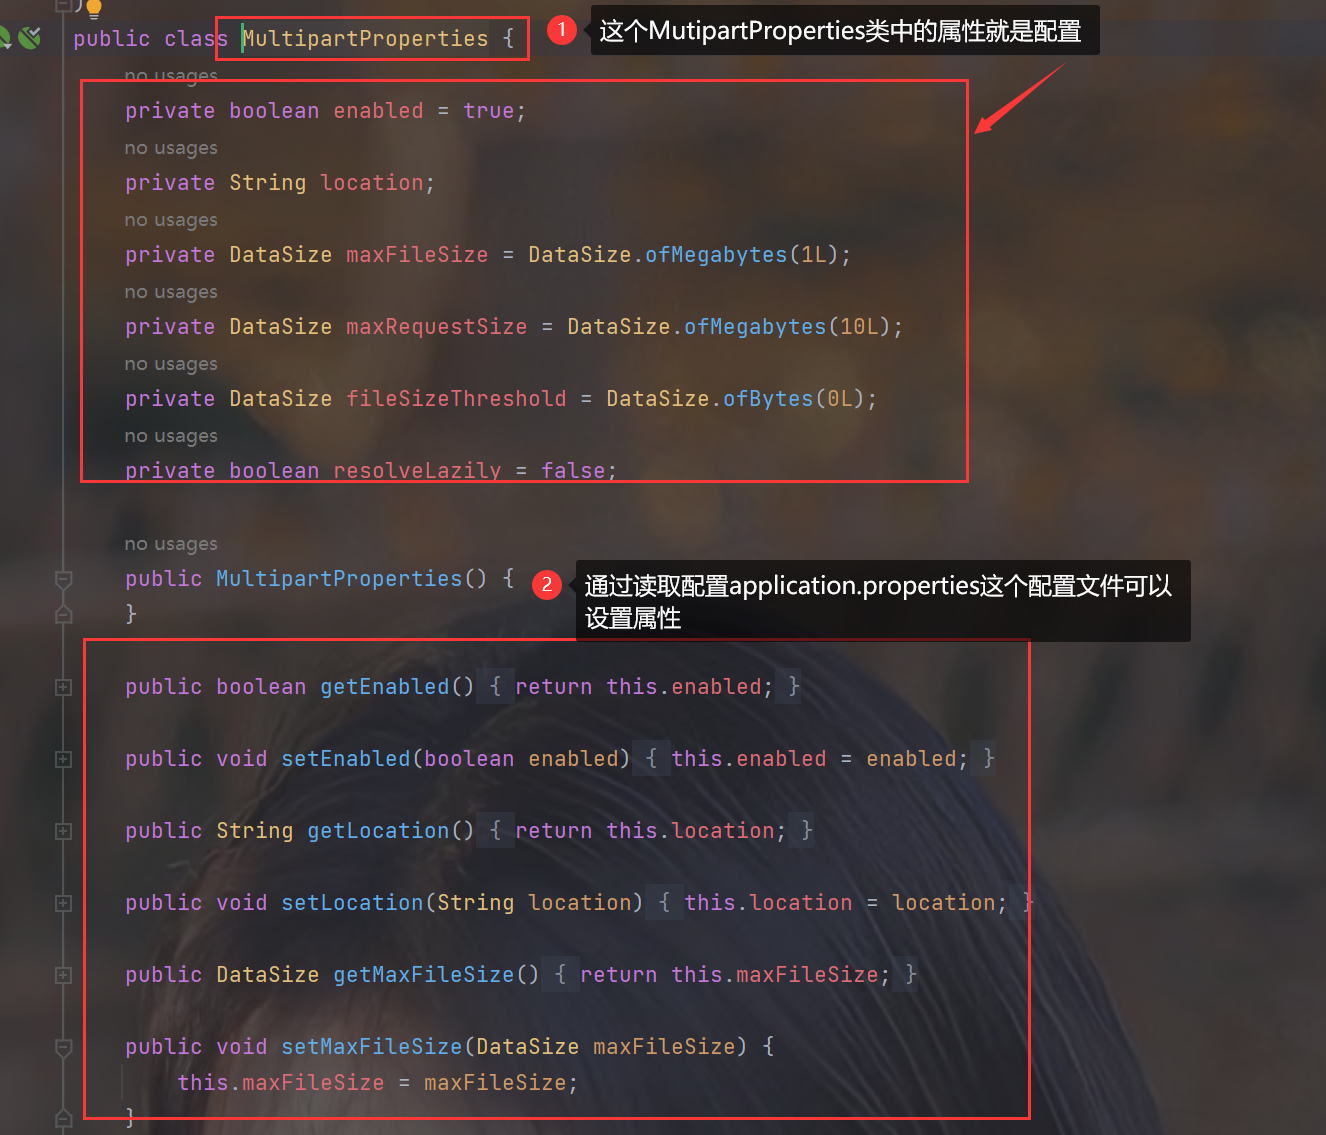
9.关于xxxAutoConfiguration,xxxProperties,application.properties的关系
1.简要介绍
- xxxProperties这个单例bean的属性就是配置,读取application.properties来修改默认的配置
- xxxAutoConfiguration这个单例bean的属性中有xxxProperties,通过依赖注入获取到xxxProperties的bean对象从而实现自动装配
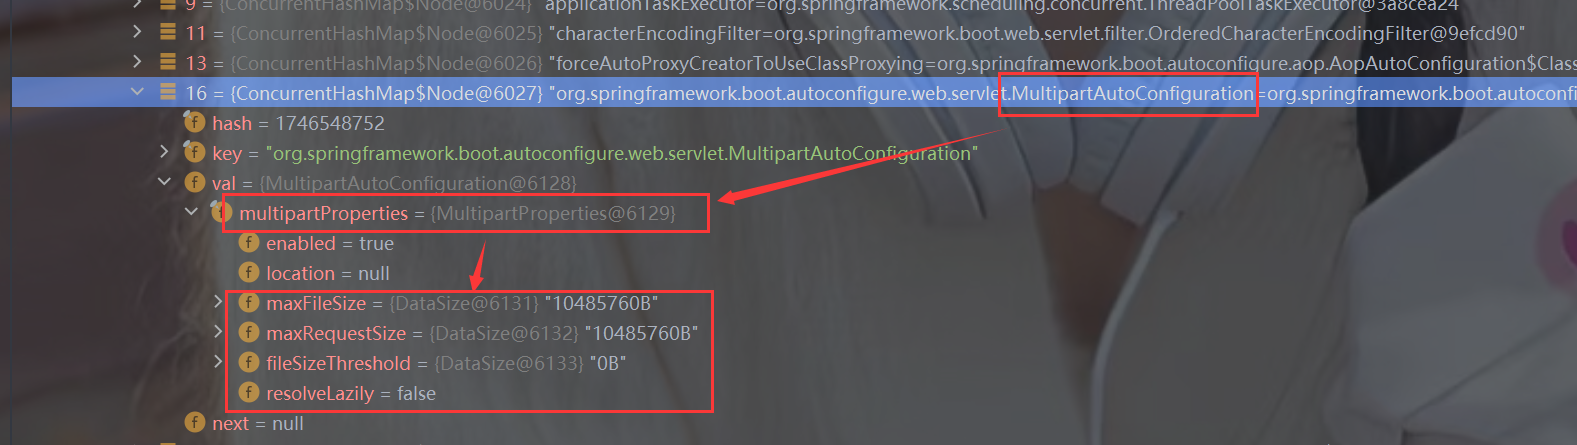
2.查看源码
3.debug展示ioc容器
本文转载自: https://blog.csdn.net/m0_64637029/article/details/136658919
版权归原作者 S-X-S 所有, 如有侵权,请联系我们删除。
版权归原作者 S-X-S 所有, 如有侵权,请联系我们删除。